
Some time ago, I had the opportunity to get both an Amiga 500 and an Amiga 1200. While the Amiga 500 was restored as a fairly traditional machine, I had a more ambitious project in mind for the Amiga 1200.
My goal was to build three different machines into a single computer:
- A high-end Amiga with a powerful CPU, graphics card, networking capabilities and all the modern conveniences normally associated with an upgraded Amiga 4000.
- A more traditional Amiga 1200 with Fast RAM and a hard drive for maximum software compatibility.
- A CD32-compatible system able to run games specifically enhanced for Commodore’s console, without requiring dedicated CD32 hardware such as the Akiko chip.
To achieve this, I combined several solutions:
- High-end mode: a PiStorm running AmigaOS 3.2, providing massive performance for a fraction of the cost of original accelerator hardware.
- Standard A1200 mode: AmigaOS 3.1 running directly from the original ROMs, a CF2IDE adapter and a 4 MB SRAM expansion. The PiStorm can be temporarily disabled by holding Ctrl + Left Amiga + Right Amiga for a few seconds during boot.
- CD32 mode: provided through the IdeFix CD32 emulation layer together with an internally mounted CD-ROM drive. I also chose to replace the original Kickstart 3.0 ROMs with newer versions to improve compatibility with CD32 titles.
One final note before starting: the article does not strictly follow the chronological order in which I performed the modifications. Instead, I reorganized everything into a more logical sequence that should be easier to follow.
This is the story of my ultimate Amiga 1200…
Used Material
The project combines both original Amiga hardware and modern upgrades. Below is the list of components I used throughout the build.
Base Hardware
- Amiga 1200 with a Revision 1.4D motherboard
- Cloanto Kickstart 3.1 ROMs (for improved CD32 compatibility)
- PCMCIA SRAM card (100 ns)

PiStorm Upgrade
- PiStorm32 Lite with CM4 adapter
- Raspberry Pi CM4 (2 GB RAM, Wi-Fi, no eMMC)
- Waveshare CM4 heatsink and fan
Video Upgrade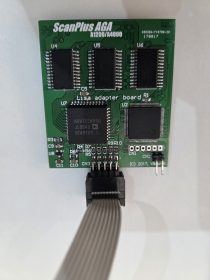
- ScanPlus AGA
- One VGA connector
Storage and CD-ROM
- Sony AD-7640A slim DVD writer

- Custom 3D-printed support for the slim drive
- 44-pin CompactFlash adapter
- Two 44-pin IDC 2.0 mm connectors
- 30 cm 40-pin to 44-pin IDE ribbon cable
- 40-pin / 44-pin IDC crimping tool
- Slim JAE to 40-pin IDE adapter with audio output
- Standard PC Audio CD cable
Motherboard Repairs and Modifications
- Tantalum capacitors
- 5 kΩ potentiometer
- 4.7 kΩ and 100 Ω resistors
- Various thin wires
- Double-sided adhesive tape
- Hot glue
Miscellaneous
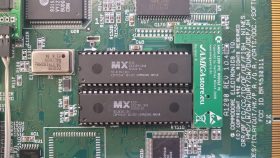
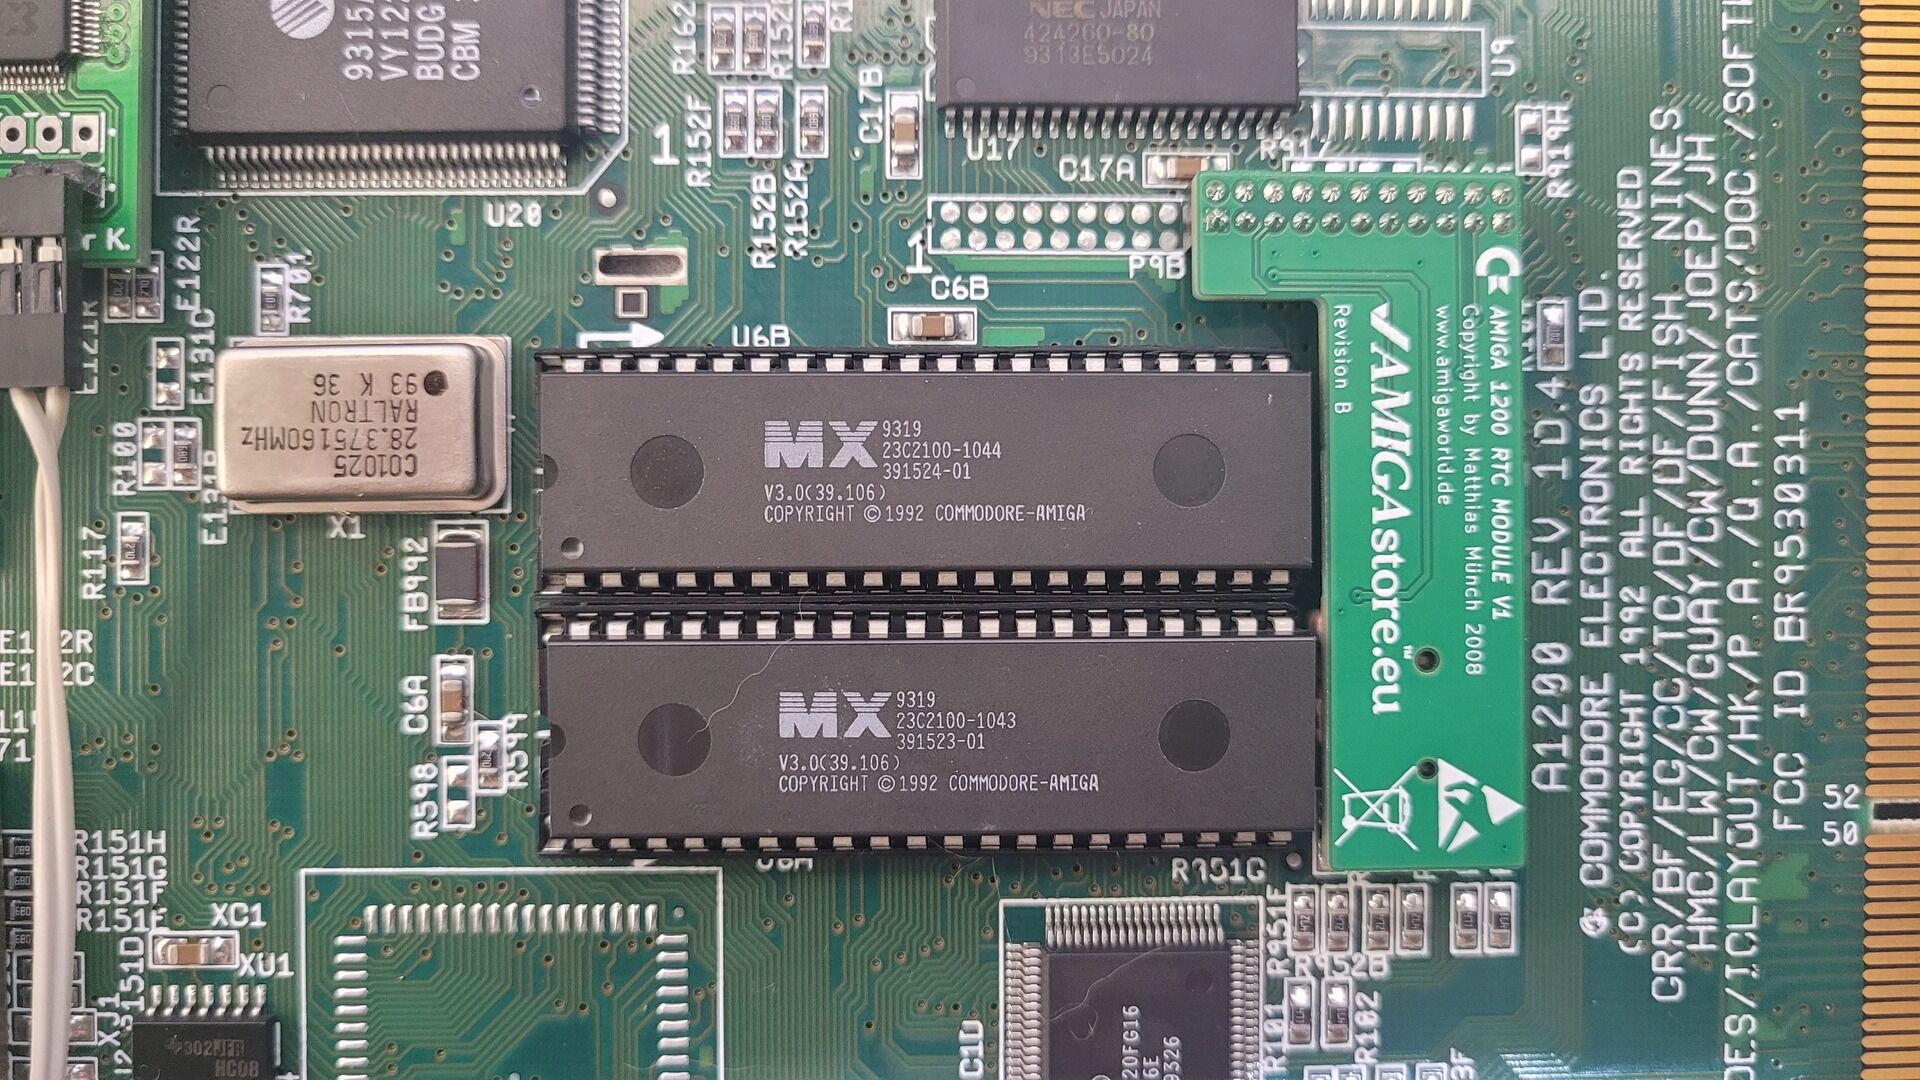
- Amiga 1200 RTC Module V1 (to keep date and time even when the PiStorm is disabled)
- MicroSD card extension cable
This may look like a lot of parts, but most of them are inexpensive. The PiStorm remains by far the most cost-effective way of building a very powerful Amiga system while keeping compatibility with the original hardware.
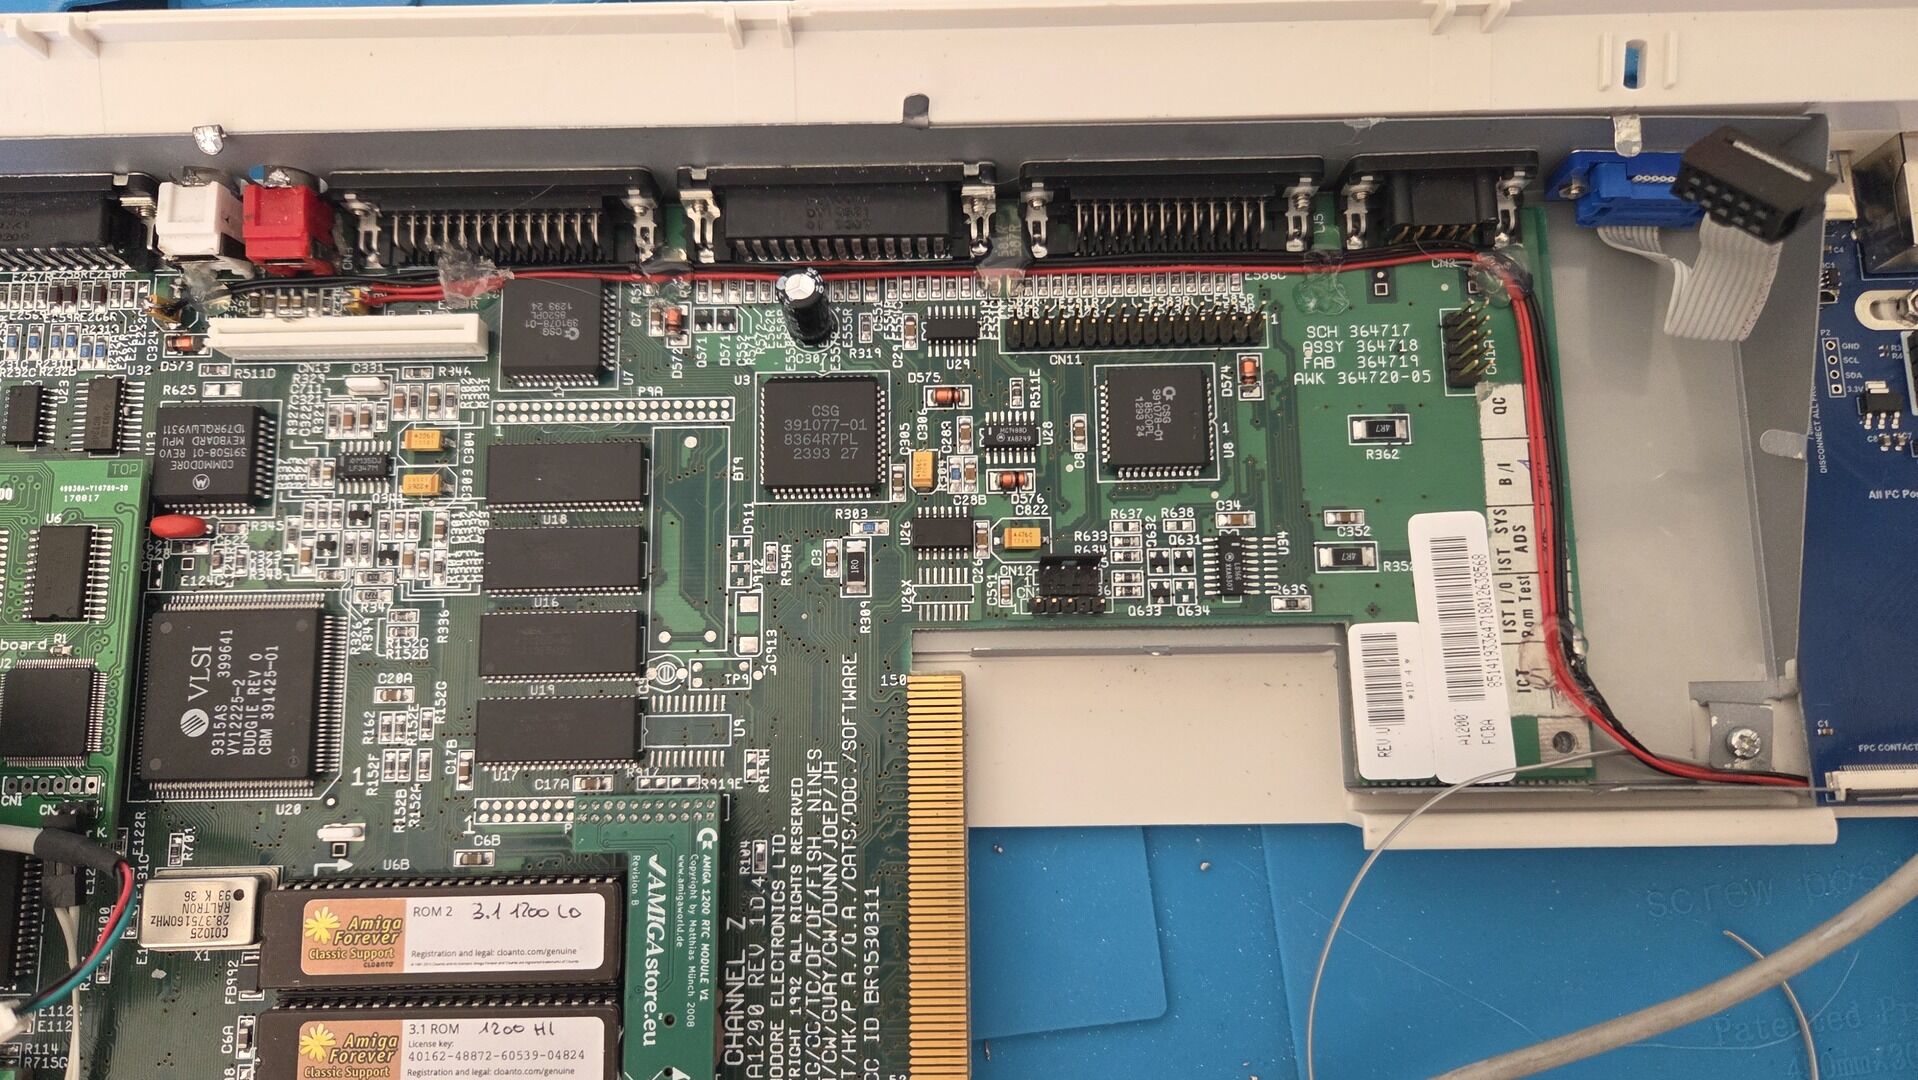
Hardware Mods and repair
Recap & shield painting
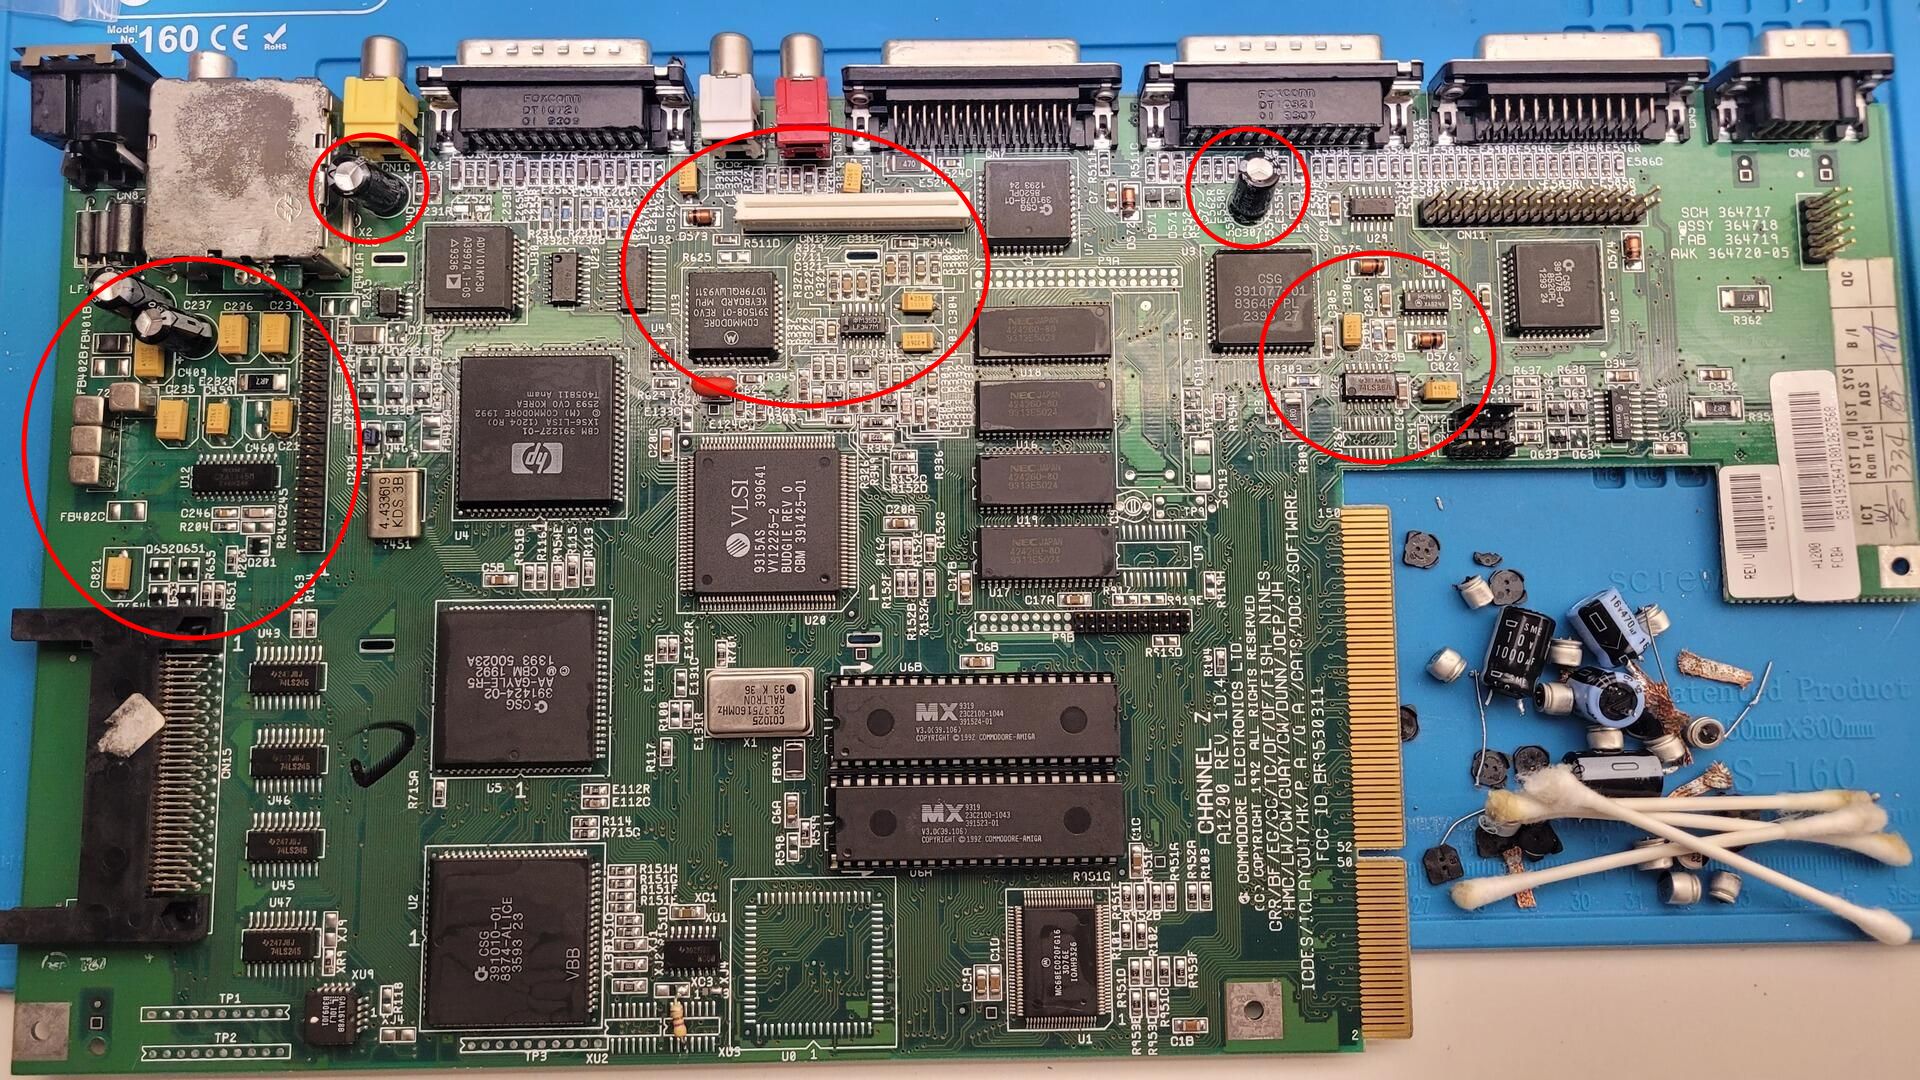
Like many surviving Amigas, this A1200 was still fitted with its original electrolytic capacitors. Rather than waiting for them to fail, I decided to replace them with tantalum capacitors as a preventive measure.
I used:
- Type B for all 10 µF capacitors
- Type C for the 22 µF and 47 µF capacitors
- Type D for the 100 µF capacitors
- Other standard black capacitors
This is a fairly common replacement strategy nowadays and has already been documented extensively by the Amiga community, so I will not detail the entire recap process here.
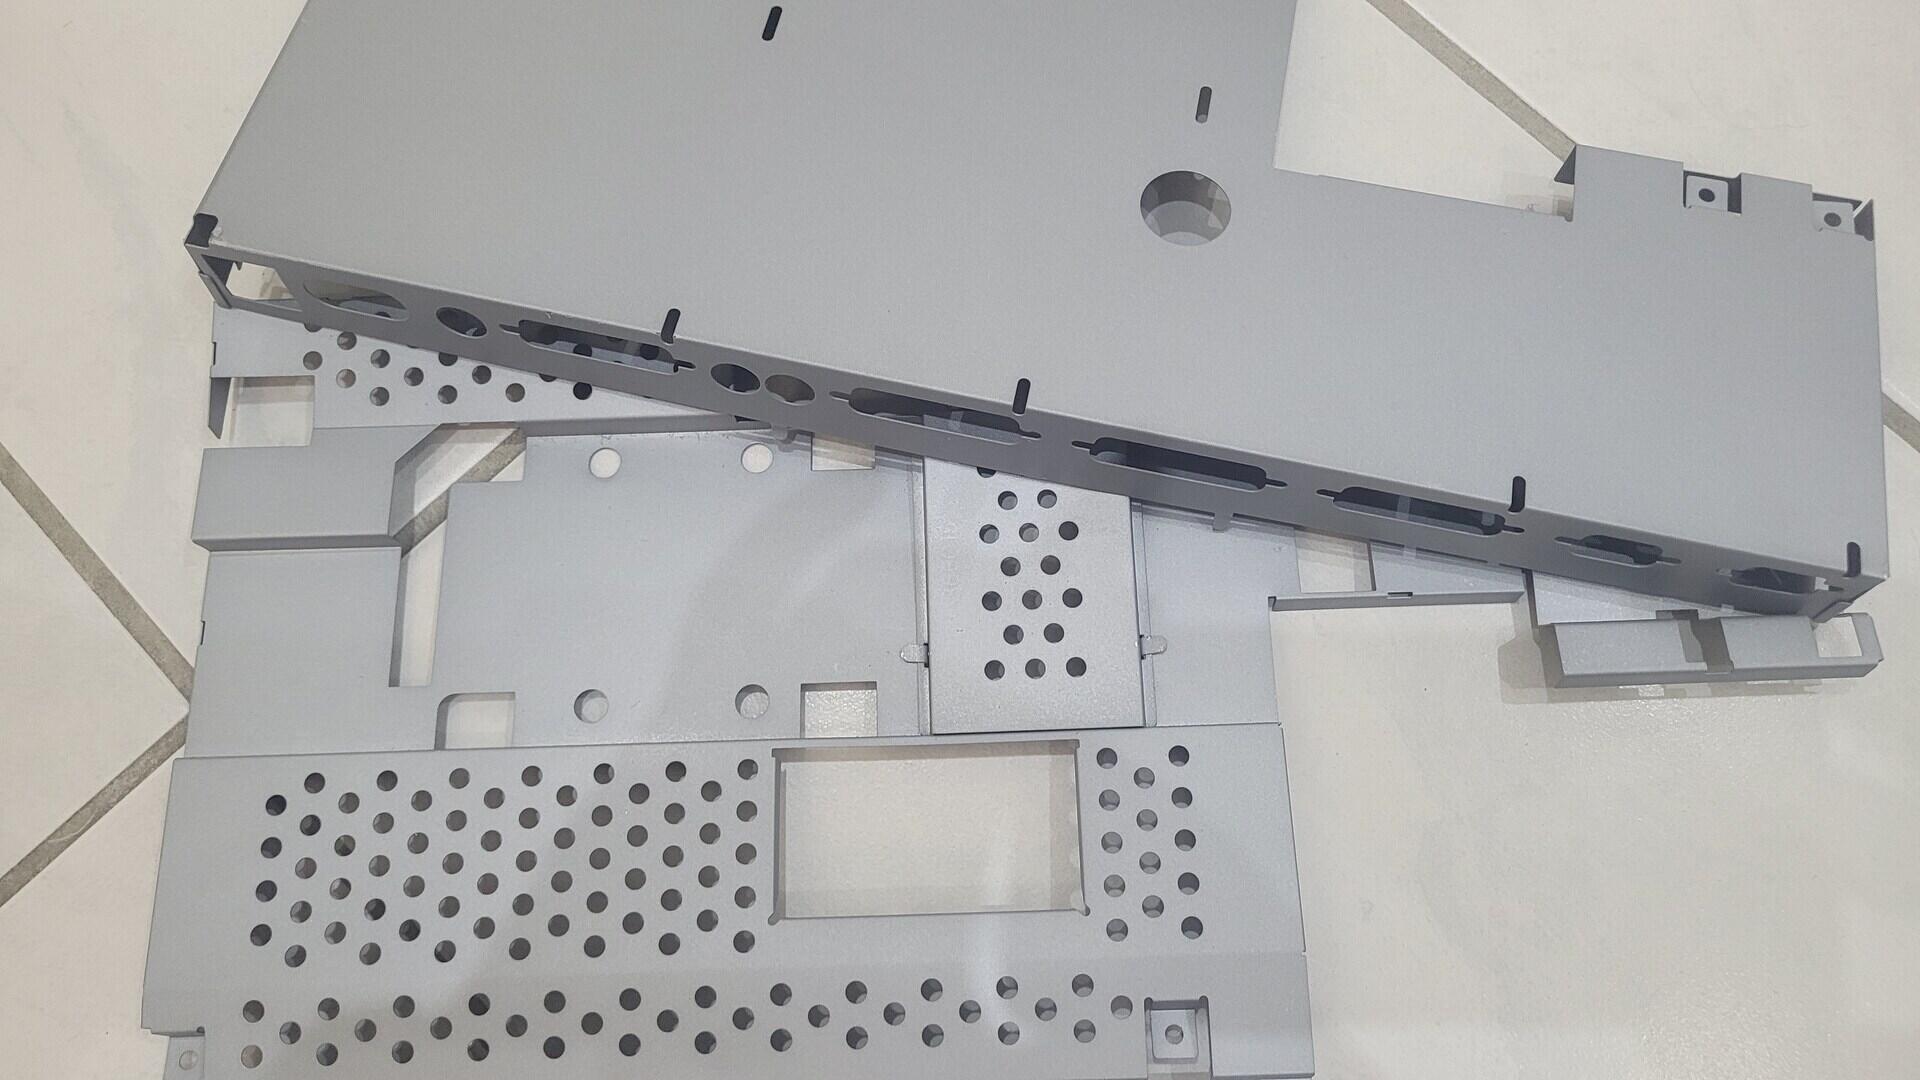
While the motherboard was out of the case, I also took the opportunity to restore the metal shields. As I did on my previous Amiga projects, I lightly sanded the corroded areas and applied a zinc-rich protective paint. The finish is slightly different from the original metal coating, but it looks clean and should provide good long-term protection against corrosion.
A few photos of the recap and shield restoration process:

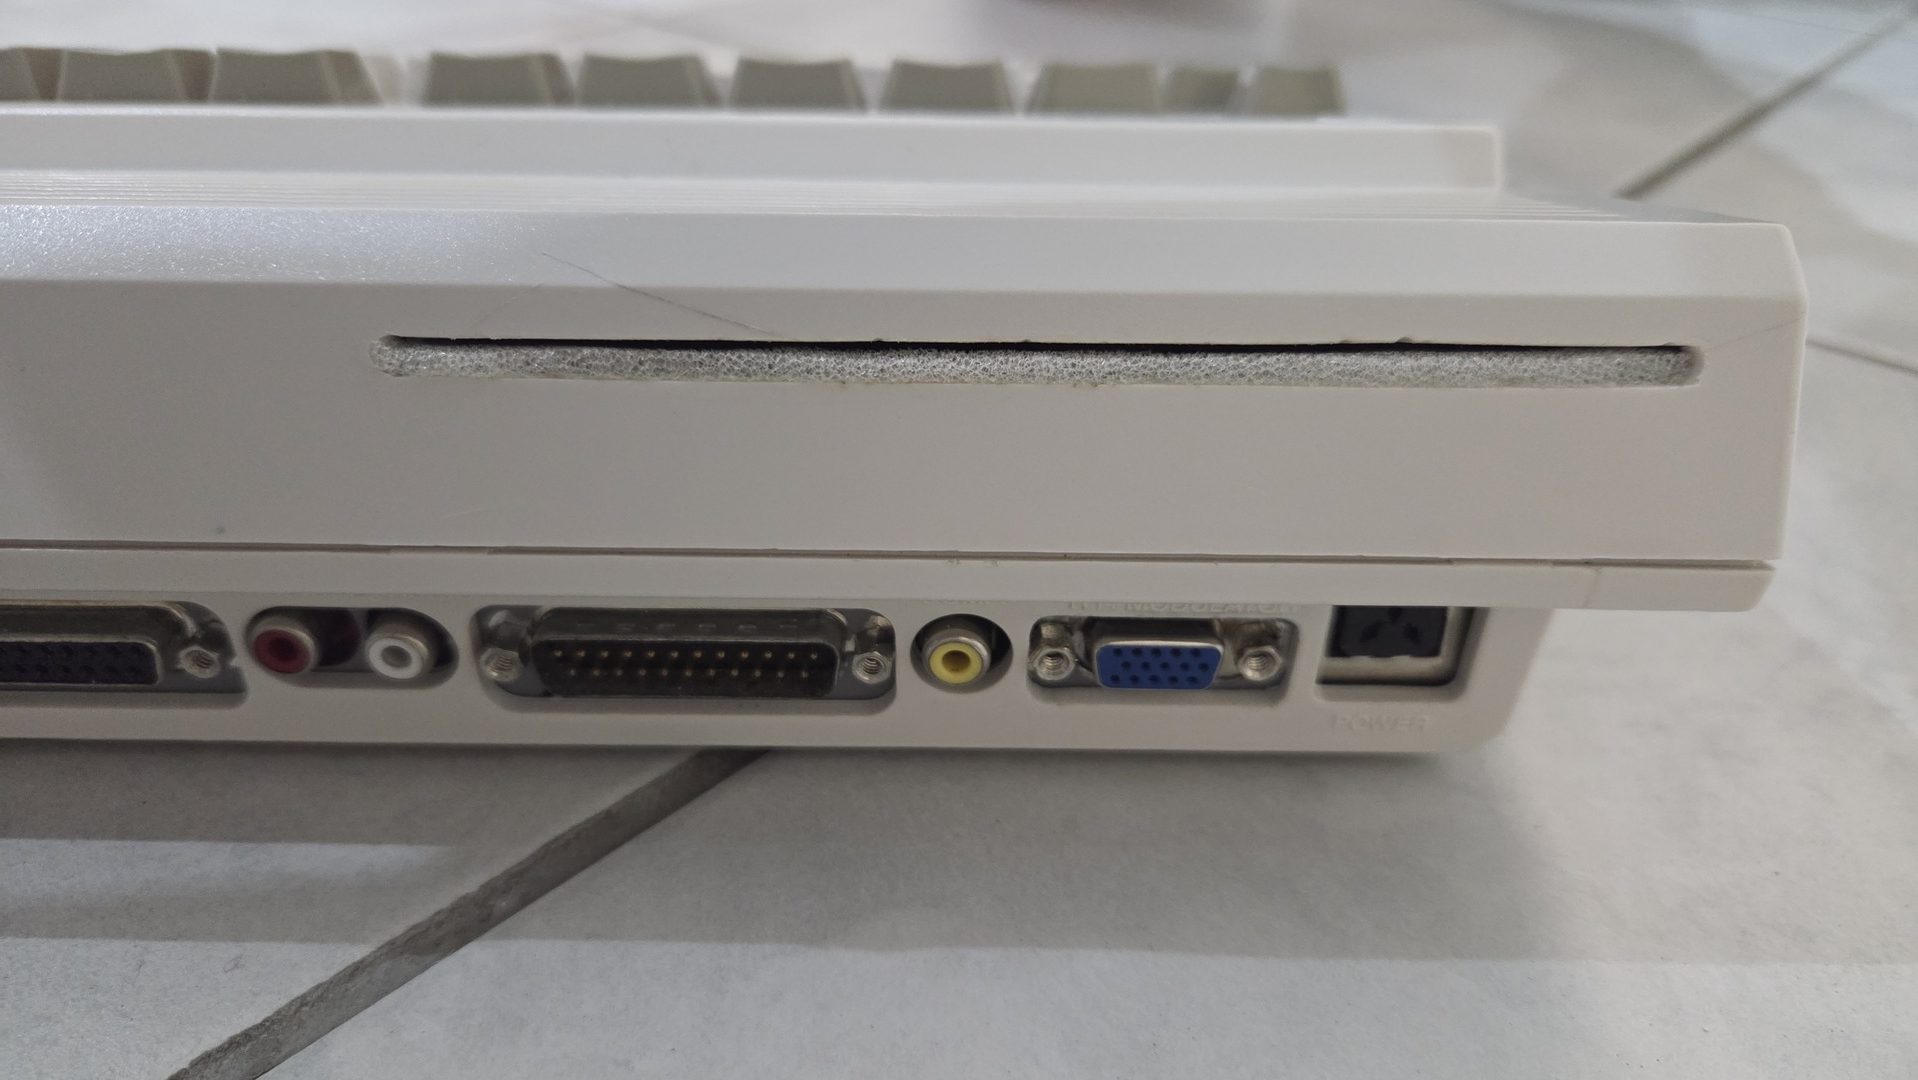
Native VGA Output
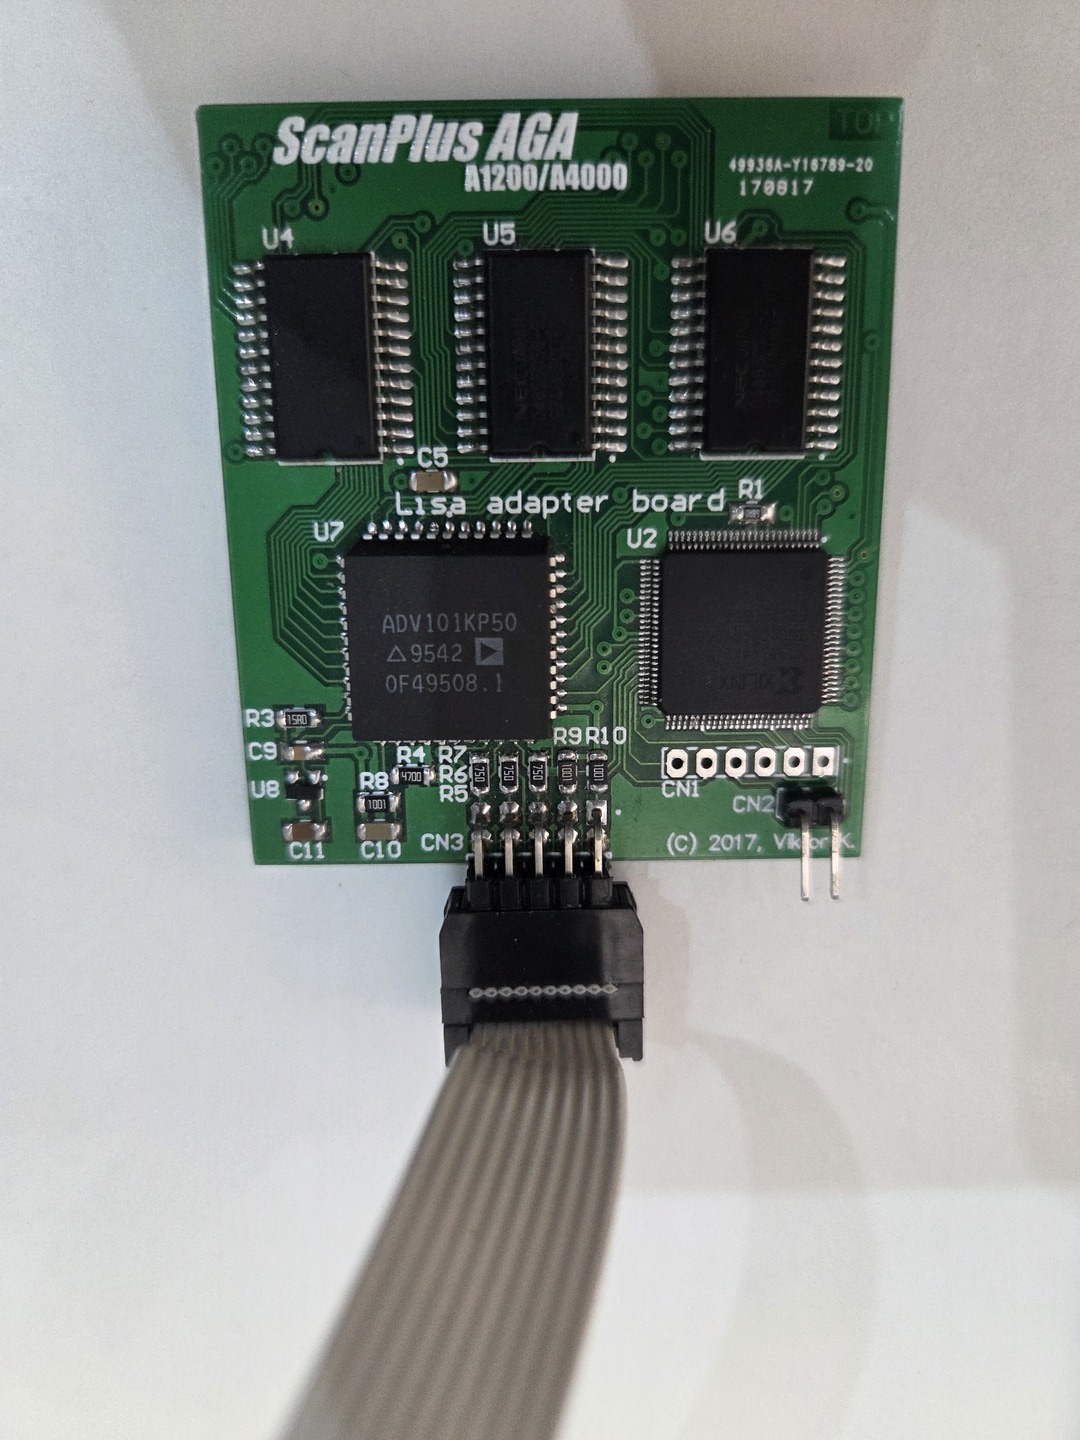
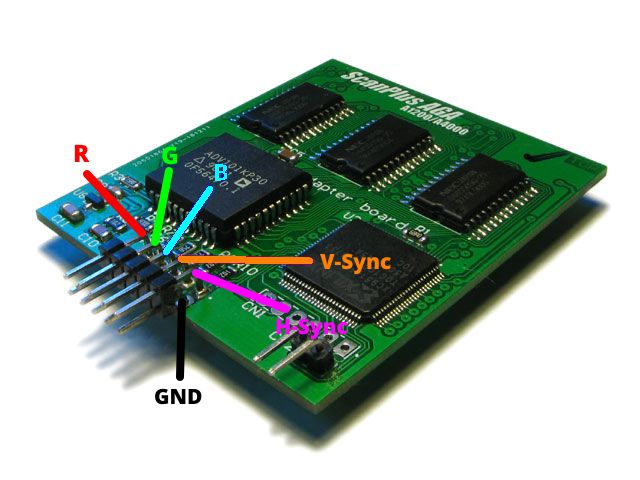
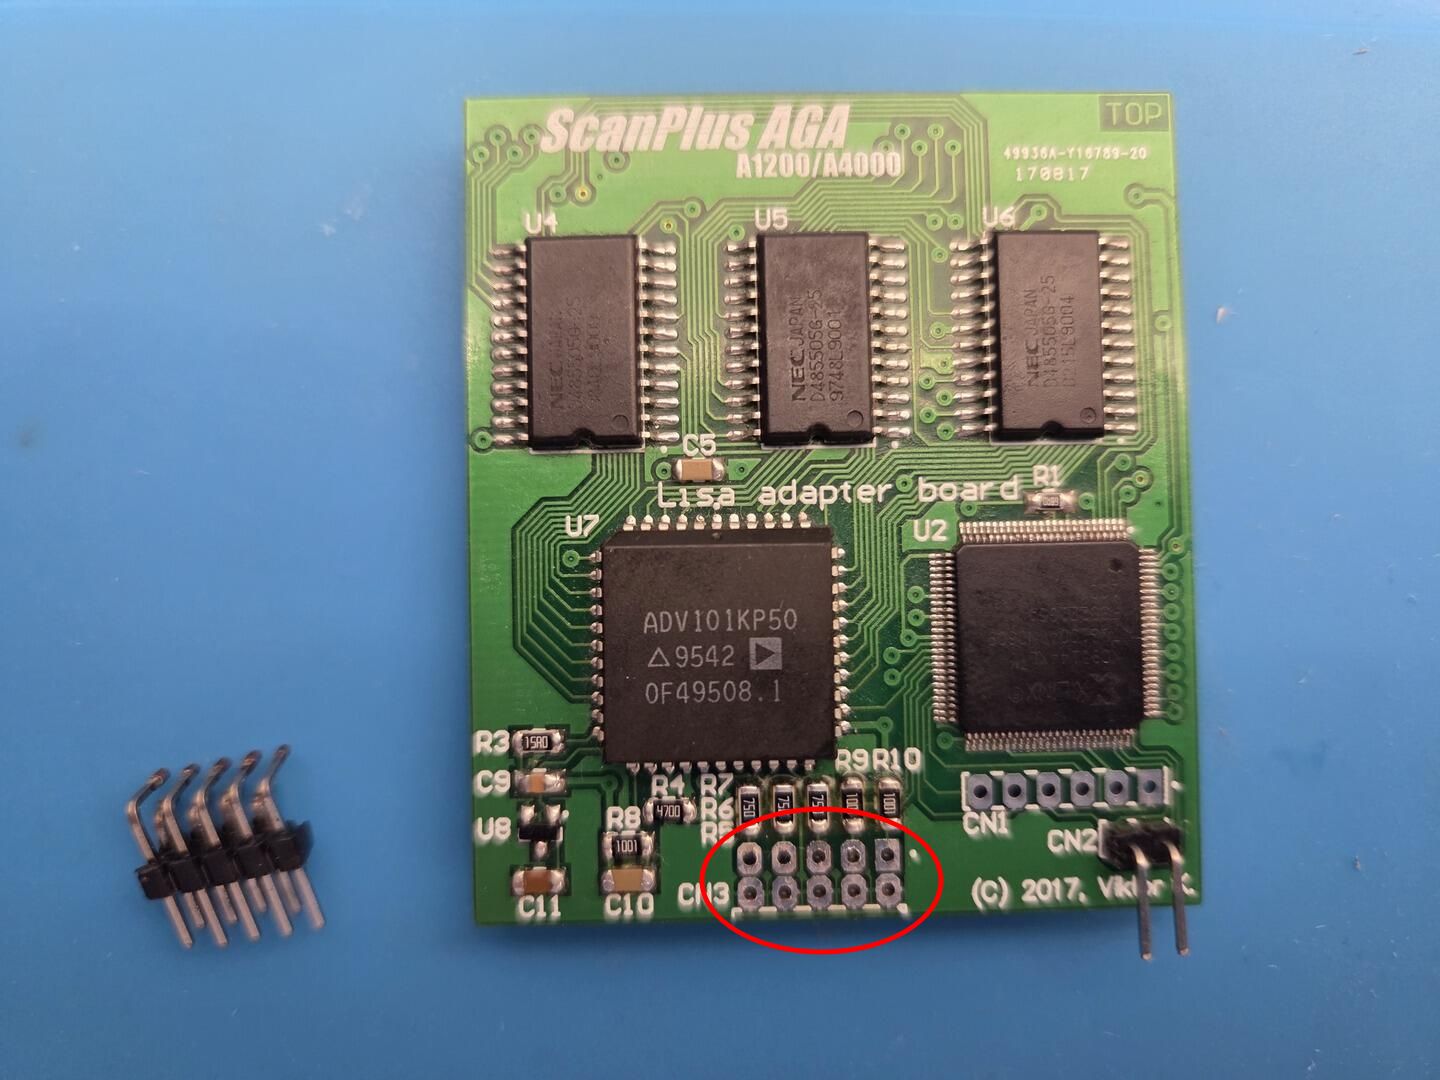
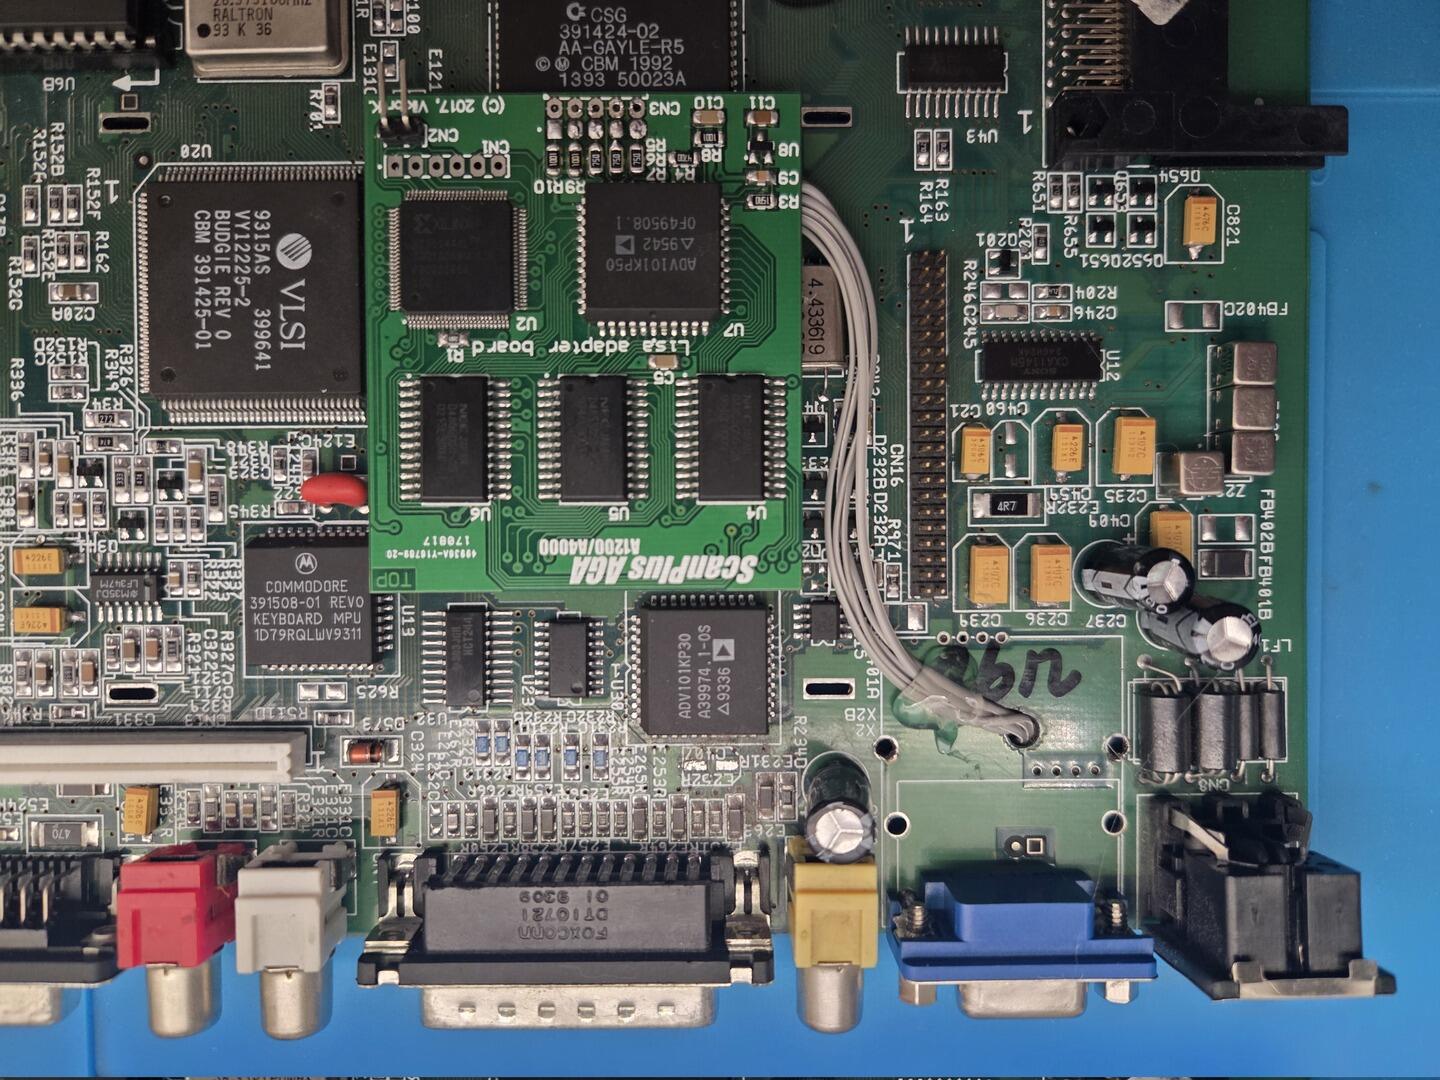
One of the upgrades I wanted from the beginning was a native VGA output. The ScanPlus AGA makes this possible while keeping compatibility with the original video hardware.
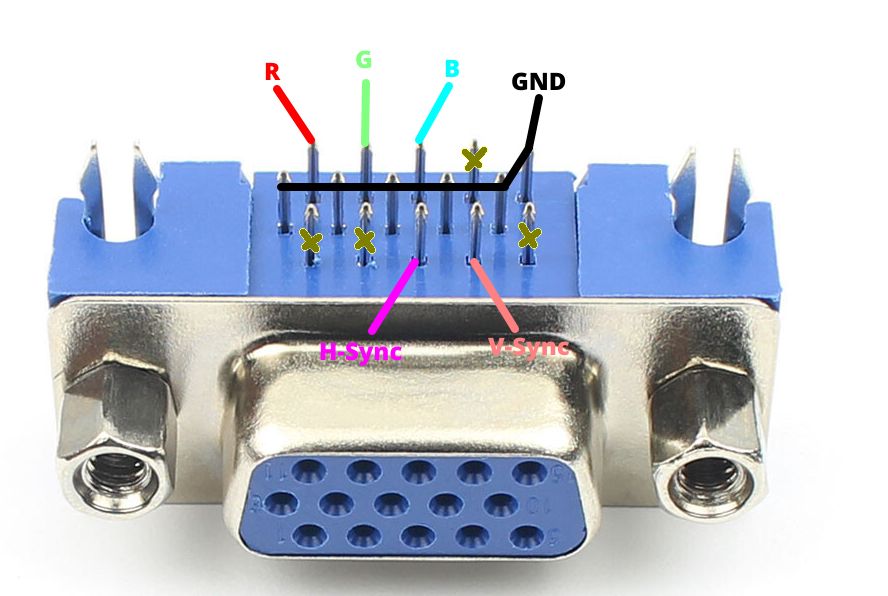
The first step was to prepare the wiring between the ScanPlus AGA and a standard VGA connector.
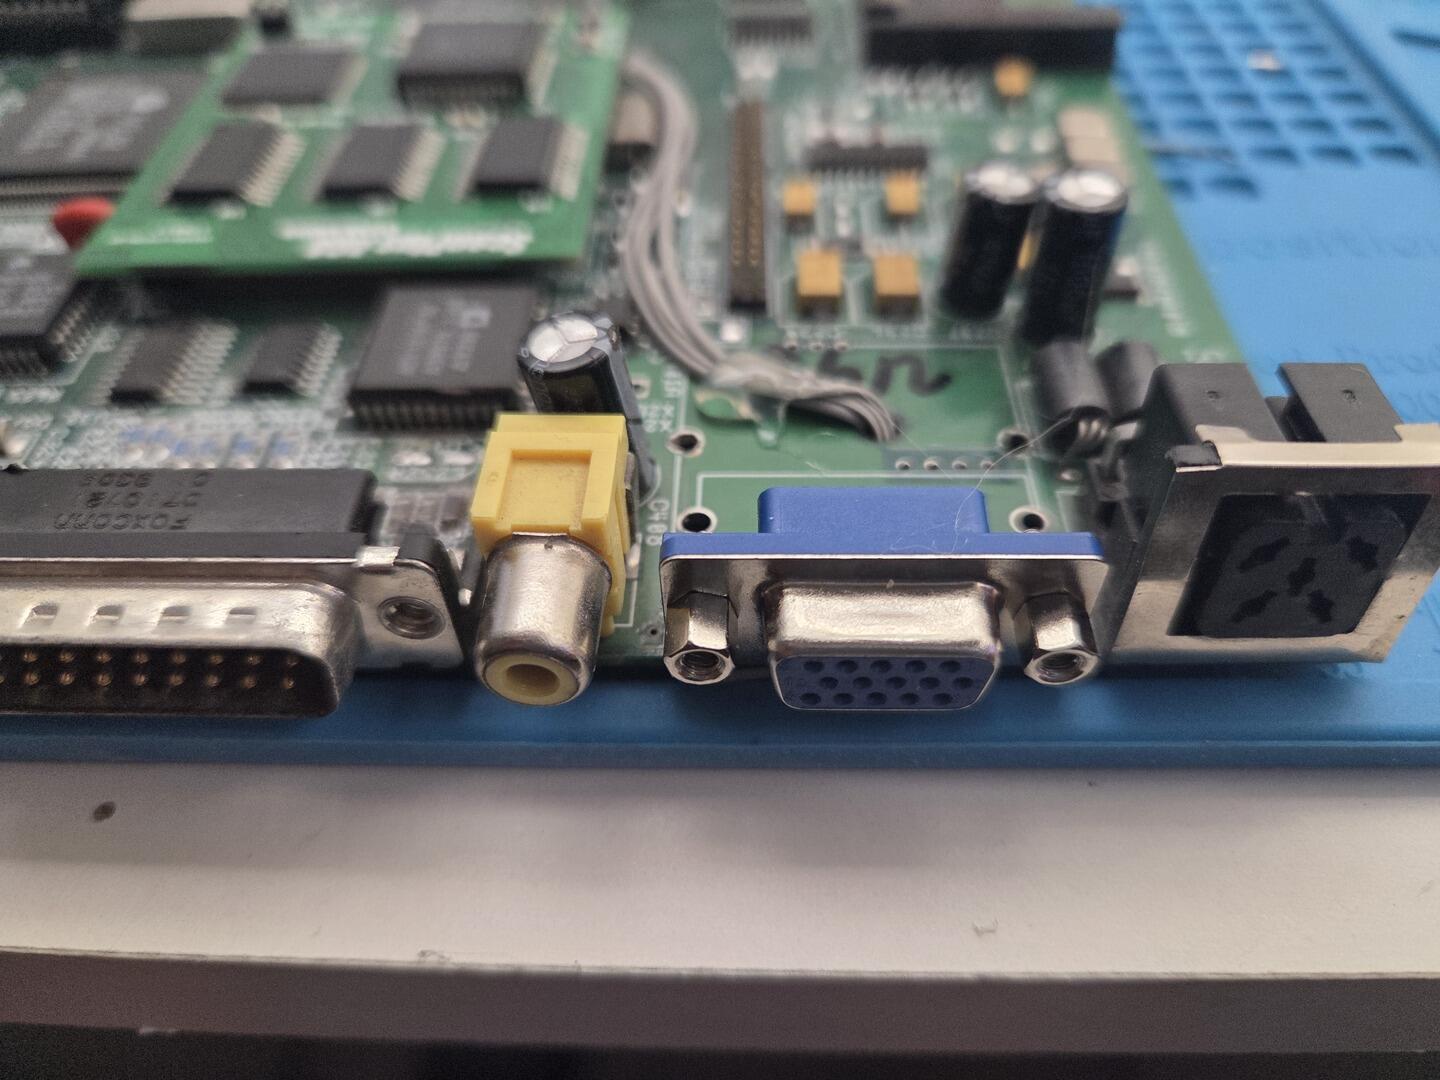
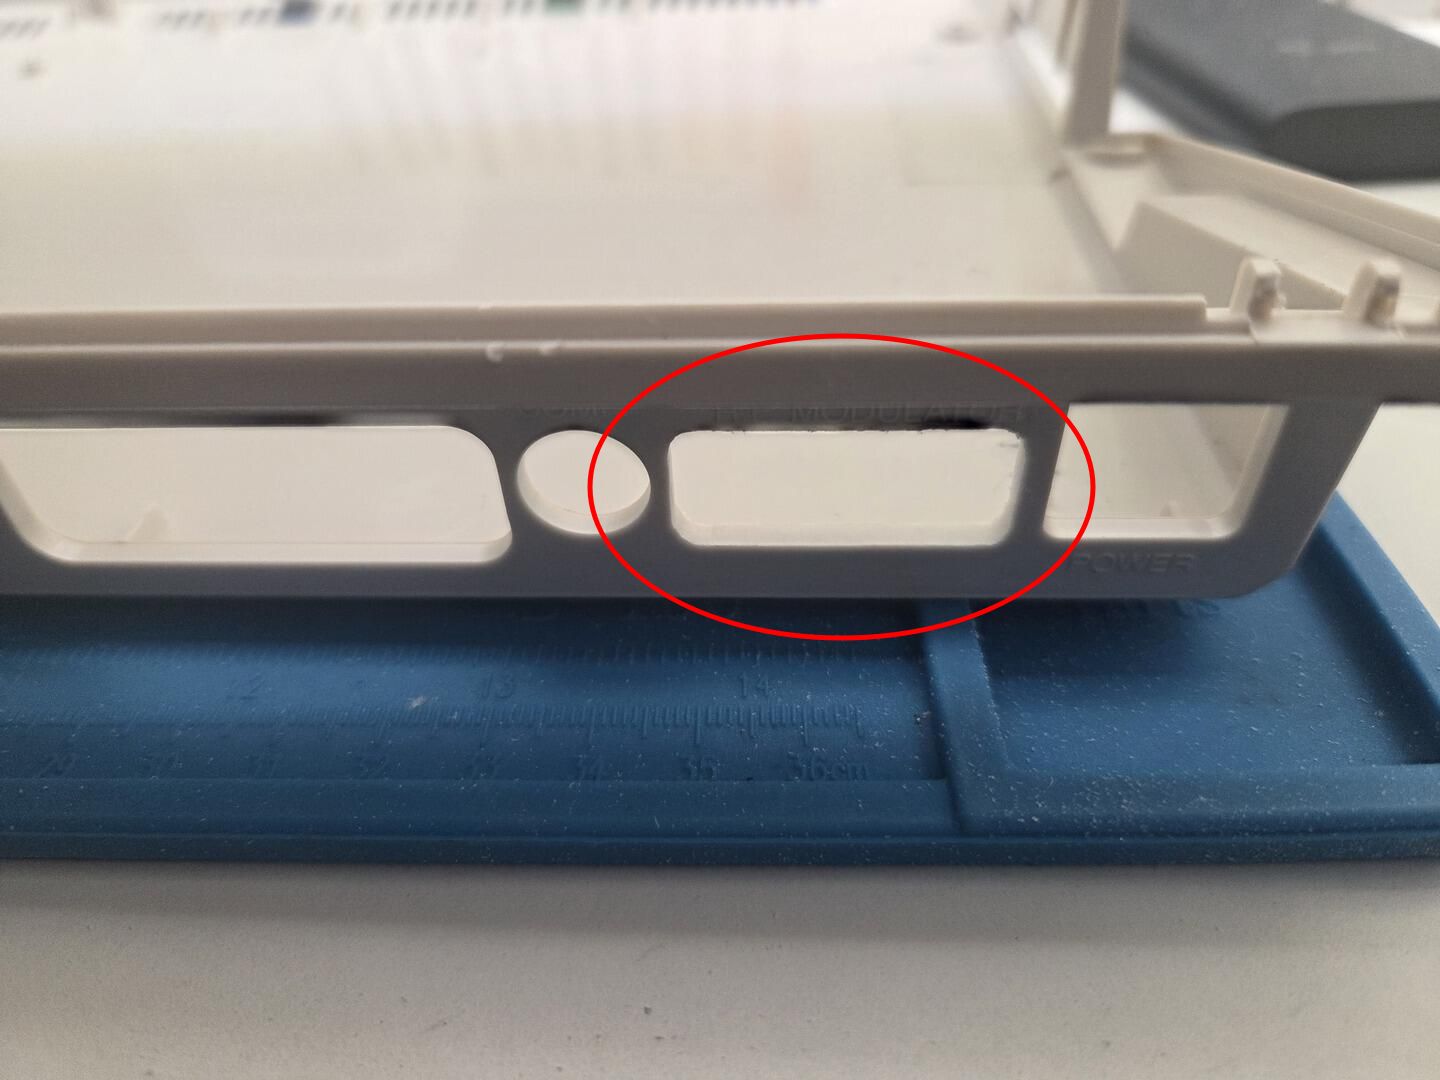
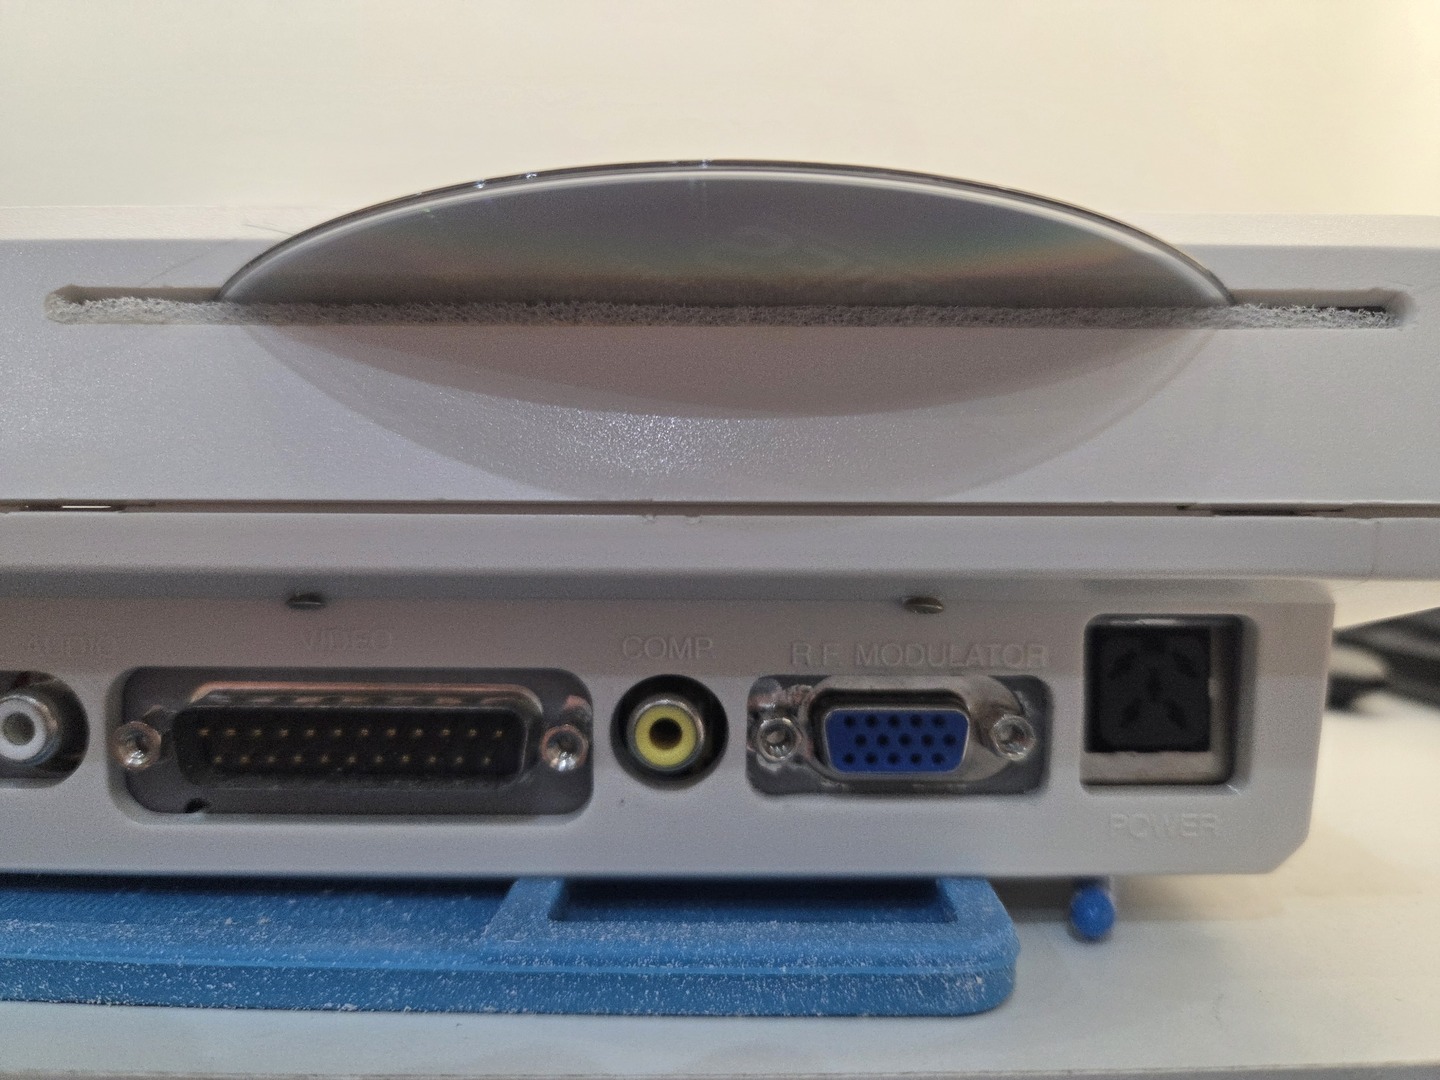
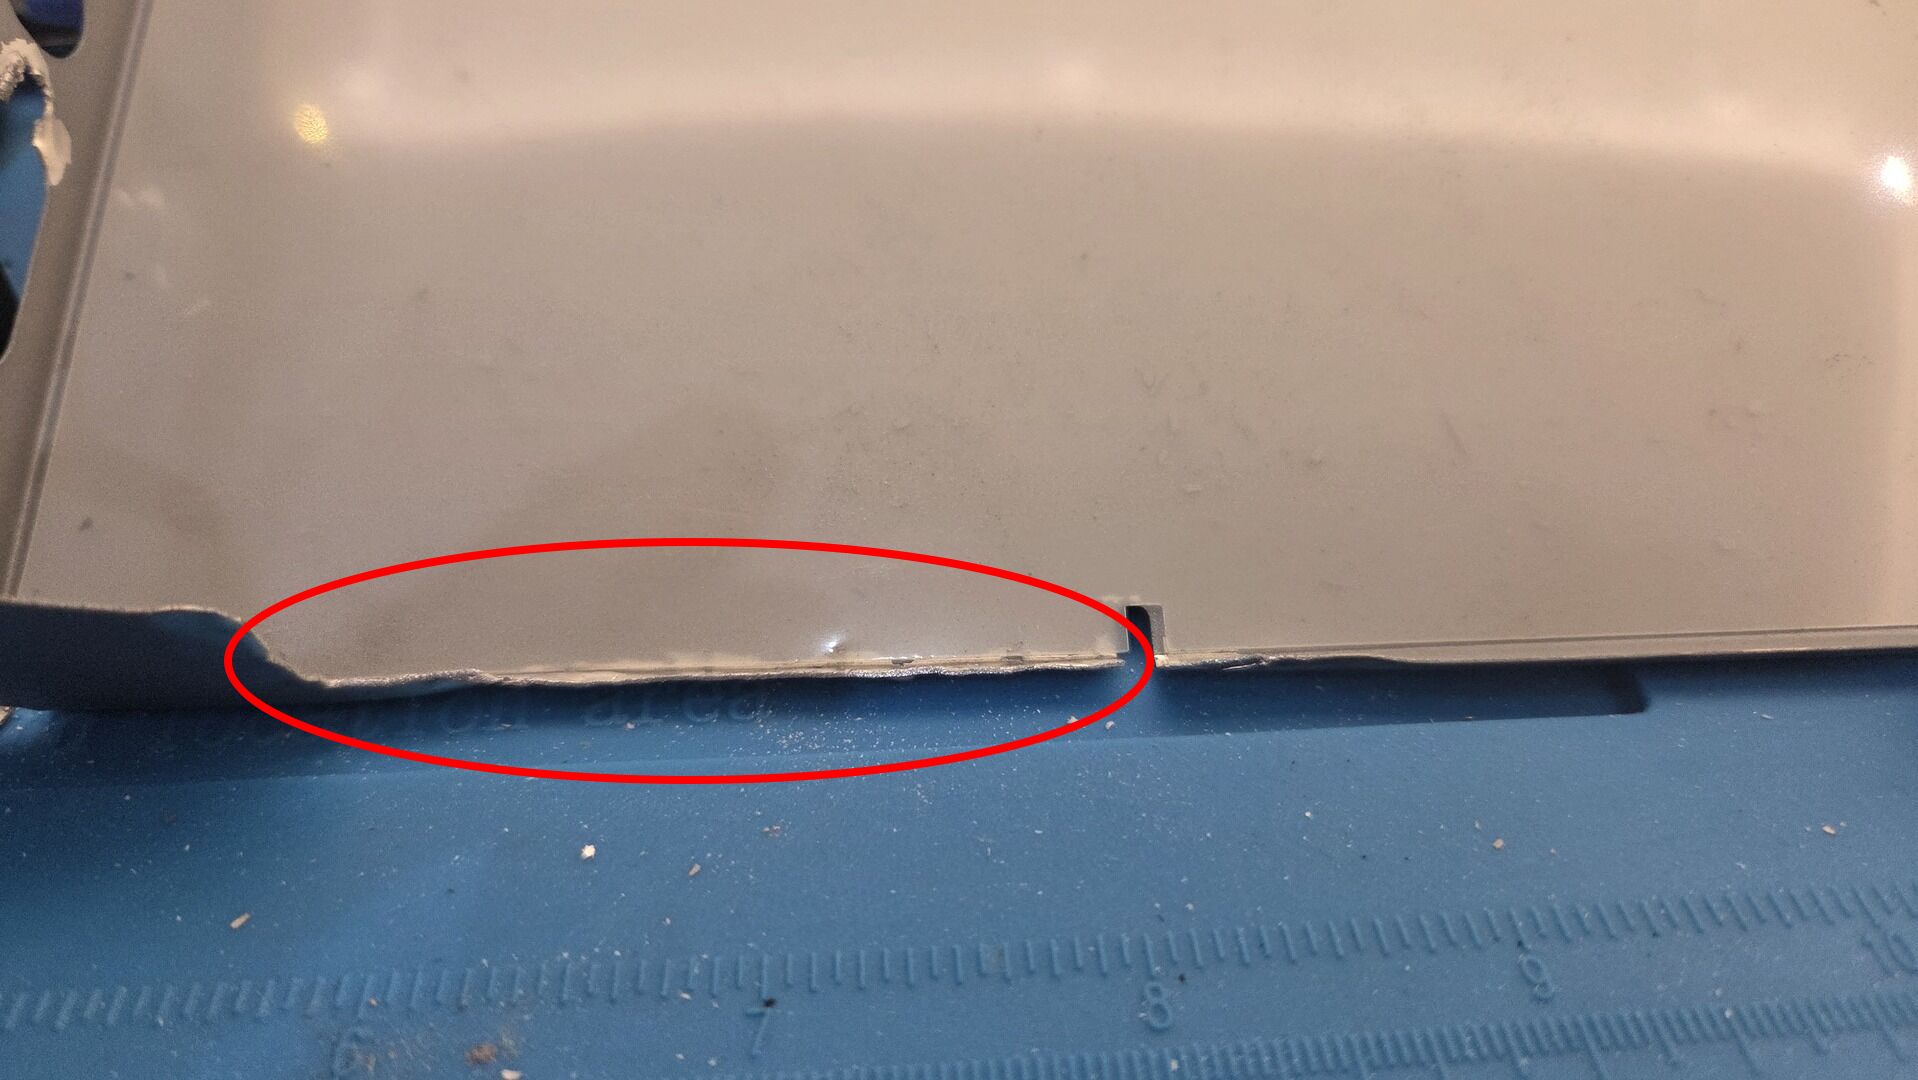
To make room for the connector, I removed the original RF modulator. This provided enough space to mount a VGA connector at the rear of the Amiga.

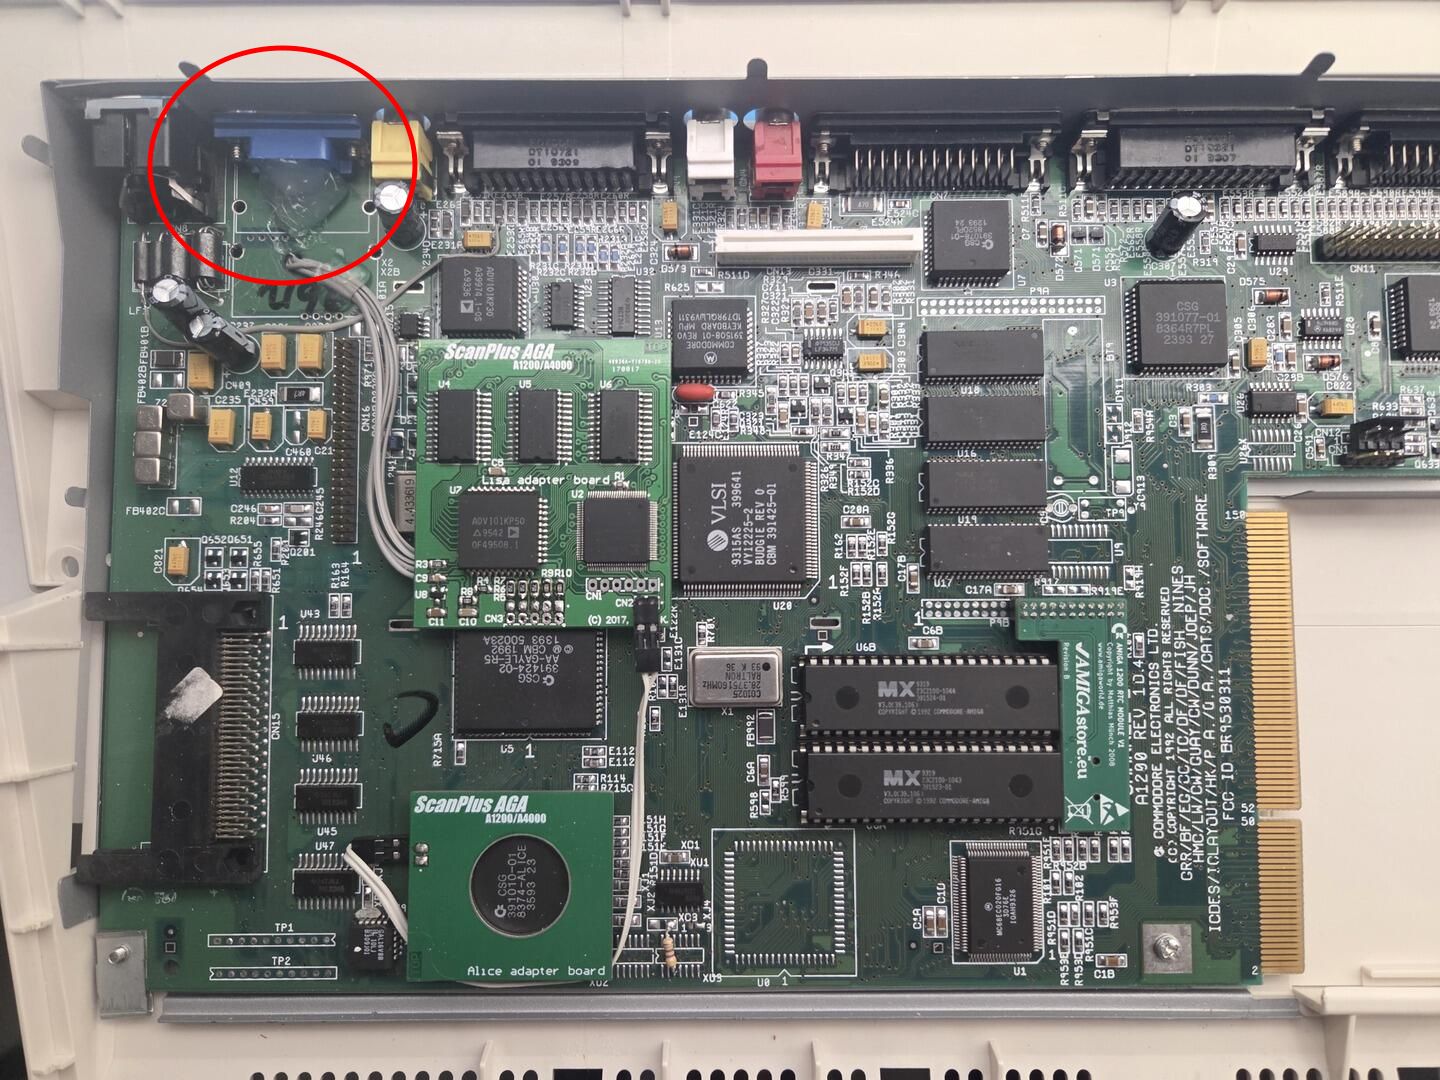
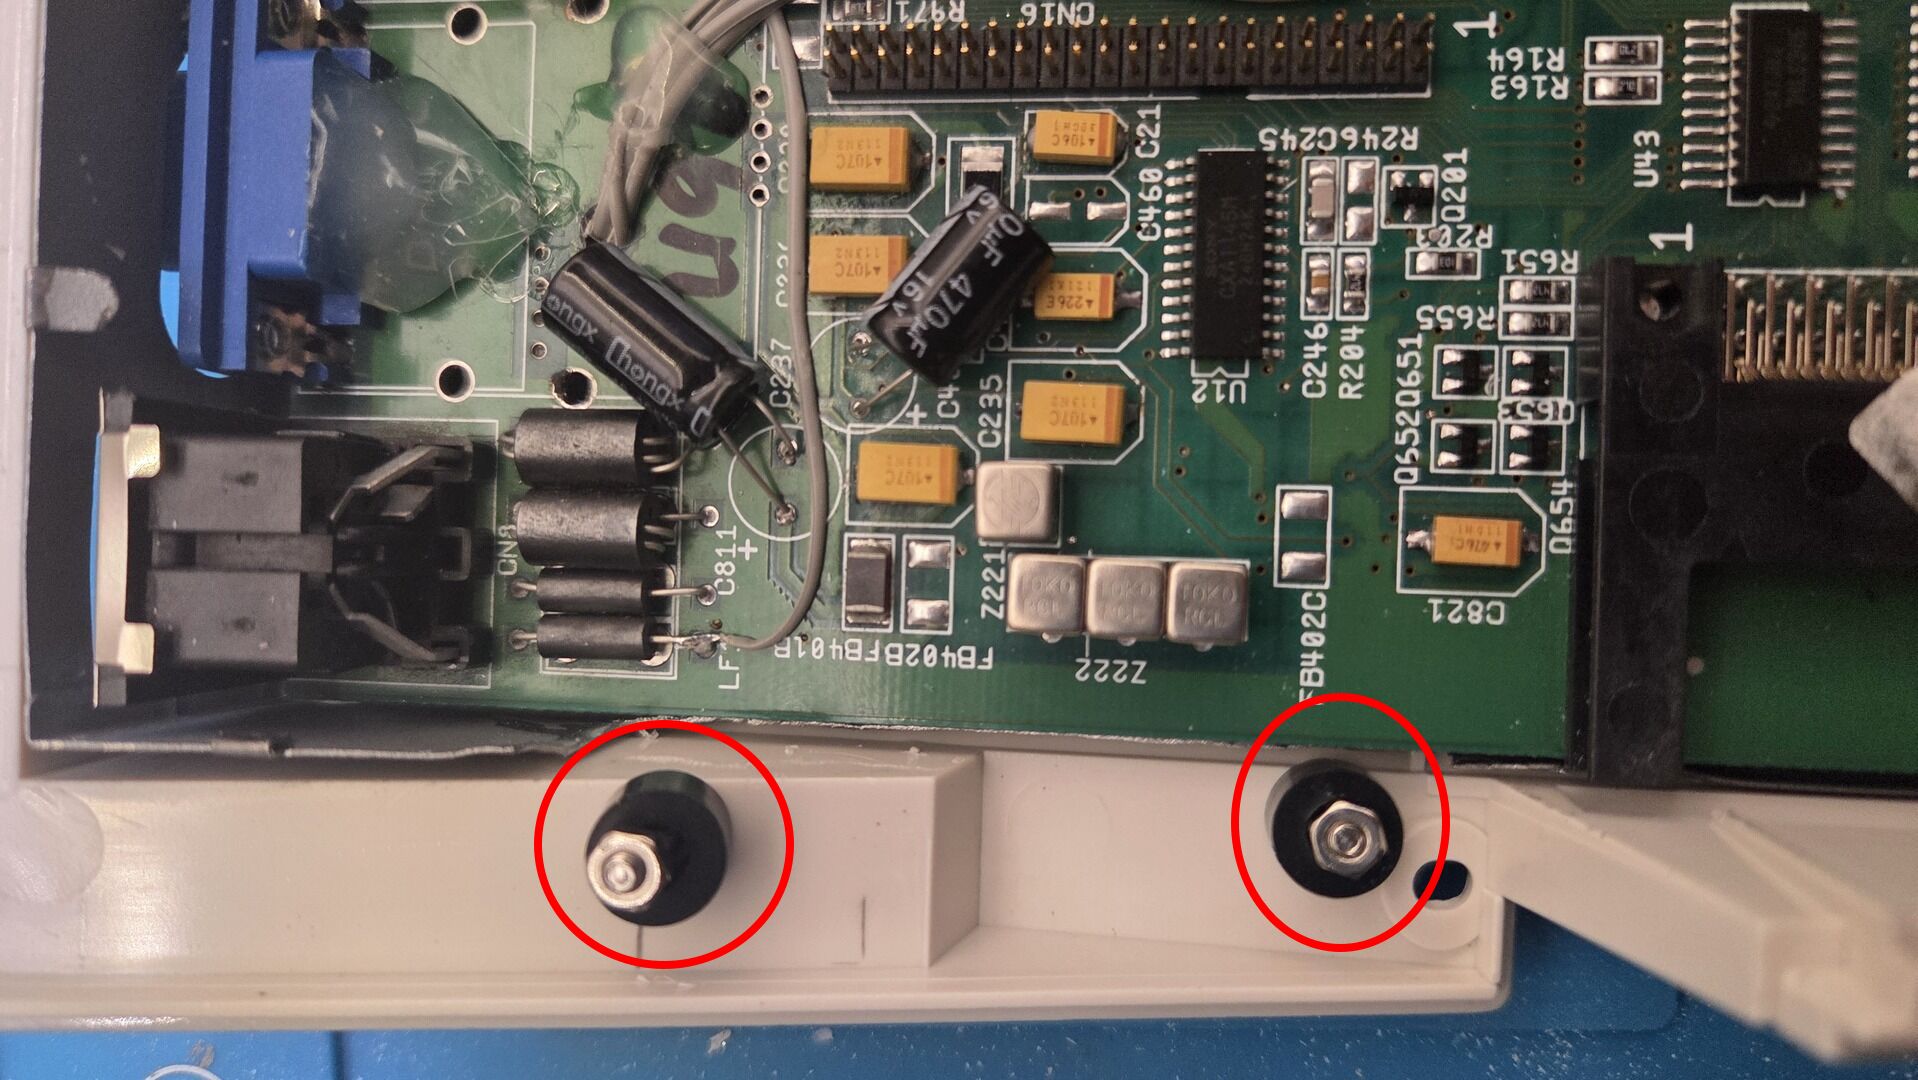
In order to align the VGA connector with the existing rear connectors, I had to slightly modify the motherboard. A small section of the board was cut away and two mounting holes were drilled on each side of the connector.
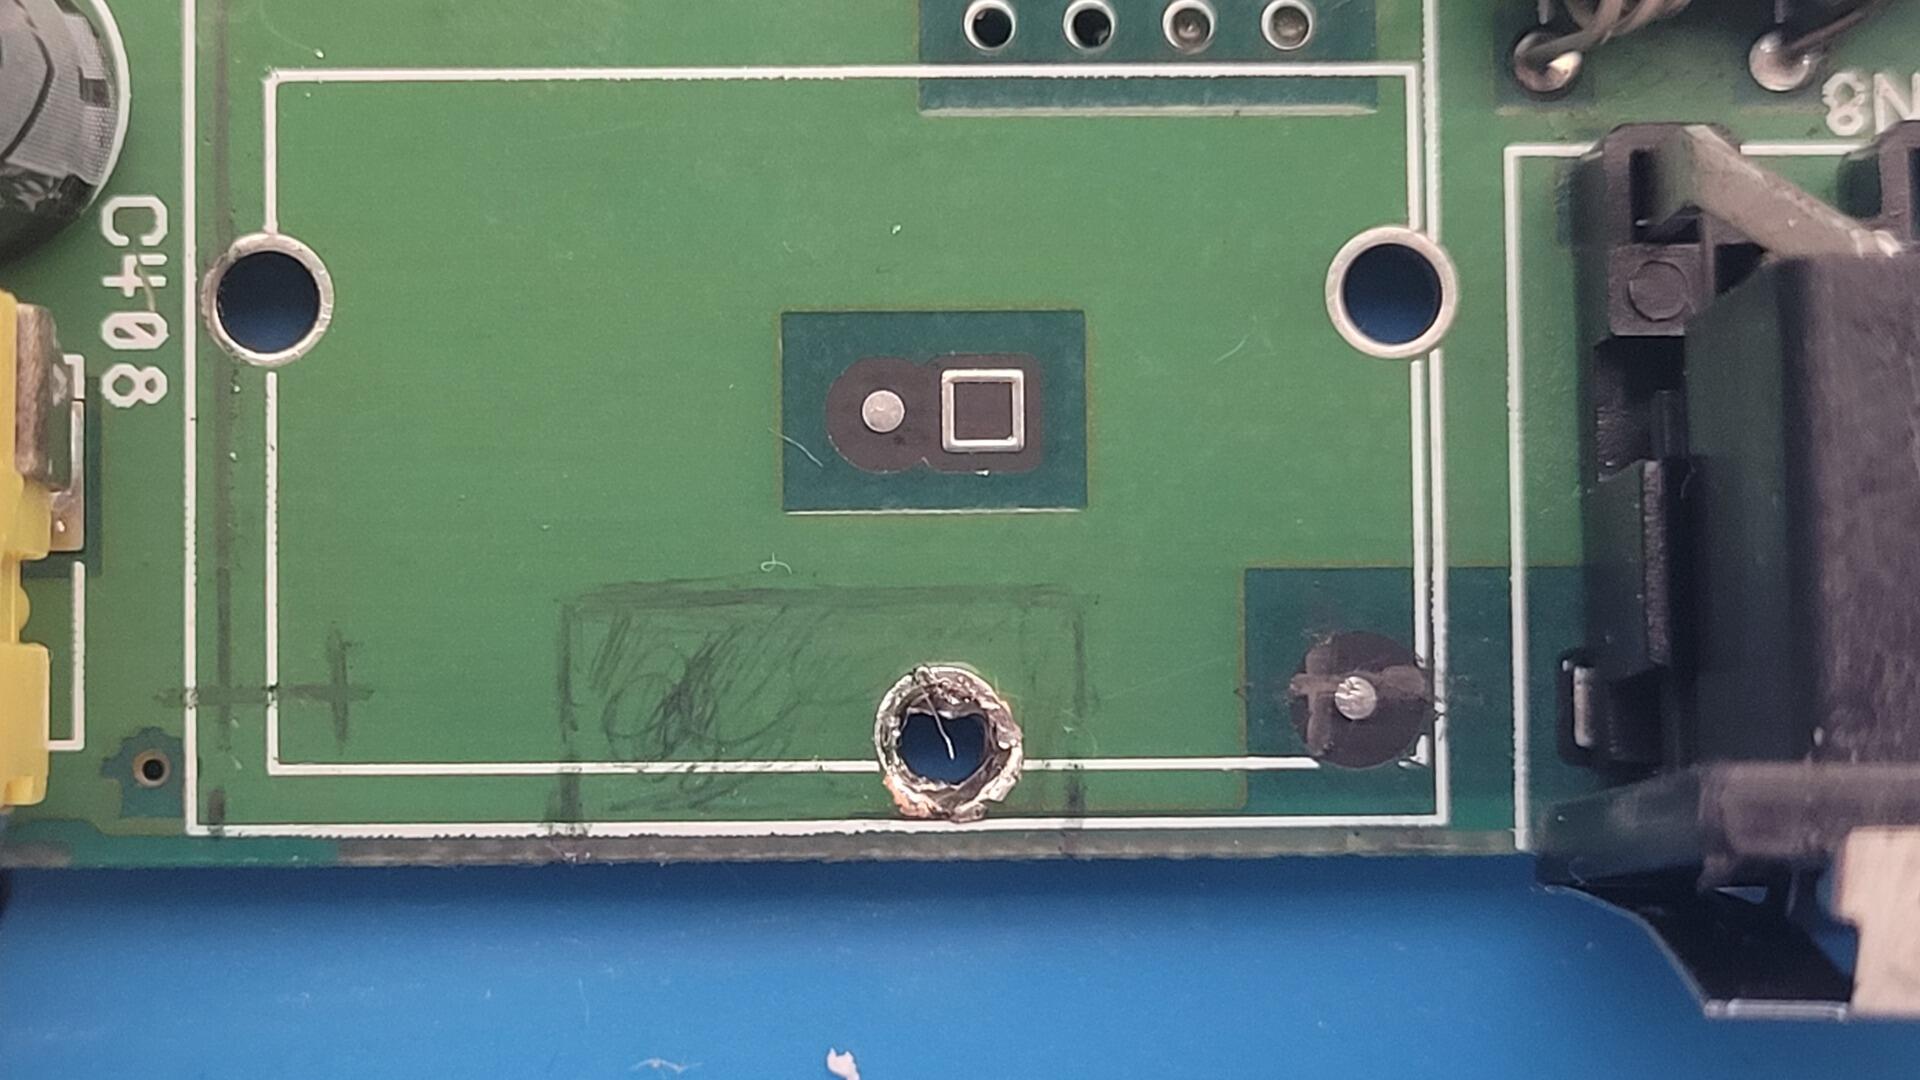

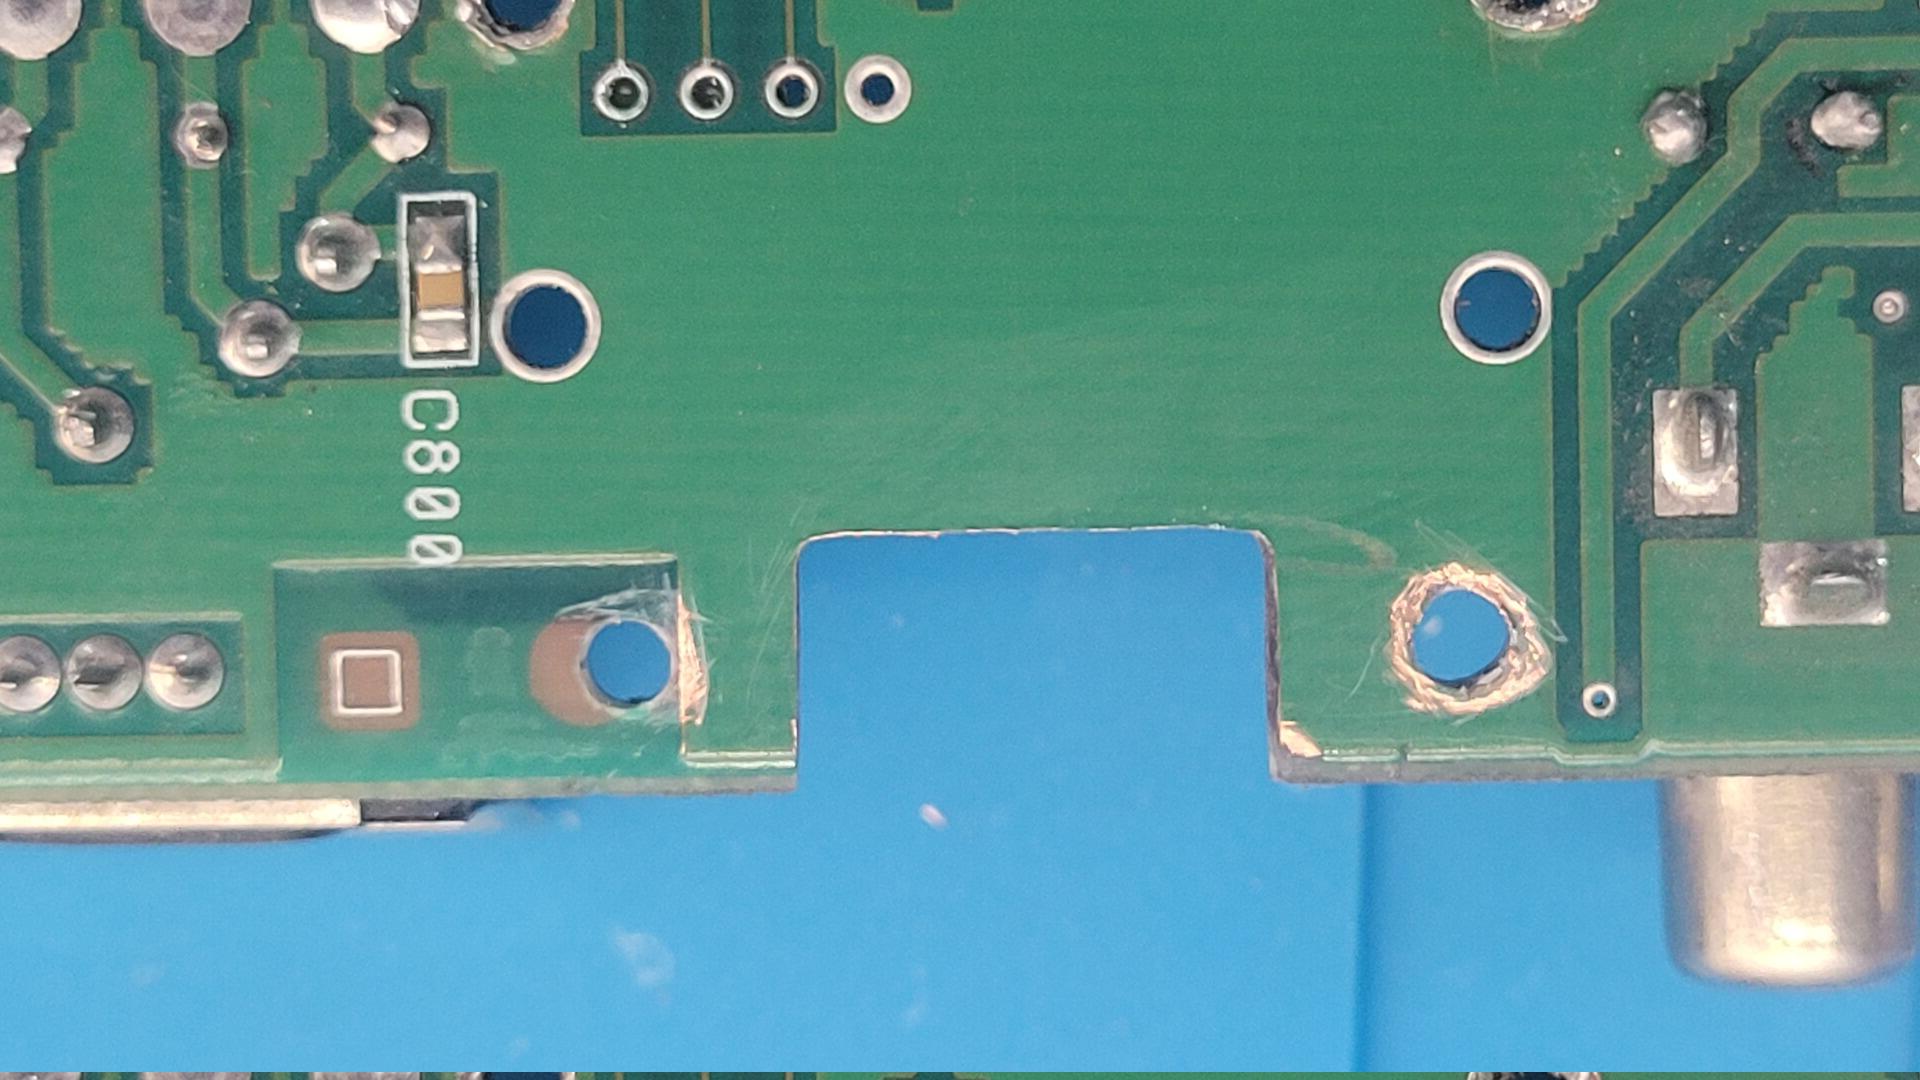
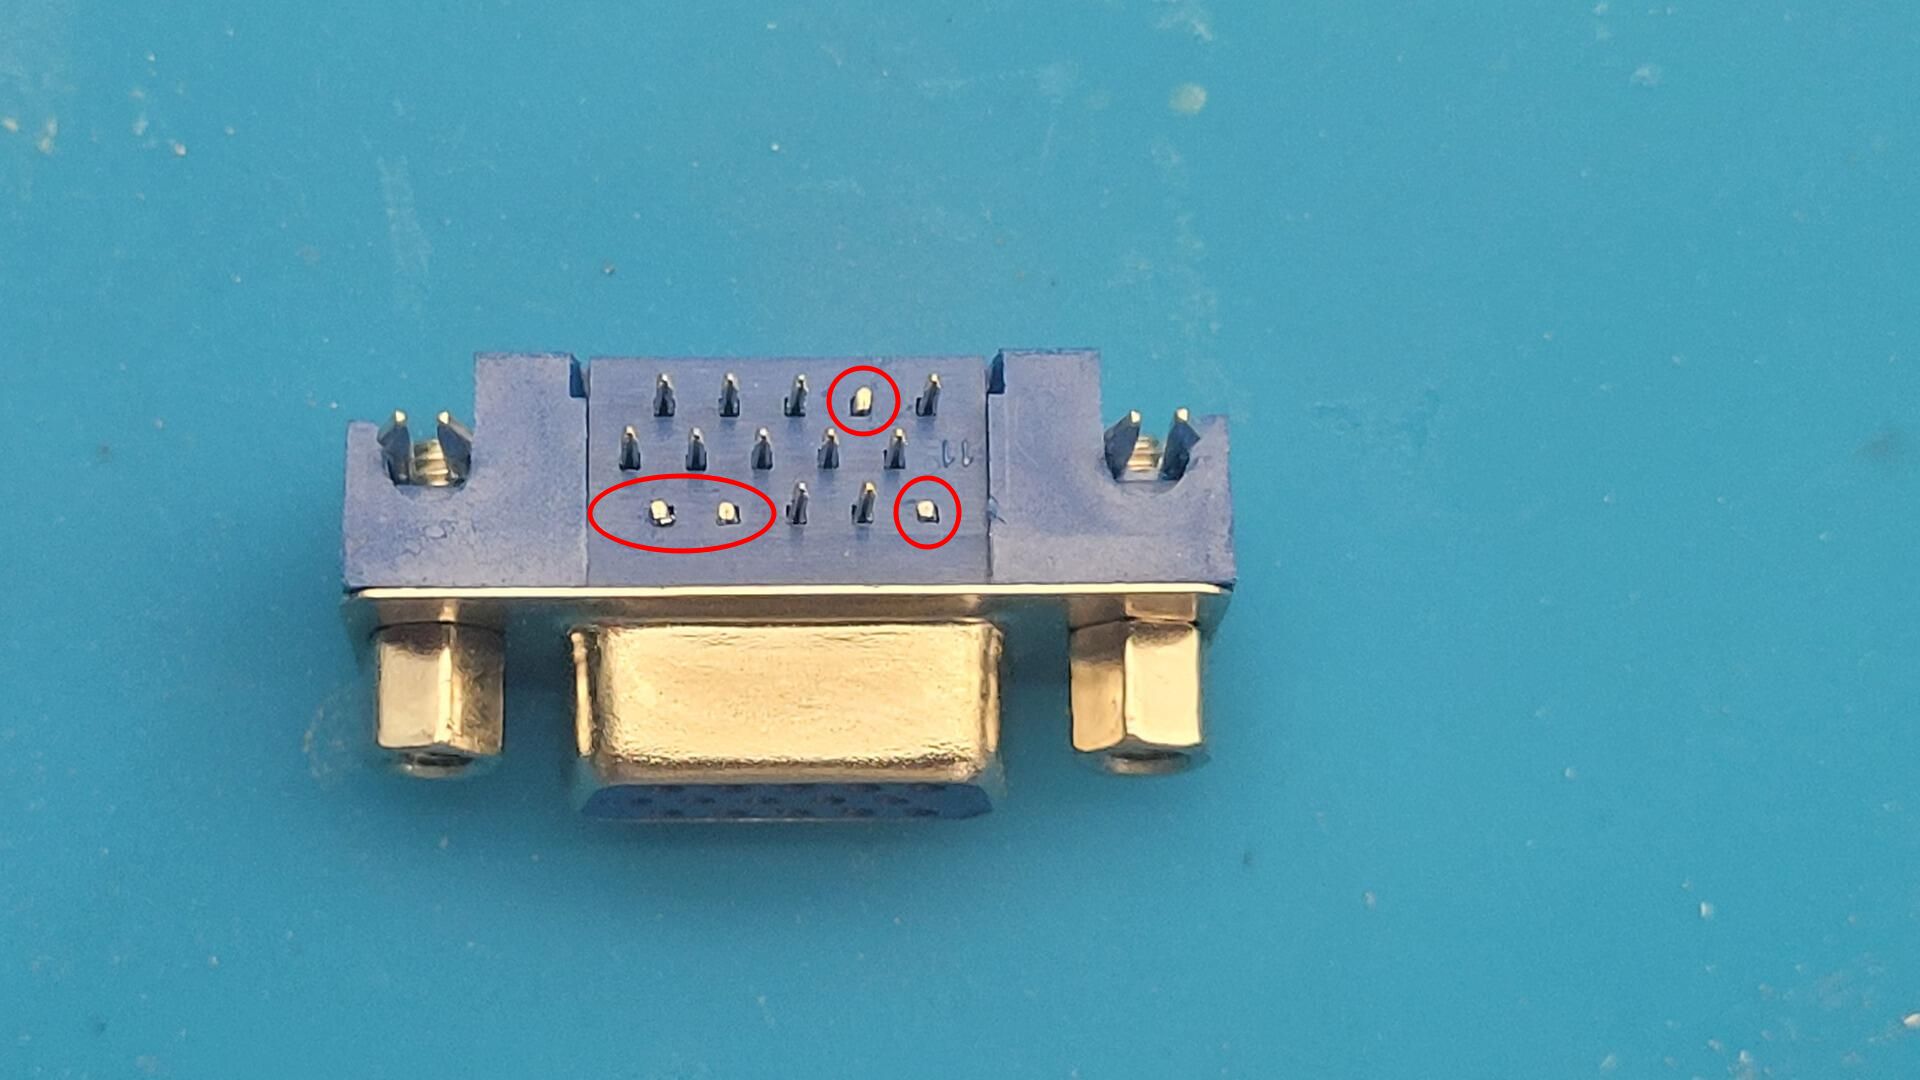
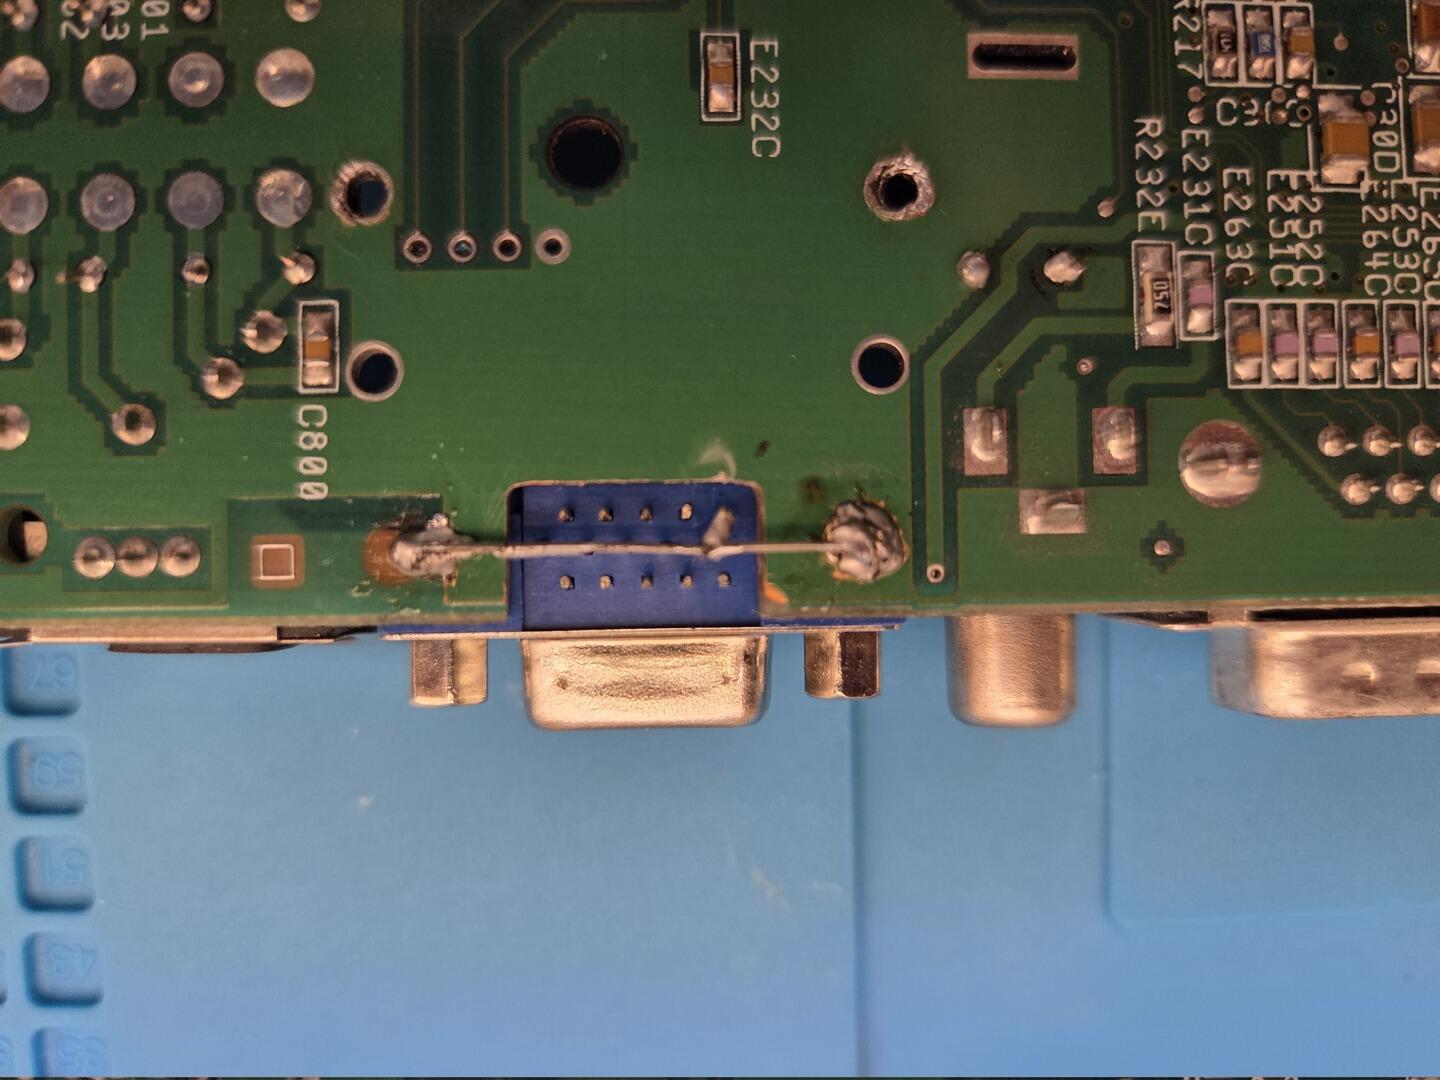
To simplify wiring and avoid mistakes during soldering, I removed all unused pins from the VGA connector. I also removed the corresponding header pins from the ScanPlus AGA to keep the assembly as low-profile as possible. This would later become important, as I needed every millimeter of clearance for the internal CD-ROM drive.
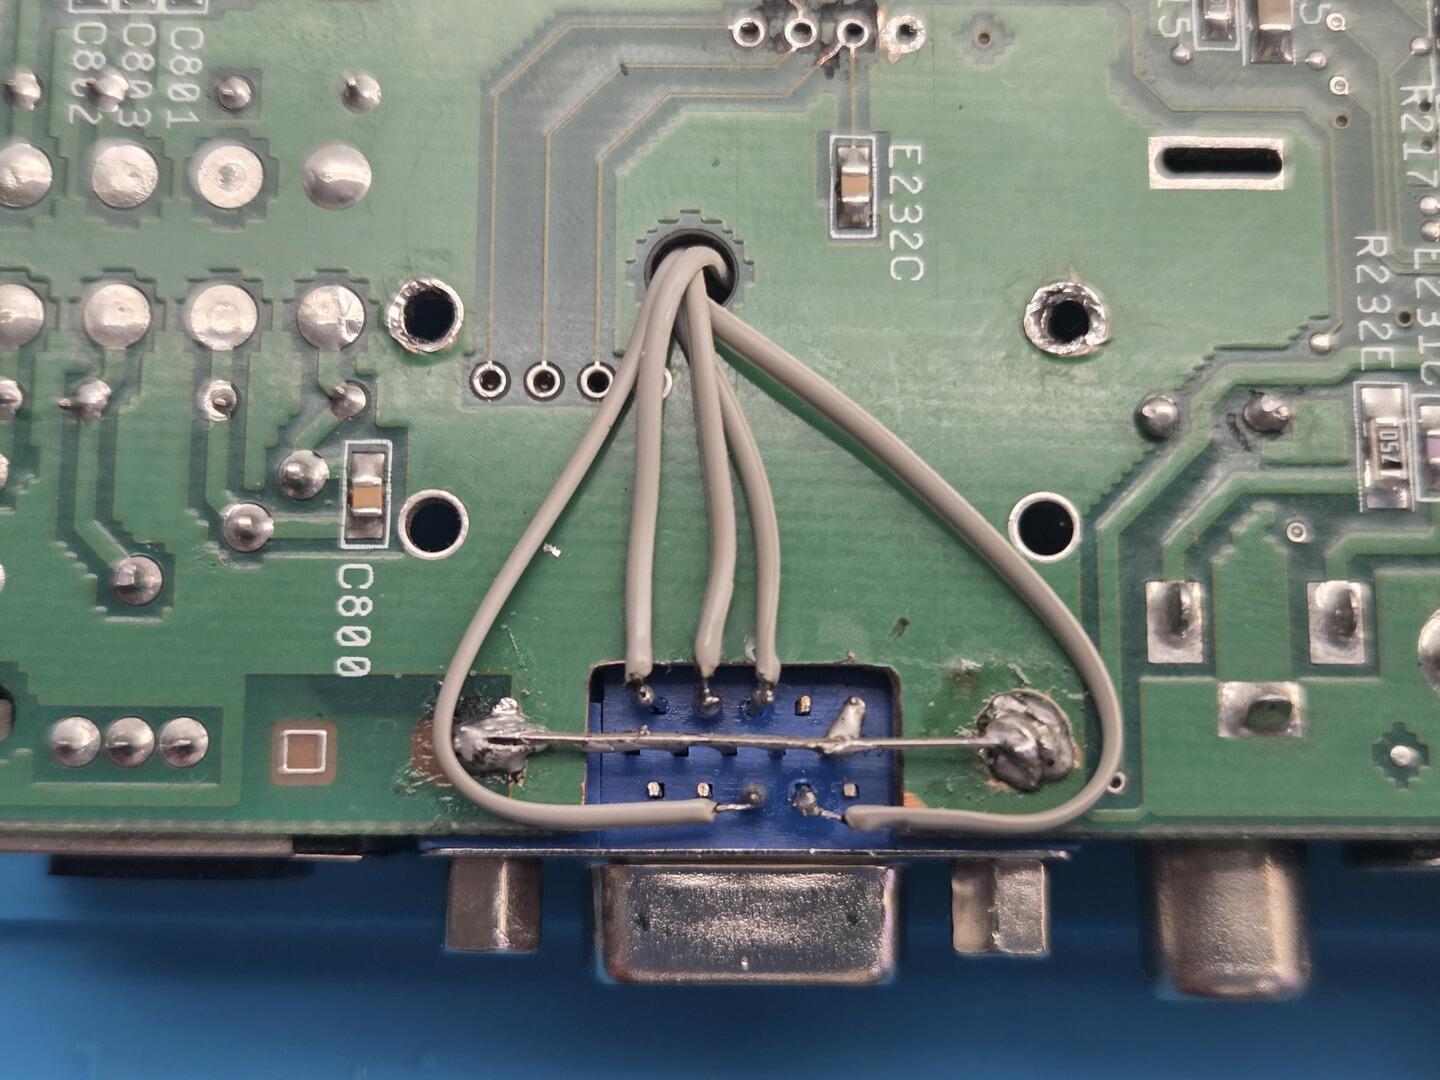
The VGA connector was then mechanically secured using its ground tabs soldered directly to the motherboard ground plane.

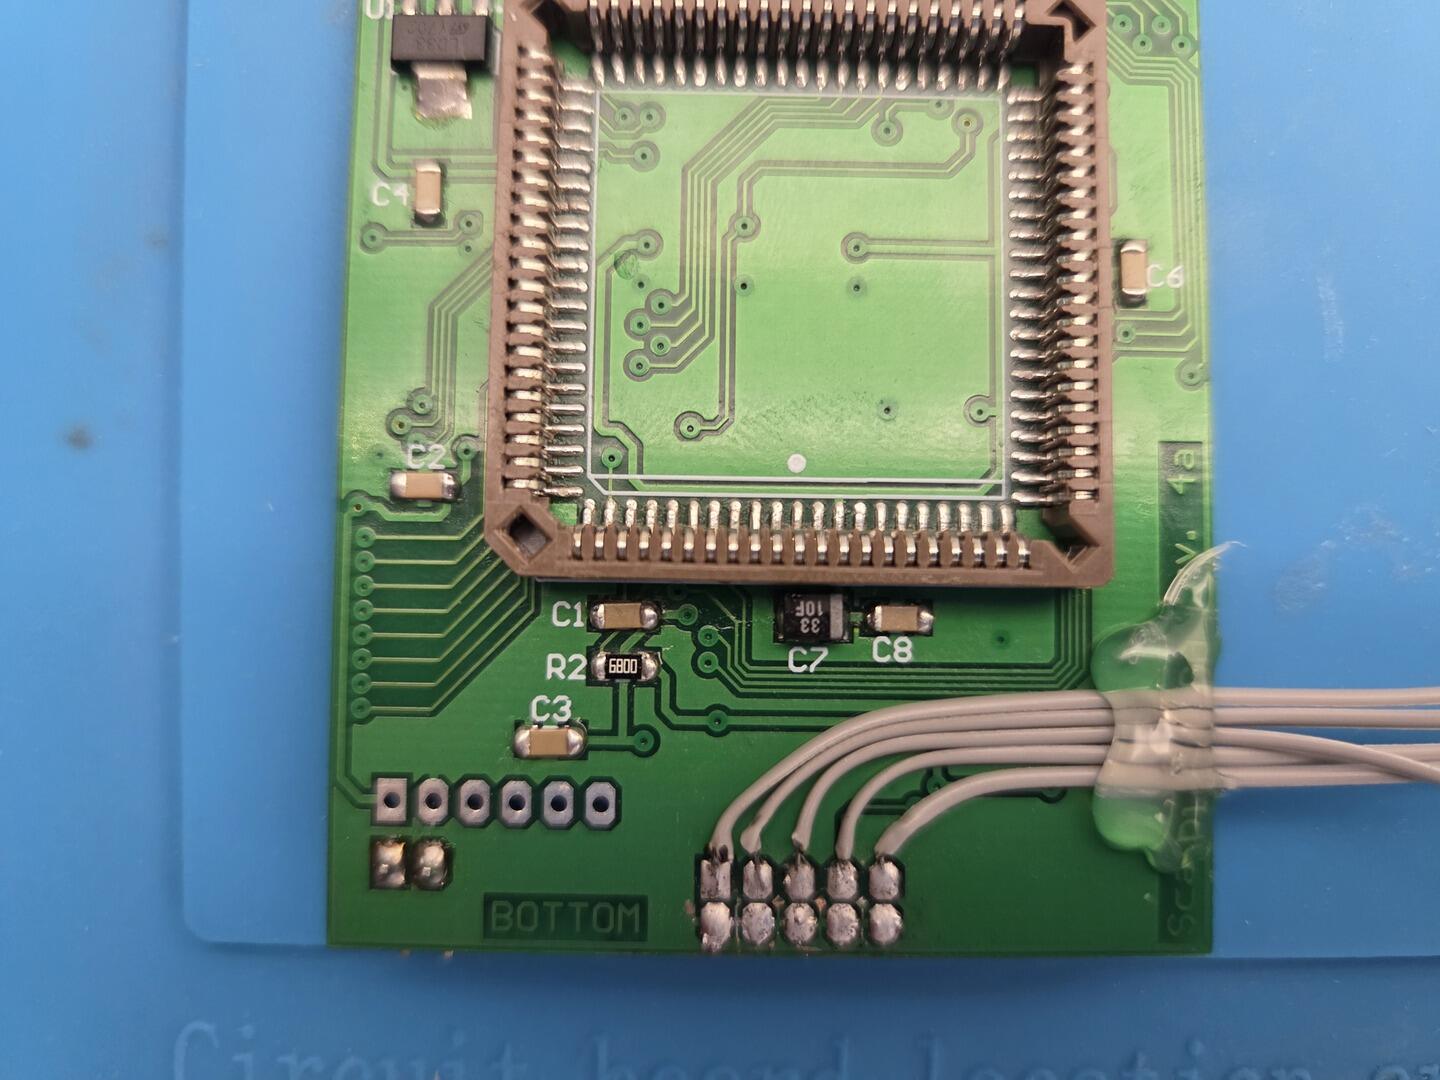
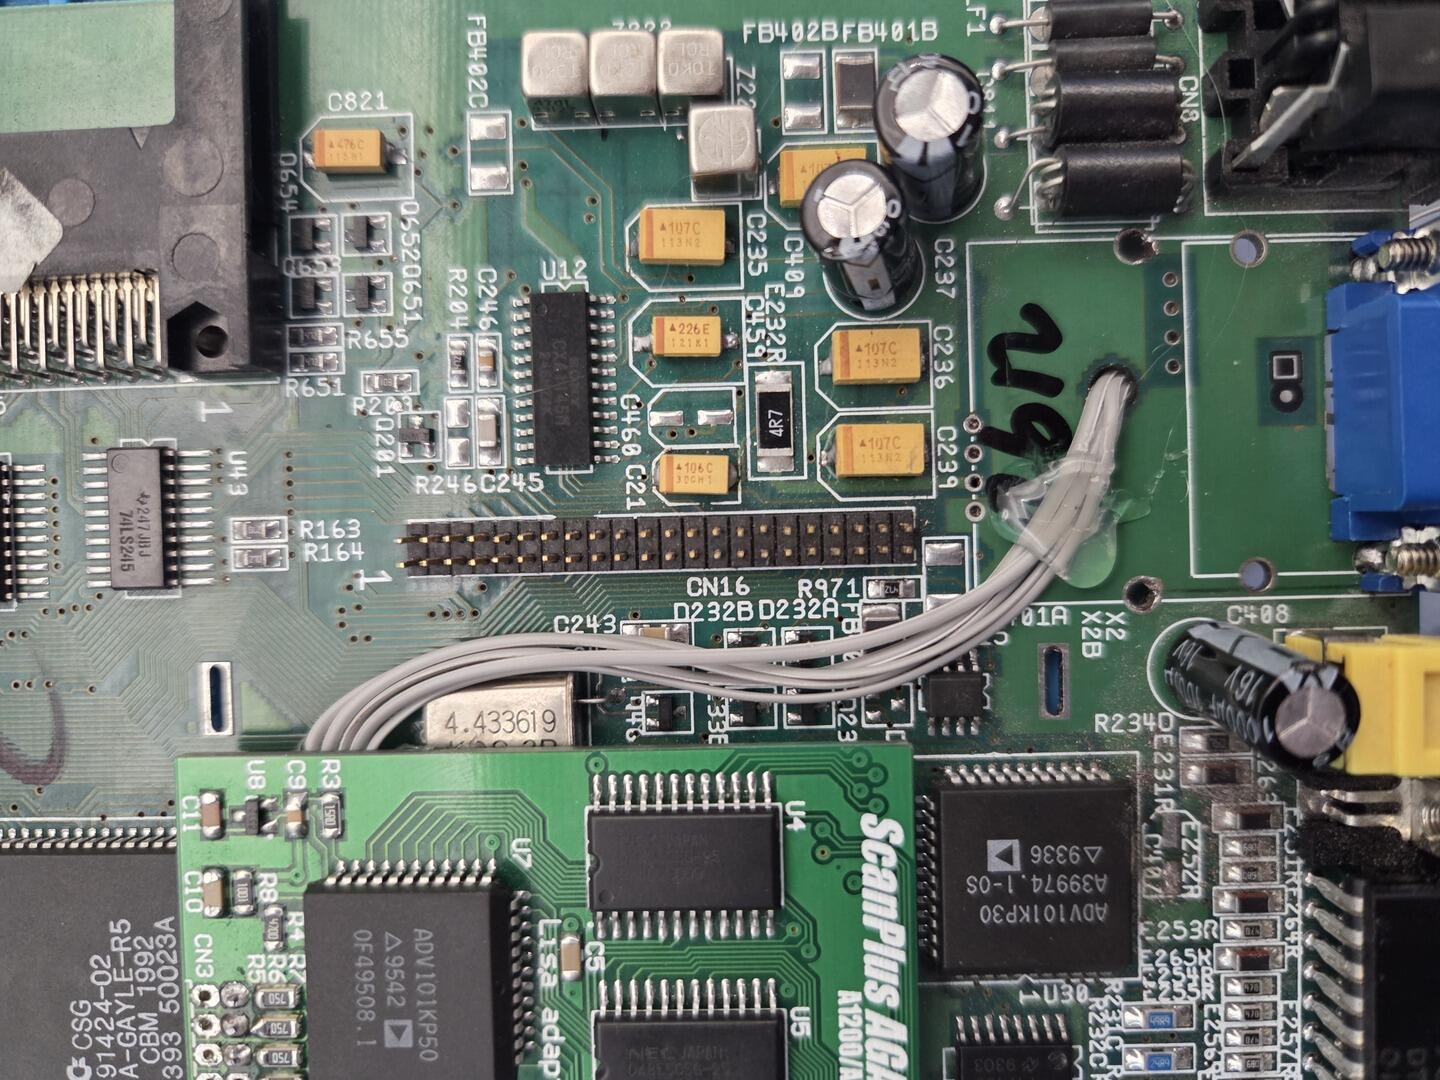
I connected the ScanPlus AGA to the VGA connector using individual wires salvaged from an IDE ribbon cable. Once everything was tested, the wiring was secured with hot glue to improve reliability and protect it from cable movement.
At this point I had a perfect VGA signal coming from the AGA chipset. Success… or so I thought.
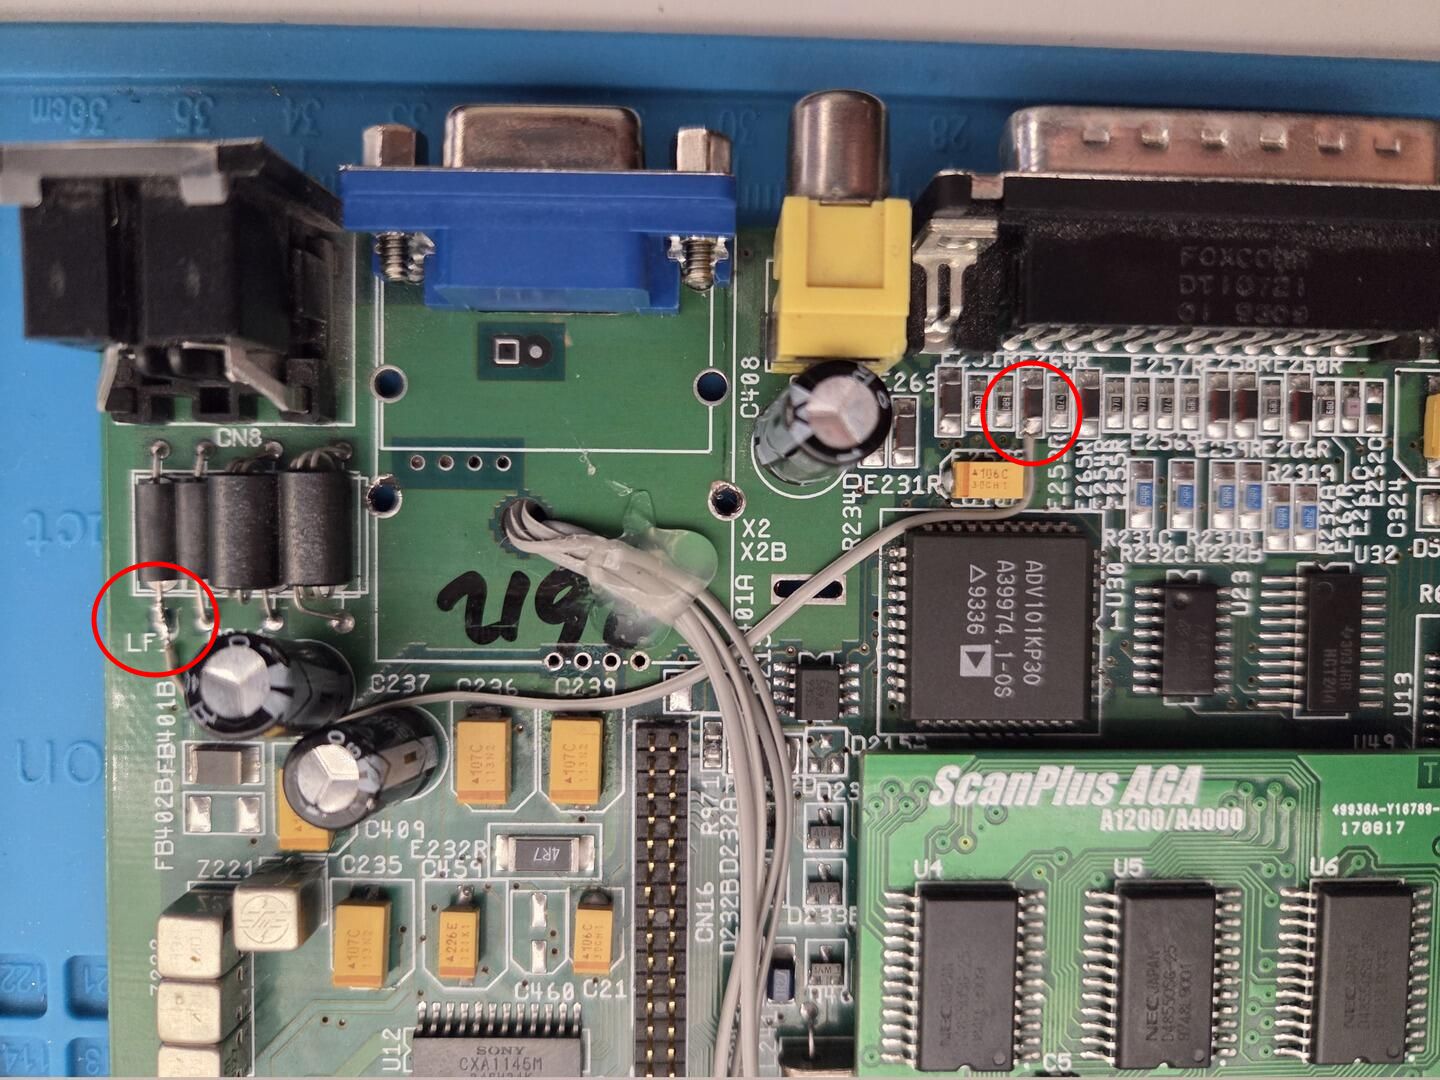
When I connected my Commodore 1081 monitor to the original DB23 RGB connector, I discovered that RGB output was no longer working. Interestingly, composite video was still functional, suggesting that neither Lisa nor Alice had been damaged during the modification.
My first suspicion was a missing CSync signal. However, measuring pin 10 of the RGB connector showed approximately 4.8 V, indicating that sync was indeed present. I then started checking the remaining signals and quickly noticed that pin 22 was reading 0 V instead of the expected 12 V.
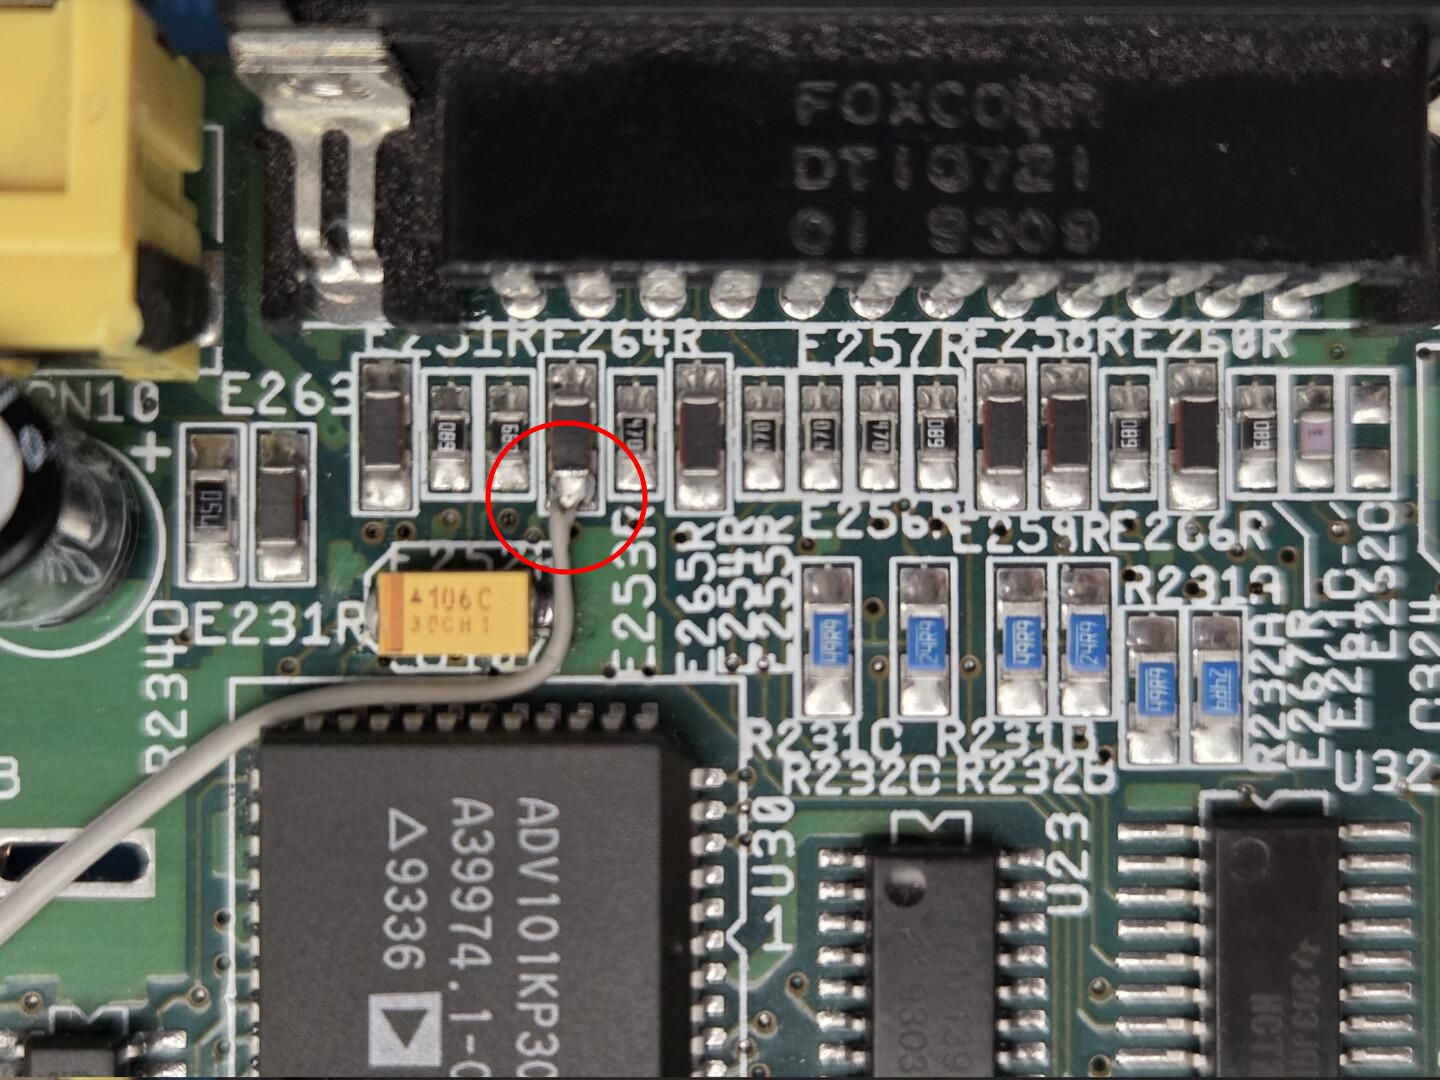
Using the excellent schematics available on amigapcb.org, I traced the issue and discovered that the 12 V line passes underneath the RF modulator area. I most likely damaged this trace while desoldering the RF module or cutting the motherboard.
Fortunately, the fix was straightforward: I connected the 12 V output of LF1 directly to E264R. As soon as the wire was installed, the original RGB output came back to life.
The final step was adapting both the rear case opening and the RF shield to accommodate the larger VGA connector. I also reinforced the connector with additional hot glue to better withstand repeated VGA cable insertions and removals.
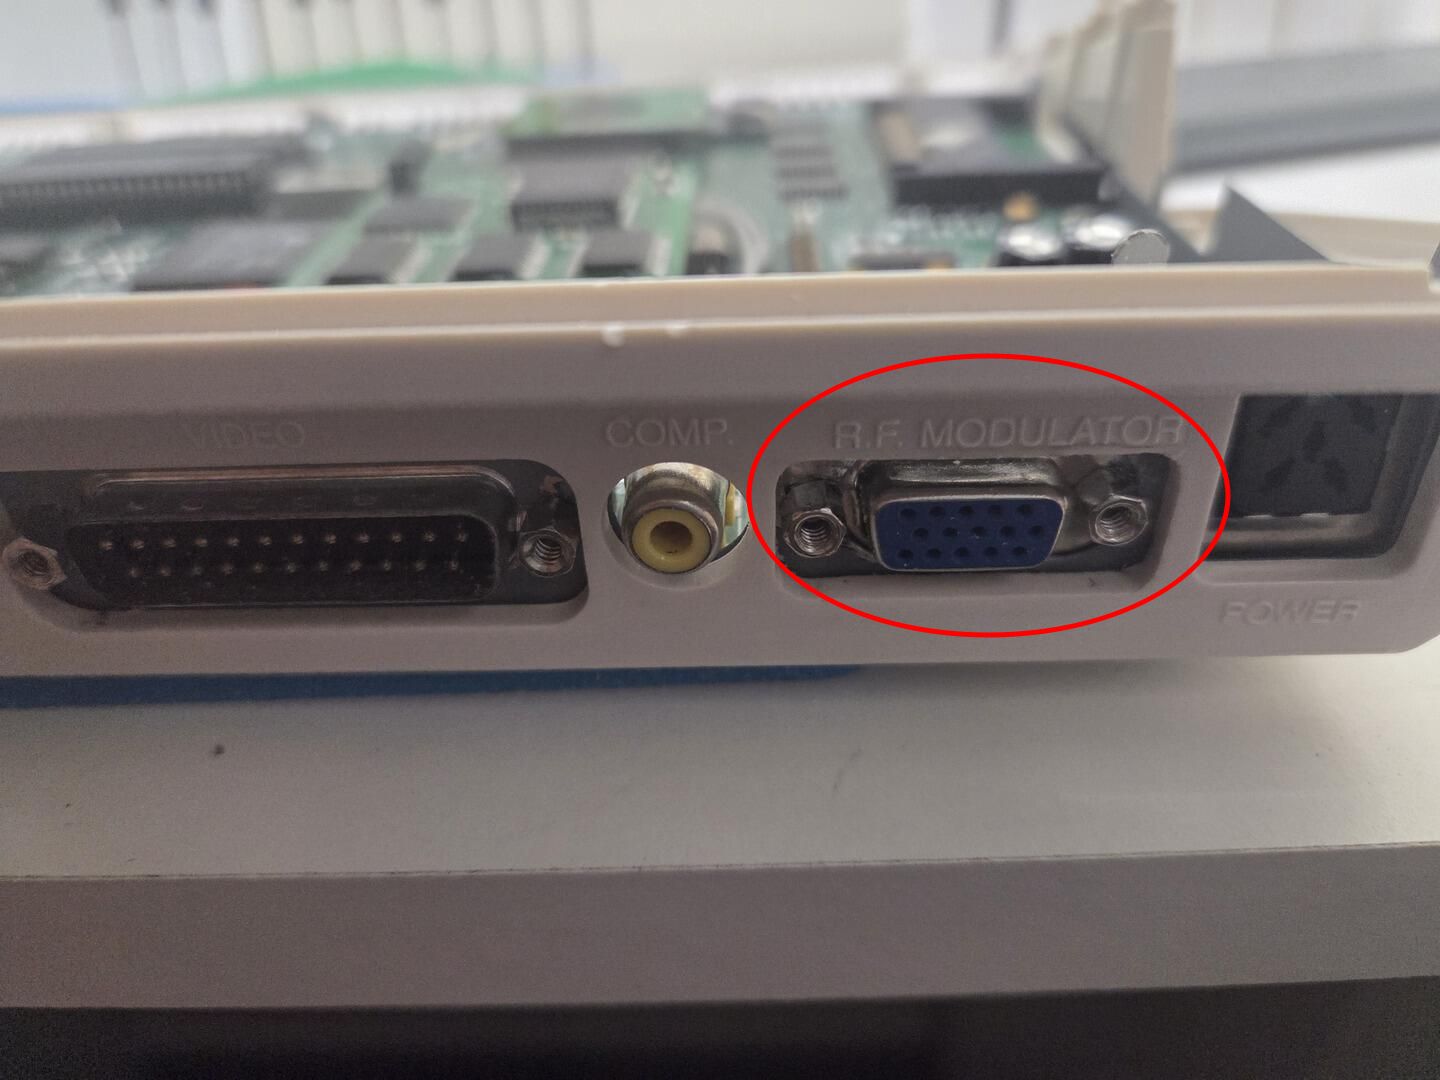
The result looks almost factory-made and gives the Amiga 1200 a convenient native VGA output while preserving the original RGB functionality.
DVD burner integration
My first attempt used a Panasonic UJ-876-C, a slot-loading IDE DVD drive originally designed for Apple laptops. It worked correctly, but it had two major drawbacks: it could not coexist with another IDE device configured as either master or slave, and it lacked an analog audio output.
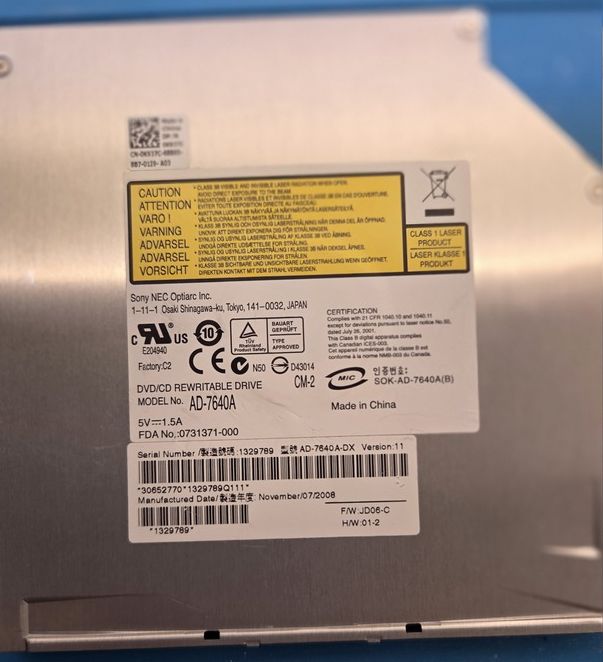
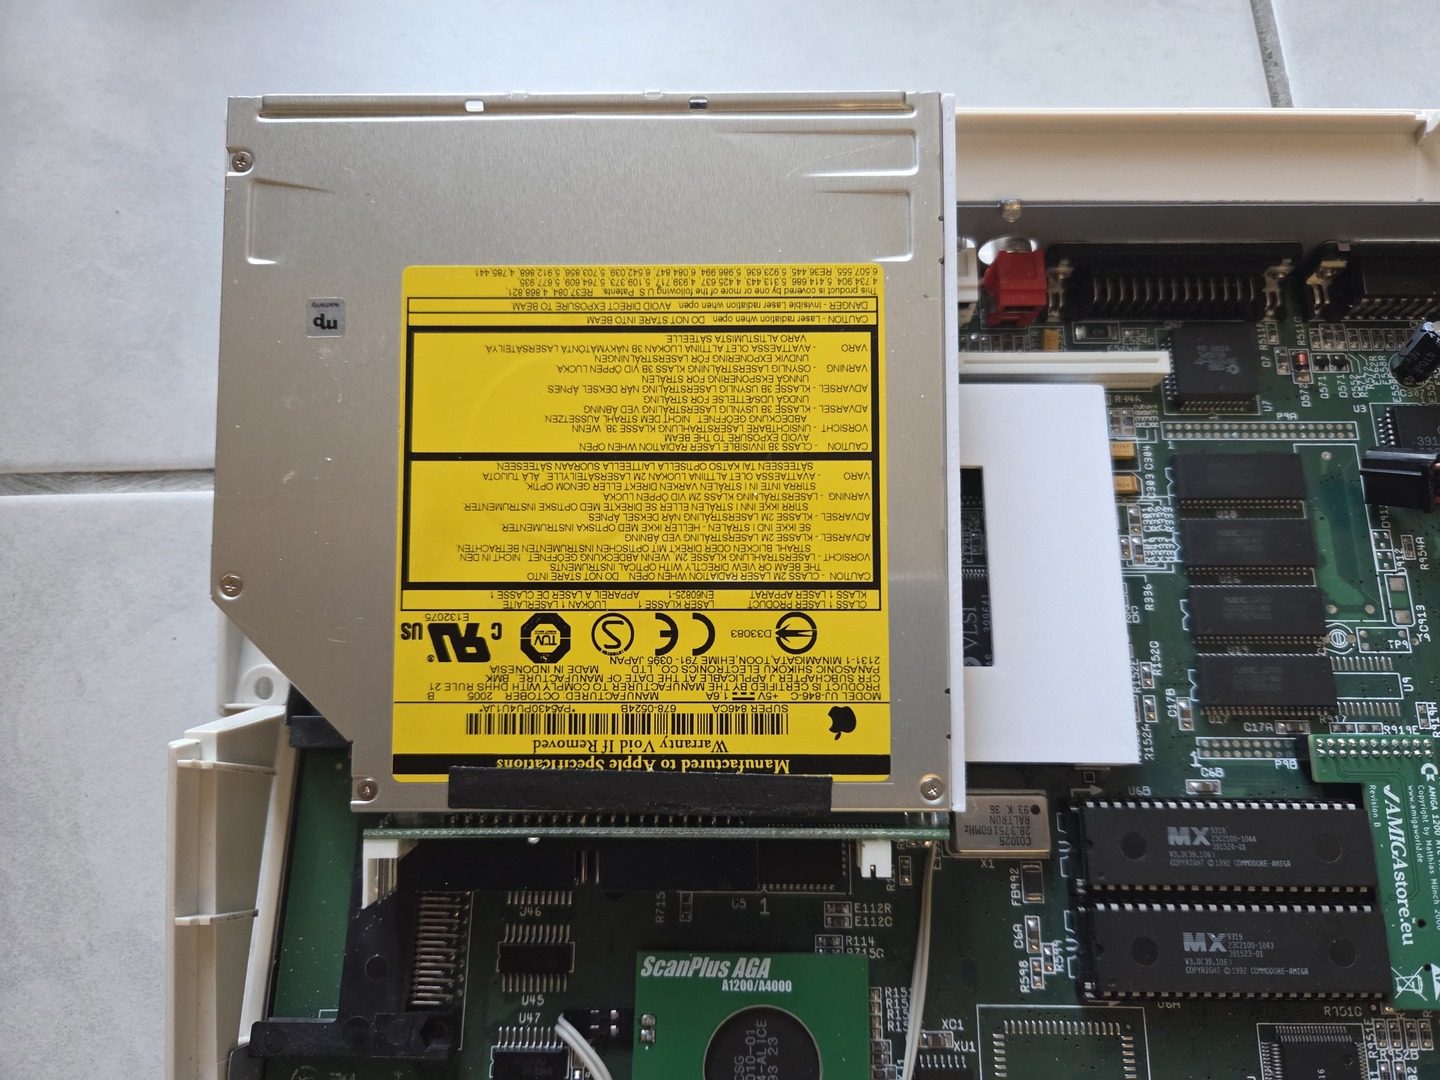
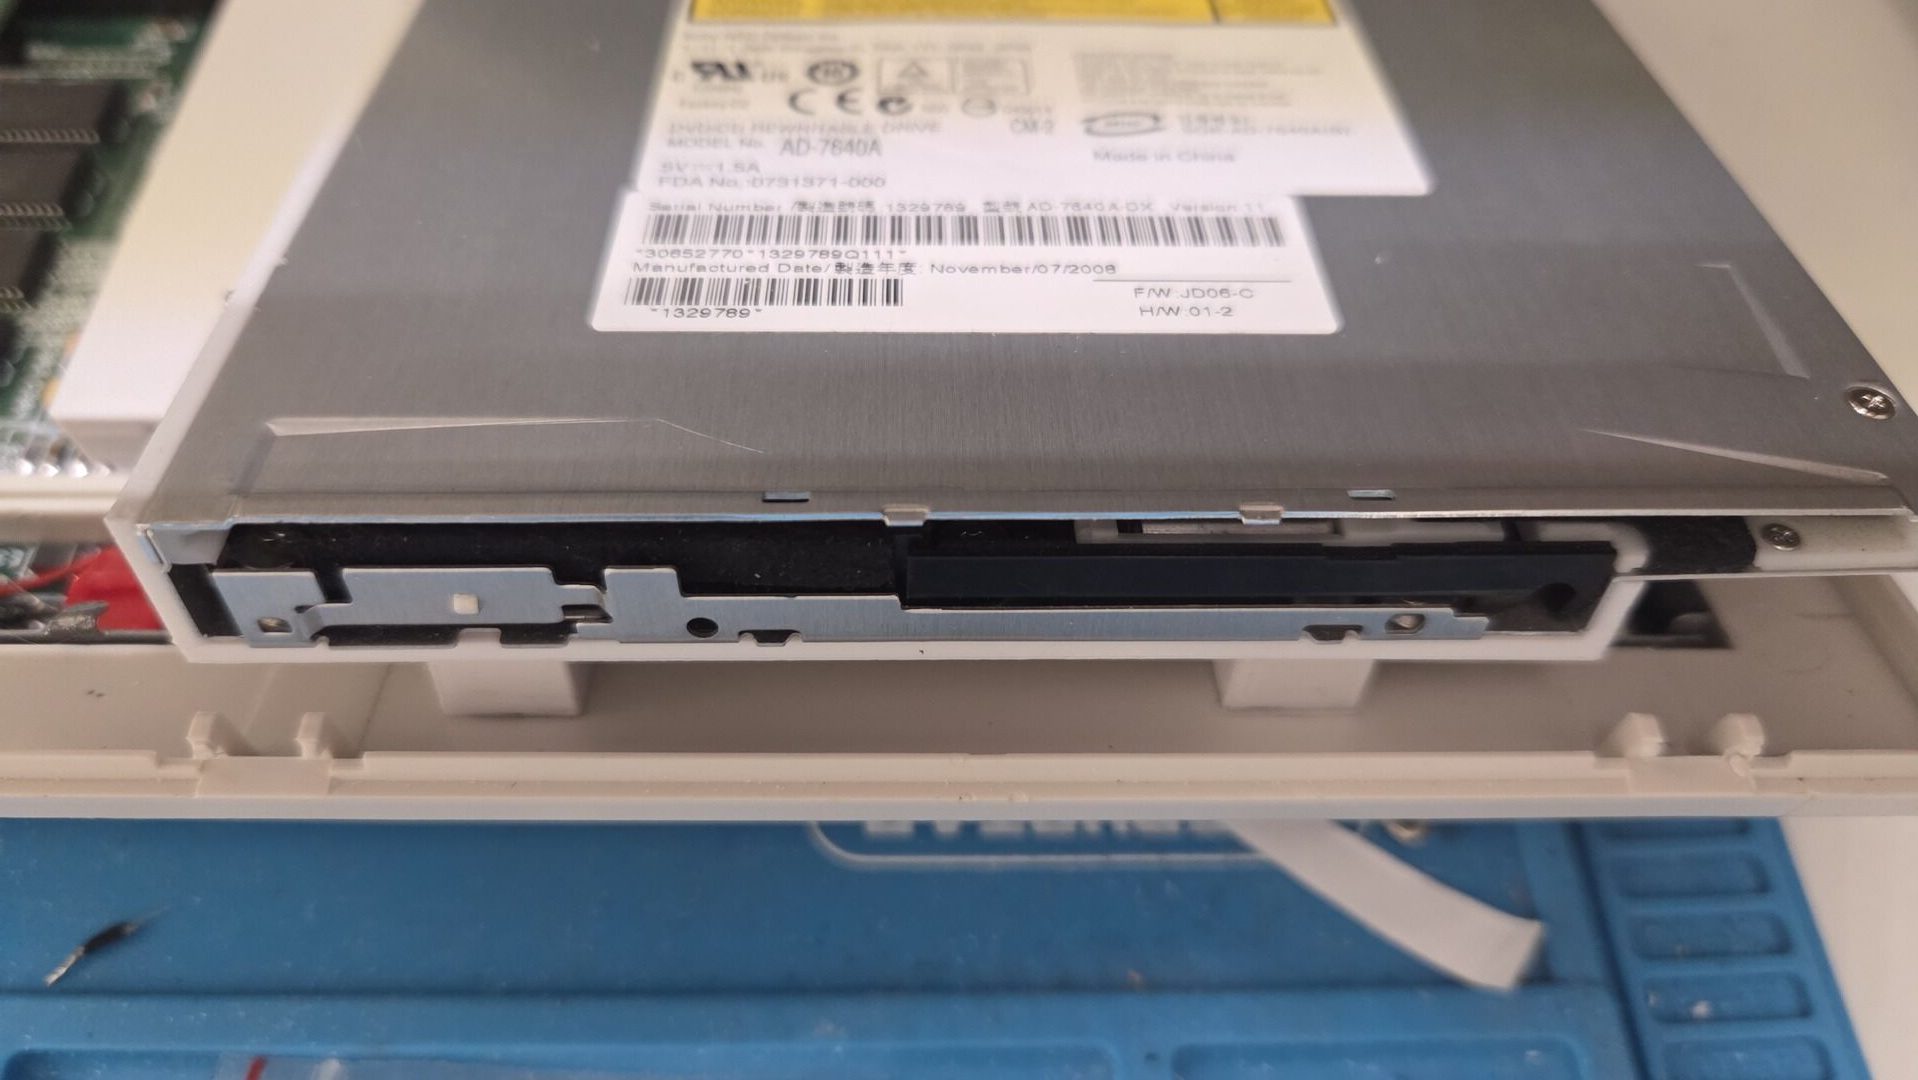
My second attempt turned out to be the right choice: a Sony AD-7640A slim DVD burner. Like the Panasonic drive, it is a standard ATAPI device, but without the limitations I encountered previously. Since I discovered the issues with the UJ-876-C rather late in the project, it is still visible in some of the photos below.
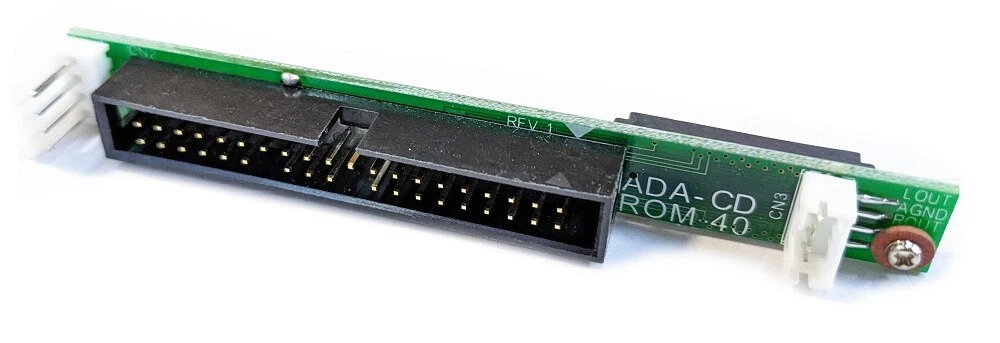 To connect the drive, I used a slim JAE-to-40-pin IDE adapter with power support. I slightly modified the adapter to better fit the available space. One advantage of this particular model is that it provides an analog audio output, allowing the CD audio to be mixed with the Amiga’s internal sound system, as described in the next section.
Fitting a slim optical drive inside an Amiga 1200 requires a few modifications:
- I designed and printed a custom mounting bracket that reuses the original 2.5-inch hard drive mounting holes.
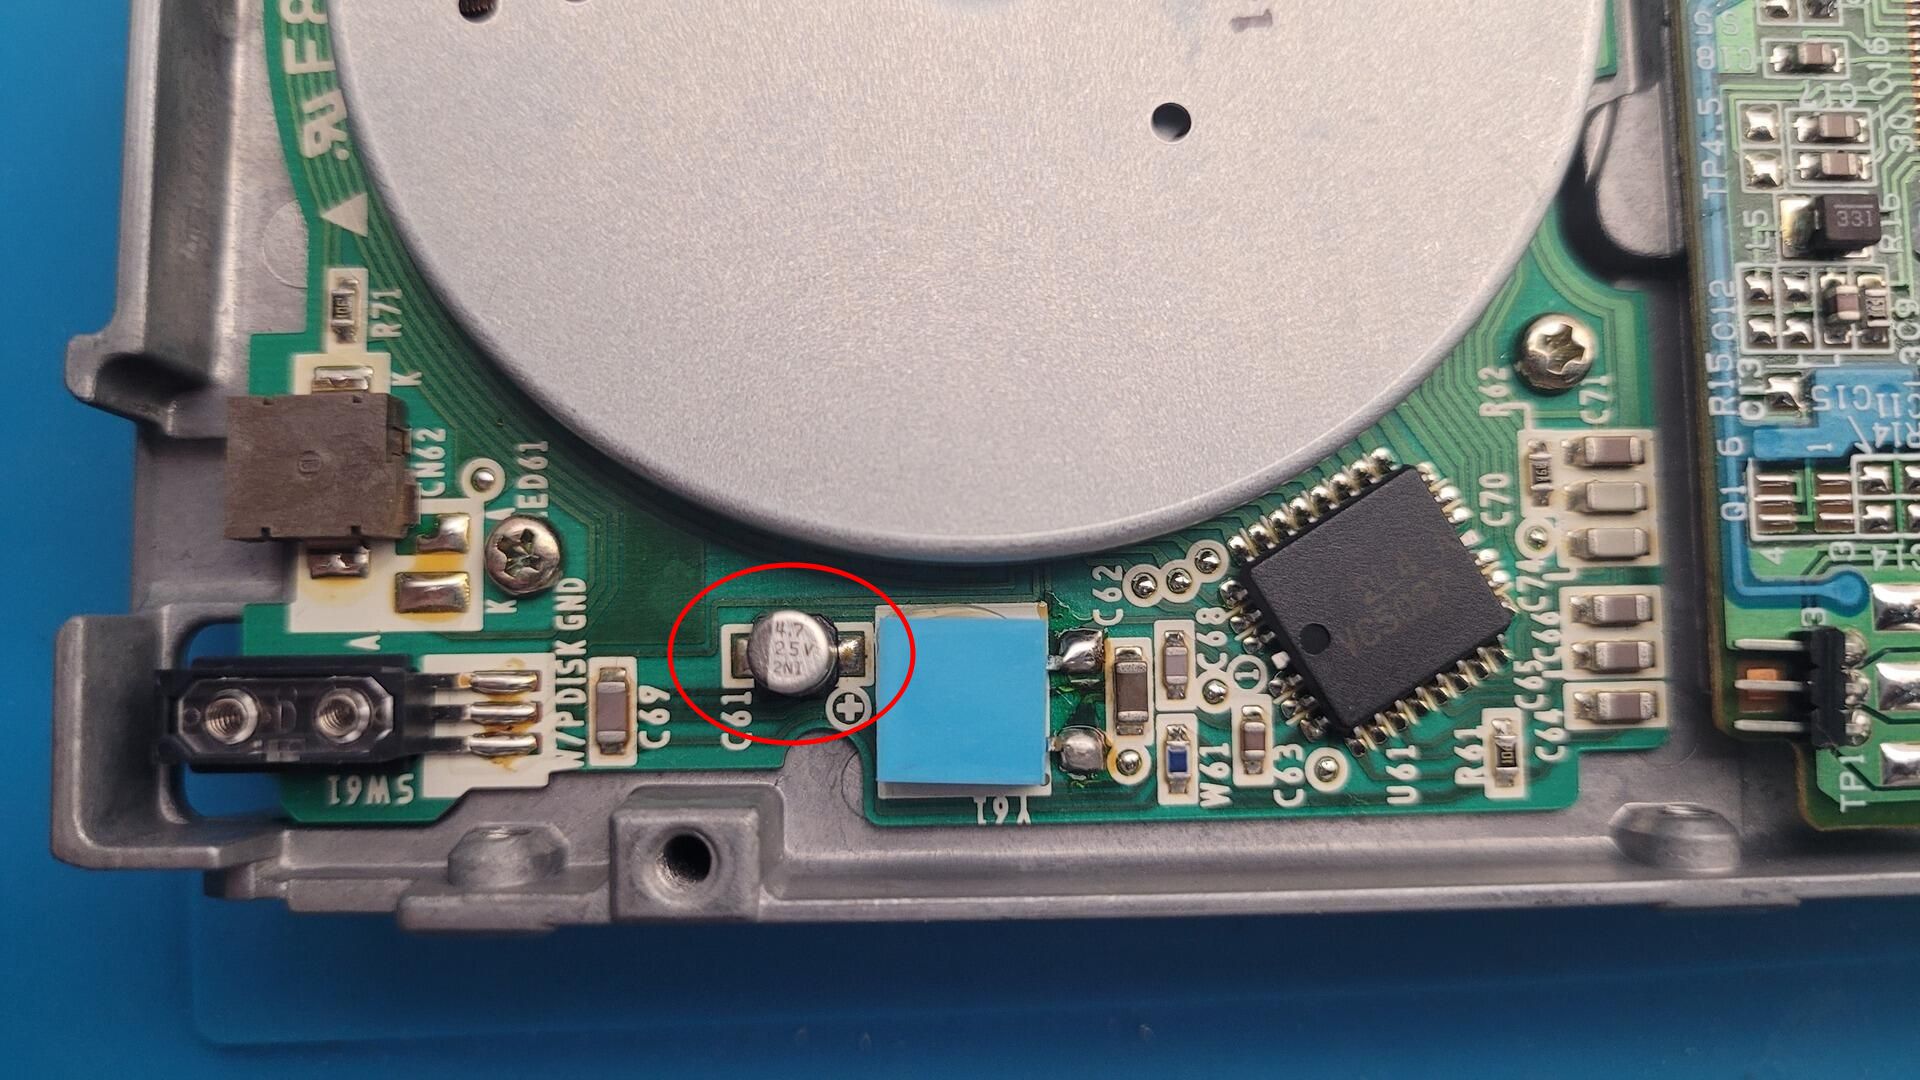
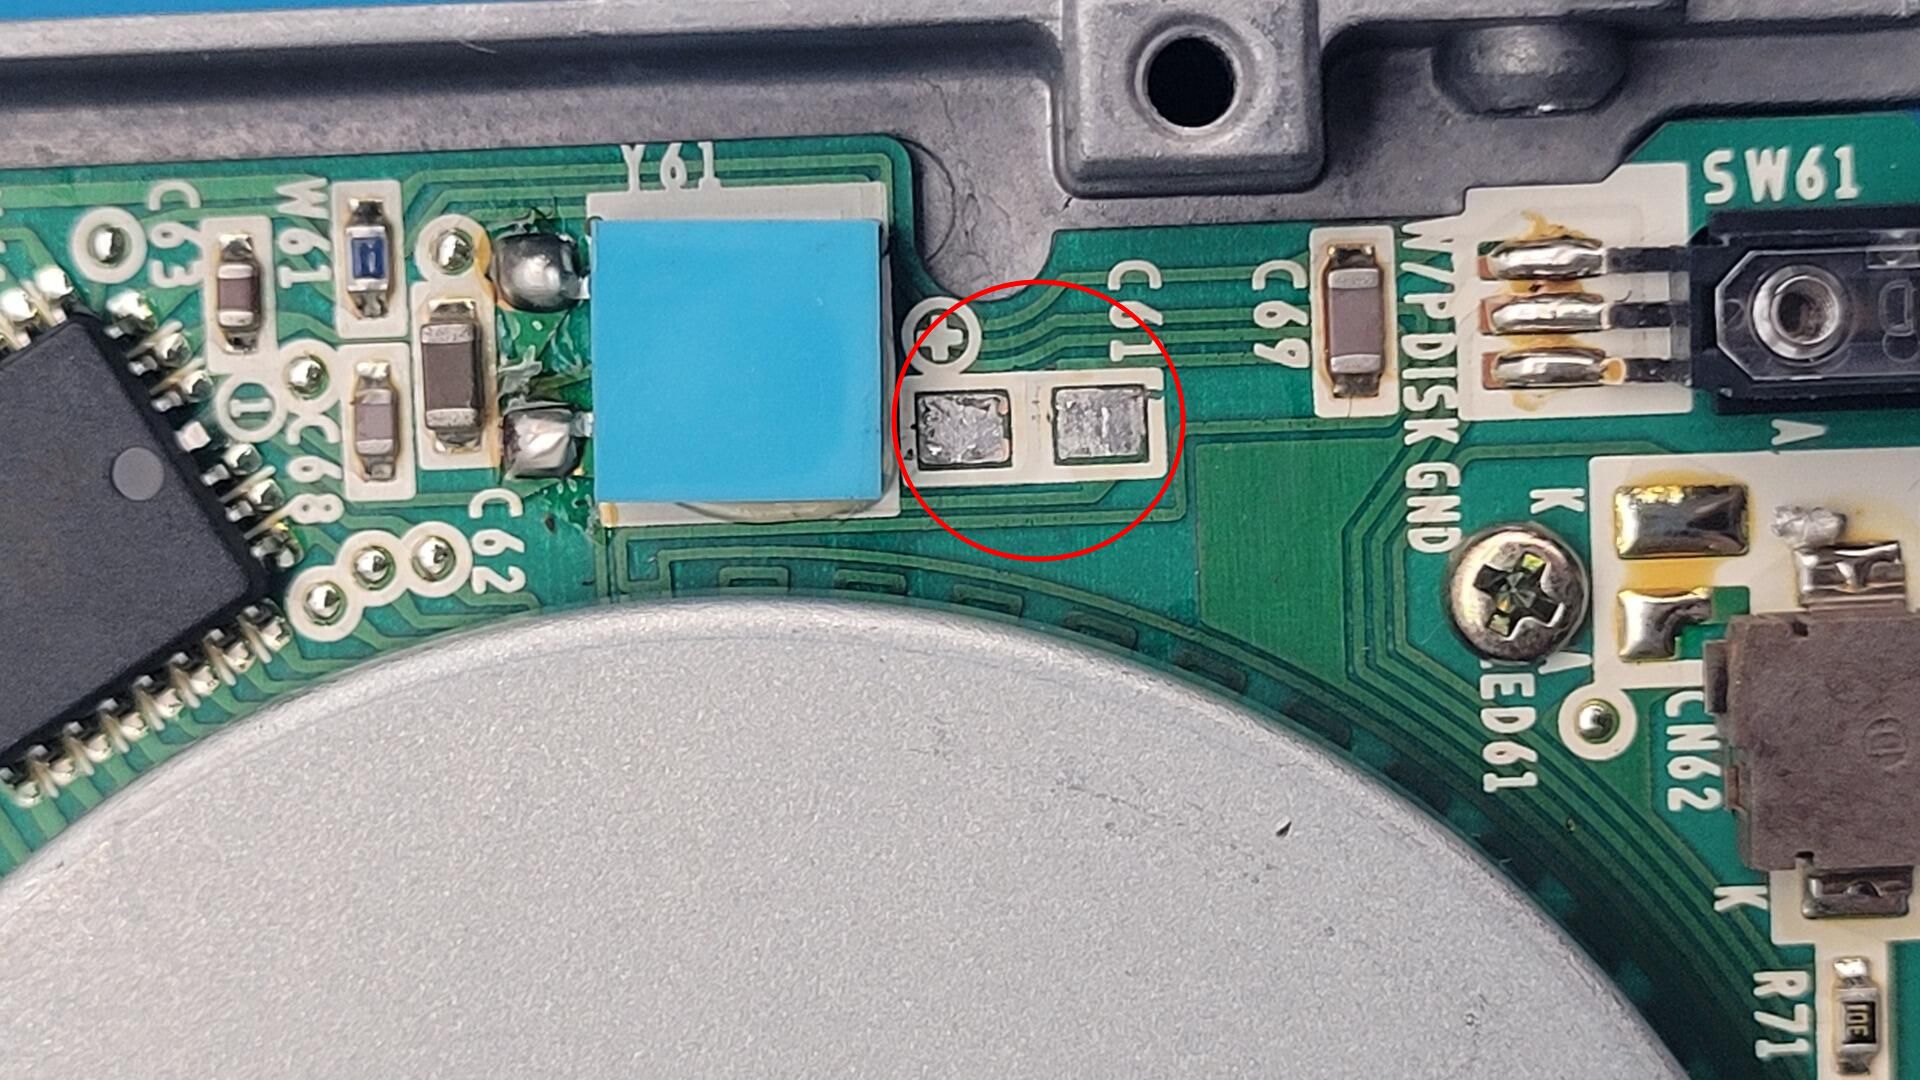
- Capacitors C811 and C237 had to be moved and flattened to gain a few extra millimeters of clearance.
- Some plastic reinforcements inside the upper shell had to be removed.
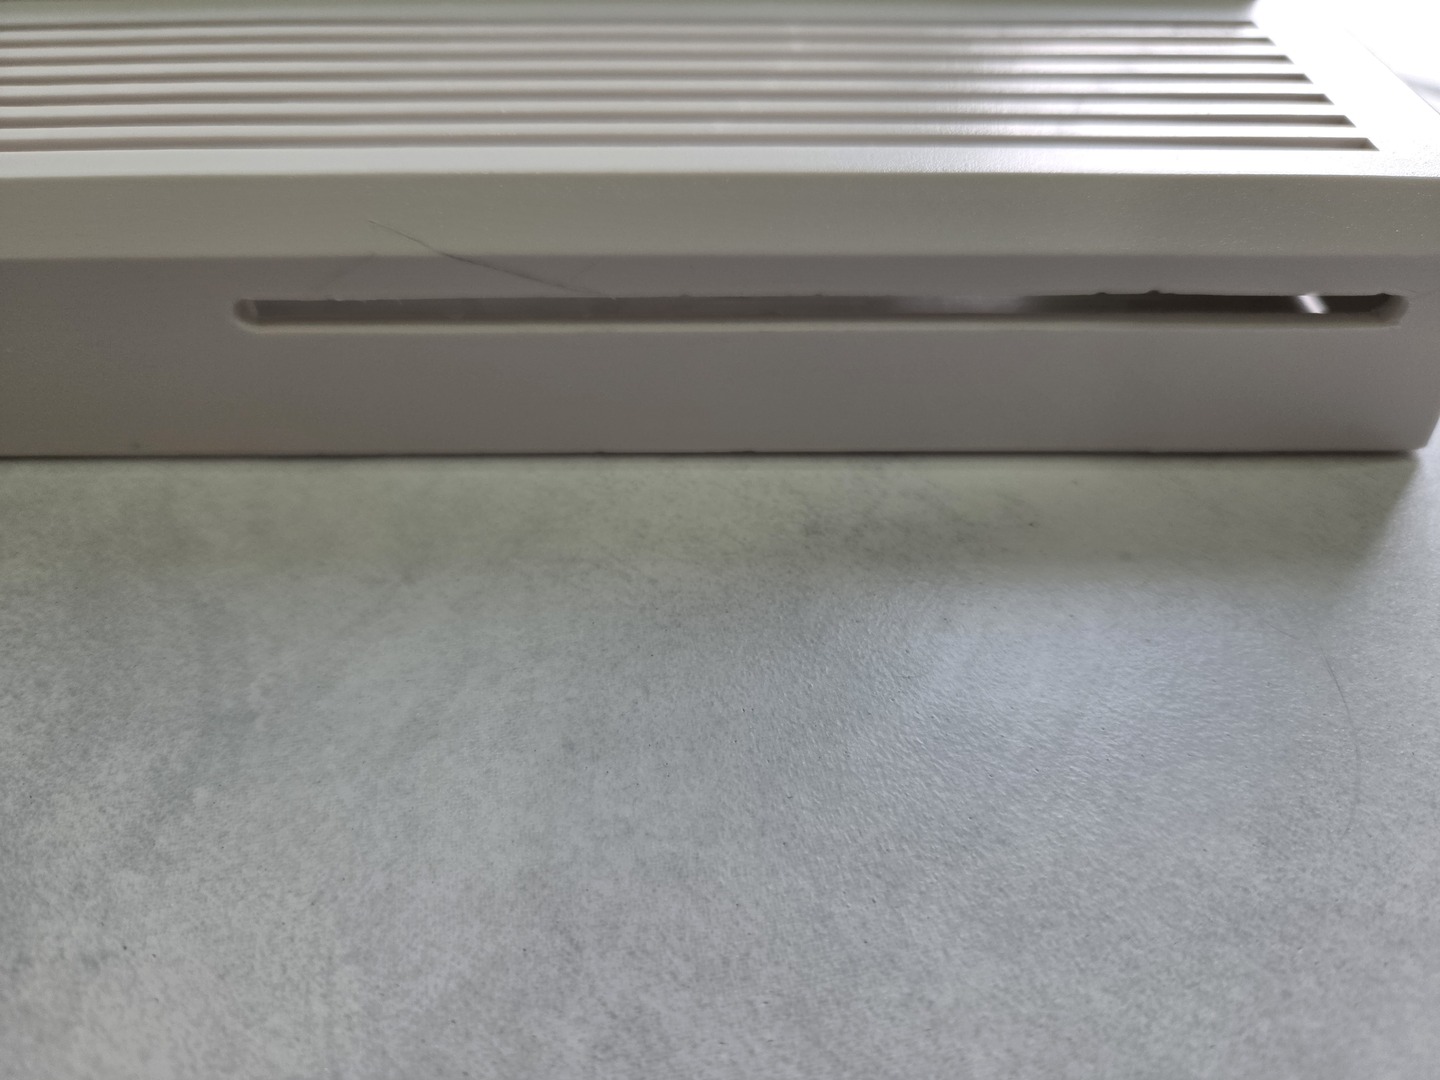
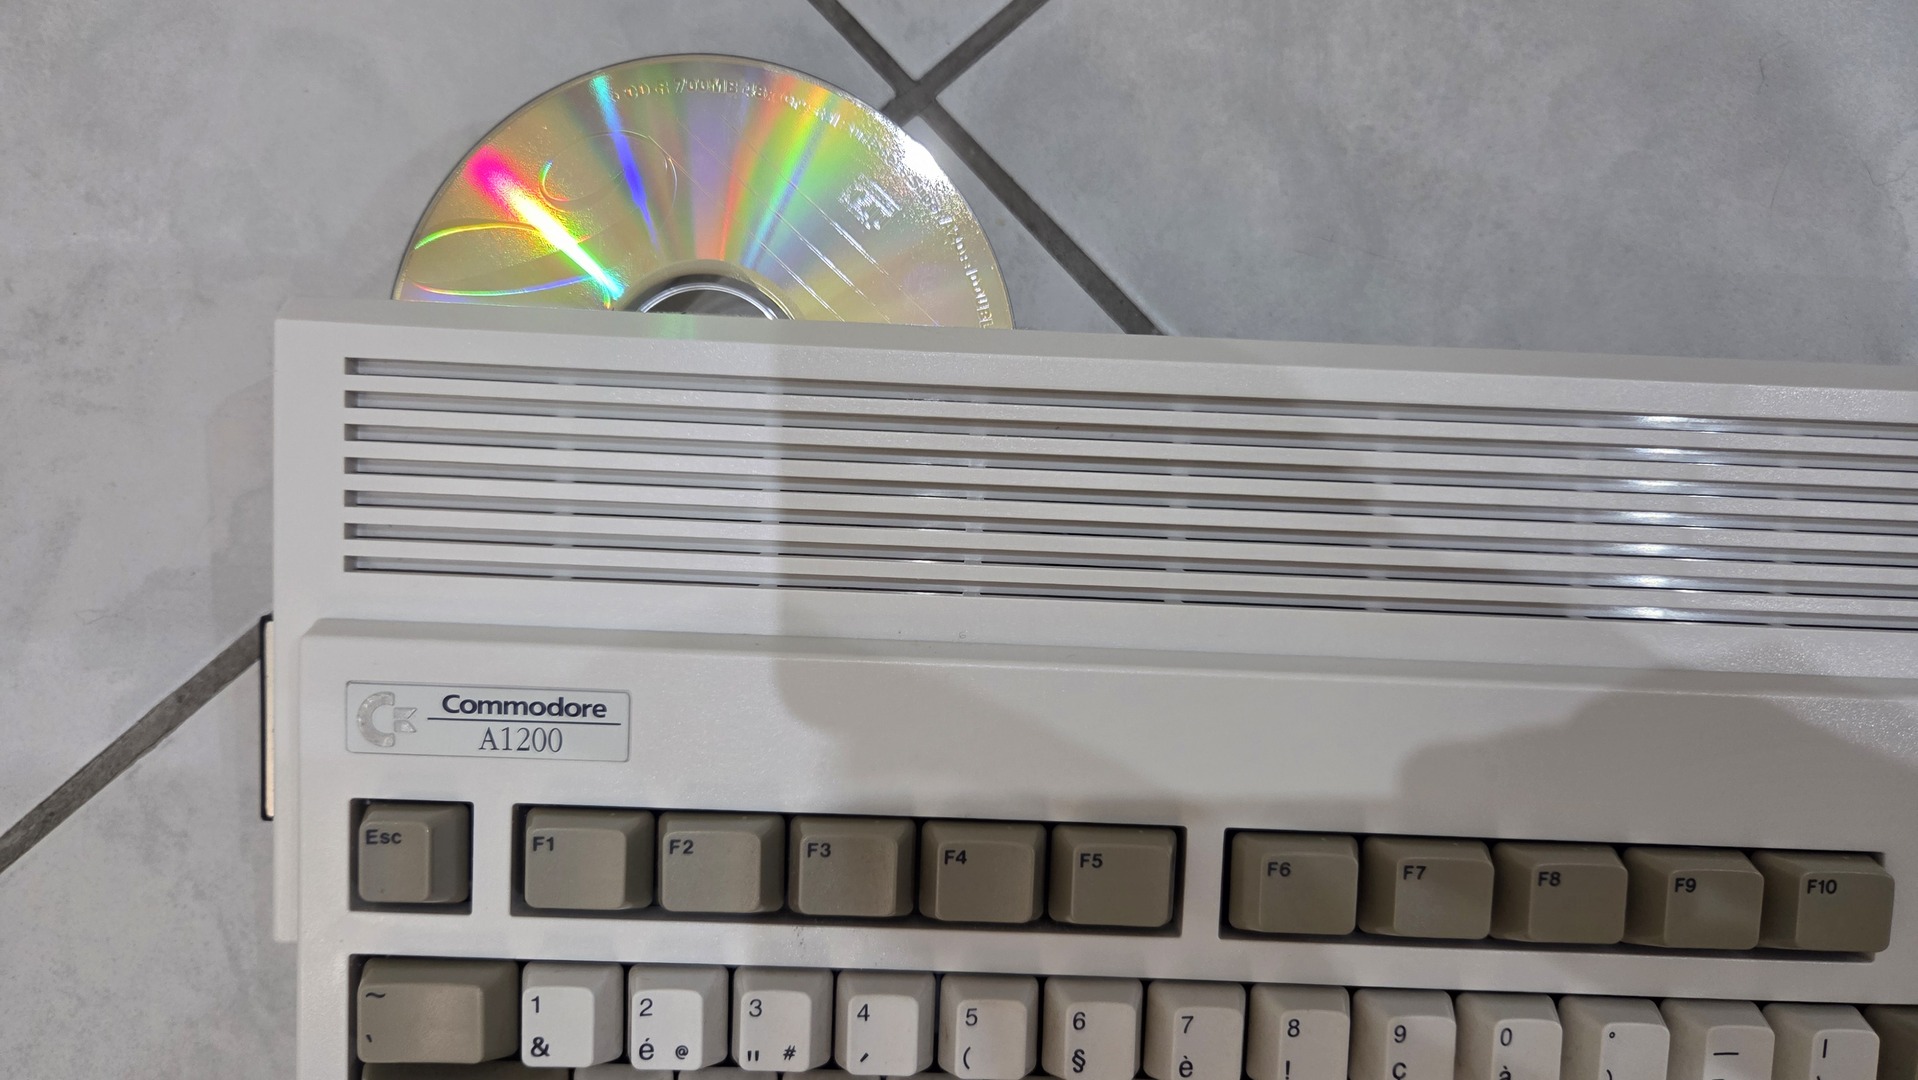
- A slot had to be cut into the top cover to allow discs to be inserted.
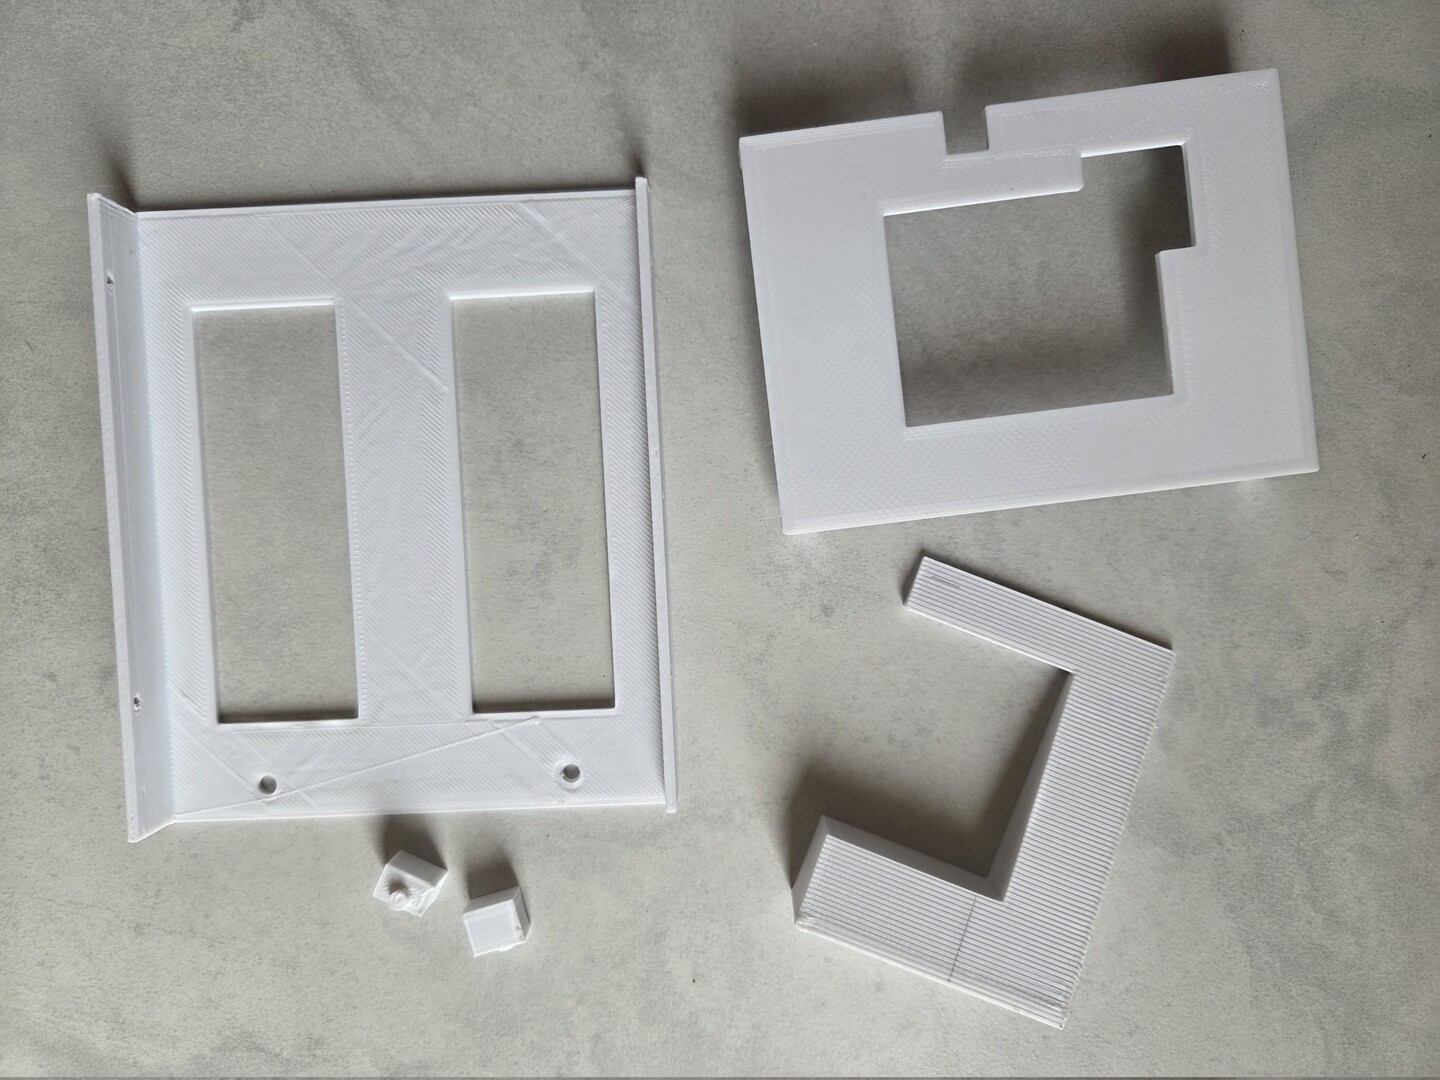
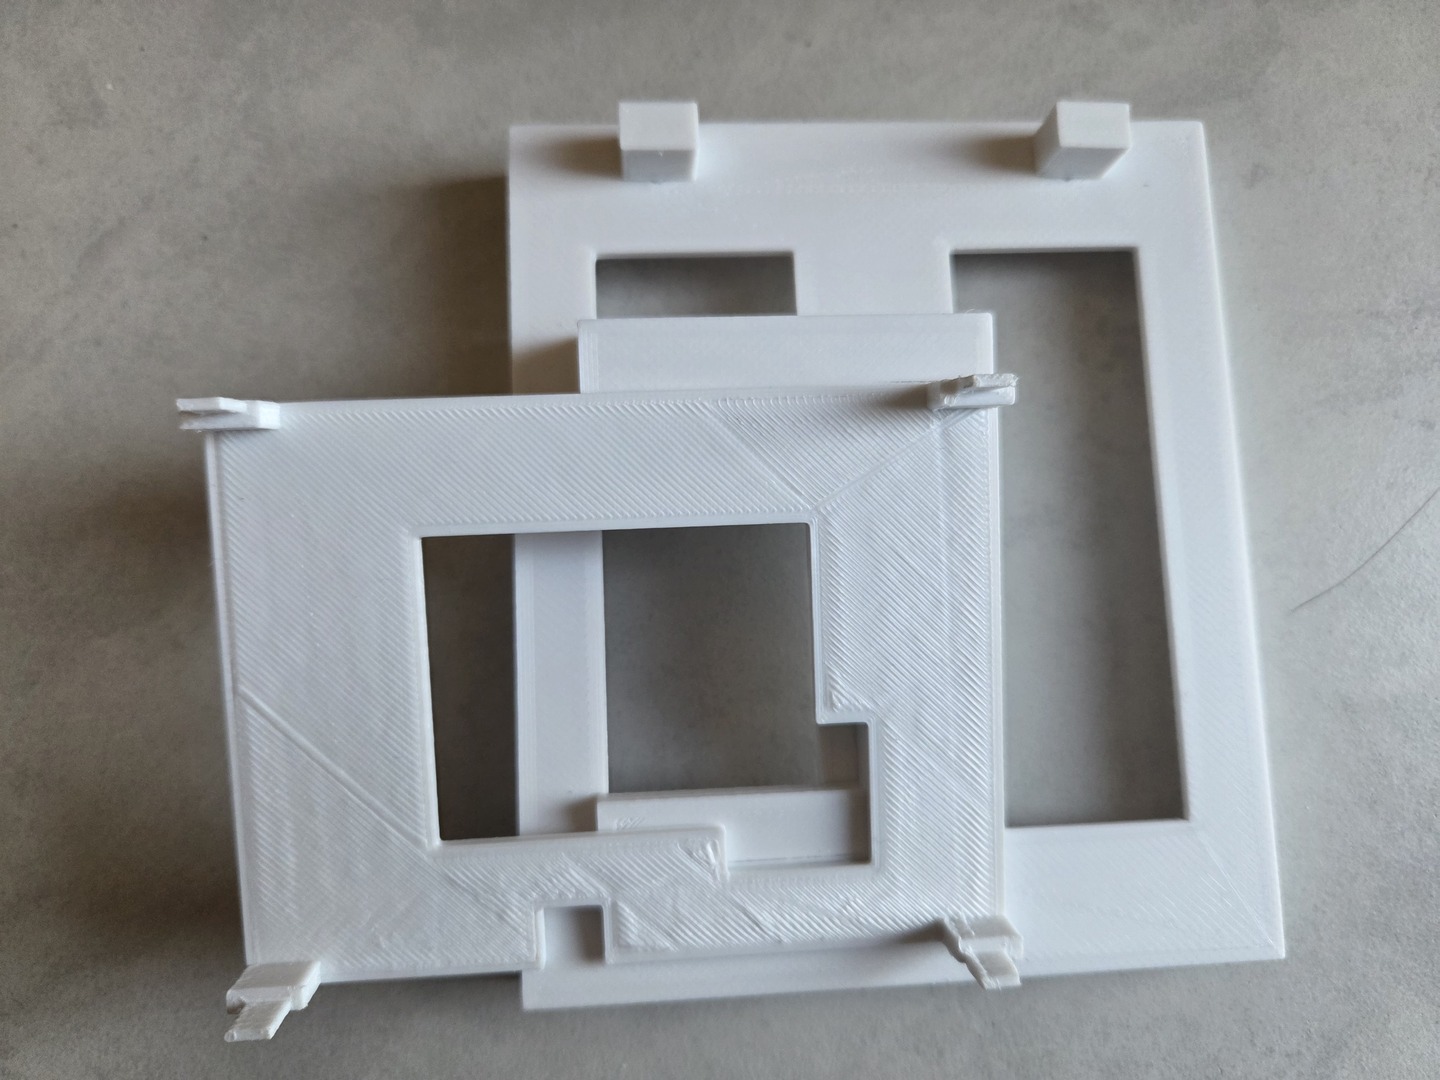
The drive support consists of four individual parts that are glued together after printing. The source files are available on Thingiverse.
Printed support:

Plastic removed from the upper shell:
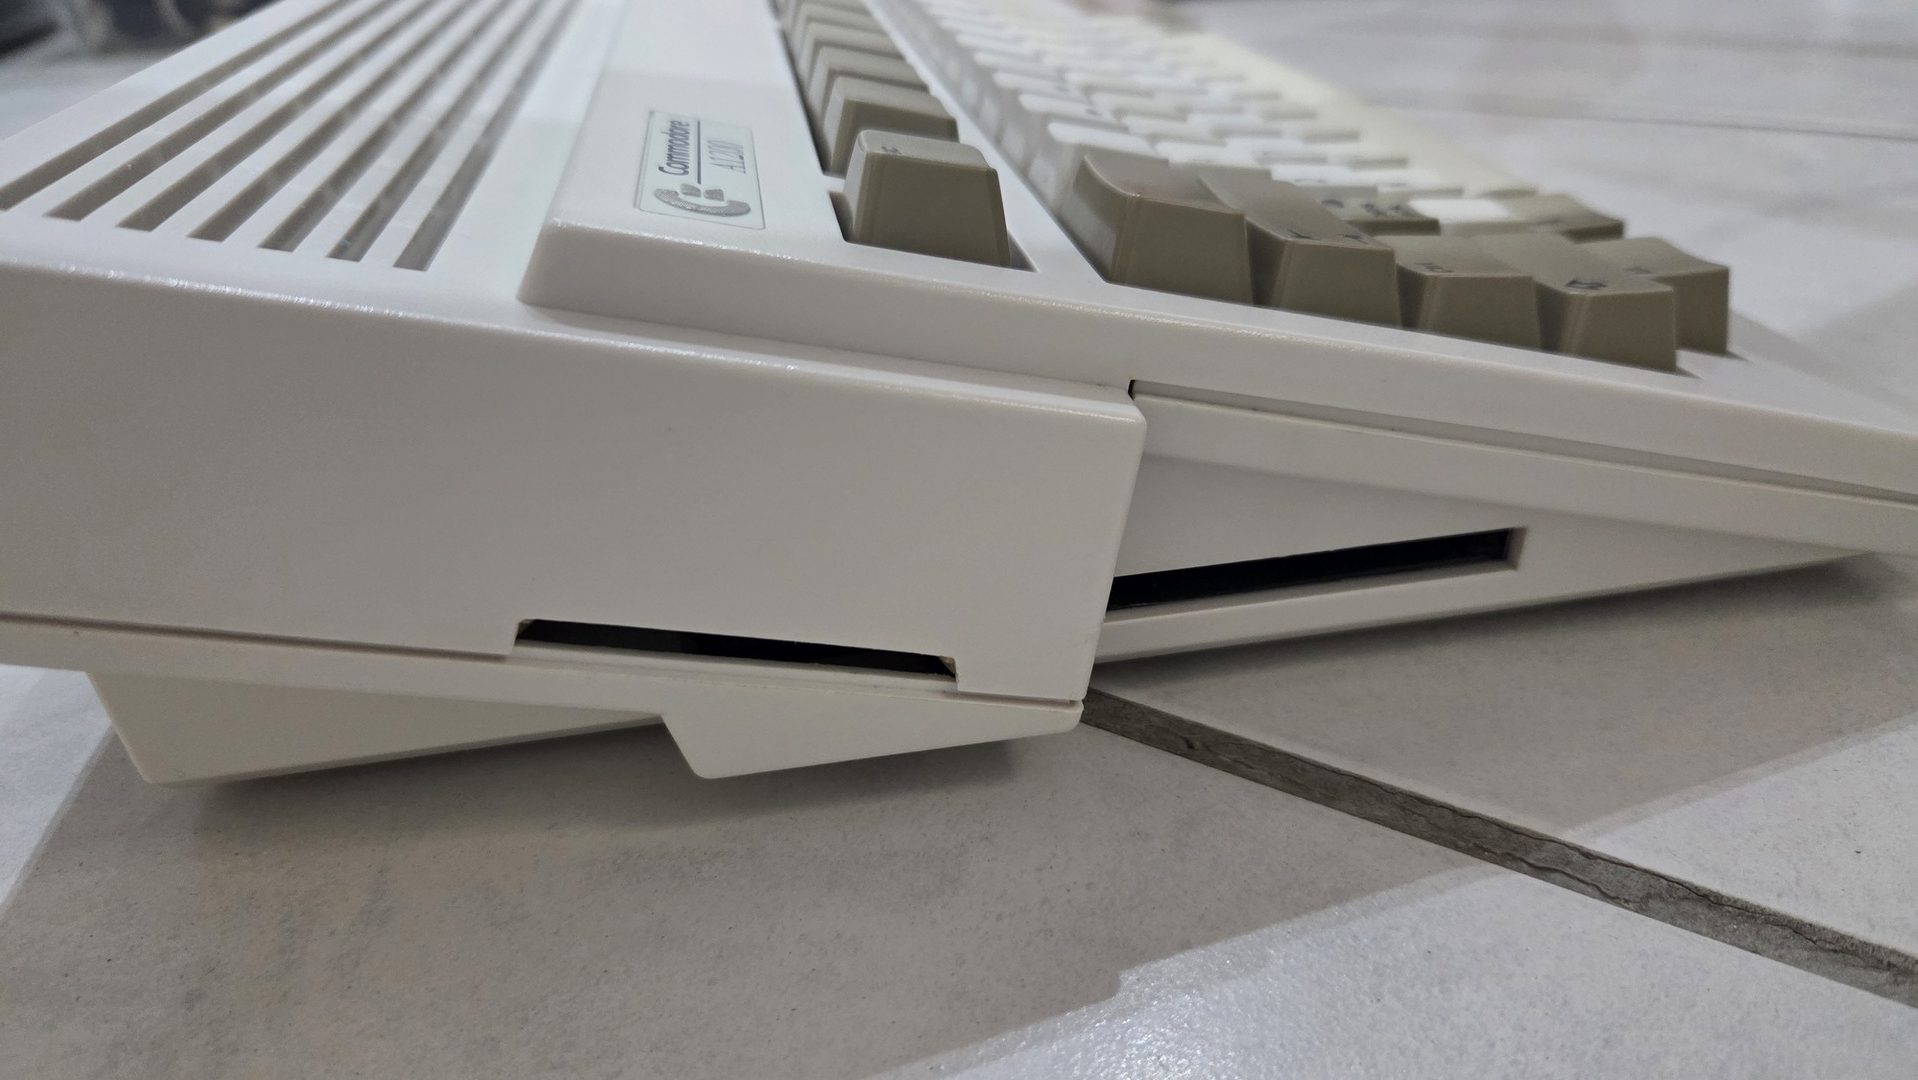
For the disc slot, I first drilled a series of small holes and then finished the opening manually with a file until I obtained a clean result. To prevent scratches while inserting or ejecting discs, I added a strip of soft adhesive Velcro along the lower edge of the opening.
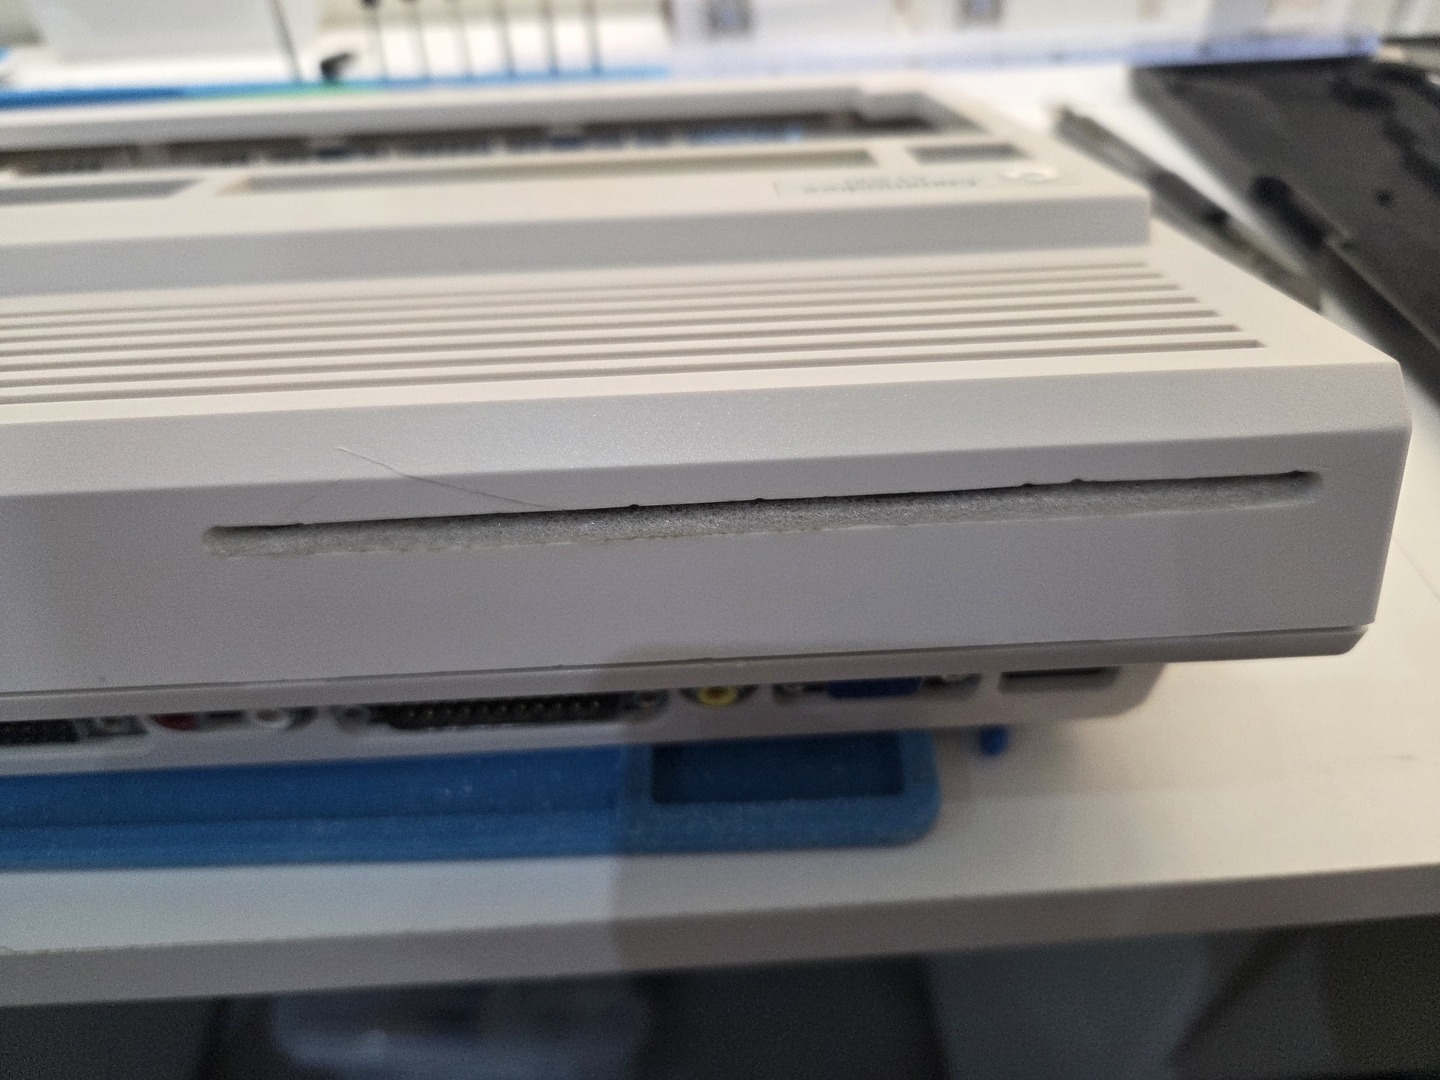
The final result is surprisingly discreet and looks almost as if the Amiga had originally been designed with an integrated optical drive.
Mixing analog audio CD with Paula
Unlike the Amiga 4000, which includes a dedicated CD Audio connector on the motherboard, the Amiga 1200 has no provision for mixing CD audio with Paula’s output. Since I wanted proper CD32 compatibility and support for Audio CDs, I had to build my own mixer circuit.
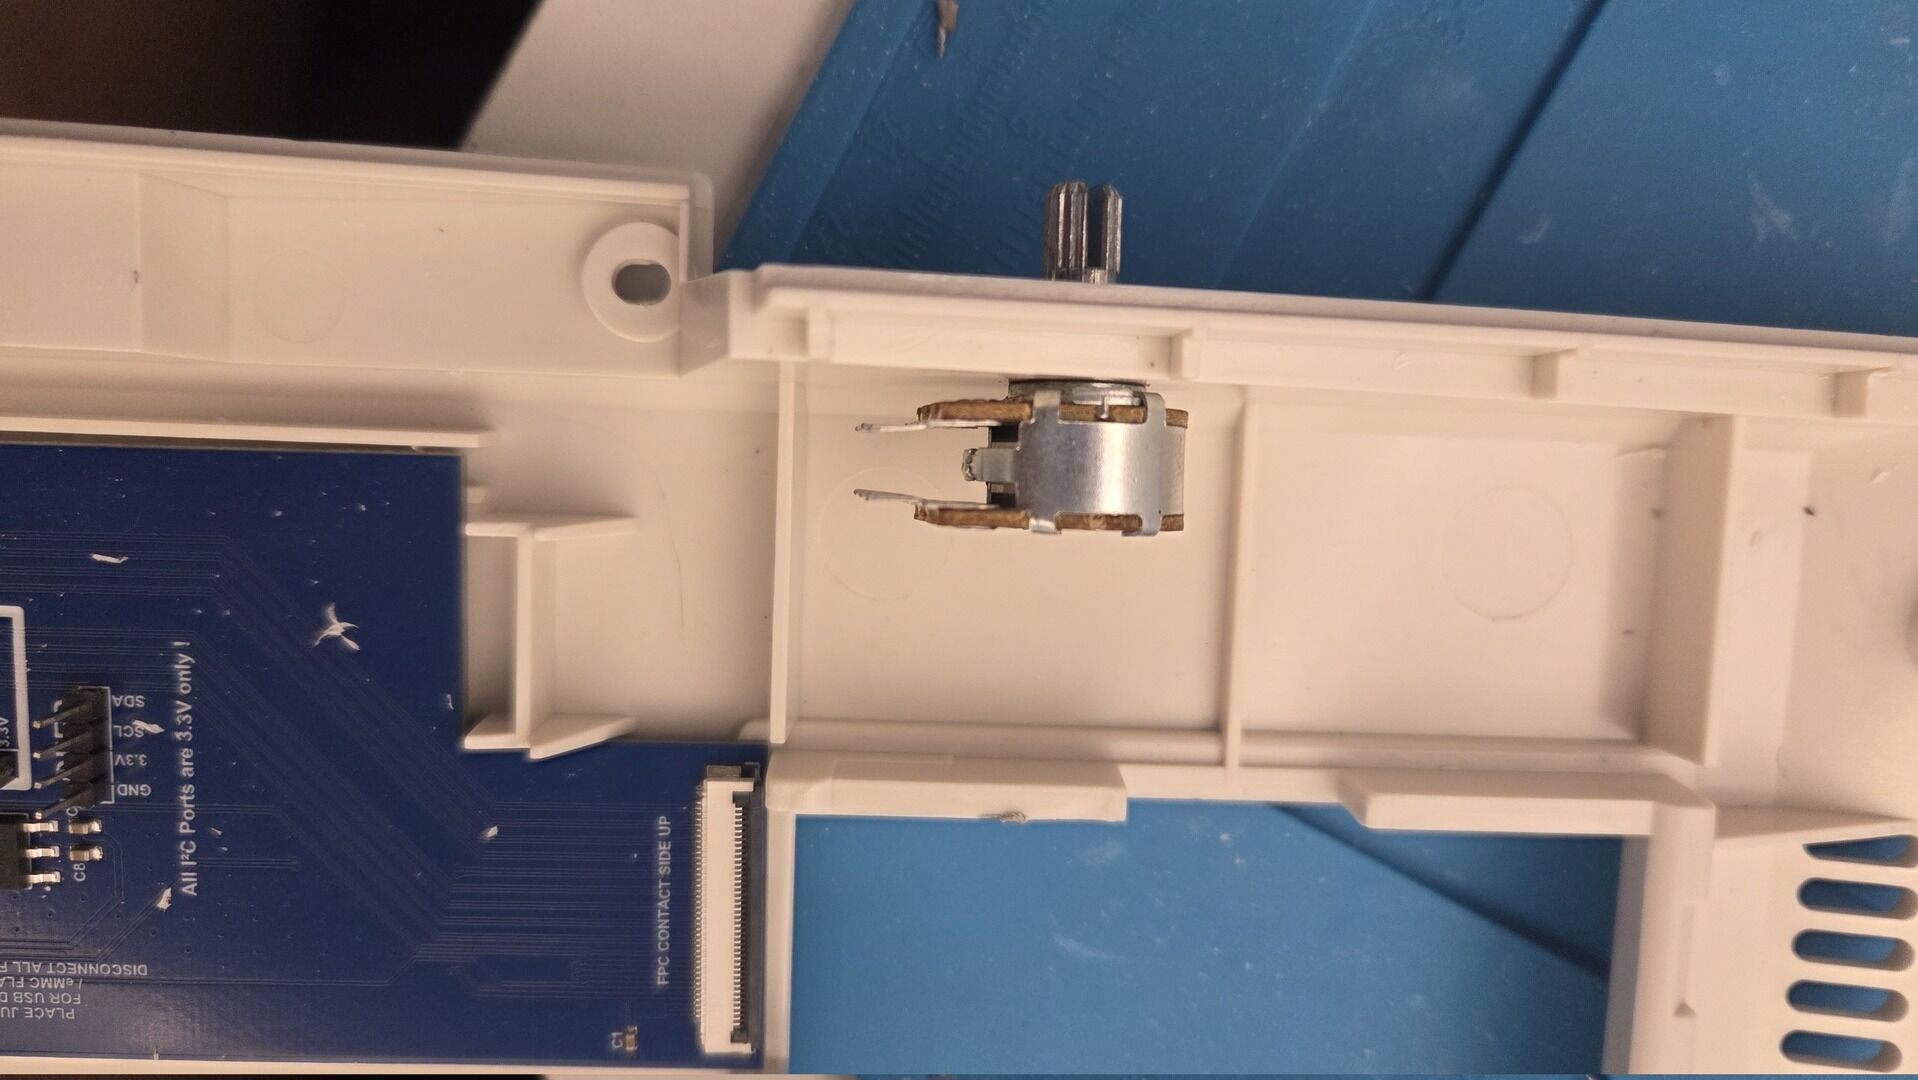
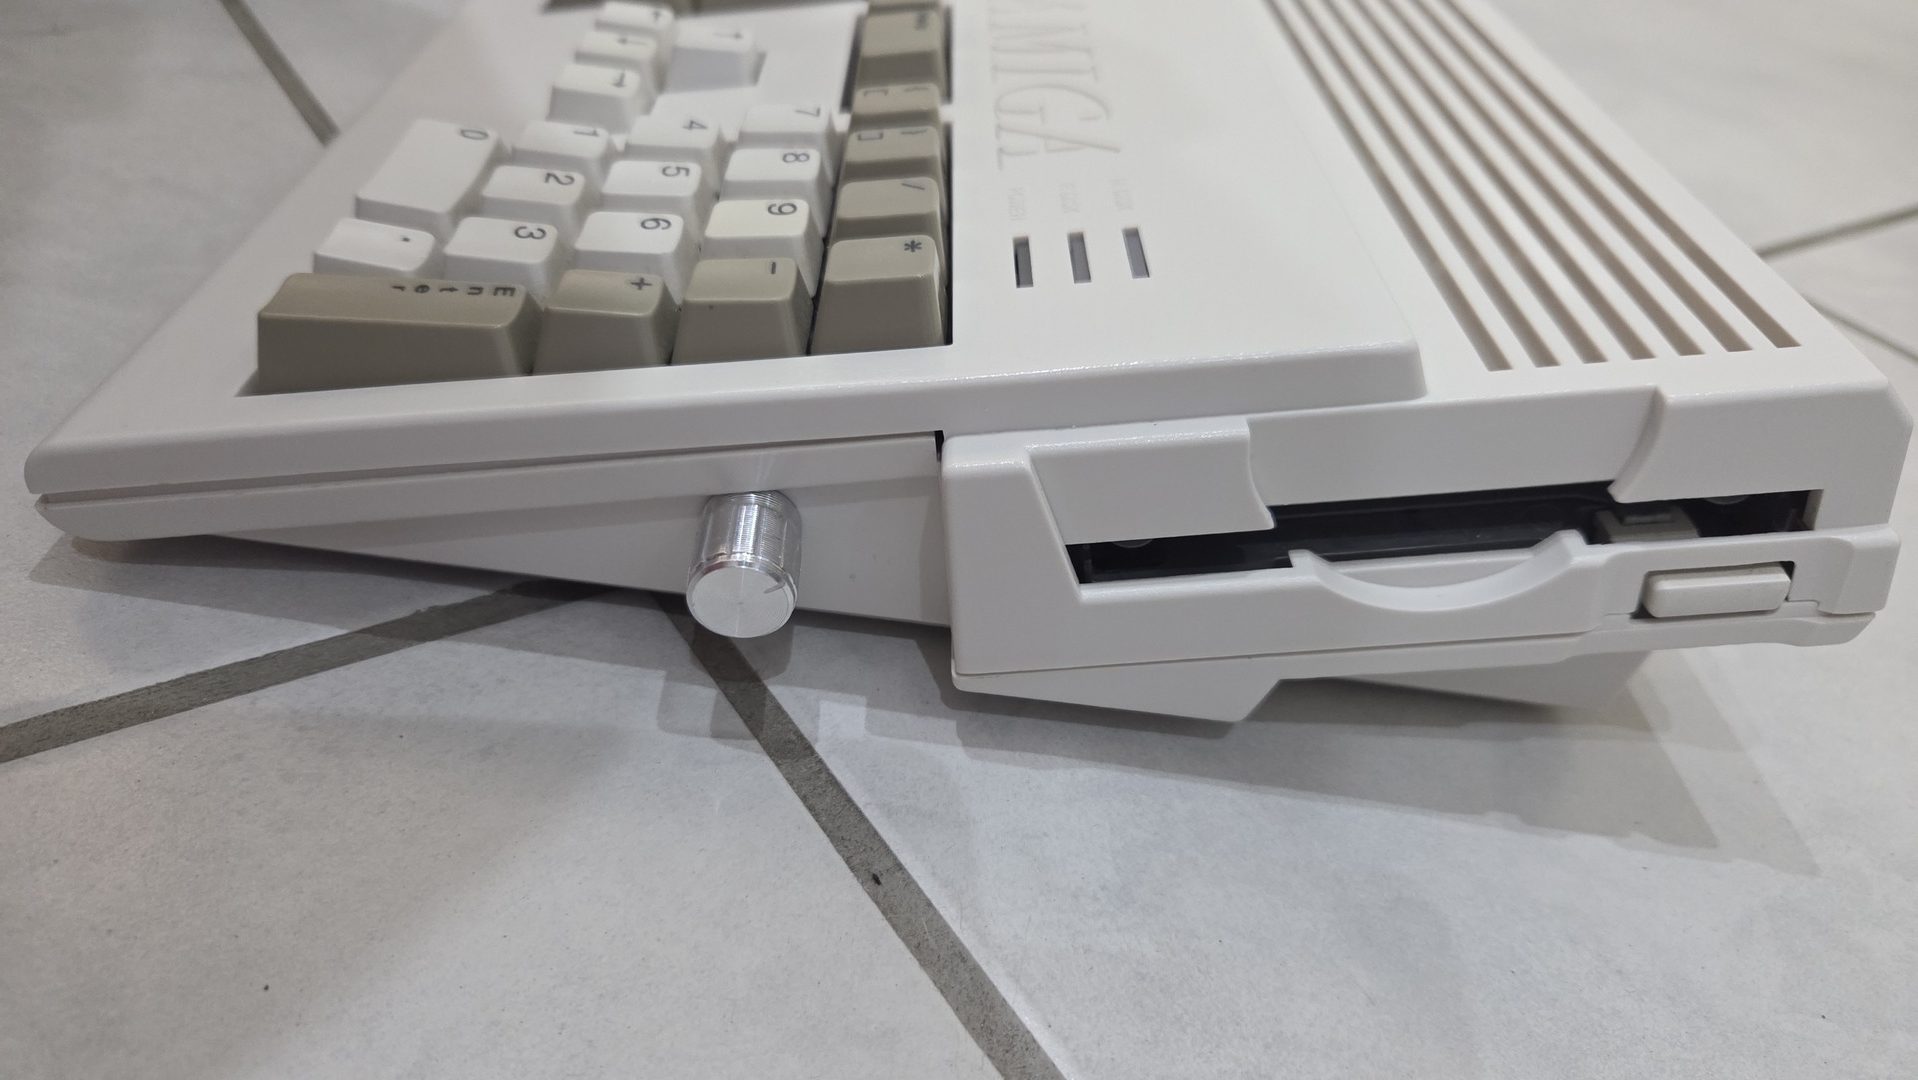
While doing so, I also added a volume control to balance Paula and CD audio levels. This turned out to be particularly useful because some CD32 games do not have a well-balanced mix between digital sound effects and CD music.
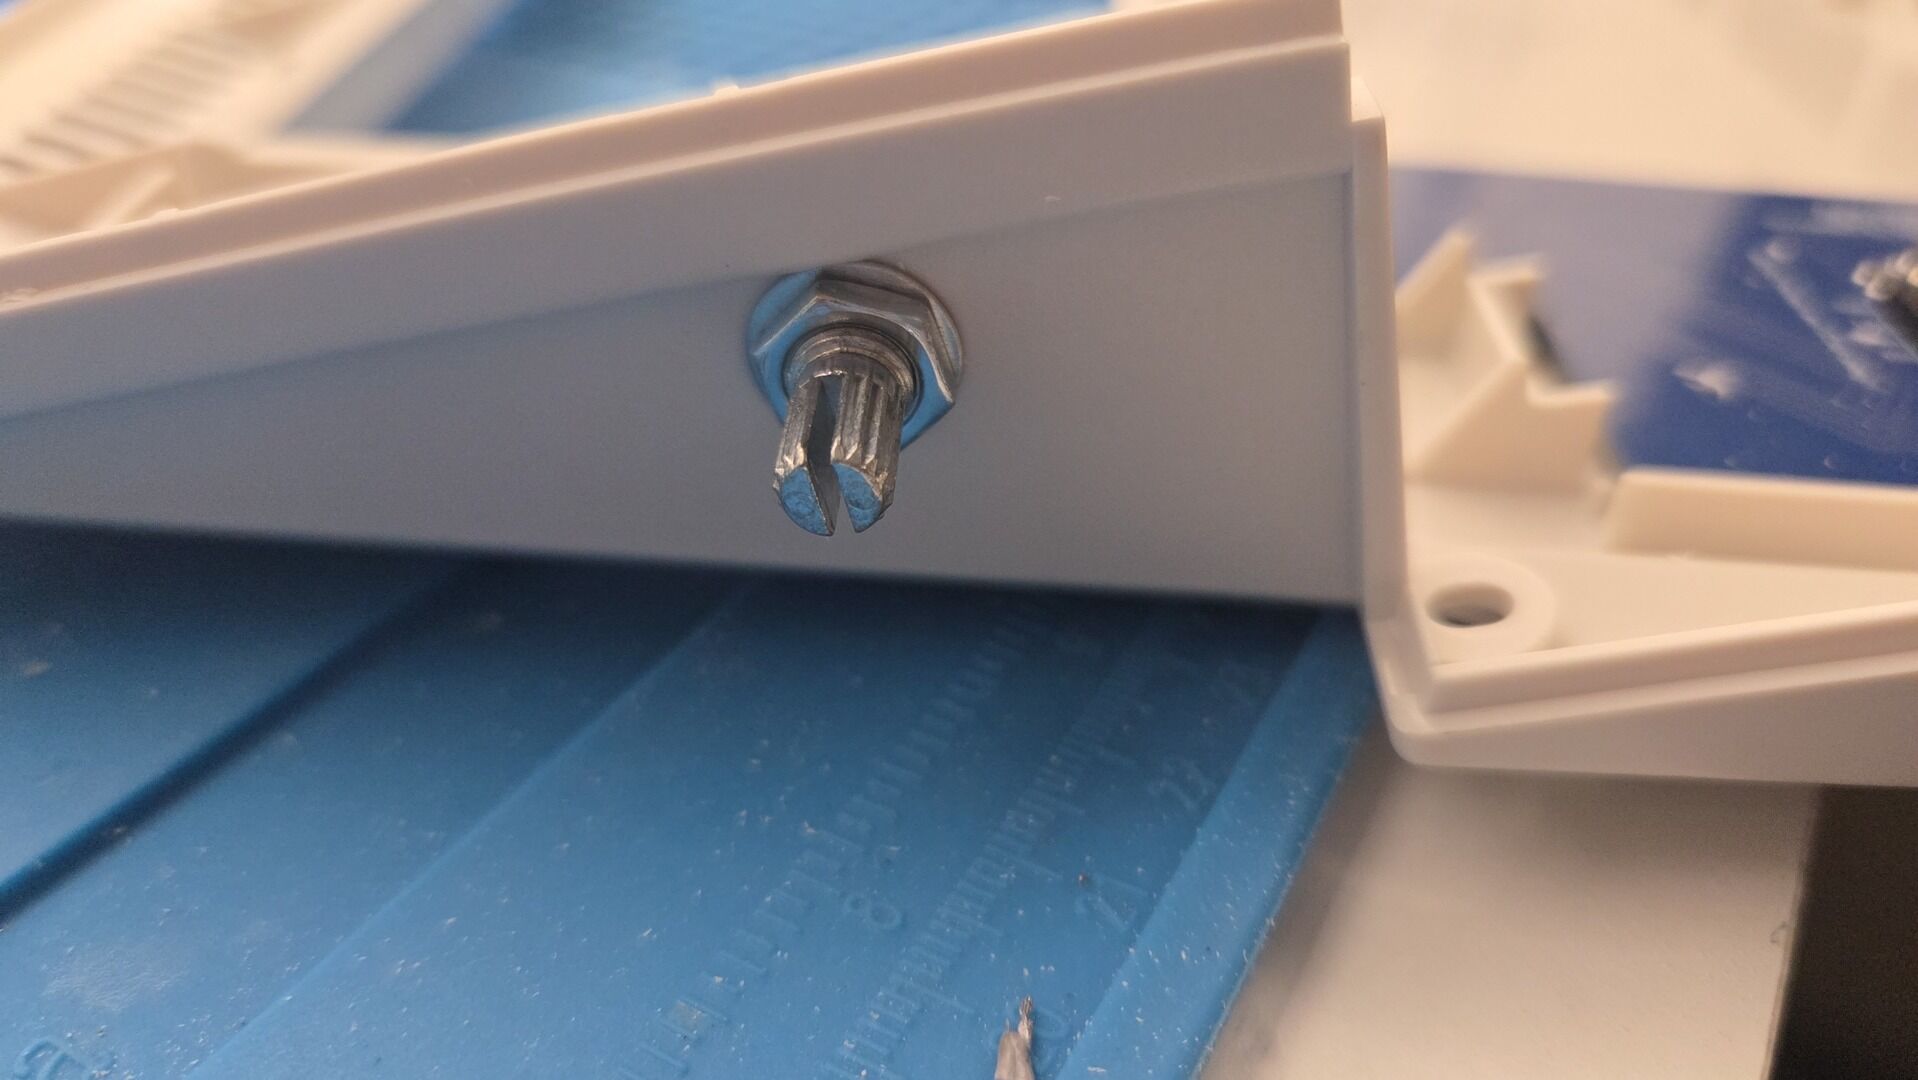
The potentiometer is mounted near the floppy drive through a custom-drilled hole in the case:
To design the mixer, I used two sources of documentation:
- The Amiga 1200 audio schematic (page 6): https://www.amigawiki.org/dnl/schematics/A1200_R1.pdf
- Simon Goodwin’s article: https://simon.mooli.org.uk/AF/article/GOODWIN/GW01.HTML
The principle is fairly simple:
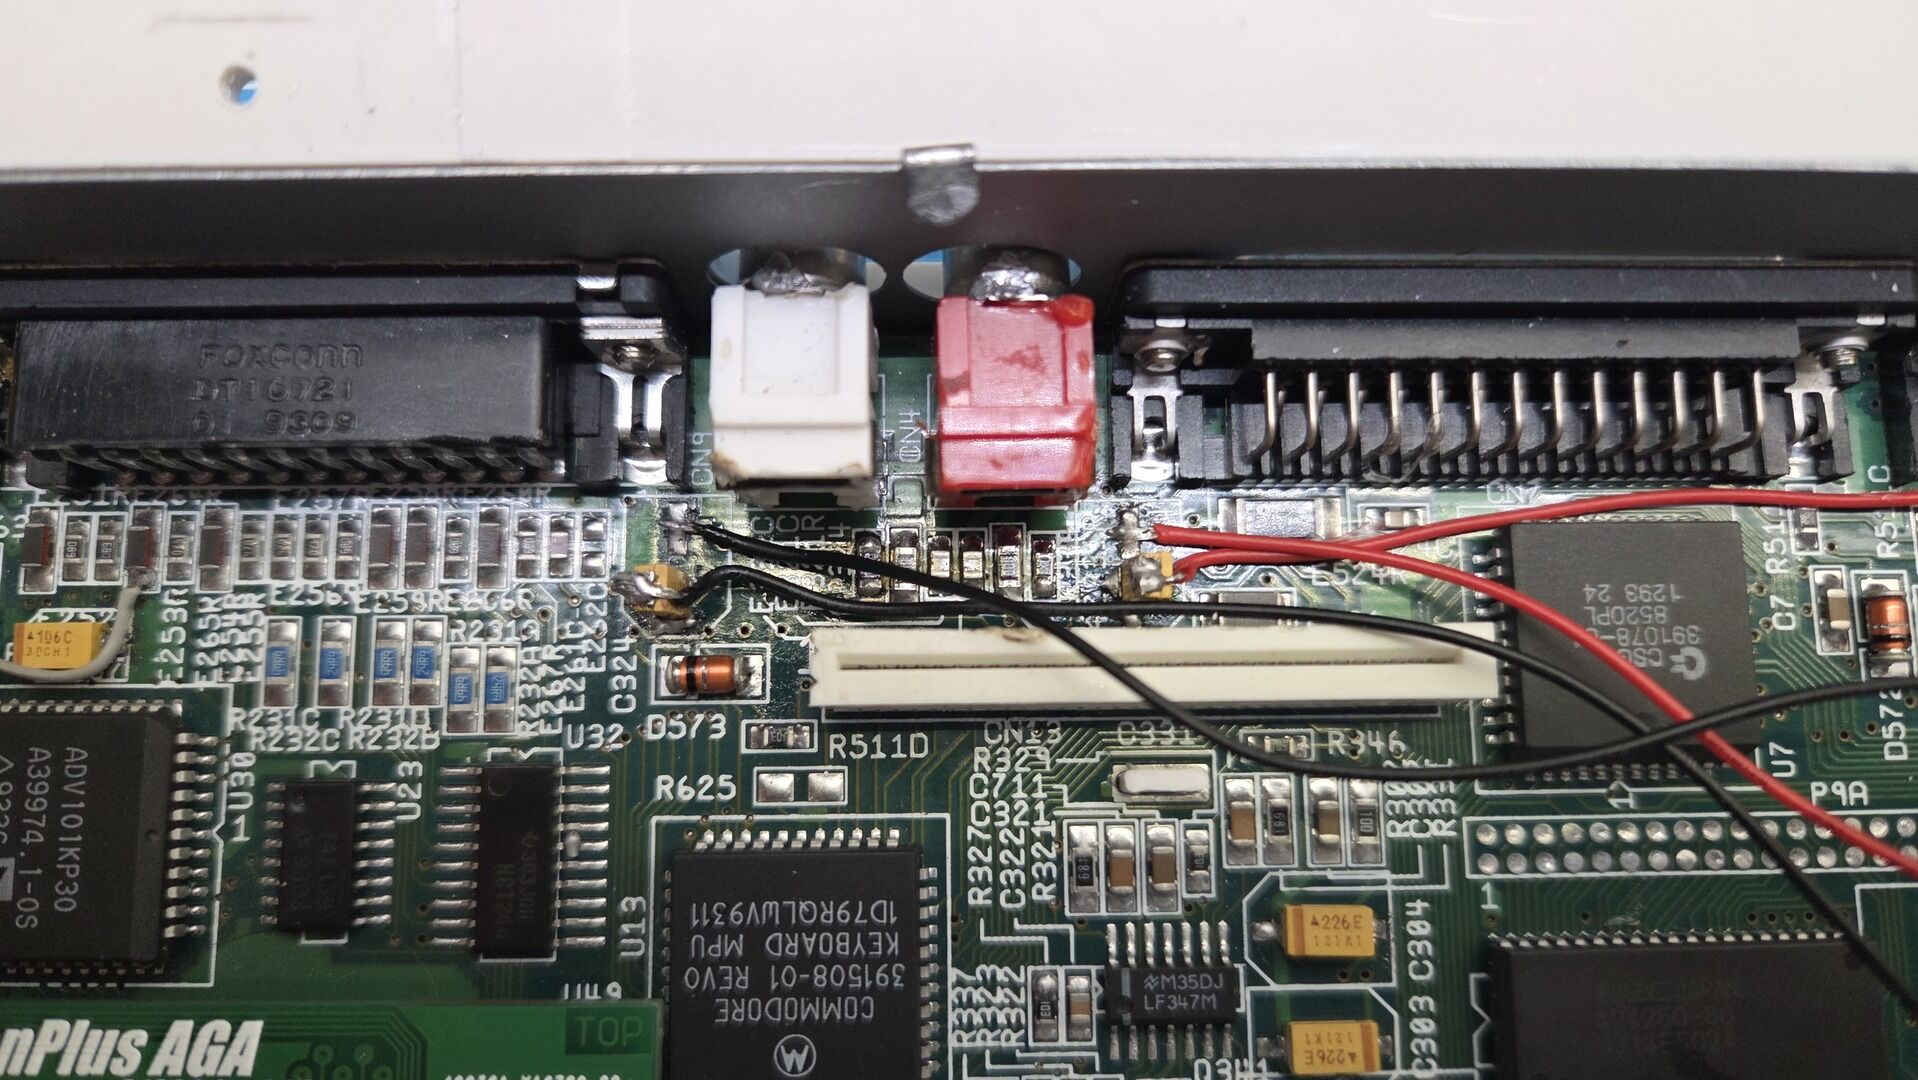
- The positive side of capacitors C324 and C334 carries the left and right Paula outputs. Each channel is connected to one side of the potentiometer through a 4.7 kΩ resistor. These resistors reduce Paula’s level so that it is closer to a standard CD line output.
- The left and right outputs from the CD drive are connected to the opposite side of the potentiometer through 100 Ω resistors. These provide some protection for Paula in case the potentiometer is fully turned toward the CD input or develops a fault.
- The negative side of C324 and C334 is used as the mixed output. These points are connected to the center pins of the potentiometer, where both audio sources are combined.
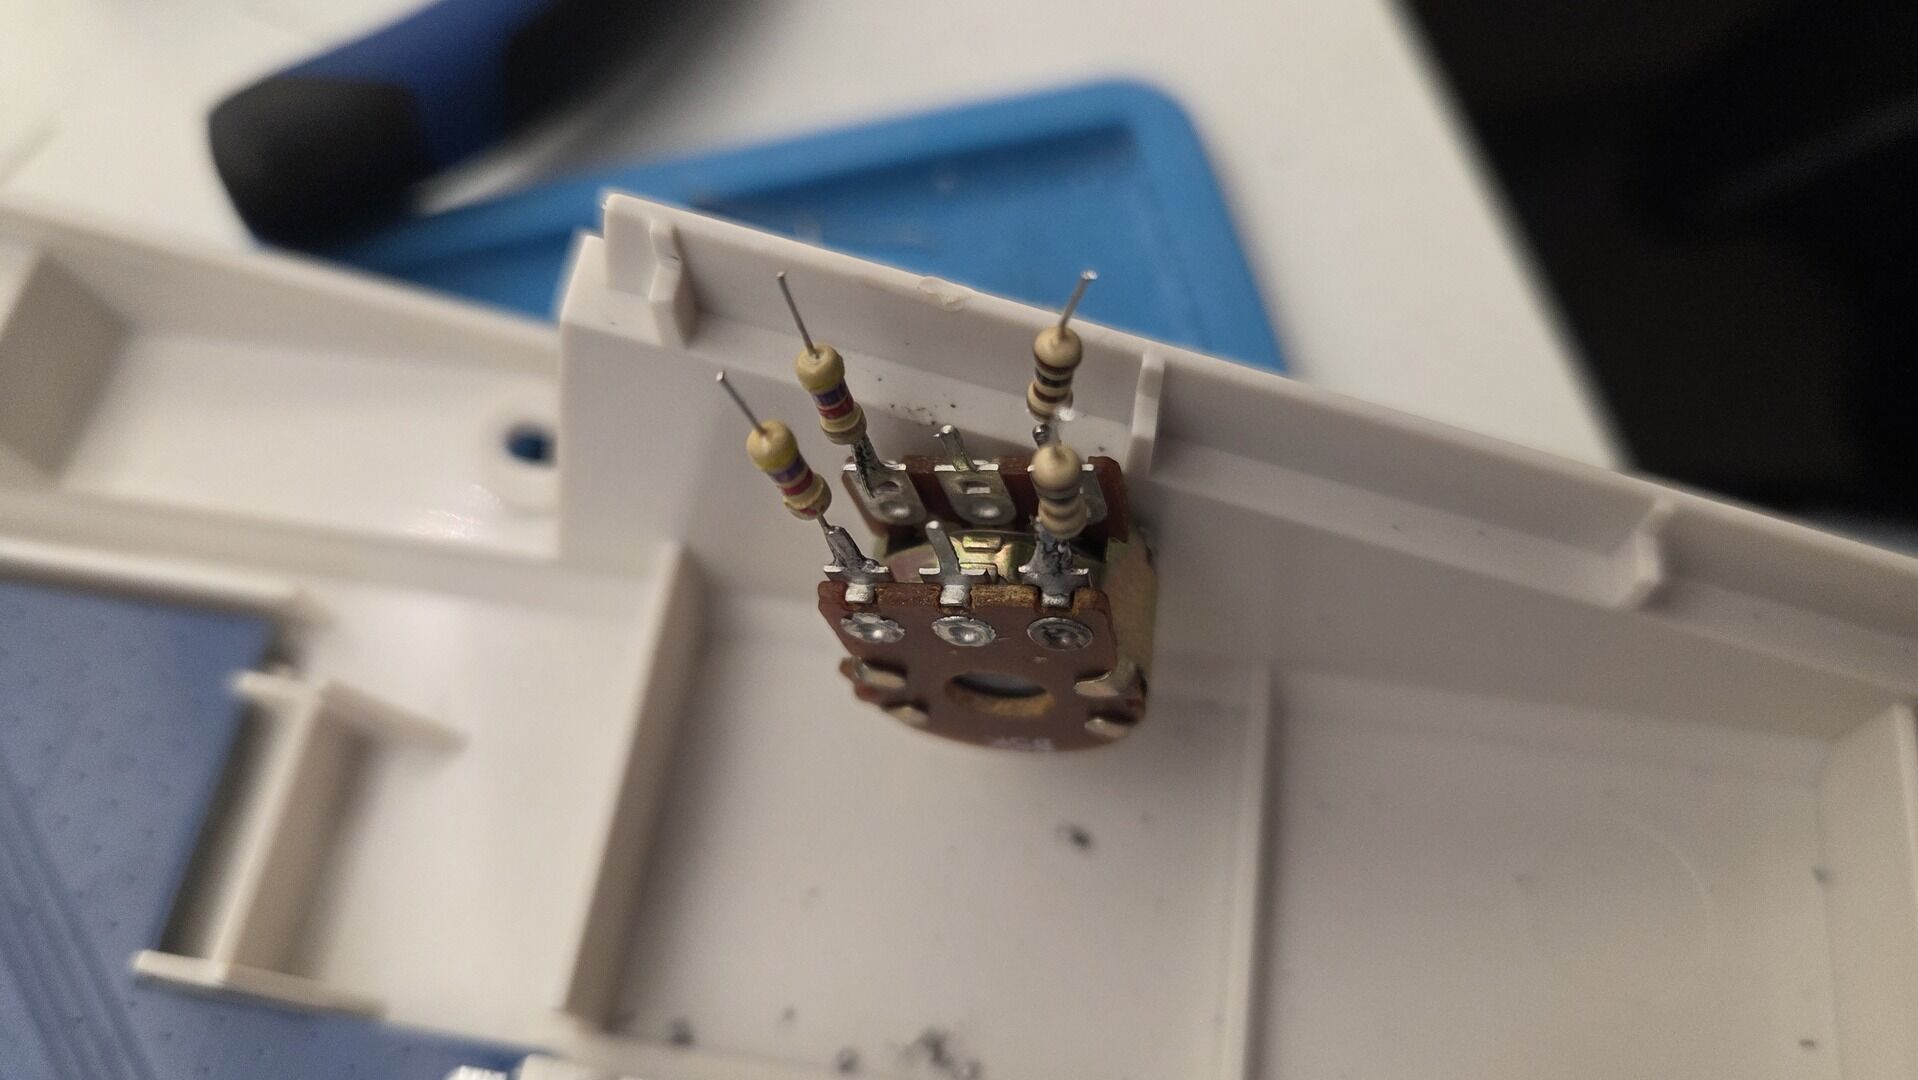
I chose a 5 kΩ potentiometer to keep the overall output impedance reasonably low and minimize any loss in output volume.
To implement the modification, I first changed the orientation of capacitors C324 and C334 and mounted them vertically. This provided convenient solder points for the audio input and output wires.

The Paula and CD audio wires were then connected to the potentiometer together with the required resistors.
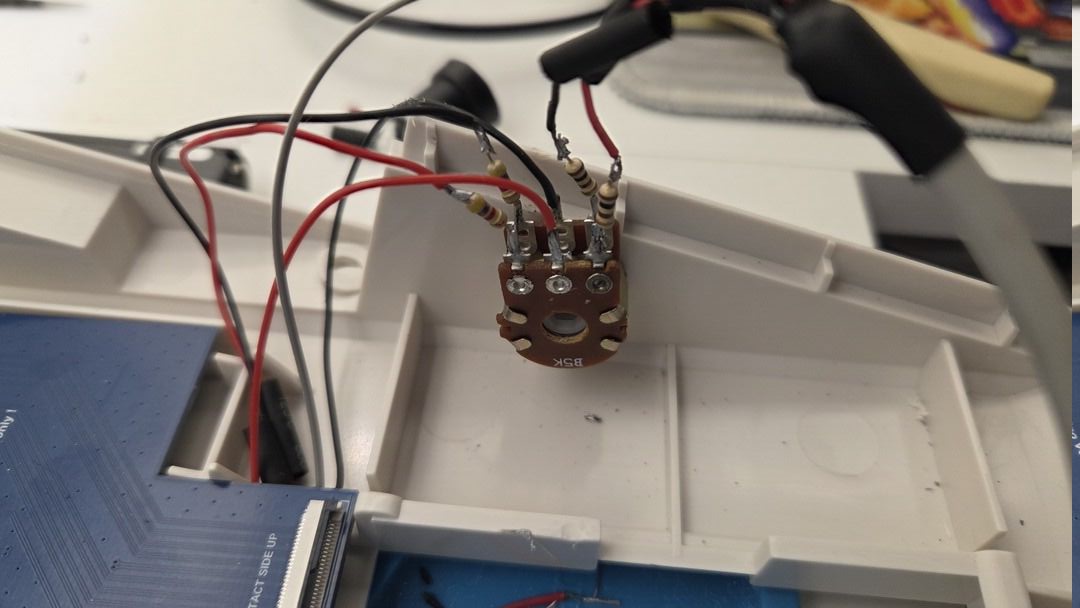
Finally, all wiring was routed and secured to keep the installation as clean as possible.
The result works surprisingly well. CD audio is automatically mixed with Paula’s output and the front-mounted potentiometer allows quick adjustment depending on the game or application being used.
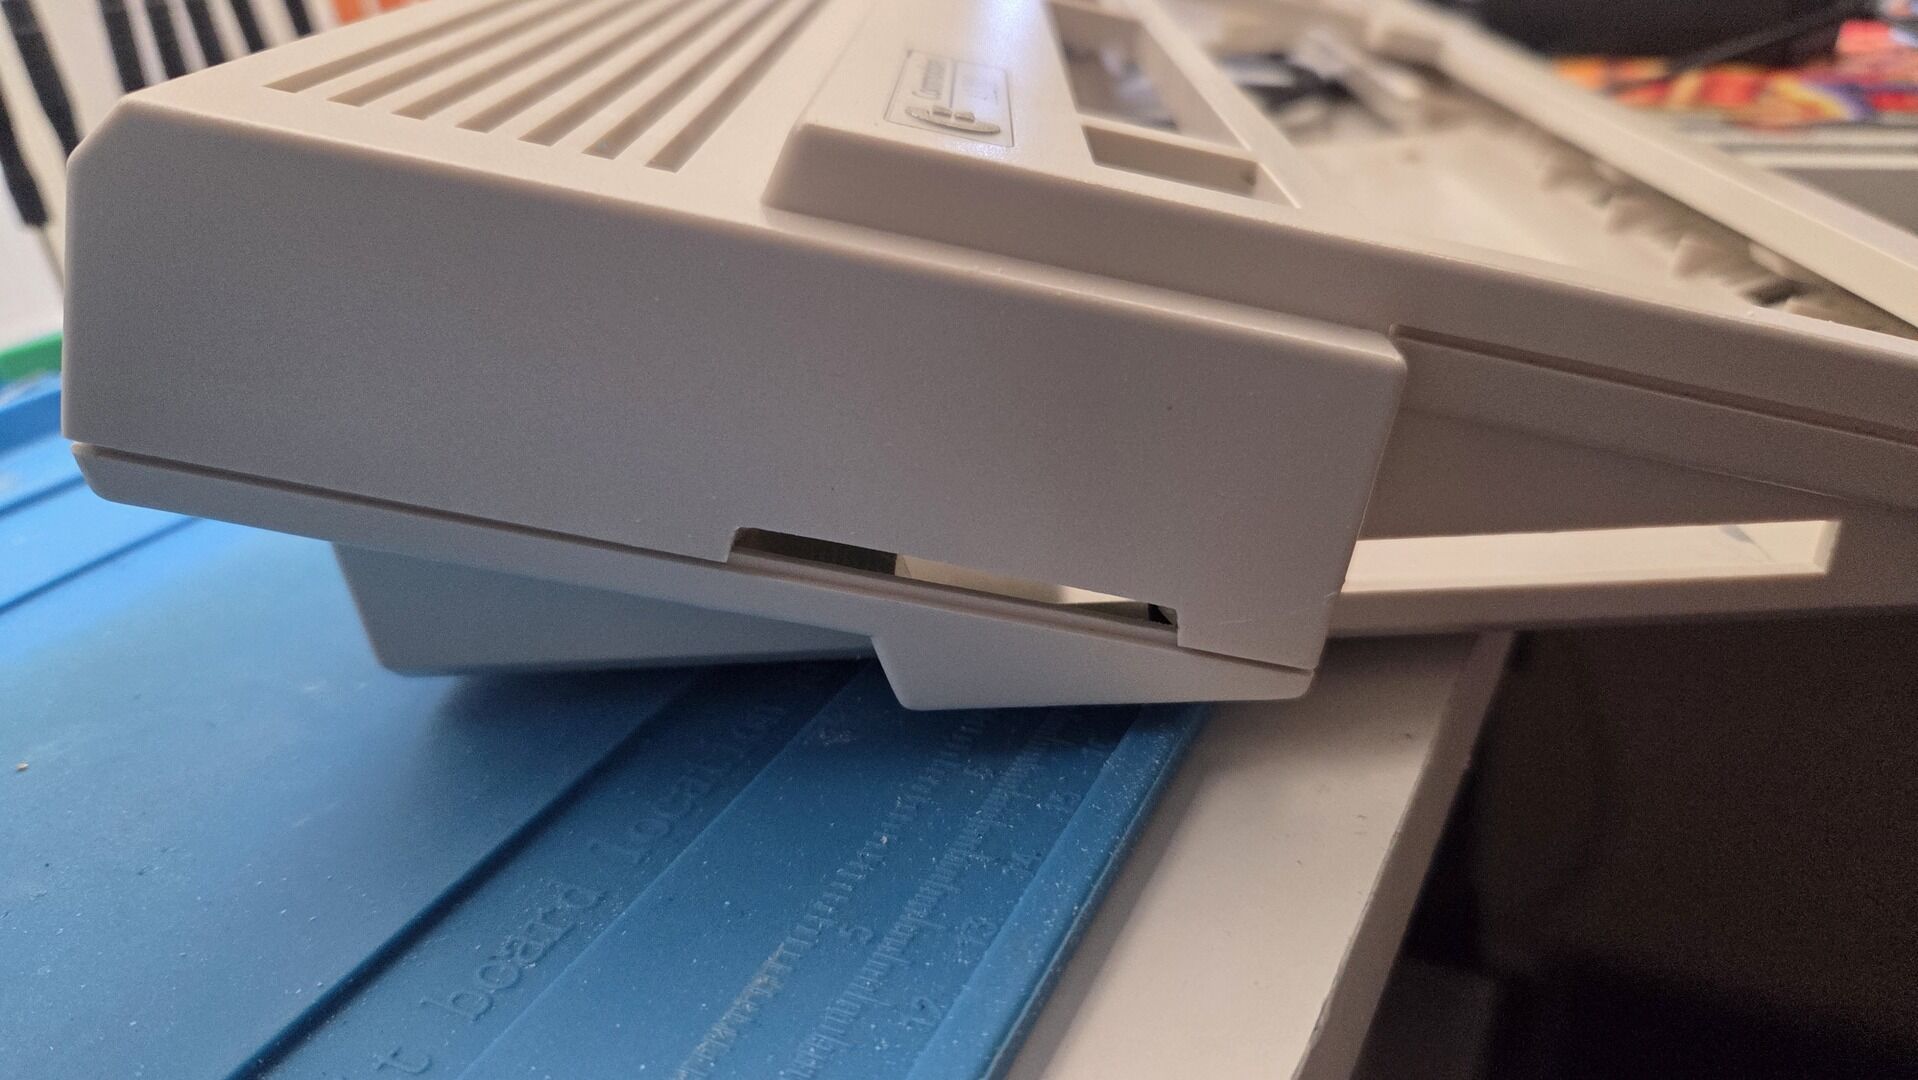
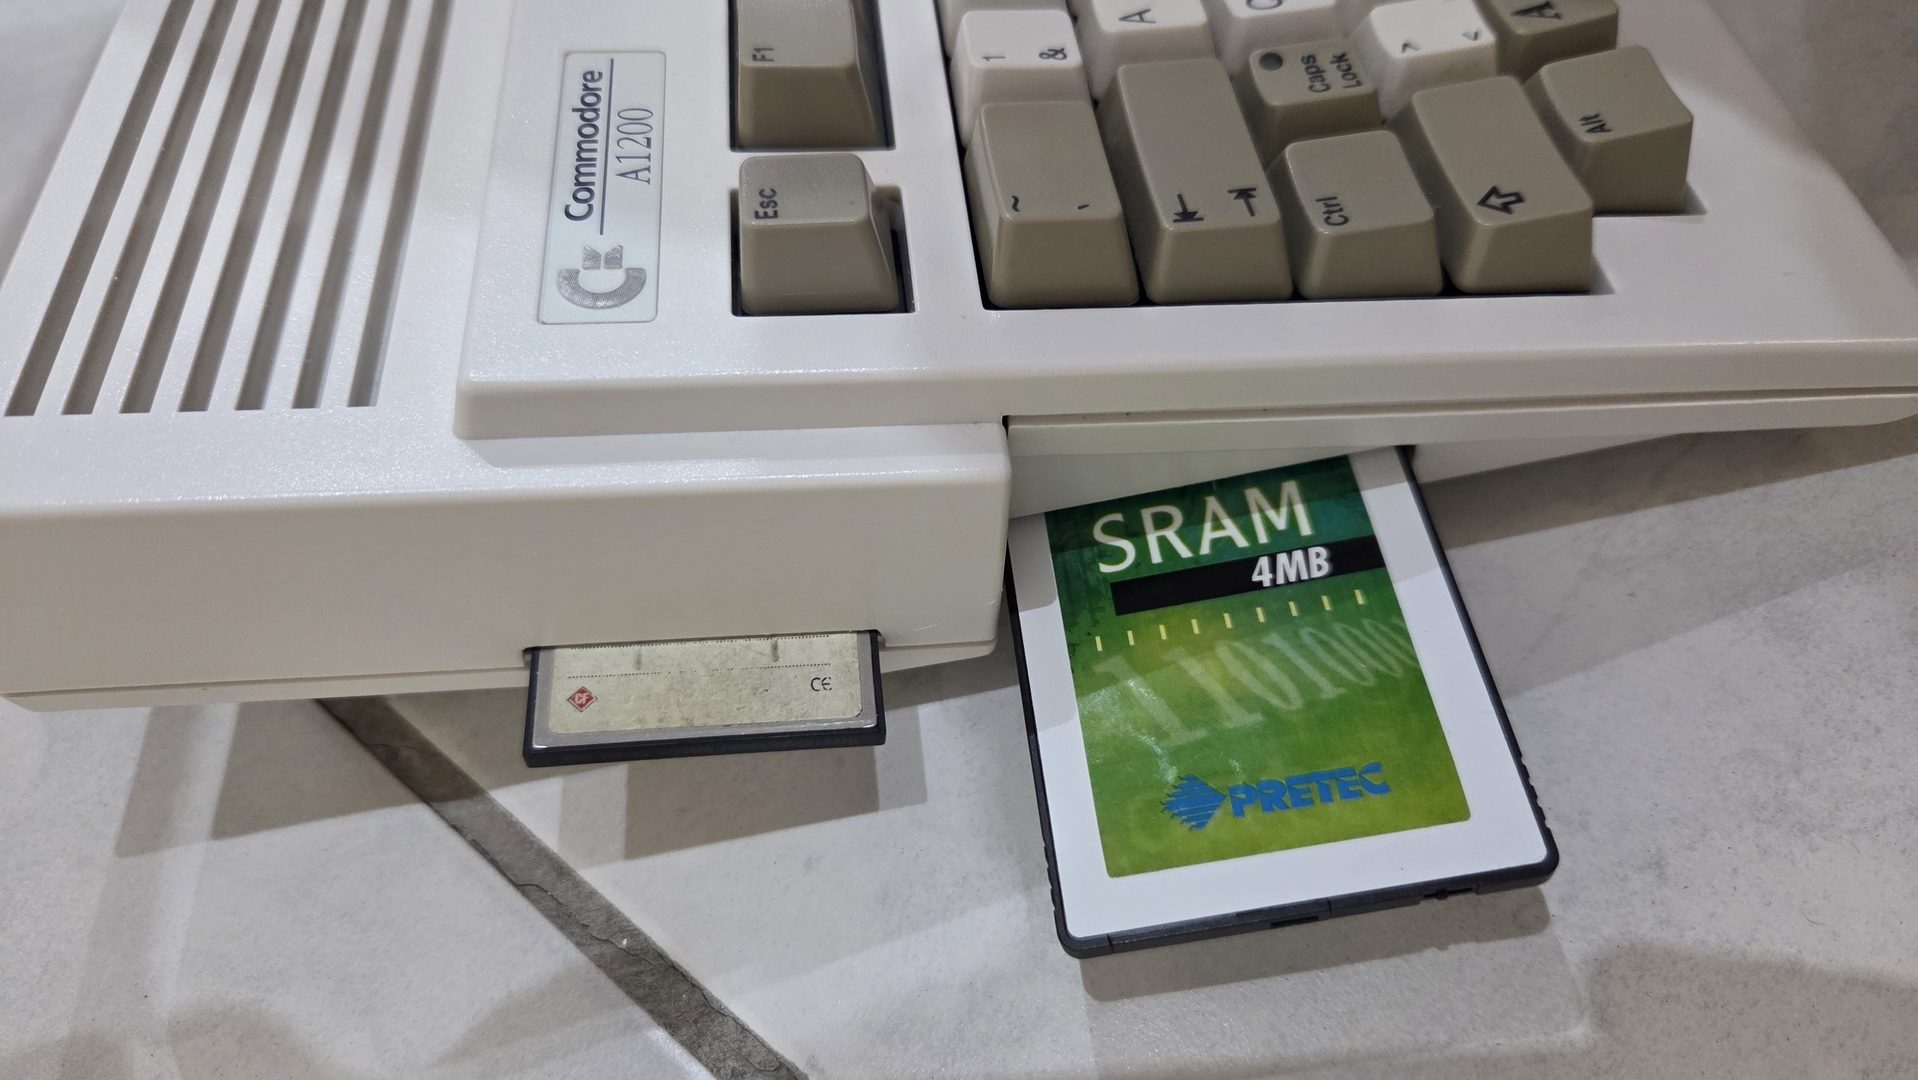
CFCard reader integration
With the optical drive and the ScanPlus AGA already occupying a significant amount of space inside the case, mounting a CompactFlash adapter above the PCMCIA slot was no longer an option. Another requirement for this project was to be able to swap CompactFlash cards without having to open the Amiga every time.
To achieve this, I decided to integrate the CF card reader on the left side of the PCMCIA connector.
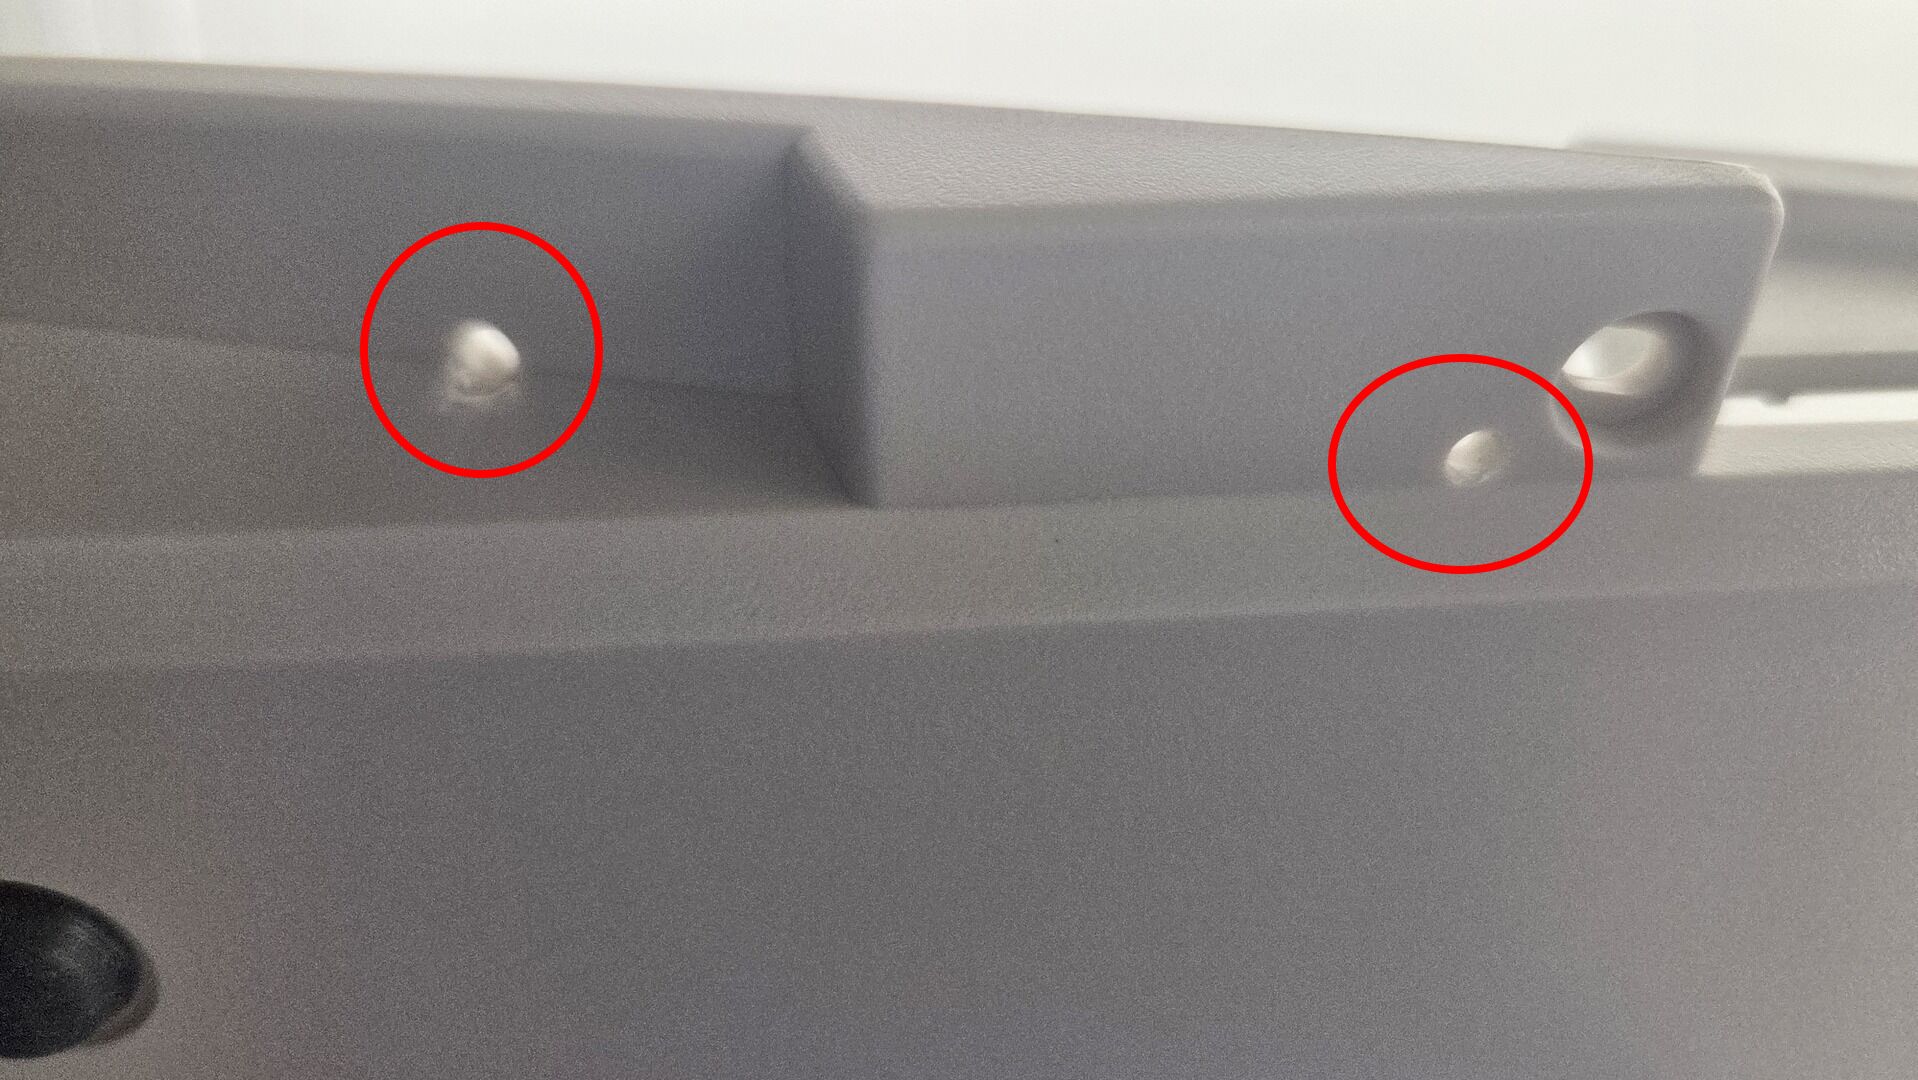
The modification involved:
- Cutting part of the lower shield.
- Drilling two mounting holes for the CF card reader.
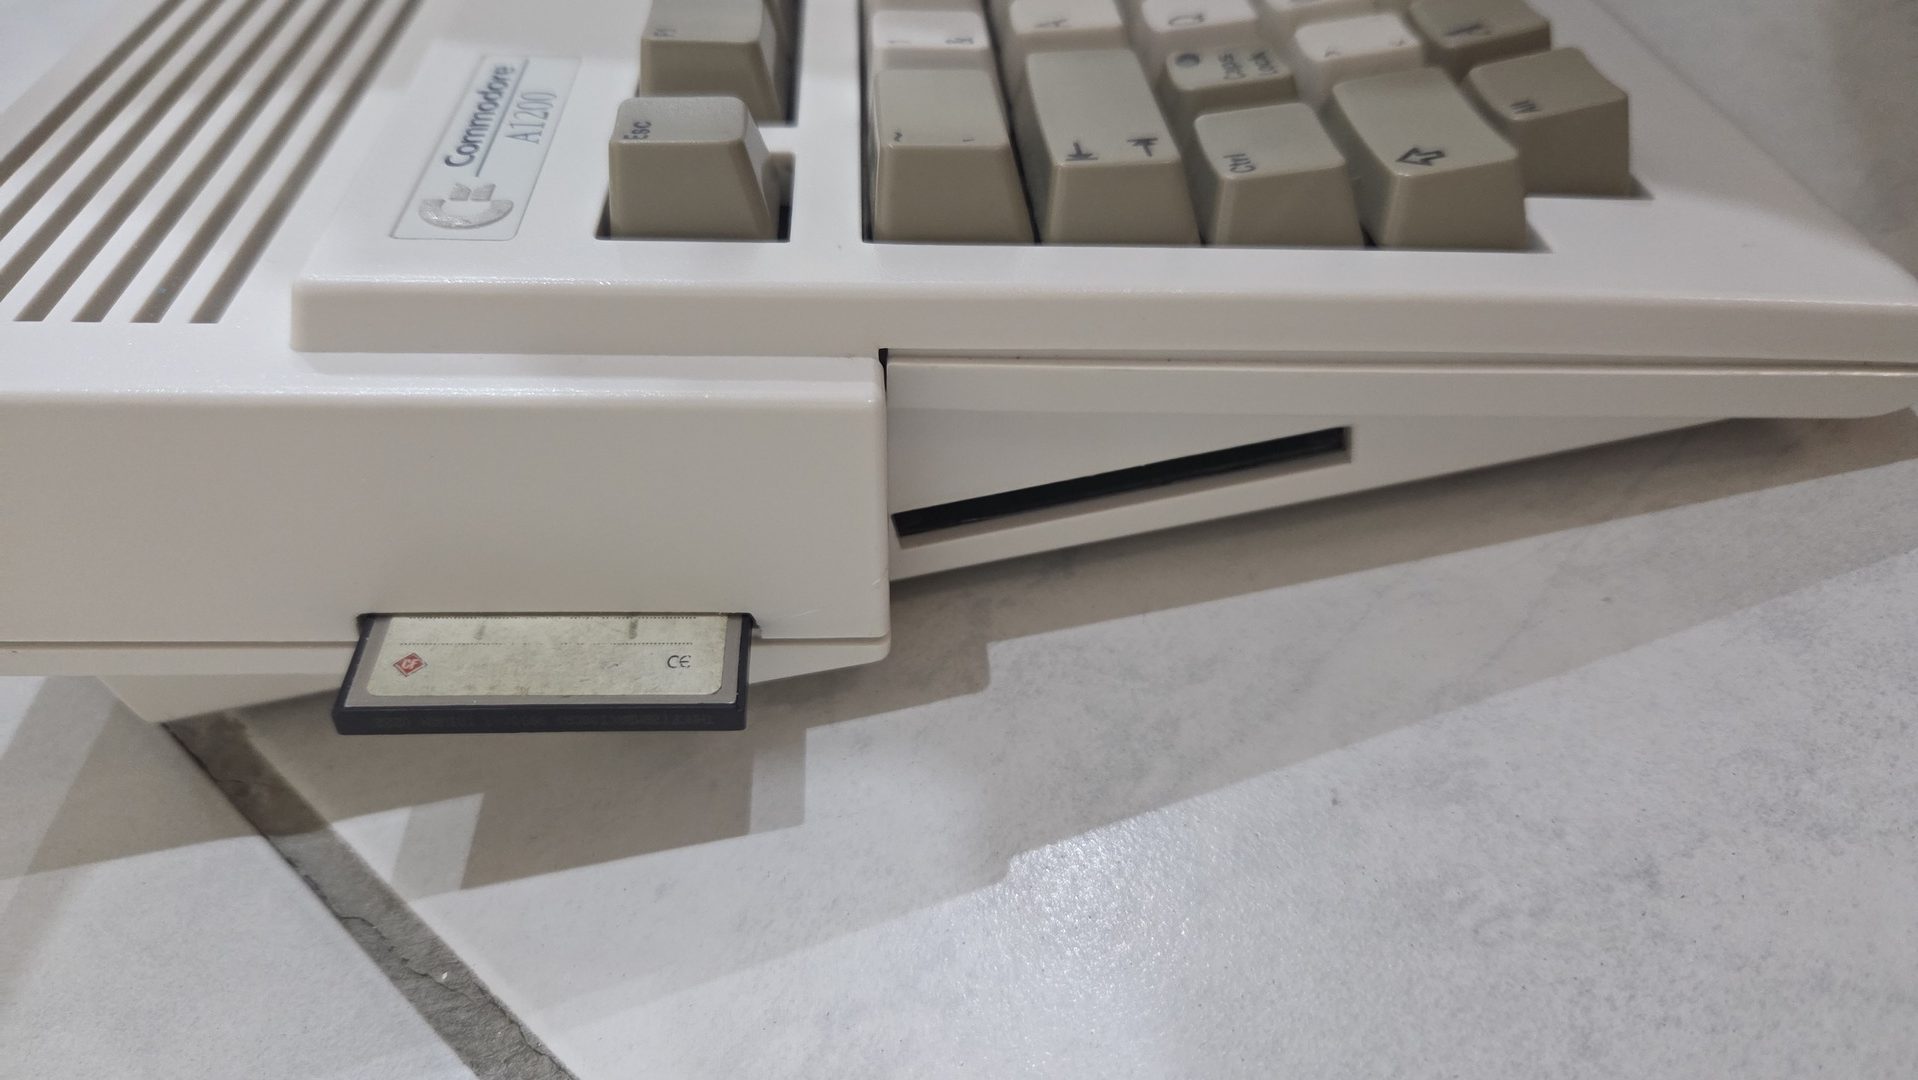
- Creating a slot in the case for CF card insertion, using the same technique as for the DVD drive opening: a series of small drilled holes followed by careful finishing with a file.
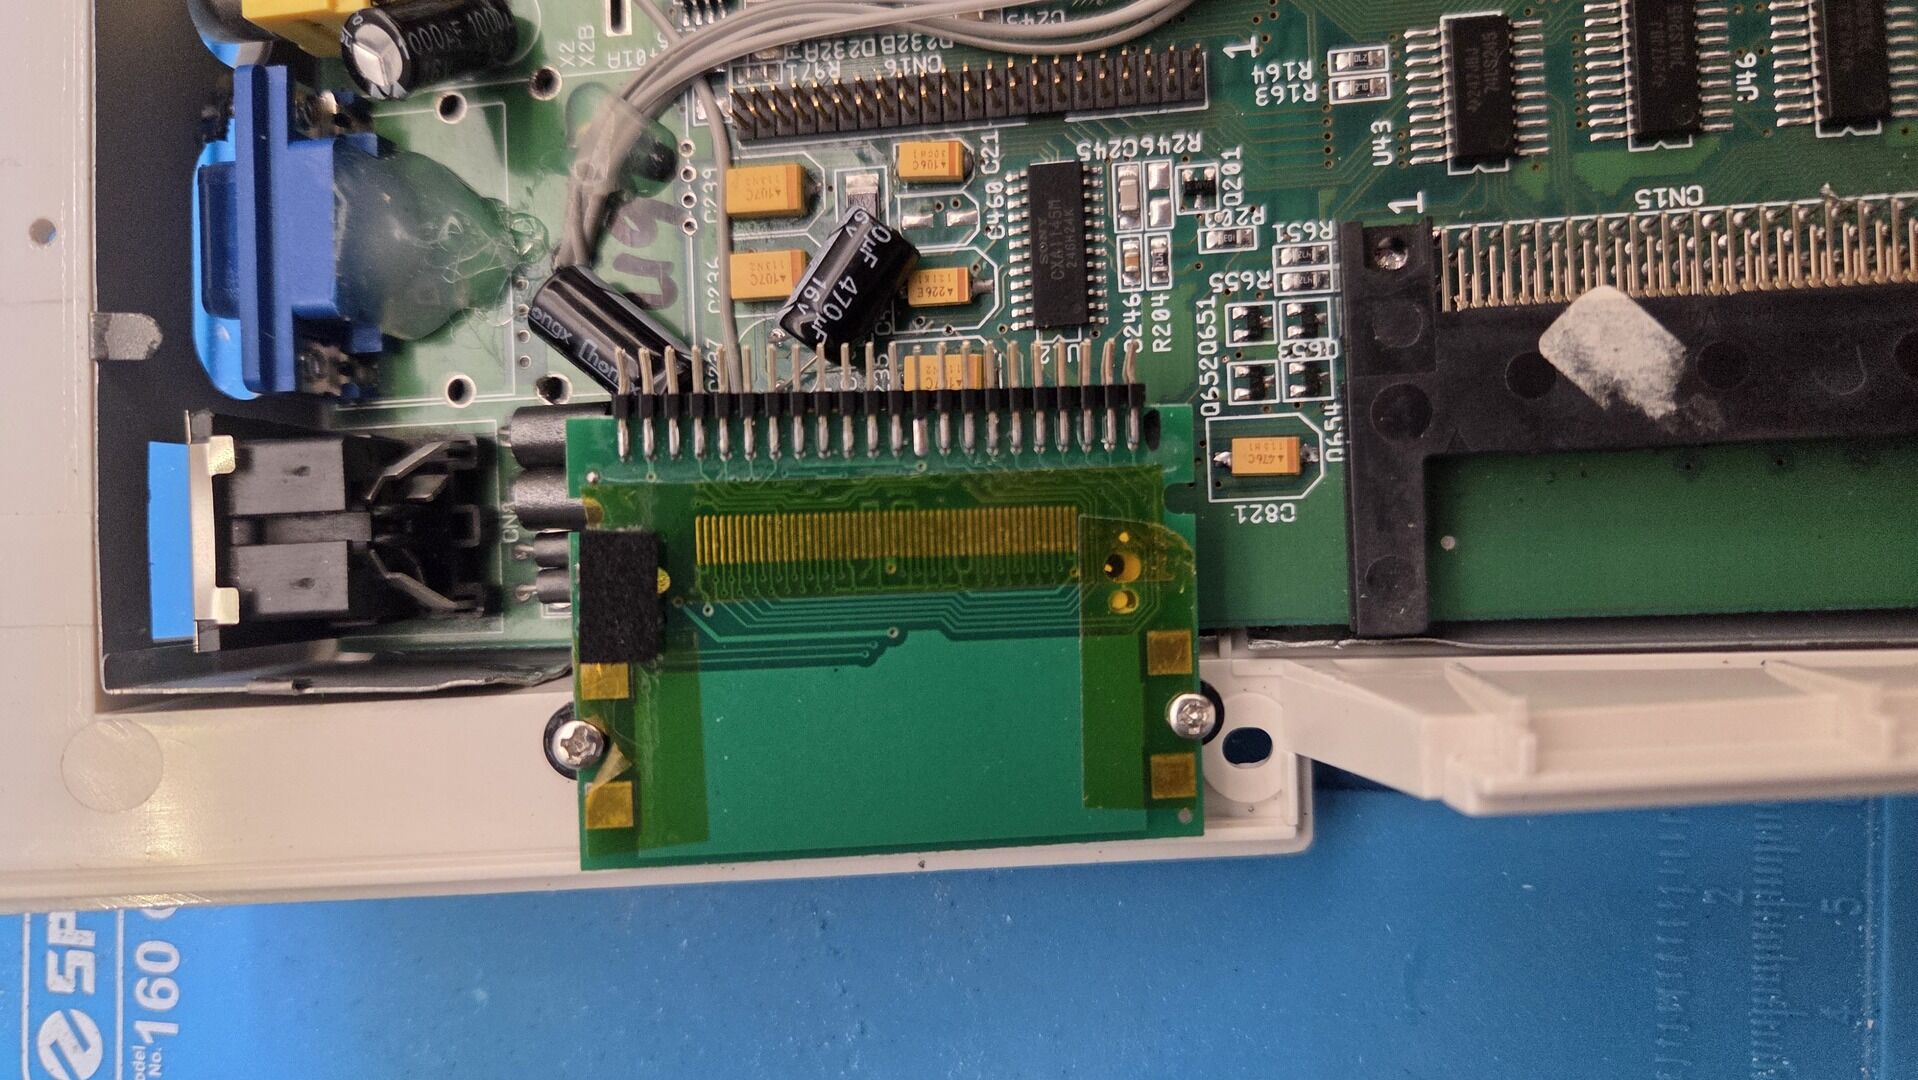
The CompactFlash adapter I selected is a slim 44-pin model purchased from AliExpress. One of its advantages is that it is directly powered through the IDE connector, eliminating the need for additional power wiring.
After a few adjustments, the reader fitted perfectly between the motherboard and the side of the case while remaining easily accessible from the outside.
The final result:
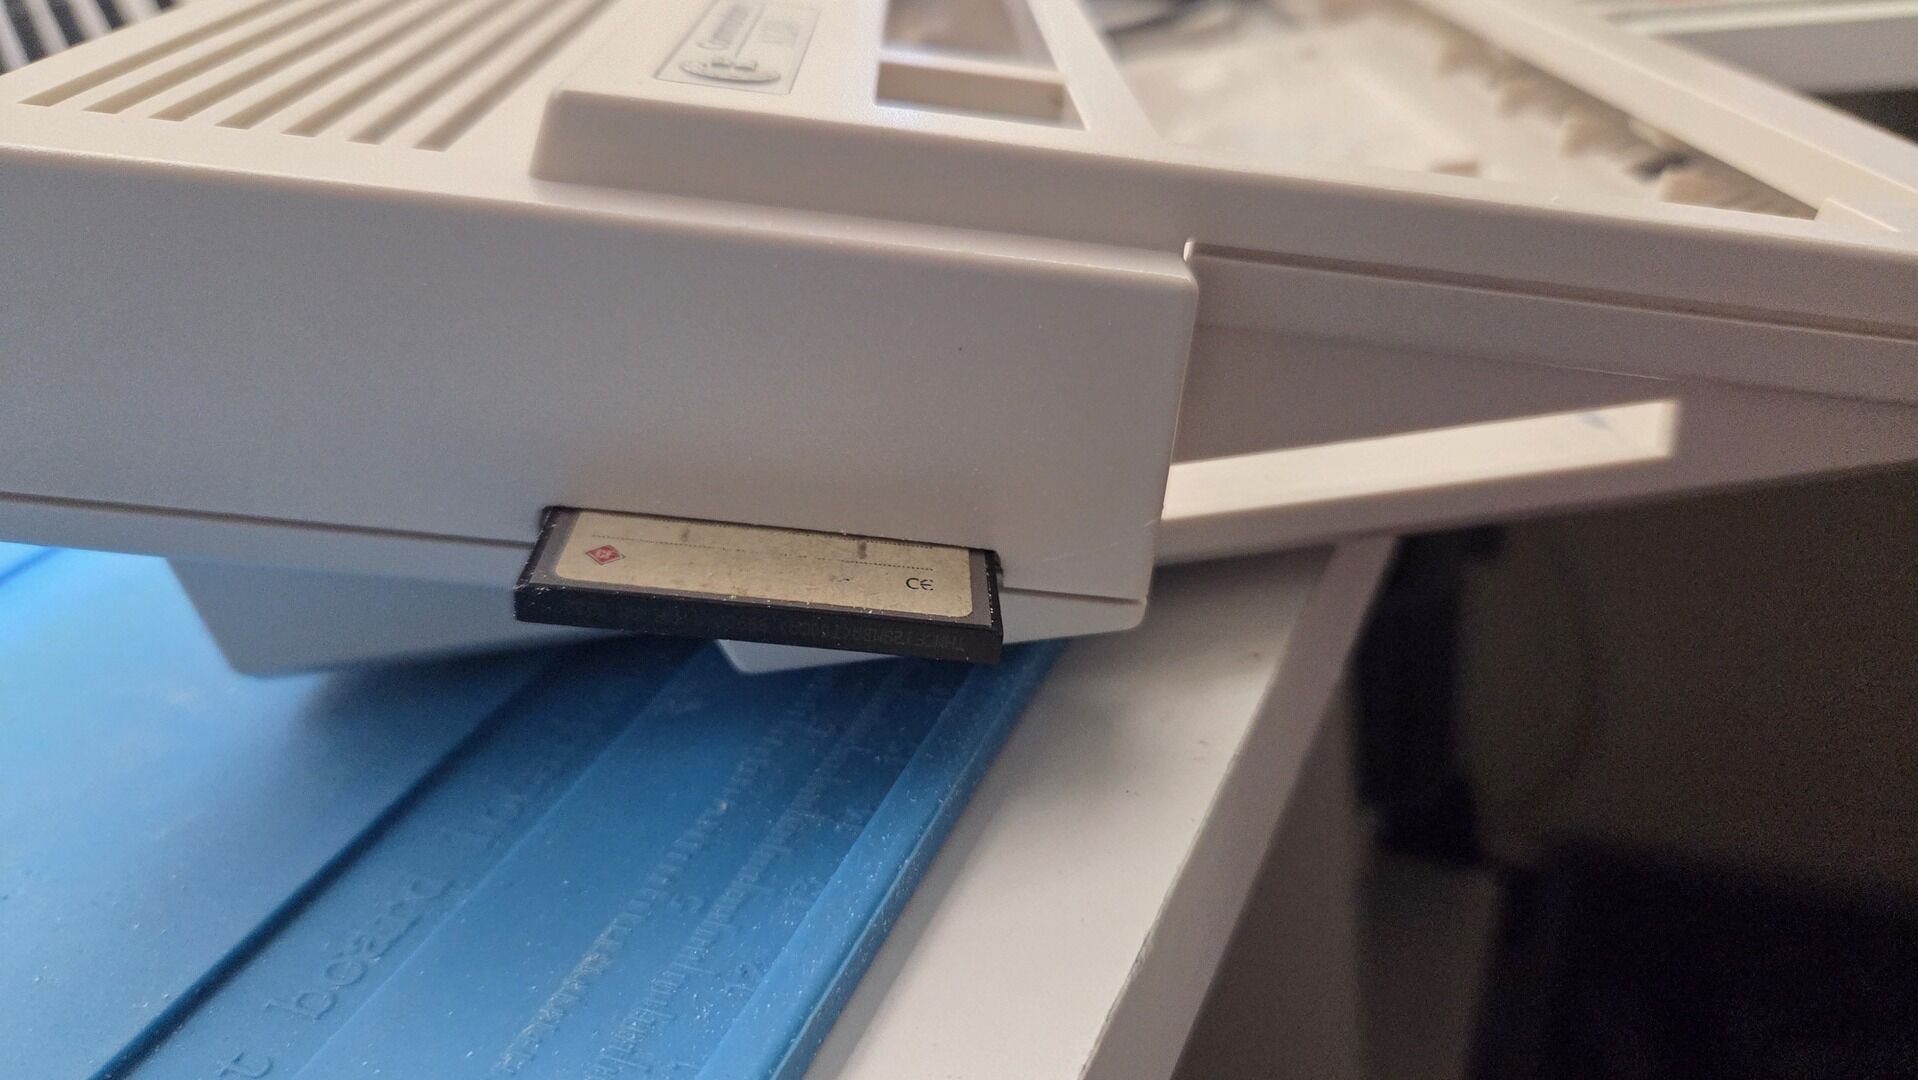
This turned out to be one of the most practical modifications of the whole project. Swapping operating systems, transferring files, or creating backups now only requires removing the CompactFlash card, with no need to open the Amiga.
Custom IDE Ribbon cable
As you may have noticed in the previous sections, I ended up building a custom IDE ribbon cable. Space inside the Amiga 1200 was becoming extremely limited, and I needed a single cable capable of connecting both the 44-pin CompactFlash adapter and the 40-pin optical drive.
The starting point was a 30 cm IDE cable purchased from AliExpress. Besides being much longer than necessary, it was fitted with a standard Molex power connector, which was not suitable for powering the slim DVD drive.
On the left, the shortened cable with the original Molex connector. On the right, the modified version with the new power connector:
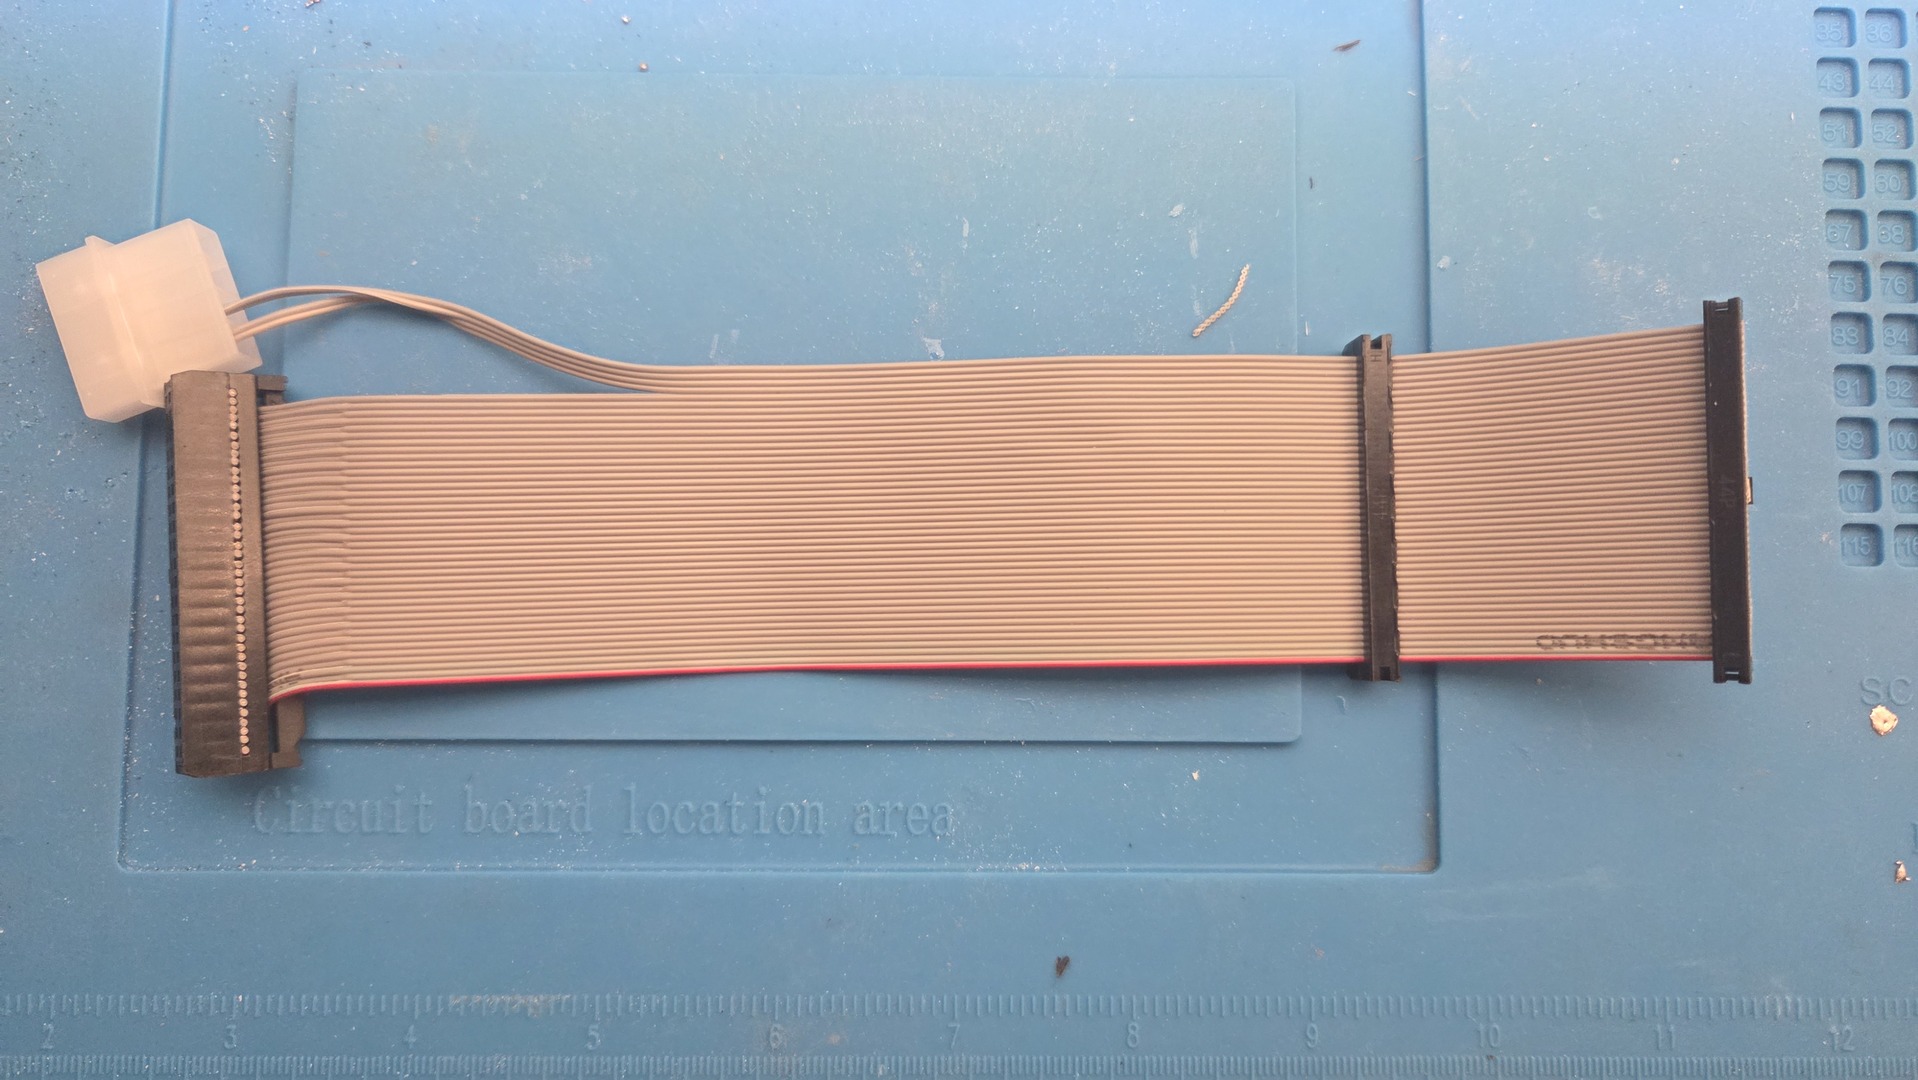
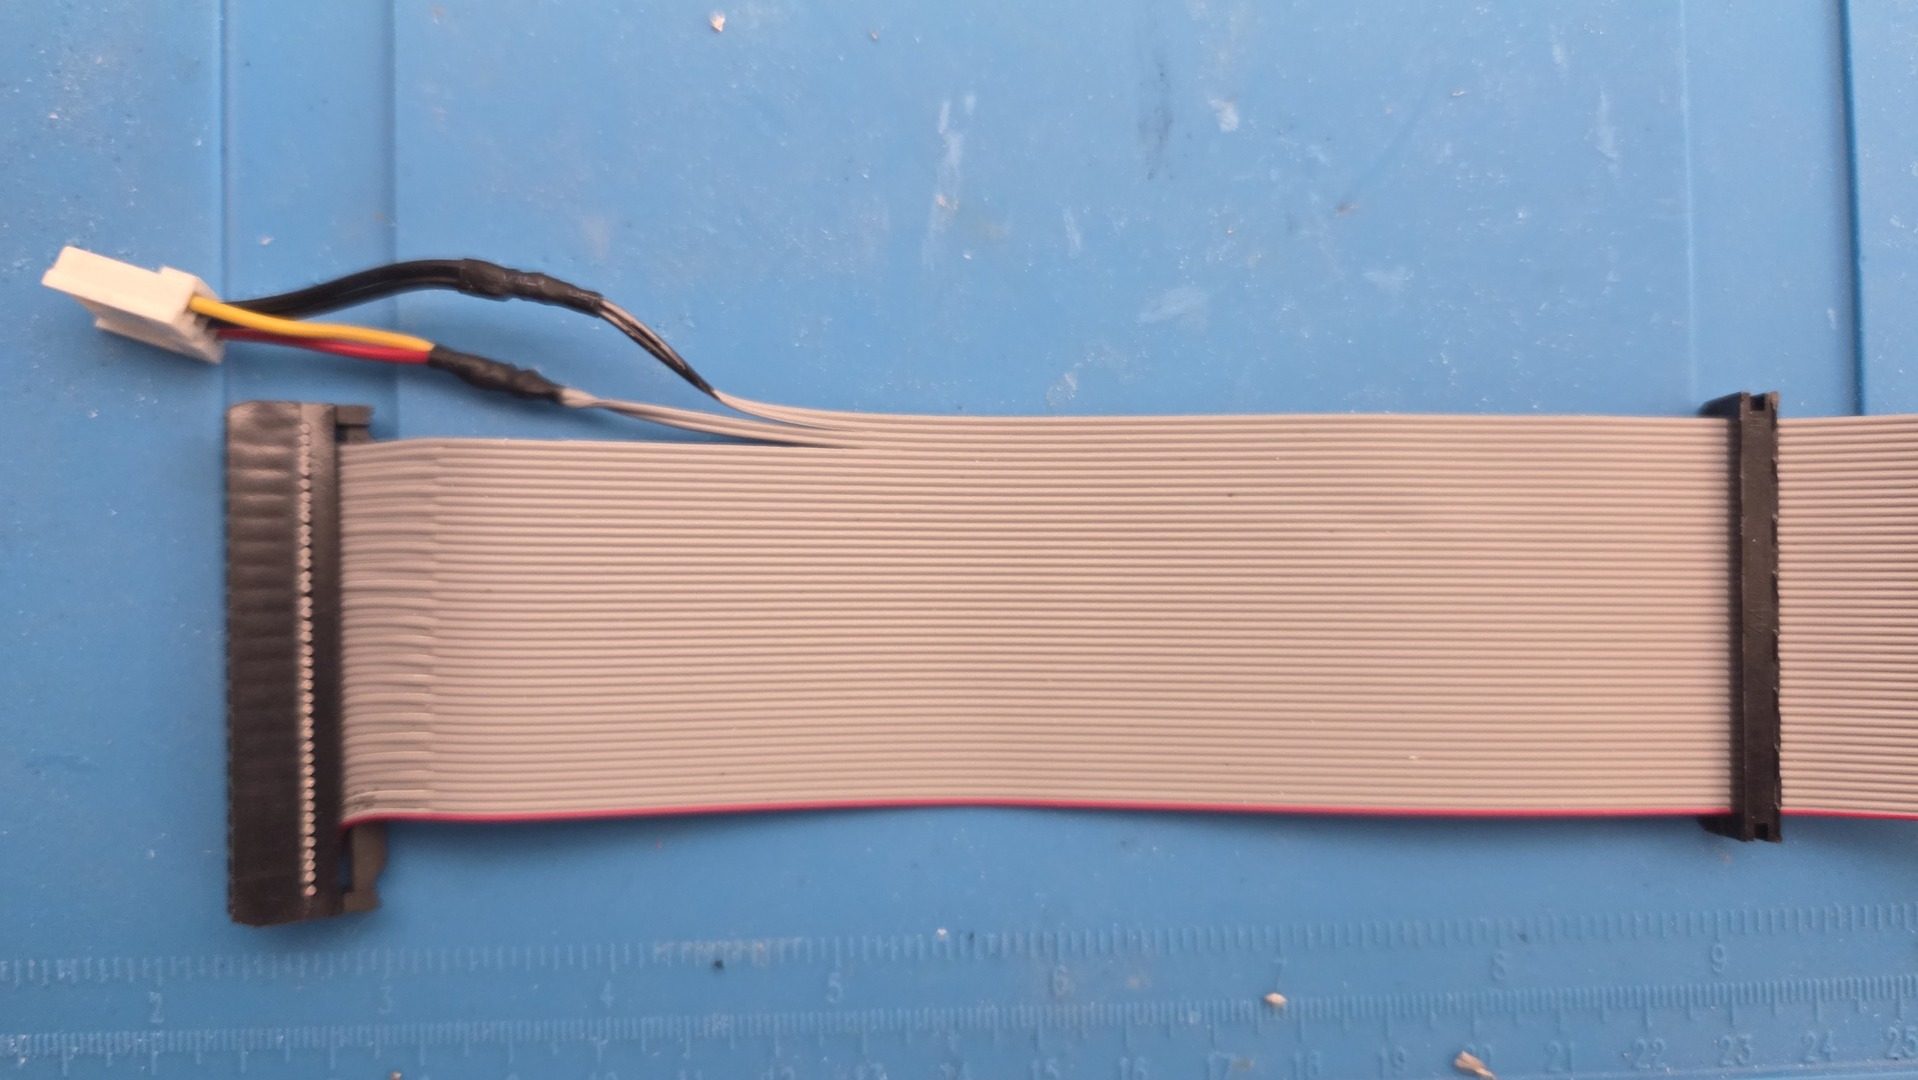
I shortened the ribbon cable to better fit the available space and replaced the power connector with one matching the requirements of the slim drive adapter.
The final cable is approximately 21 cm long, with about 20 cm between the first and last connectors. The intermediate 44-pin IDE connector used by the CompactFlash adapter is located roughly 4 cm from the motherboard IDE connector.
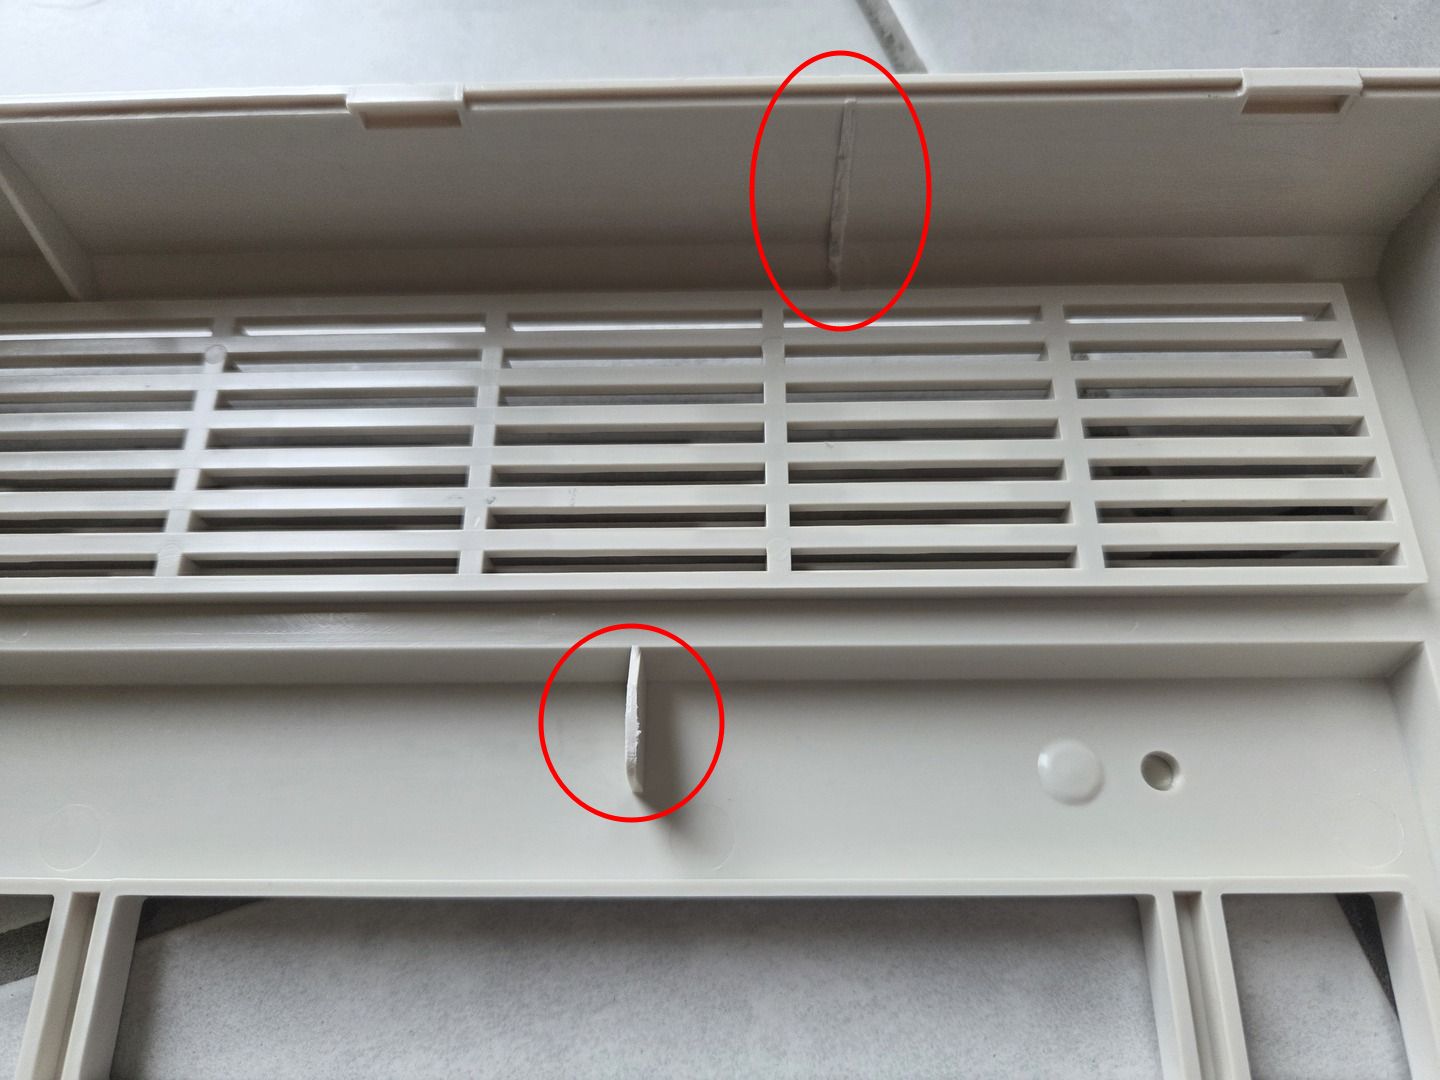
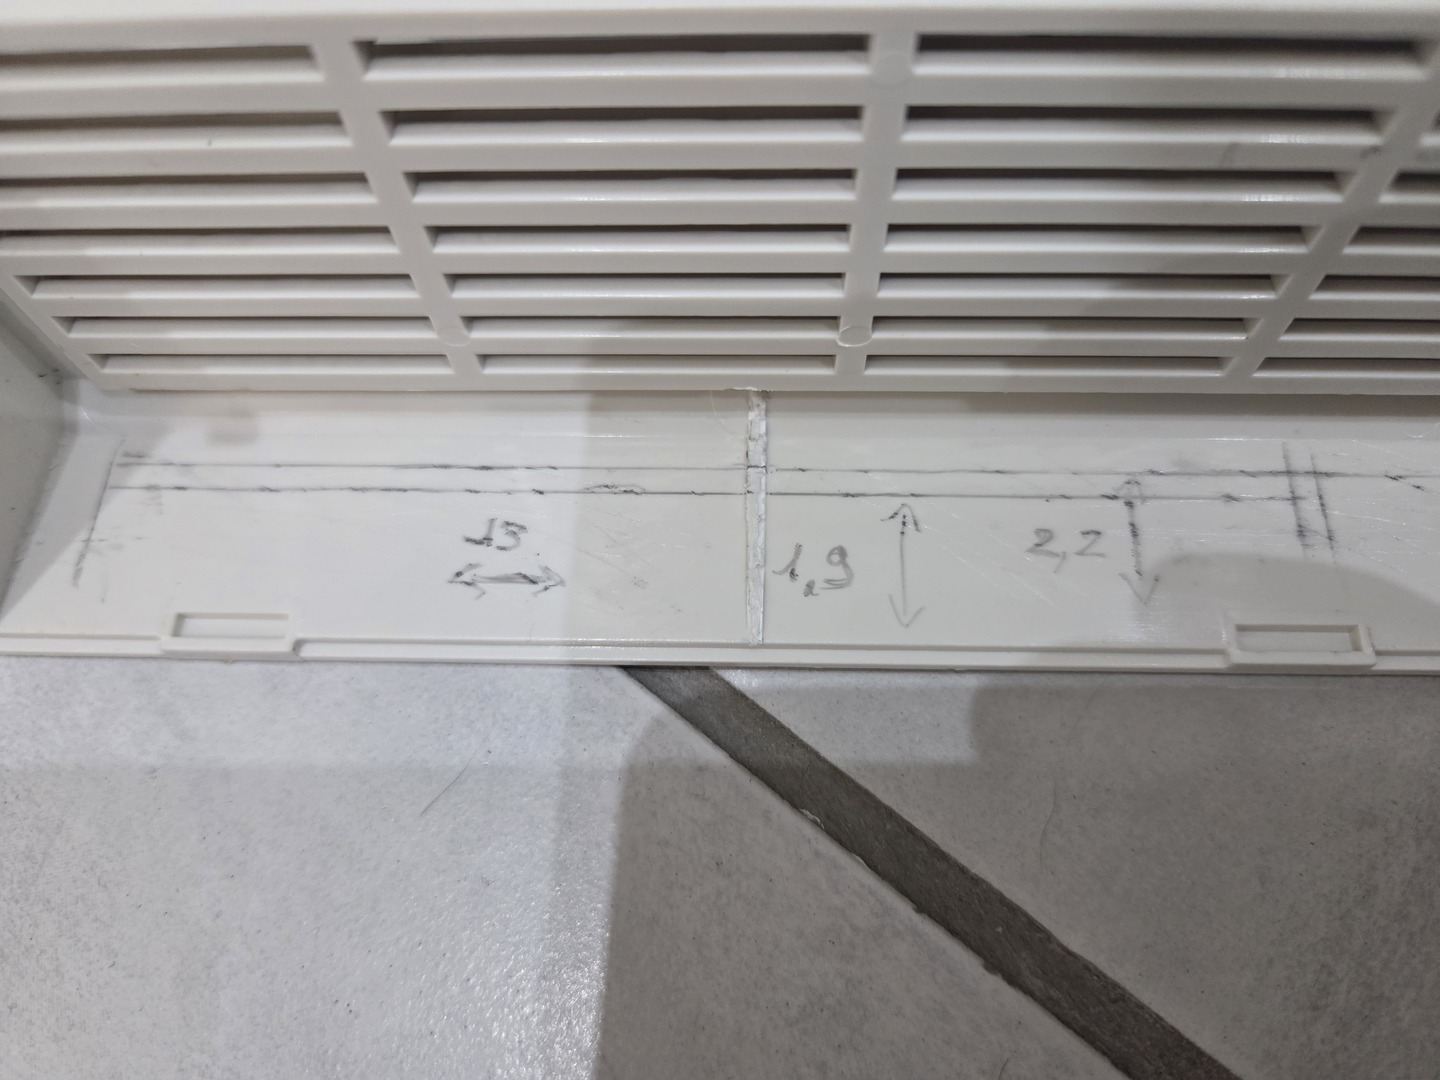
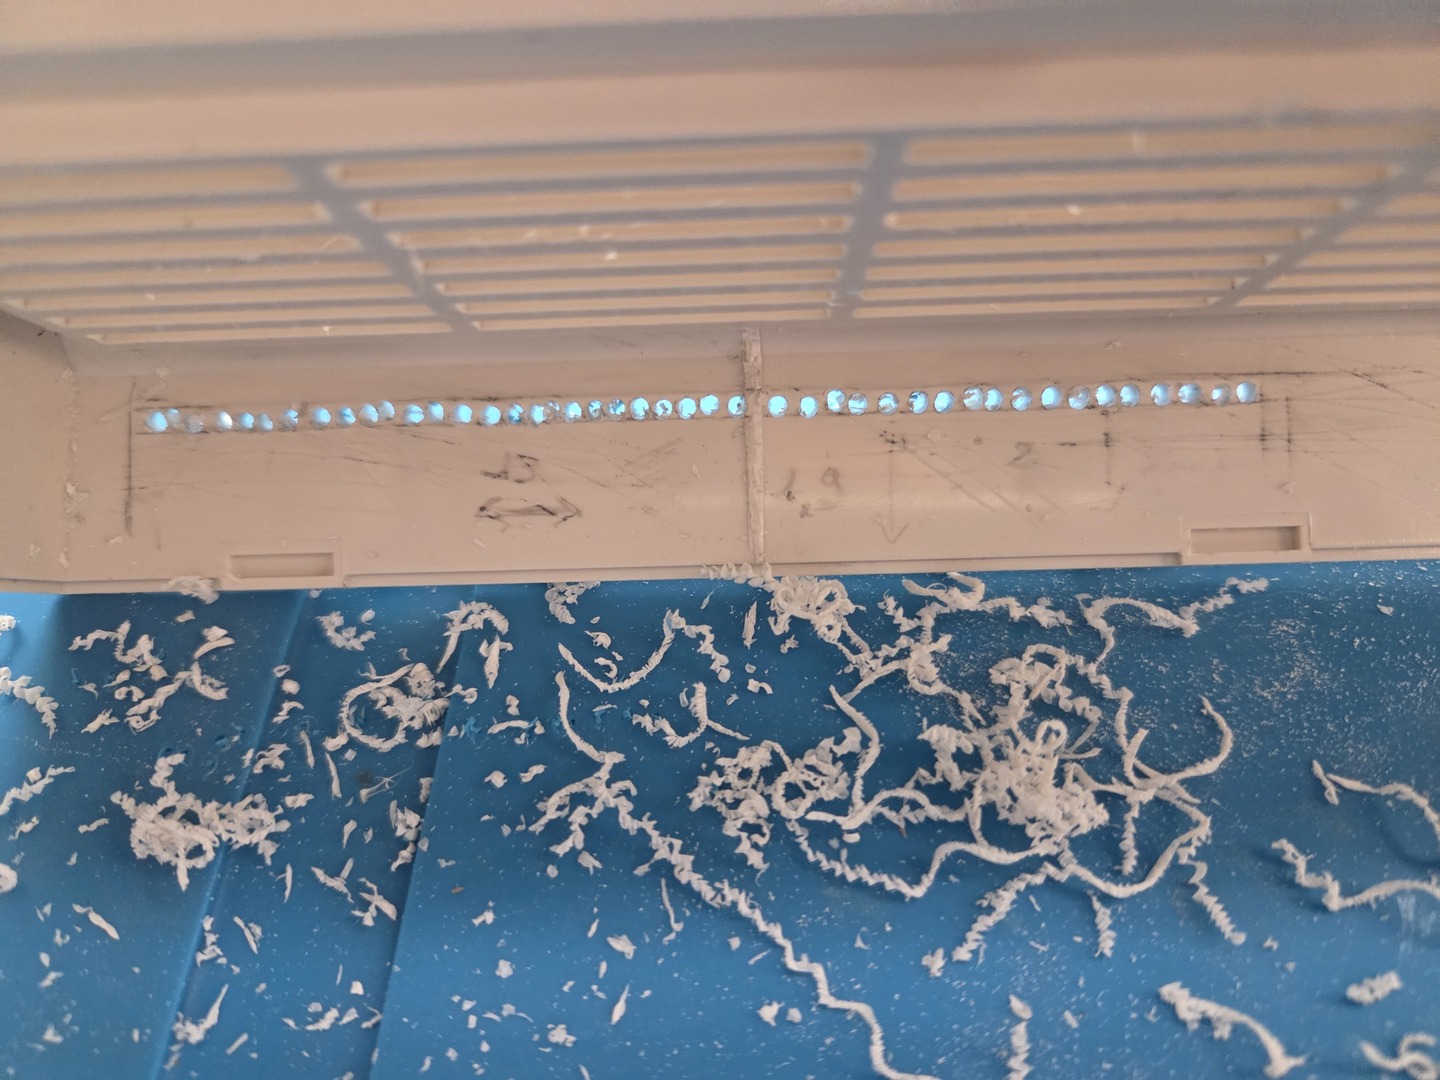
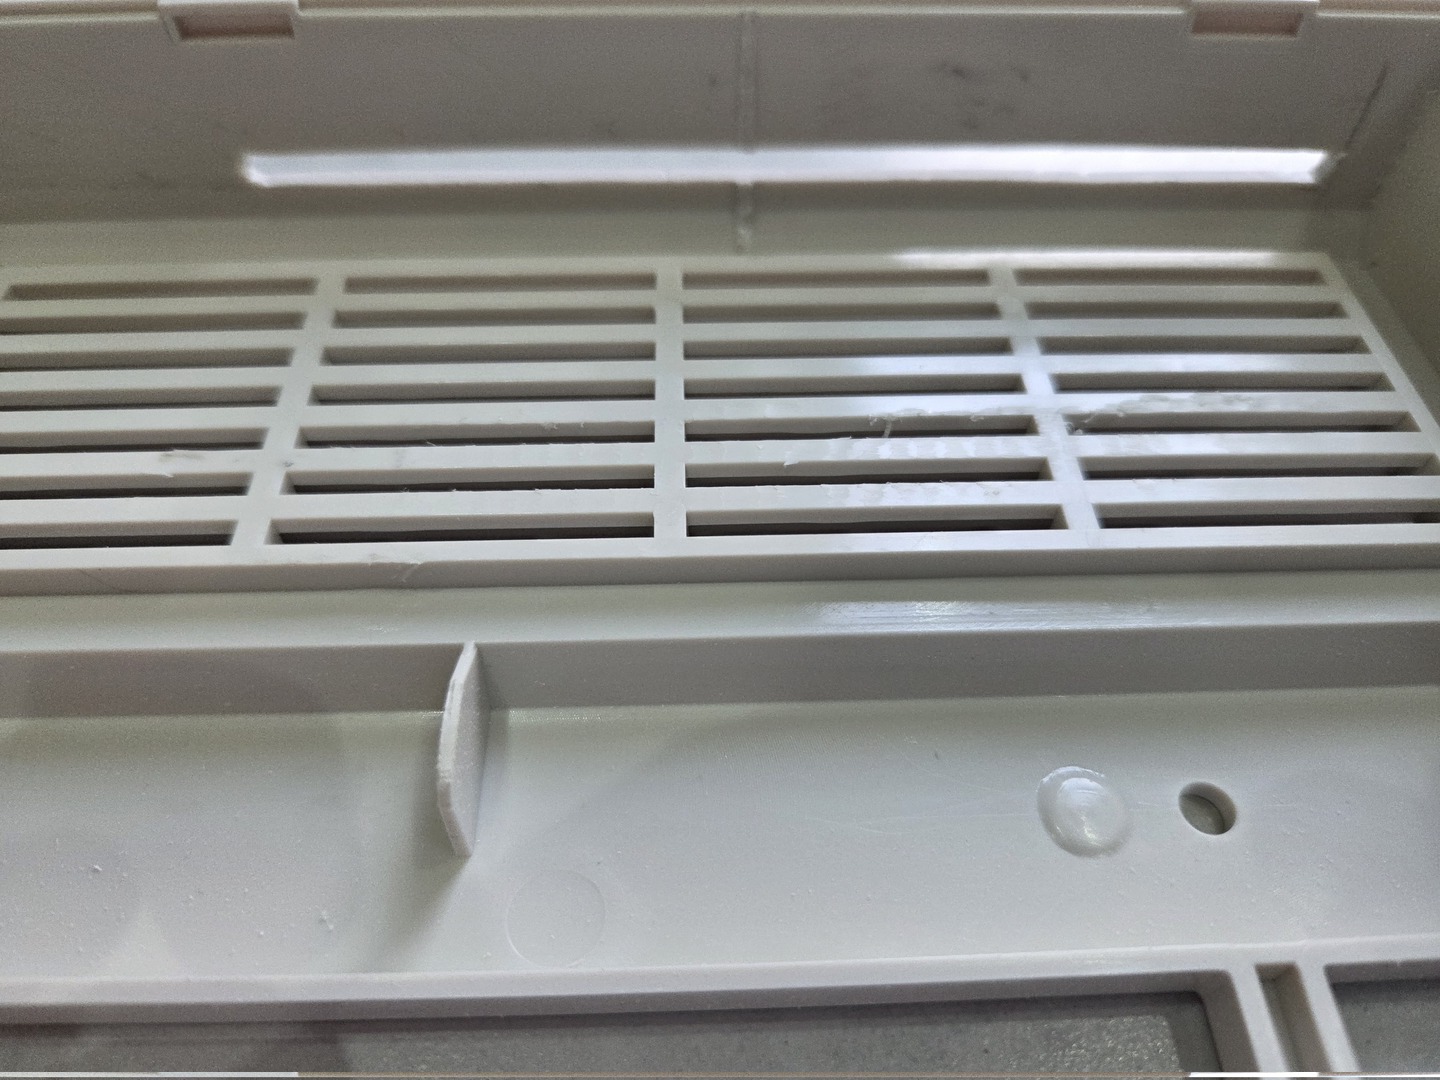
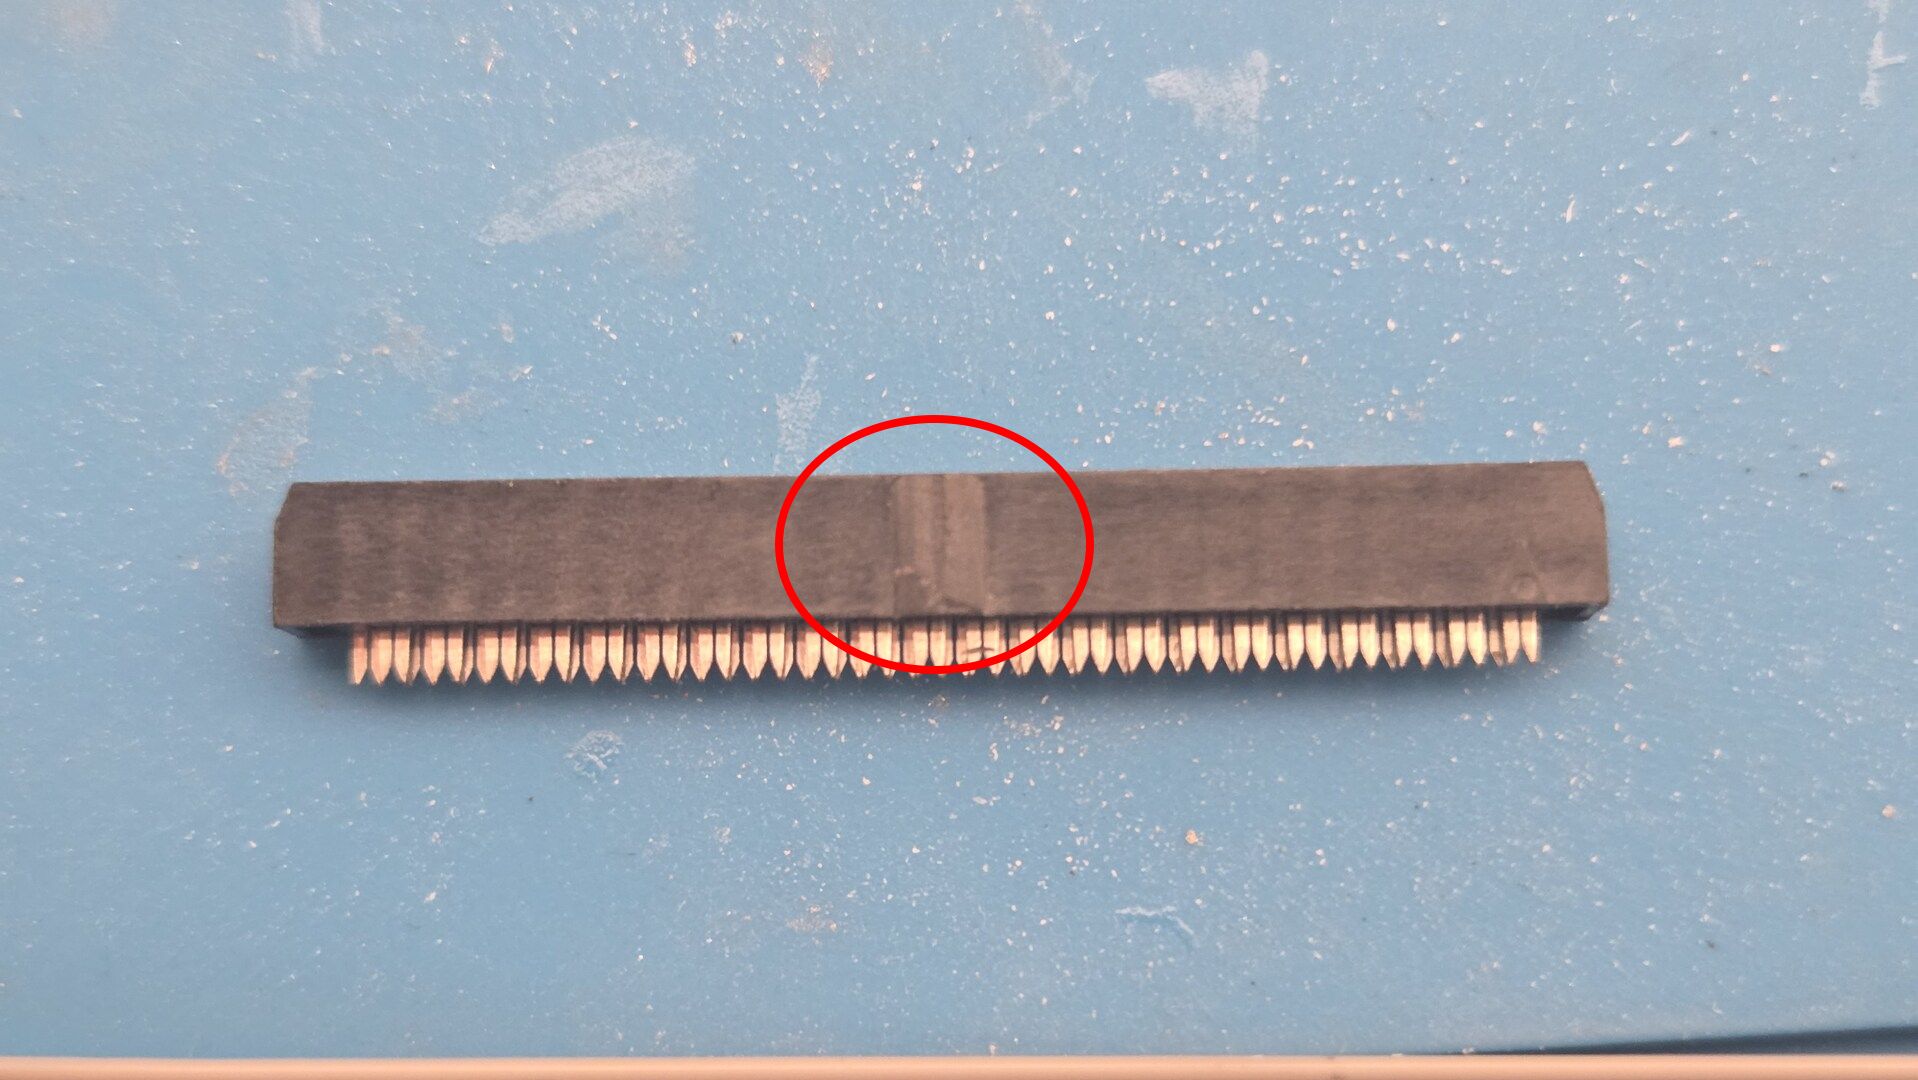 One small modification was also required on the intermediate connector: I had to remove the plastic keying tab because it interfered with the CompactFlash reader housing.
This custom cable greatly simplified the internal layout and helped keep the installation neat.
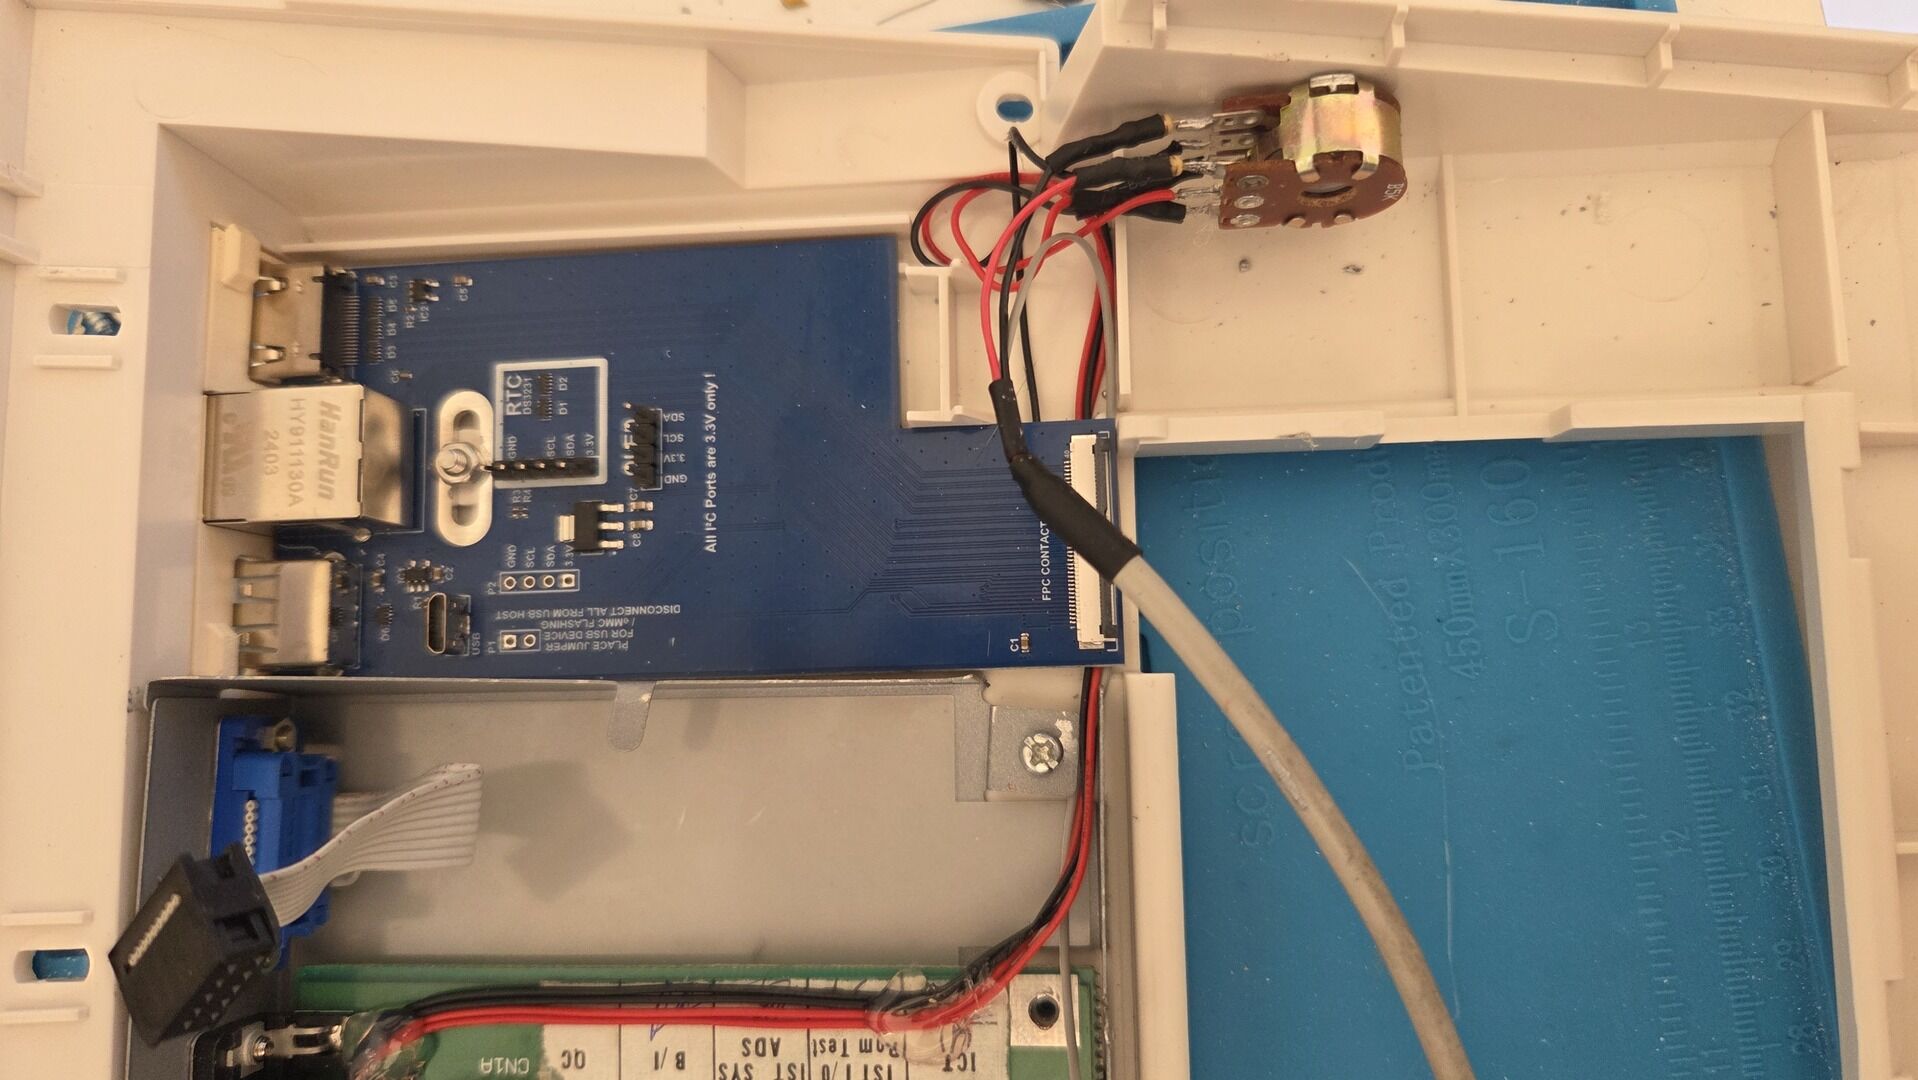
PiStorm integration / leds / external SD reader
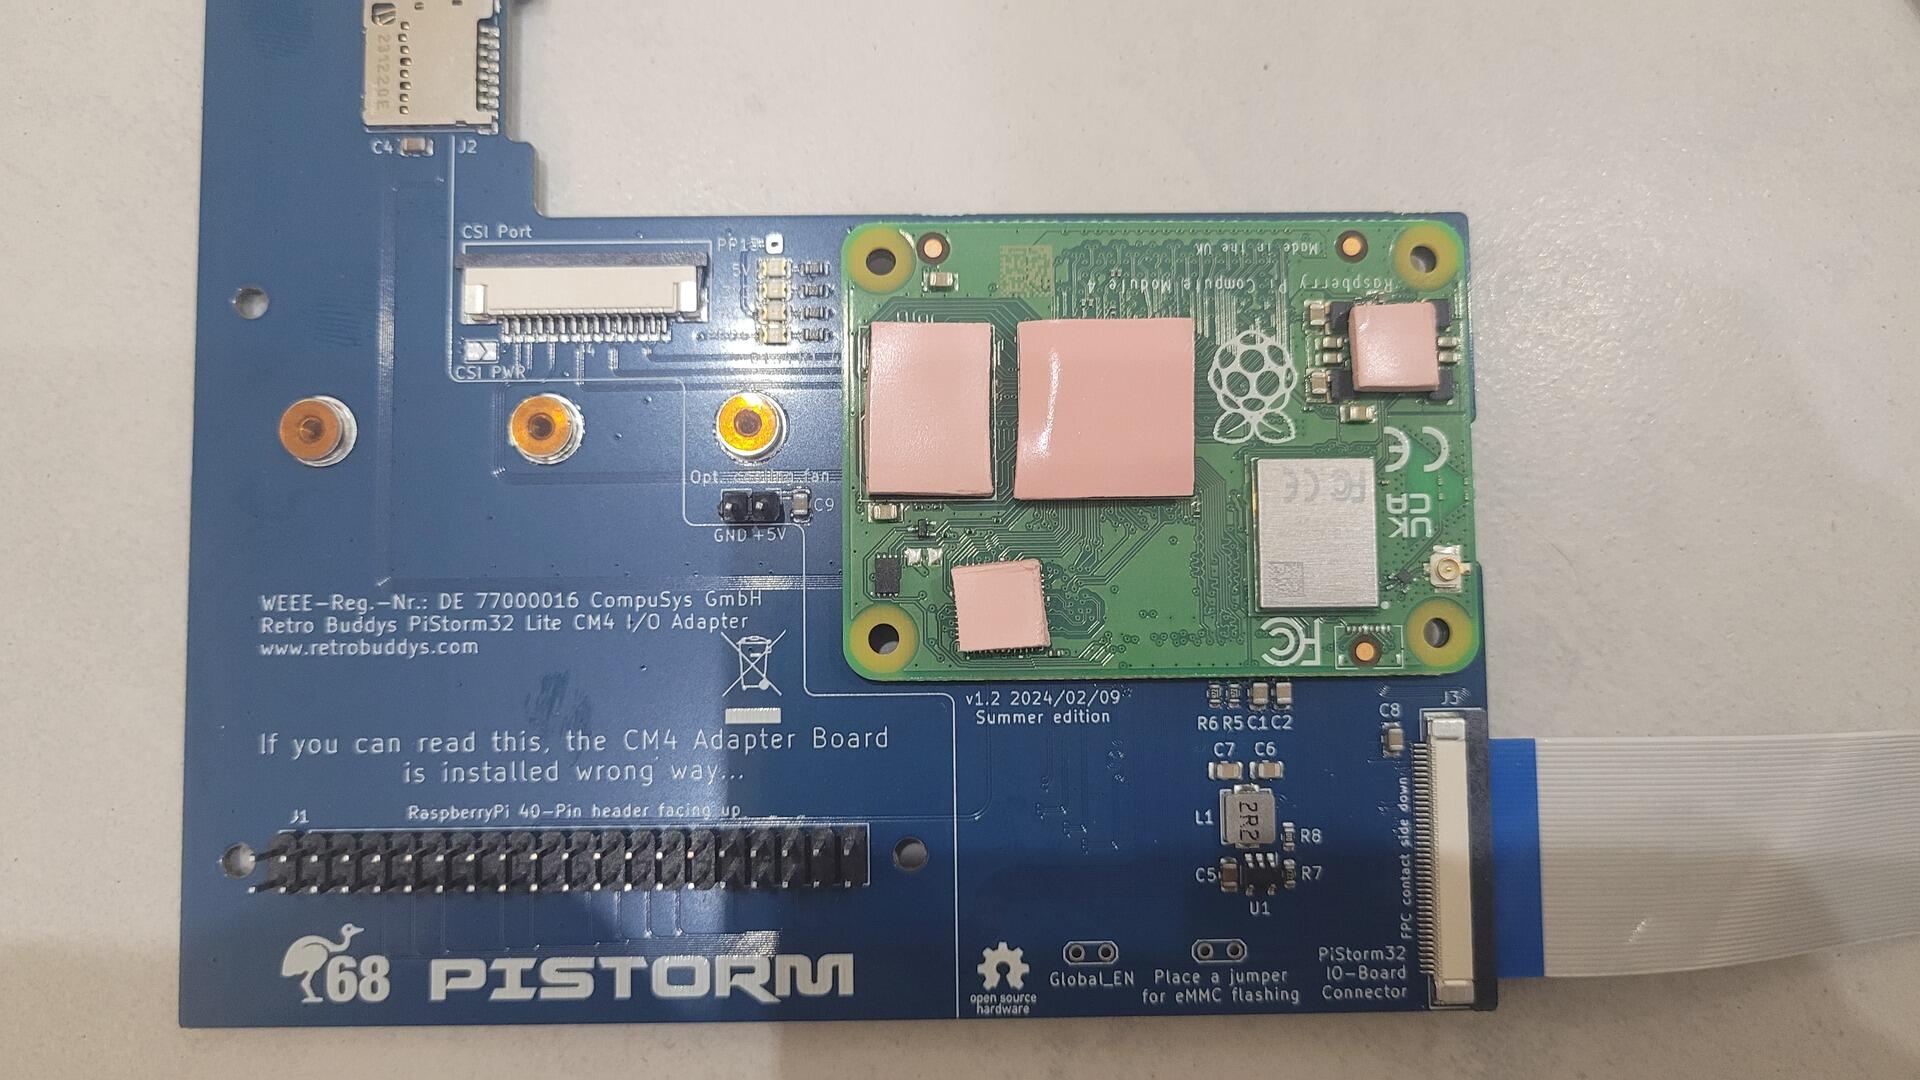
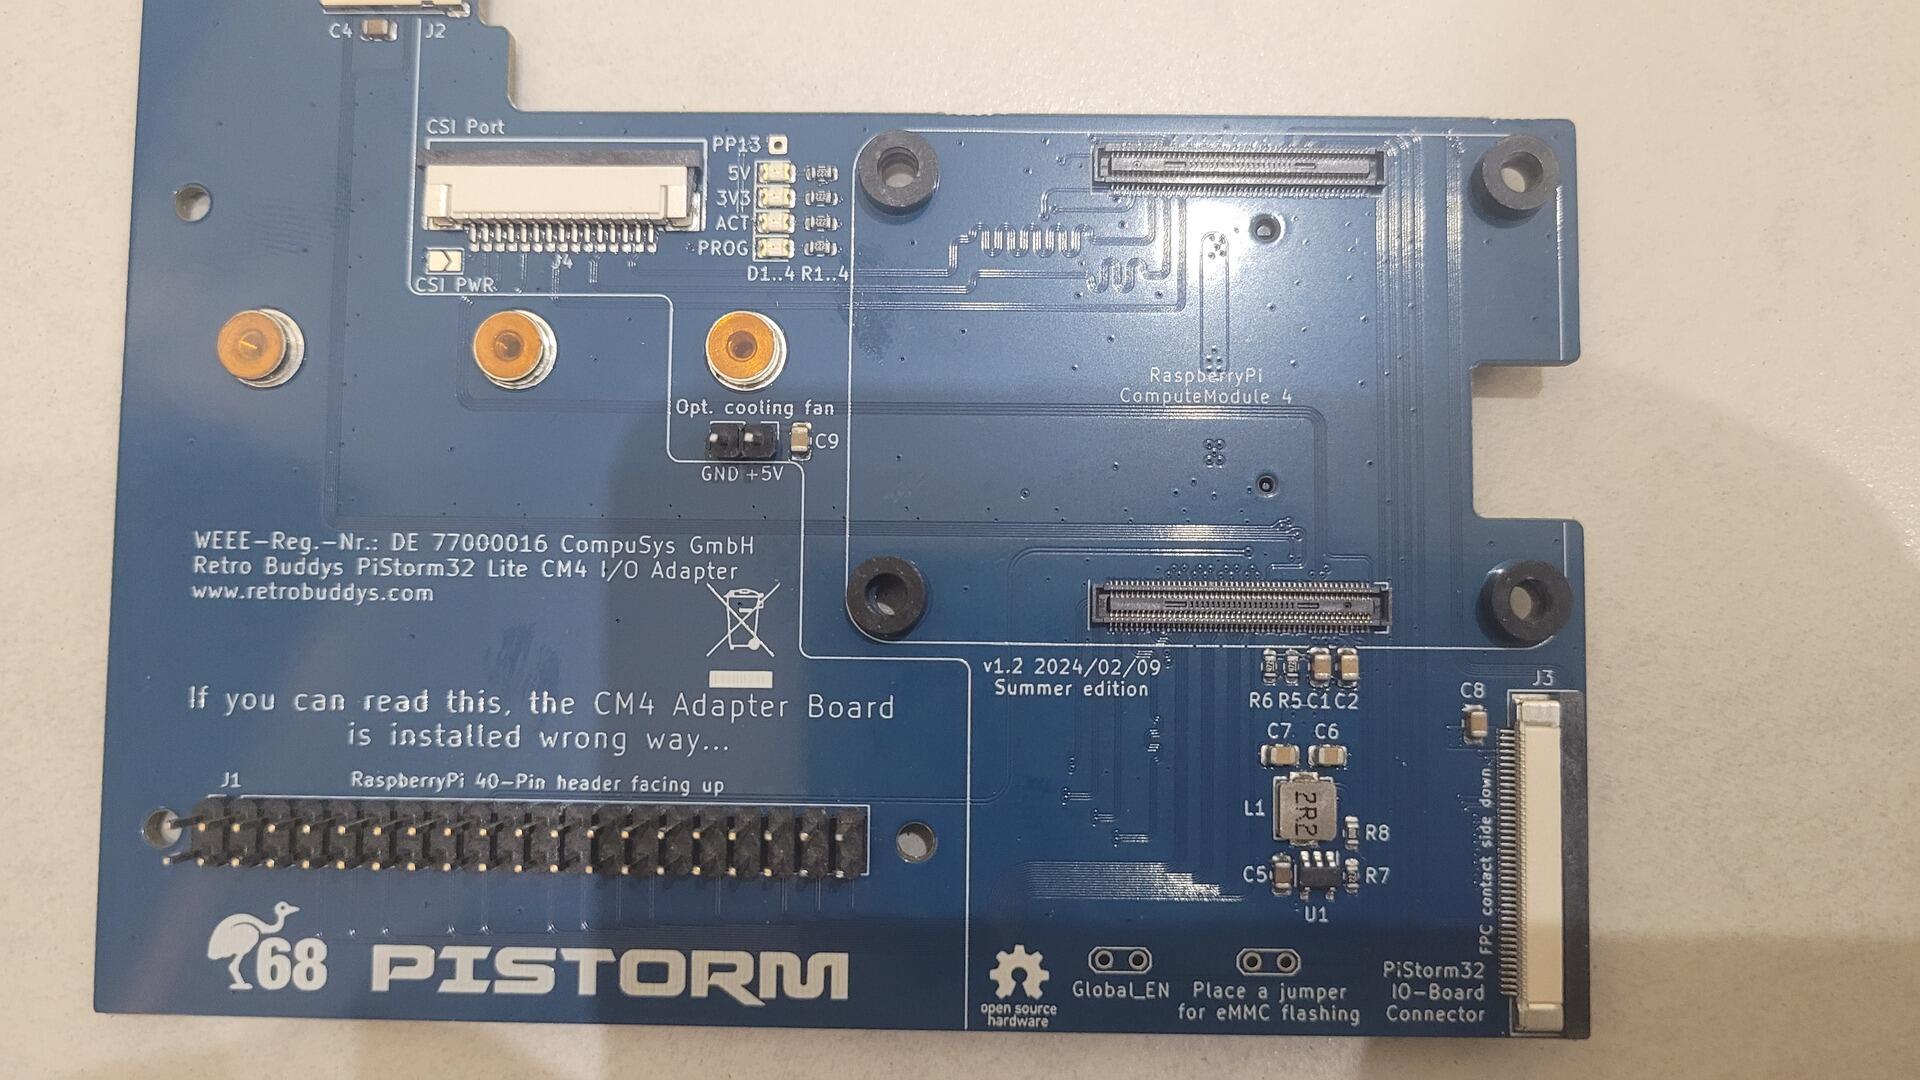
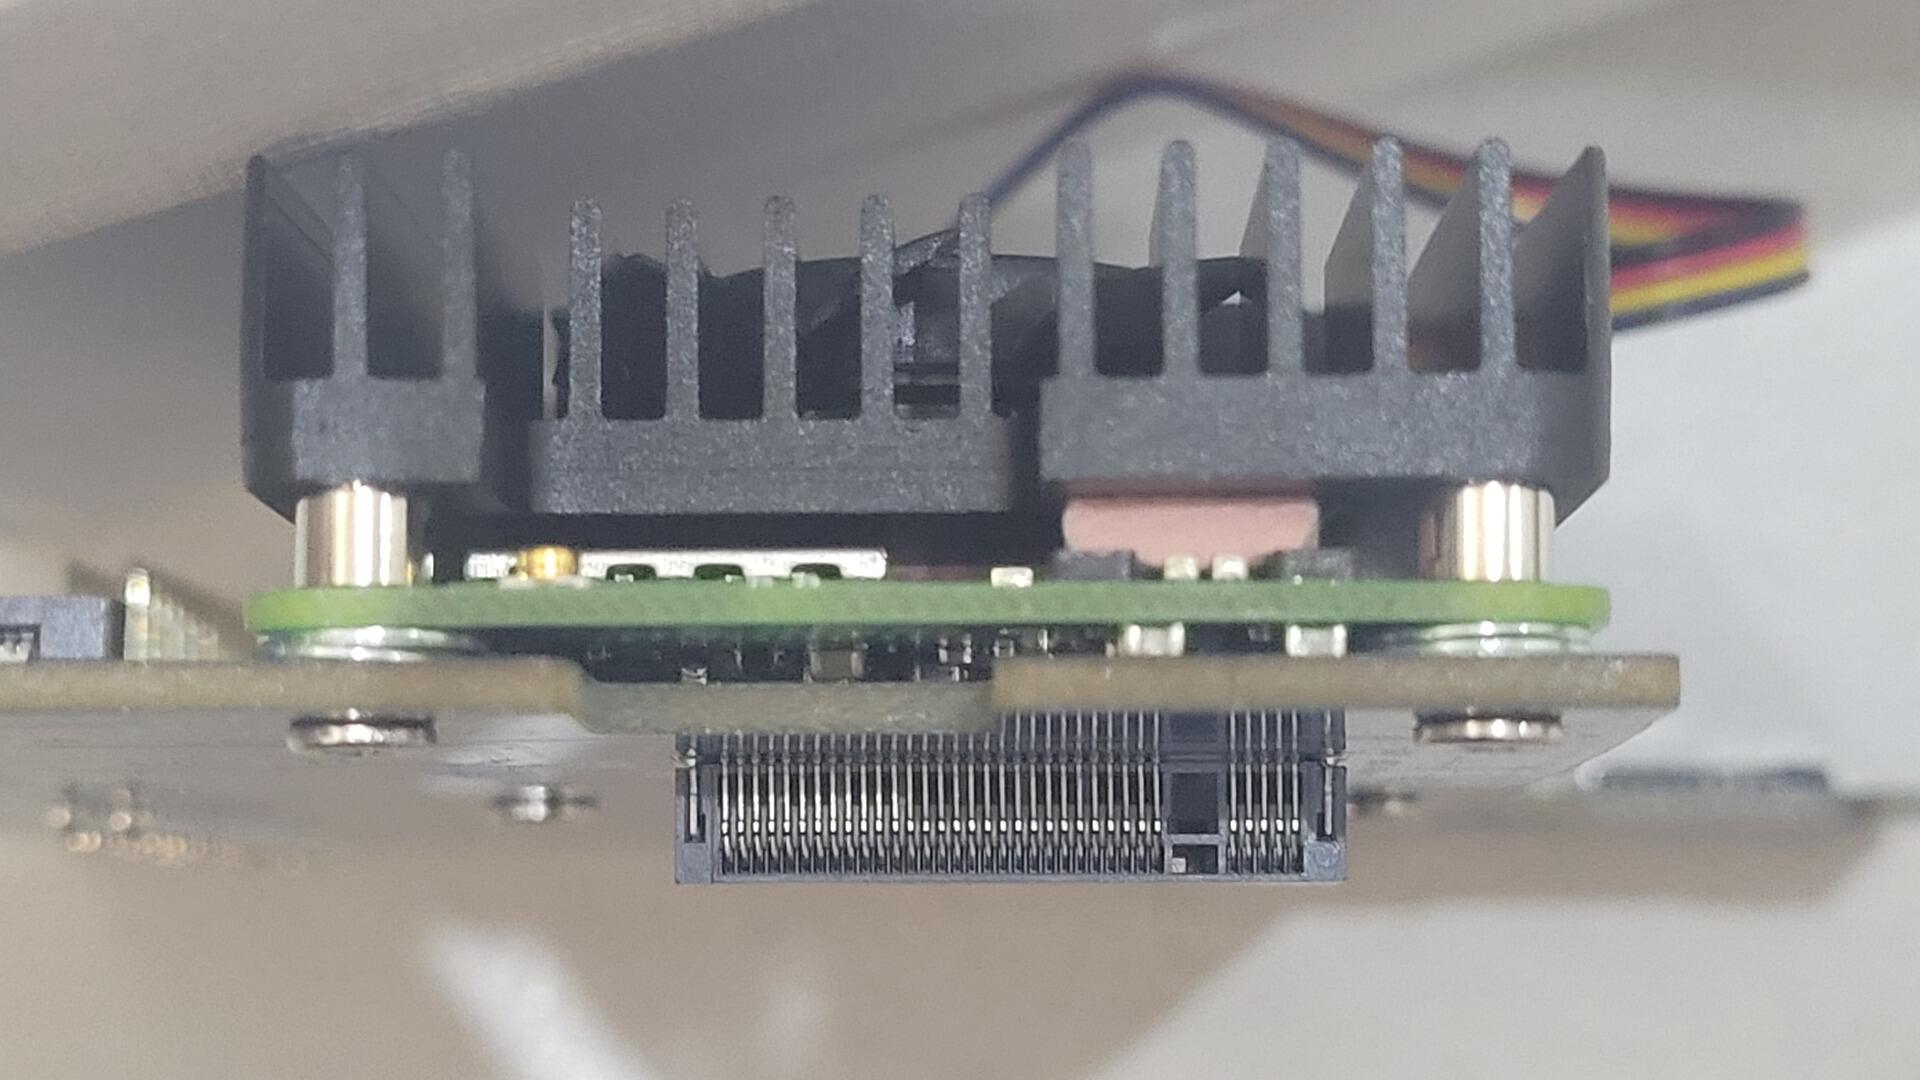
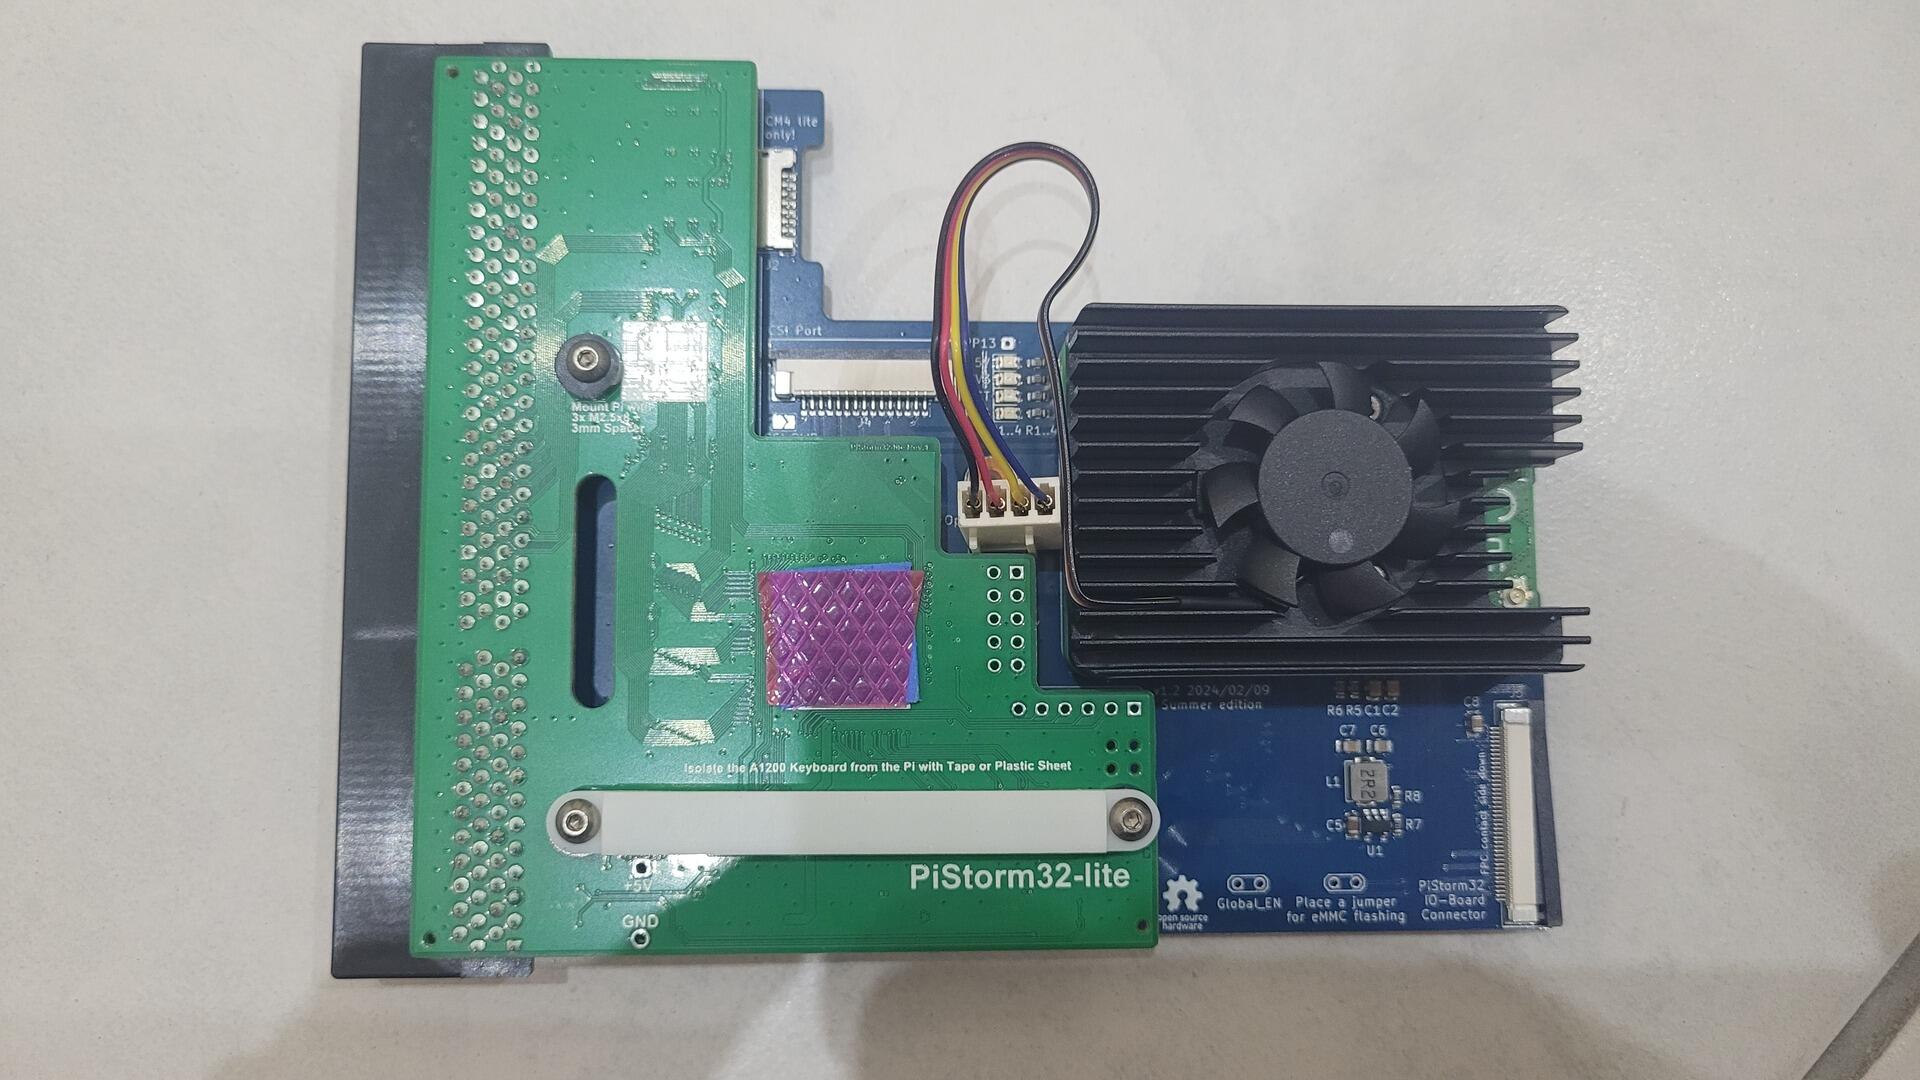
As mentioned earlier, I chose a PiStorm32 Lite fitted with a Raspberry Pi CM4 and a Waveshare heatsink/fan assembly.
The CM4 adapter board includes an activity LED that blinks whenever the MicroSD card is accessed. My initial idea was to connect this signal to the original Amiga 1200 hard drive LED. The adapter board even provides a dedicated pad that can be used together with the IDE connector to drive the Amiga’s front-panel LED.
However, that LED was already being used to indicate activity from both the CompactFlash card and the DVD drive. I wanted to keep those indications while also being able to distinguish PiStorm storage activity.
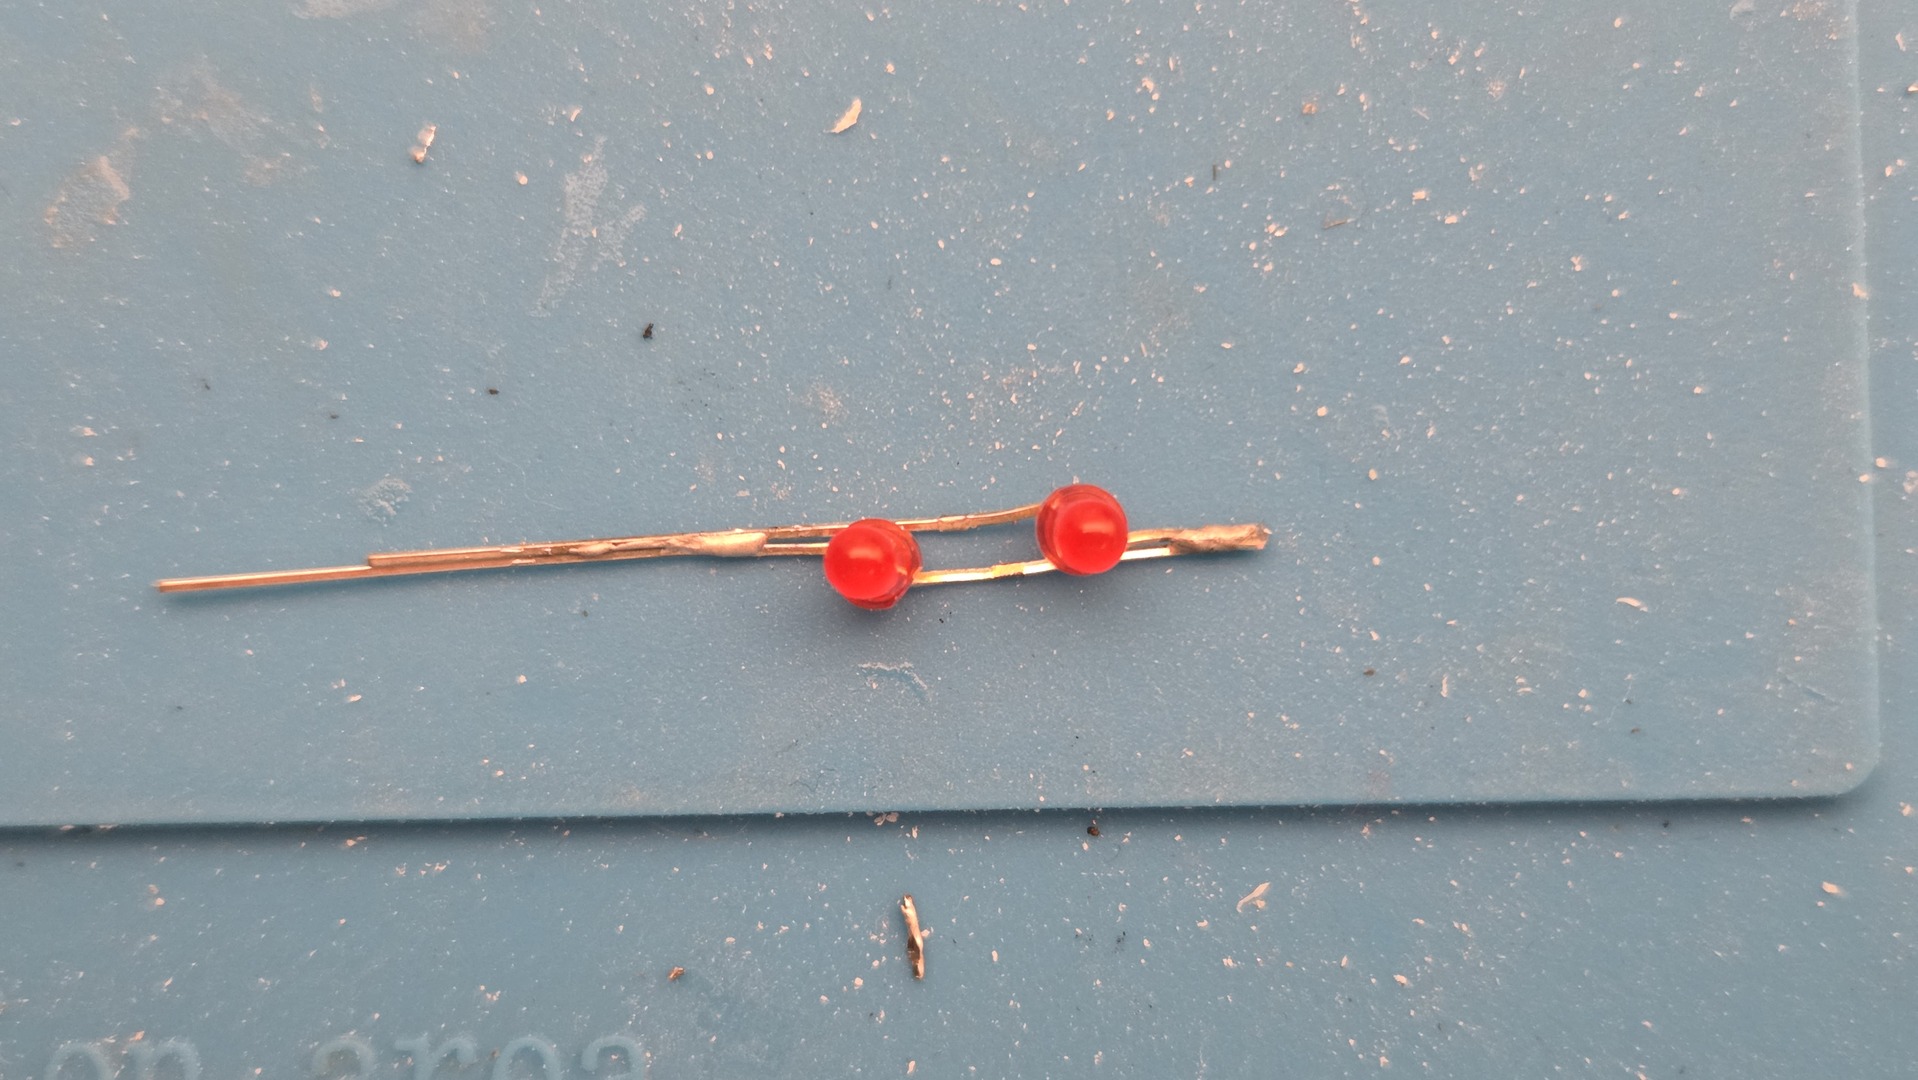
I therefore used the same trick as on my custom Amiga 500 project: two small red LEDs positioned directly against the original Amiga LED light guide.
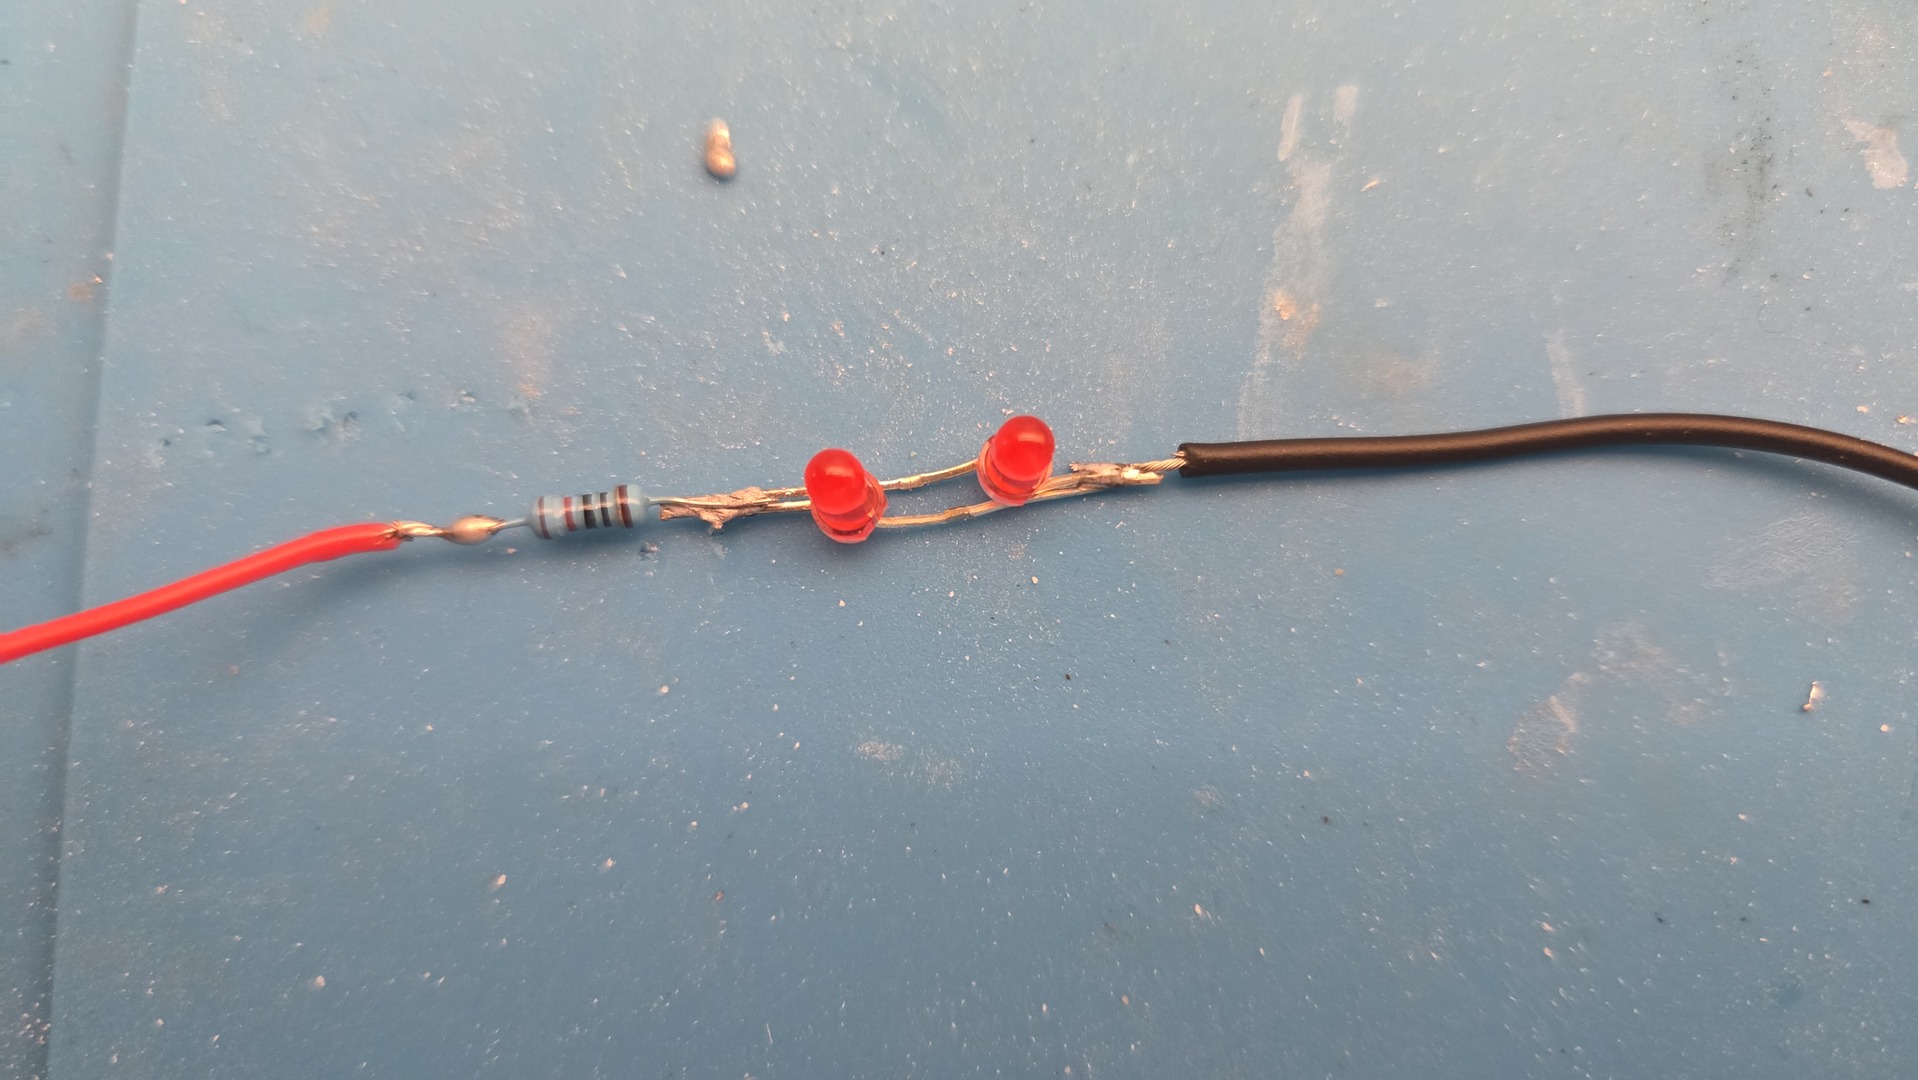
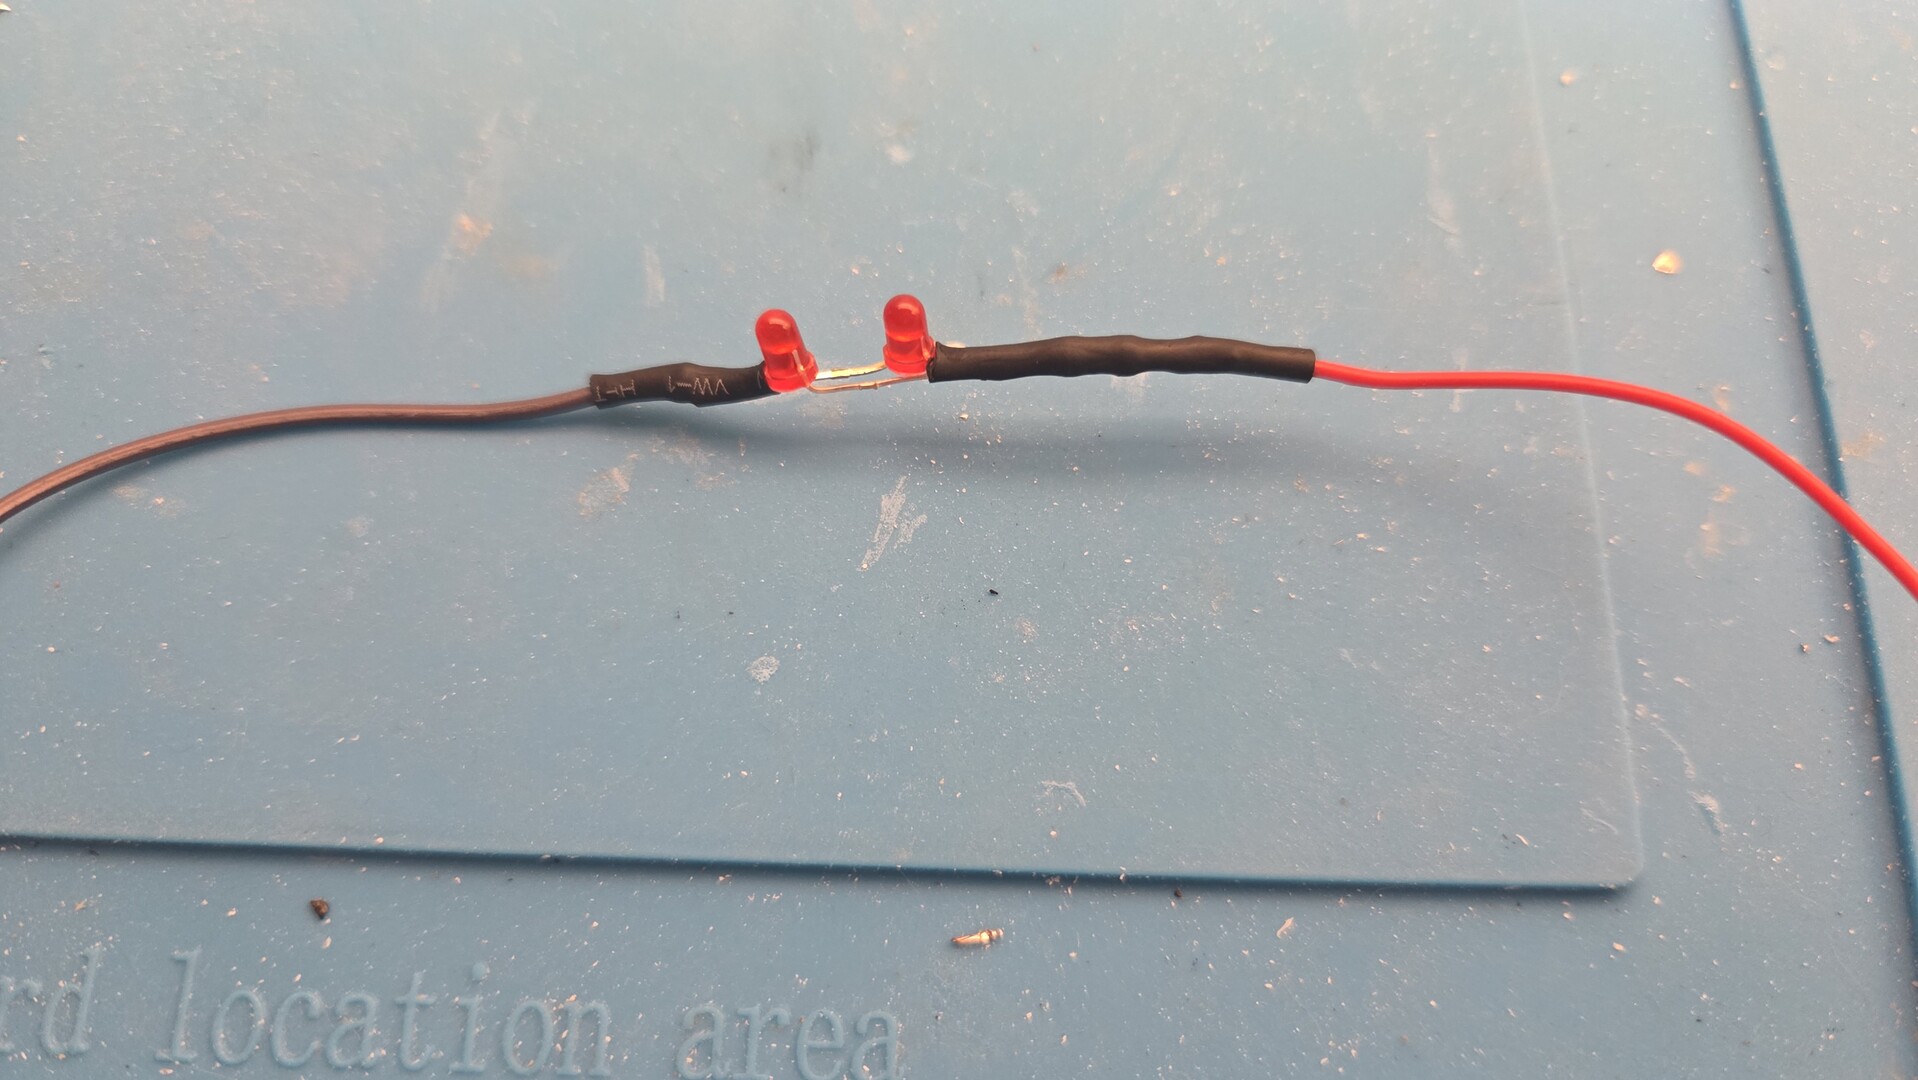
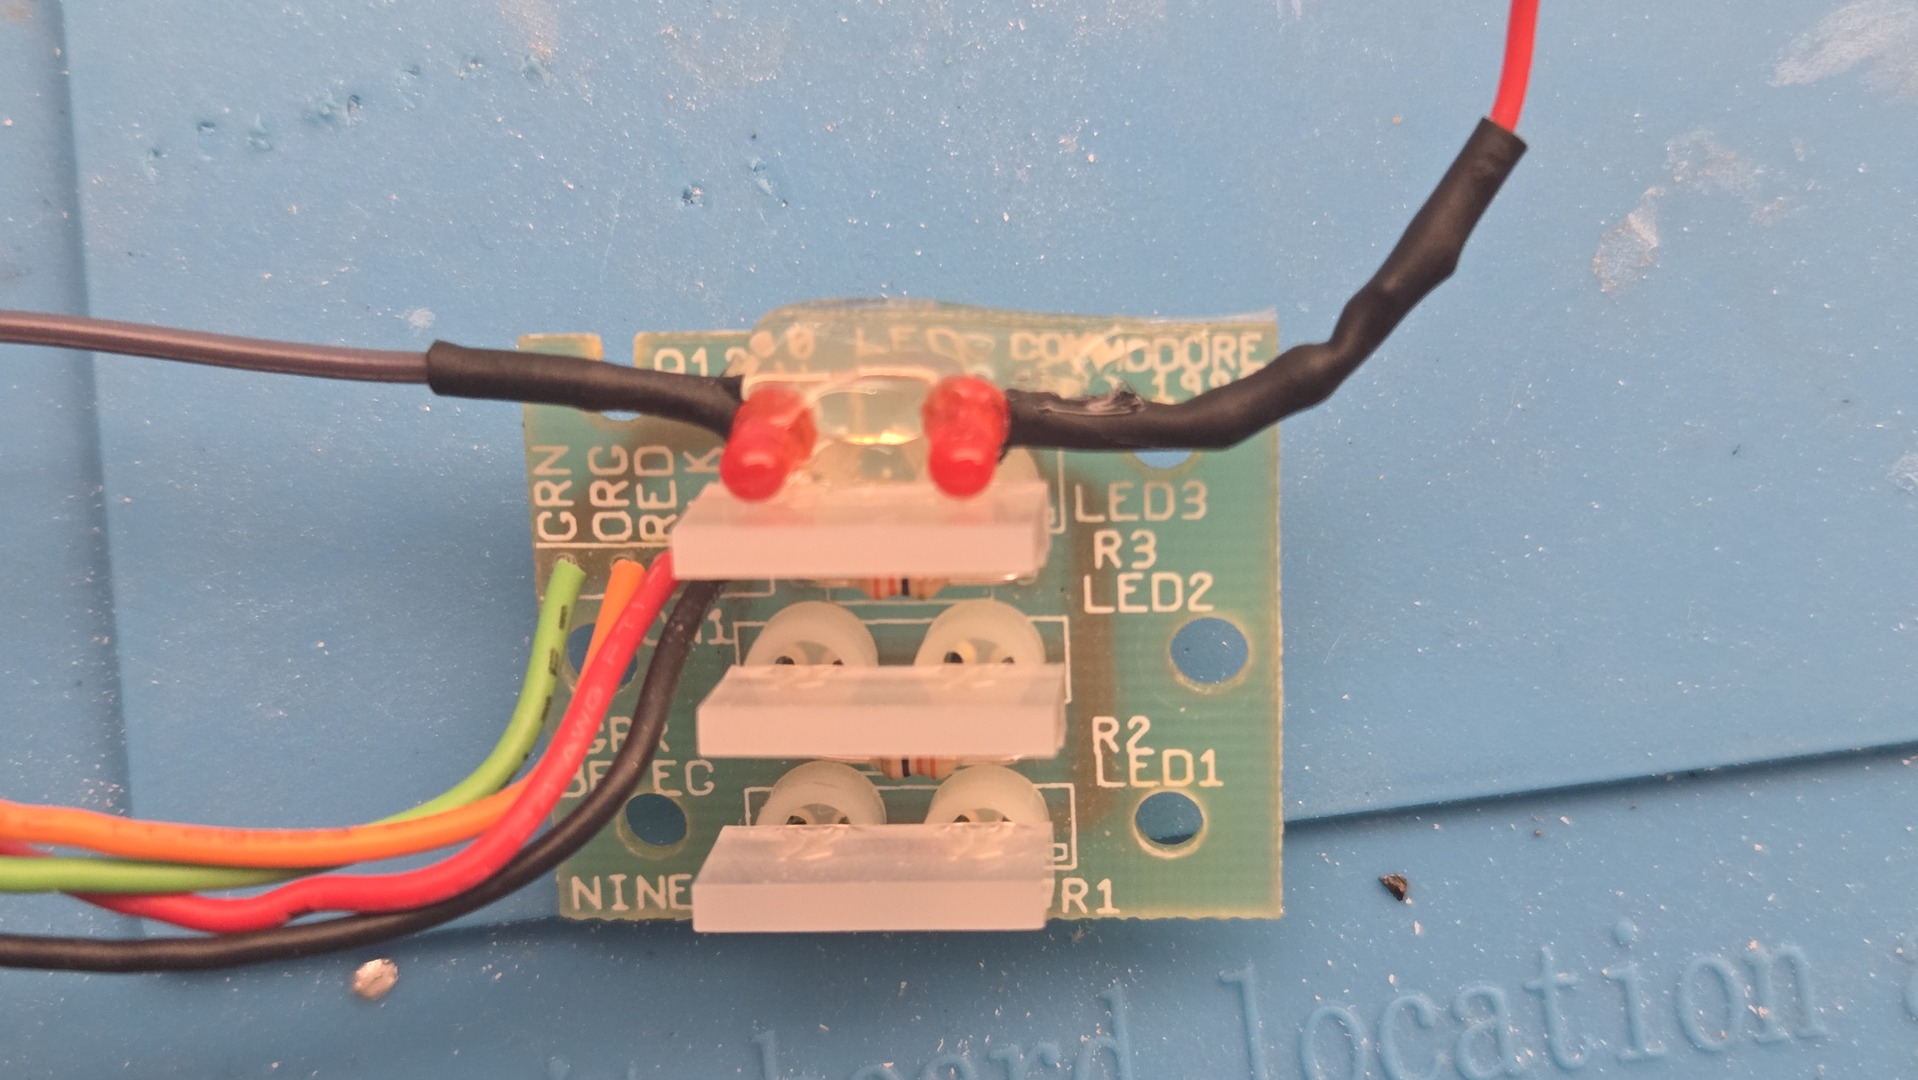
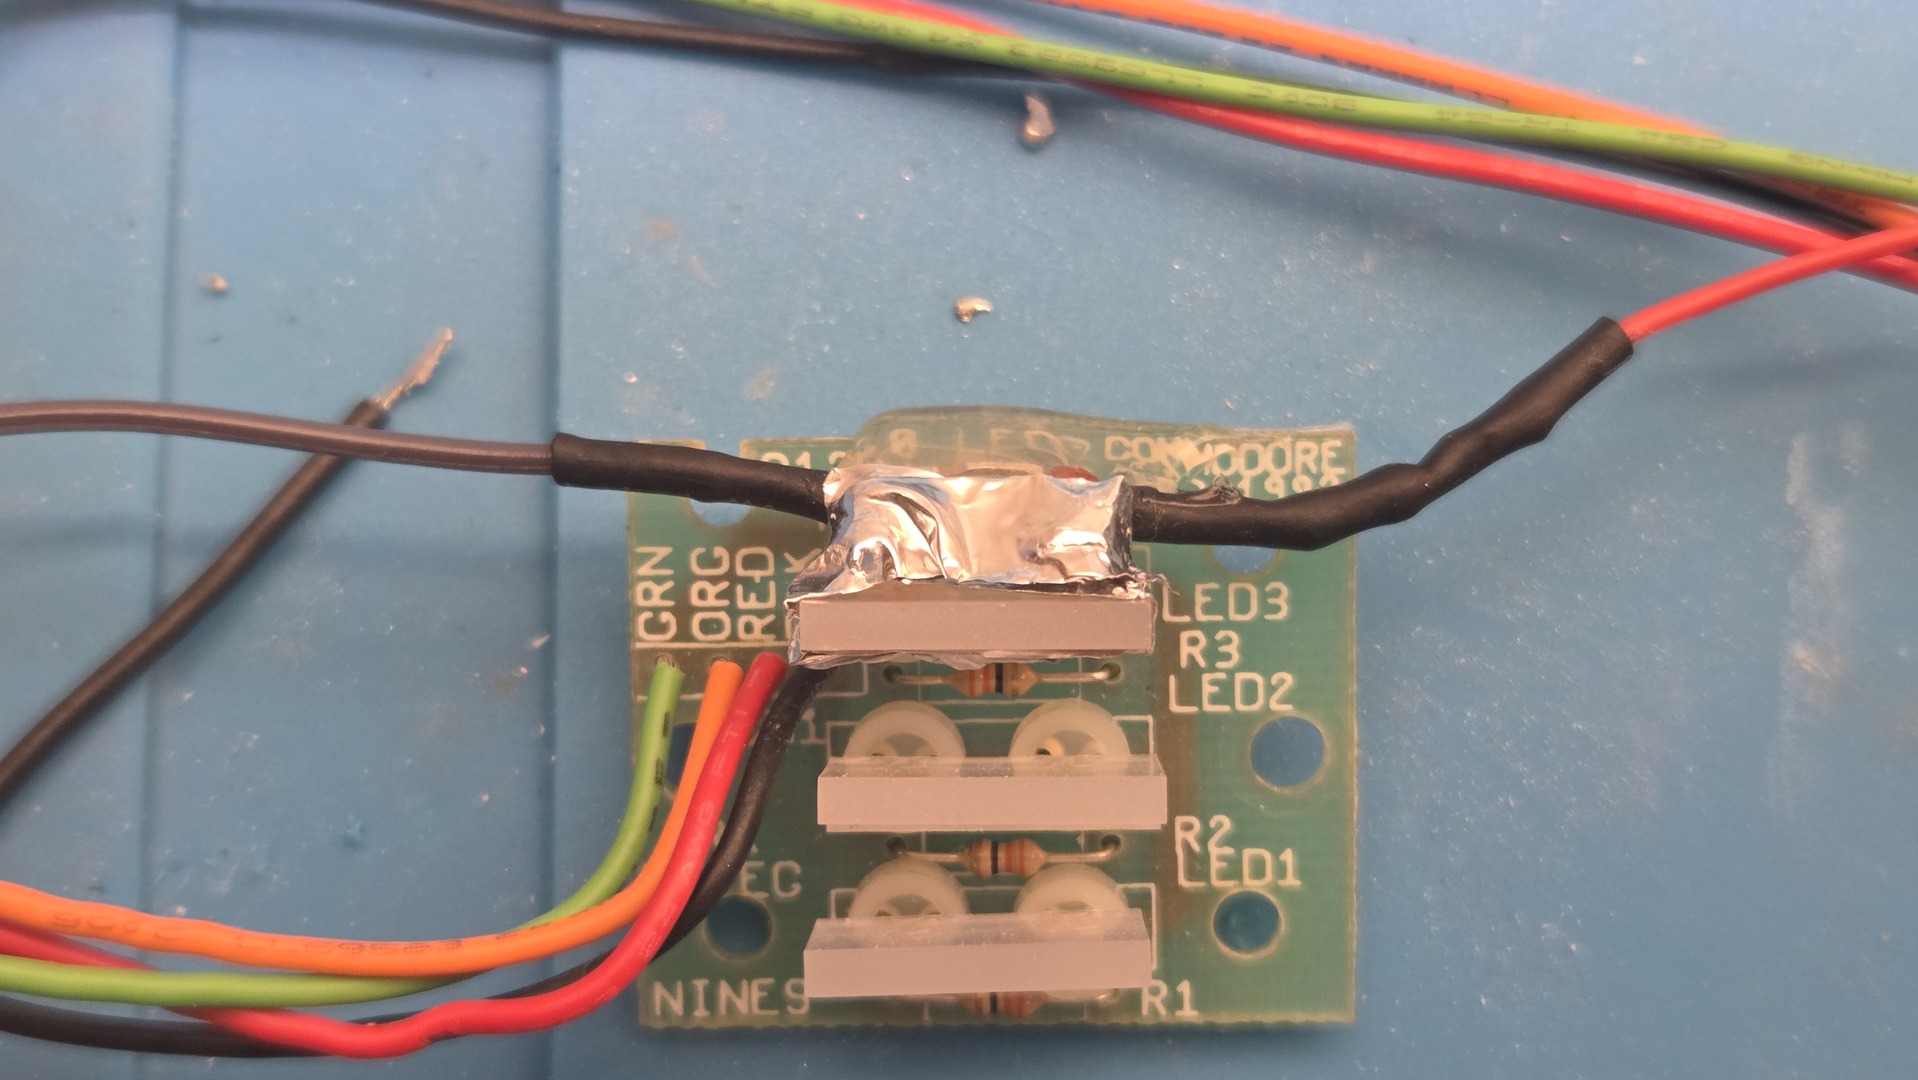

The result is surprisingly effective. The original LED continues to show IDE activity, while the additional LEDs indicate MicroSD card access from the PiStorm.
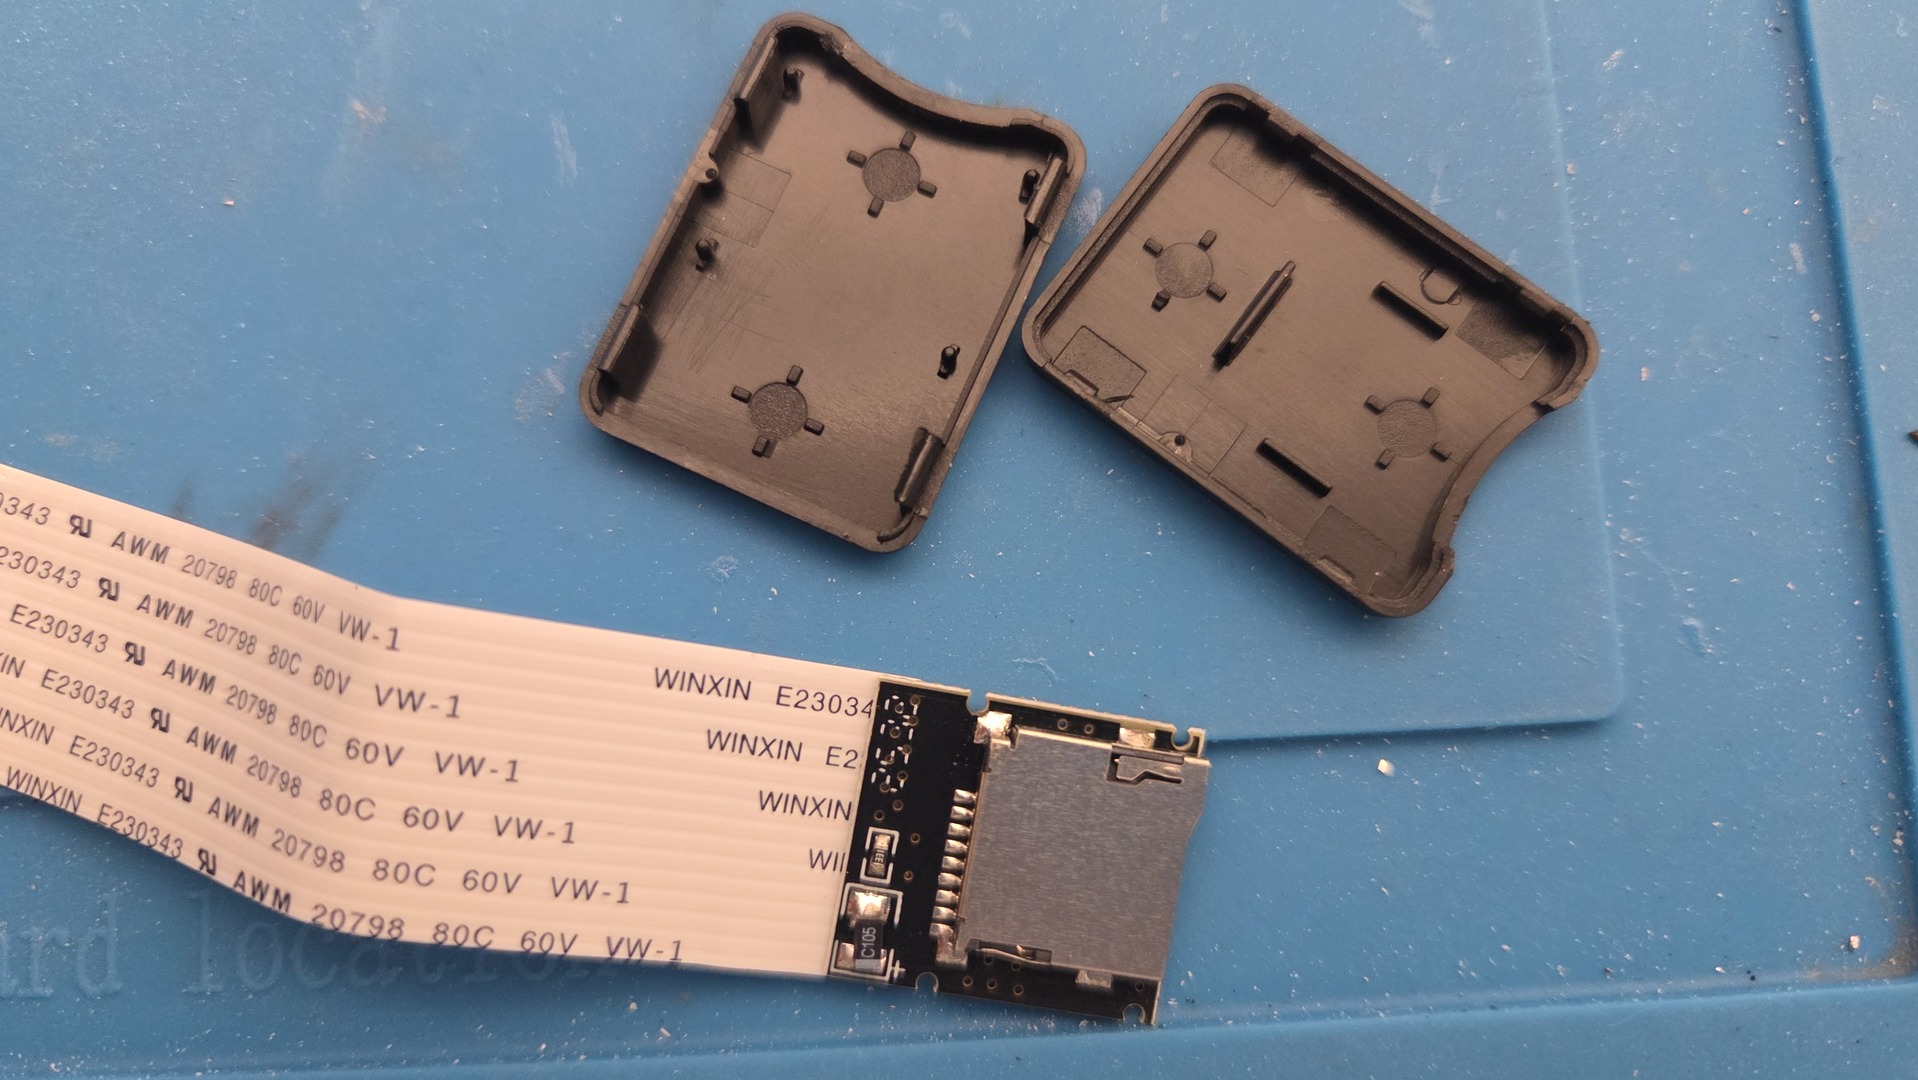
Another inconvenience of the CM4 adapter is that the MicroSD slot becomes inaccessible once everything is assembled inside the Amiga. Since a large part of the fun with the PiStorm is experimenting with different operating systems, Emu68 versions and configurations, I wanted quick access to the card without having to open the machine.
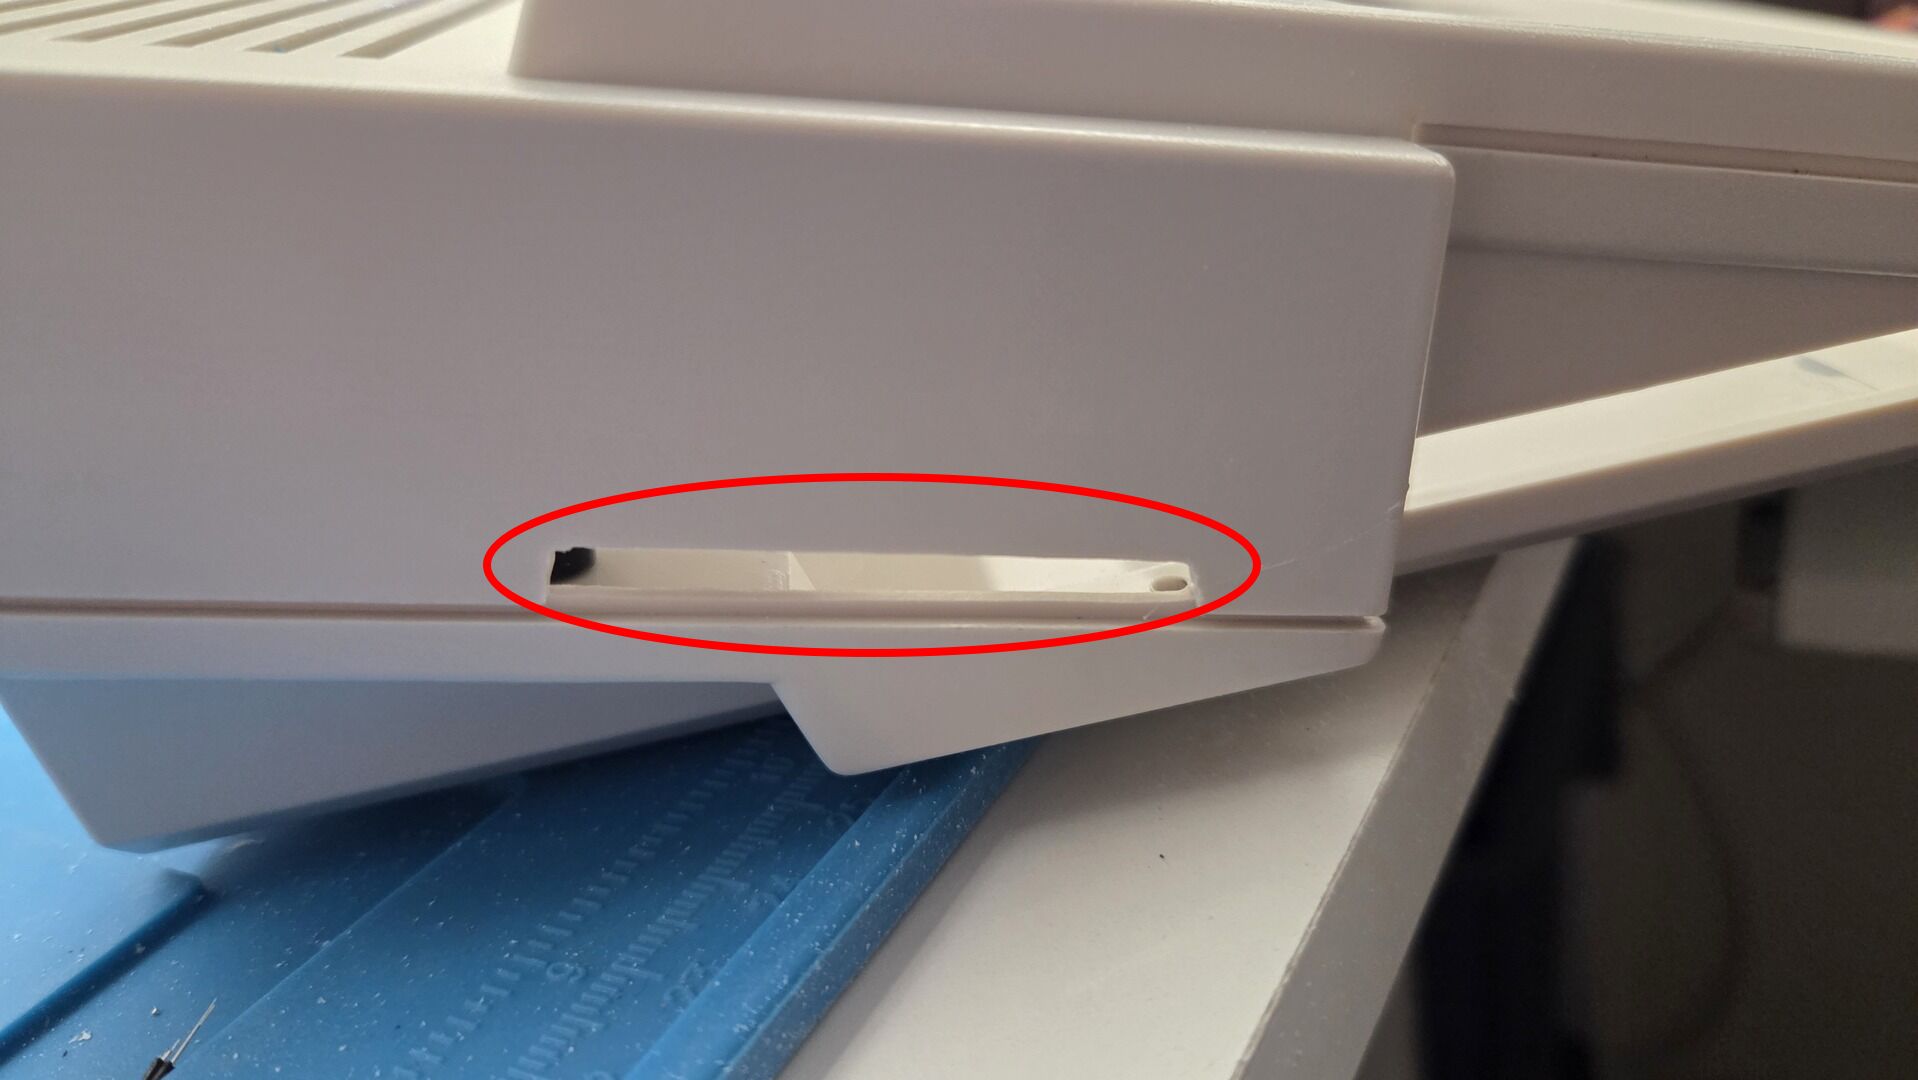
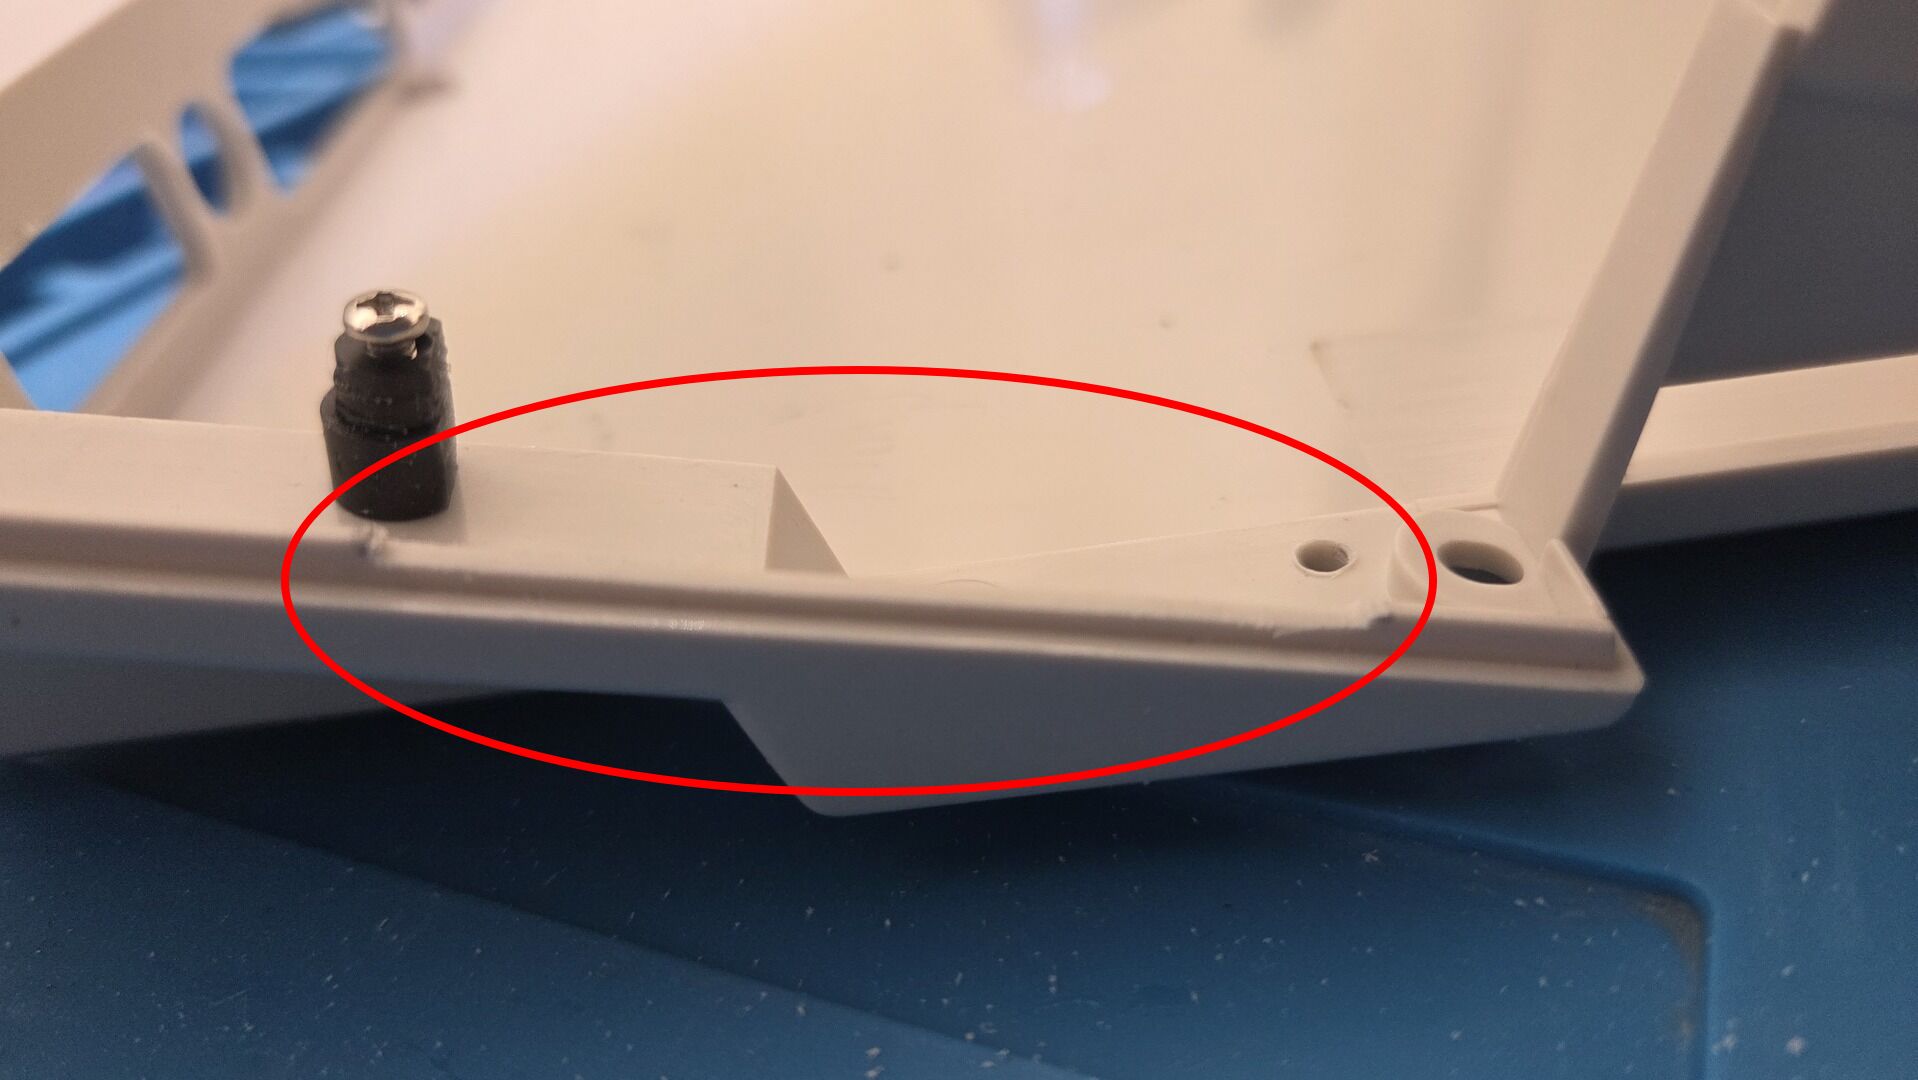
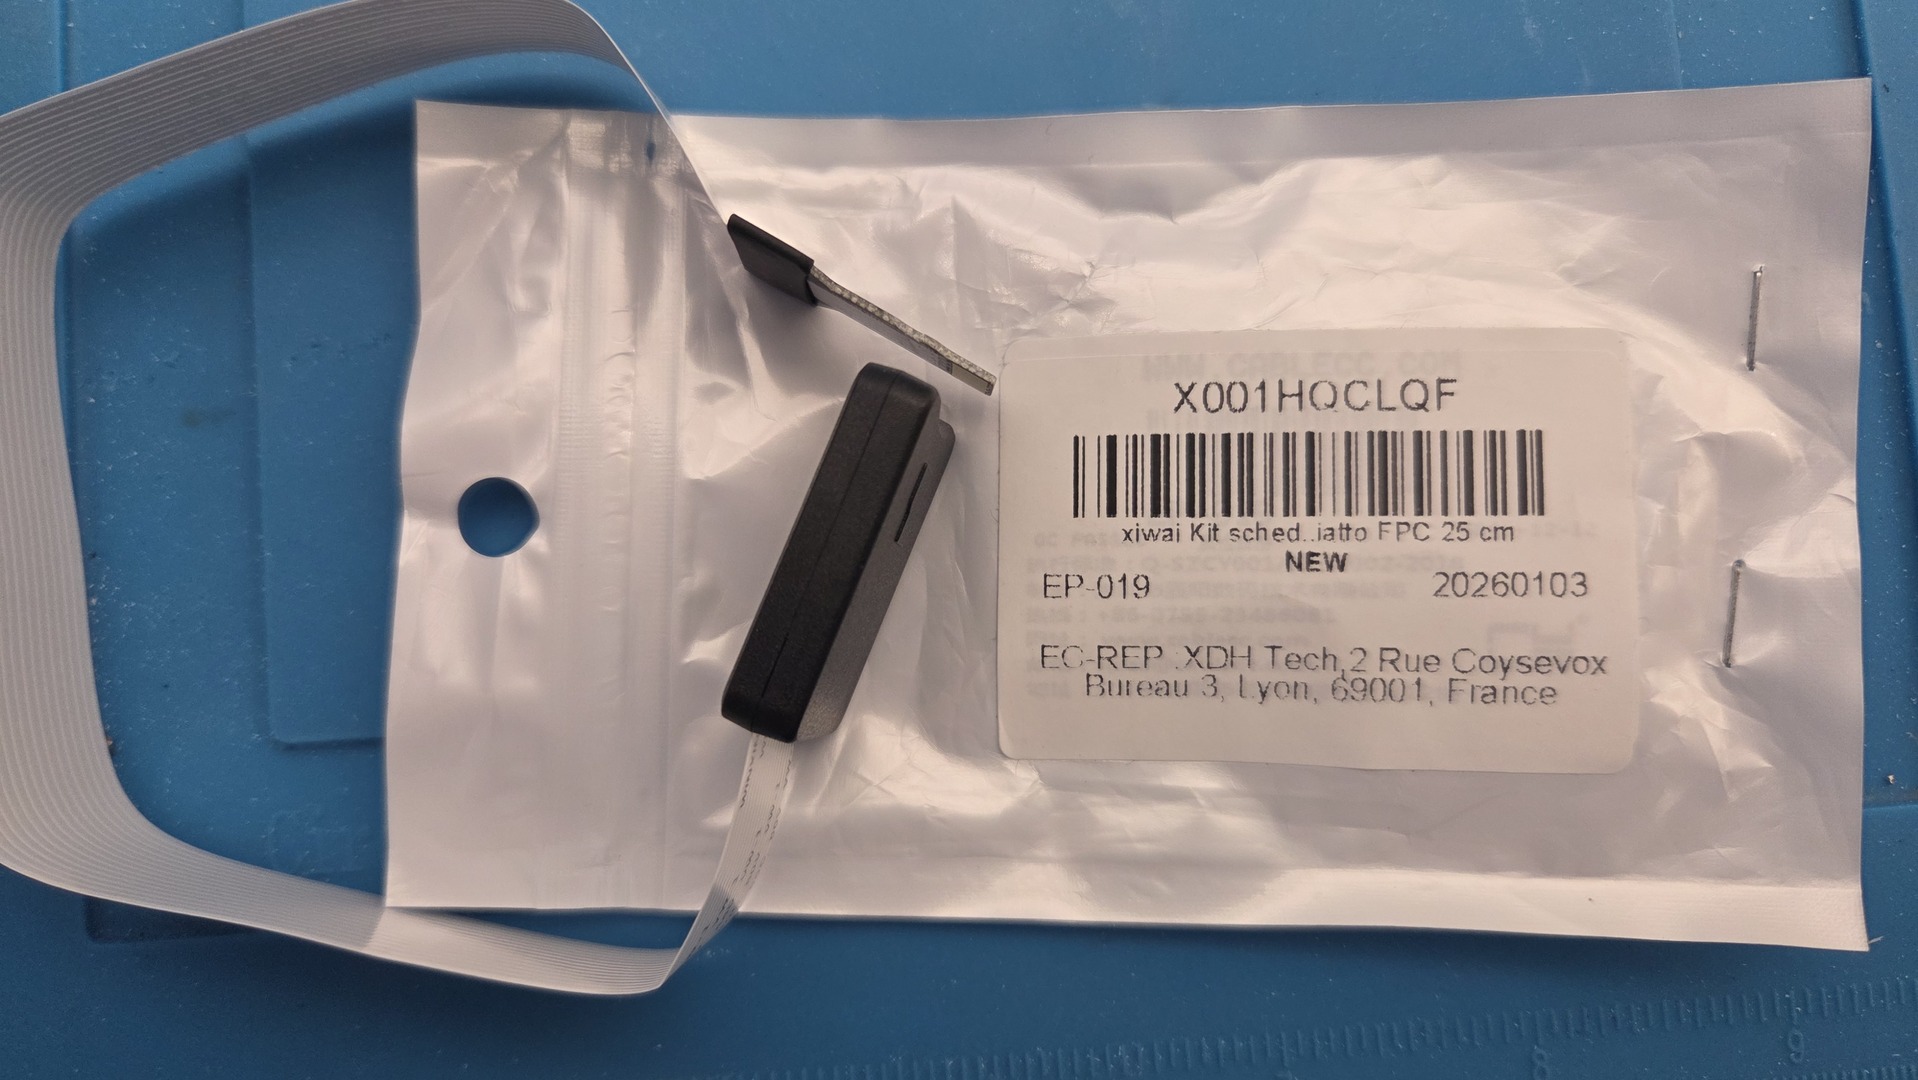
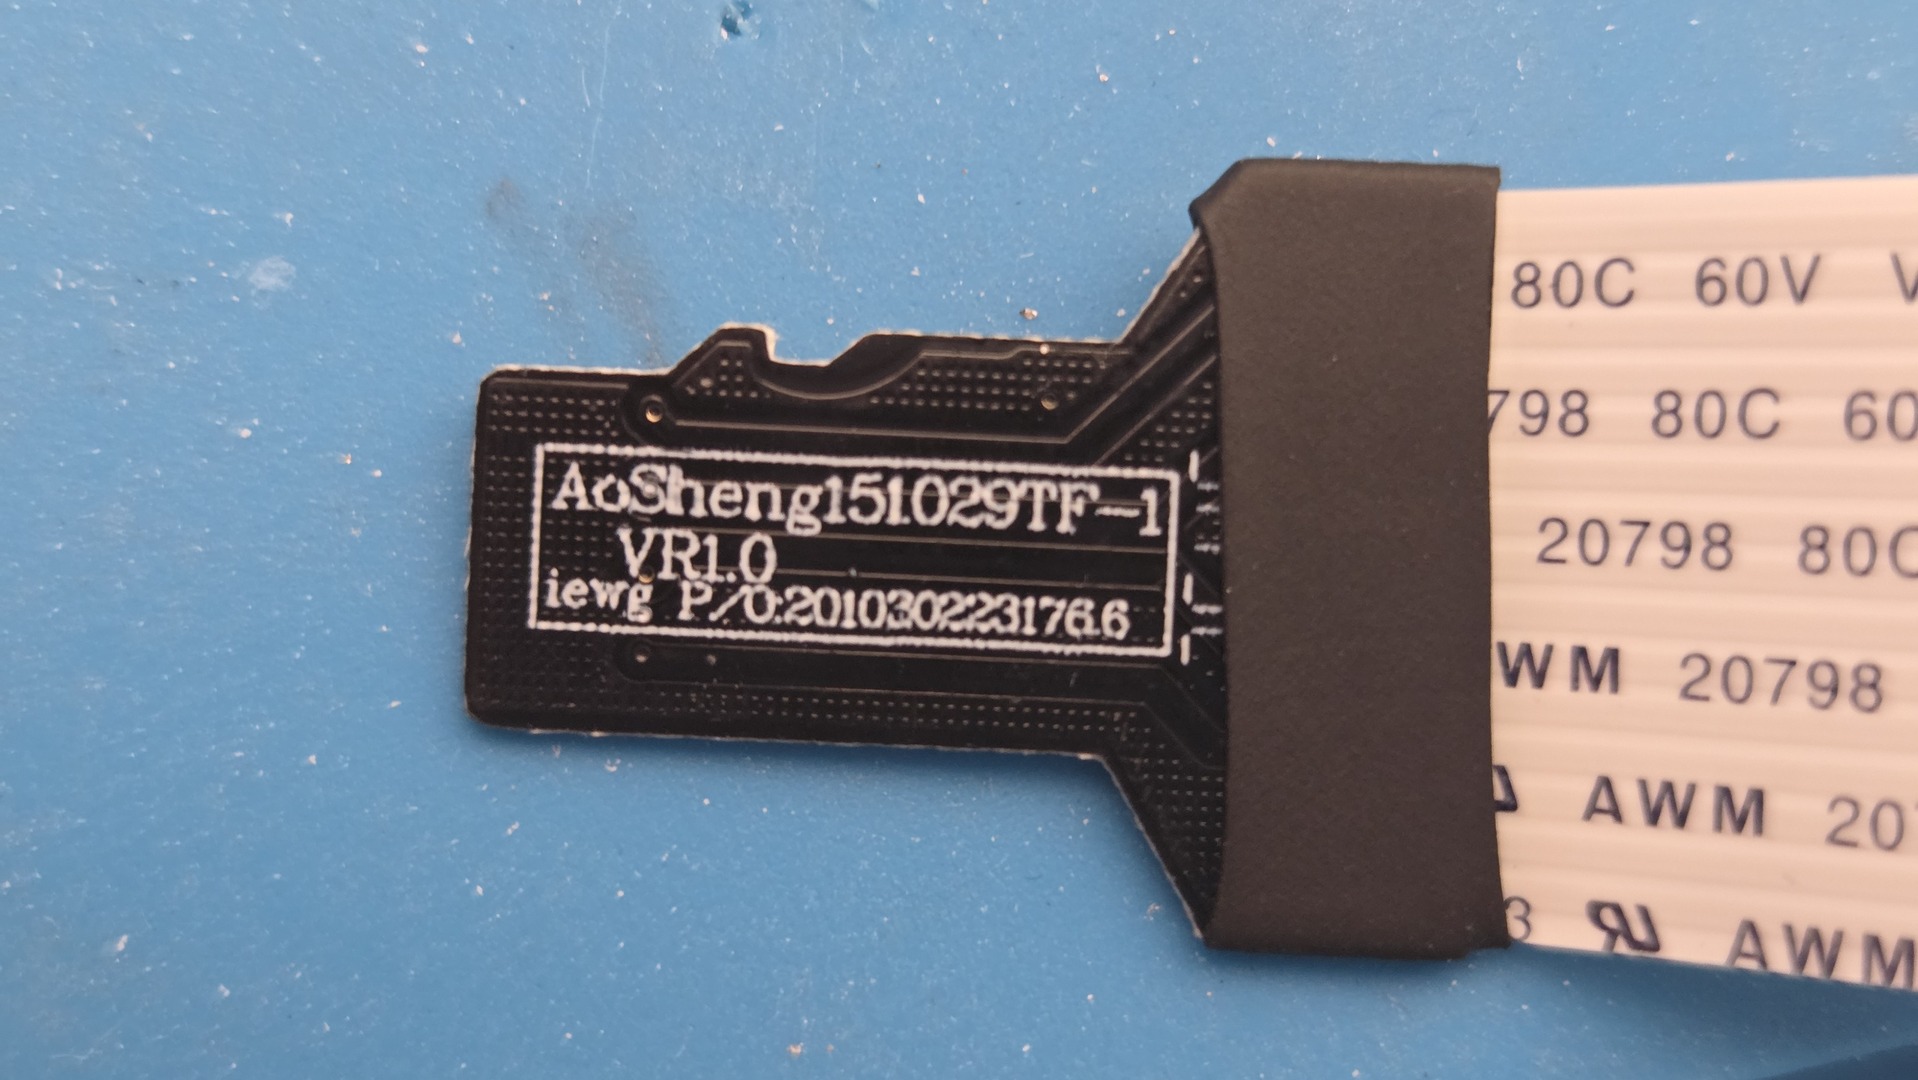
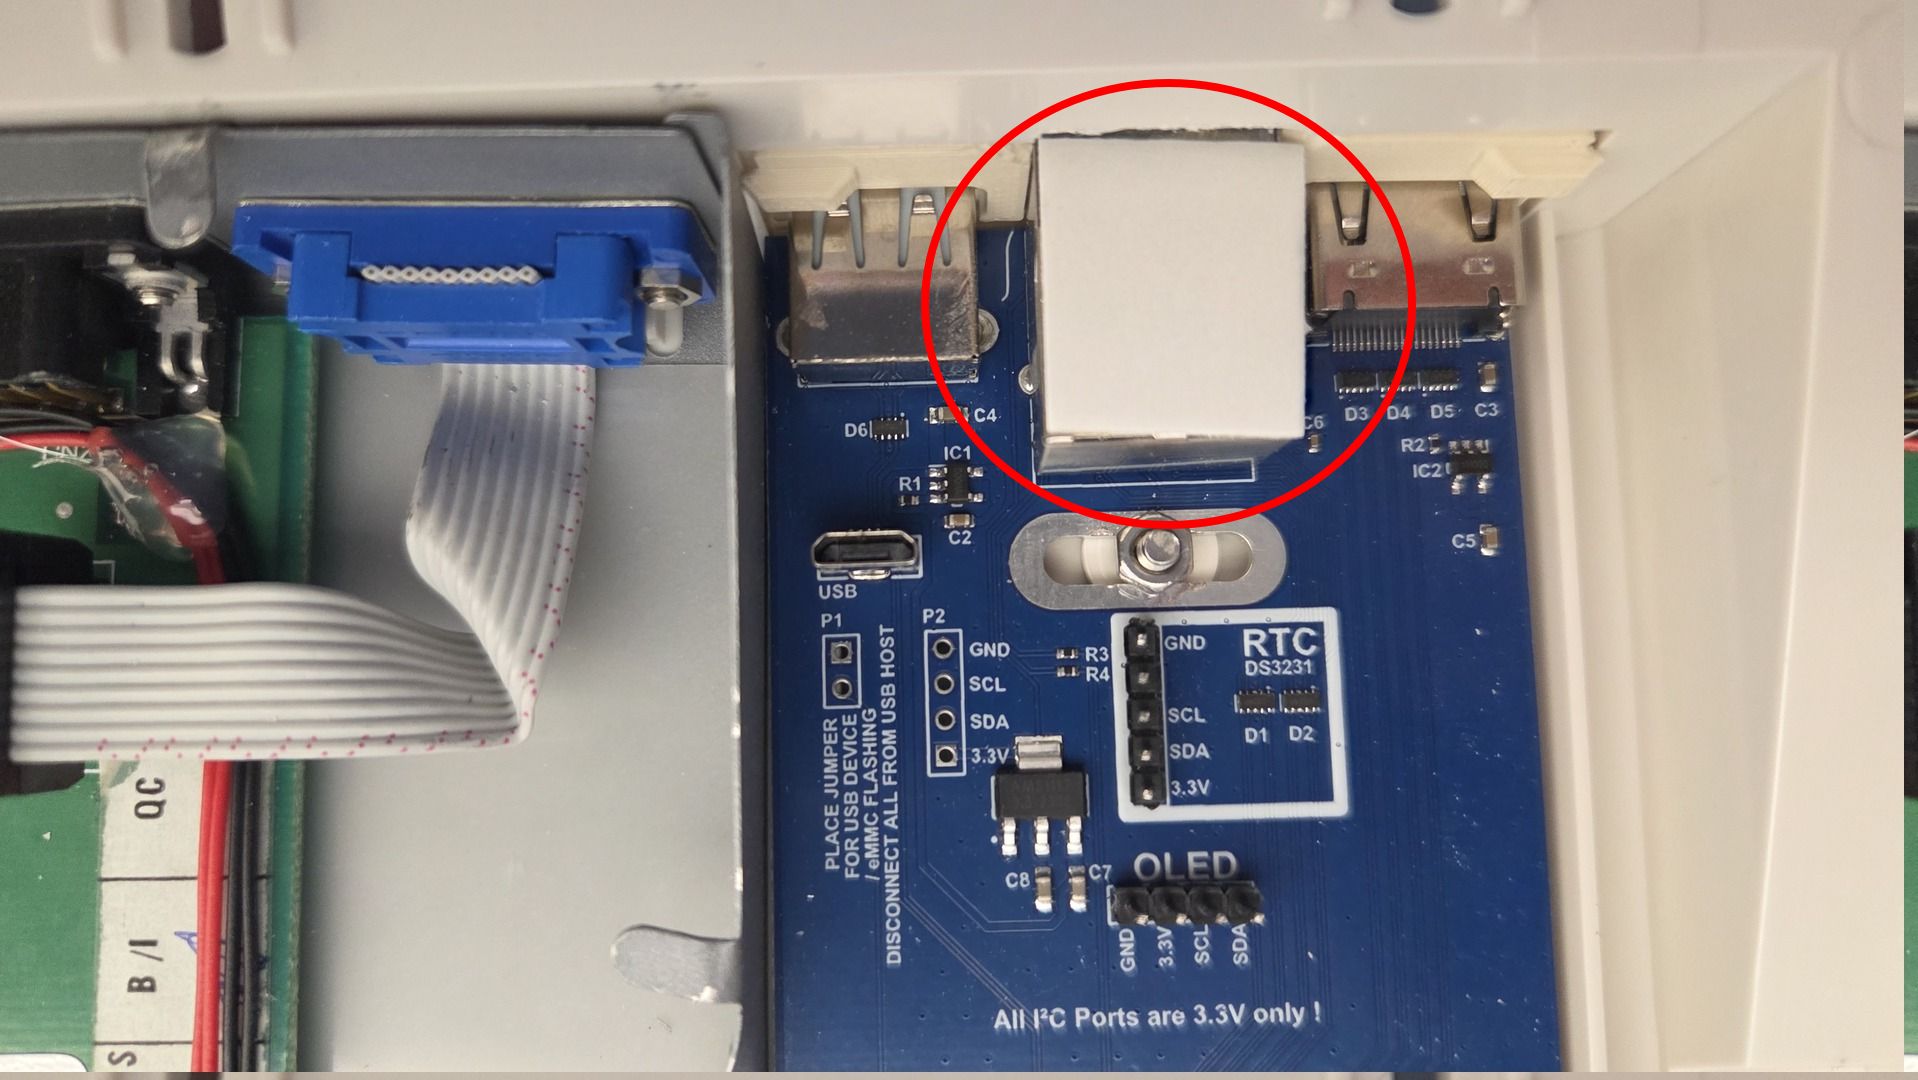
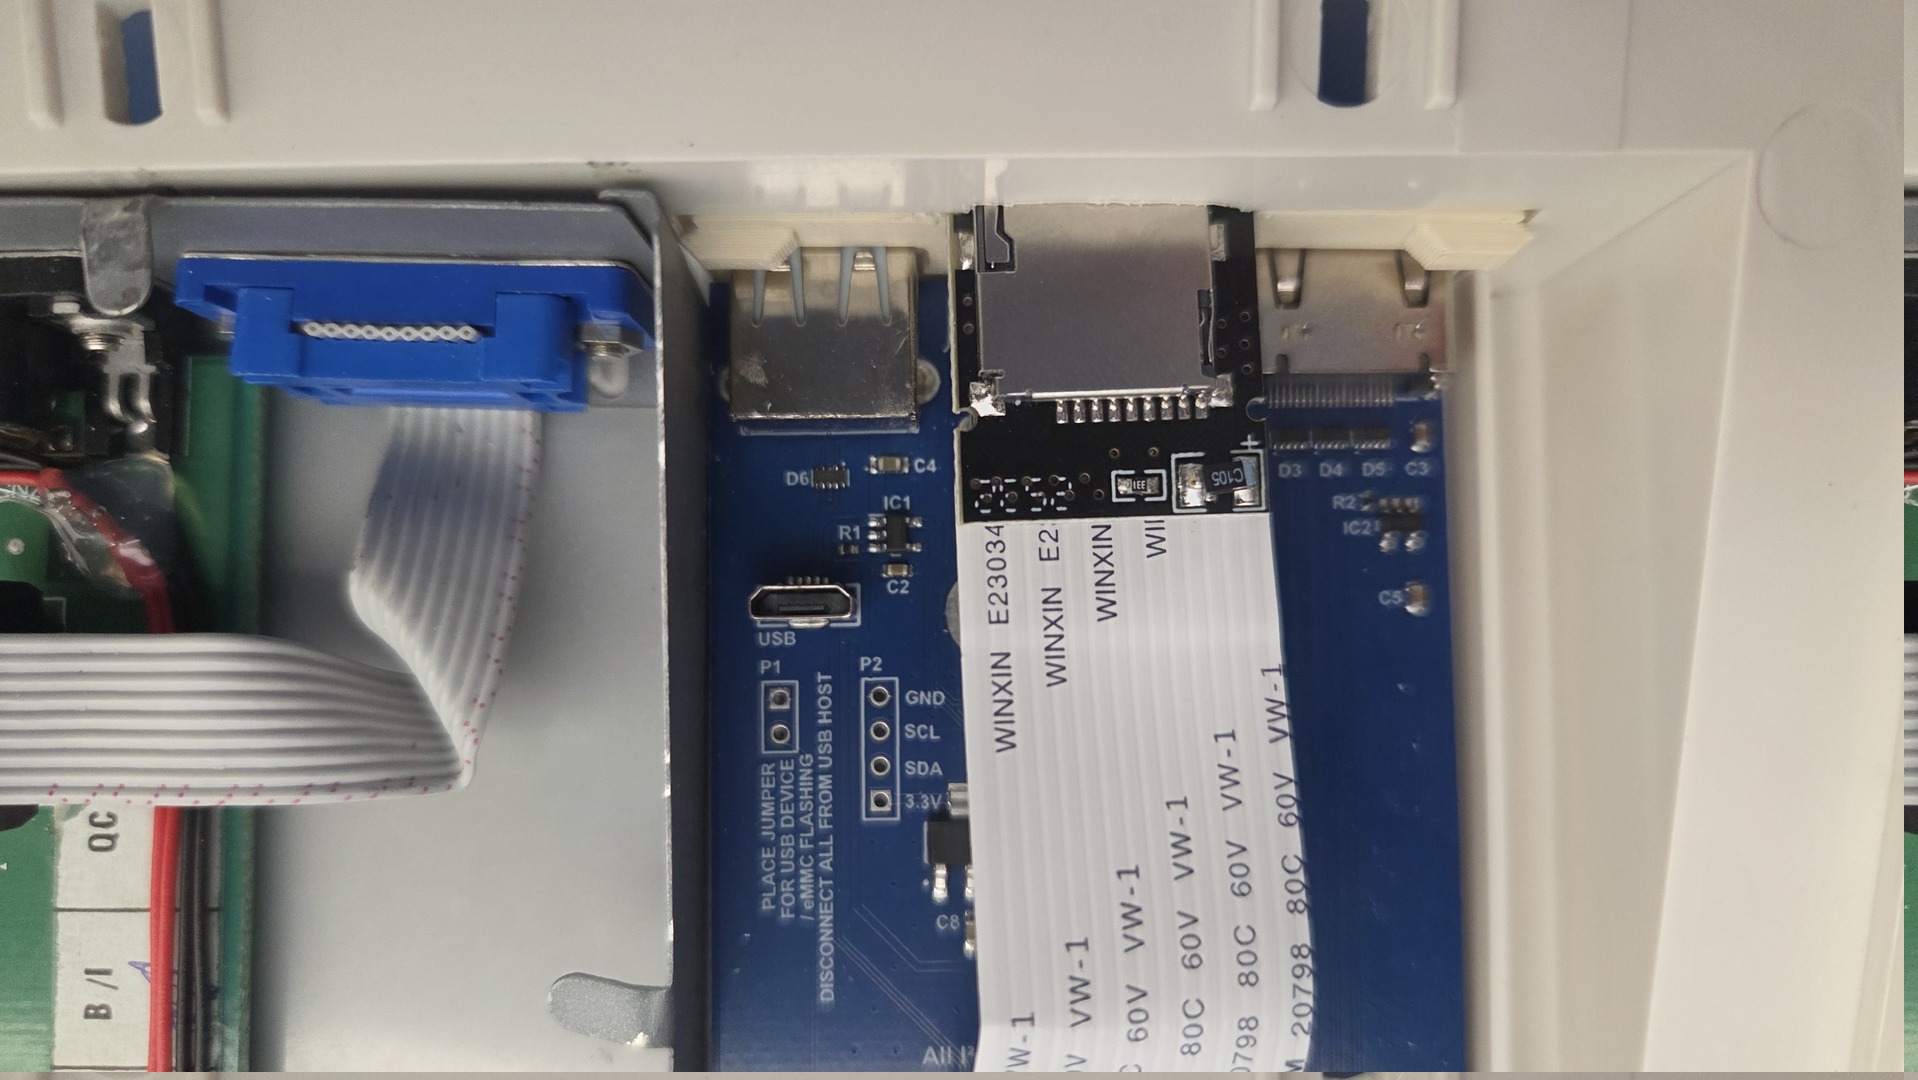
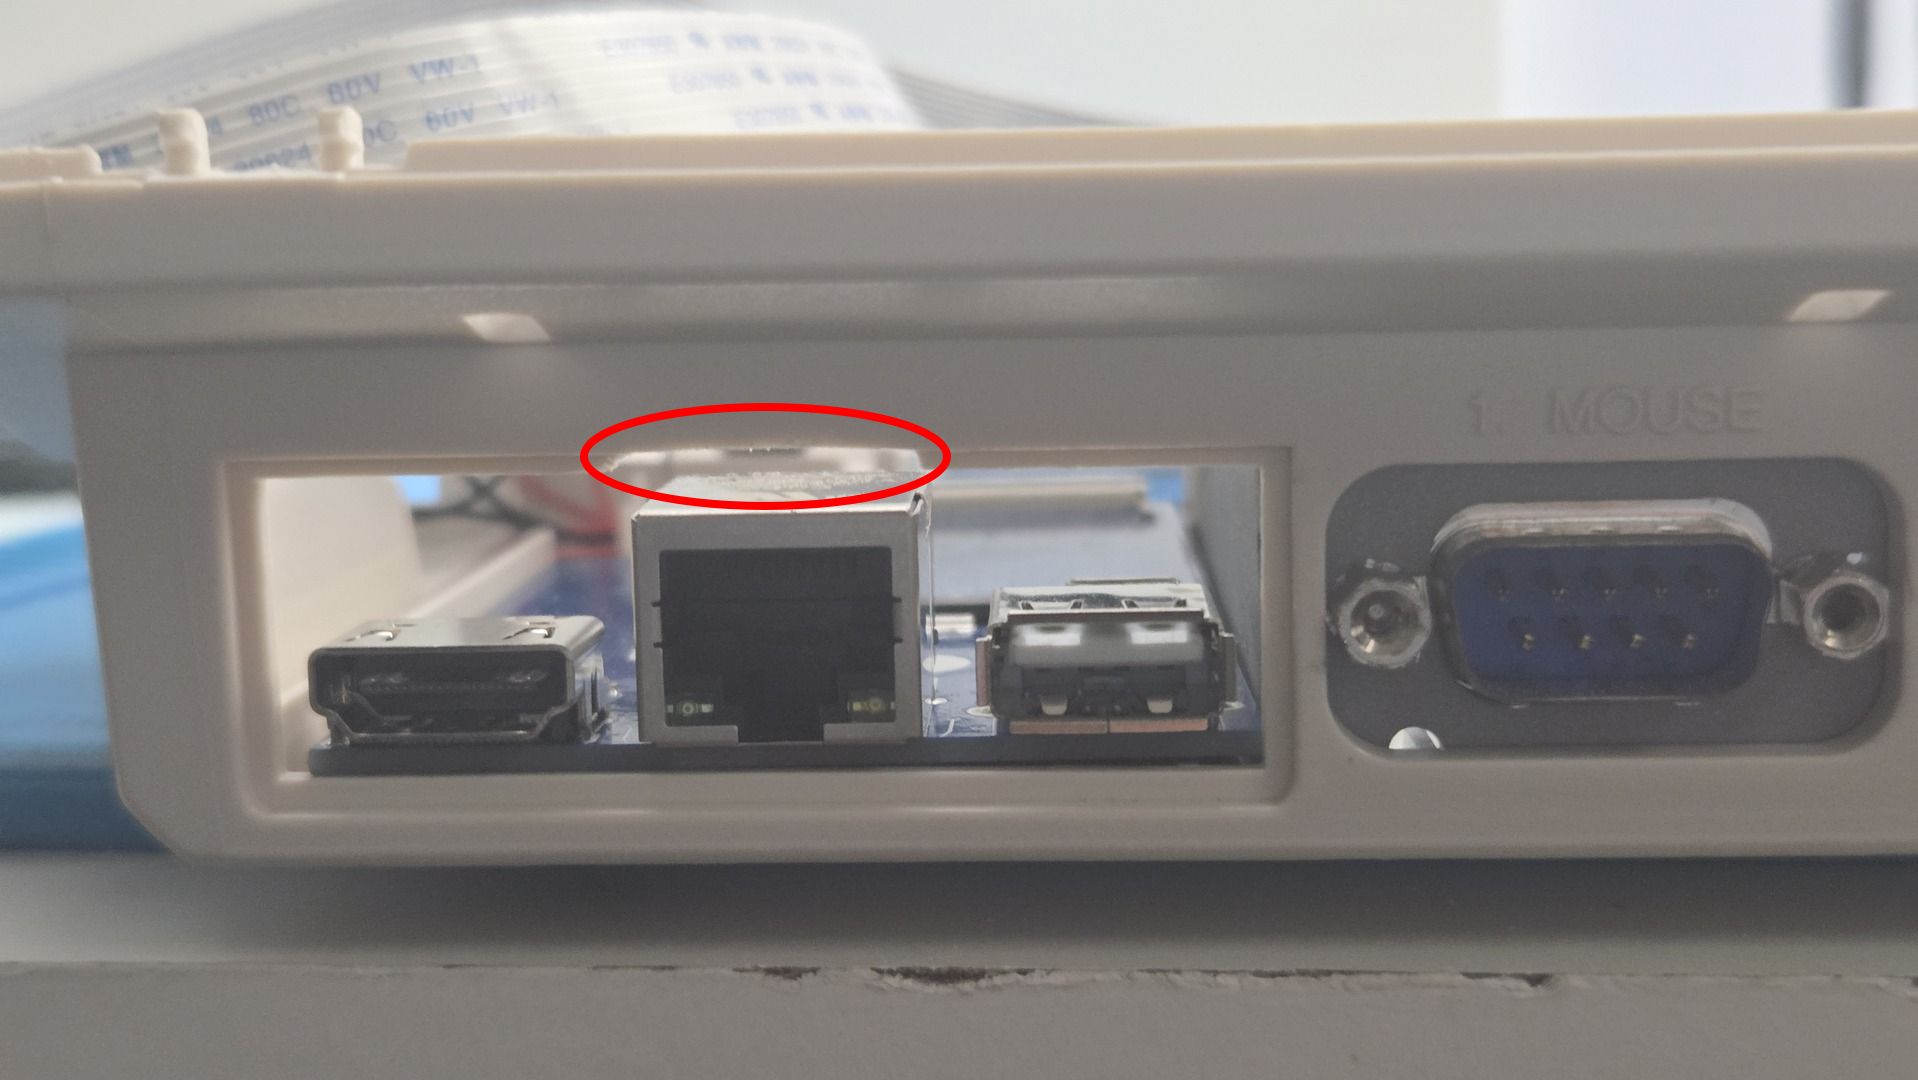
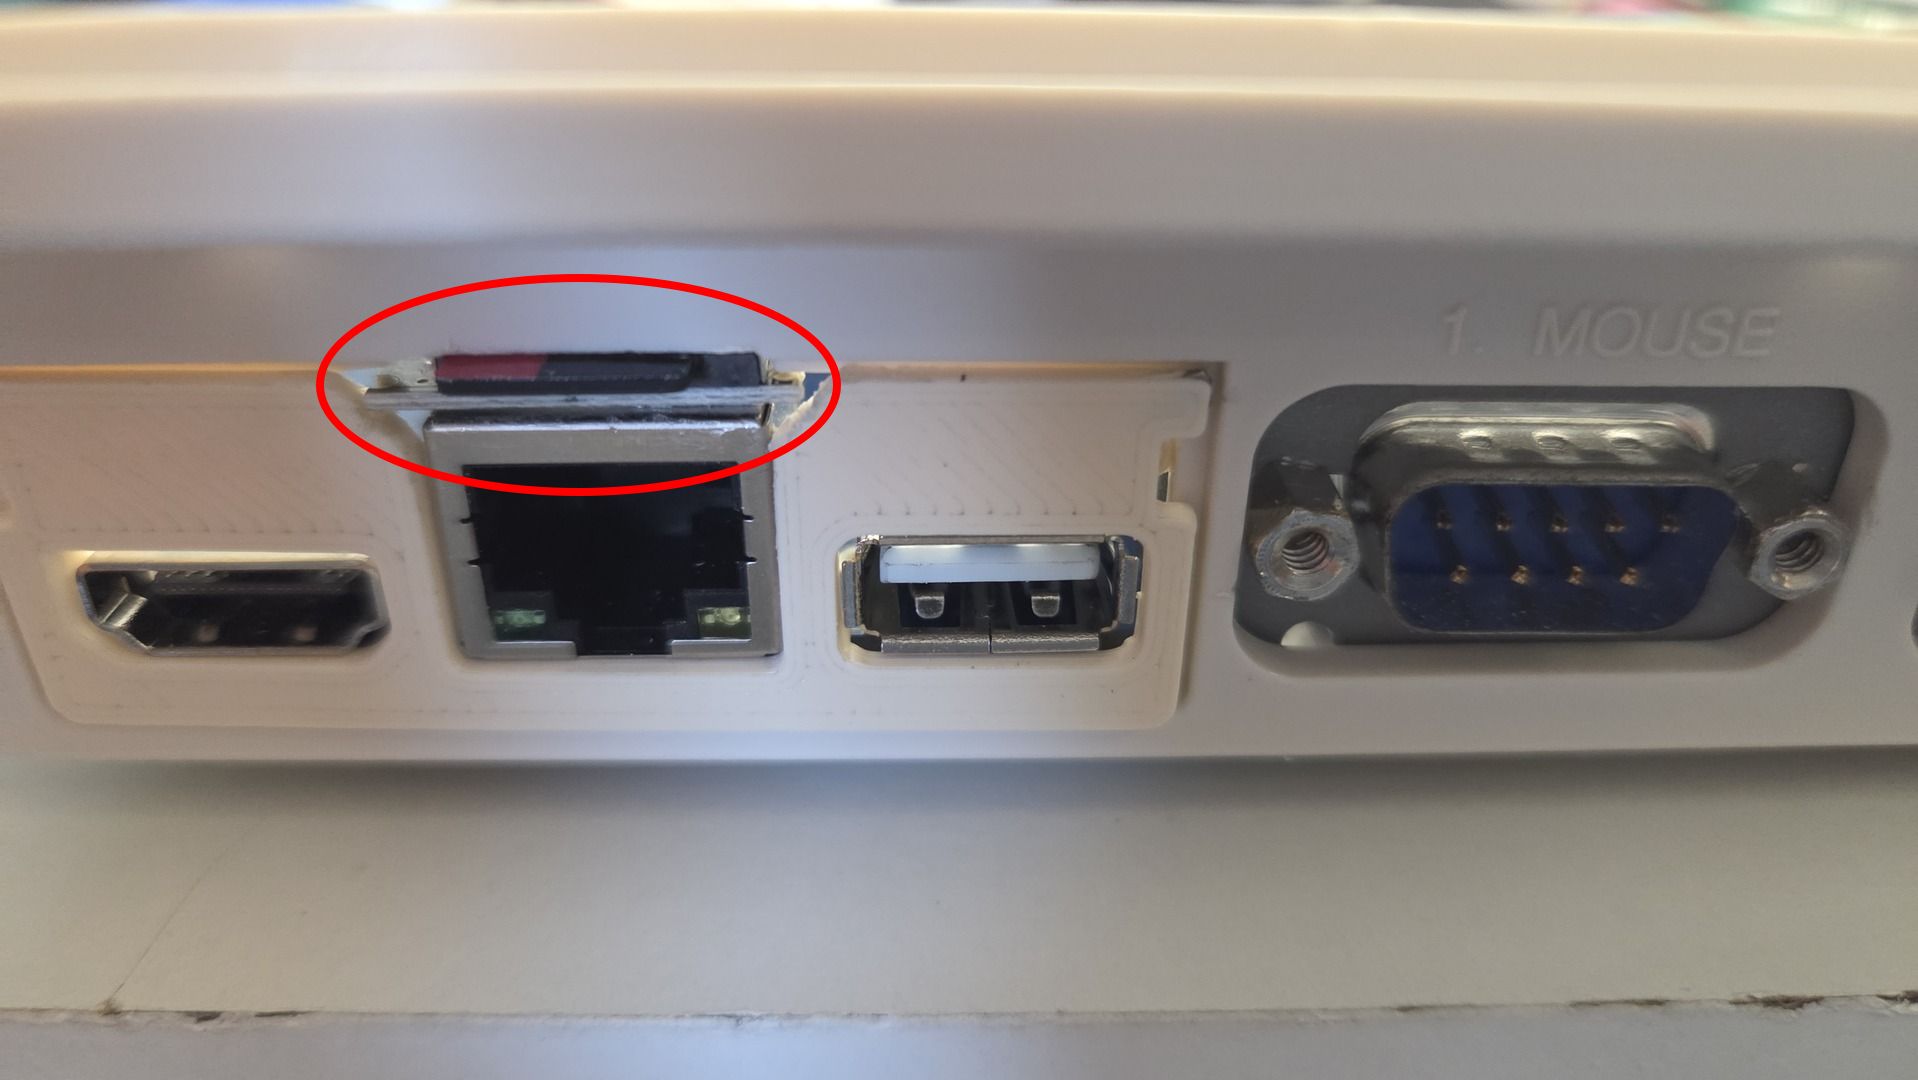
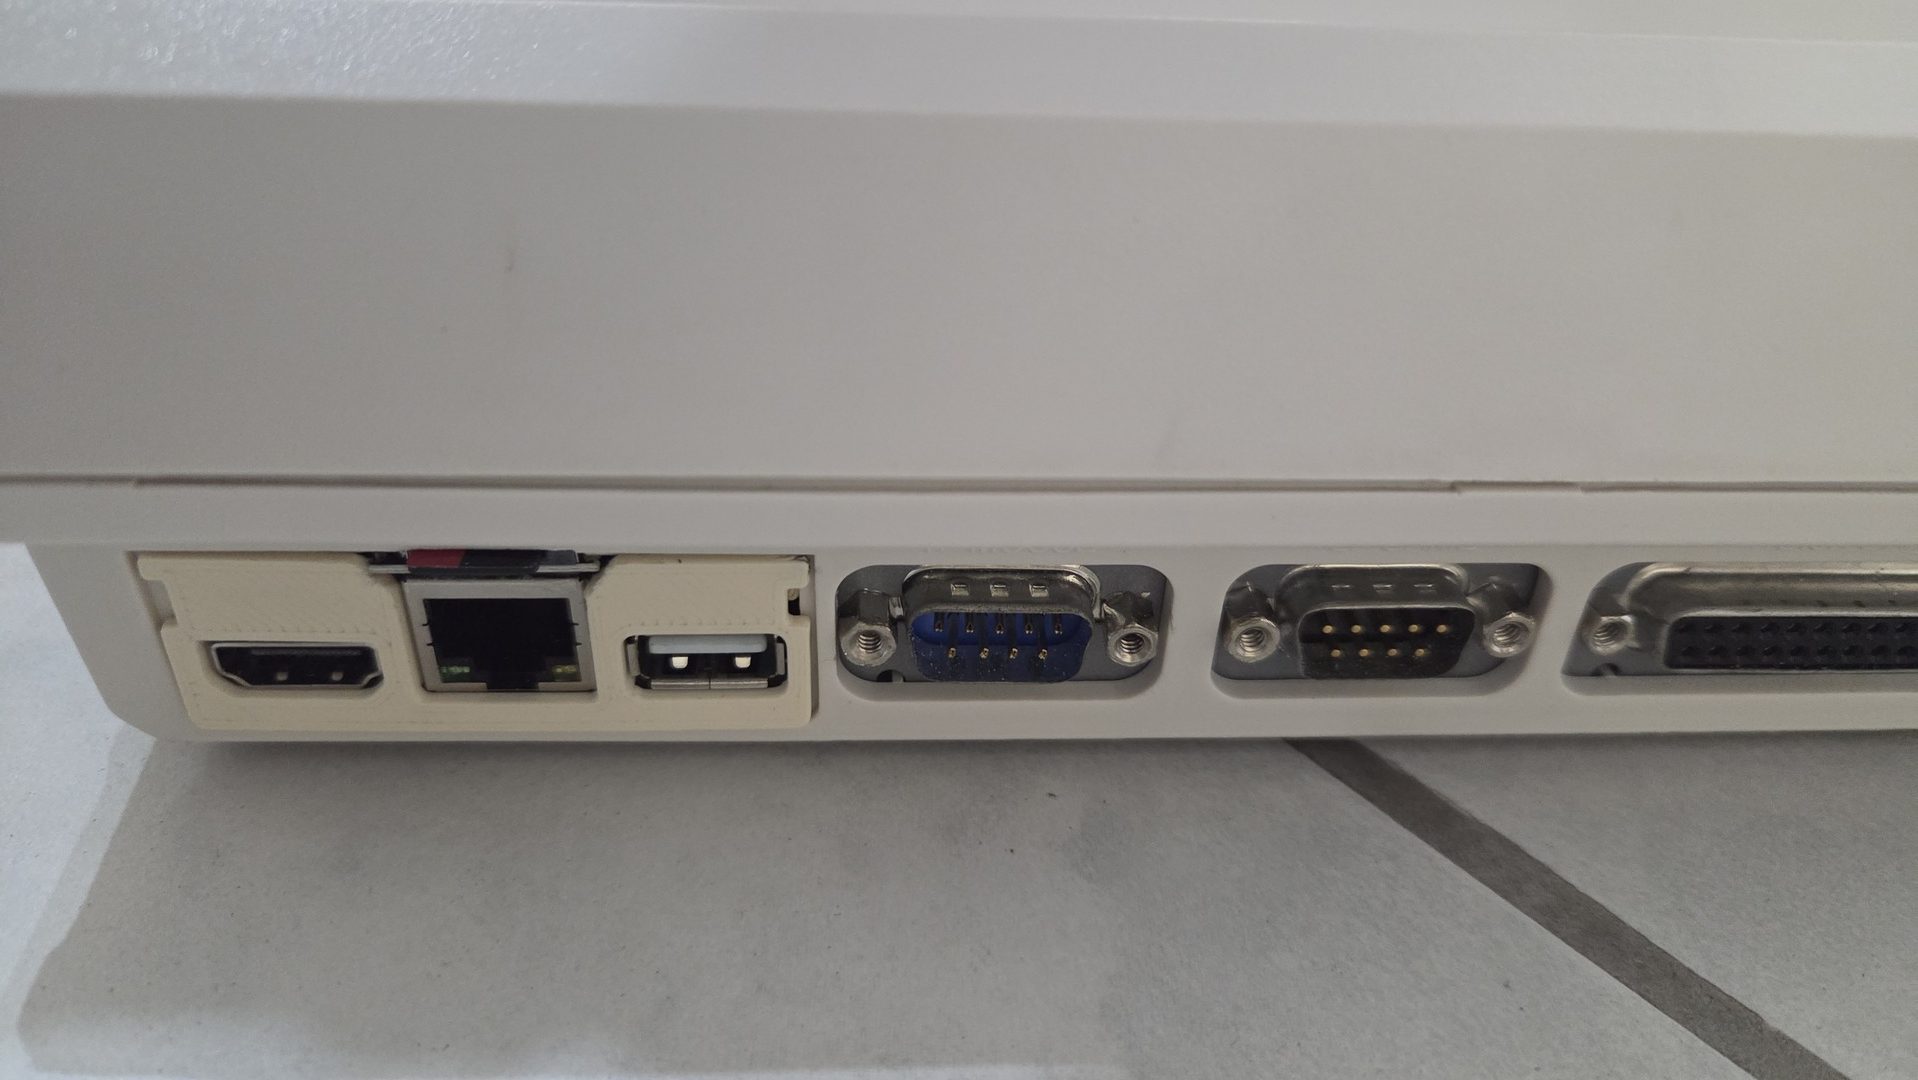
To solve this, I installed a MicroSD extension cable. I slightly modified the trapdoor of the expansion bay and filed part of the plastic so that the extension connector could be mounted above the RJ45 network connector. The assembly is simply secured using double-sided adhesive tape.

Remount
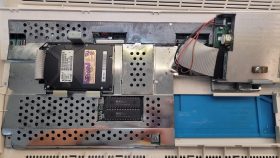
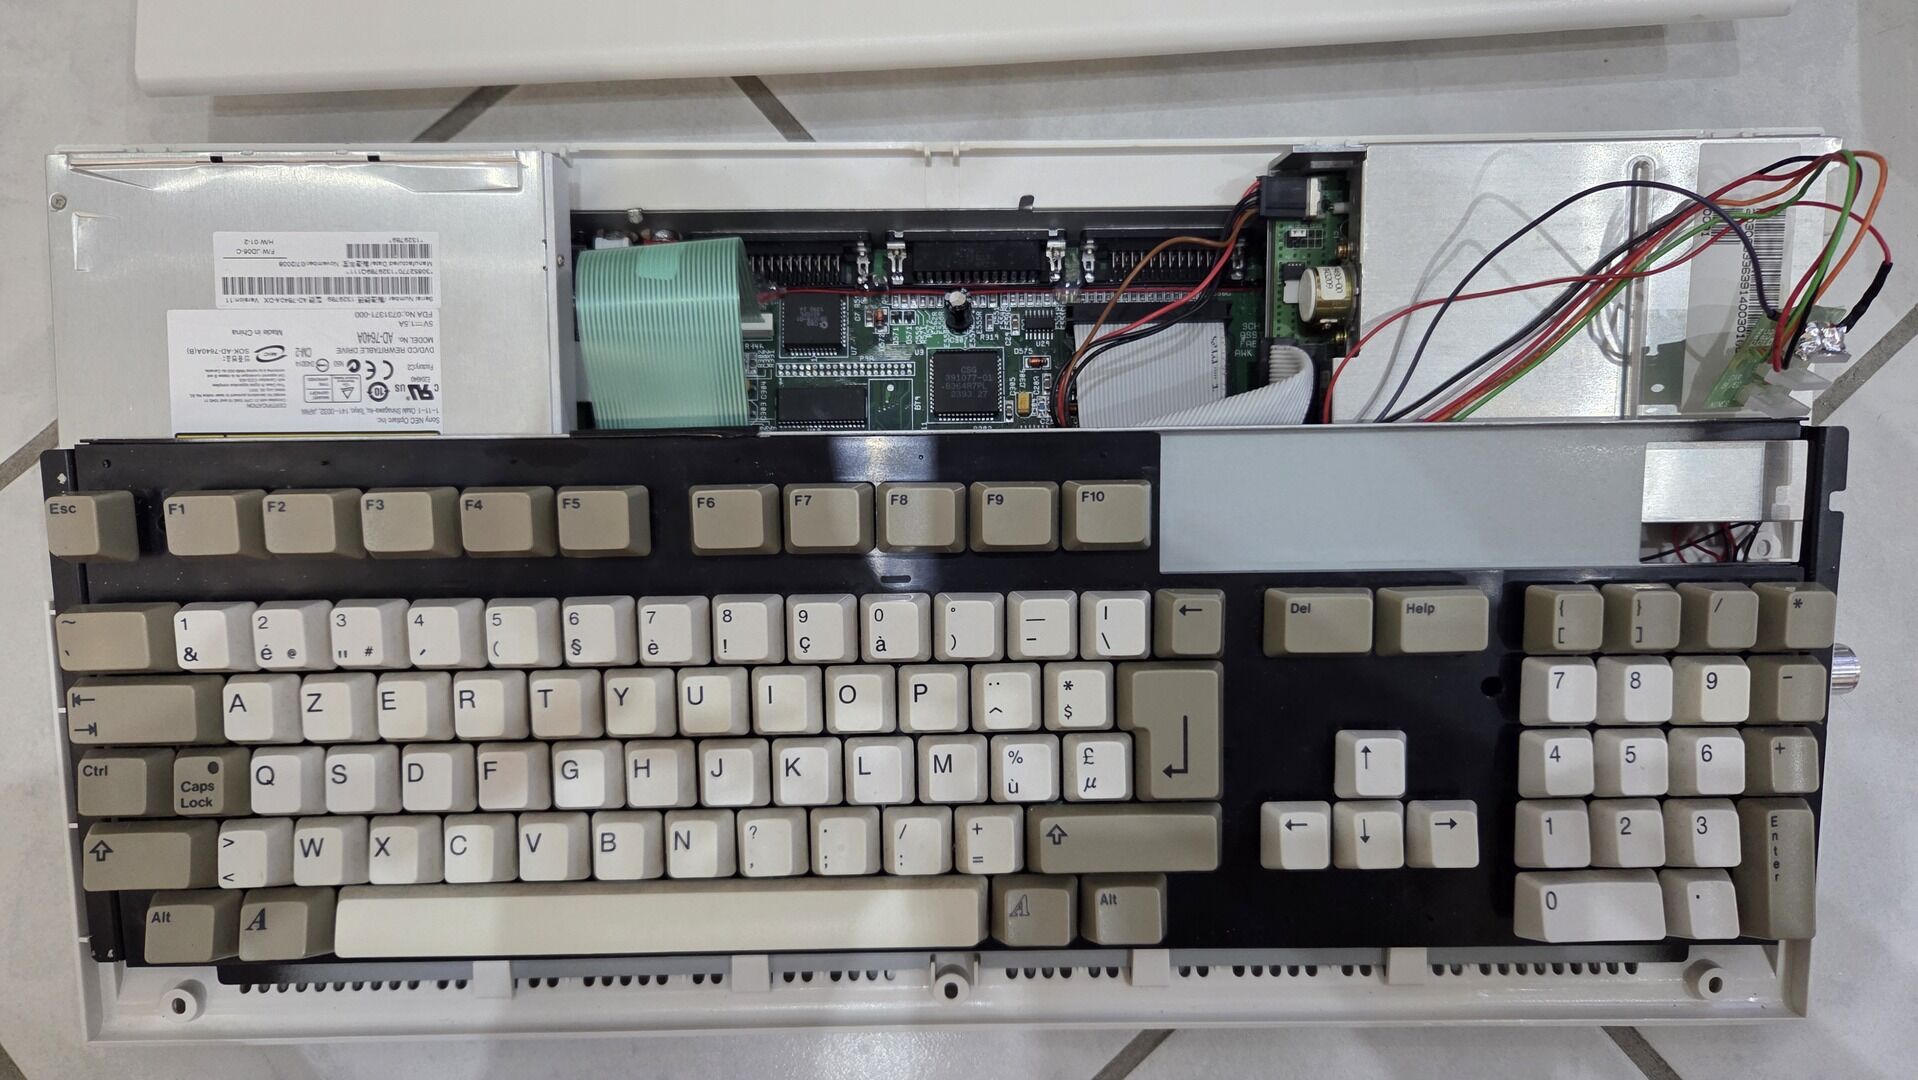
All major modifications were completed and it was finally time to put everything back together.
This step required a bit of patience, as the Amiga now contains considerably more hardware than Commodore originally intended: the PiStorm, CompactFlash adapter, optical drive, custom IDE cable, audio mixer, VGA output and all the associated wiring.
Fortunately, after a few adjustments and careful cable routing, everything fitted inside the case without putting excessive stress on any component.
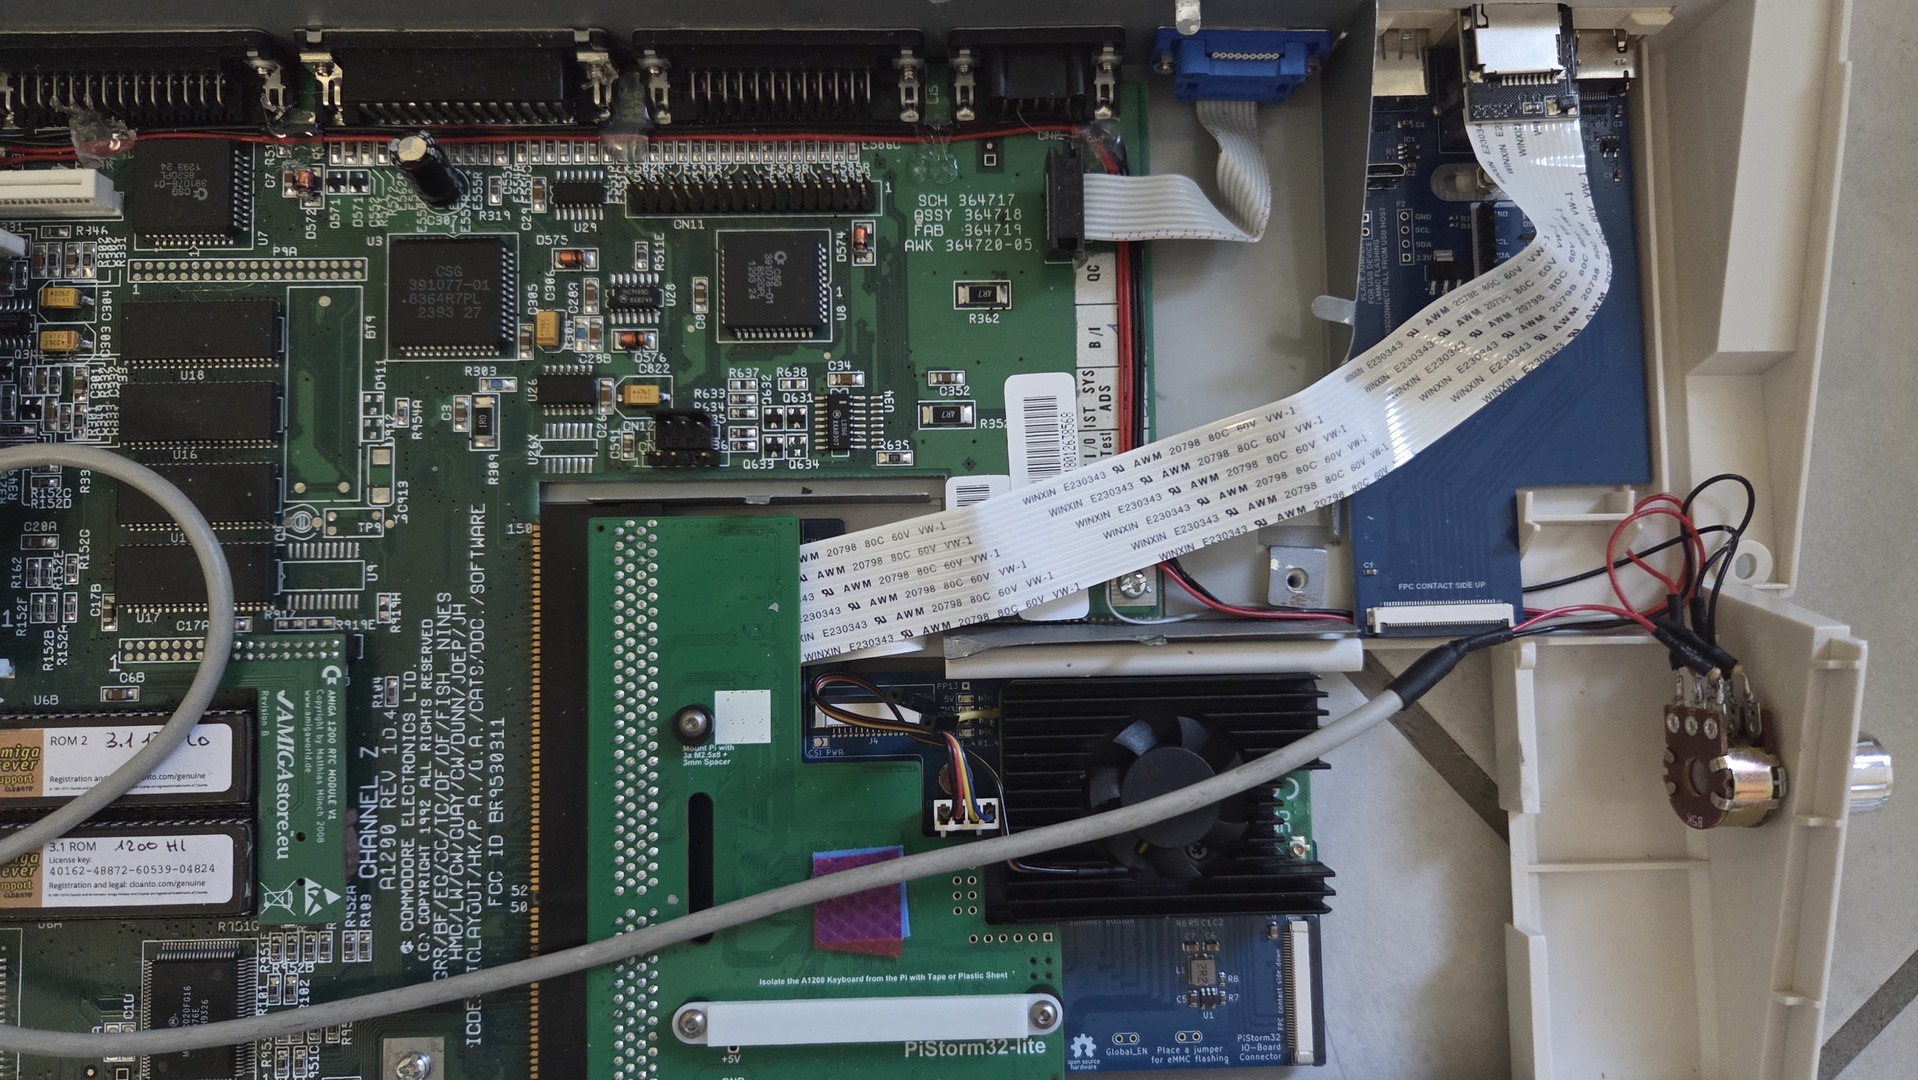
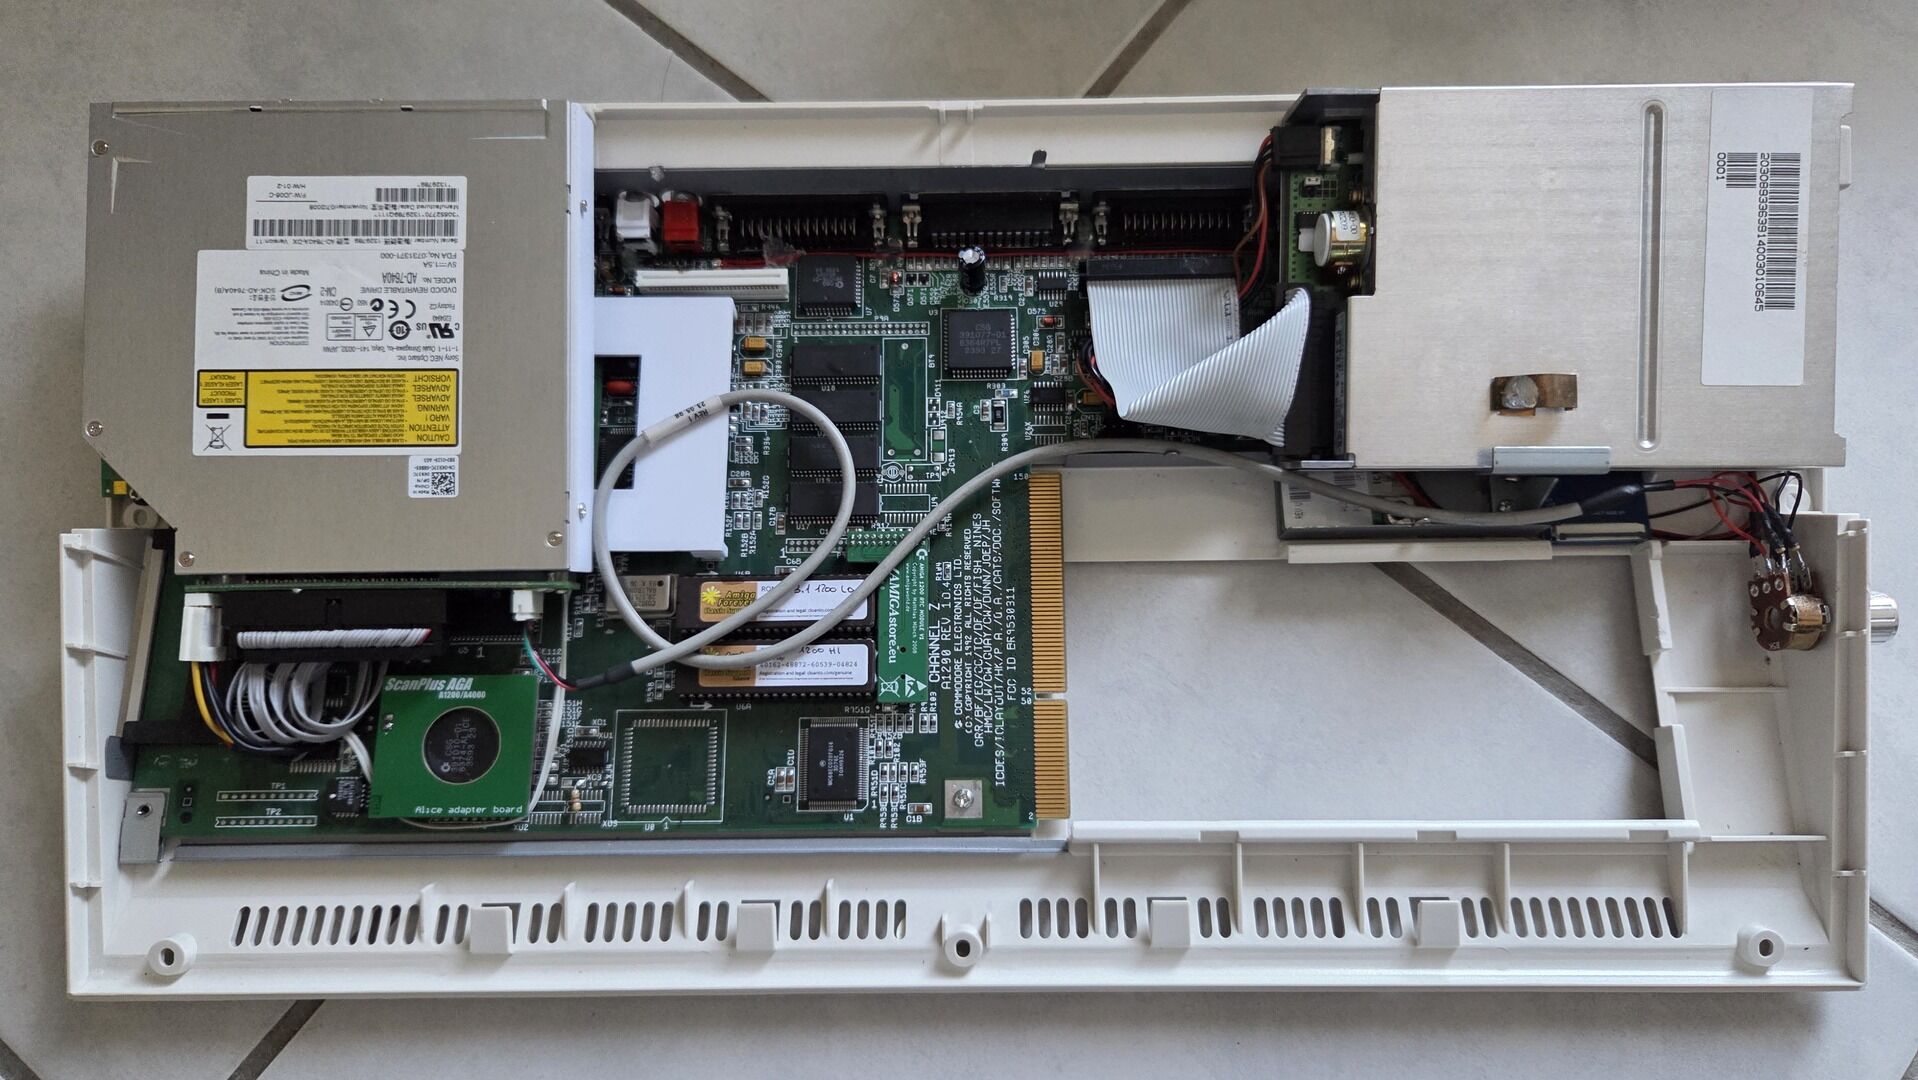
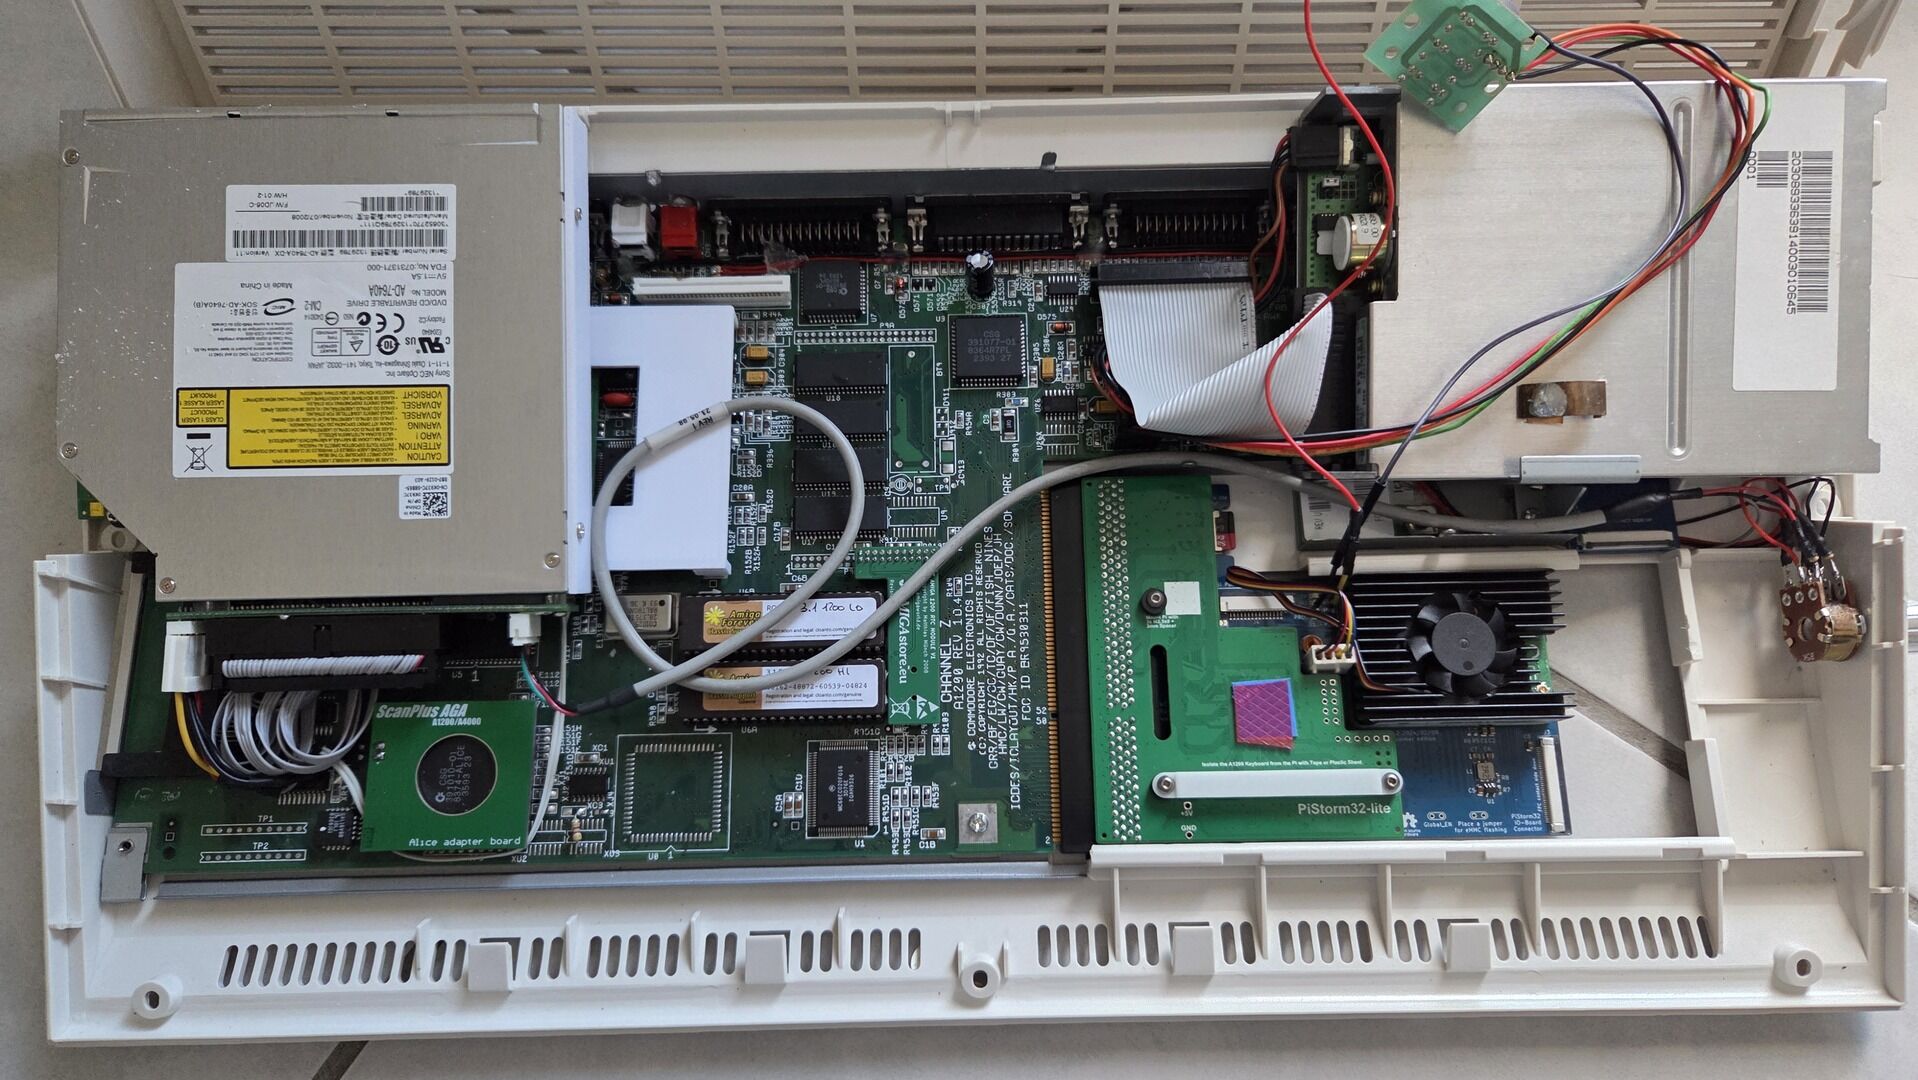
The following photos show the various reassembly stages and the final internal layout.
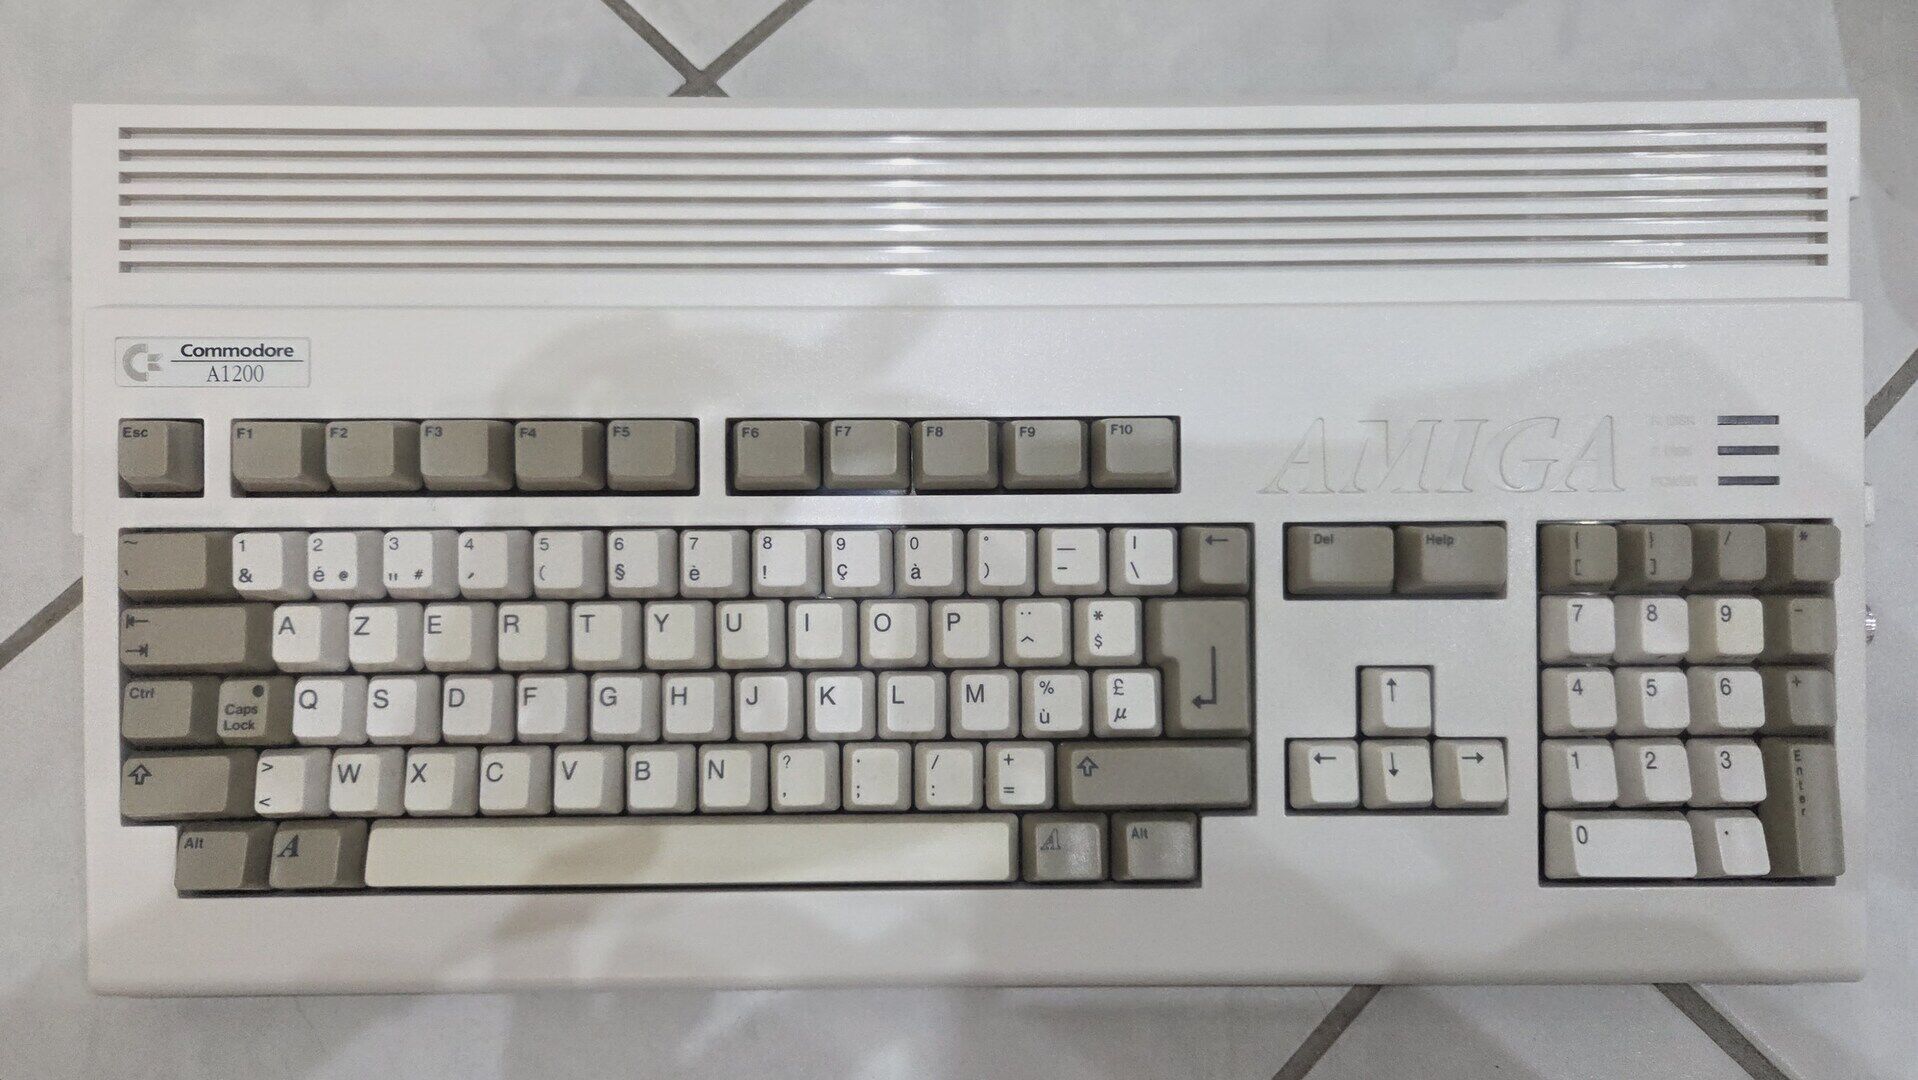
Final result
An “Amiga 1232 Storm CD” 🙂
At this point, the project finally comes together as a single, unified machine. Depending on how it is configured, it can behave like a classic Amiga 1200, a massively expanded PiStorm-powered system, or a CD32-compatible setup with internal optical drive support.
The result is a hybrid machine that keeps full compatibility with the original hardware while adding a level of flexibility and performance that would have been unimaginable at the time.

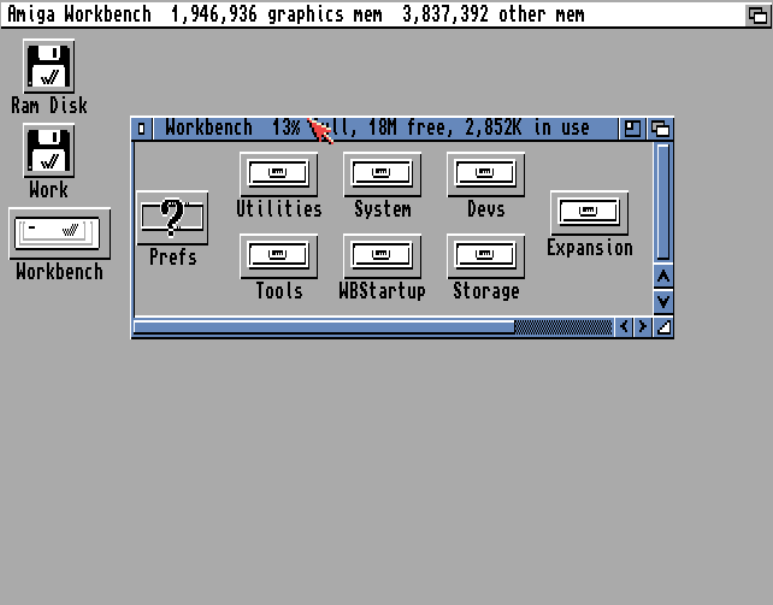
OS 3.1 and CD32 compatibility
The goal of this section was to set up a clean, standard Commodore Amiga installation based on Workbench 3.1, using FFS, properly structured Work and System partitions, and only a minimal set of additional tools to improve usability.
The installation was performed using Amiberry for convenience and repeatability, before being deployed on the real hardware.
Amiberry configuration
The system was first prepared using Amiberry, configured to emulate the original Amiga hardware as closely as possible. The goal was to stay as close as possible to a real Amiga 1200 setup, while still benefiting from the flexibility of an emulation environment during installation.
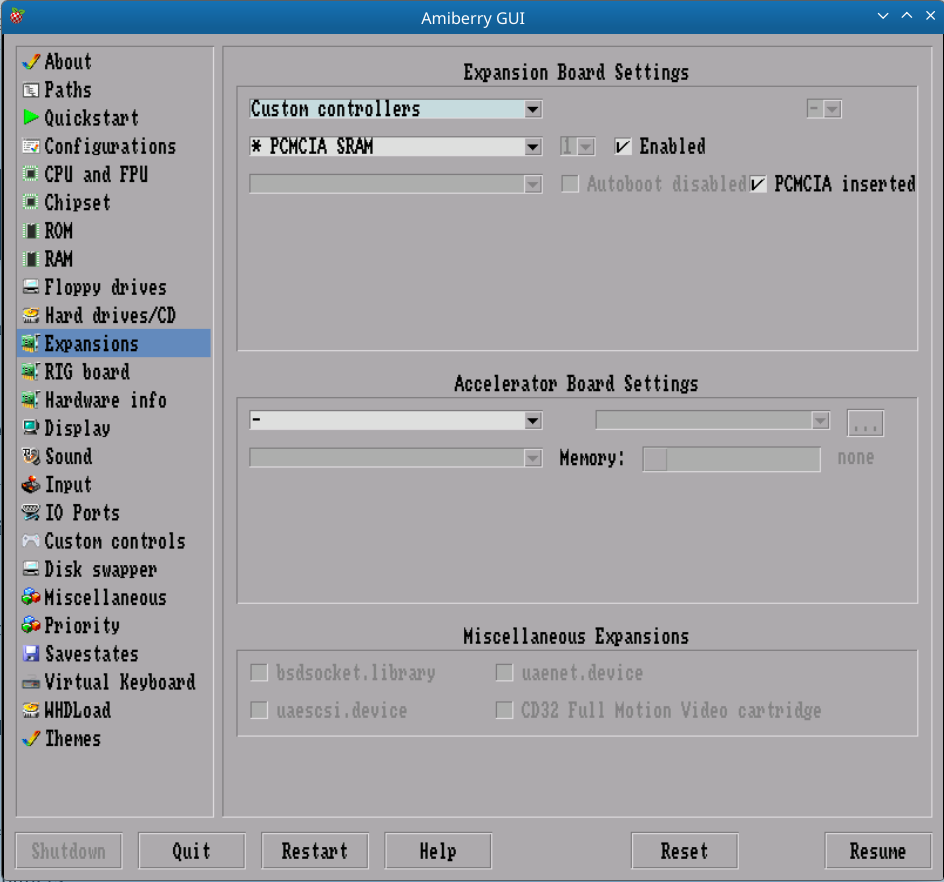
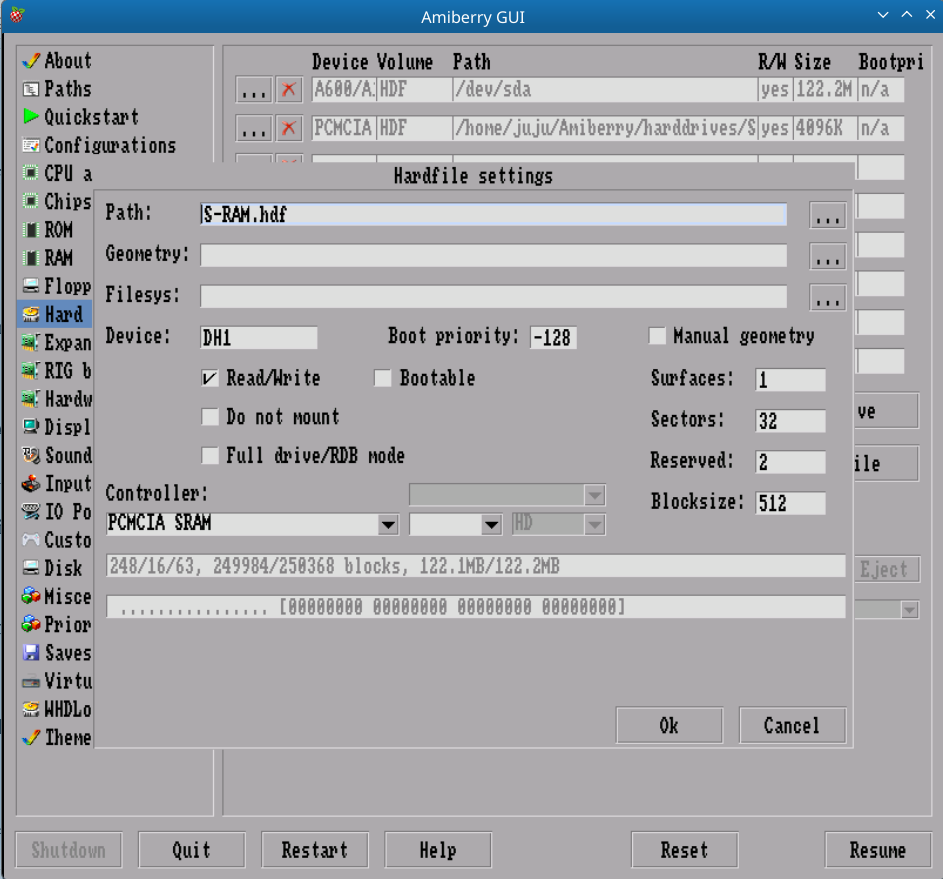
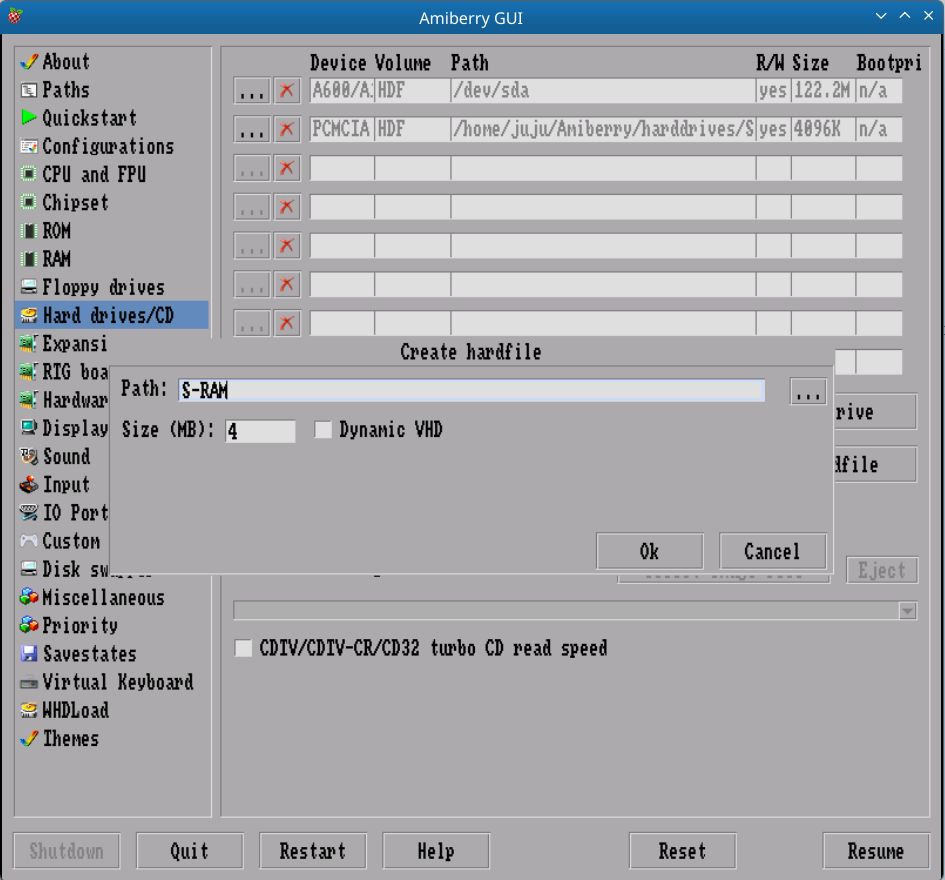
S-RAM was configured inside Amiberry:

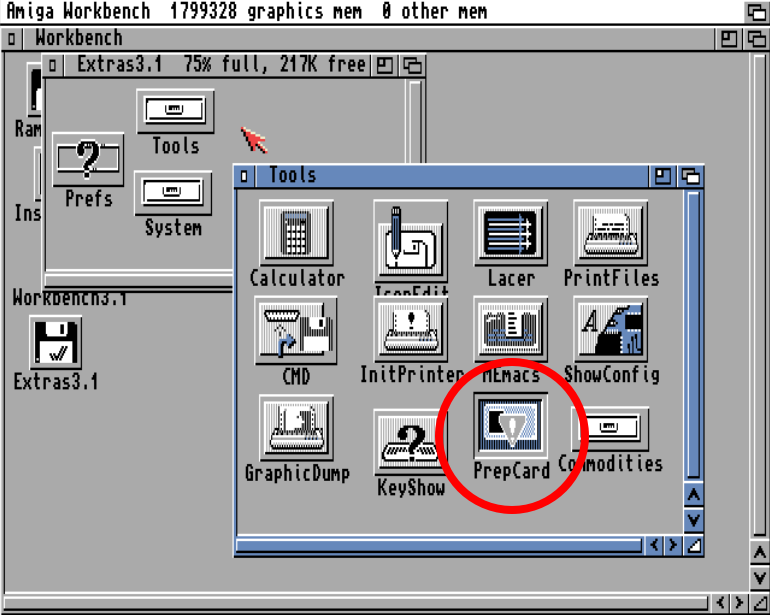
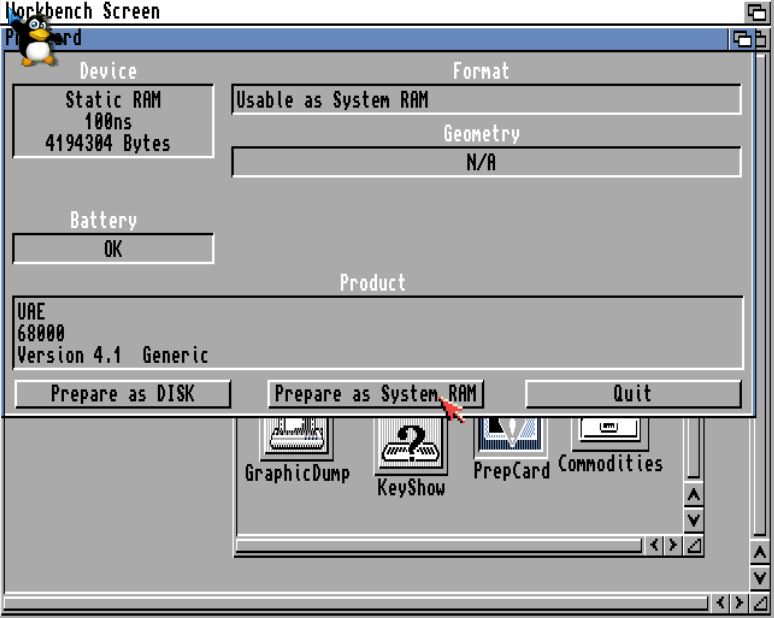
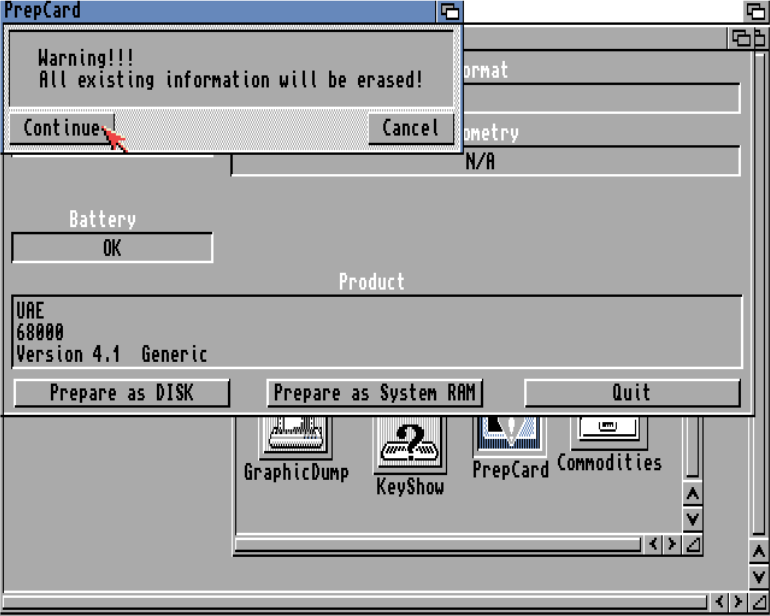
Once detected, the S-RAM was made available as additional memory using PrepCard from the Extra floppy disk:
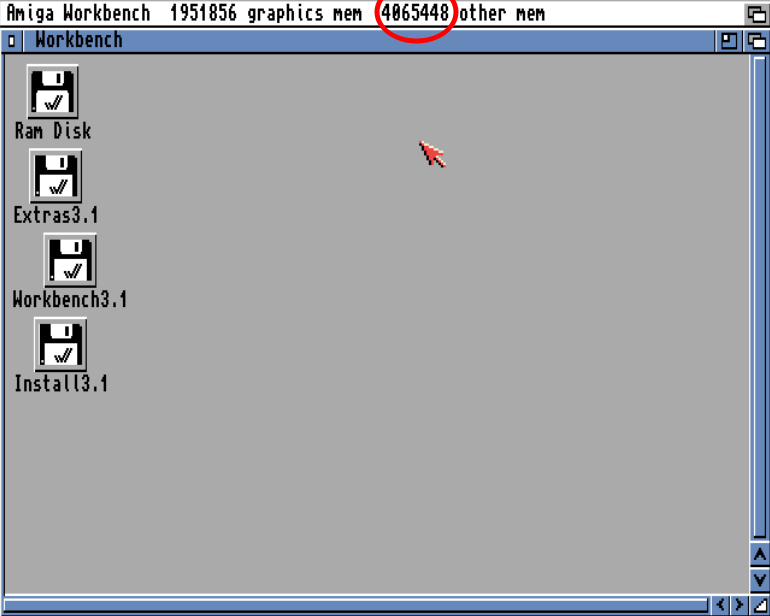
This step ensures the same memory behavior as on real hardware, while allowing a smooth and controlled installation process before deploying the system on the actual machine.
Prepare and install WB
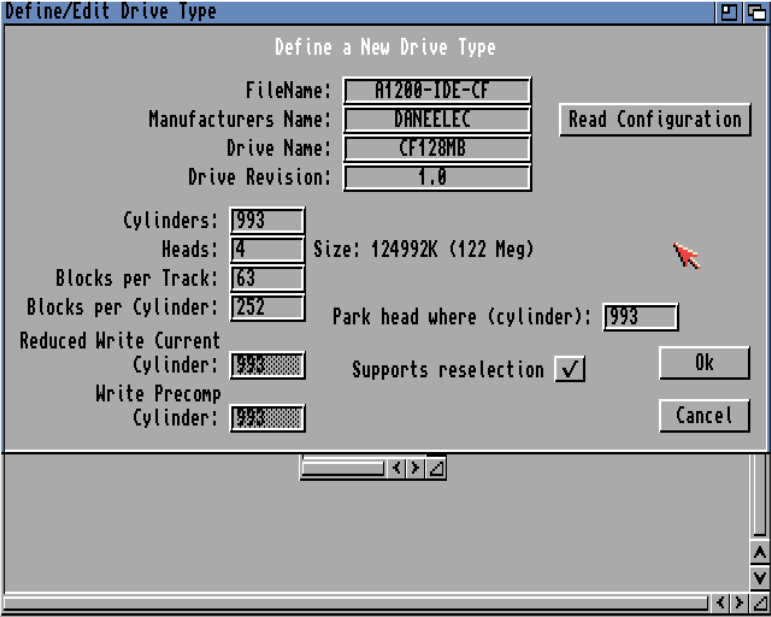
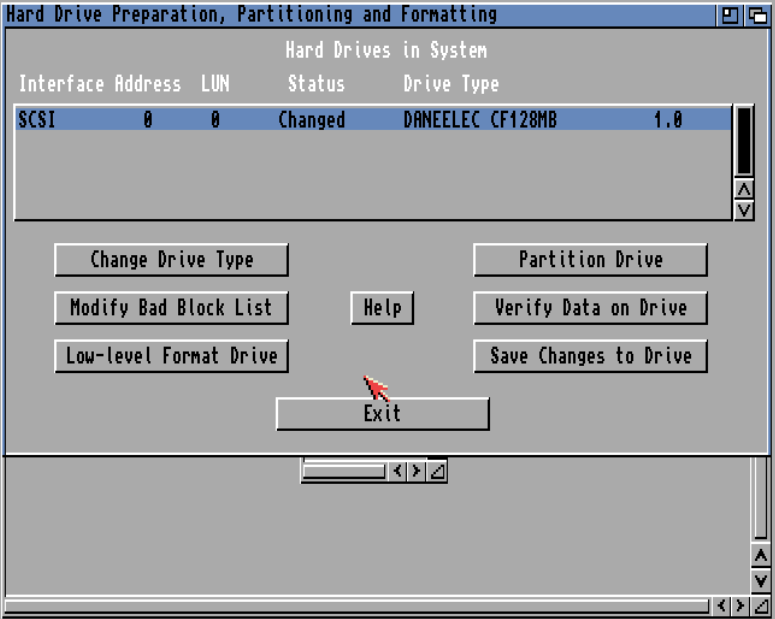
The system was booted from the AmigaOS installation disk. To simplify the process, I copied the Installer tool into RAM, allowing faster access and the ability to define a new hard drive setup.
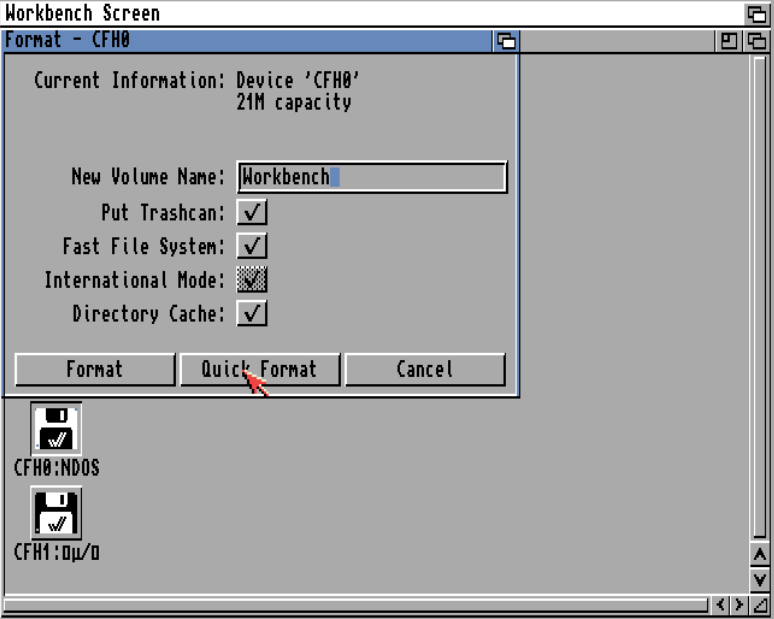
I named the partitions CFH0 and CFH1 to avoid any conflict with the SD-based partitions used by the PiStorm setup.
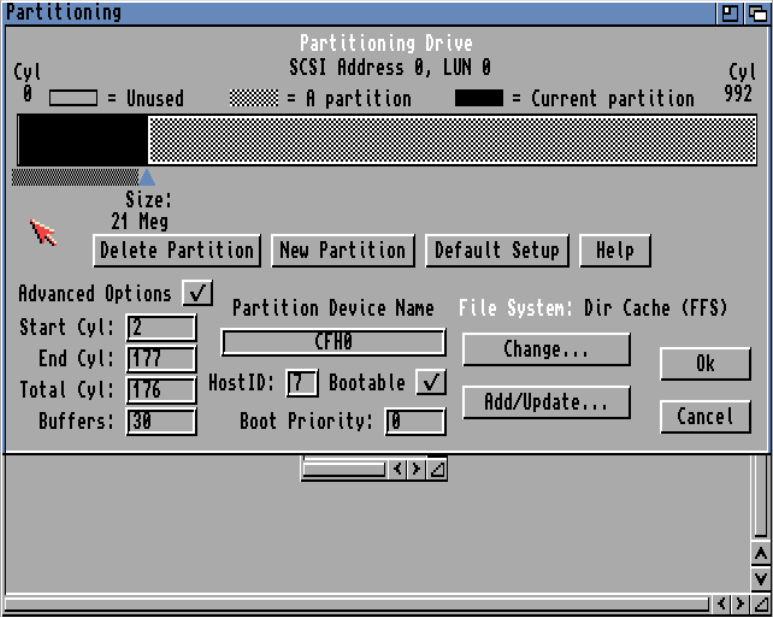
The partition layout was as follows:
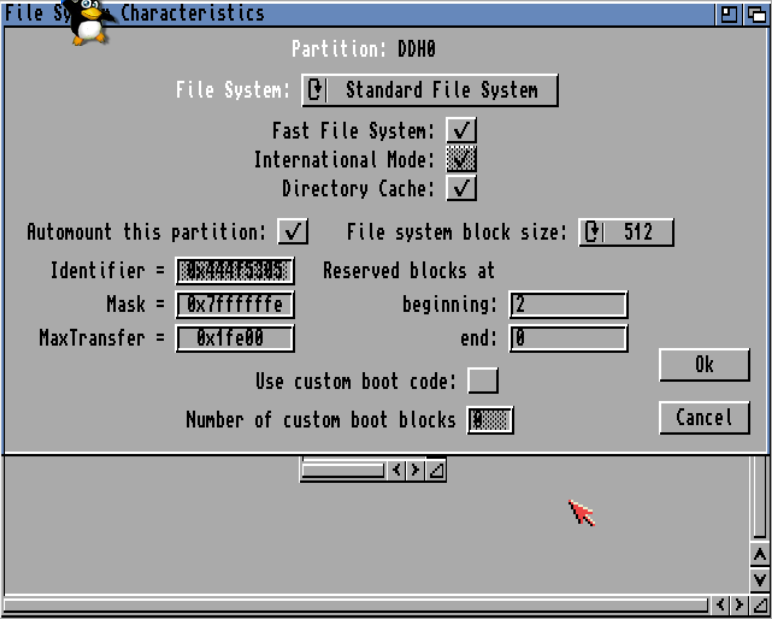
- CFH0: 21 MB / 100 buffers
- CFH1: 100 MB / 200 buffers
Both partitions use FFS with directory cache enabled, and a MaxTransfer value set to 0x1FE00
After rebooting, both partitions were quick-formatted before launching the standard Workbench installation process.
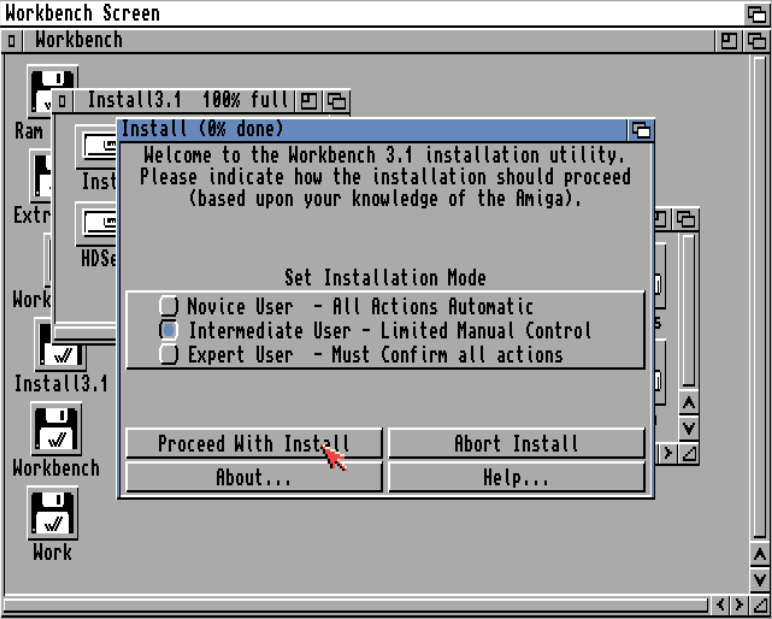
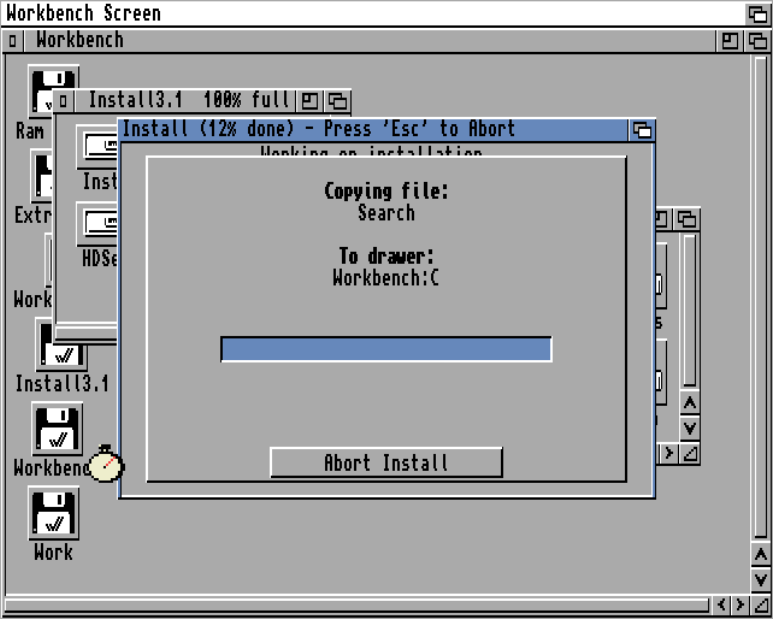
Home made automated installer
I wrote a custom installer script that essentially automates the setup of a full AmigaOS environment. Its purpose is to reproduce a consistent configuration in a simple and repeatable way.
In practice, it performs the following tasks:
- Copies the base system files into SYS:
- Installs application packages from an APPS directory to a target partition (for example WORK: )
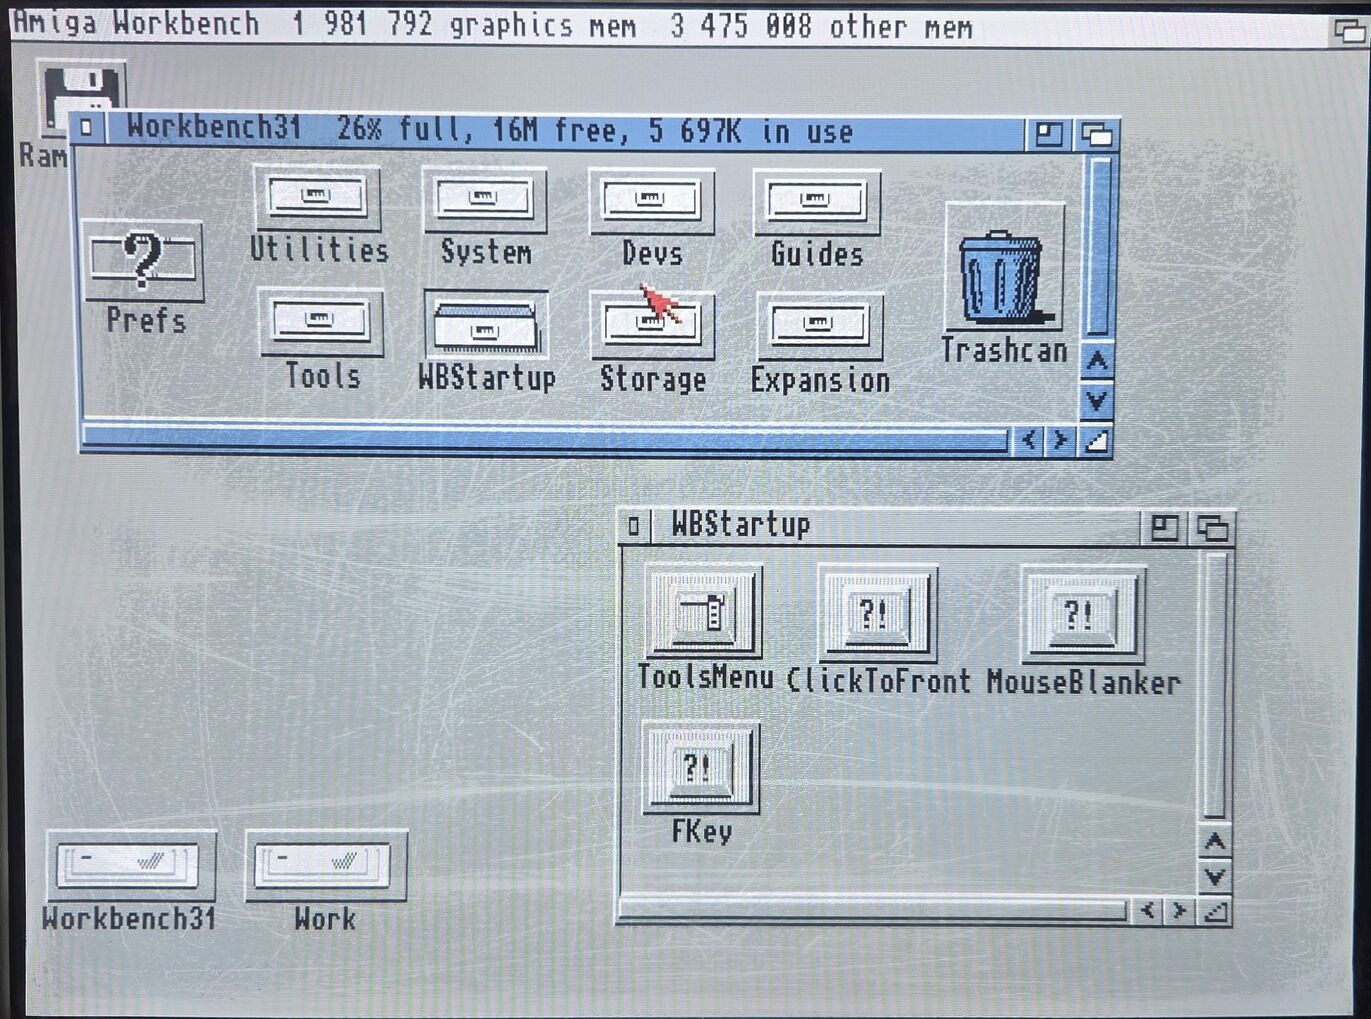
- Lets the user choose which commodities to enable
- Applies patches to the Startup-Sequence
- Appends custom content to the User-Startup
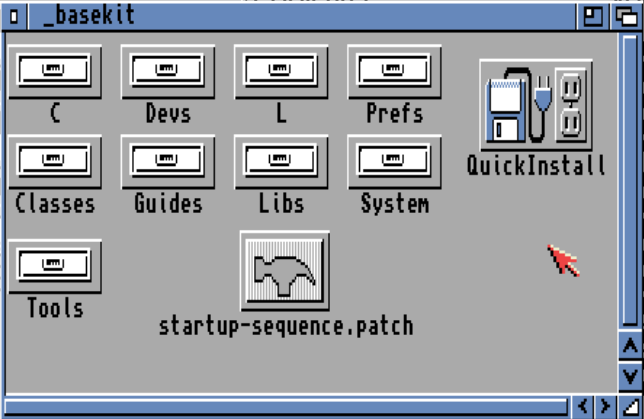
You can think of it as a poor man’s Ansible for AmigaOS: a way to quickly deploy a preconfigured system by preparing a set of standard folders (S, C, Libs, etc.), along with modified startup scripts.
The Startup-Sequence can optionally be patched using a simple file named startup-sequence.patch . The use of the EDIT command was particularly helpful here, as described in the AmigaDOS documentation: https://www.pagetable.com/docs/amigados_tripos/amigados_manual.pdf
If a User-Startup.patch file exists, its content is automatically appended to S:User-Startup .
This installer is also used to automatically deploy selected tools, enable commodities, and patch both startup scripts in one pass. It was originally more of a fun experiment to better understand how the Amiga Installer system works than a production tool.
The source code and documentation are available on my GitHub: https://github.com/jit06/AmigaQuickInstall
Installed software
This section lists the additional software installed on the system to improve usability, compatibility, and provide some testing tools. Some of these are essential for the setup, while others are installed mainly for experimentation and curiosity.
Core Utilities and Tools
- FileMaster 3 (with keyfile)
- BGUI (required by FileMaster 3)
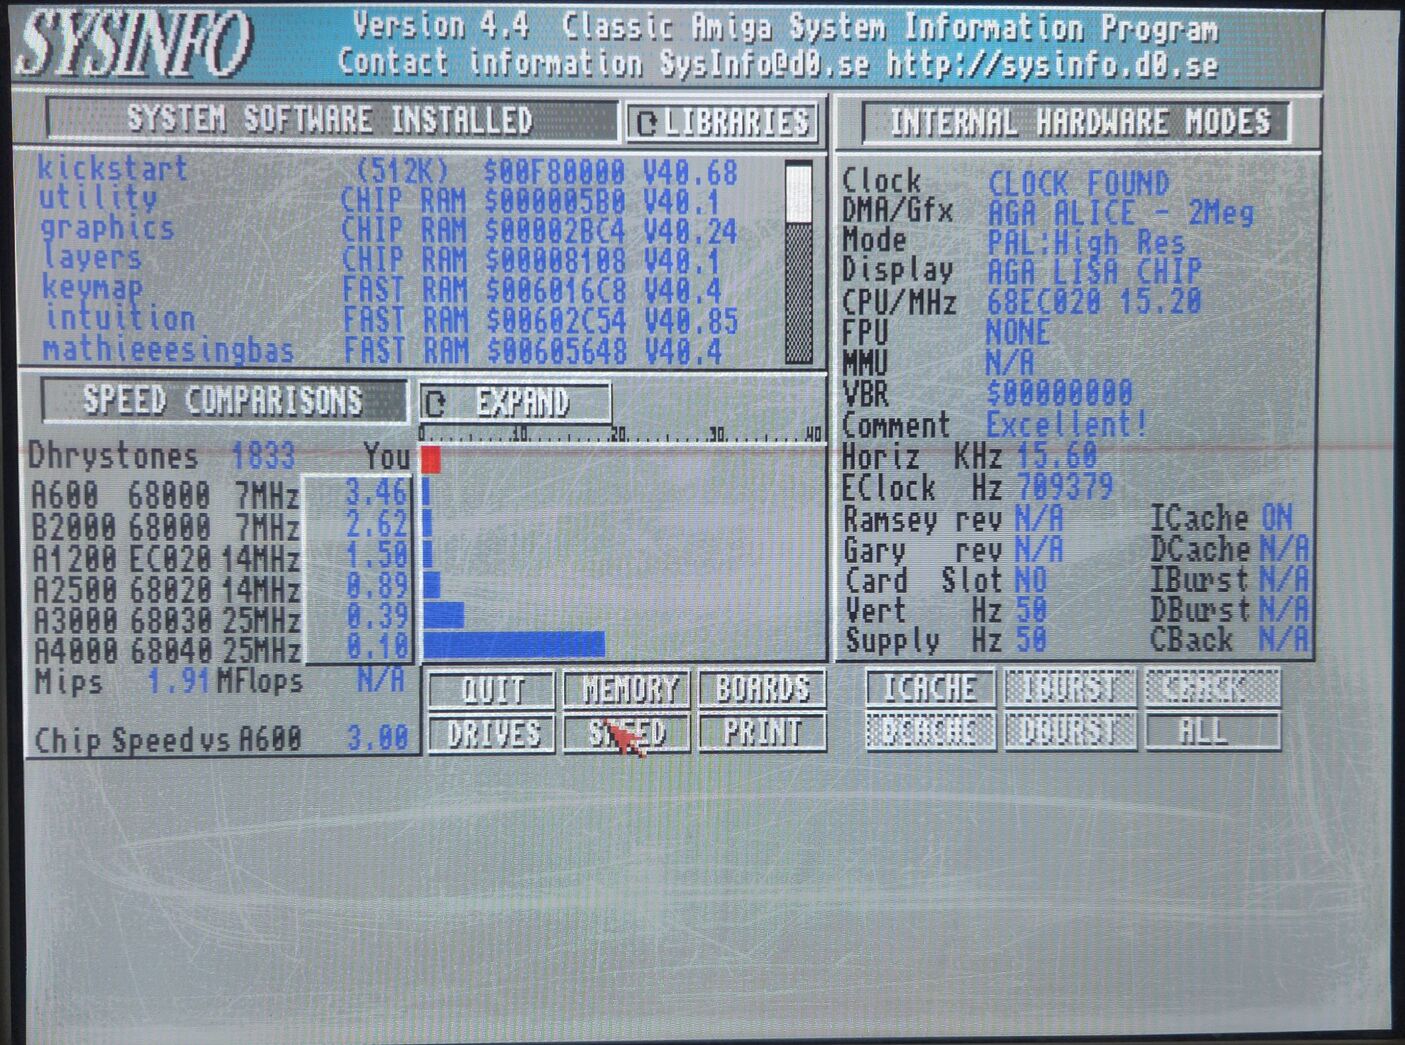
- SysInfo
- LHA 2.15
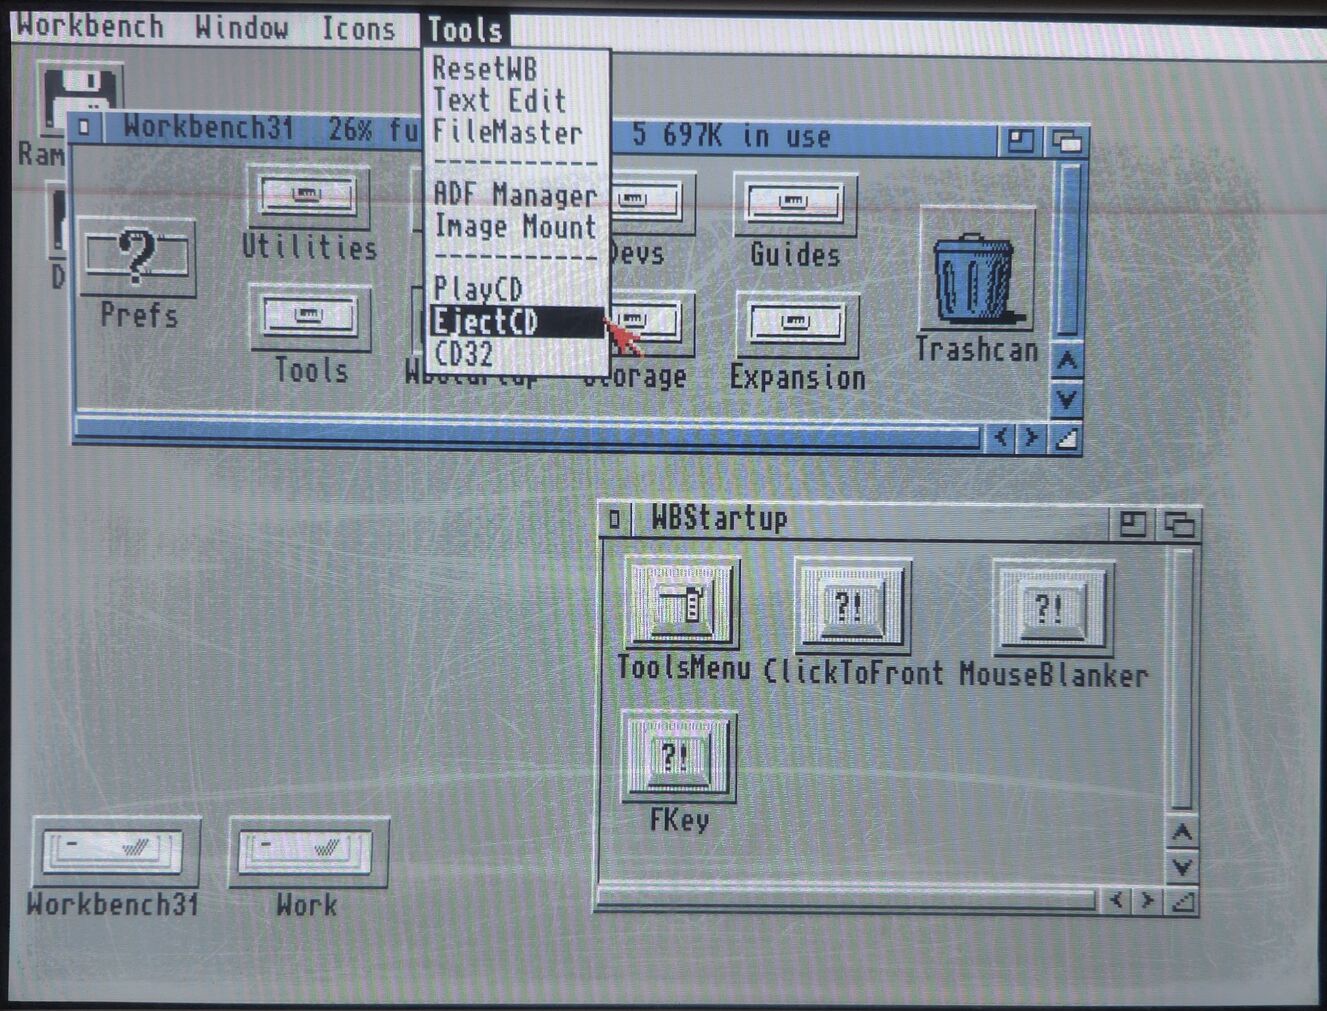
- ToolsMenu
- ImageMount
- ADFZ
- ASE2019_2 text editor
- PoolMem
- BlazeWCP
- FBlit
- FText
- KingCON
- ReqTools
- PowerPacker library
- IDEFix97 and CD32 emulator support
For IDEFix CFCard compatibility, I also used the patched version available here: https://wiki.icomp.de/wiki/File:Eb_final.lha
This was combined with the CFCard patch for IDEFix. To apply the patch, the spatch utility is required. I found a working version inside CrossDOS 6 Professional v6.02 (1995-10-09), available on archive.org.
The patch was applied as follows:
spatch -oIDEFix_patched -pIDEFix.pch IDEFix
Applications (APPS)
- ProTracker AGA fix
- X-Copy
- AmiWolf
- ADoom
Of course, AmiWolf and ADoom were installed mainly for testing and curiosity rather than real usage, and are not really playable in this configuration.
Custom startup-sequence
Below are the Startup-Sequence patch and User-Startup file used by my custom installer script.
The idea was to keep the base system clean while still allowing automation of all additional tools and configurations through a controlled startup flow.
Startup-Sequence patch file. As you can see, pressing F10 during boot launch the CD32 emulator.
|
1 2 3 4 5 6 7 8 9 10 11 12 13 14 15 16 17 18 19 20 21 22 |
F/BindDrivers/;I ;--- Custom commands Start --- ; CD32 Emulation start if F10 is pressed C:KeyCheck 59 if warn SYS:System/PutPrefs NonLace SYS:System/CD32 endif ; Better memory handler C:PoolMem INSTALL >NIL: ; IDEFix C:IDEFix ; Better C2P and blitter operations C:blazewcp C:FBlit C:FText ;--- Custom commands End --- |
User-startup patch file:
|
1 2 3 4 5 6 7 8 9 10 11 12 13 |
;--- Custom User Additions --- ; KingCon as CON replacement Assign CON: DISMOUNT Assign RAW: DISMOUNT Mount CON: from DEVS:KingCON-mountlist Mount RAW: from DEVS:KingCON-mountlist ; IDEFix Assign CacheCDFS: SYS:System/IDEfix C:ActivateCrossIDEfix ALL ;--- Custom Additions End --- |
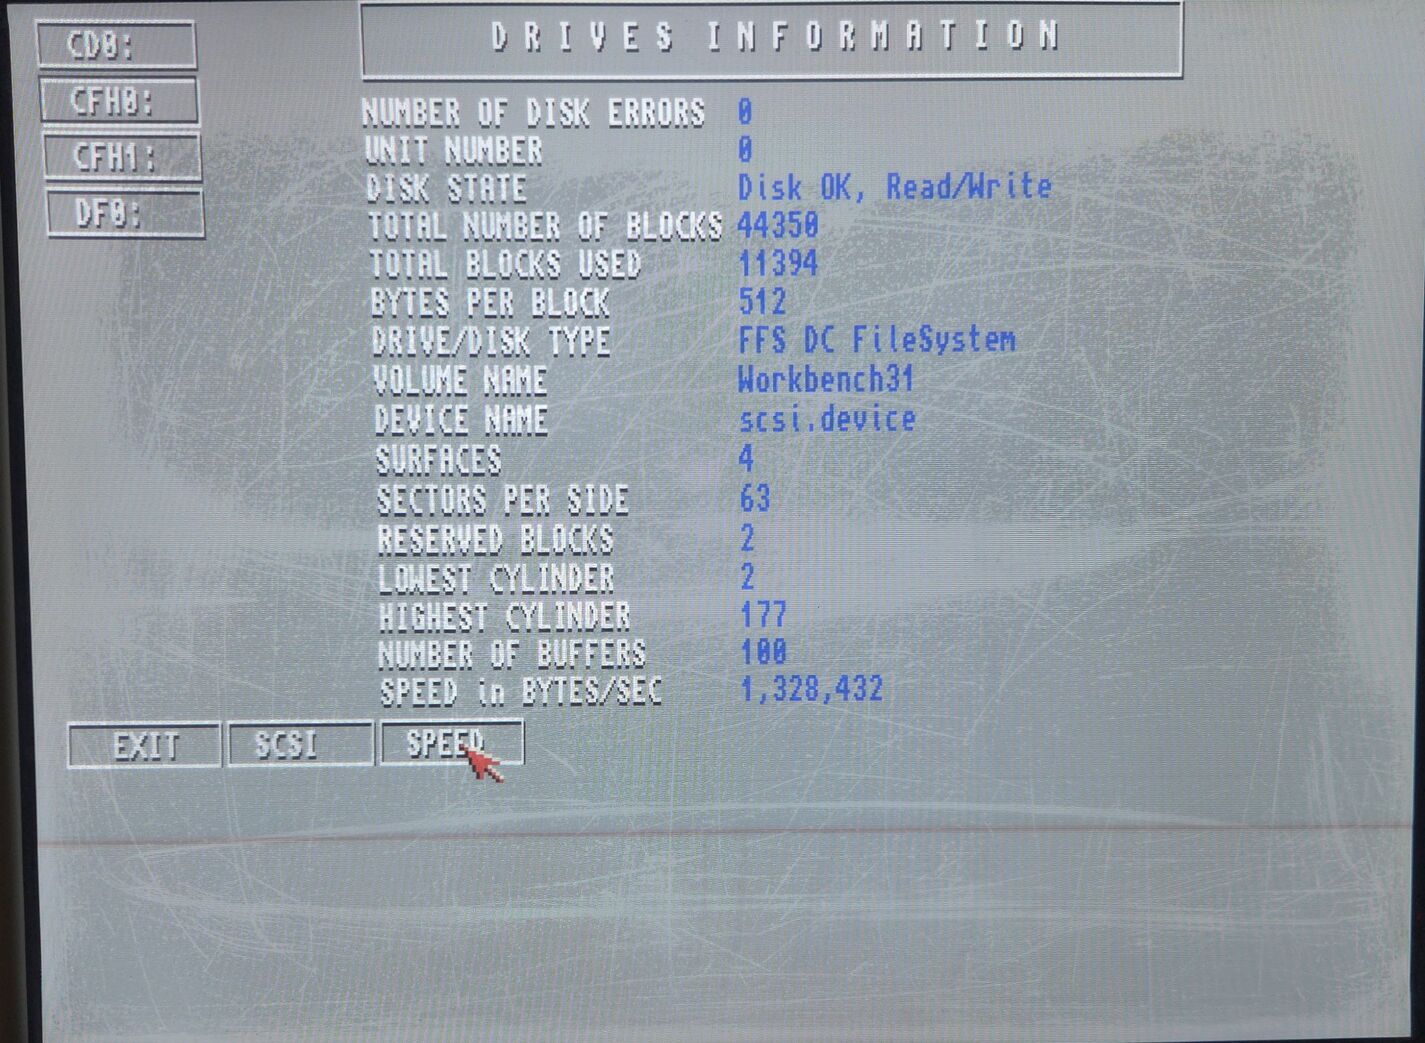
On real hardware
Sorry for the bad quality of the photos, they have been taken on a real VGA CRT monitor running standard PAL resolution at 50 Hz.
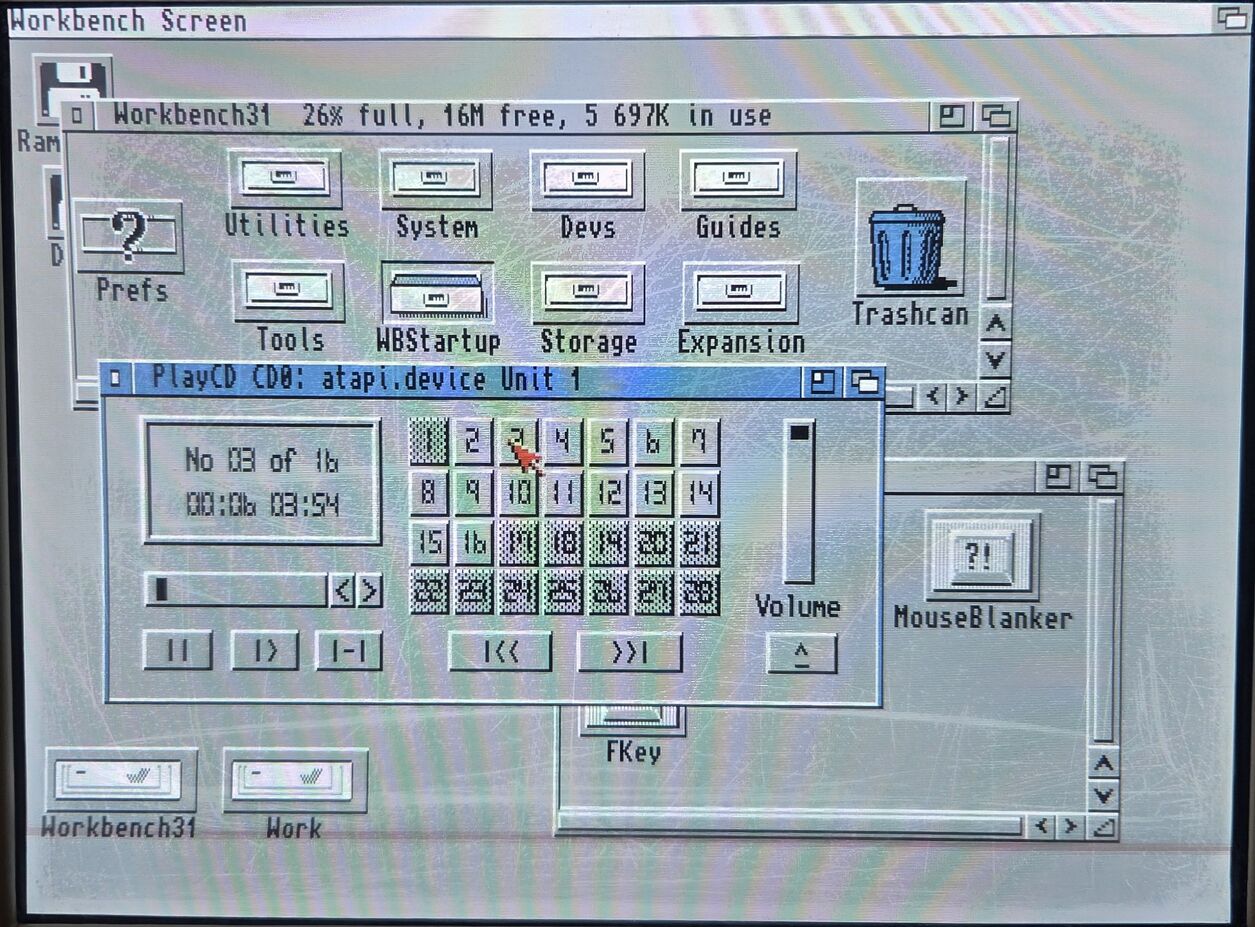
CD32 compatibility
Below is a preliminary list of tested games. I will complete it over time as I continue testing more titles.
For each game, I indicate whether it runs via:
- Standard Amiga boot (pressing F10 for CD32 emulation mode)
- CD32 floppy mode
- Directly launched from Workbench using the CD32 emulator
Tested games
- Fire & Ice (F10)
- Bubble & Squeak (F10)
- James Pond 2 (Workbench)
- Disposable Heroes (F10)
- The Chaos Engine (Floppy)
- Banshee (F10)
- Wendetta 2175 (Workbench)
- Super Skidmarks (F10)
- Super Stardust (Workbench)
- Alfred Chicken (F10)
- Project X / F17 Challenge (F10)
- Alien Breed Tower Assault (Workbench)
- Trolls (Workbench)
- Ultimate Body Blows (Workbench)
- Fightin Spirit (Workbench)
Brian the Lion behaves in a slightly unexpected way:
The CD version boots and plays audio CD correctly in CD32 mode, but results in a black screen. When launched manually from Workbench, the game runs properly, but without CD audio playback.
Below is a video booting Disposable Heroes 🙂
Fully automated Pistorm / OS3.2 install
I wanted a reusable, fully automated and easy-to-use way to prepare a complete SD card for my PiStorm setup, while still keeping it flexible and customizable.
Emu68Imager already provides part of this workflow, but not everything: custom software installation still needs to be done from the Amiga side, and more importantly, it only runs on Windows… while I am mainly a Linux user.
So I decided to build my own solution:
The first tool handles the full SD card provisioning, while the second one is used to merge multiple ADF images into a single installable package.
Basically, creating a full Amiga setup is now as simple as inserting the MicroSD card into my PC and running:
|
1 2 |
sudo ./setup_disk.sh -d /dev/sdc -k ROMs/A1200.47.115.rom -c contribs/custom_cm4_config.txt -l contribs/custom_cmdline.txt ./package.sh -d /dev/sdc -m SDH0=Workbench -m SDH1=Apps -m SDH2=Games -m SDH3=Data -i OS32,addons,picasso96,emu68tools,ibrowse,optical,office,graphics,pimyretro,games,pcgames,whdload,whdlmedias,whdlgames INT ✘ |
In a few minutes, the script performs the following steps:
- Creates Emu68 partitions and formats them using PFS3
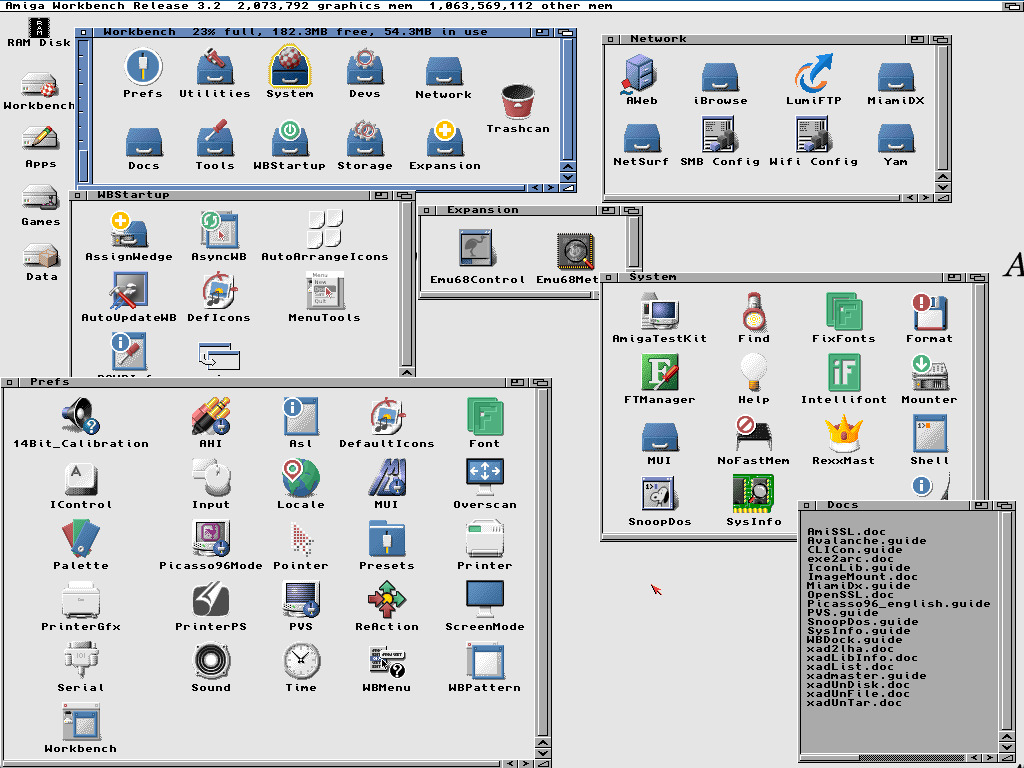
- Installs AmigaOS 3.2 and all latest updates
- Installs essential tools, patches, and network software (Miami, YAM, iBrowse, NetSurf, etc.)
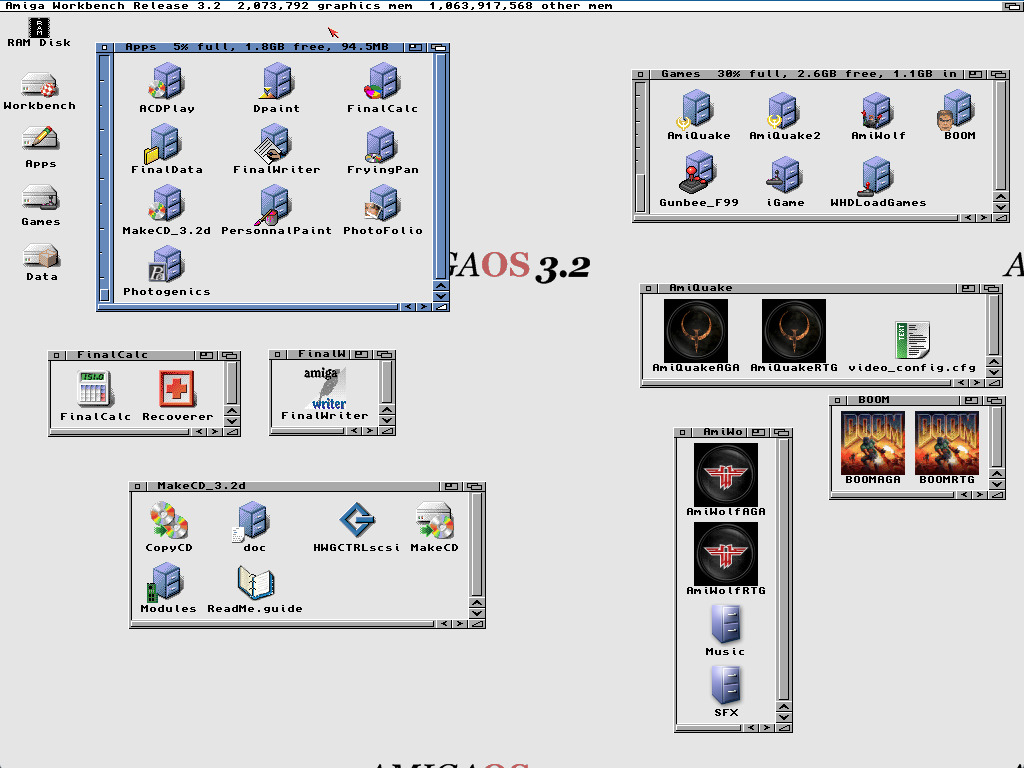
- Installs chosen applications (Final Writer, DPaint V, Photogenics, etc.)
- Installs selected games, including WHDLoad and a full iGame media set
Everything is fully customizable and based on a simple package system. This allows anyone to reproduce the exact same configuration or adapt it to their own needs. Contributions and new packages are welcome via pull requests.
Nothing is better than a realtime video : installation speed depends on you internet connection and SDCard speed. Not that for the video, I disabled some big packages like Quake and Quake II because the game assets take some time to download and it is not really interesting for the demo purpose.
Below some screenshots of the result (from Amiberry)
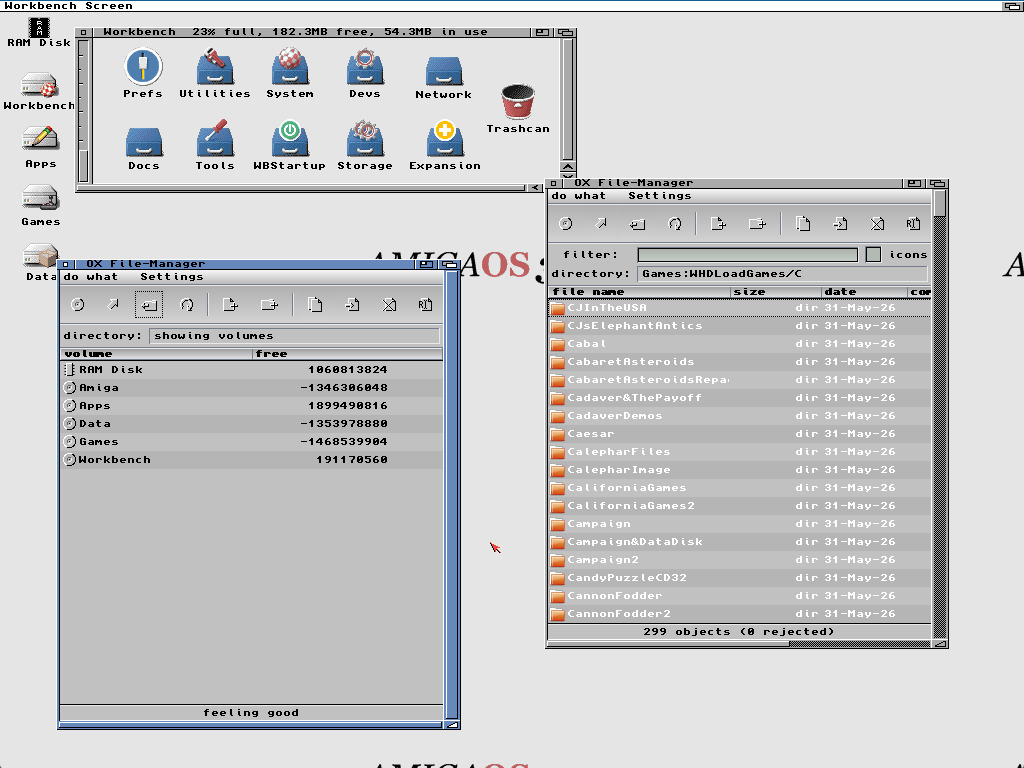
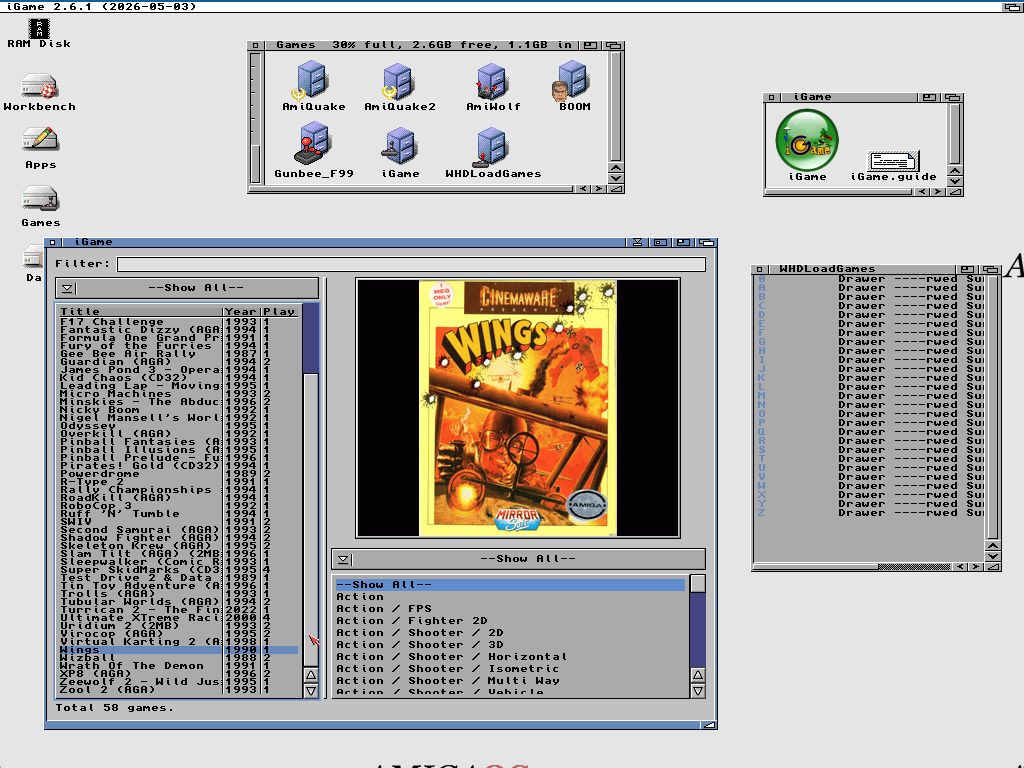
I also plan to make an Amiga-side tool that generates a “state package”, capturing system configuration such as preferences and Workbench icon positions. This would makes reinstallation much easier without losing the user setup. For now, the out-of-the-box result is a bit “rought”, but it still faster to obtains than any other way to install so many softwares 🙂
