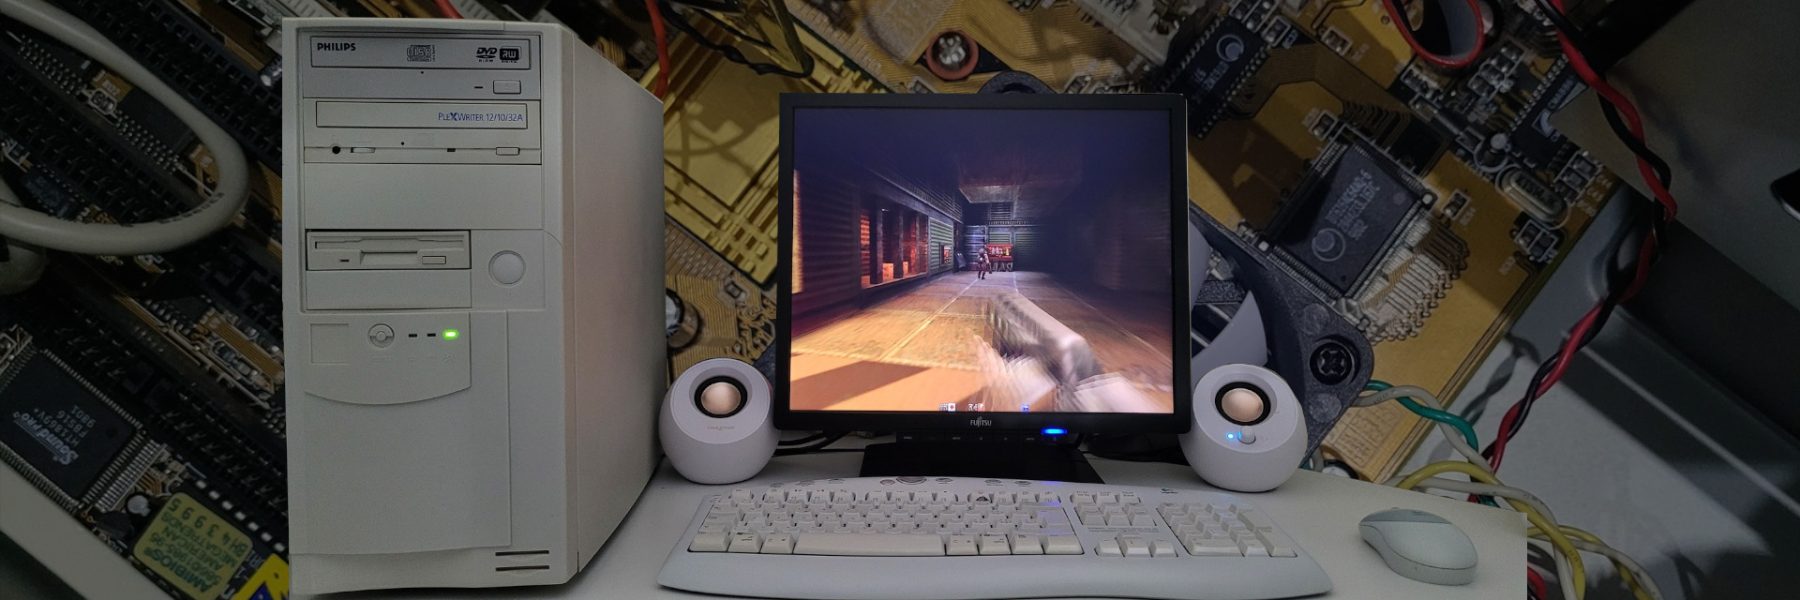
Back in the nineties, I was using boosted Amiga computers and a Playstation, not a PC. Of course, I had the chance to play Doom on my father’s PS/2 with its 486SLC, but I did not really played with the fastest toy of this era : socket 7 based PC. As I found some nice components from this period, I decided to build a good old configuration based on K6-II and the first Nvidia 3D card to play all games from the nineties. It turned out that it runs old DOS games as well as late 90′ ones.
This is the story of my pimped socket 7 PC…
Hardware configuration
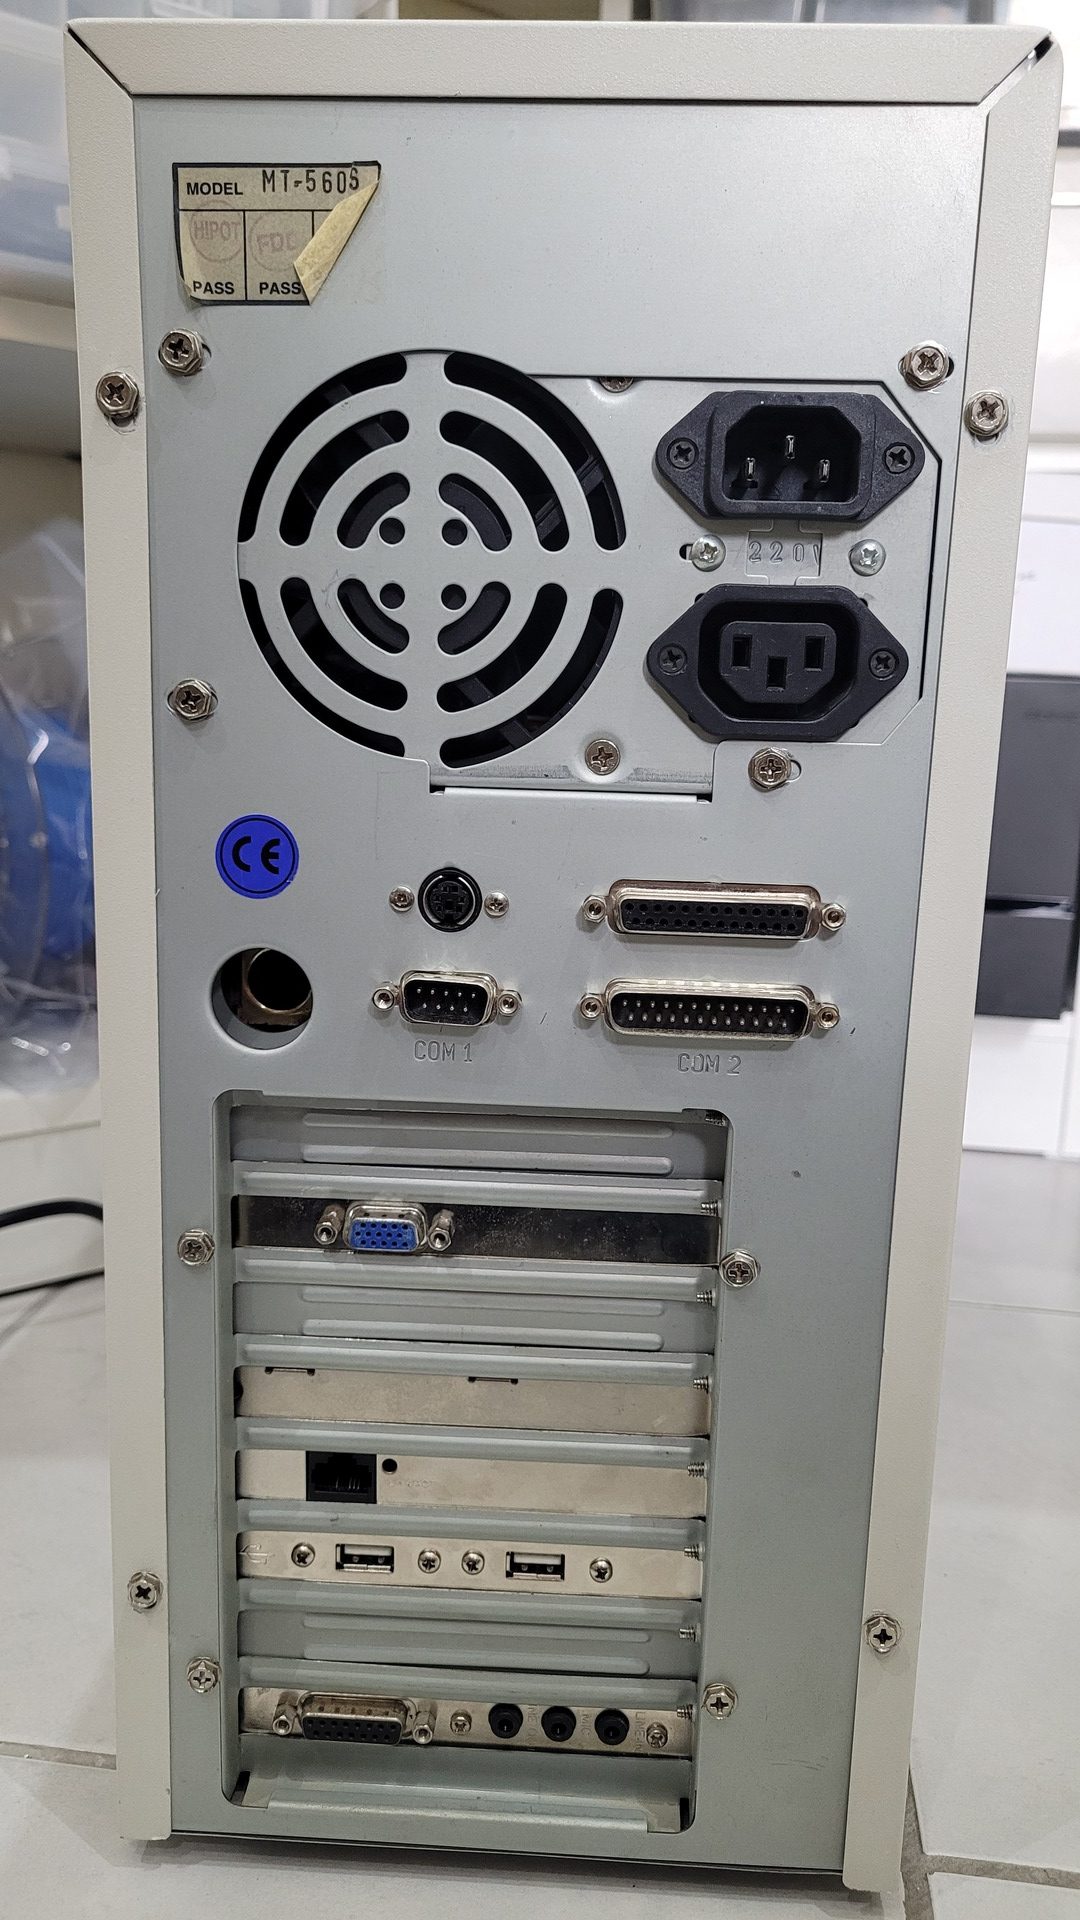
- Motherboard : PCChips M571 V3.2, which is very well documented
- CPU : K6-2 400Mhz 2.2v (400AFQ), which provides a very good socket 7 speed / price ratio and is easy to overclock up to 500 Mhz
- RAM : 1×128 MB PC100 SDRam stick which of course runs flawlessly at 83Mhz
- Graphic Card: Riva 128, very good at 2D with DOS games, VBE 3.0, and good with D3D/OGL
- ATA controller : Promise Ultra100 TX2
- A Realtek 8139 based network card for easier file transferts
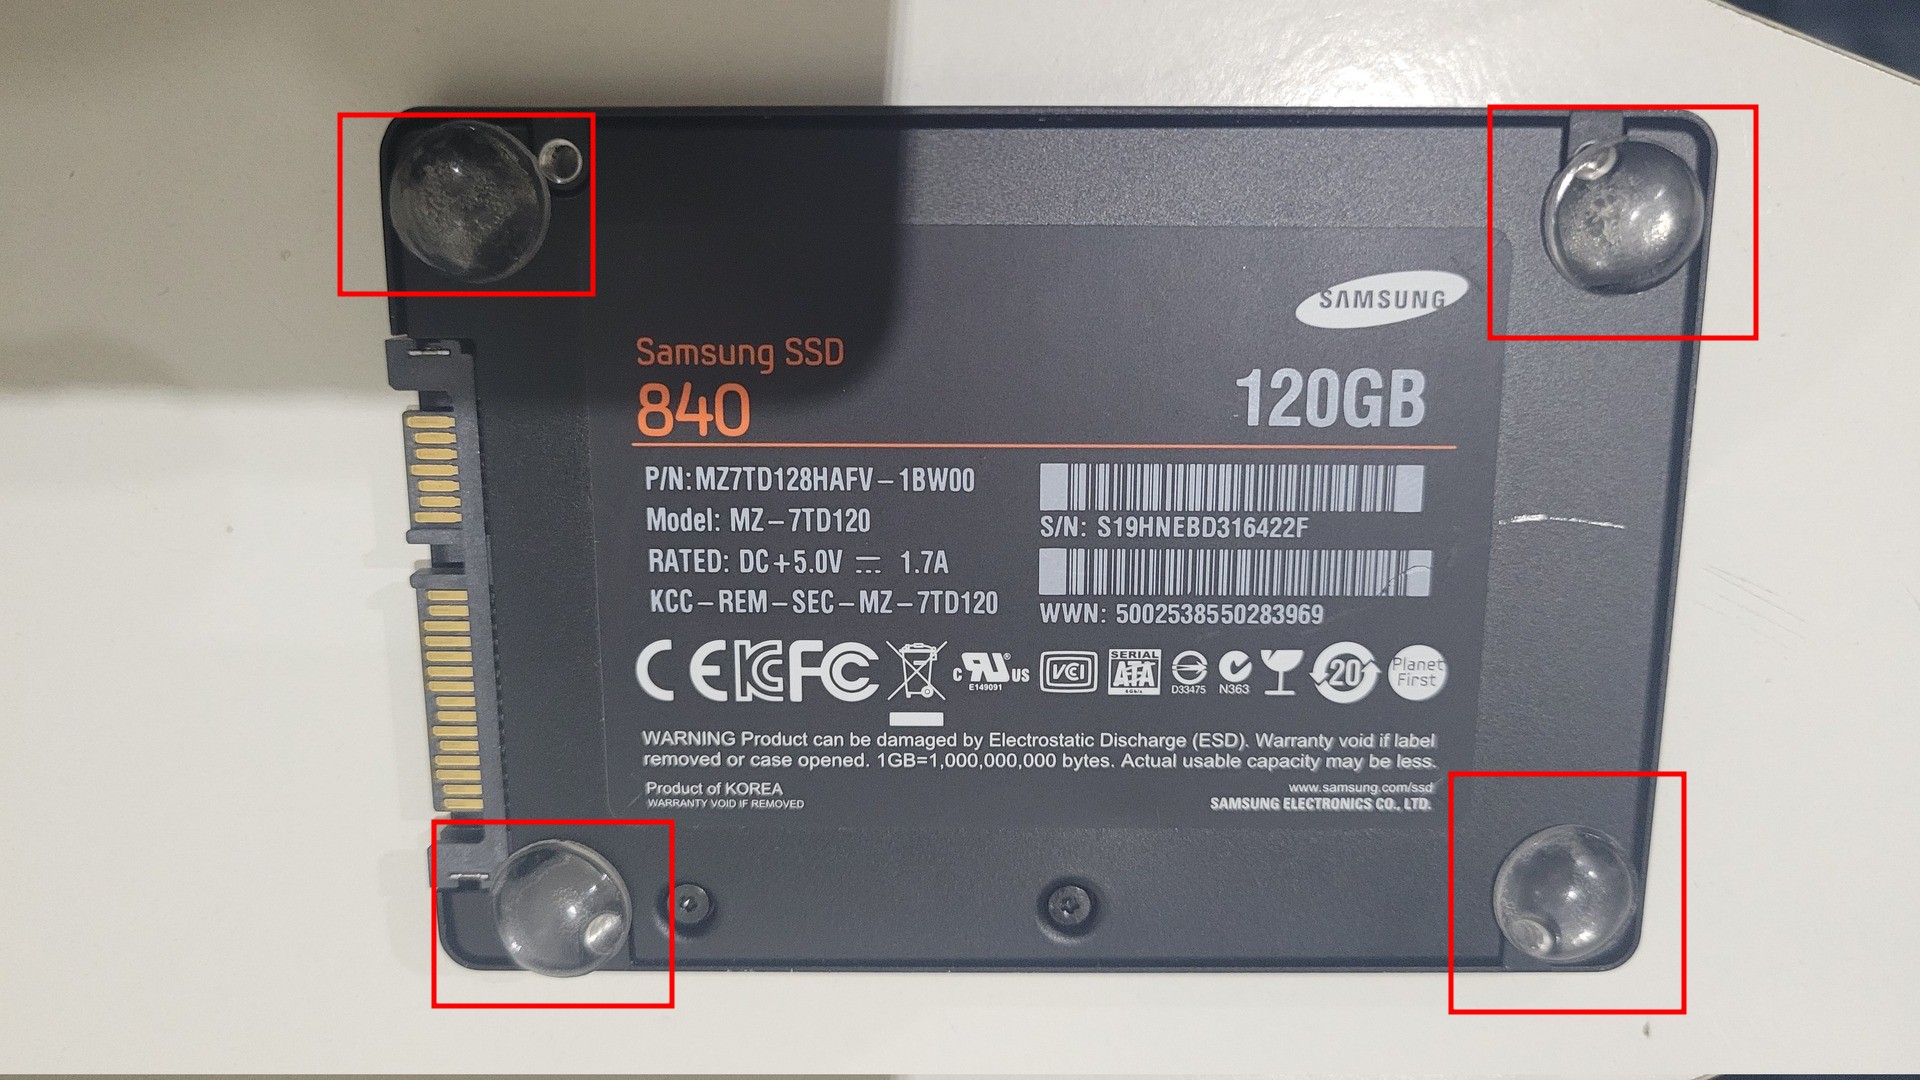
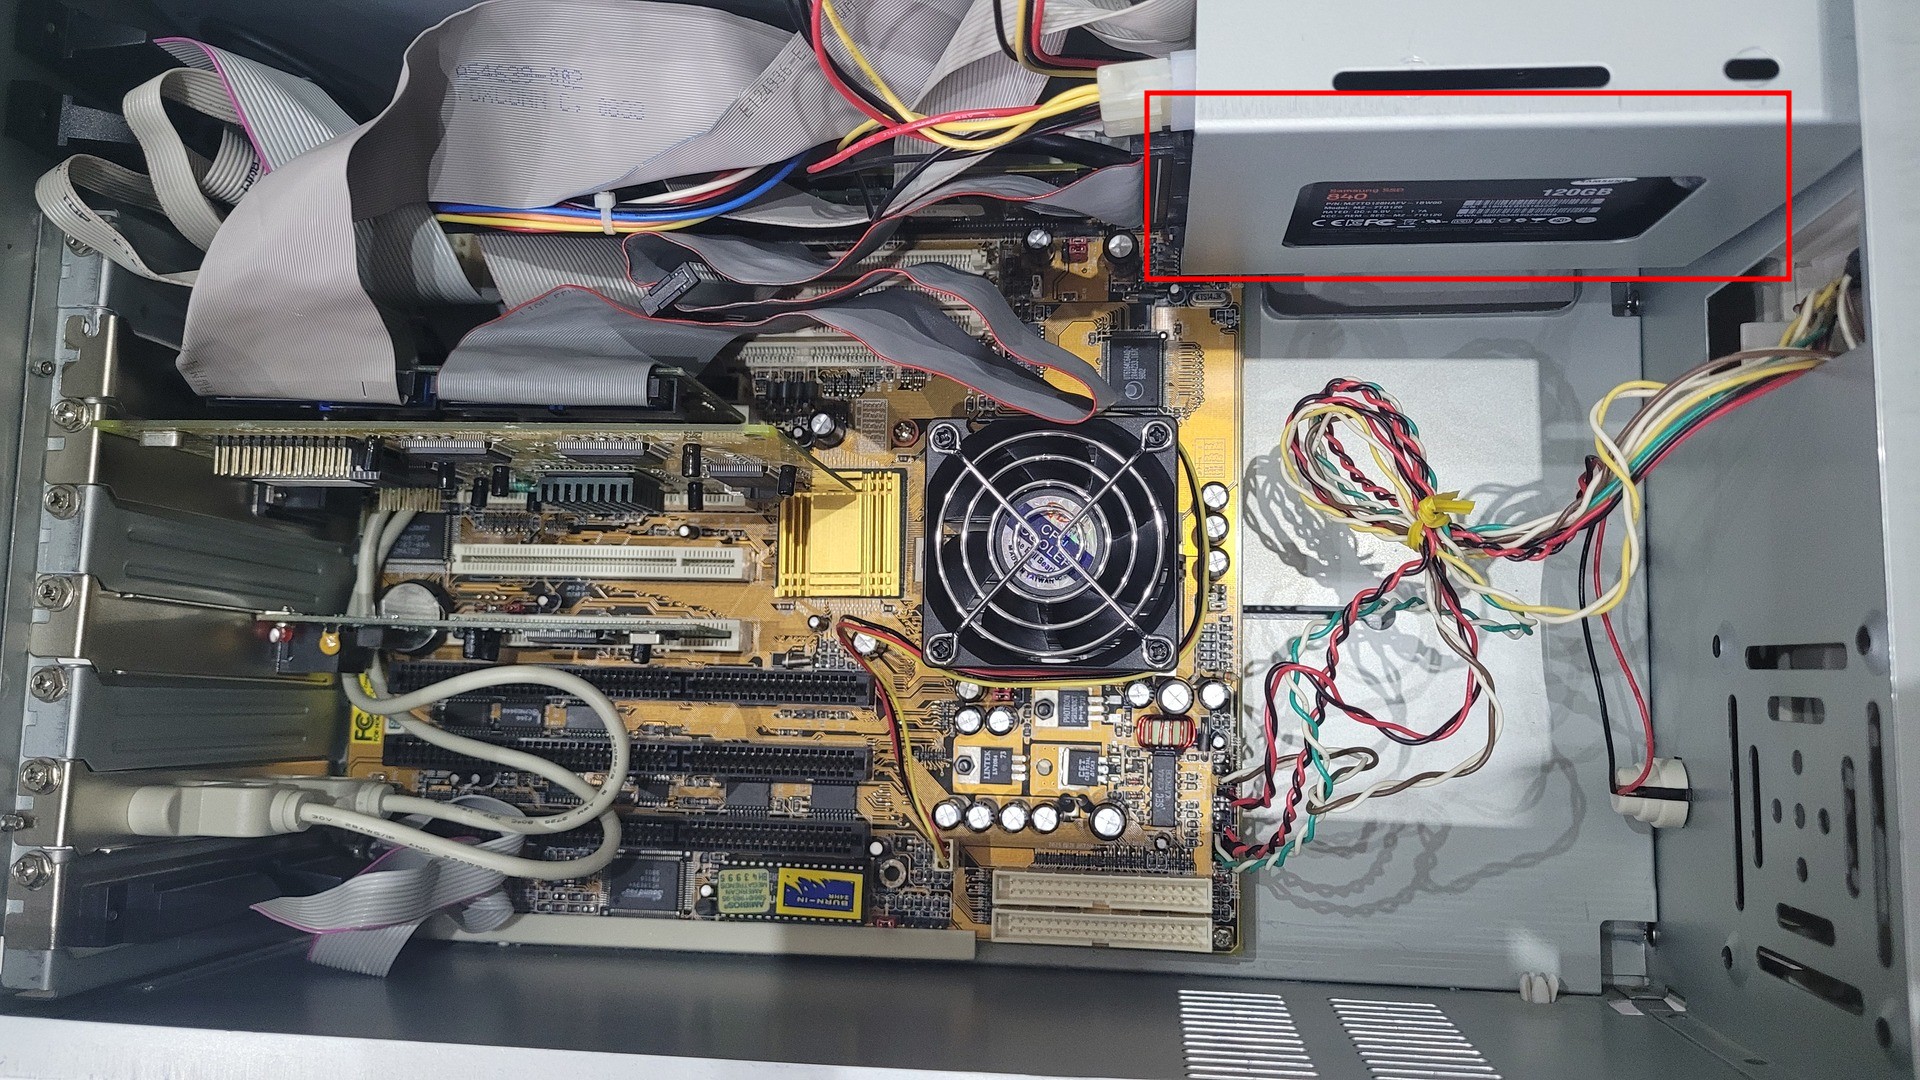
- 128 Gb SATA SSD + adapter : it is not “retro” but I really can’t use old HDD anymore, too slow and too noisy 🙂
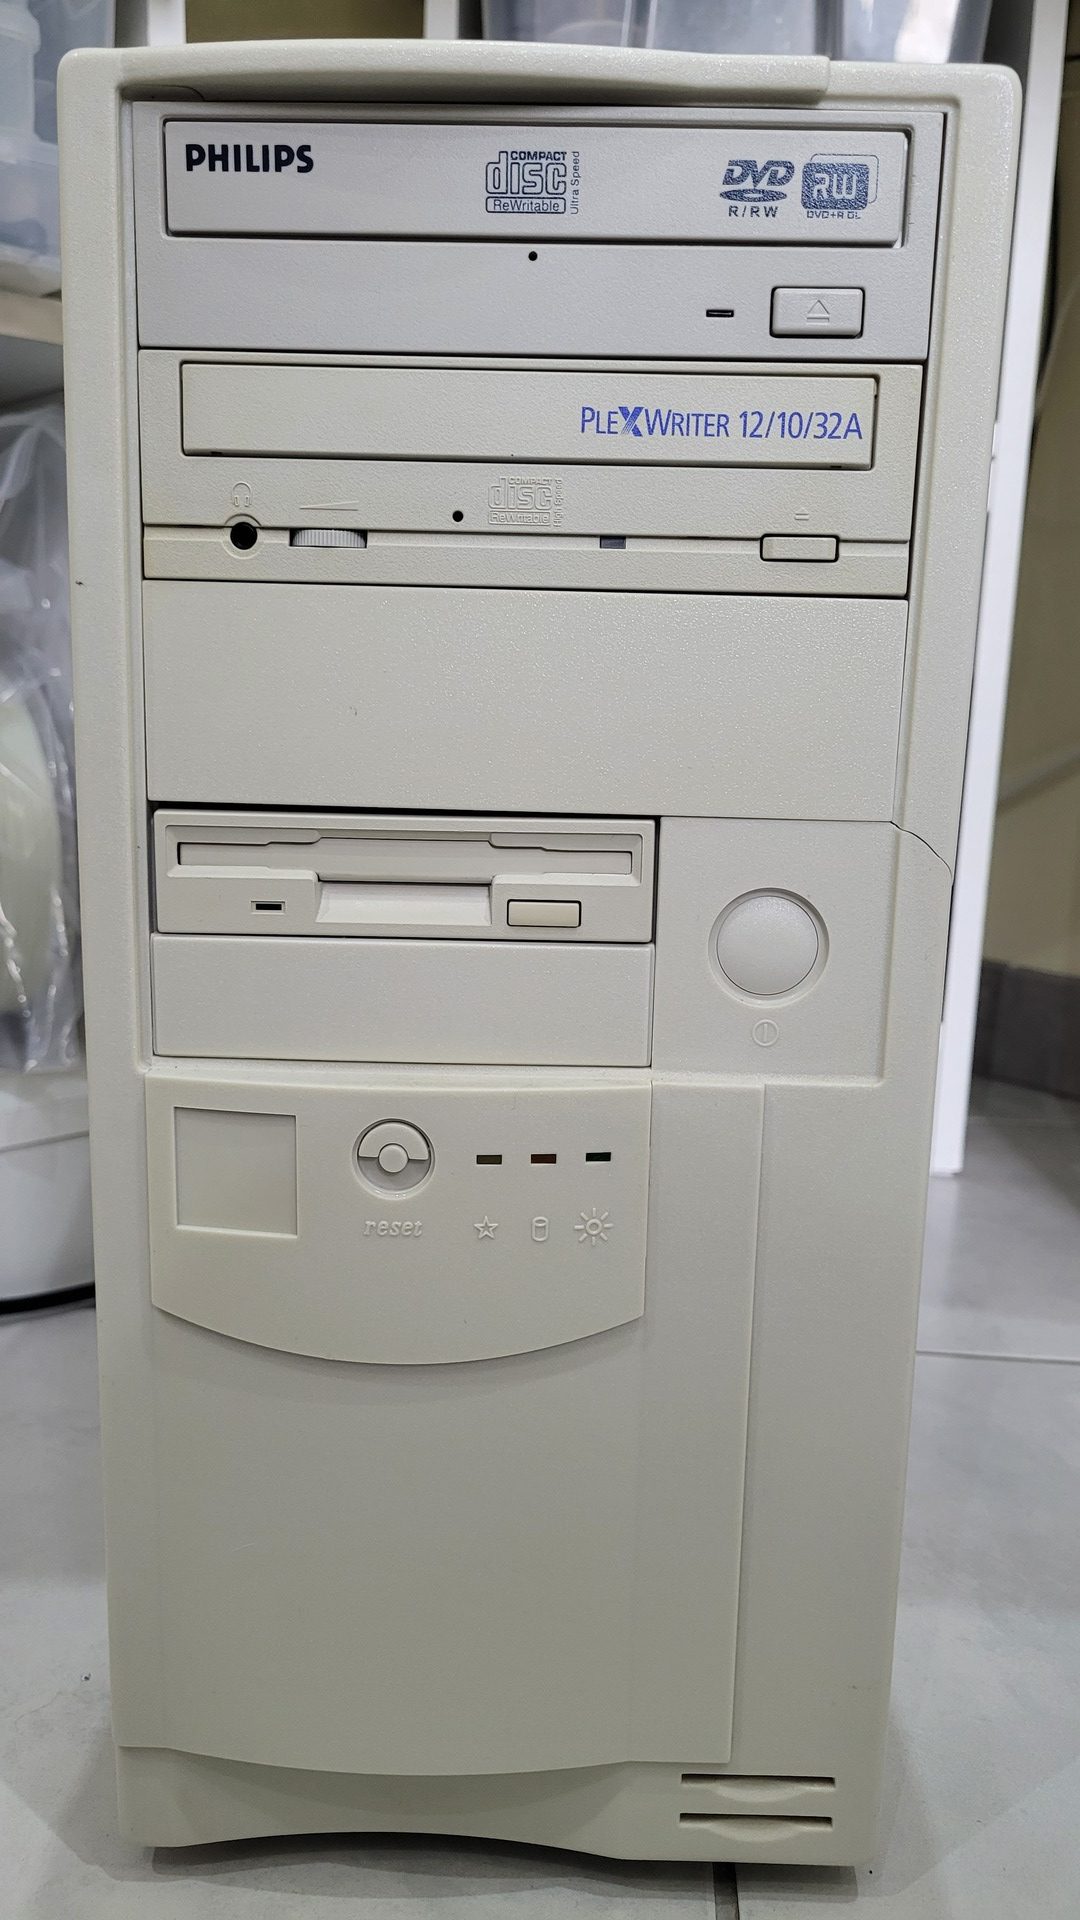
- Philips DVD RW drive
- Plextor 12/10/32 CD-Writer
Sone side notes regarding this hardware :
- I had the chance to find the Plextor CDWriter for cheap. Trust me or not, it is the only writer I own (out of 4) which allows me to burn PSX ISO that my PSX can read without any glitch nor stuttering !
- The DVDRW drive is just here because I wanted to mount 2 drives for the fun and I got it for 5 euros. The bonus is that the drive is able to read any media including RW (CD + DVD).
- I added the UATA controller because the motherboard one does not support more than 32GB. In addition, this allows for very good speed with the SSD. The optical drives are not connected to it because this controller does not allow to boot on them and it is not supported by MSCDex in DOS mode
- The M571 motherboard integrated audio has a wide DOS compatibility while also being very good in Win9X (SB16 + WSS)
Prerequisites
Updating the bios
The bios version did not support K6-2, so I had to update it to the latest version. Chance is that I had an old bootable IDE hard disk with Windows 95 to make a bootable floppy.
Basicaly, I did the following :
- Format a bootable floppy disk
- Get the latest bios file (2022s) from https://theretroweb.com/motherboards/s/pcchips-m571-v3.2-a#downloads
- Use a CD-RW to write bios and flash tools file on a modern computer, then use this CD-RW under Windows 95 and copy the files onto the bootable floppy (I had no usb floppy drive nor usb driver for win95)
- Follow the guide at http://m571.com/m571/howtoflashyourbios.htm
Important note : the bios file was not found by the Amiflash tool and throwed the message “file does not exist”. The reason was that the bios file had the read-only bit active !
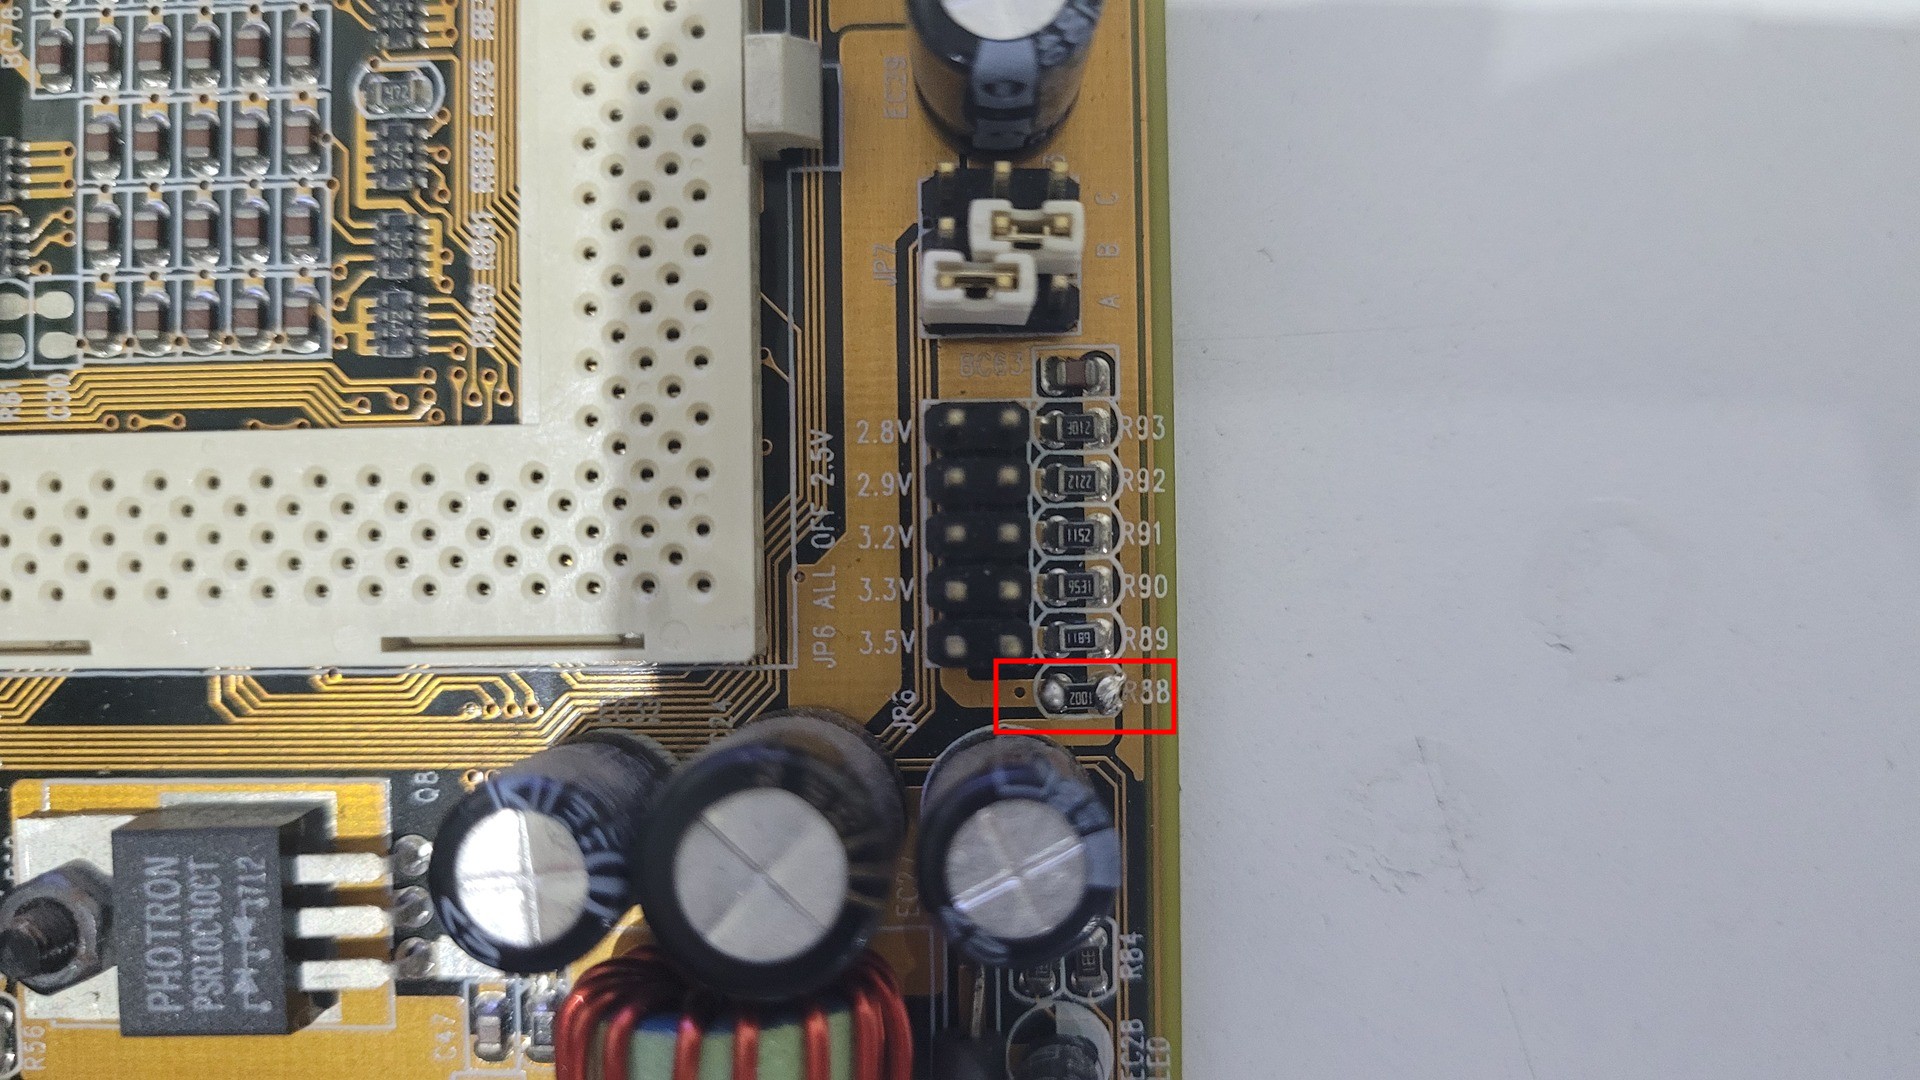
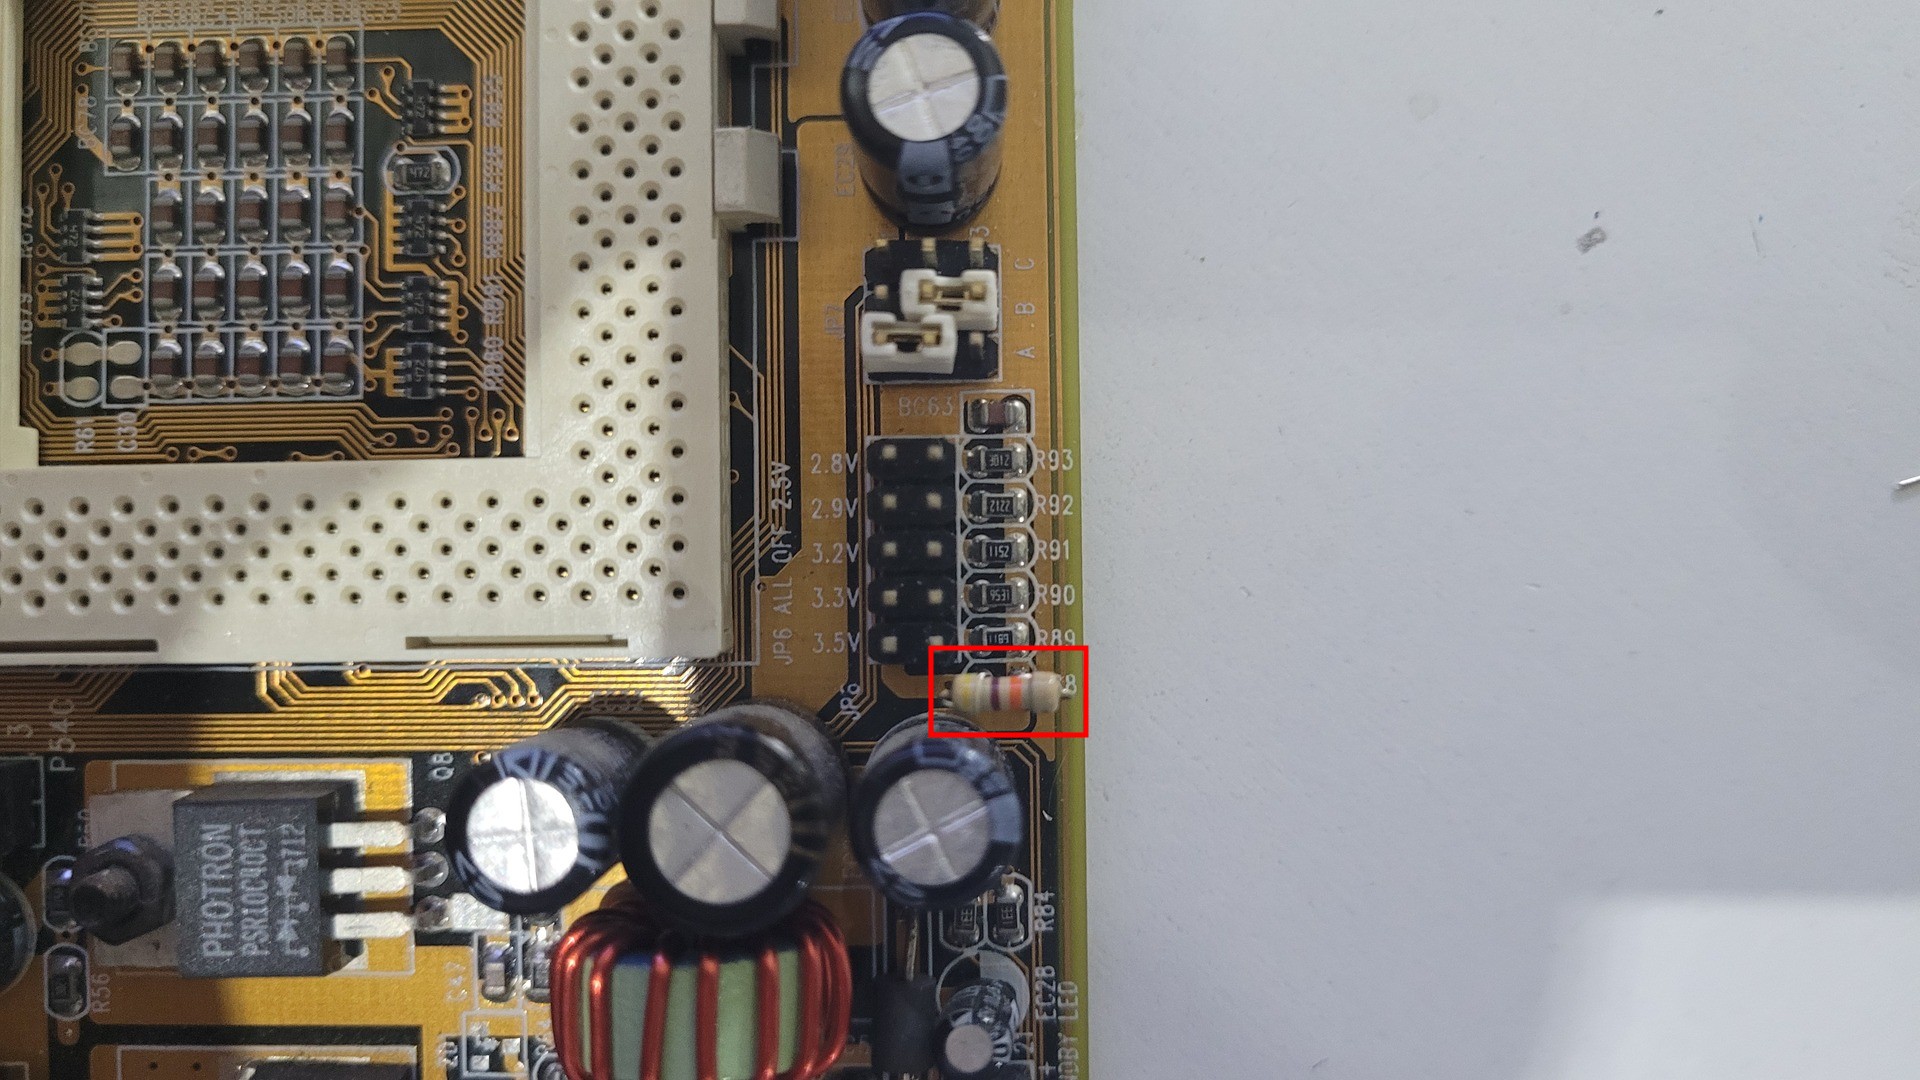
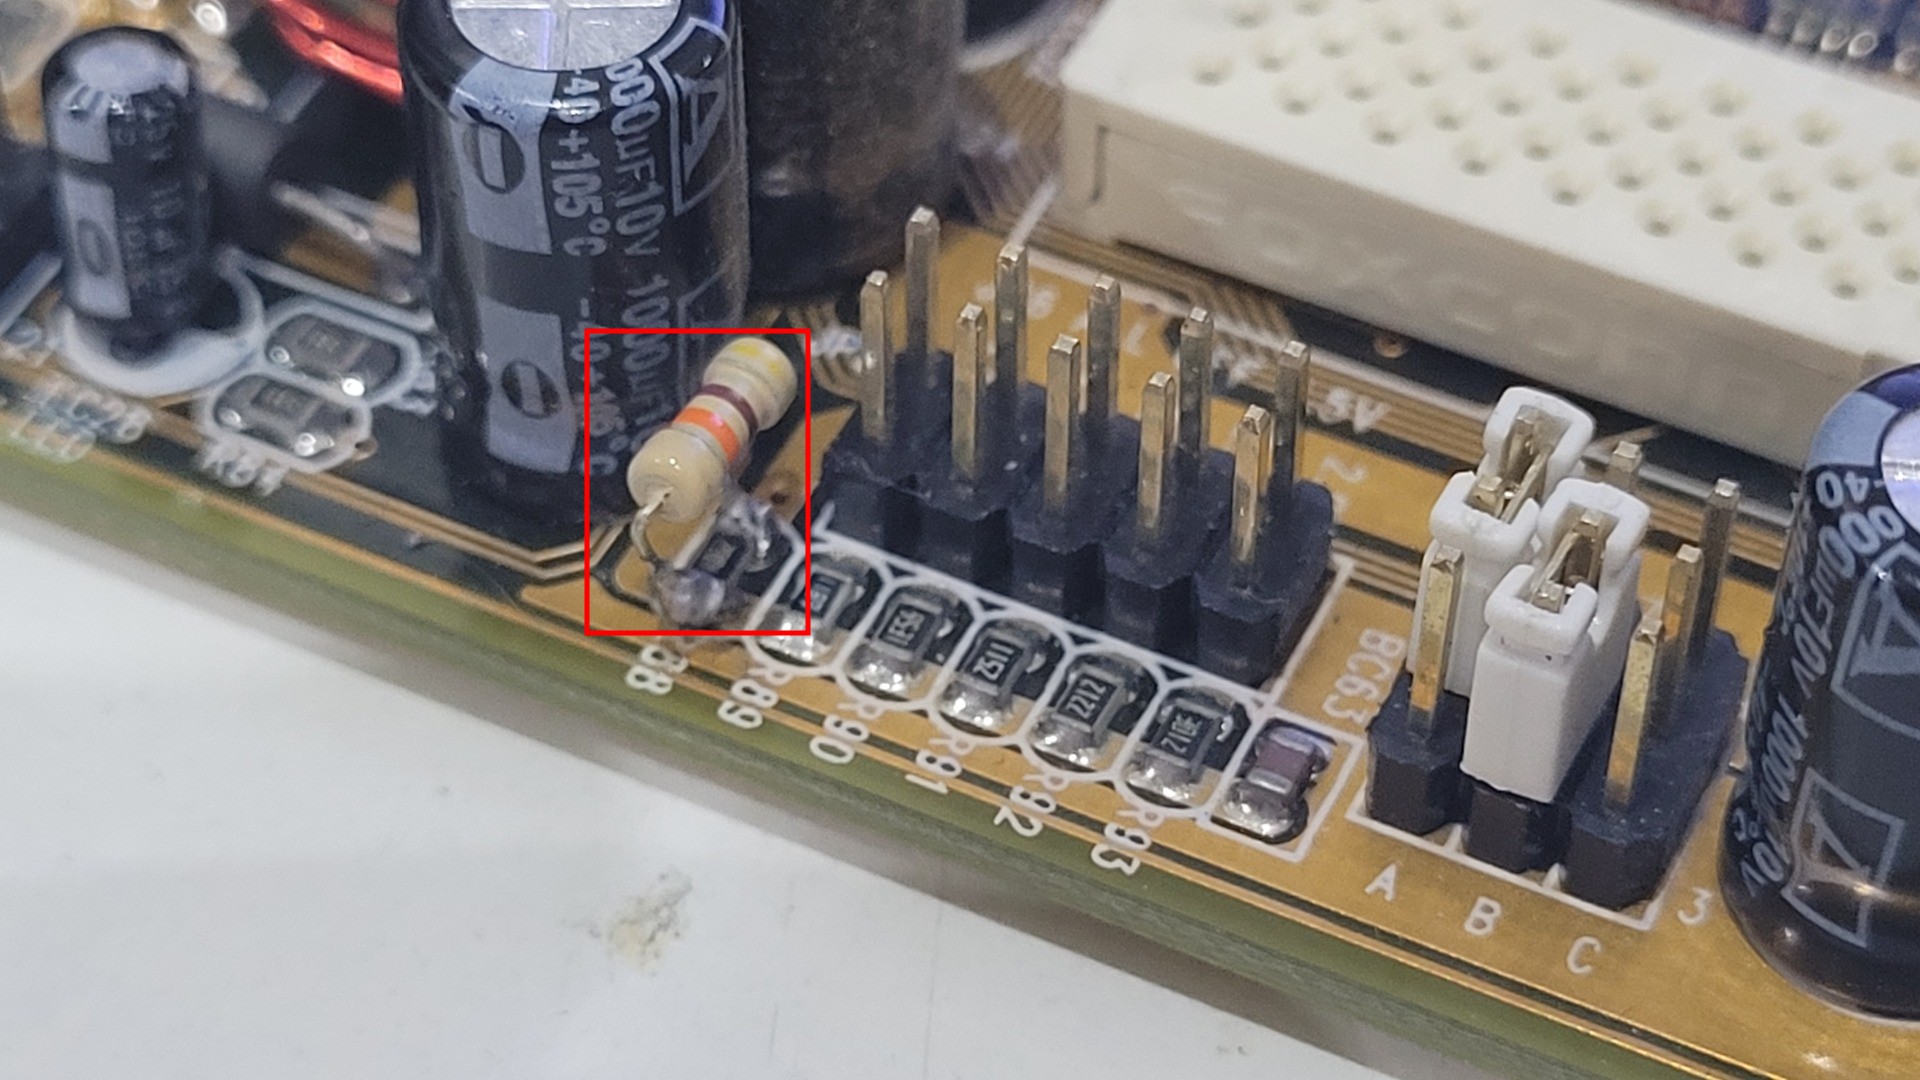
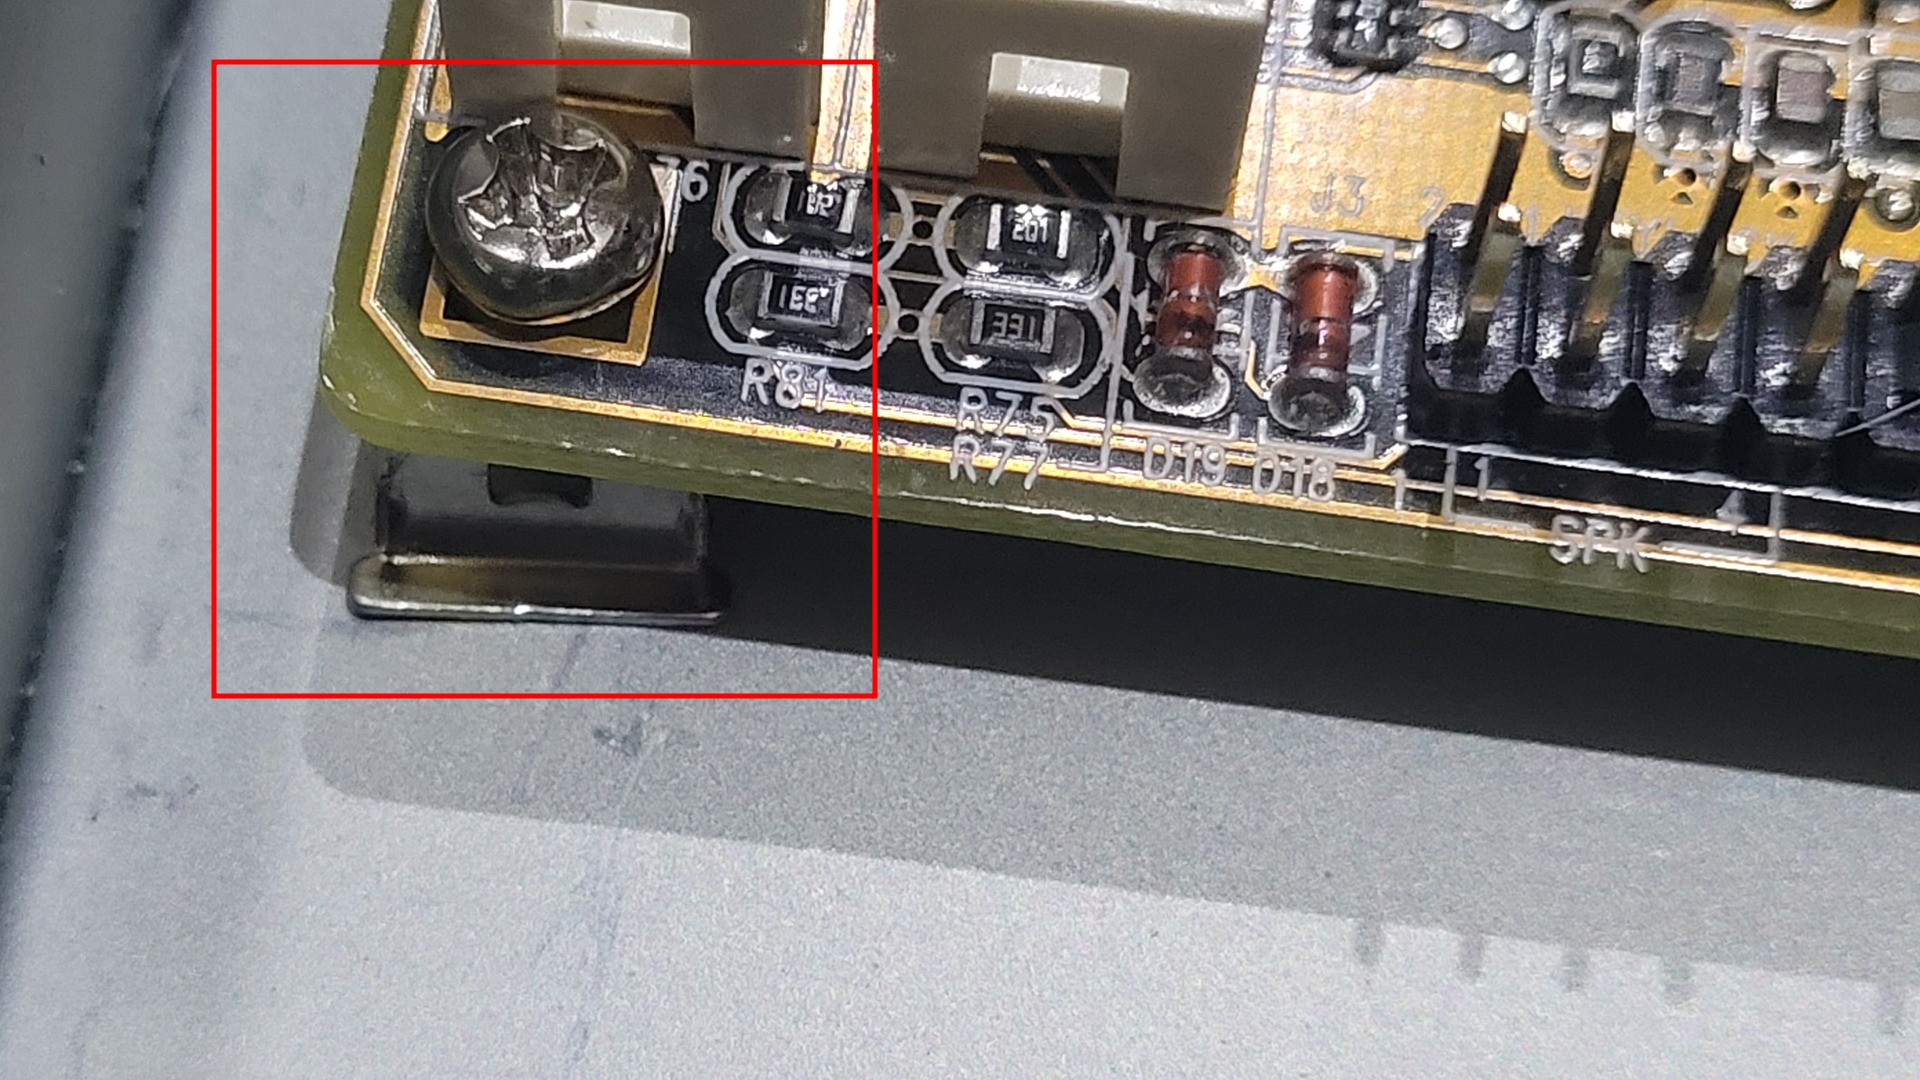
Moding the motherboard for 2.2V CPU
The M571 V3.2 motherboard supports no less than 2.5V CPU core. But there is a way to add a new voltage, it has been documented here : http://m571.com/m571/franczabkar/v32corev.htm. The core voltage is defined by a voltage divider : depending on the jumper setting, a resistor is selected in parrallel with R79 (10.2Kohm), which changes the resulting voltage. Thus, without any jumper, we are free to solder any resistor in parralel to R79 to get the desired core voltage.
In my case, I used a 41K resistor, which, according to the given formula should gives 2.24V. This voltage is perfectly acceptable for a 2.2v CPU and gives enought juice to overclock it.
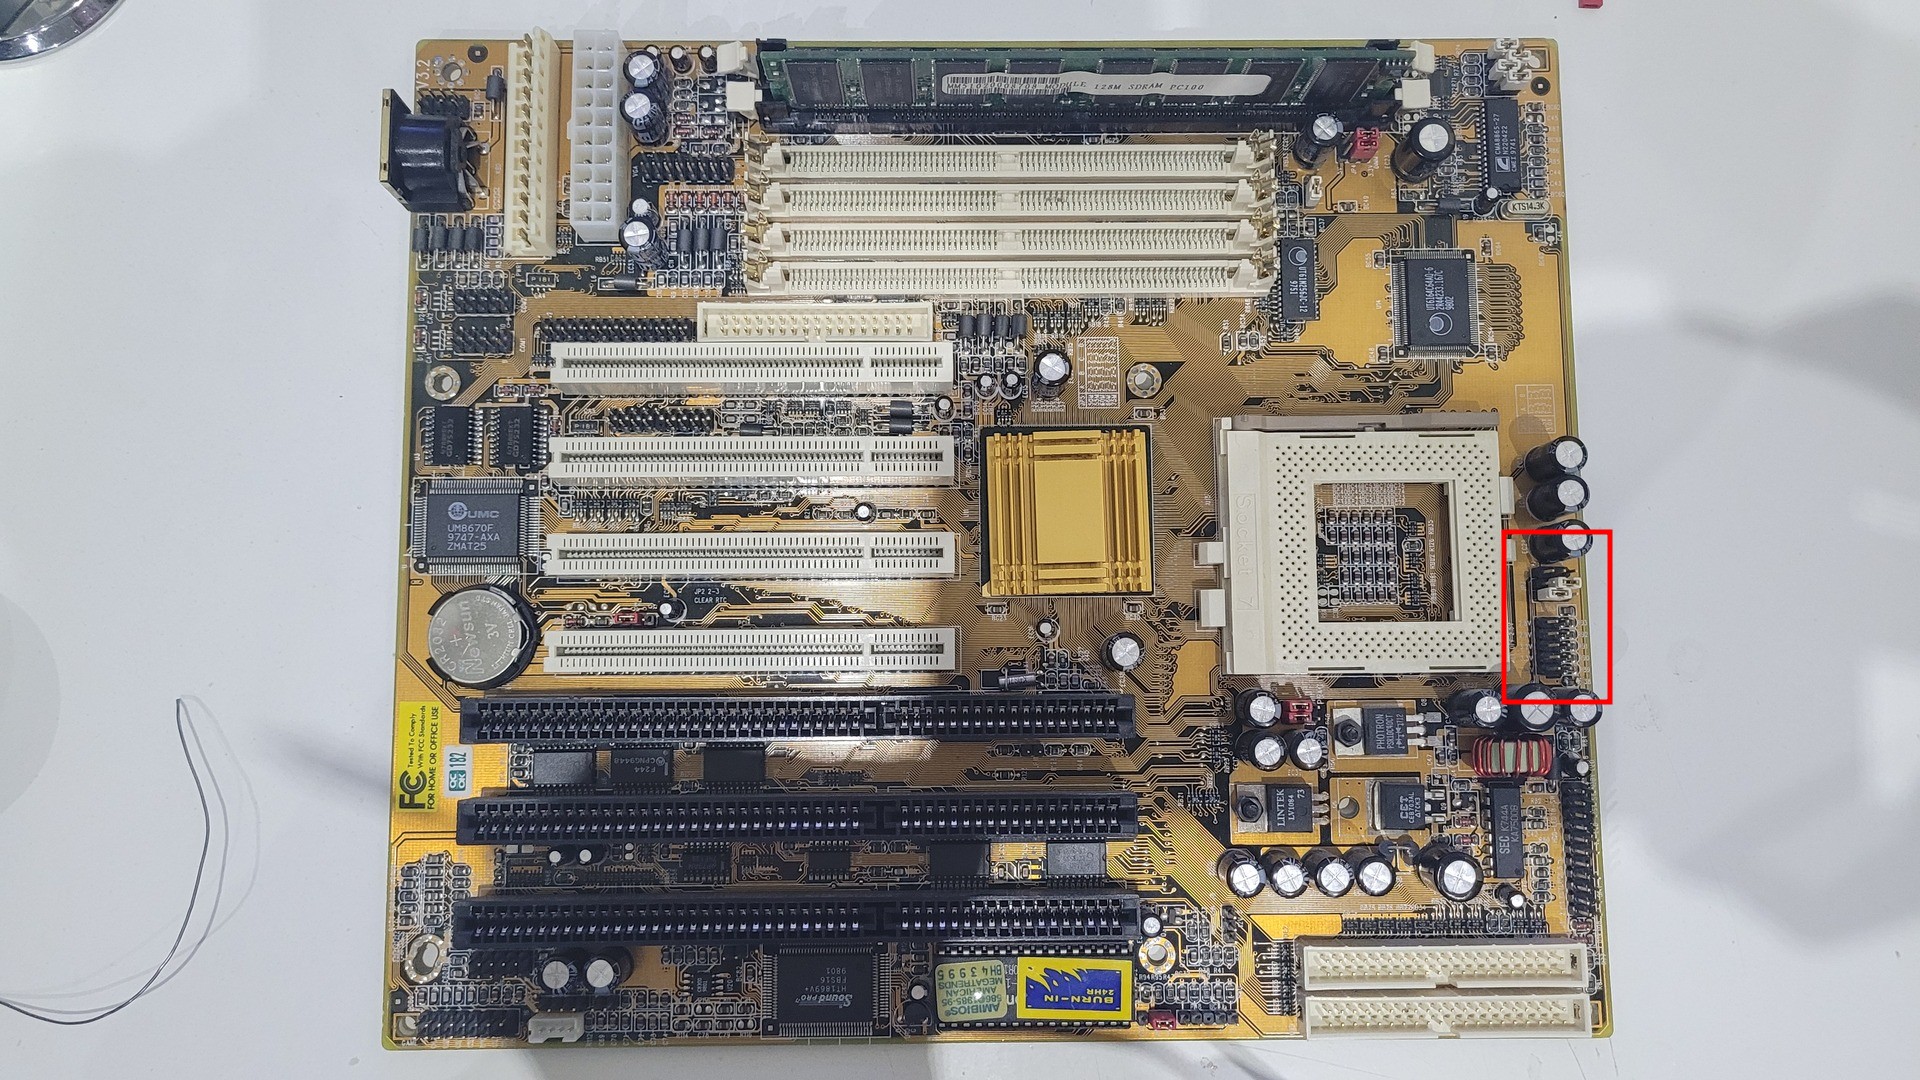
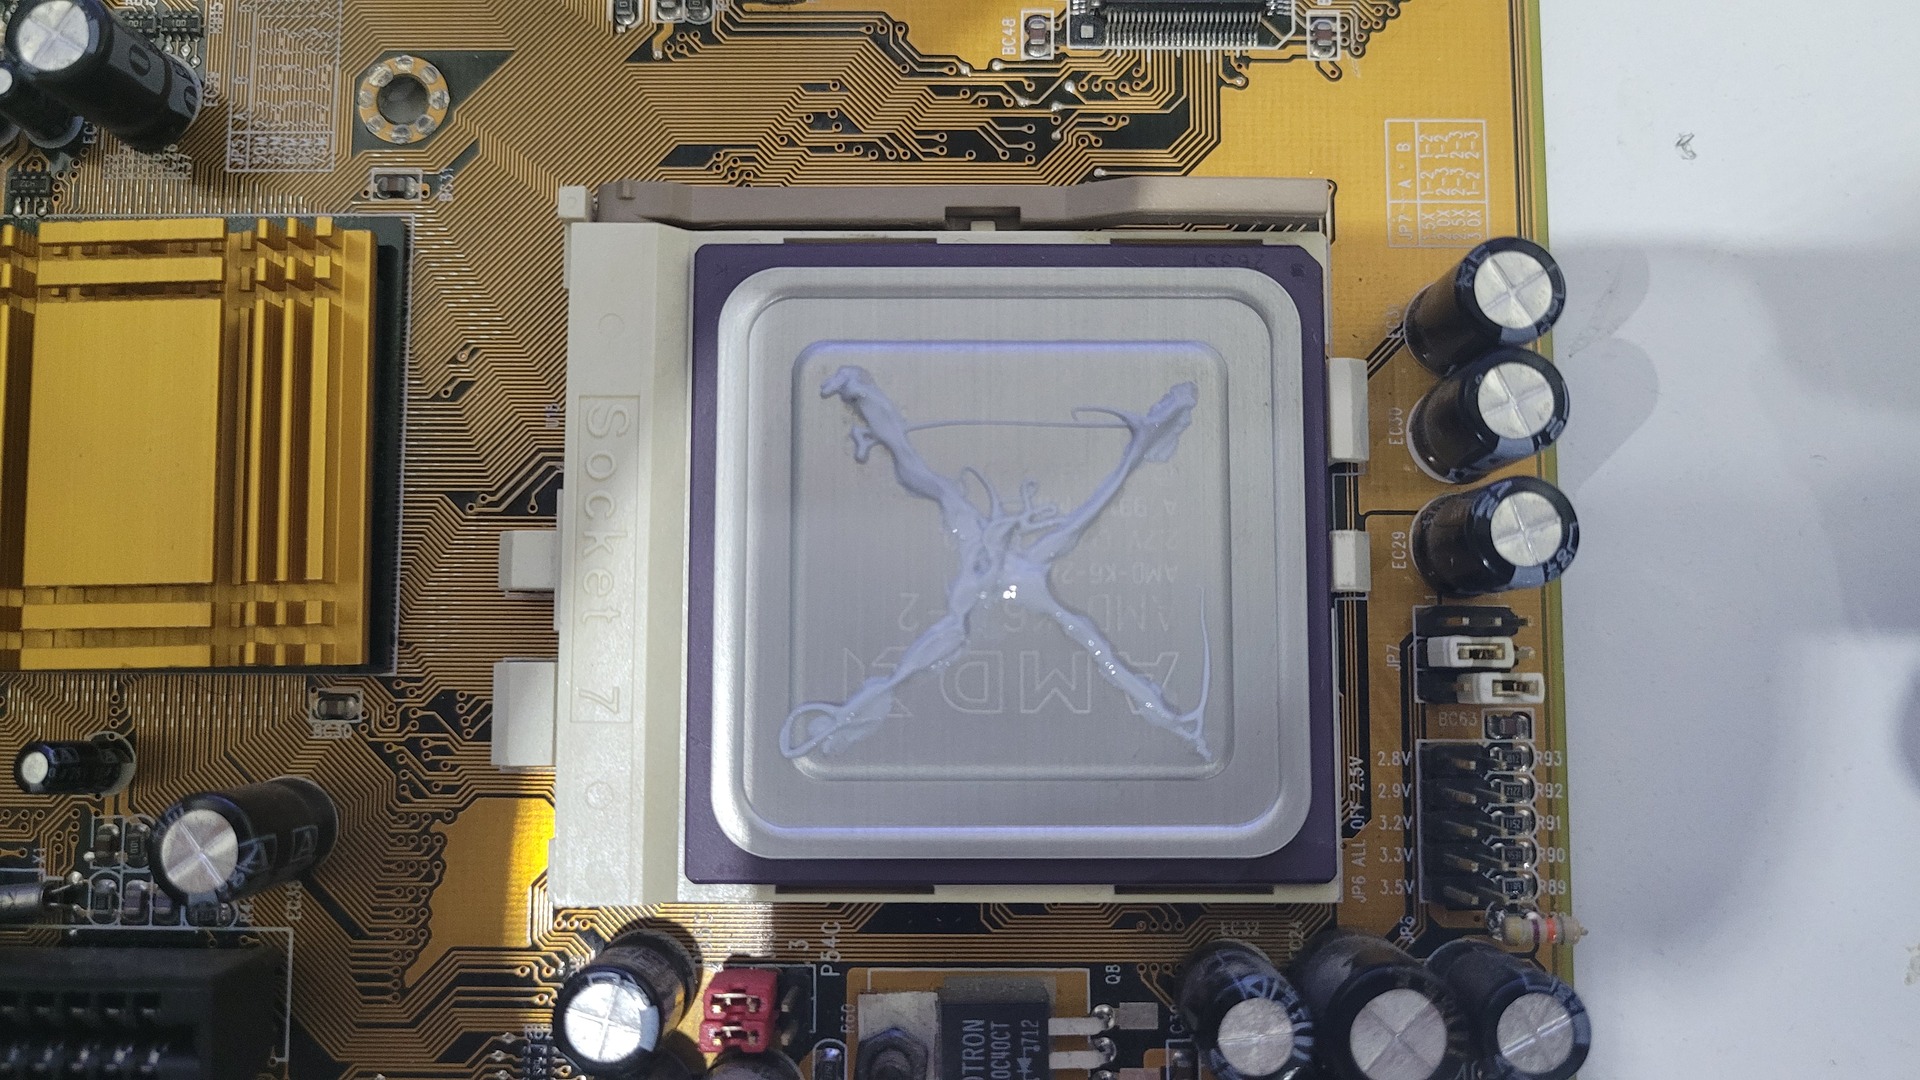
Finaly, I installed the K6-II with a socket 371 cooling set that fits perfectly. I also set JP7 (CPU frequence multiplier) to 2X as the the AMD k6-2 translate it to 6x (6 x 66 Mhz = 396Mhz)
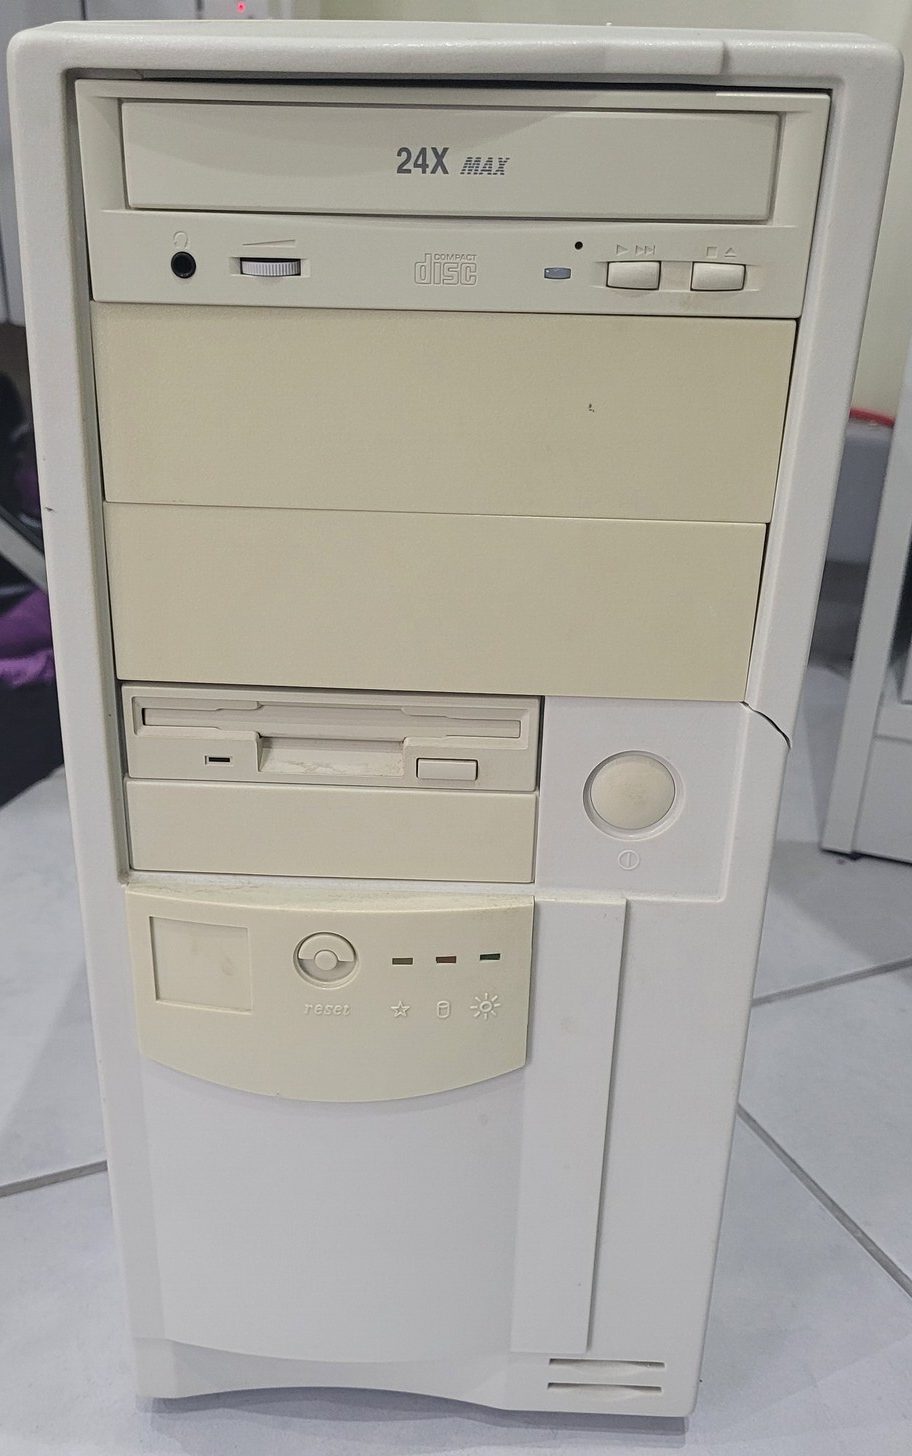
AT Case and mounting
Retrobright
AT cases are not easy to find, at least at a reasonnable price, but I really wanted such a case for the retro look. Moreover, choosing an ATX would have required modifications to host the M571 AT motherboard. I have been lucky enought to find an mini AT tower in petty good conditions… Except some yellowish parts. But there is clearly no secret now to revive plastic parts with retrobright.
This is how the case looked-like as I received it
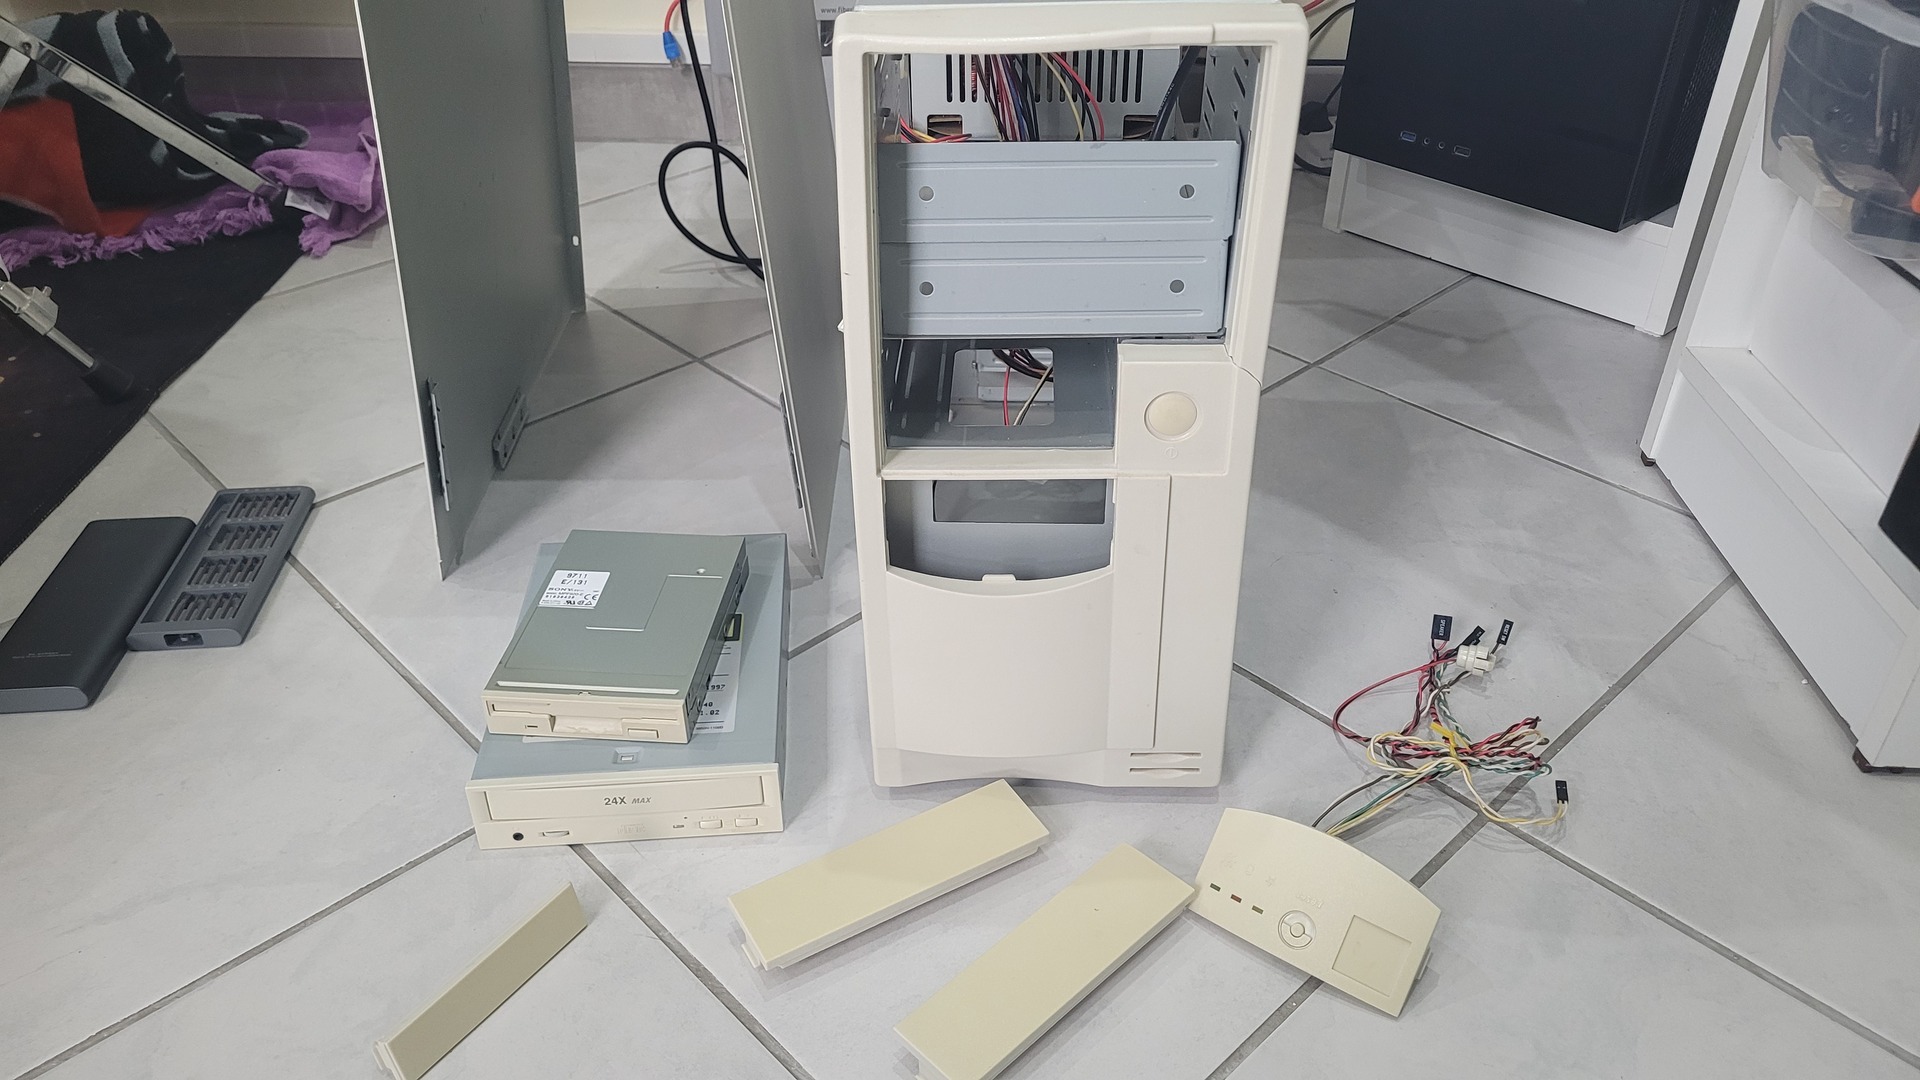
I disassembled yellowish parts to put them in my retrobright case (which can be seen in a previous article):
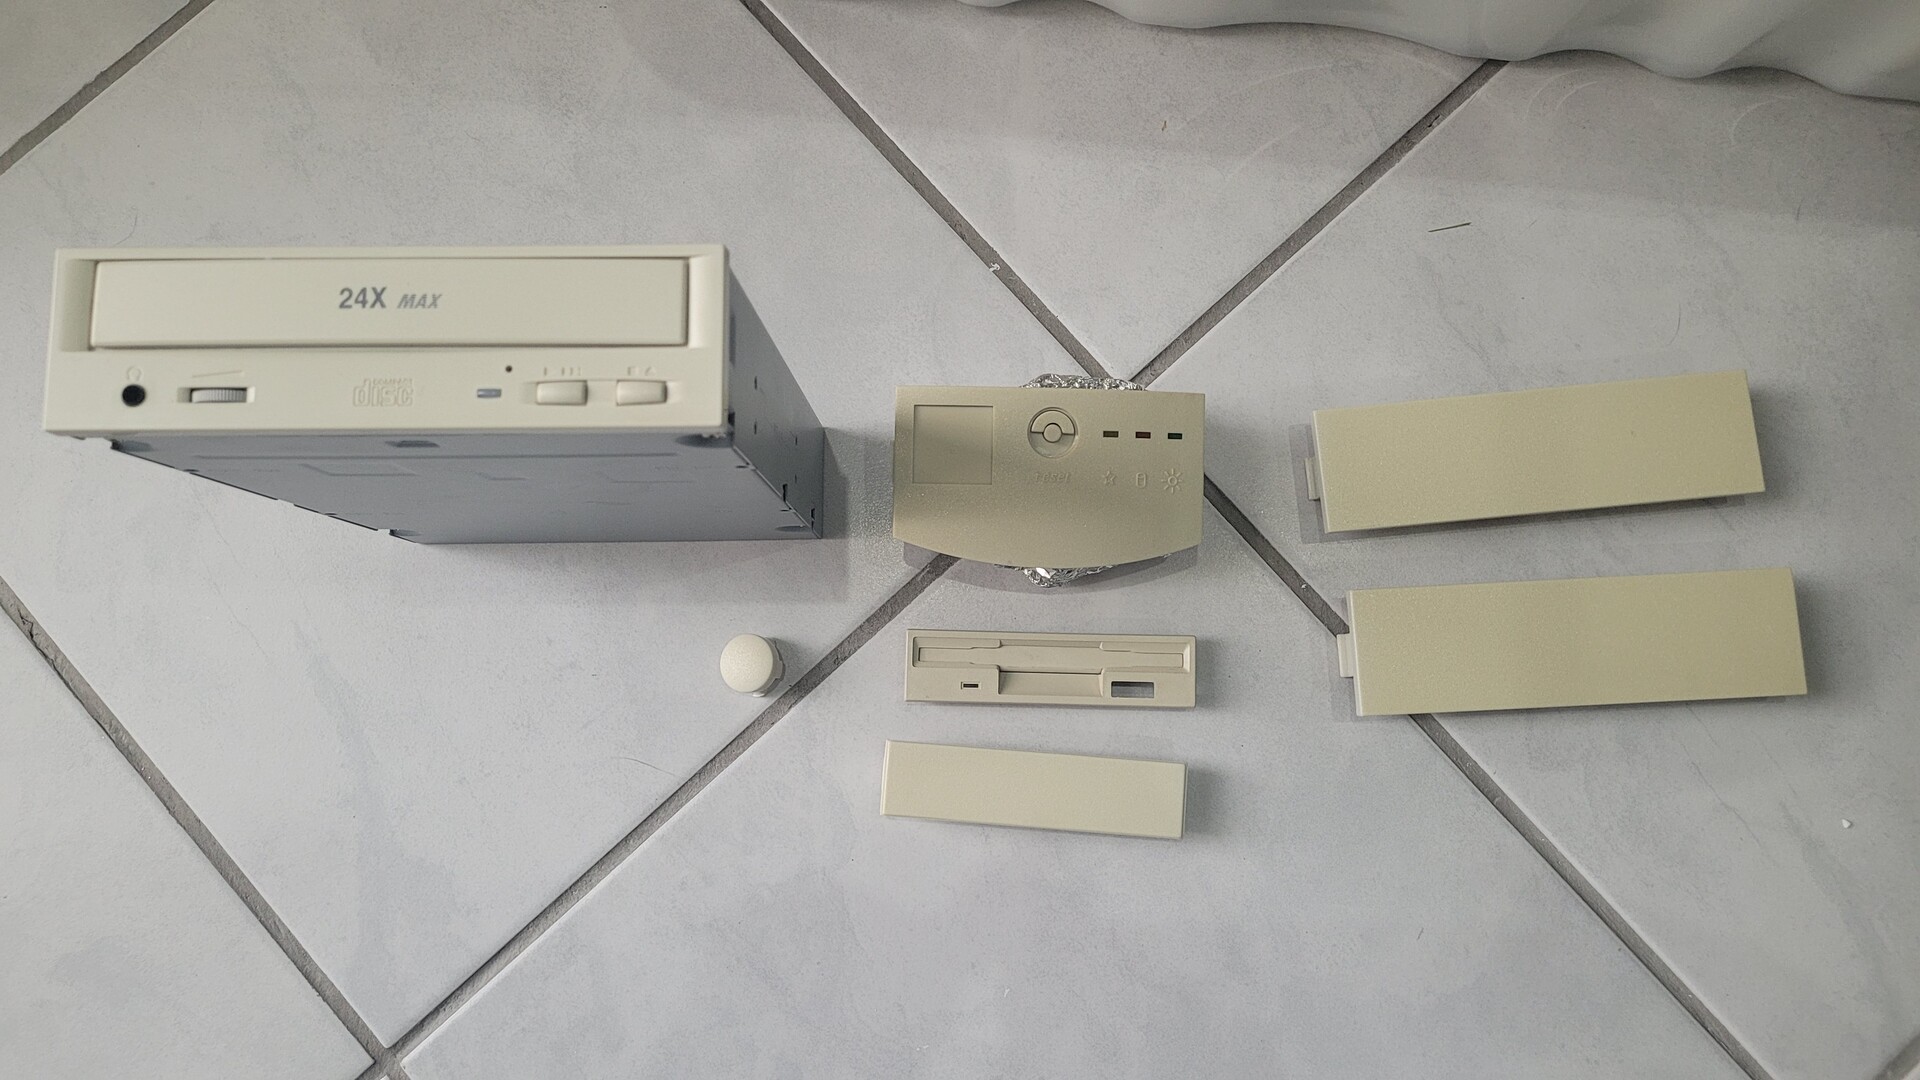
The result after a few hours of retrobright process (left = before, right = after)
Mounting
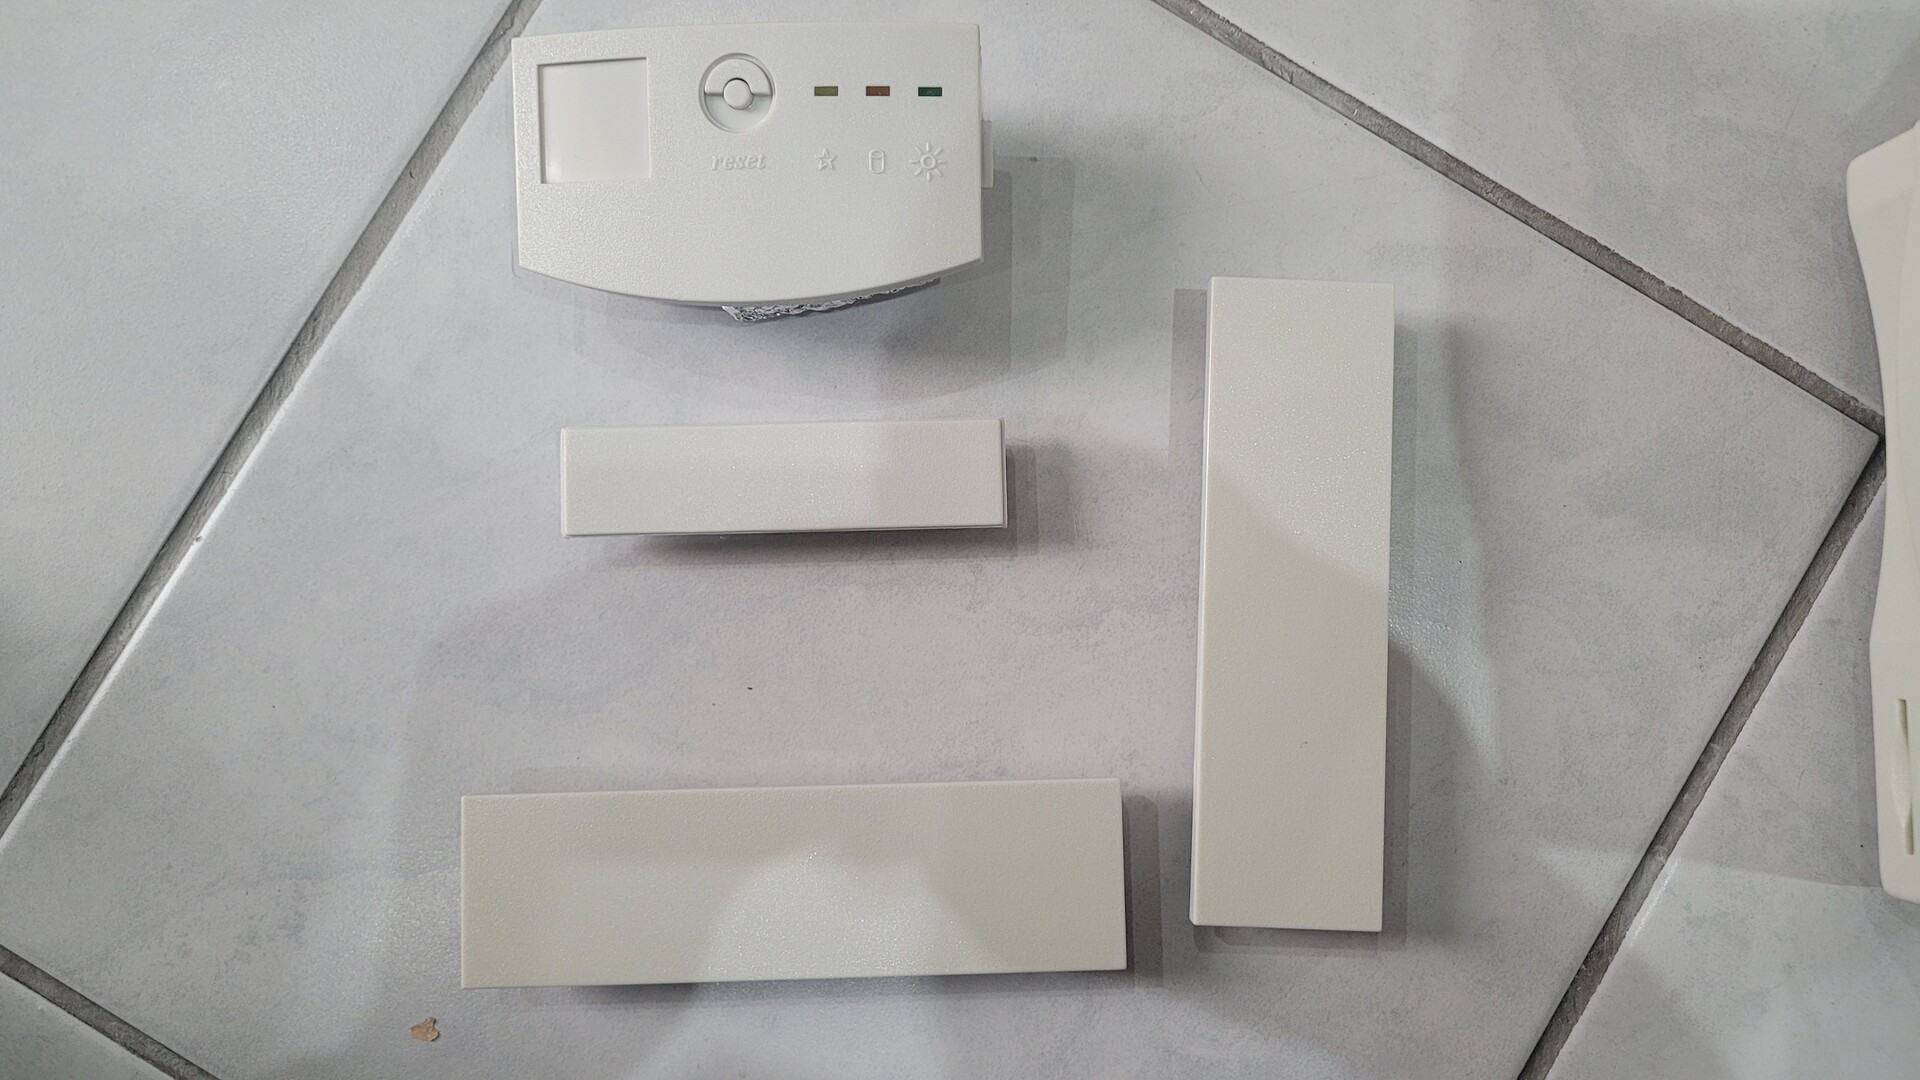
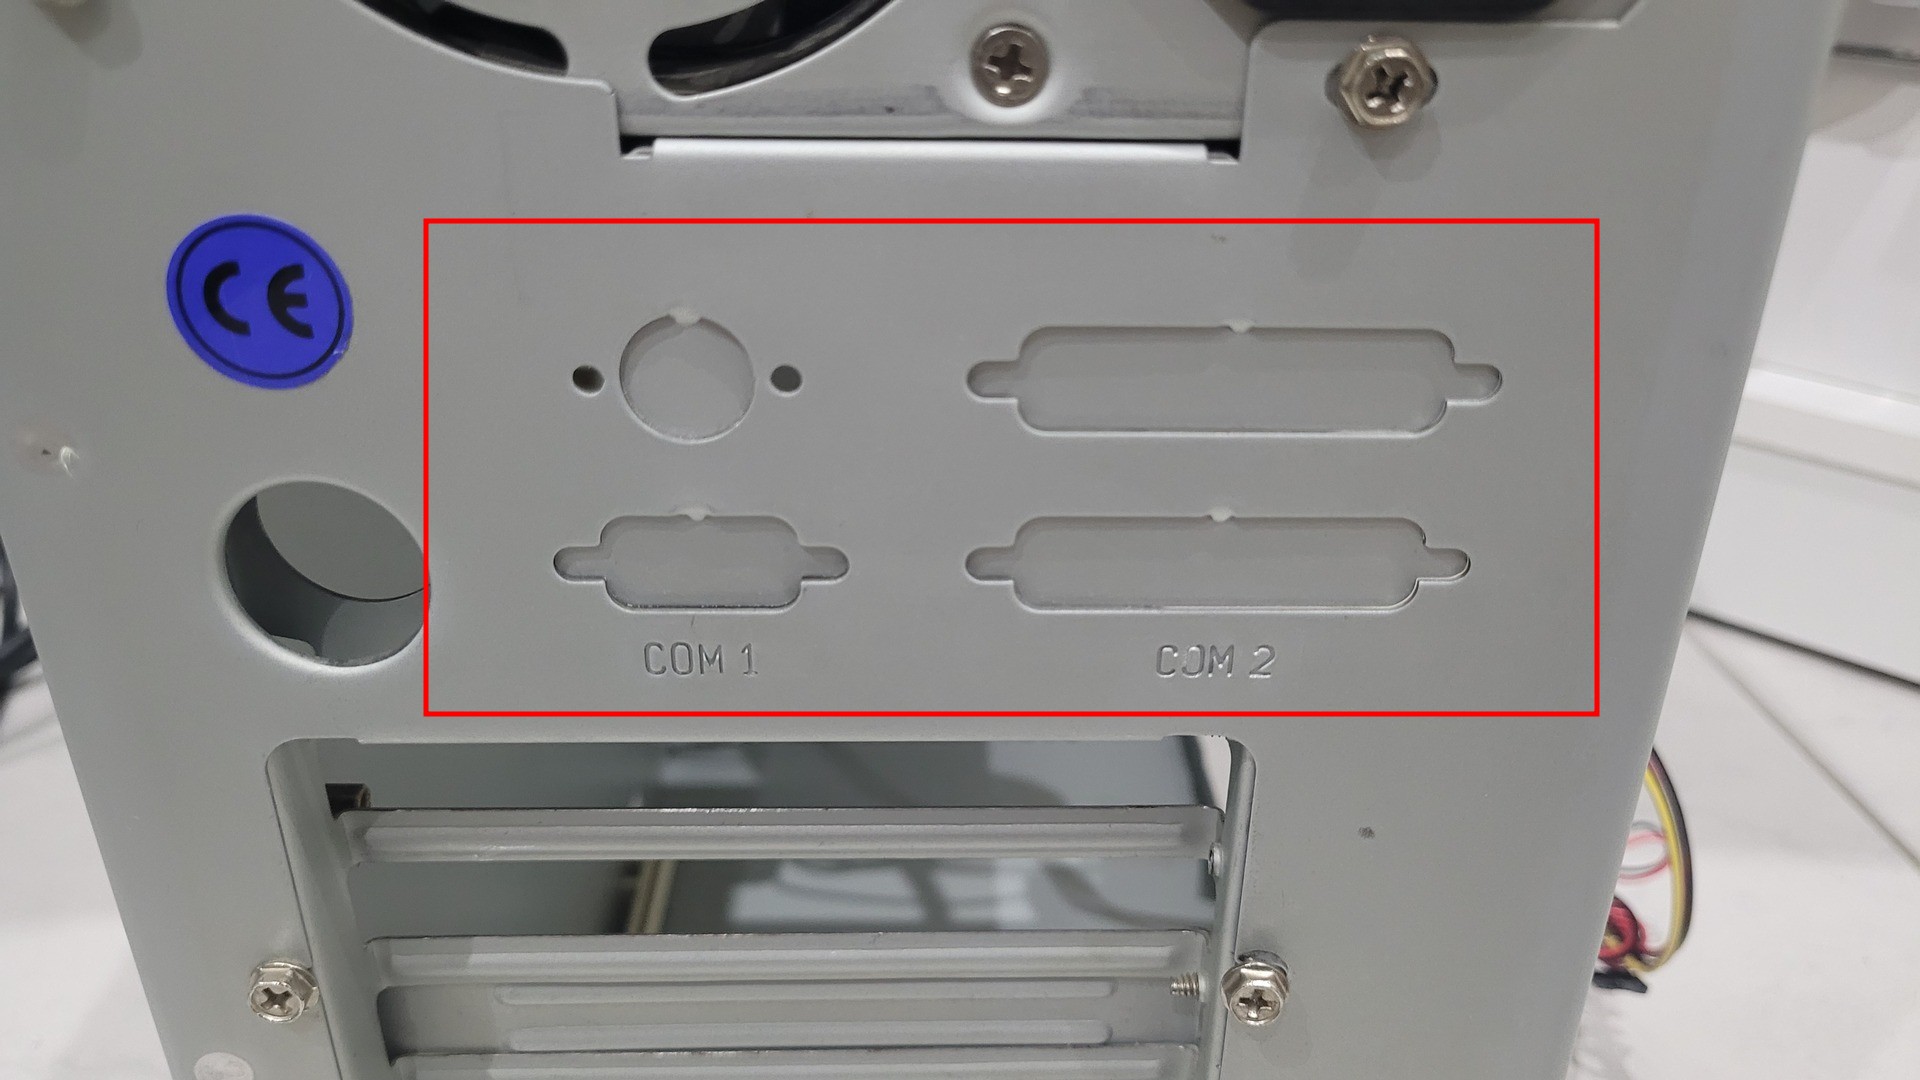
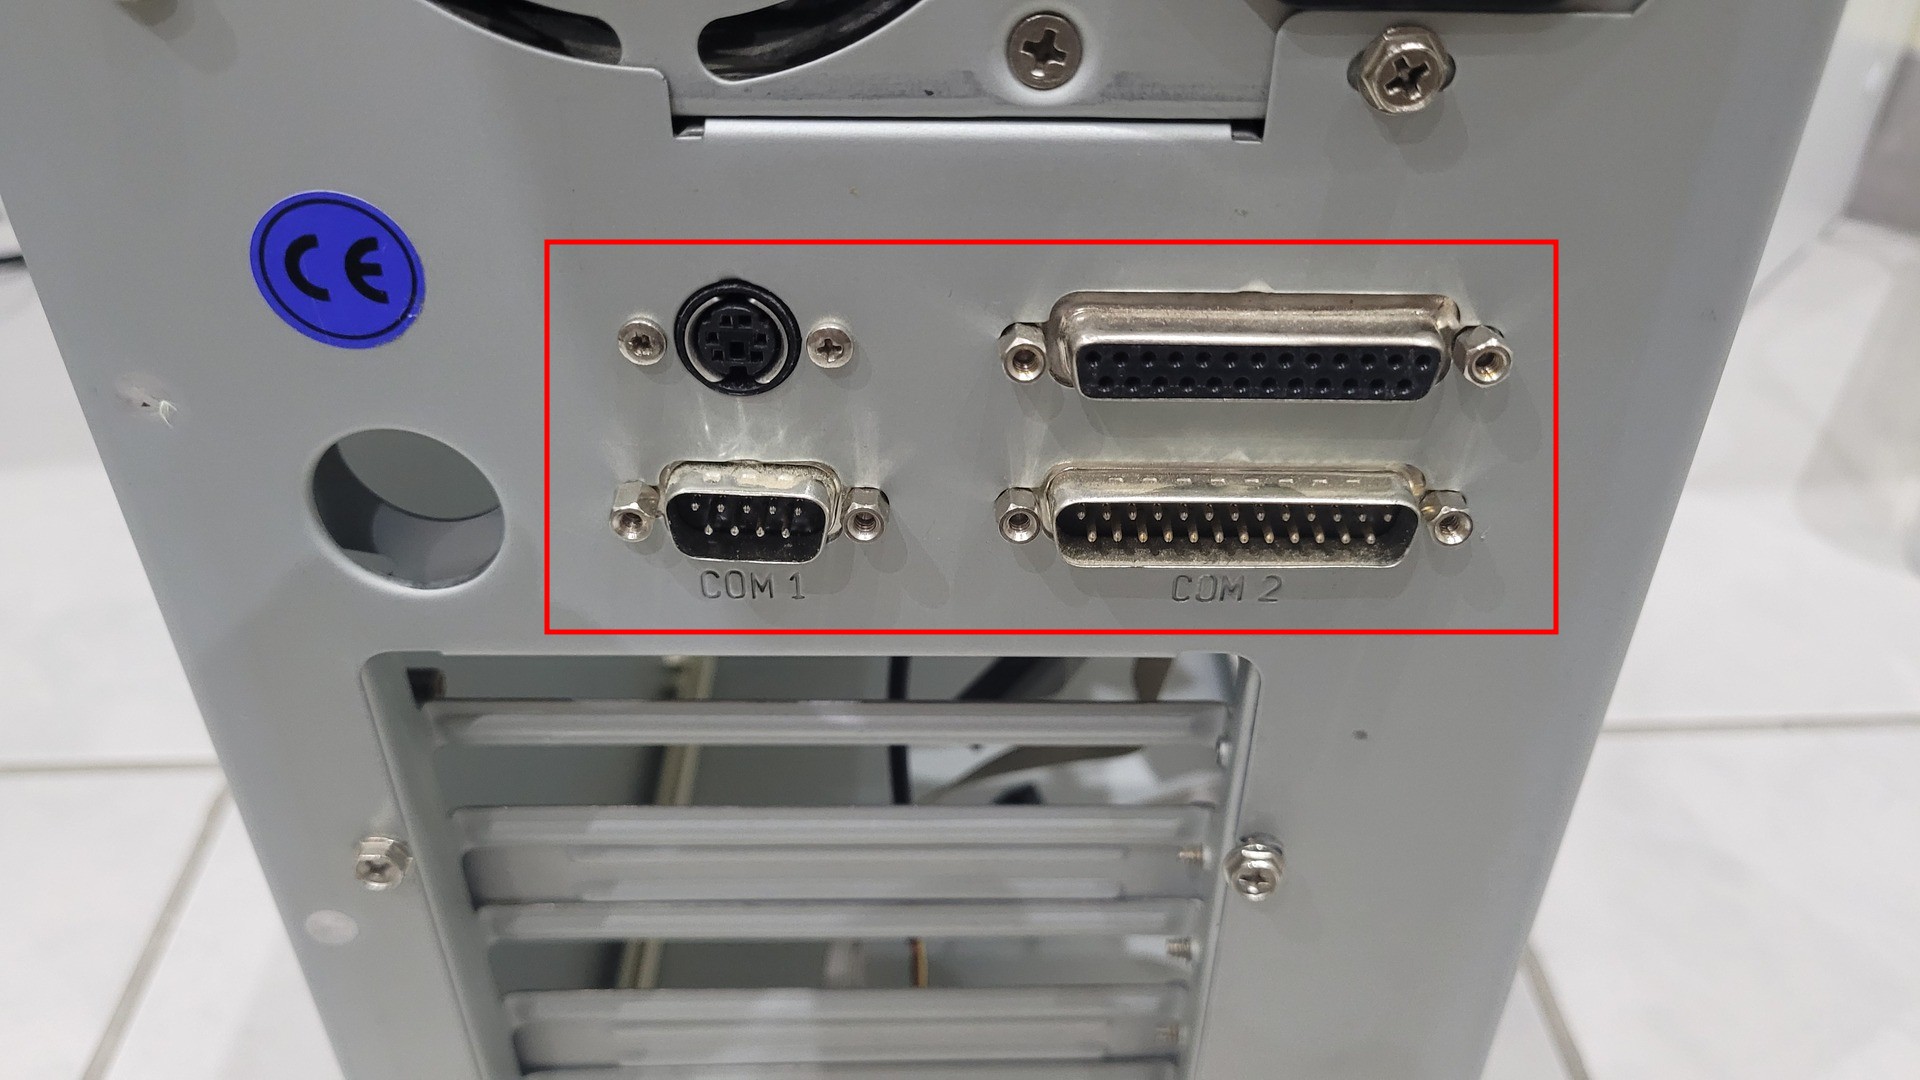
I started to mount serial, parallel and ps/2 ports on the back. You may know that AT cases had to be customizable because motherboards back panel was not standardized except for the AT Keyboard port.
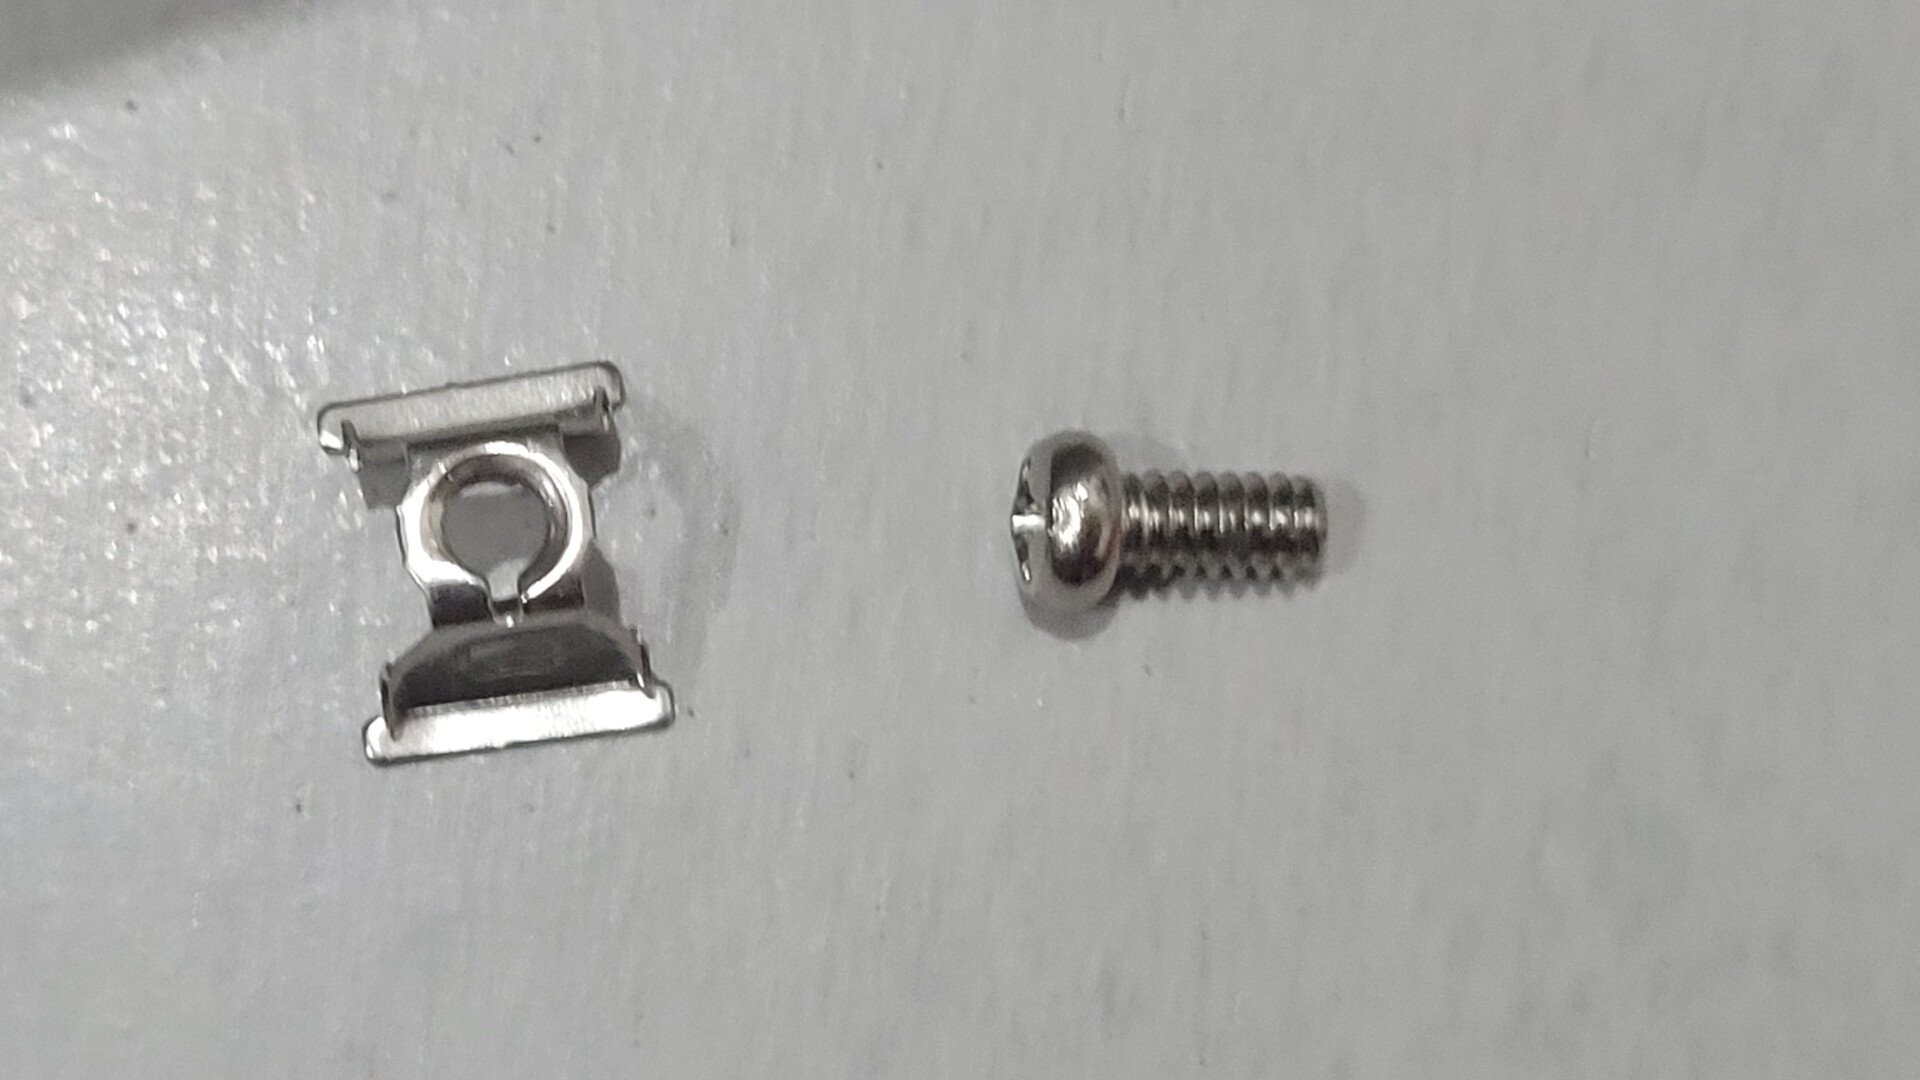
Another problem with AT form factor : there were not alway enought sckrew holes to fix all motherboard corners. Sometime, there were just some plastic legs glued on the metal with double sided adhesive. Here is what I used for upper right corner so the motherboard is not bent while pushing cards in slots or plugging ribbon cable connectors:
One good thing about the M571 motherboard is that it provides 2 USB ports on the J7 connectors, together with PS/2 and infrared ports. This connector should be used by a daughter board but unfortunately I did not get it with the m571. However, as explained here on m571.com site, and standard USB header can used if the shield wire is cut so it is not connected to Ps/2 line. I personnaly cut this wire on both connectors so I’m sure I will never make a mistake.

As said earlier, I used an 2.5 inch SSD as main storage media. As the AT case has 3.5 inches slots for hard disks. I could skrew the SDD only on one side. In order to make sure that the SSD won’t break, I put 4 plastic pads on it so it stands firmly on its whole surface
Make the beast quieter
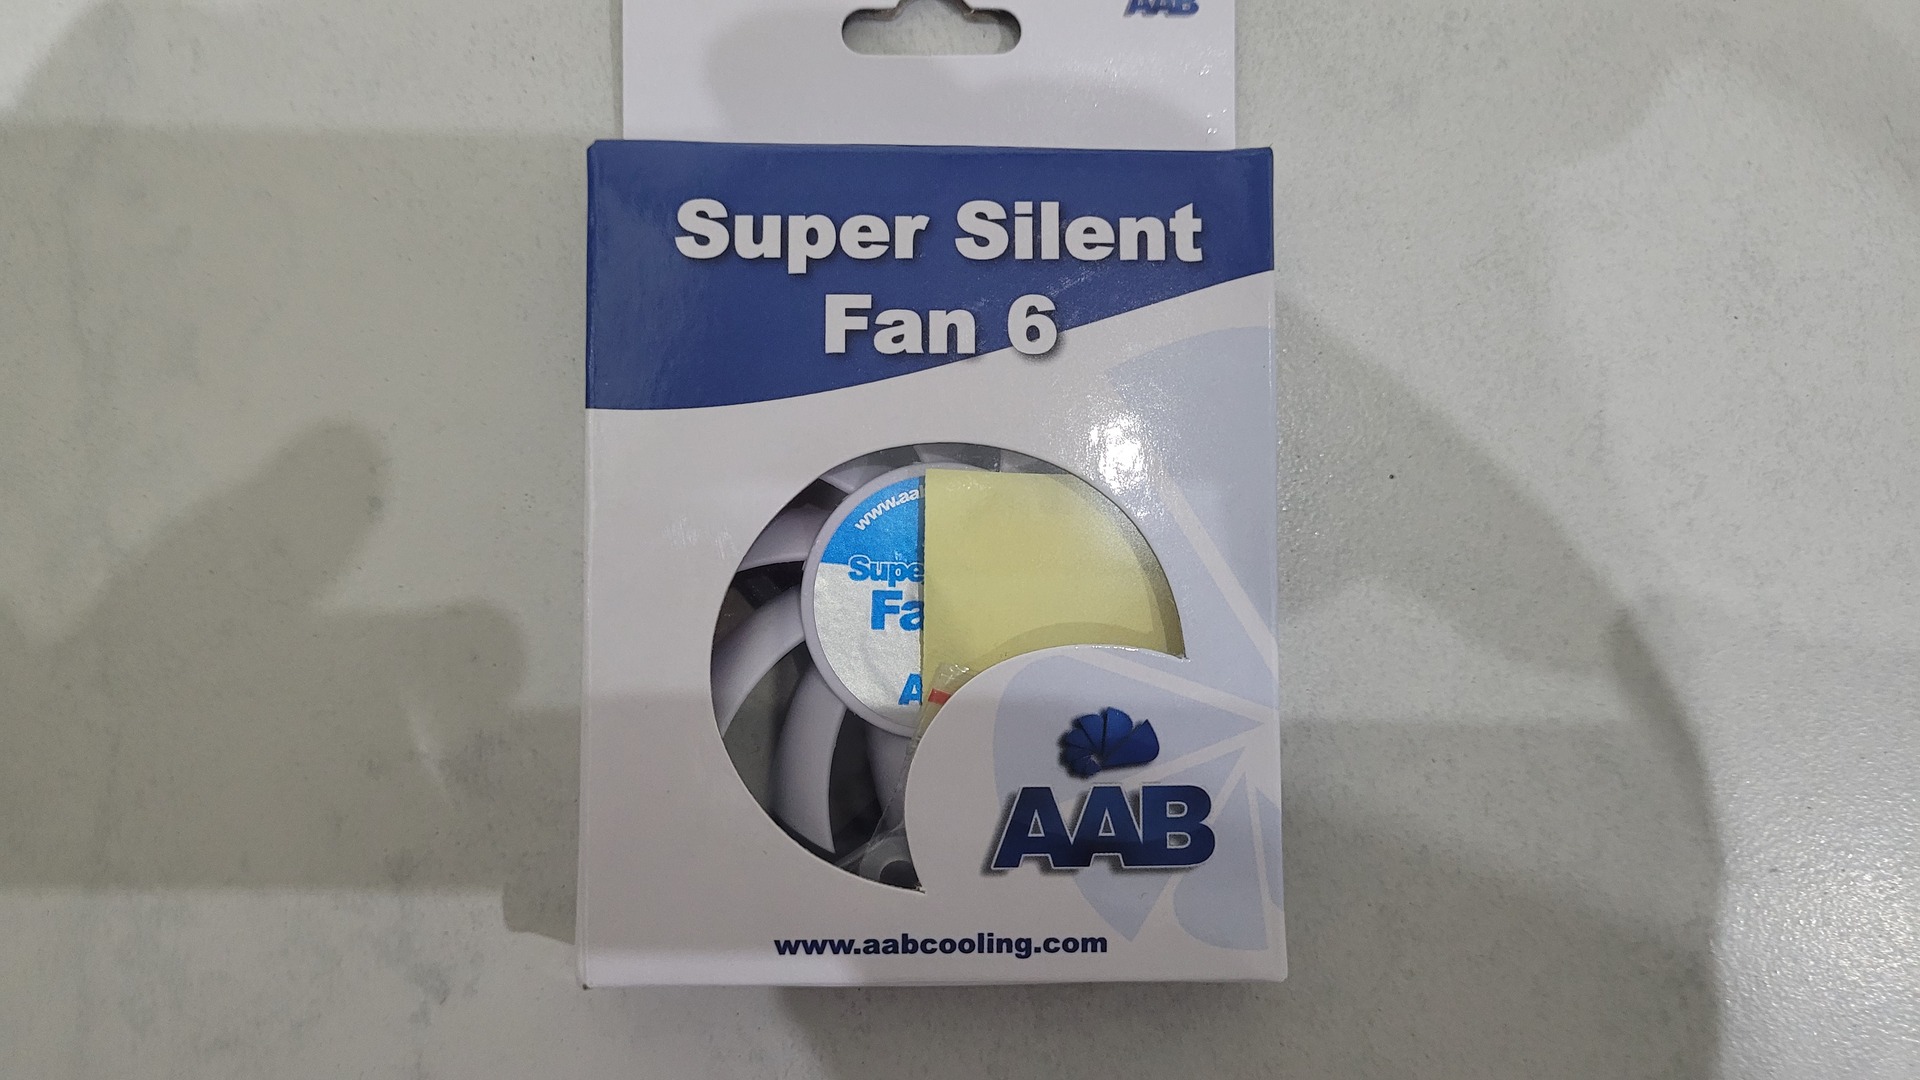
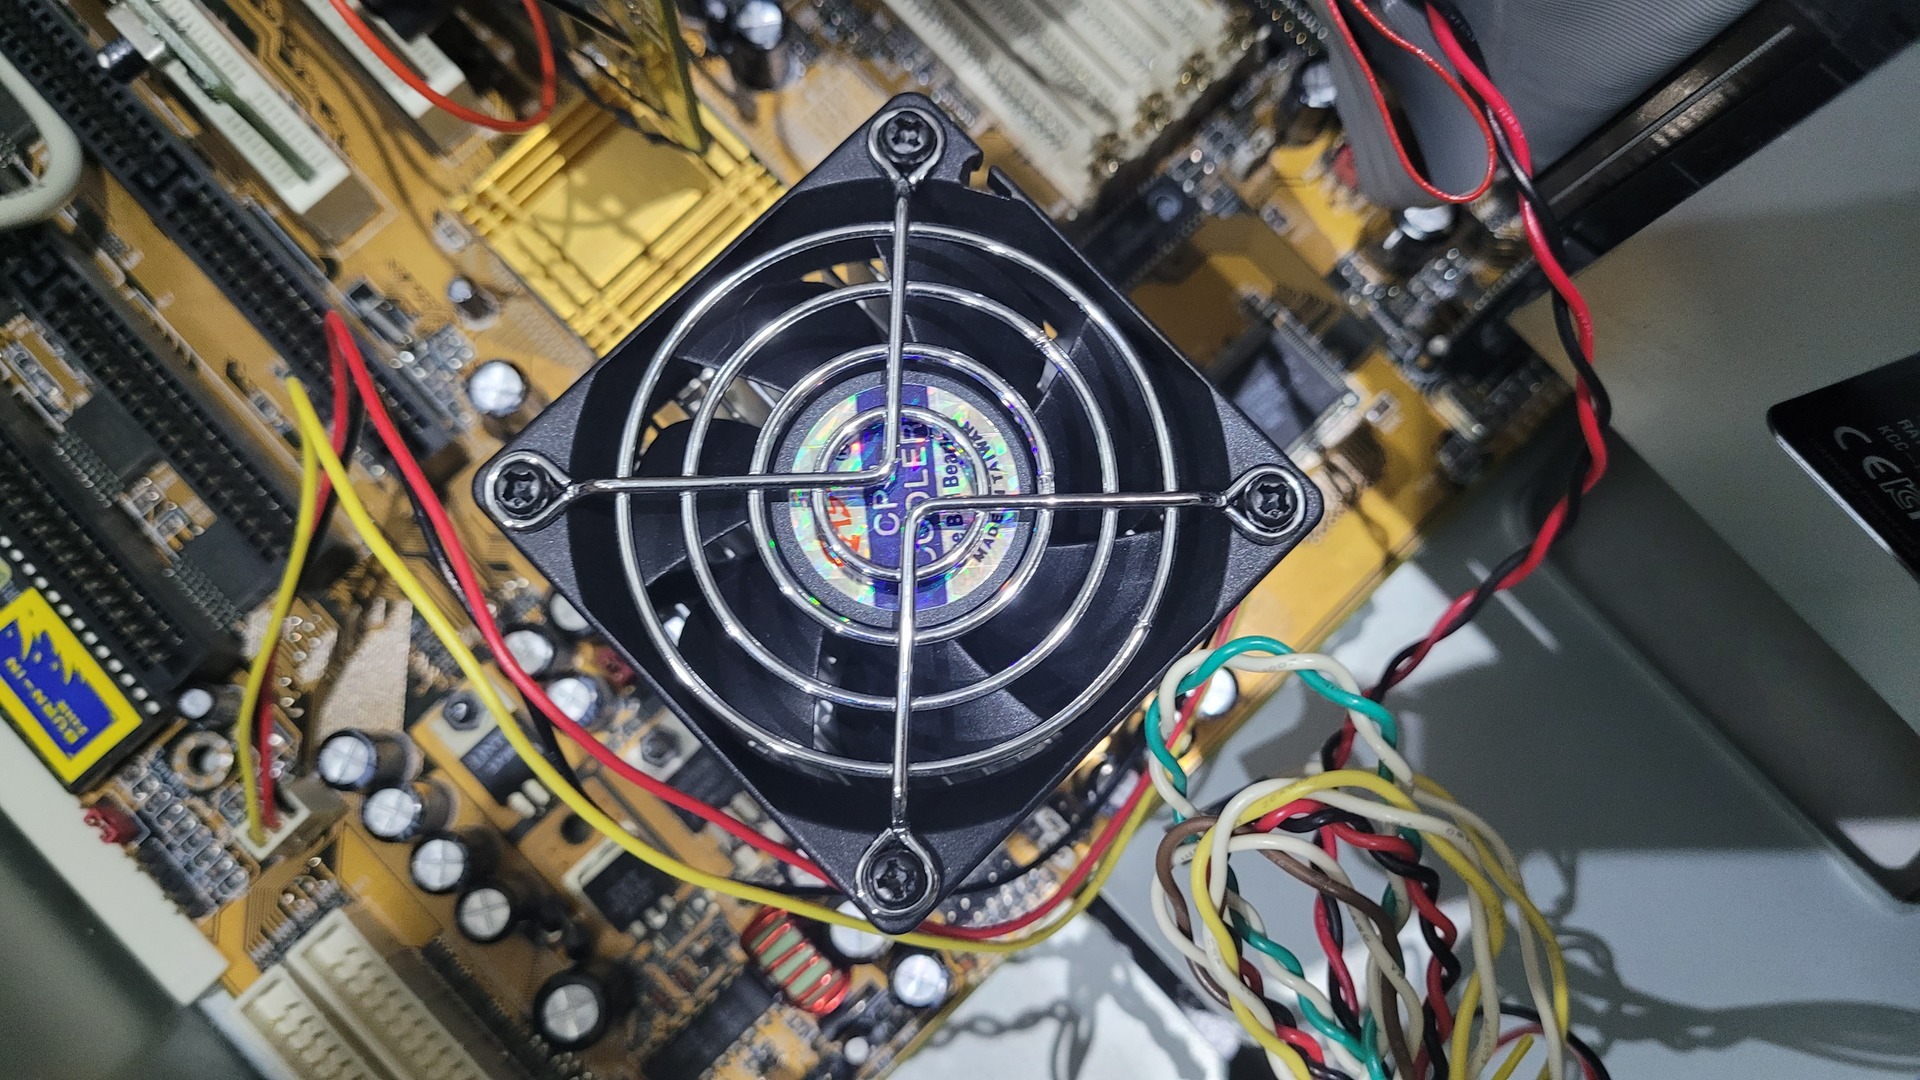
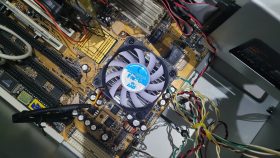
One thing about old PCs is that they tend to be very noisy because of the fans. The ball bearing and “silent” fans we can find nowadays are a lot more quieter with the same efficiency (if not more) in terms of air flow. I measured the volume level (case closed) with stock fans and then with the replacement I used. With stock fans, I got 48.1 dbA whereas with replacement I now get 35.6 dbA !
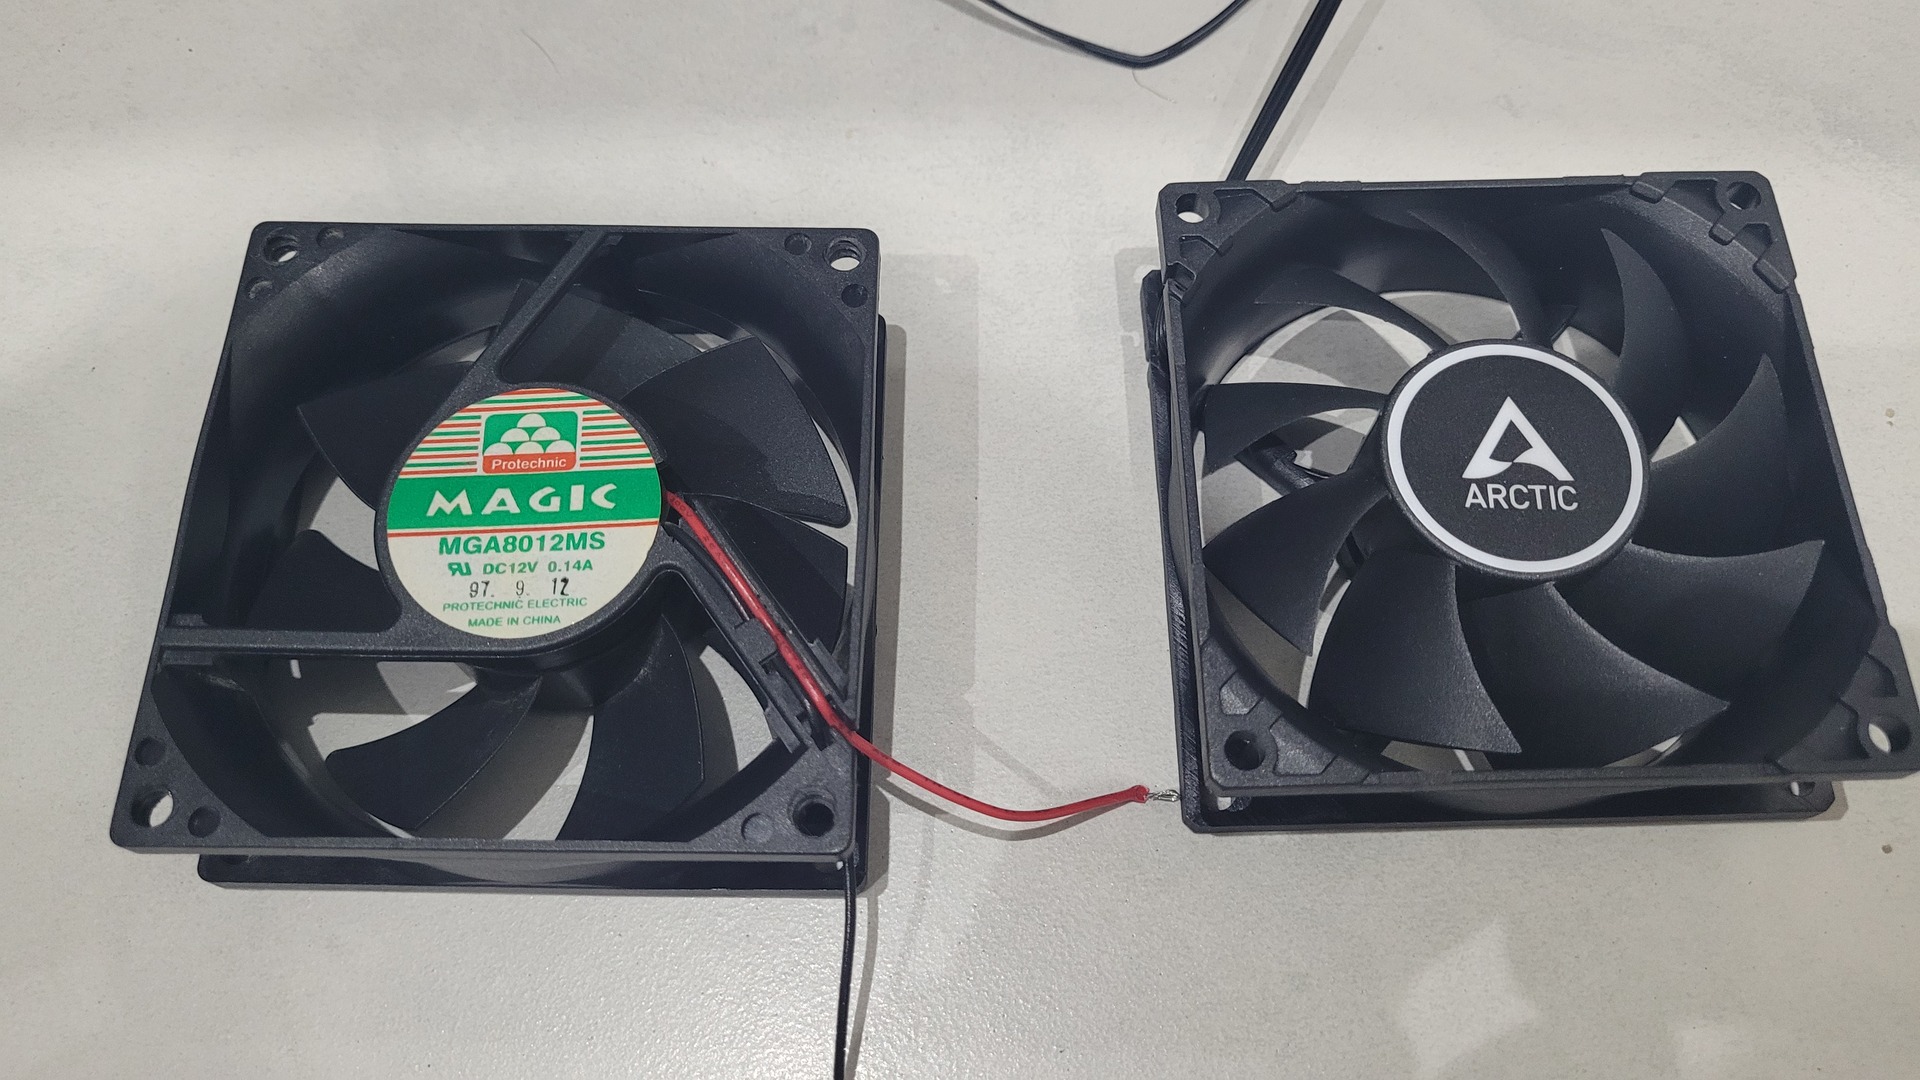
The first fan I replaced if the CPU one. I just bought a super silent 60mm fan (photo on the left) and replaced the old one (photo on the middle) by this quieter model (photo on the right)
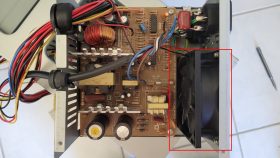
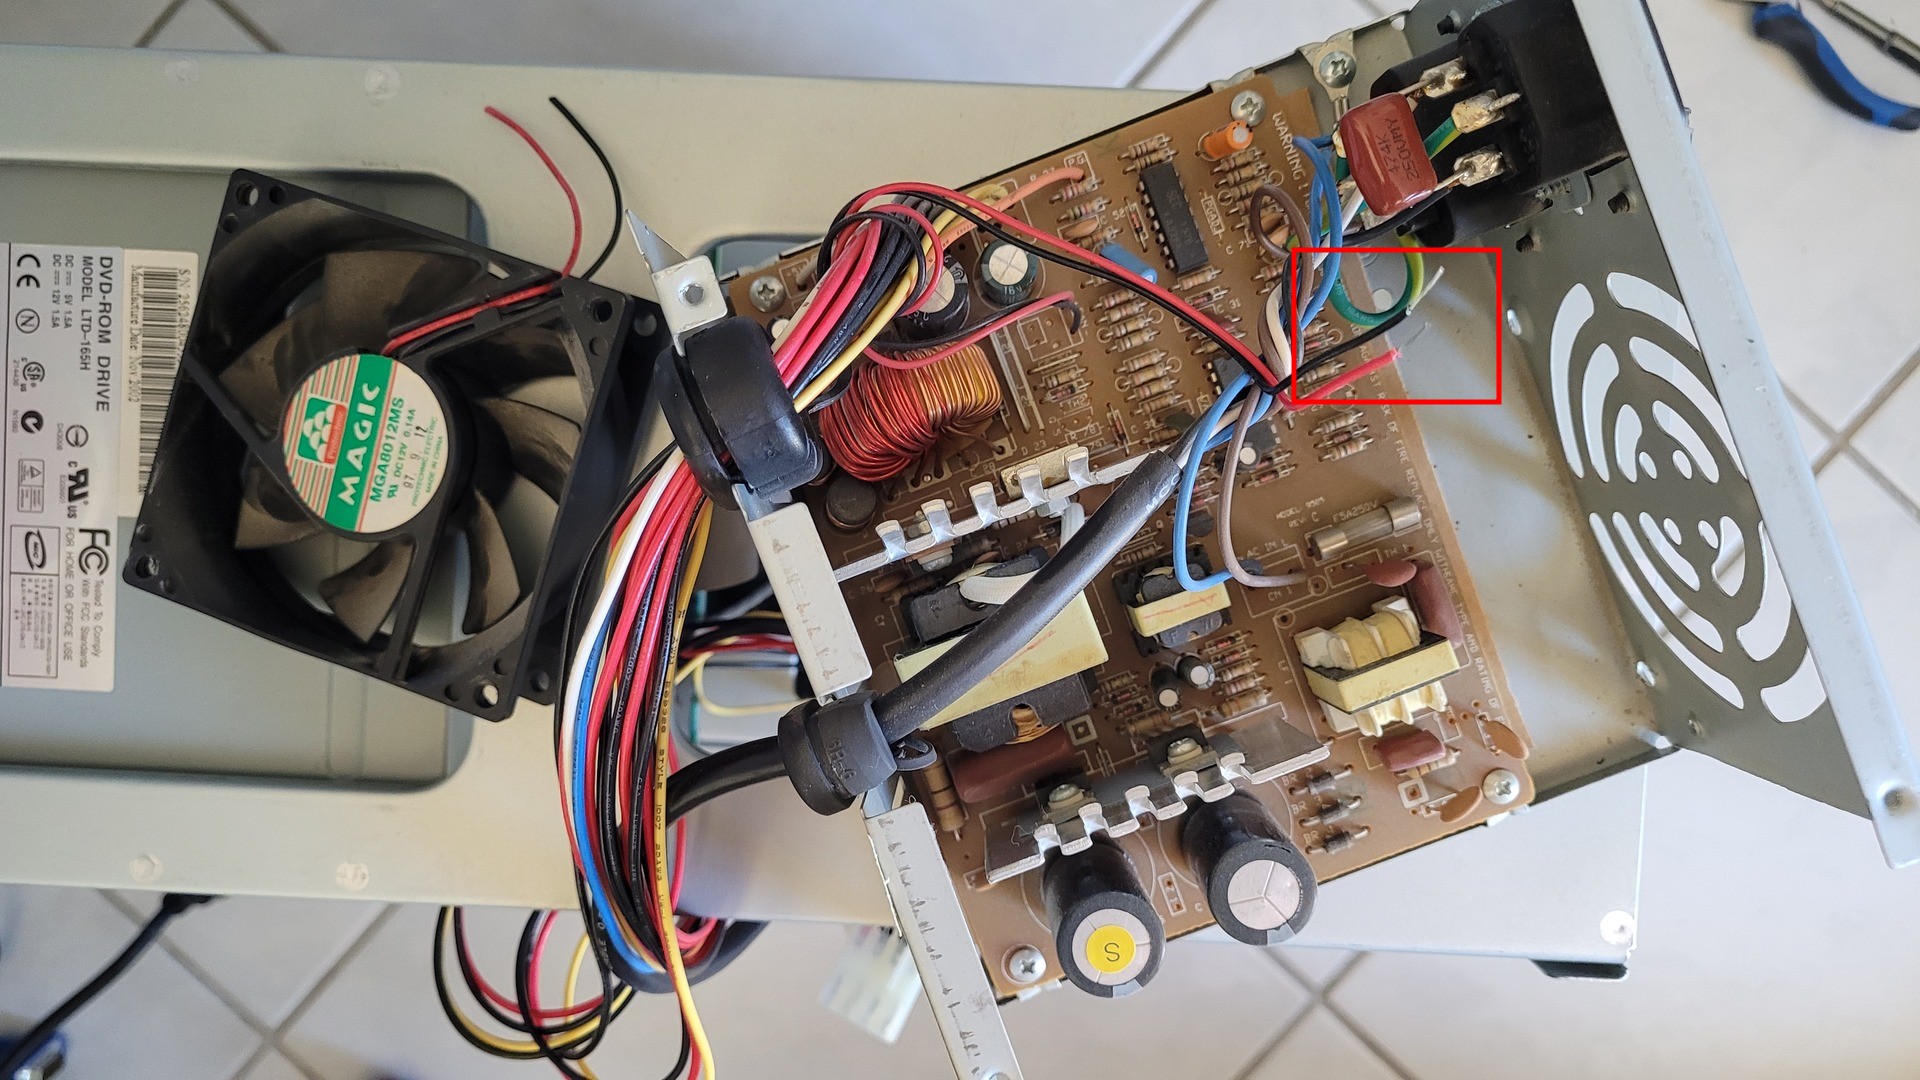
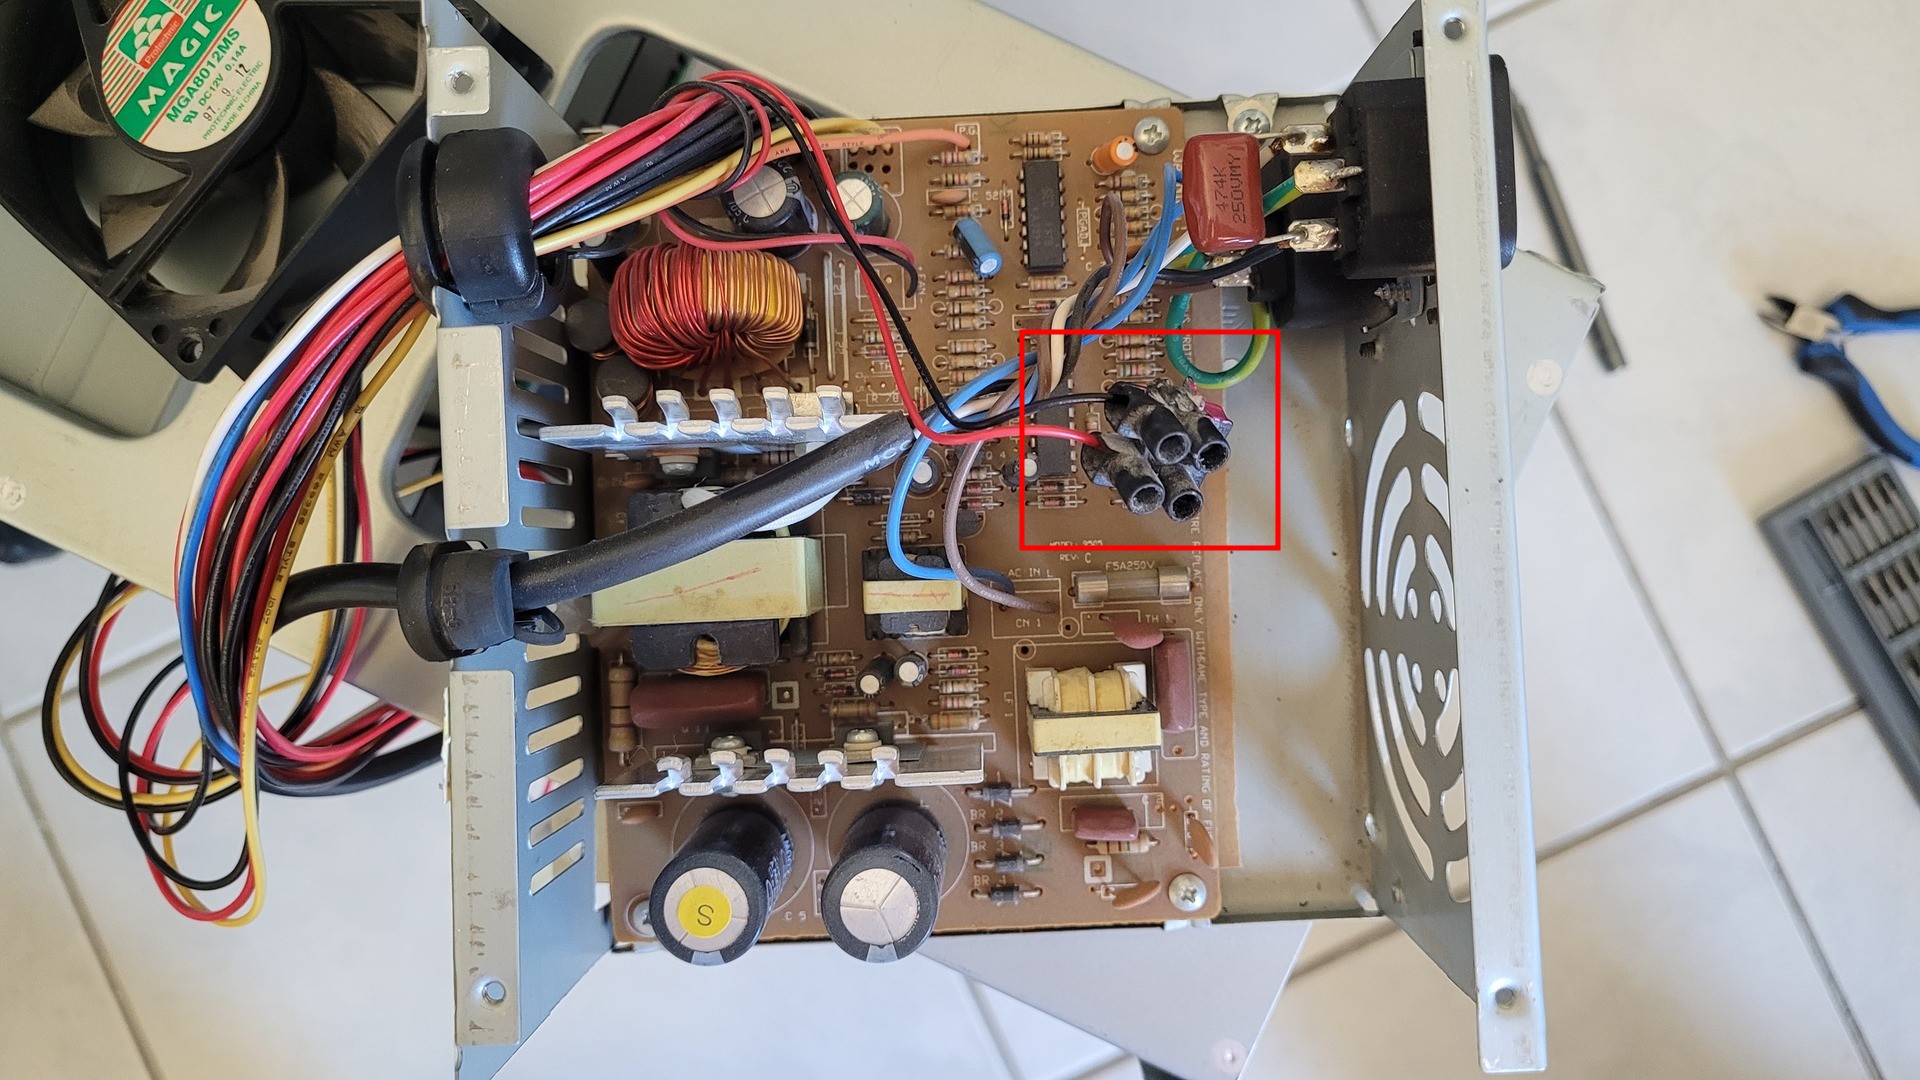
The second fan I replaced is the one of the power supply by an Artic F8 “standard fan case”. To do so I opened the Power supply (unplugged, of course) and unskrewed the fan
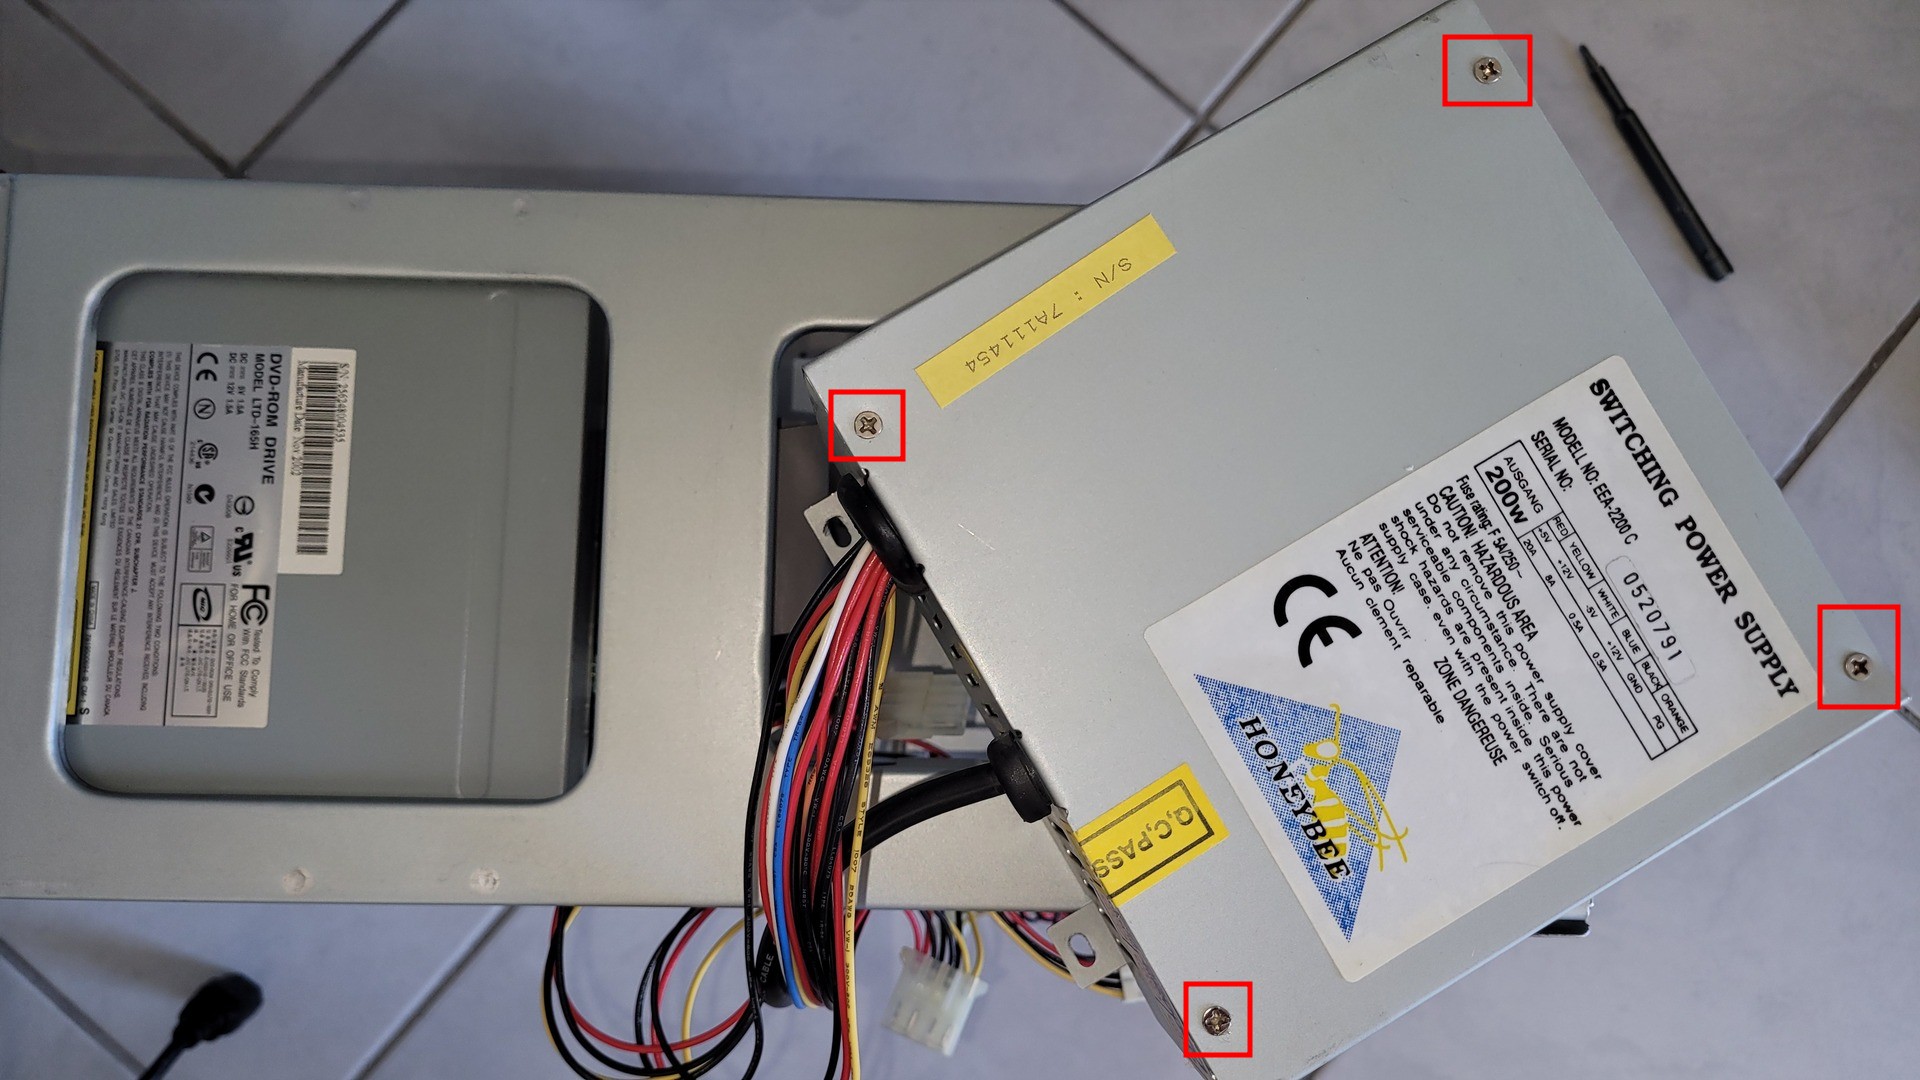
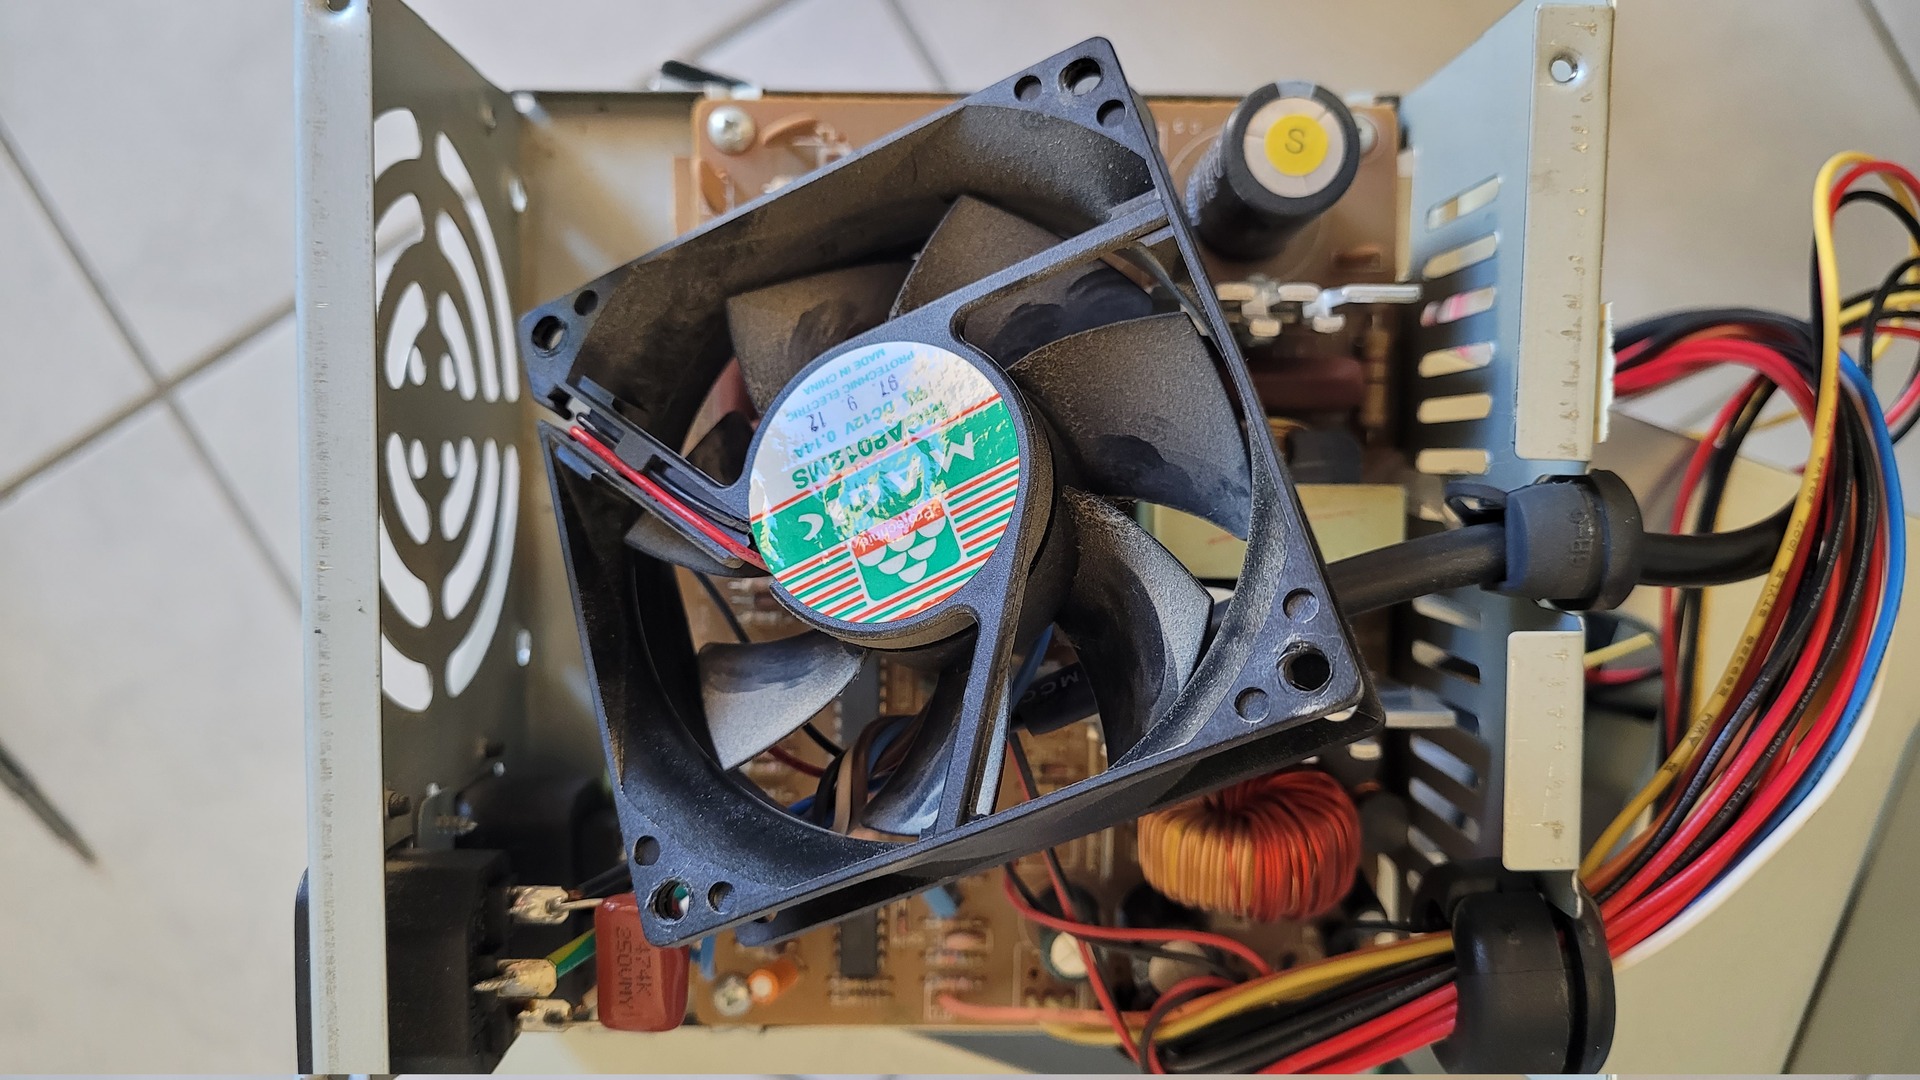
To make a future replacement more simple, I just cut the fan’s wire and used a domino to connect the new fan. The rightmost photo shows the two fan with the old one on the left and the new one on the right
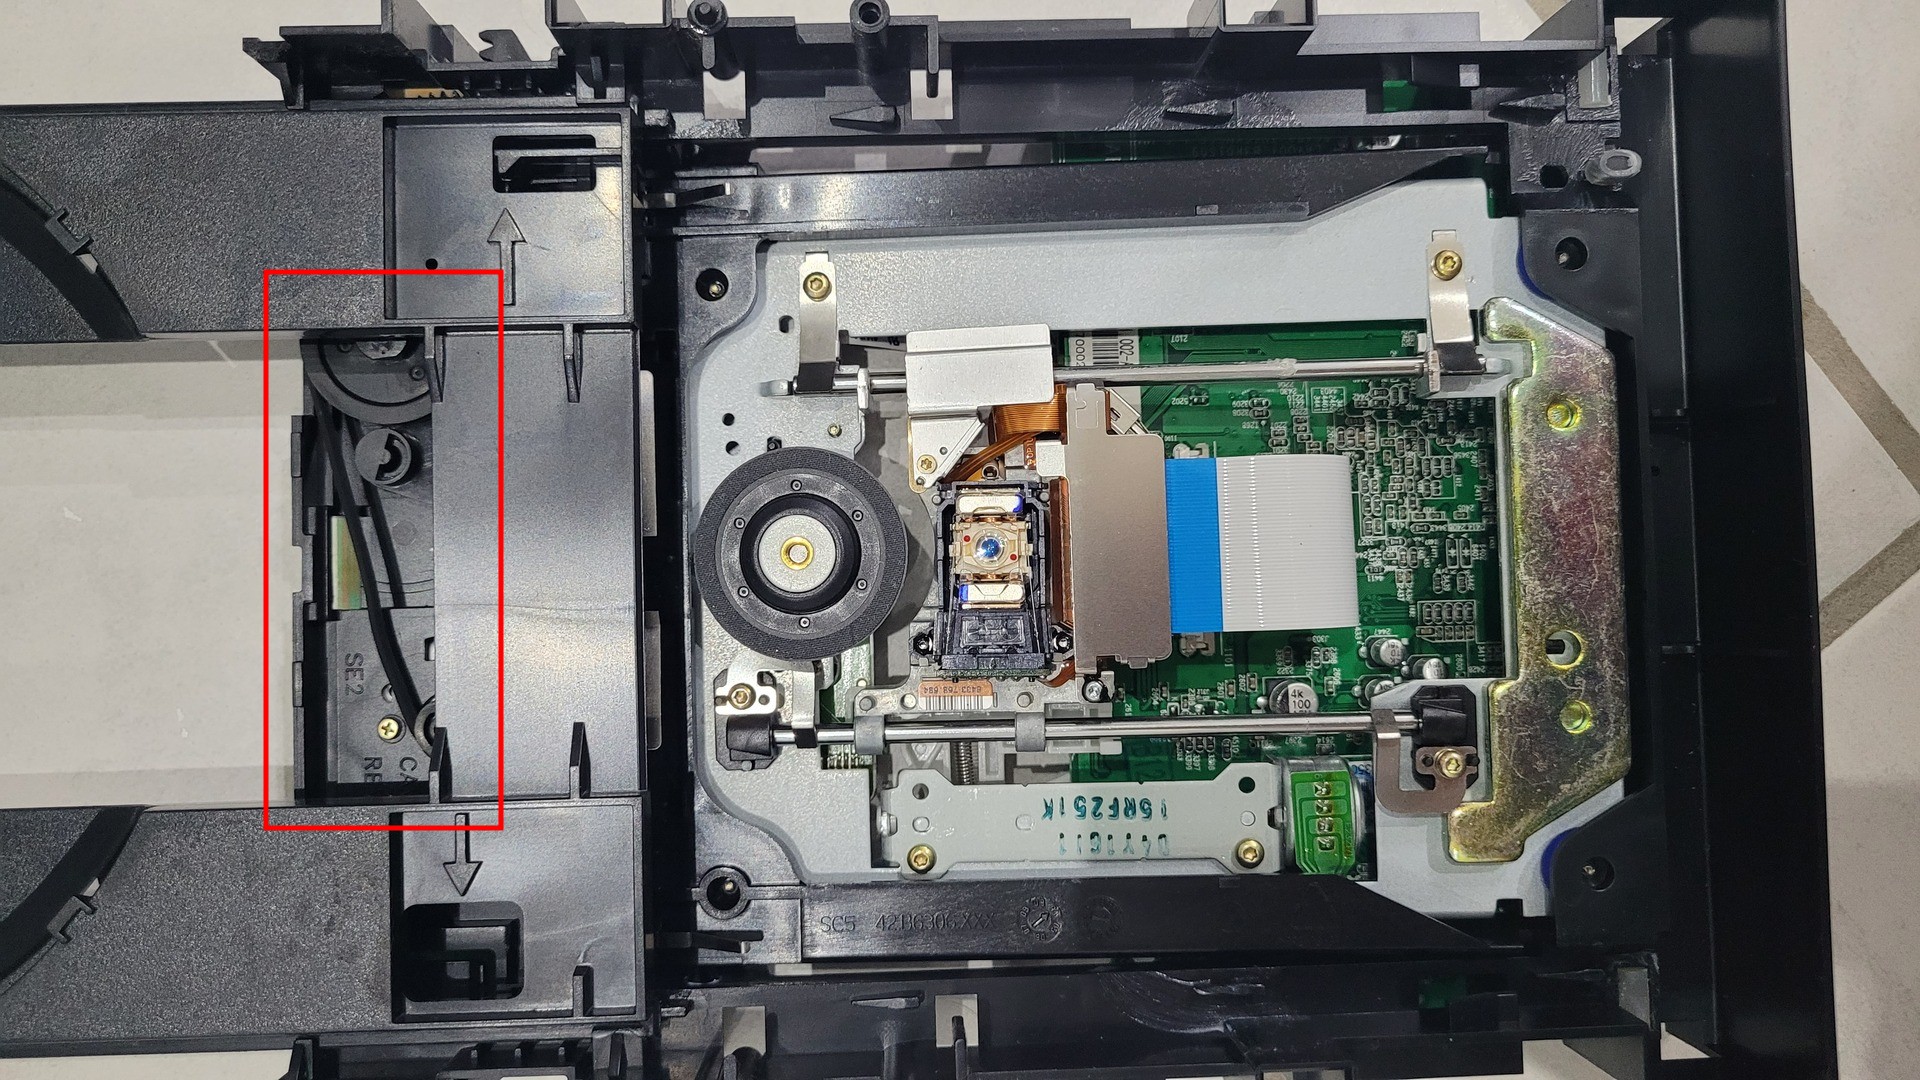
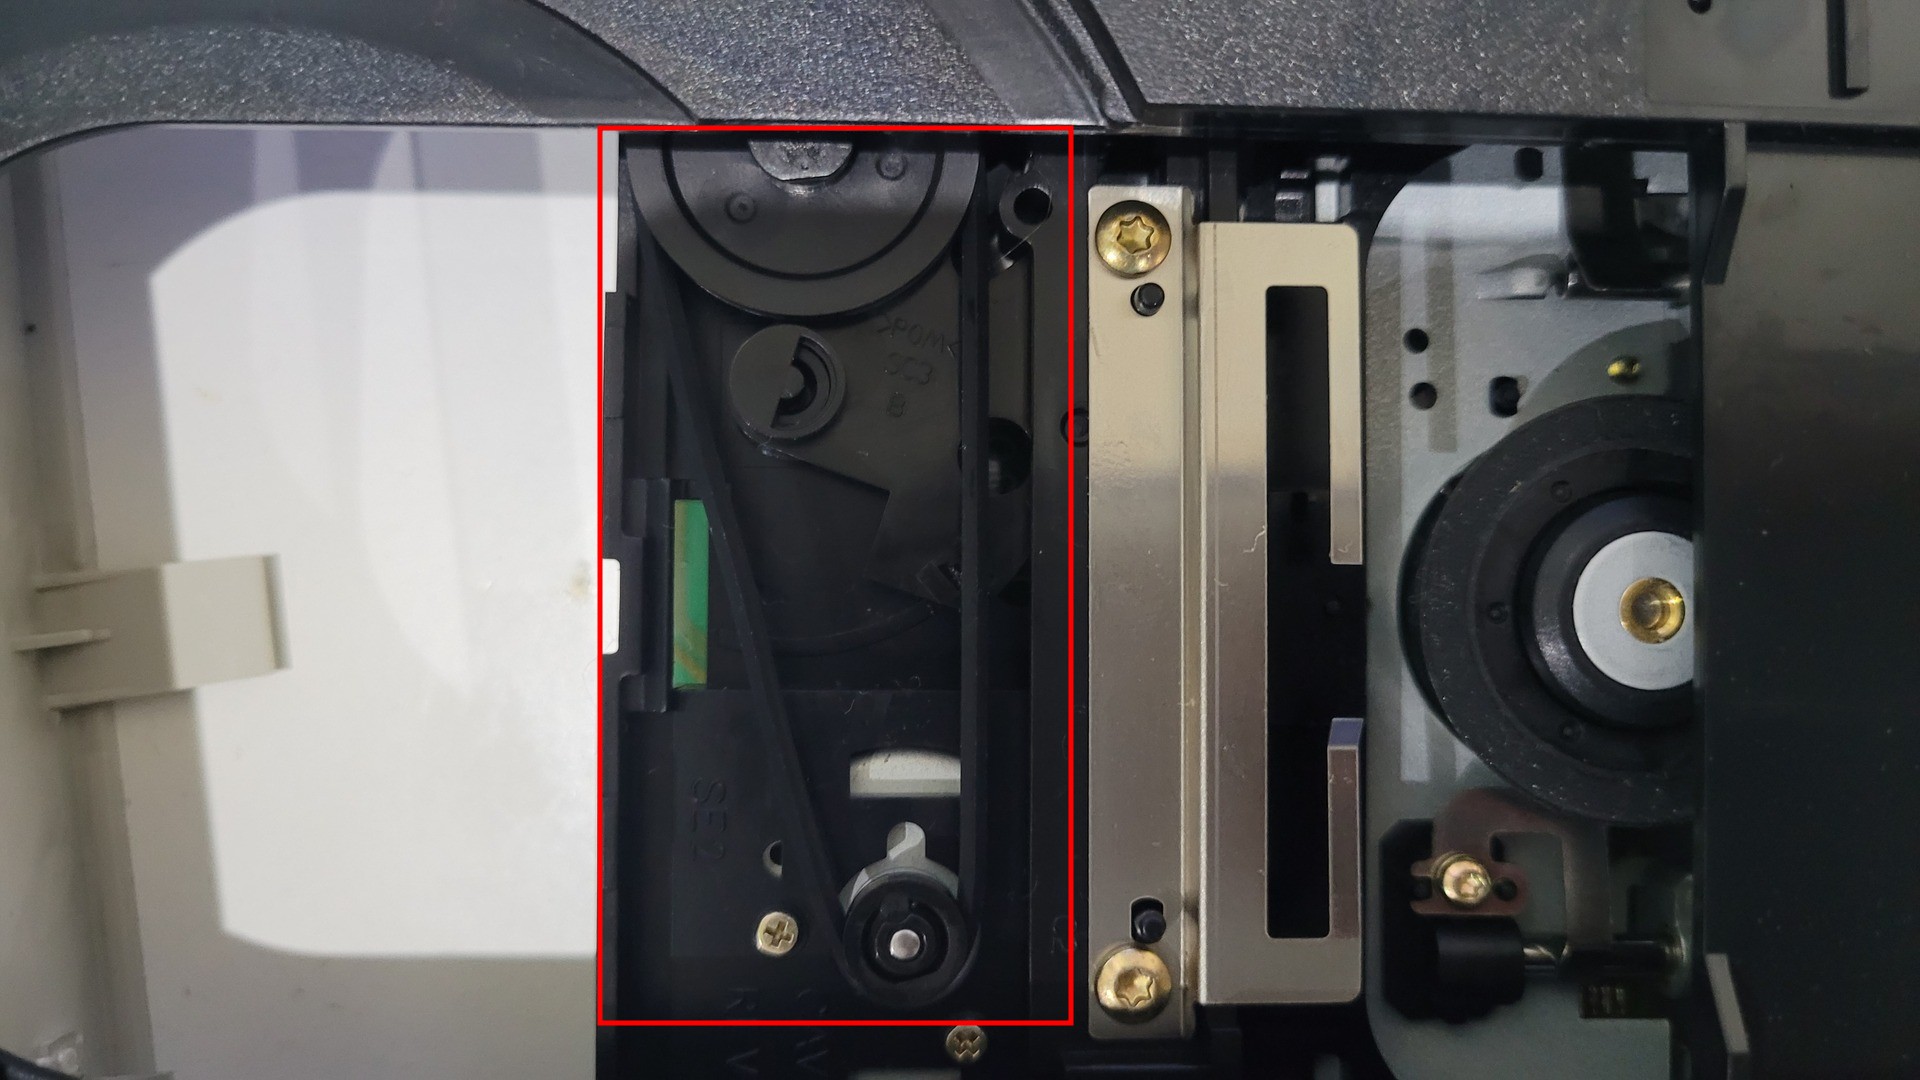
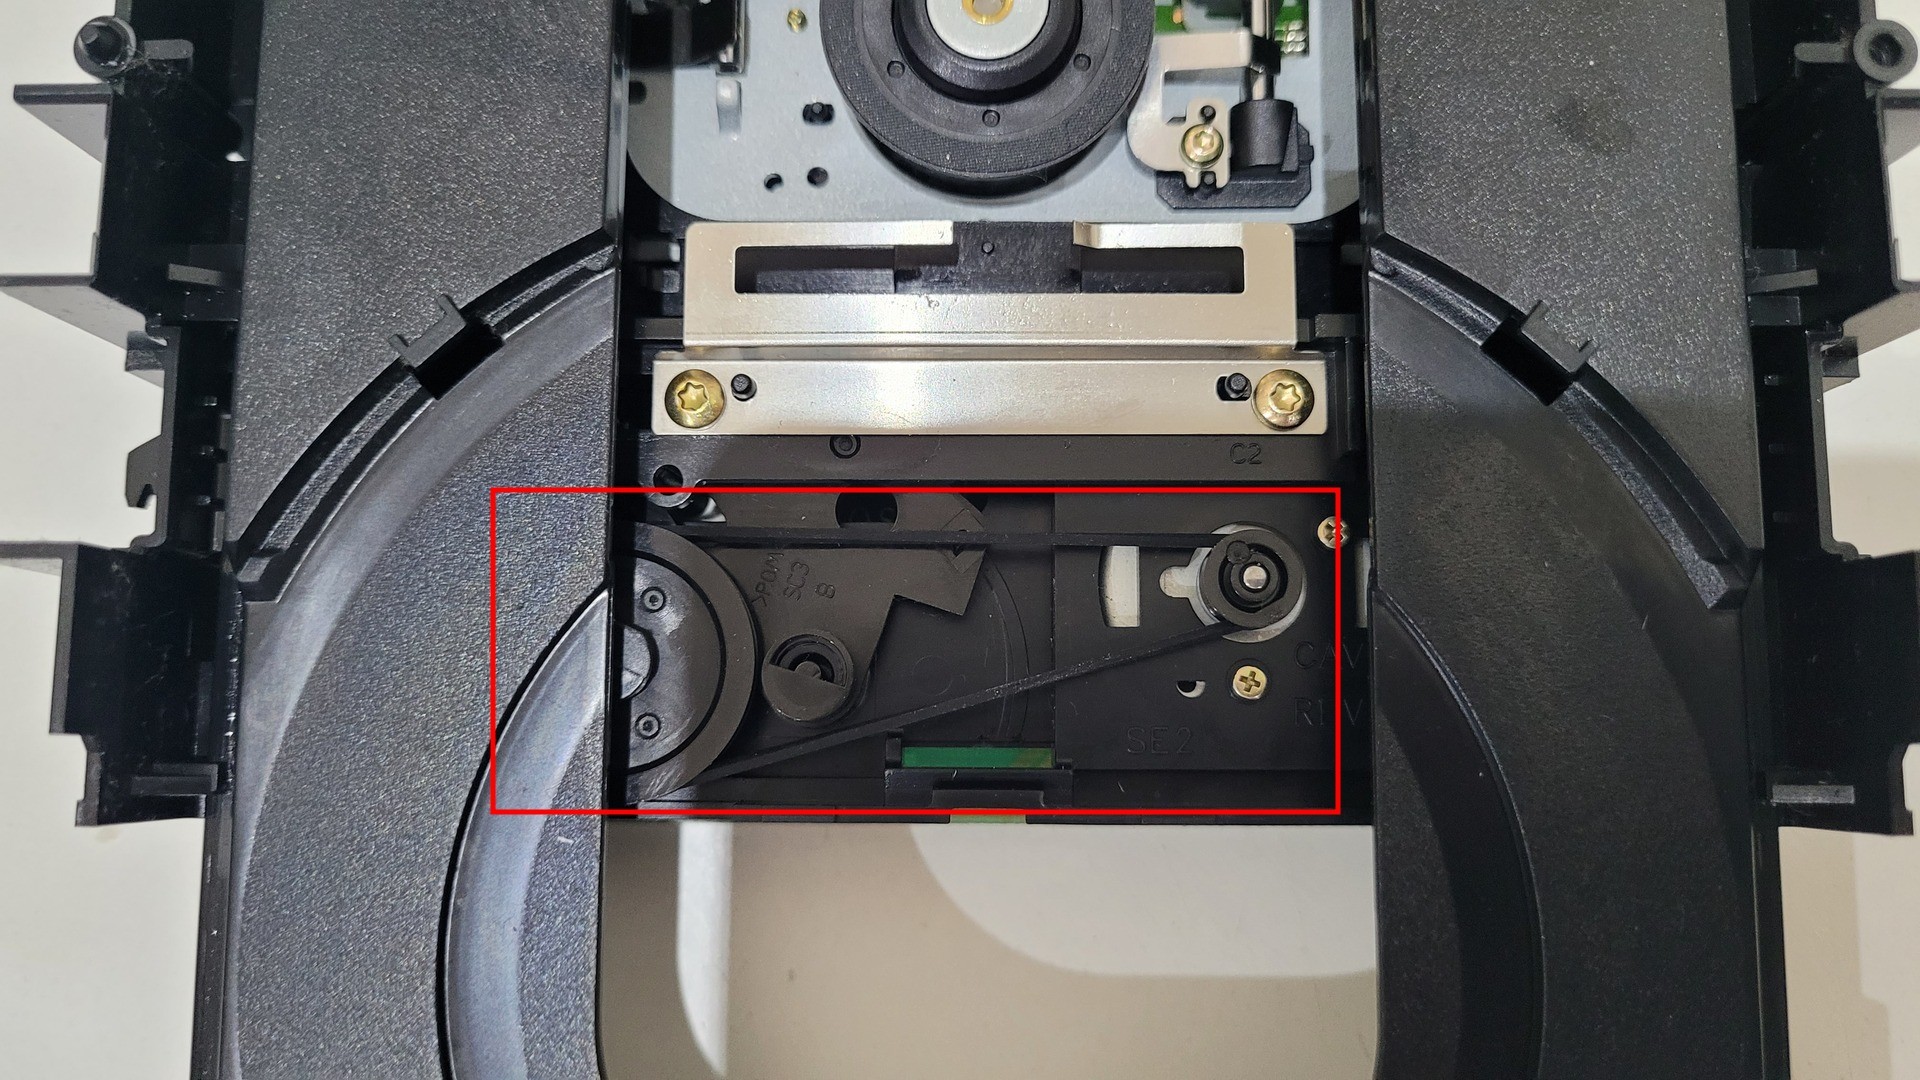
Repairing the DVD driver tray
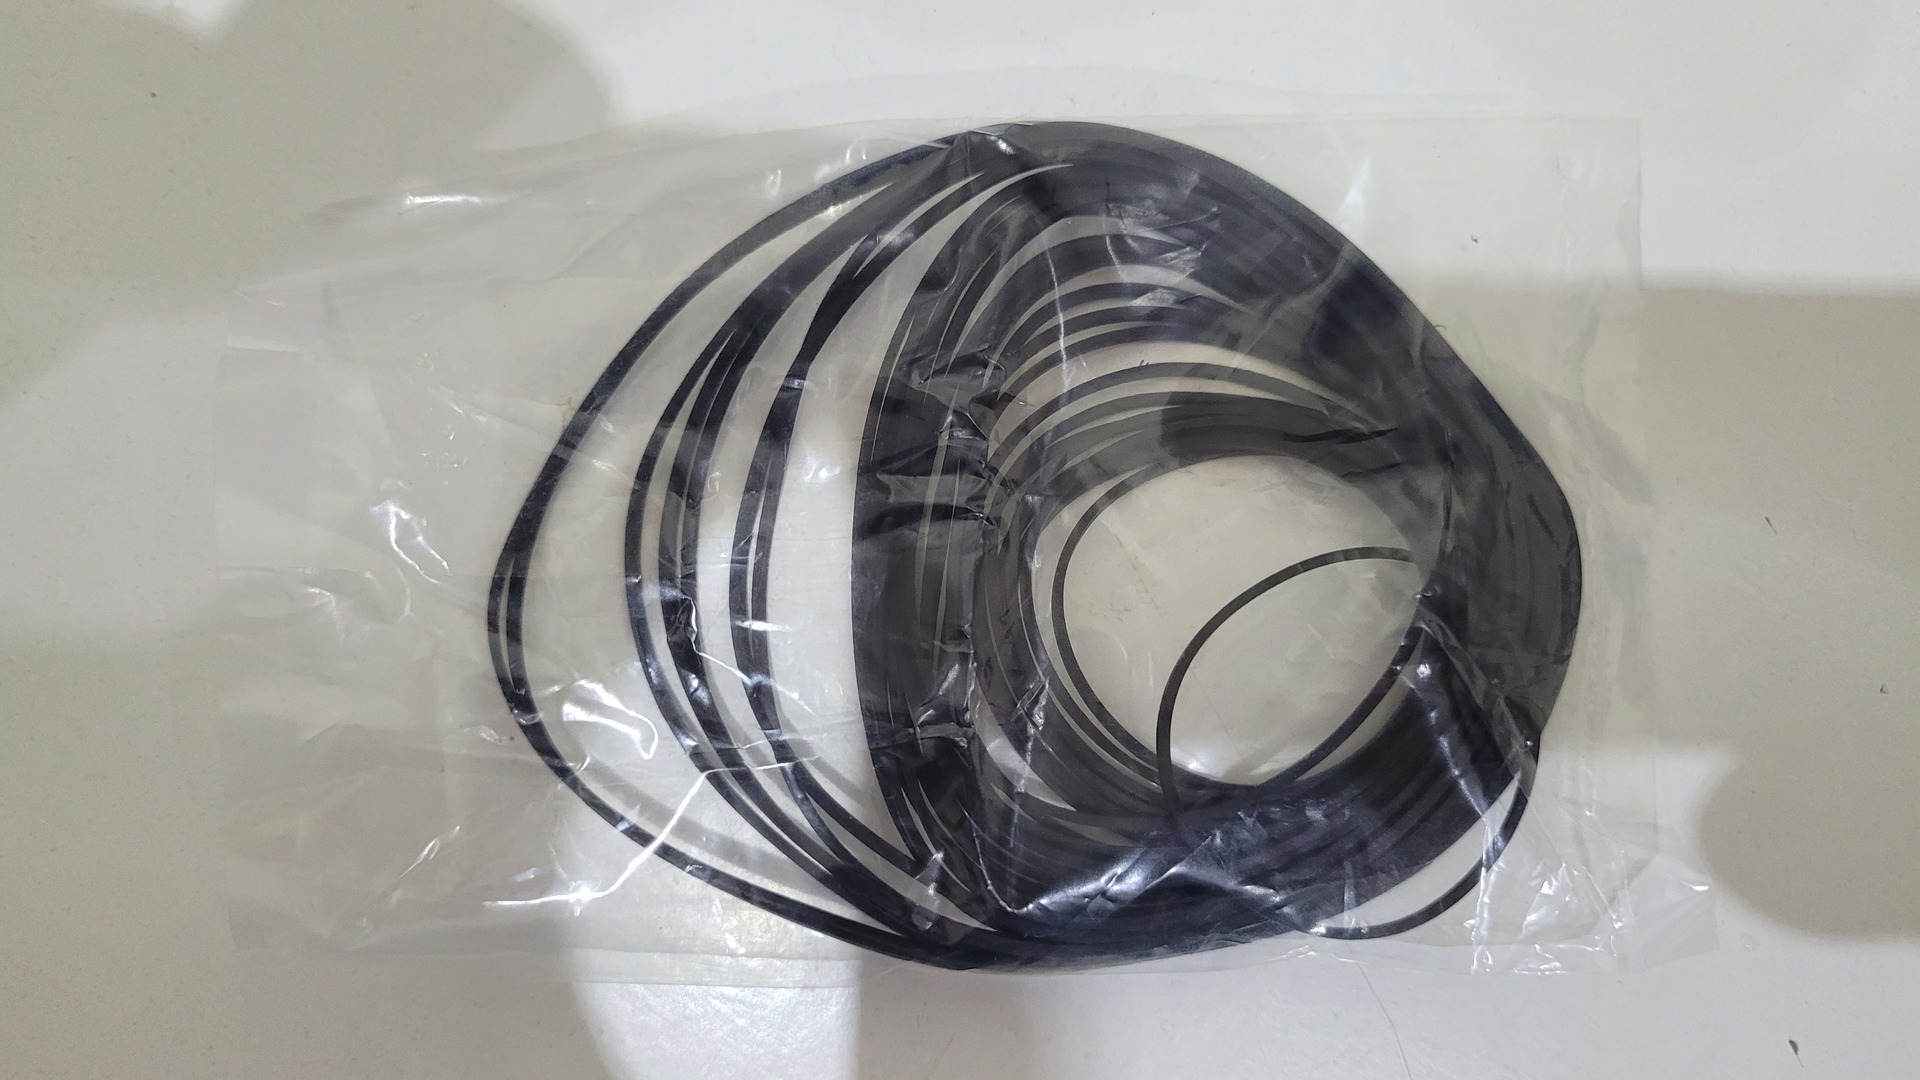
One last thing I had to do before installing any software : repairing the DVD drive tray. The drive was not able to open. The reason was that belt used to link the opening menanism with the motor was too lose, probably because of its age.
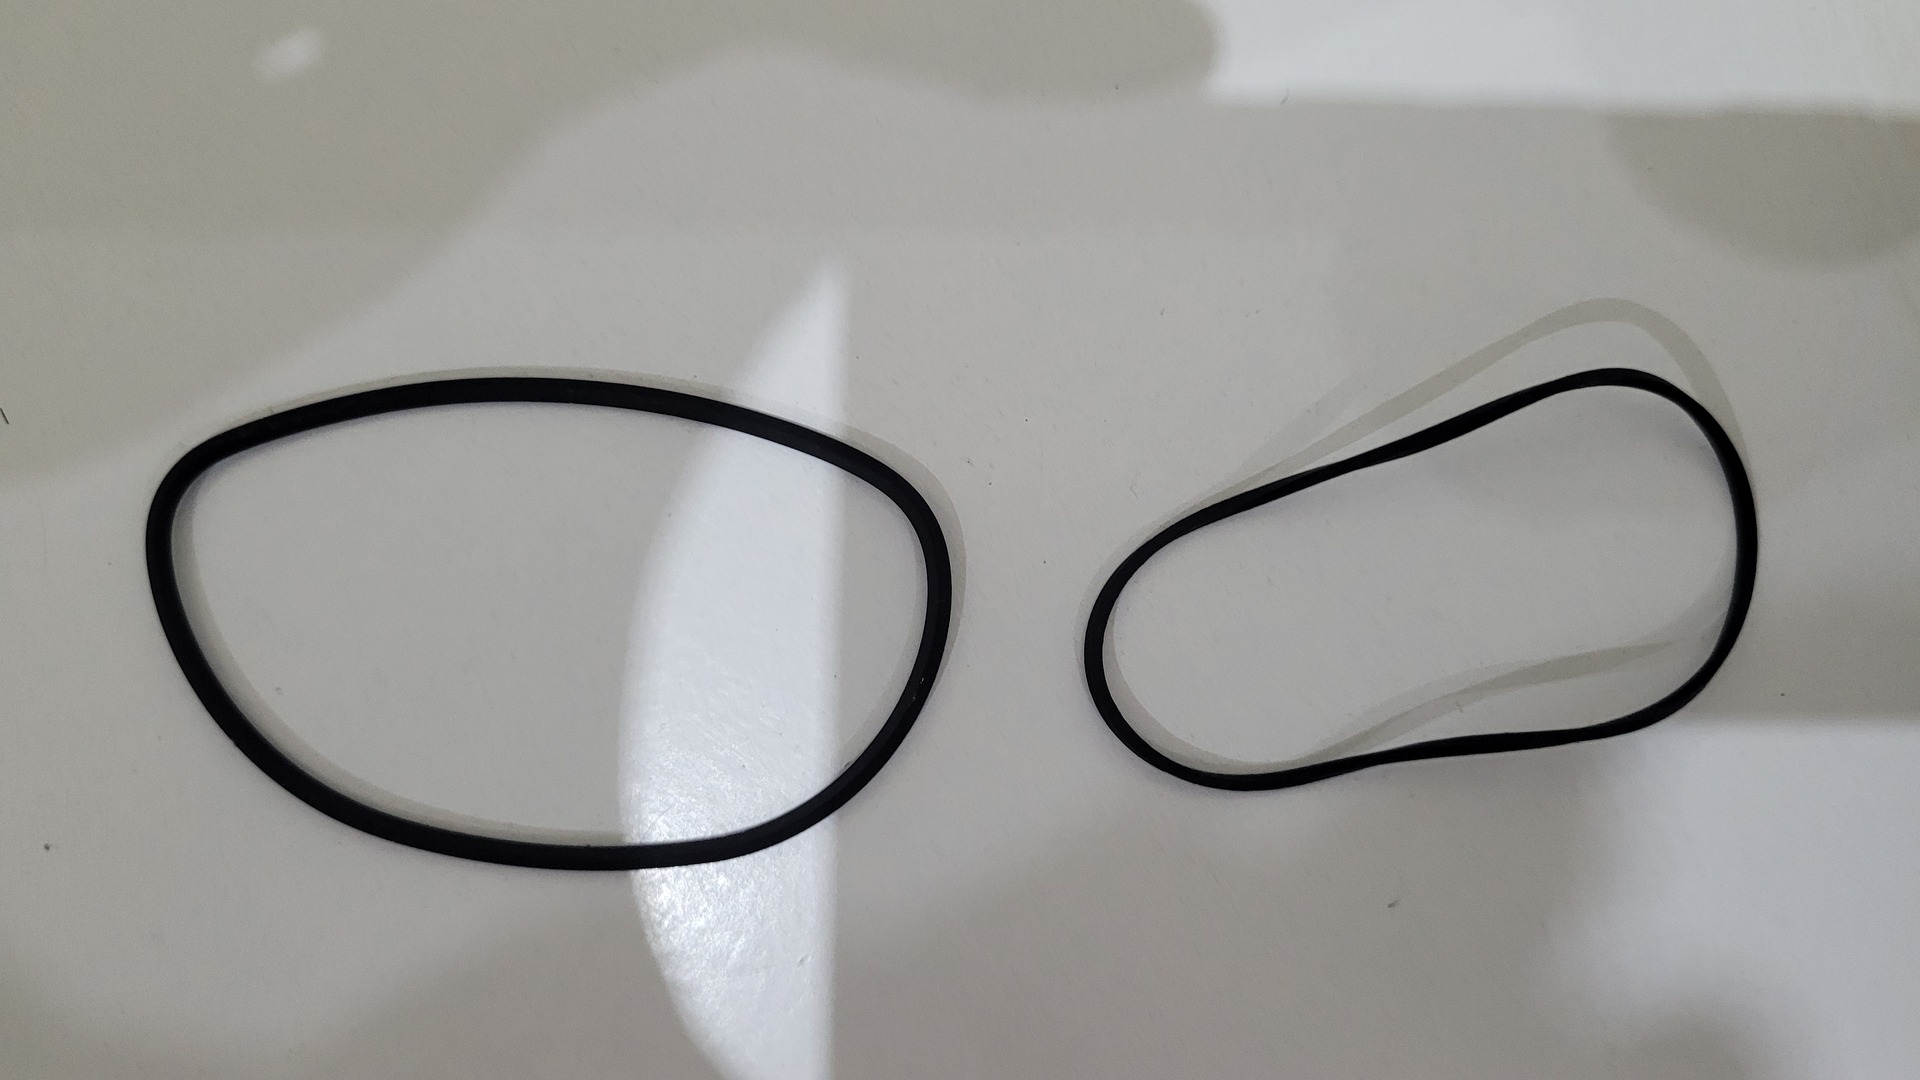
Finding the exact same size of belt is not difficult, I just bought a kit of multiple sized belt on amazon.
Changing the belt require to open the drive and manually open the tray to access it.
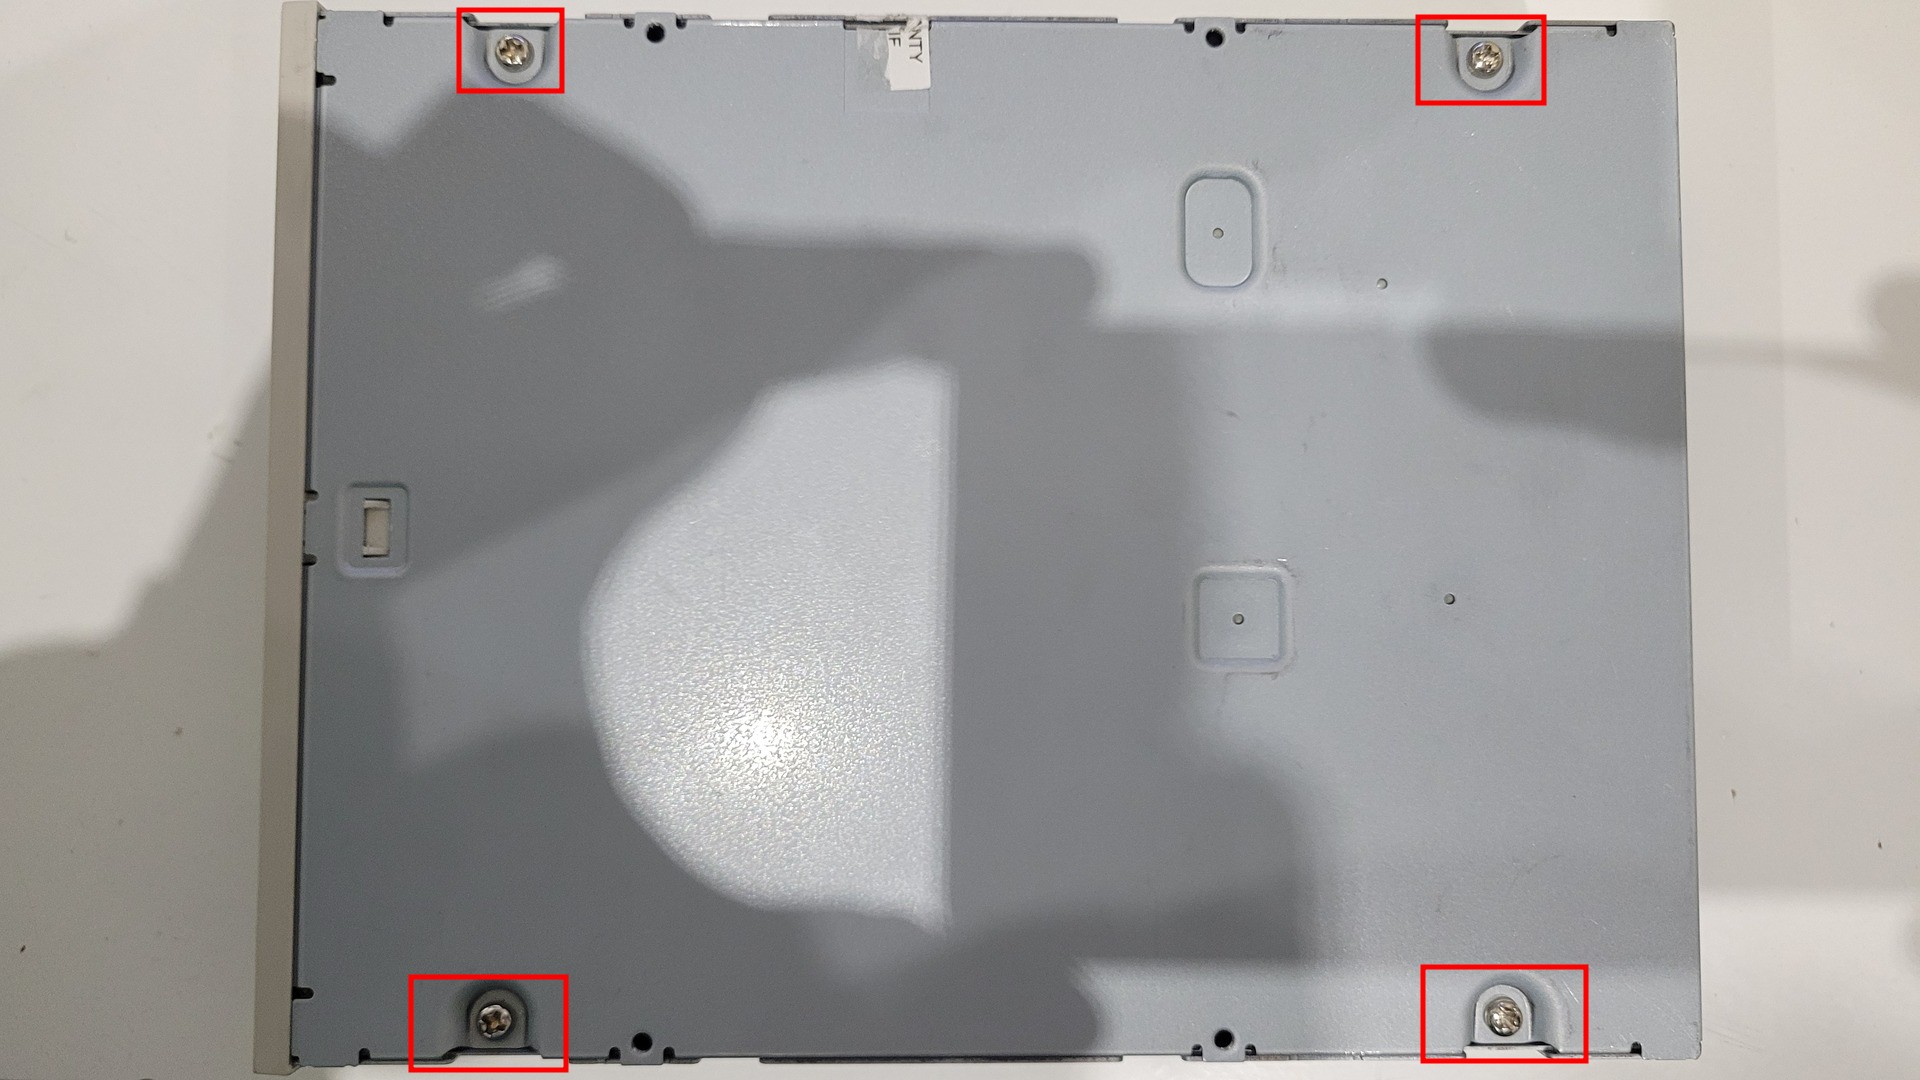
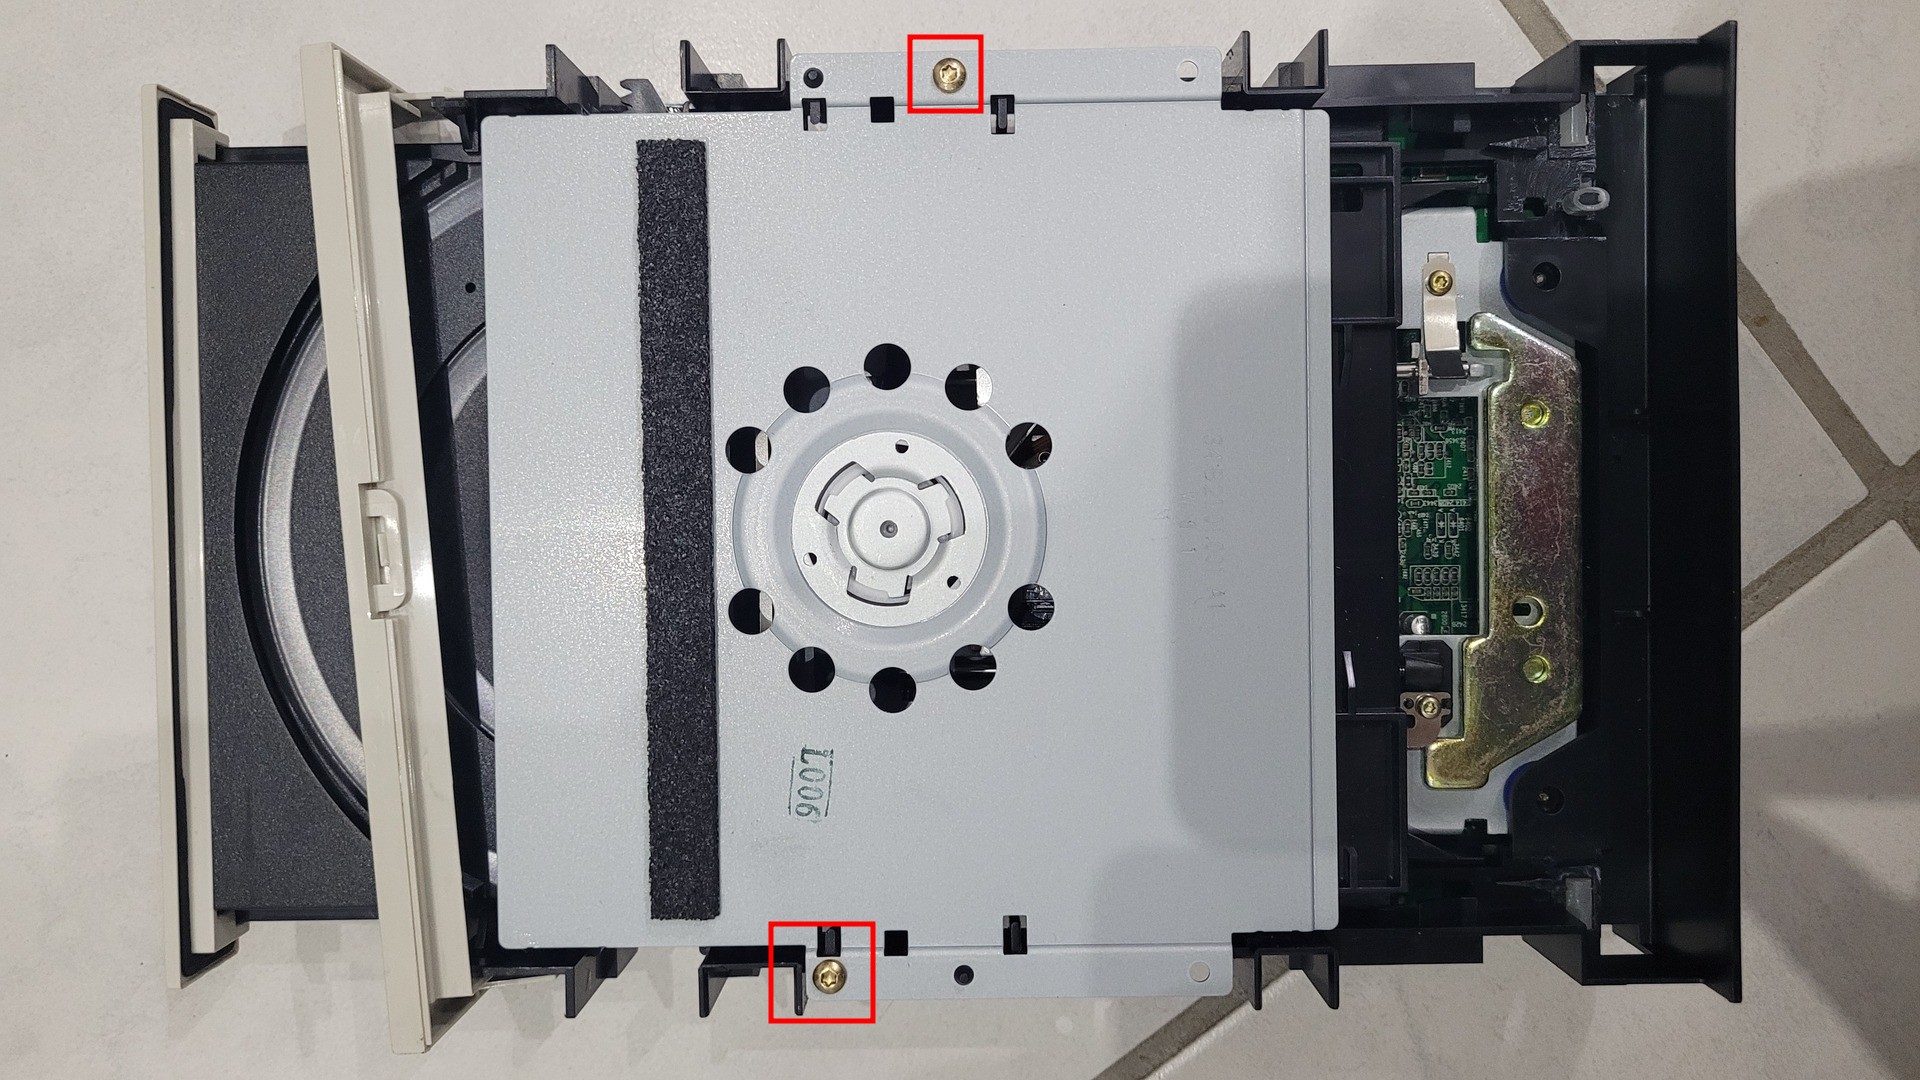
With the opened drive, the belt can be seen as soon as the tray is pushed as if it was opened
The belt can be easily replaced with a pair of tweezers. The photo on the left show both belt, the new one being on the right of the photo. It is a bit thinner but it works perflectly.
Good old retro look
With all assembled, mounted and repaired, the final PC is ready to be installed and tweaked !
Windows 98 install
Base install
Installing Windows 98SE is pretty easy, there are just a couple of things to do for convenience, like installing from HDD (or SSD) instead of the CDRom, so you never be prompted to insert Windows CDRom. I basicaly followed the guide from vogon: https://www.vogons.org/viewtopic.php?t=52119
Some side notes thought:
- I had not to assign IRQ to VGA (in the BIOS) because it was crashing Windows with both Promise card and the Sound blaster activated
- I copied all files from the Win98 CD with the xcopy command which can be found in D:\tools\oldmsdos
- I also copied all softwares and drivers I needed in C:\_addons
- The Promise card is named “PCI Mass Storage” when no driver is installed
Regarding the drivers here is where I got them:
- CMI8330: http://vogonsdrivers.com/getfile.php?fileid=193&menustate=0
- Realtek 8139: http://vogonsdrivers.com/getfile.php?fileid=1956&menustate=0 (I assigned static IP for better boot time)
- Riva 128: https://www.vintage3d.org/driver.php
The Network card is only used for file exchanges because, of course, this old PC has no access to the internet on my network :). I just shared a folder named “DOWNLOADS” and mounted it on a linux machine using the following command:
|
1 |
sudo mount -t cifs -o rw,users,user=guest,pass=,vers=1.0,sec=none,domain=WORKGROUP,ip=192.168.1.1,servern=RETROPC,file_mode=0777,dir_mode=0777 //RETROPC/DOWNLOADS /path/to/mountpoint |
System enhancements and other softwares
Here is a list of various things I added to the base Windows 98 install. Sometime it simply enhances the user experience and sometime it is something required for gaming or tweaking the system.
| name | Description | link |
|---|---|---|
| WMplayer 6.4 Codecs | Can be required for some games and allows to read some multimedia contents | download here |
| Nusb 3.6 | Generic mass storage USB drivers to use any USB flash storage | download here |
| Tweakui 1.33 | Easy interface to customize some features without editing the registry directly | download here |
| Windows ME Scandisk | This version is faster than the one from Win98 | Get it from the WinME ISO in “win9x” directory and copy it to “C:\windows\command” |
| TClockEx 1.4.2 | Tune the taskbar’s date and time. I mainly use it to monitor memory and CPU usage | download here |
| Windows installer 2 | Better compatibility and allows to install (not all) MSI. | download here |
| IE 5.5 SP2 | As obsolete as IE6 , but more compatible than the integrated IE5 without the slowdown and bugs provided by IE 6. | download here |
| 7zip | The king of unarchiving system | download here |
| Daemon tools 3.47 | Very usefull to mount disk images | download here |
| awxDTools Shell Extension | Make Daemon tools even easier to use by integrating mount / unmount into the shell menu (right click) | download here |
| Foxit reader 1.3 | Fastest way to open a PDF file on such an old computer | download here |
| Notepad++ 5.9.2 | More convenient than Notepad to edit configuration files | download here |
| Imgburn | As explained before I find it to be a perfect match with my Plextor burner to get perfectly readabe PSX copies… | download here |
| wpcrset and wpcredit | I used to change BIOS hidden values, see below | download here |
| Sandra 2001 V7 | I used it to benchmark memory while evaluating some tweaks, see below | download here |
| 3DMarks99 | The defacto overall benchmarking tool for such retro-computer | download here |
| crystaldiskmark220 | I used it to benchmark IO from SSD + Ultra 100 on the PCI bus | download here |
Finetuning
Before I started to tweak and benchmark the system, I did some finetuning that may seems obvious for those who are used to configure retro-PC. I’m not going to explain where to adjust all this as it is already documented in a lot of sites on the internet:
- I forced IRQ 5 on the Sound Blaster 16 device from the device manager. By default Windows 98 chose IRQ 9 which does not work well with old does games (e.g Doom, Wolfenchtein 3D, etc.)
- I set the virtual memory MIN and MAX to 256Mb. It is enought with my 128Mb machine.
- I disabled “taskMonitor” from startup as it is used by defrag to optimize most used files, but I find it is useless with an SSD
- I disabled the “taskscheduler”, as I do not needed it
I did some changes on the “system.ini” file. The goal was to limit disk caching as I installed a fast SSD and there was no need to take up too much ram (better keep it for games). But I made this cache faster with big chunk and cache for last accessed files and directories
|
1 2 3 4 5 6 |
[vcache] minfilecache=16384 maxfilecache=16384 ChunkSize=2048 namecache=4096 directorycache=96 |
Finaly, I also set ConservativeSwapfileUsage to limit the swap usage in case there is really no more free RAM… which should never be the case with 128Mb and games from nineties 🙂
|
1 2 |
[386Enh] ConservativeSwapfileUsage=1 |
Benchmarks, overclocking and tweaks
During all my tests and benchmark, I never touched the CPU multiplier. So K6-II was at either 400Mhz, 450Mhz or 500Mhz.
BIOS tweaks
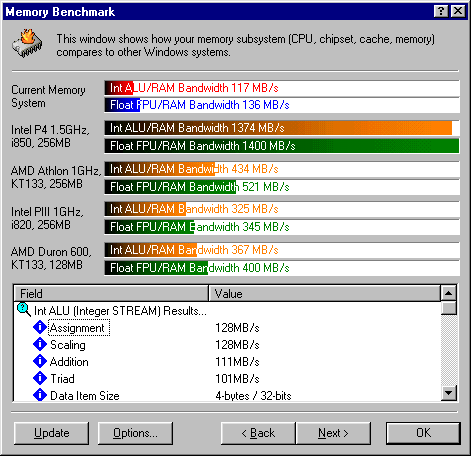
The page http://m571.com/m571/tweek.htm mentions some BIOS tweaks. I tested then with wpcrset and Sandra 2001 as benchmark tool to check whether there was any benefit.
Here is a summary of these tweaks and wether I applied it :
- E0 at adress 52h not applied, it did not make any change to performances
- 03 at address 54h applied: reduce RAS refresh pulse width from 6T to 4T
- 3A at address 53h applied: enable page miss after DRAM write
- 80 at address 55h applied: reduce assertion timing from 3T to 2T
- 5E at address 80h applied: enable advanced snoop in PCI master read cycle
- C8 at address 81h applied:enable Synchronous DRAM burst read
- FF at address 83h applied: enable CPU to PCI burst memory write
I did the tests with 66, 75 and 83Mhz FSB. All in all here the final results I have with the 83Mhz FSB:
| Without BIOS tweaks | With BIOS tweaks | |
|---|---|---|
| ALU/RAM | 102 MB/s | 117 MB/s |
| FPU/RAM | 115 MB/s | 136 MB/s |
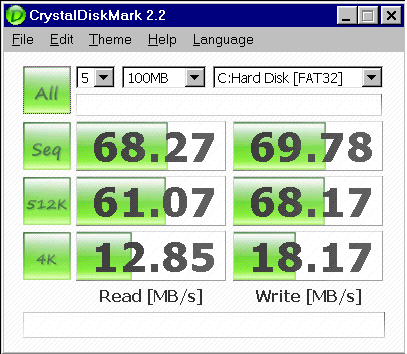
UATA speed VS FSB clock and BIOS tweaks
I Also did some benchmark (with crystaldisk) of the UATA speed with the SSD for each supported FSB frequencies.
Values are in MB/s:
| 66Mhz FSB | 75Mhz FSB | 83Mhz FSB | 83Mhz + BIOS Tweaks | |
|---|---|---|---|---|
| Seq. read / write | 55.37 / 32.27 | 61.79 / 35.96 | 68.36 / 39.74 | 68.27 / 69.78 |
| 512k read 7 write | 50.39 / 31.81 | 56.17 / 35.61 | 61.09 / 39.25 | 61.07 / 68.17 |
| 4k read 7 write | 10.85 / 11.87 | 11.72 / 13.50 | 12.61 / 14.82 | 12.85 / 18.17 |
Higher FSB frequency obviously means better PCI bus performances. As I use a fast SSD, I’m probably hitting the Promise card, the PCI bus or even the CPU limit. However, I/O are awesome for such a configuration and the BIOS tweaks nearly double write performances !
Games benchmarks
As I build this machine also for retrogaming with fun, I did some benchmarks with games. I used 3 master pieces from the nineties using the well documented commands for each one:
- Doom: “doom -timedemo demo1” (35 x 1710 / X realtics)
- Quake: “timedemo demo3” (640×480, no 3D accel)
- Quake II: “timedemo 1” (640×480, 3Dnow openGL)
Below are the results in FPS
| 66Mhz FSB | 75Mhz FSB | 83Mhz FSB | 83Mhz + BIOS Tweaks | |
|---|---|---|---|---|
| Doom | 95 | 106 | 114 | 116 |
| Quake | 16.4 | 18.5 | 20.6 | 21.5 |
| Quake 2 | 23.5 | 26.5 | 29.5 | 32.7 |
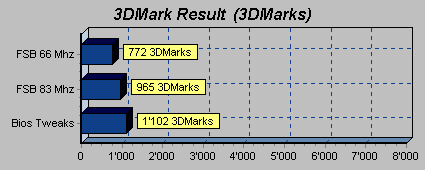
Of course, I have some 3dMarks99 results, but not for 75 Mhz FSB:

[…] a previous article, I pimped a good old Socket 7 based PC with a K6-II 400 (overclocked to 500Mhz) and a Riva 128. For […]