Amiga computers are by far my preferred retrocomputing machines. Several years ago, I owned multiple ones: A500, A2000 + SCSI, A1200 (+68060, tower, Zorro 2 bus, C64/3D) and ultimately a marvelous Amiga 4000 PPC with a CybervisionPPC, UWSCSI, scandoubler and an Ariadne2 network card.
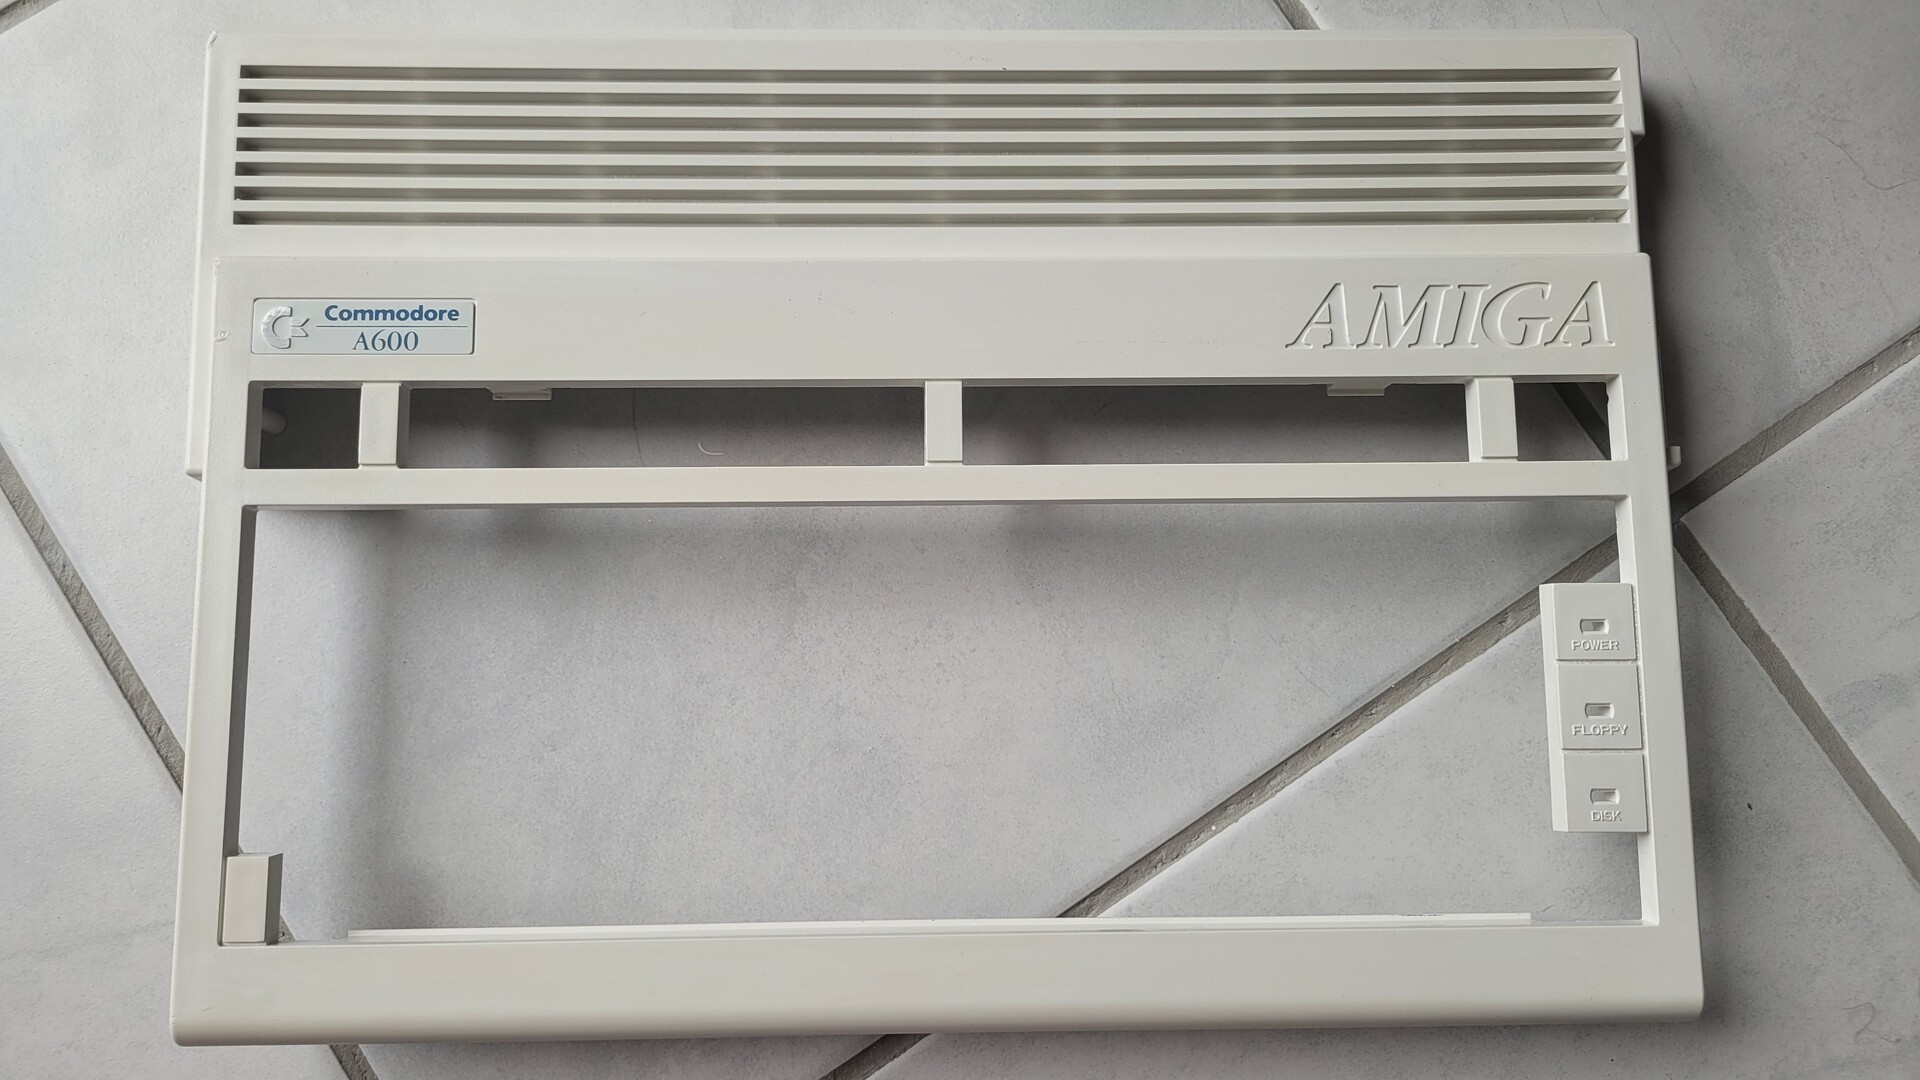
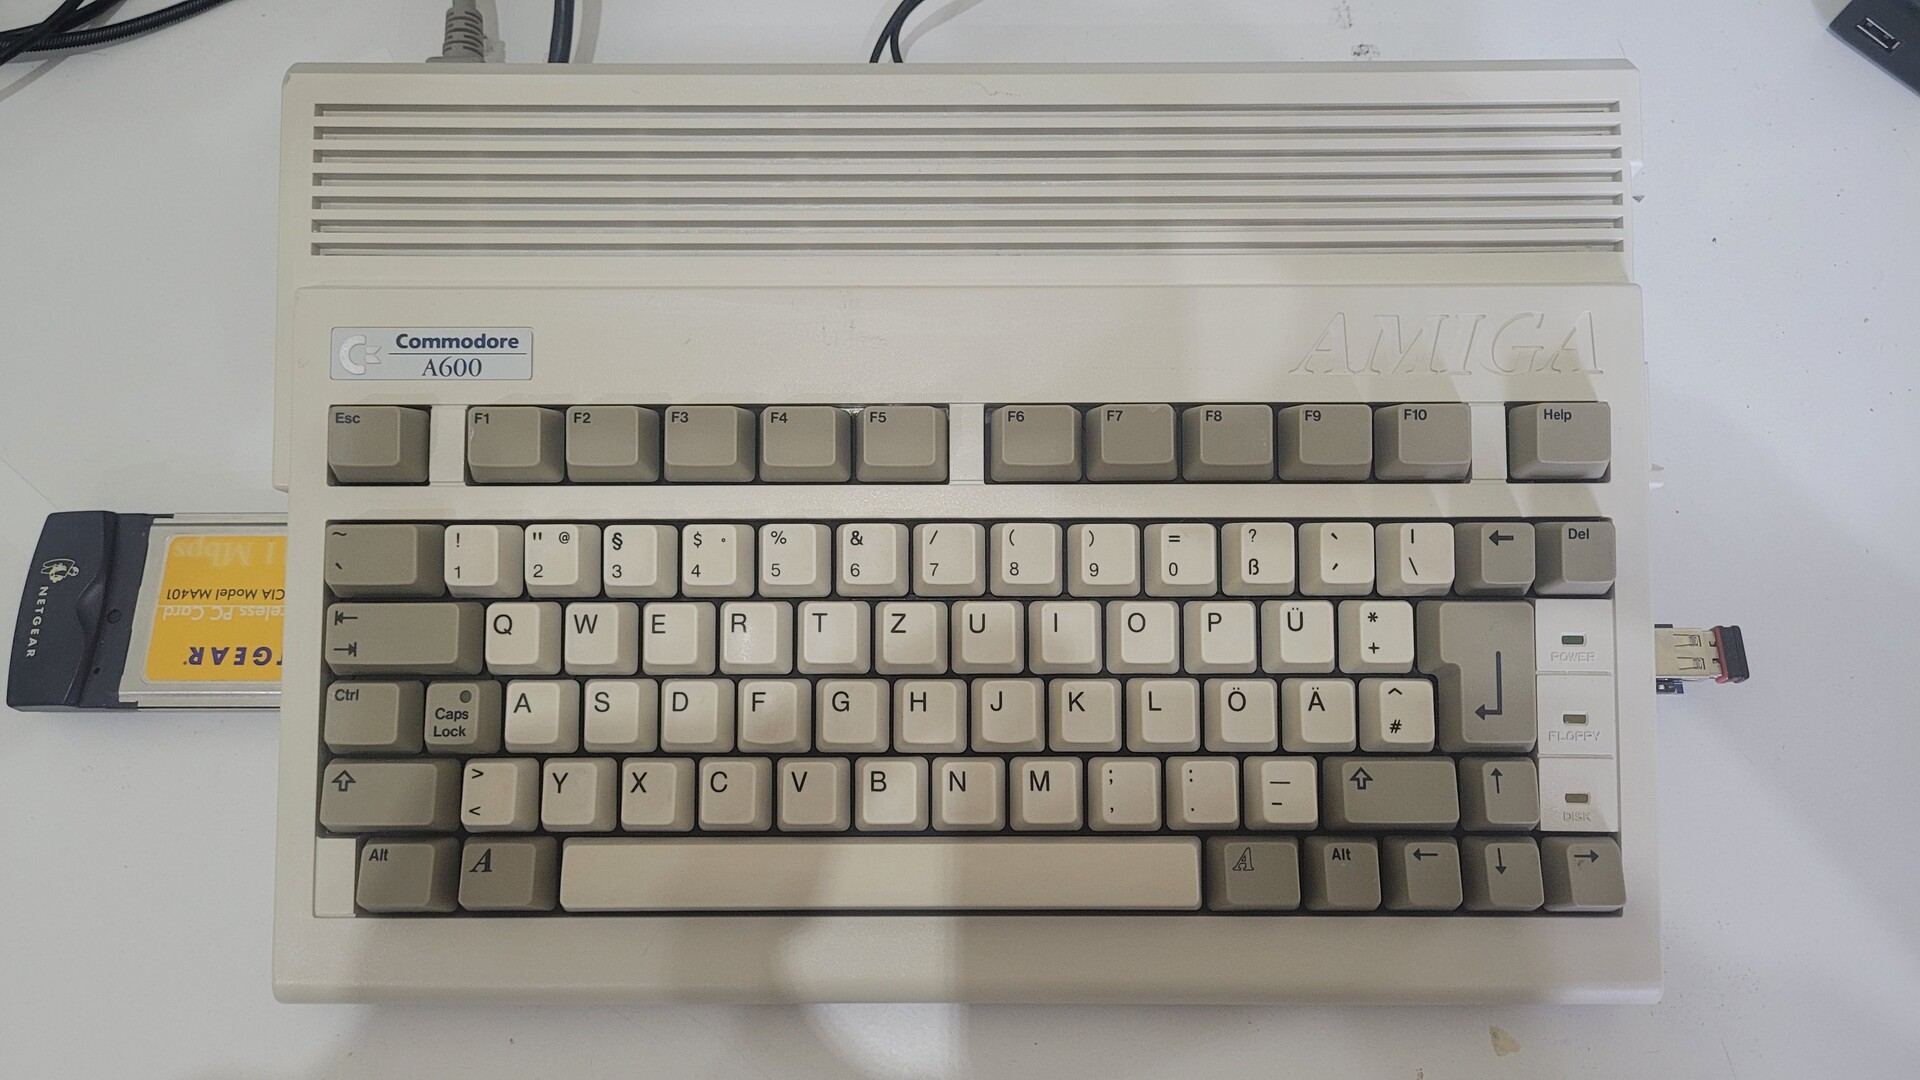
Unfortunately, I sold all theses machines back in time… And the current prices are just becoming insane. I recently found an old yellowish A600 with some dead keys at a “reasonable” price. Finally I found it to be a very good compromise: it is a compact machine and can be widely expanded with brand new cards : up to 68030, 64Mb fast ram, 2 Mb chip memory, HDMI output and even Wifi with PCMCIA card !
Here is the story of my restored / primped Amiga 600…
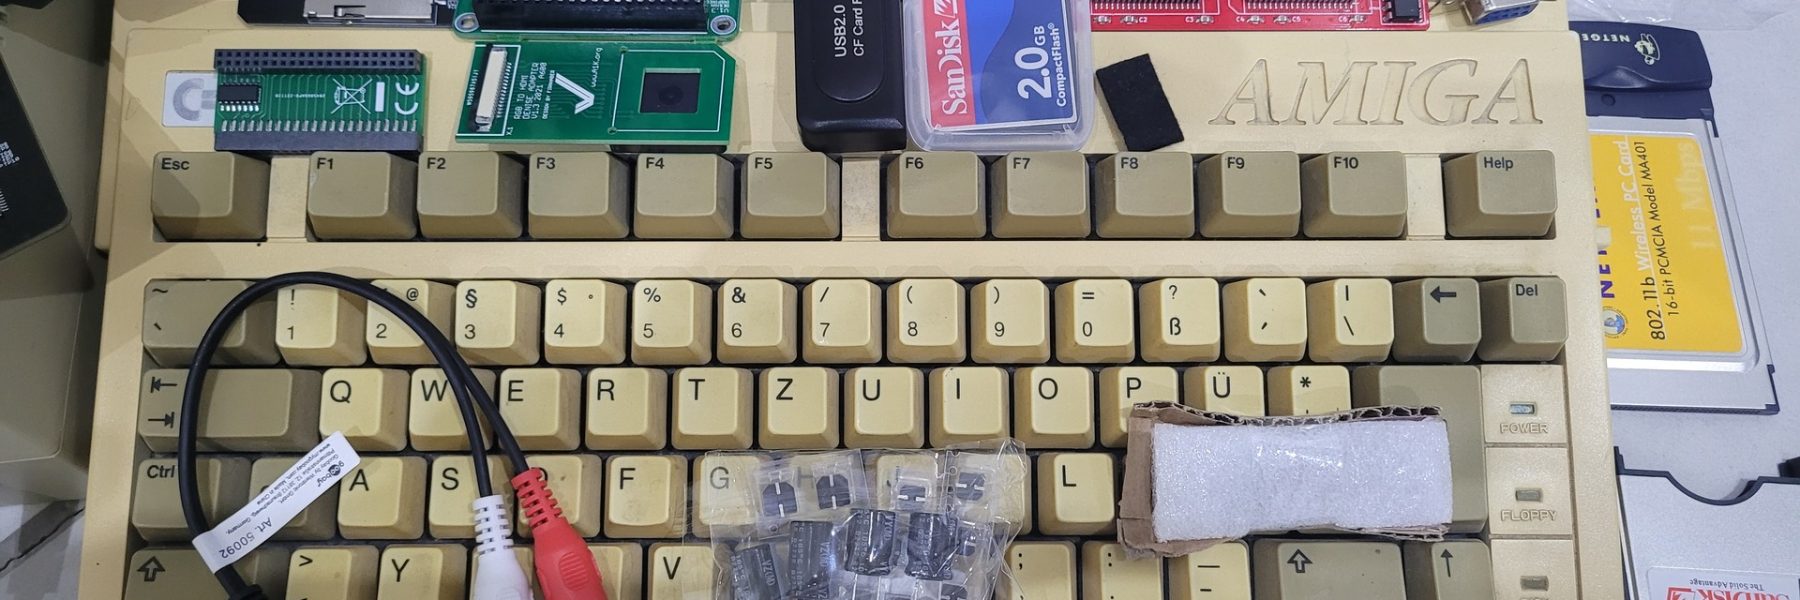
Used Materials
Amiga related things
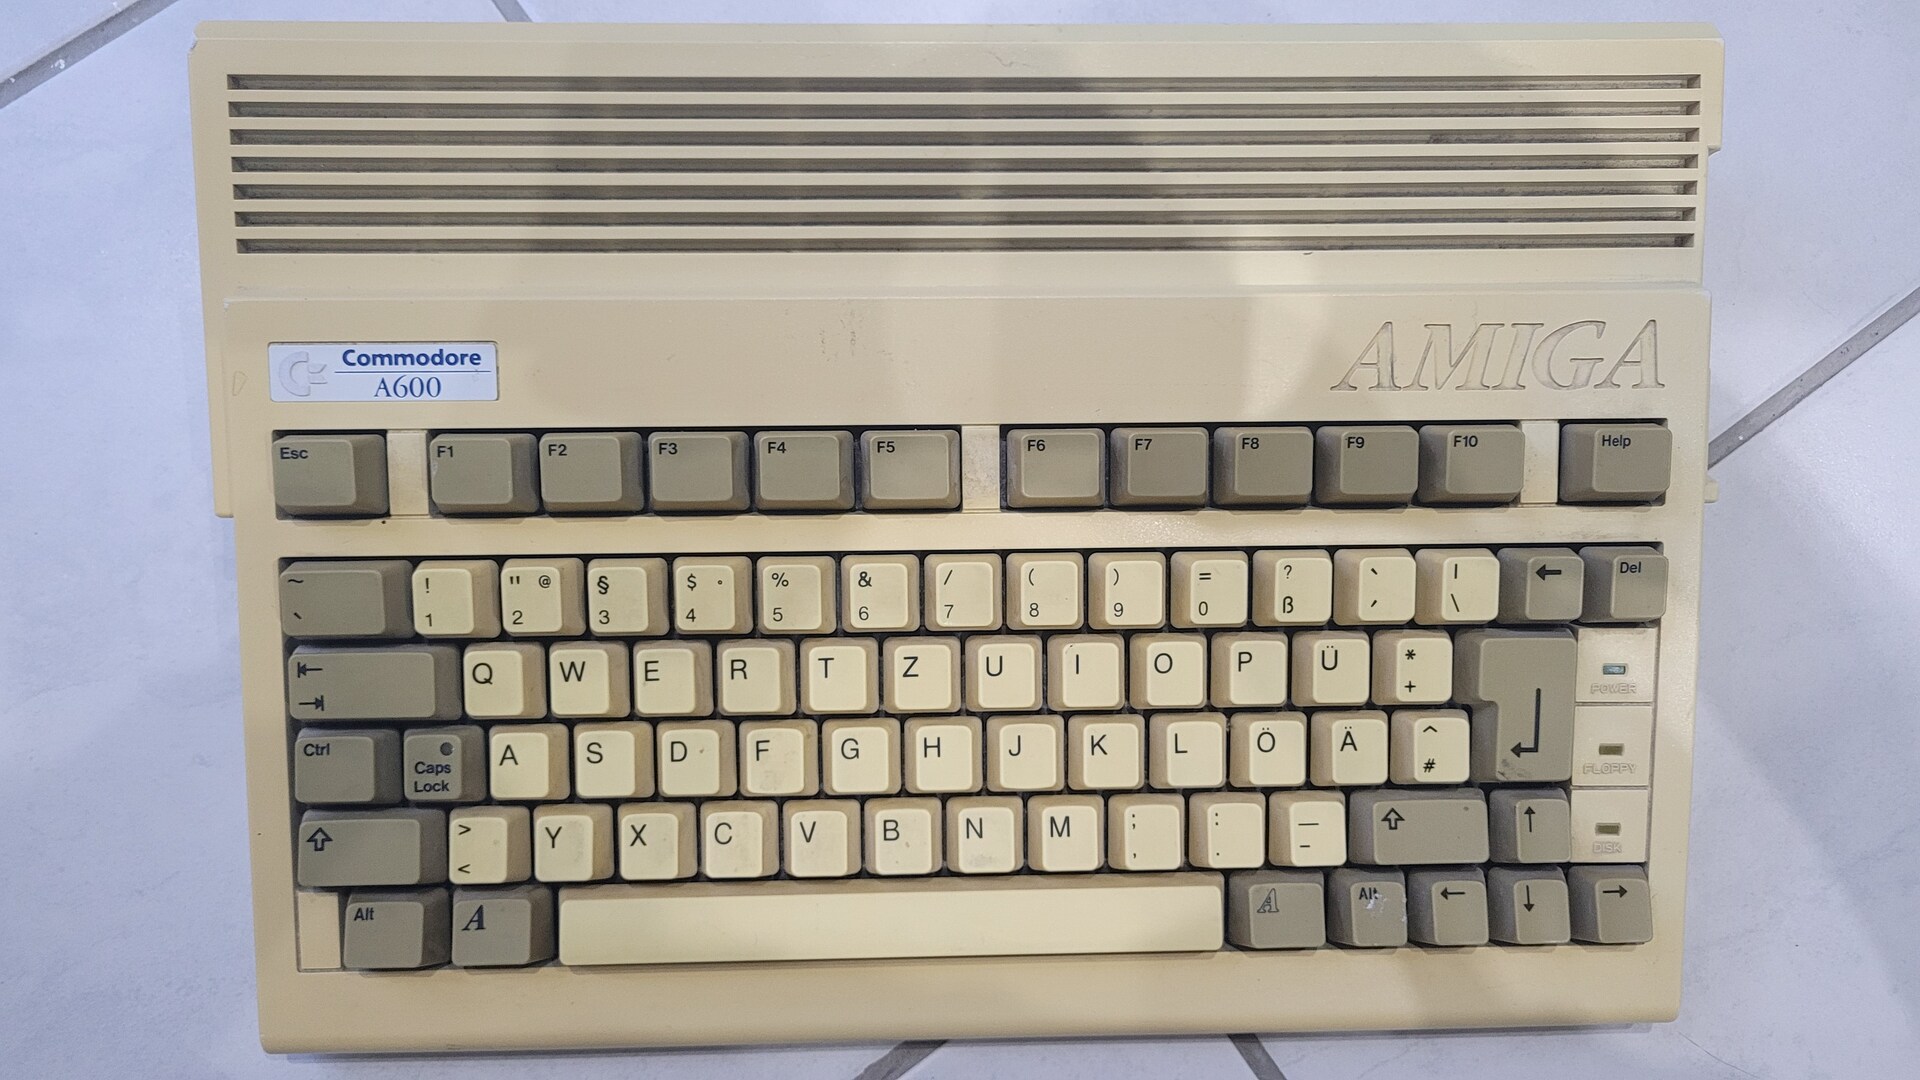
- An Amiga 600. In my case, it was yellowish and had some dead keyboard keys
- A630 Rev.2 accelerator board
- SD2IDE adapter
- IDE riser with LED signal correction
- 1MB Chip Memory Expansion + RTC
- 2Gb CompaqFlash card + PCMCIA adapter
- A Netgear MA401 PCMCIA Wifi Card
- An USB to DB9 Mouse adapter from ebay
- RGBtoHDMI kit + Raspberry Pi Zero
- Amiga OS 3.2 Rom + CD
- Hard membrane keyboard replacement
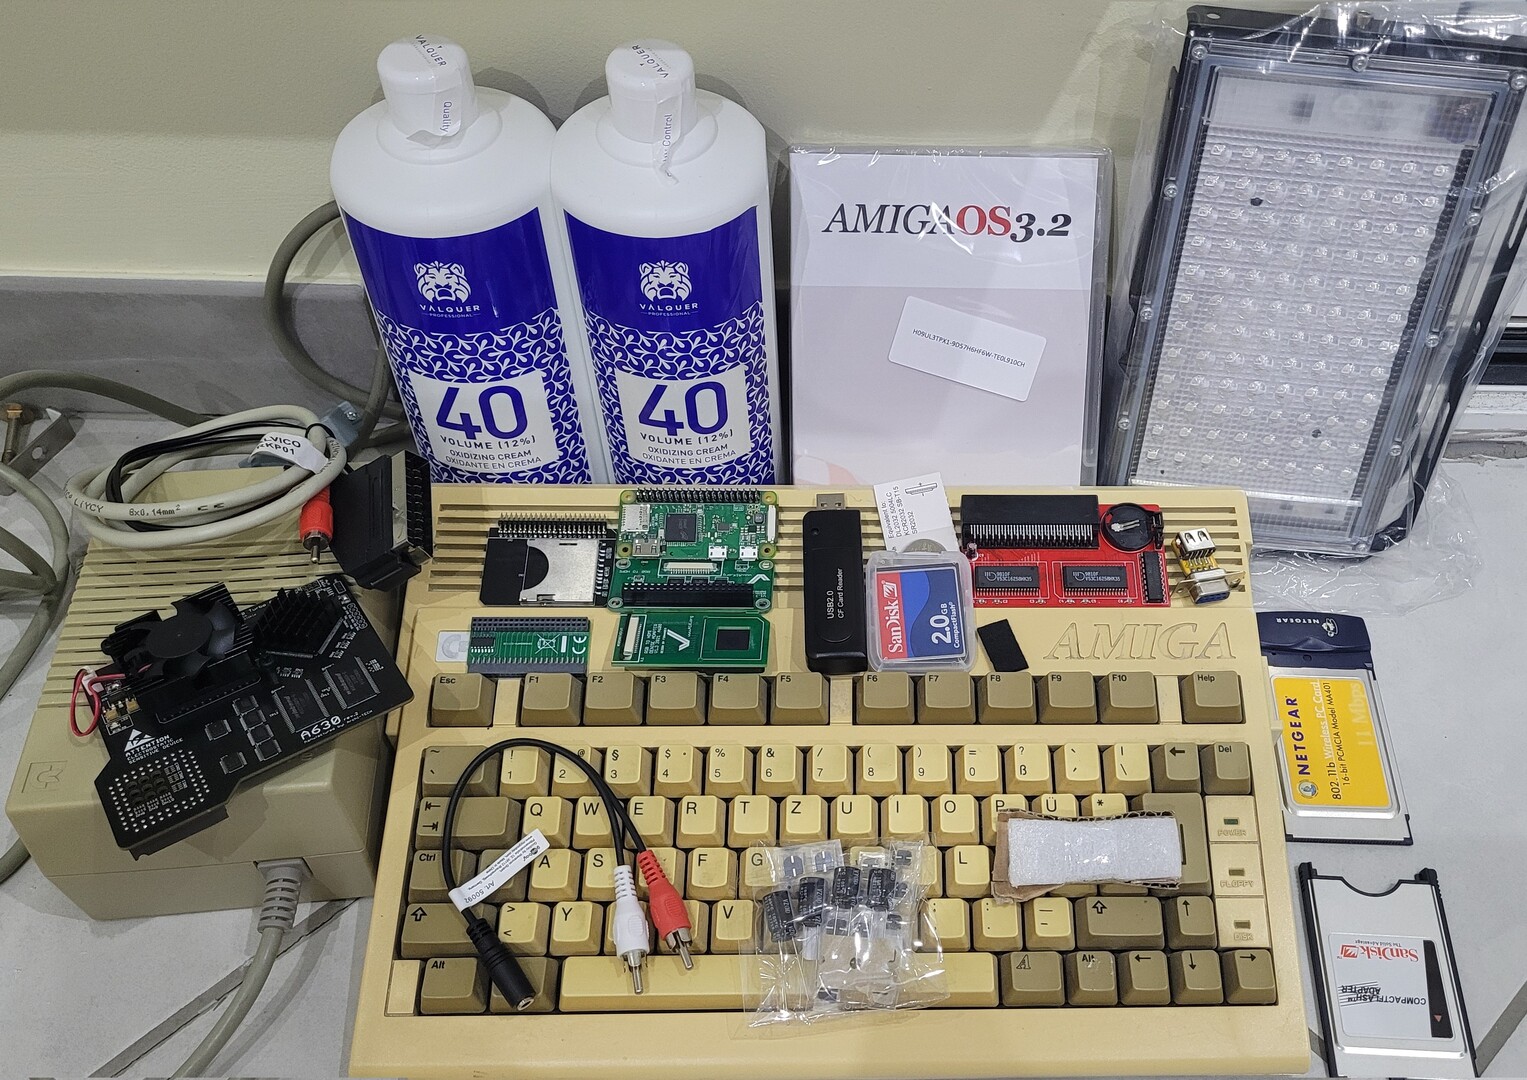
Tools and other used things
- Various capacitors (any “Amiga 600” kit would have been fine)
- Valquer Oxidant Premium Ultra-Creamy 40 Vol 12% (Retrobright)
- UV Leds lamp (Retrobright)
- HDMI FPV cable + mini HDMI male connector + HDMI femalle connector
- 64Gb MicroSD
- 3D Printer
- Solering iron with a fine tip
- Solder sucker
- Tooth brush
- Isopropyl alcool
- Some Q-tips
- Facom contact spray
Hardware
Opening the beast
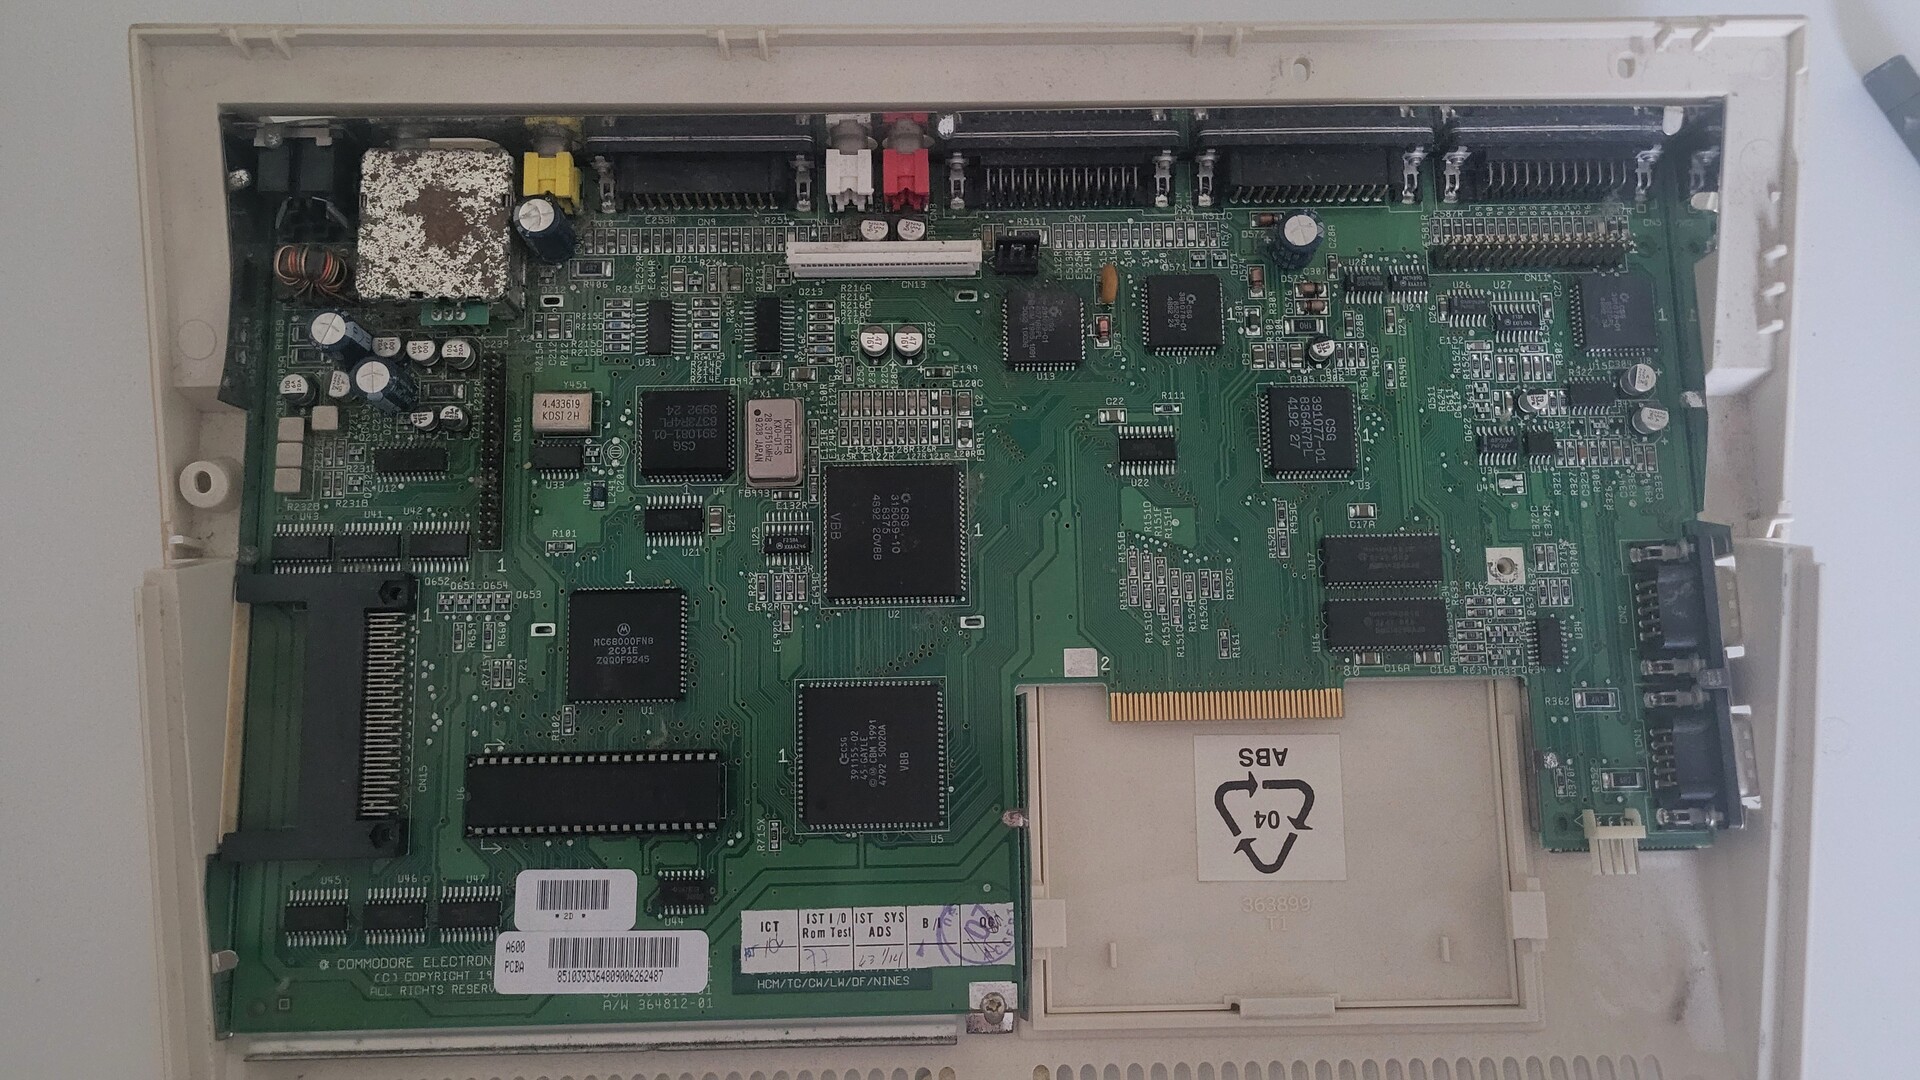
Amiga computers are generally easy to open. The Amiga 600 has few screws on the bottom and one inside that fixes the floppy drive to the motherboard.

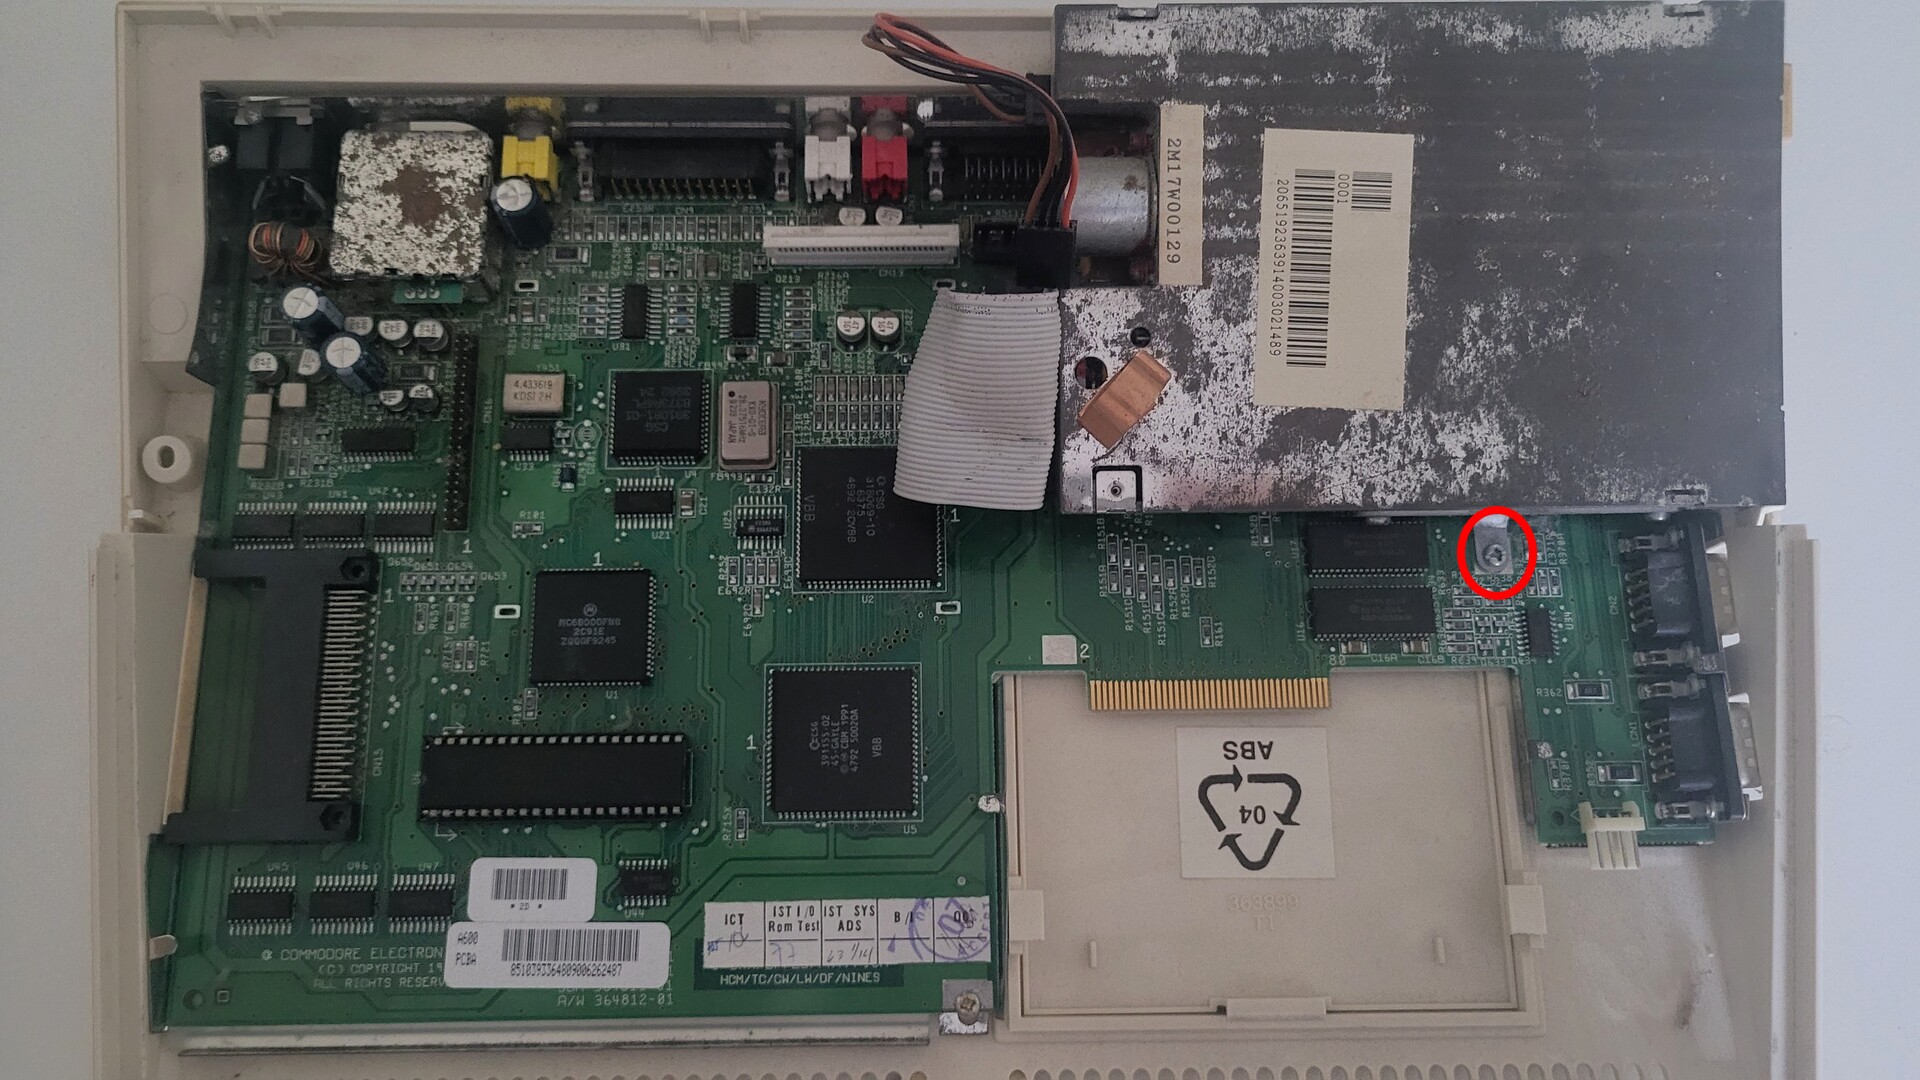
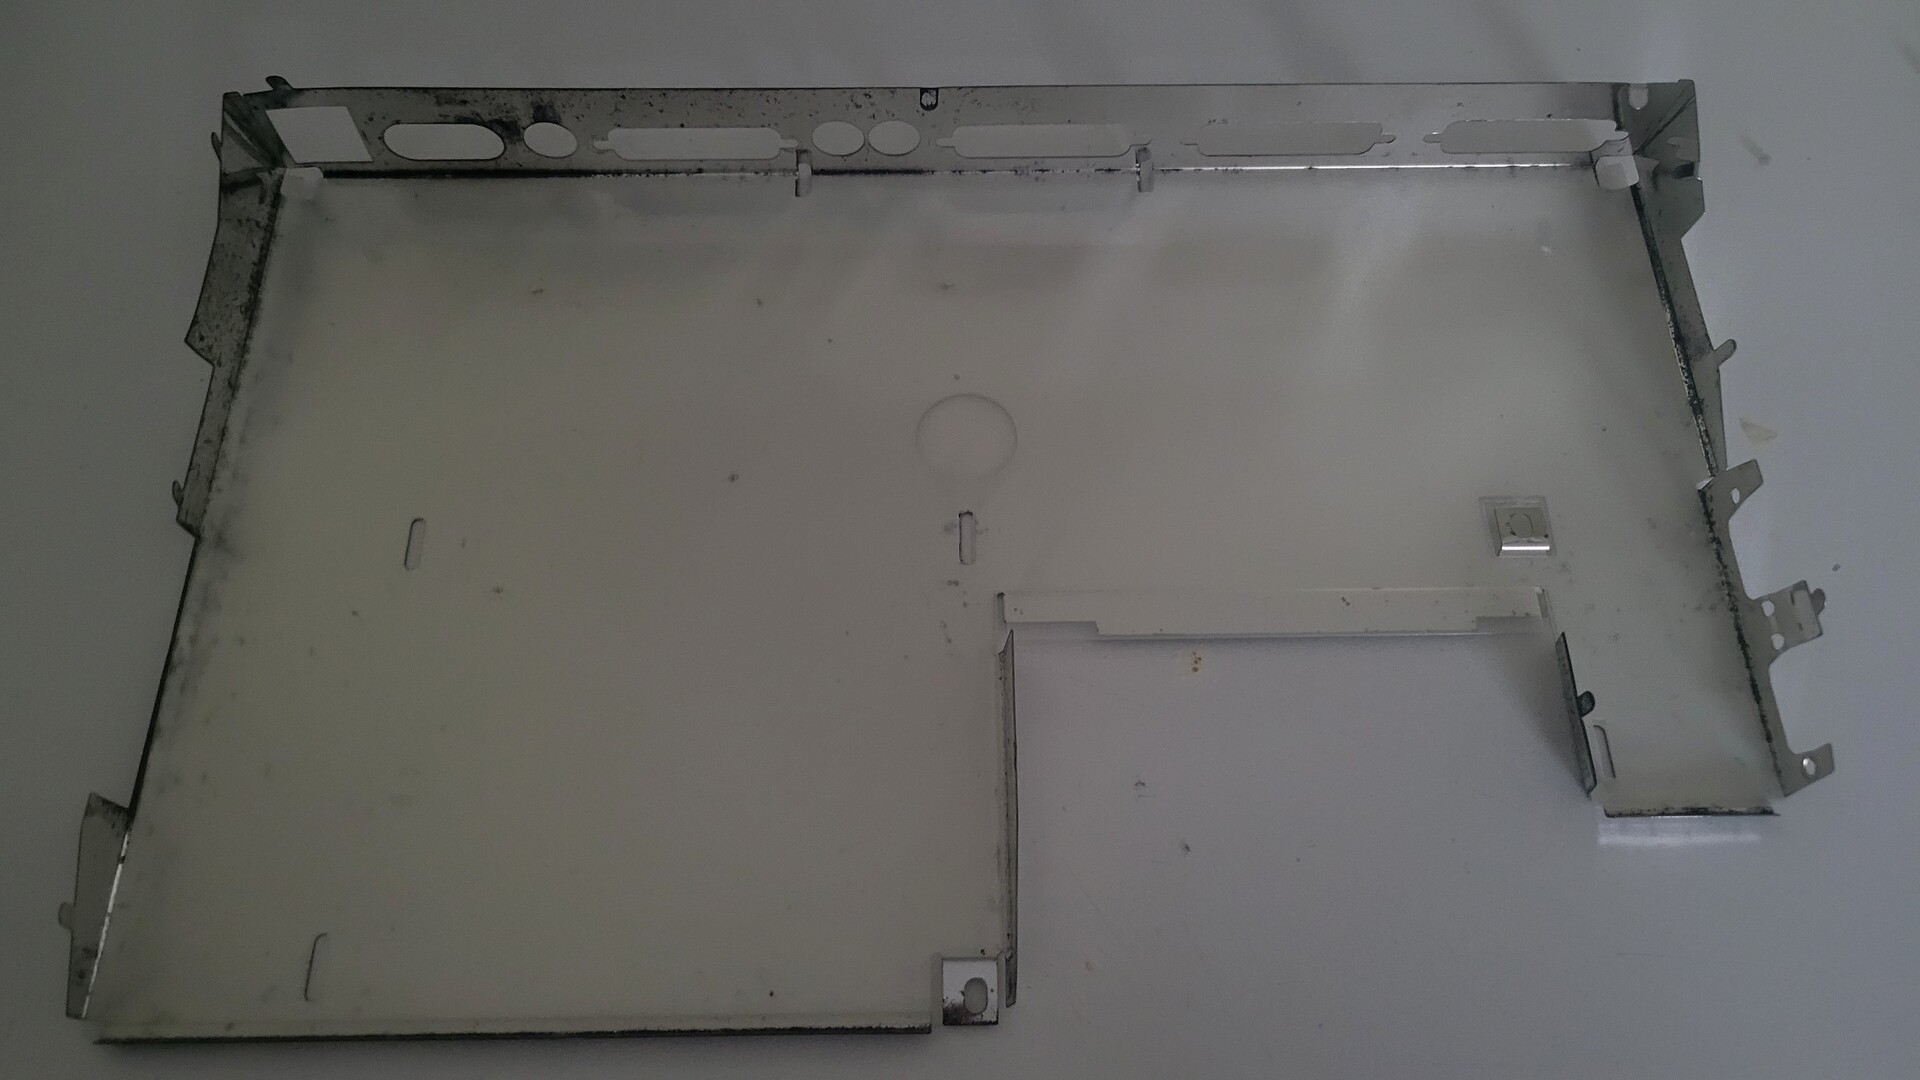
To remove the motherboard, the shell must be a little bit bent on the right side (near the db9 connectors). Finally the motherboard can be dissociated from the bottom metal shield.
Cleaning
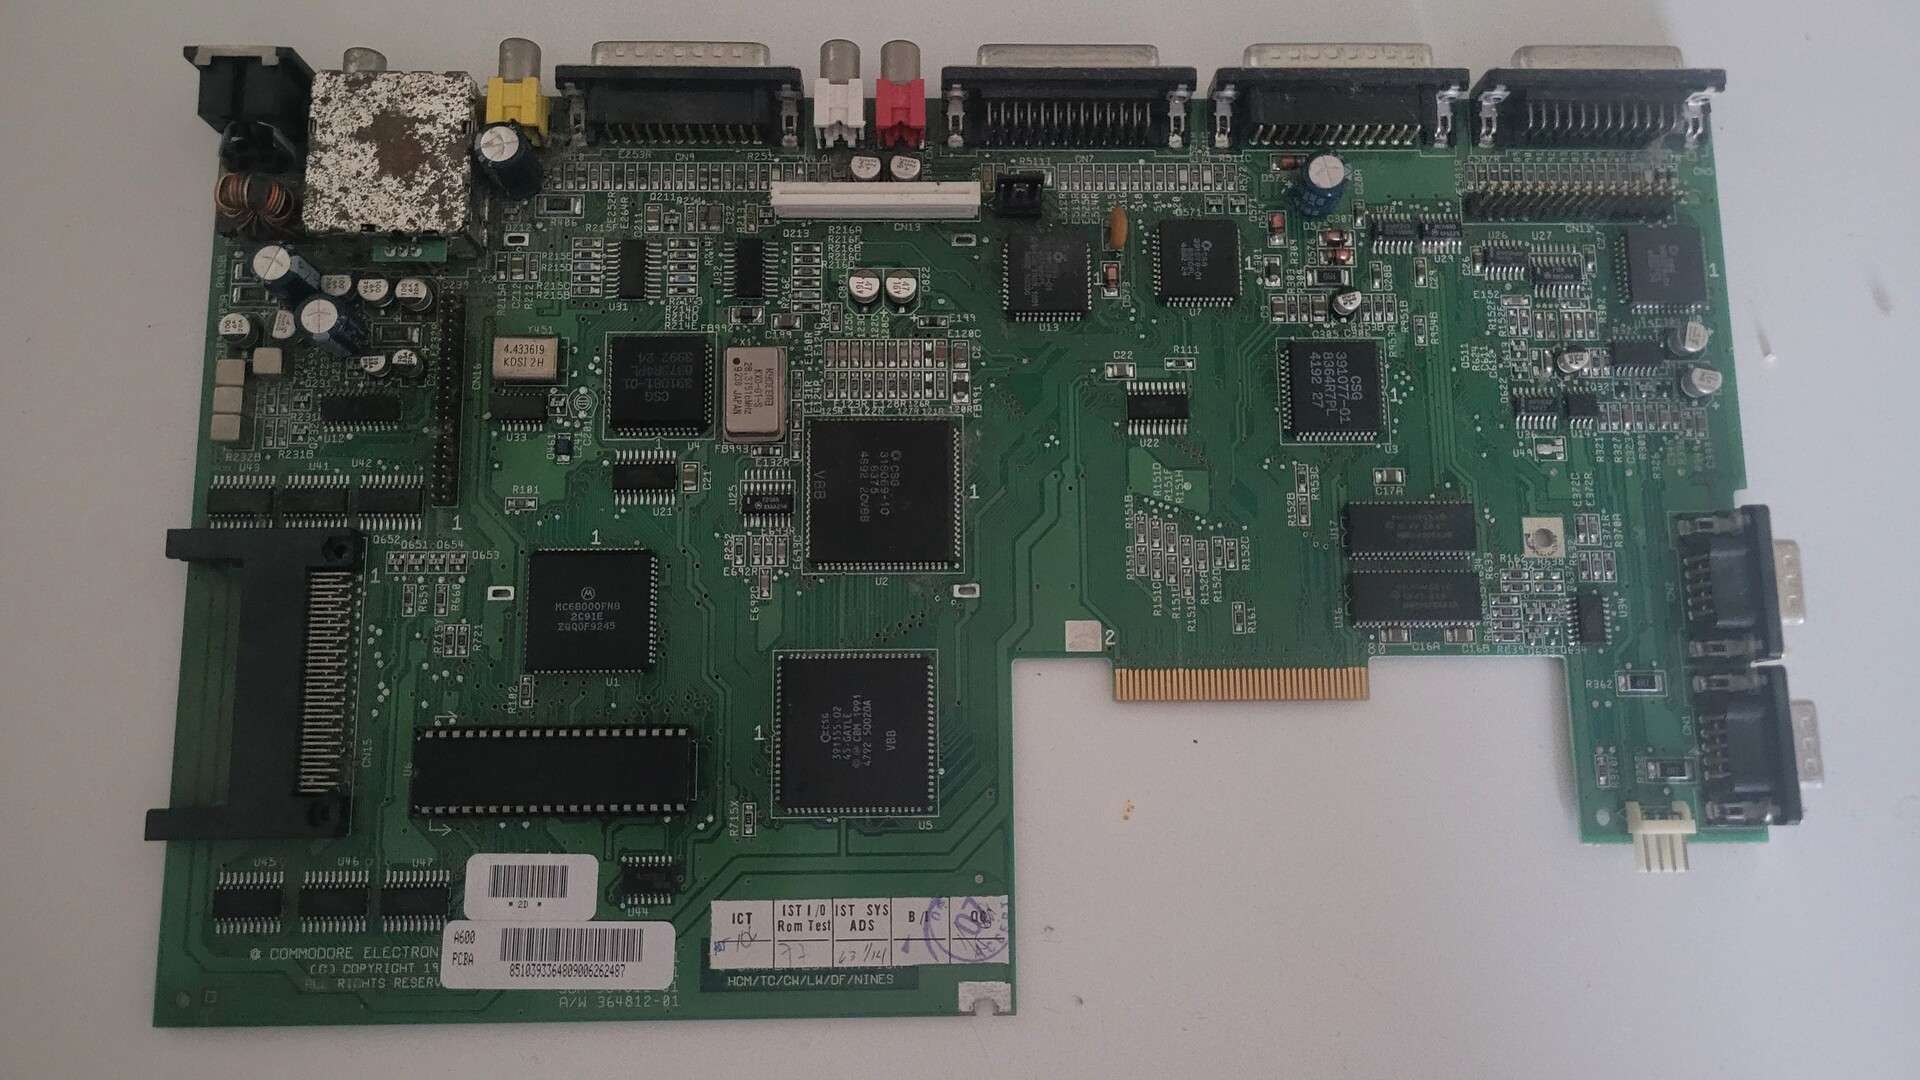
I cleaned the motherboard with some Facom contact spray and a tooth brush (left = before cleaning, right = after)

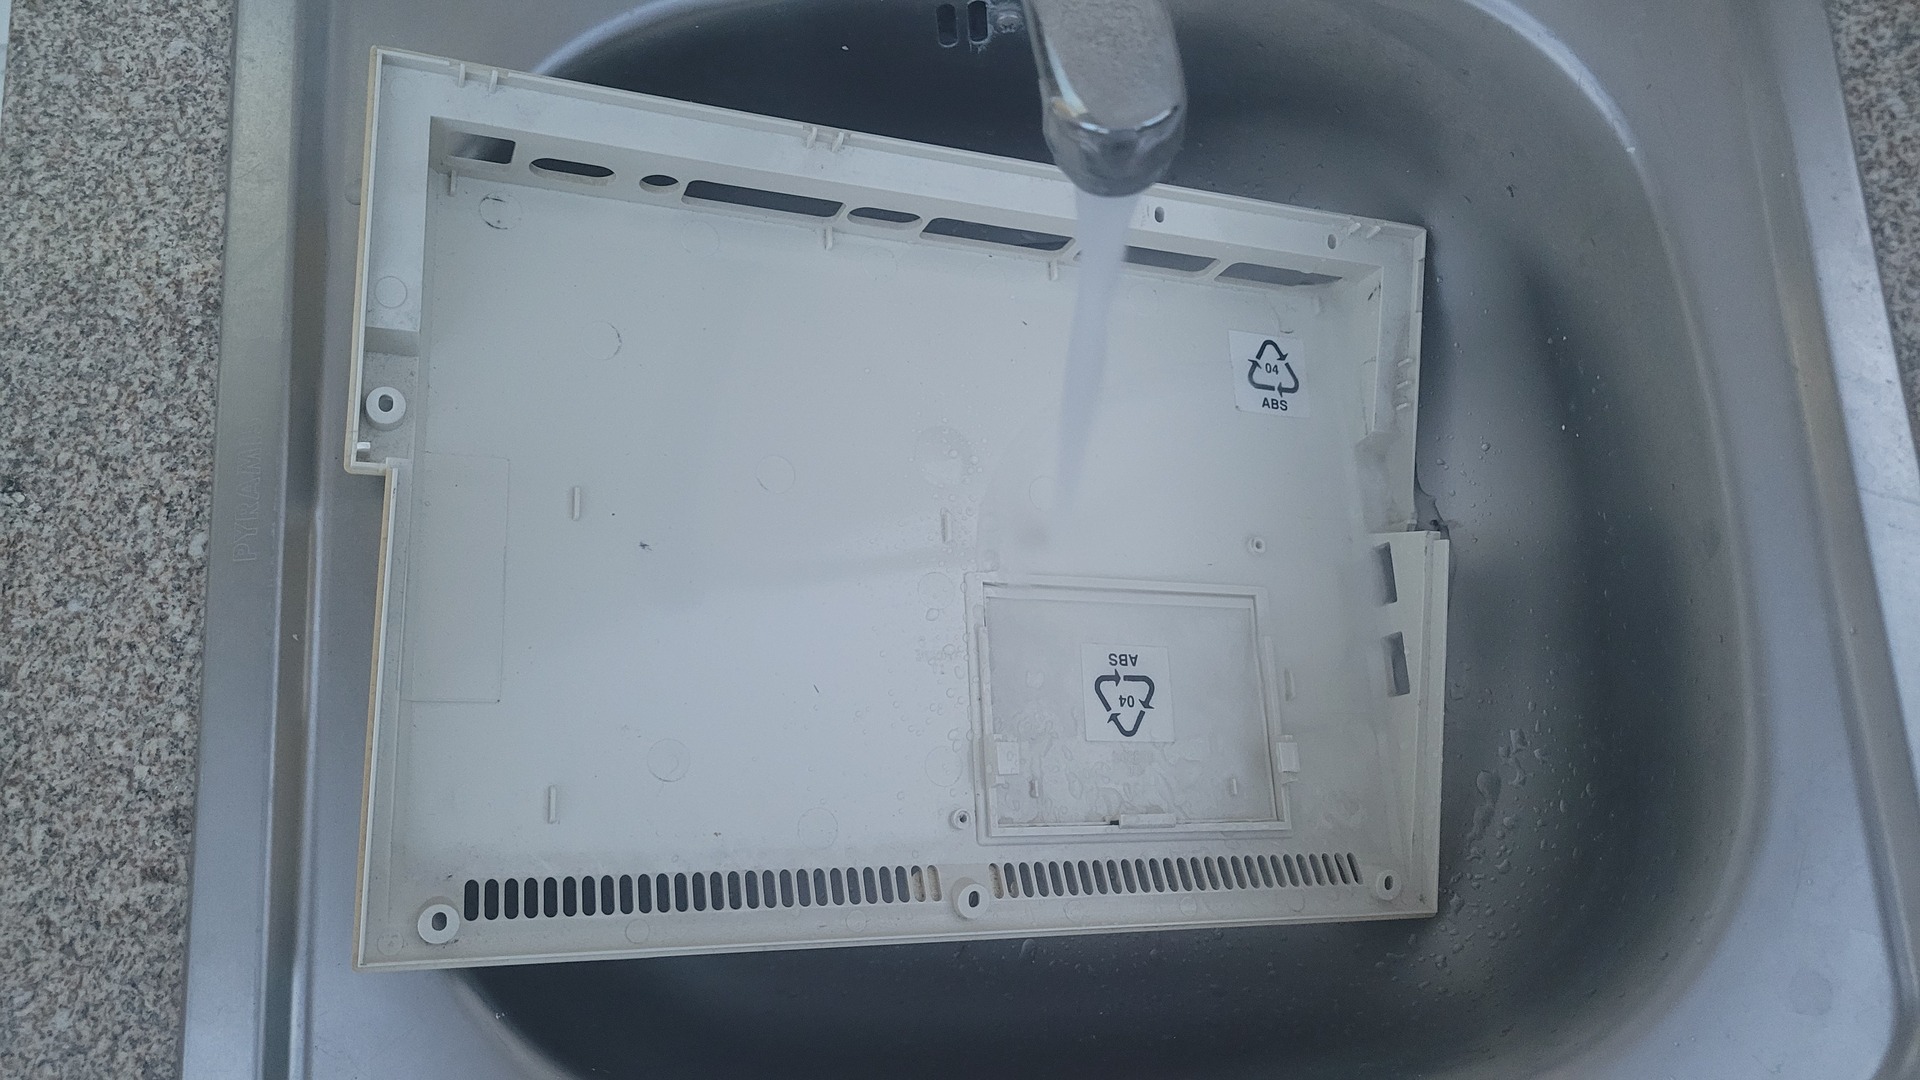
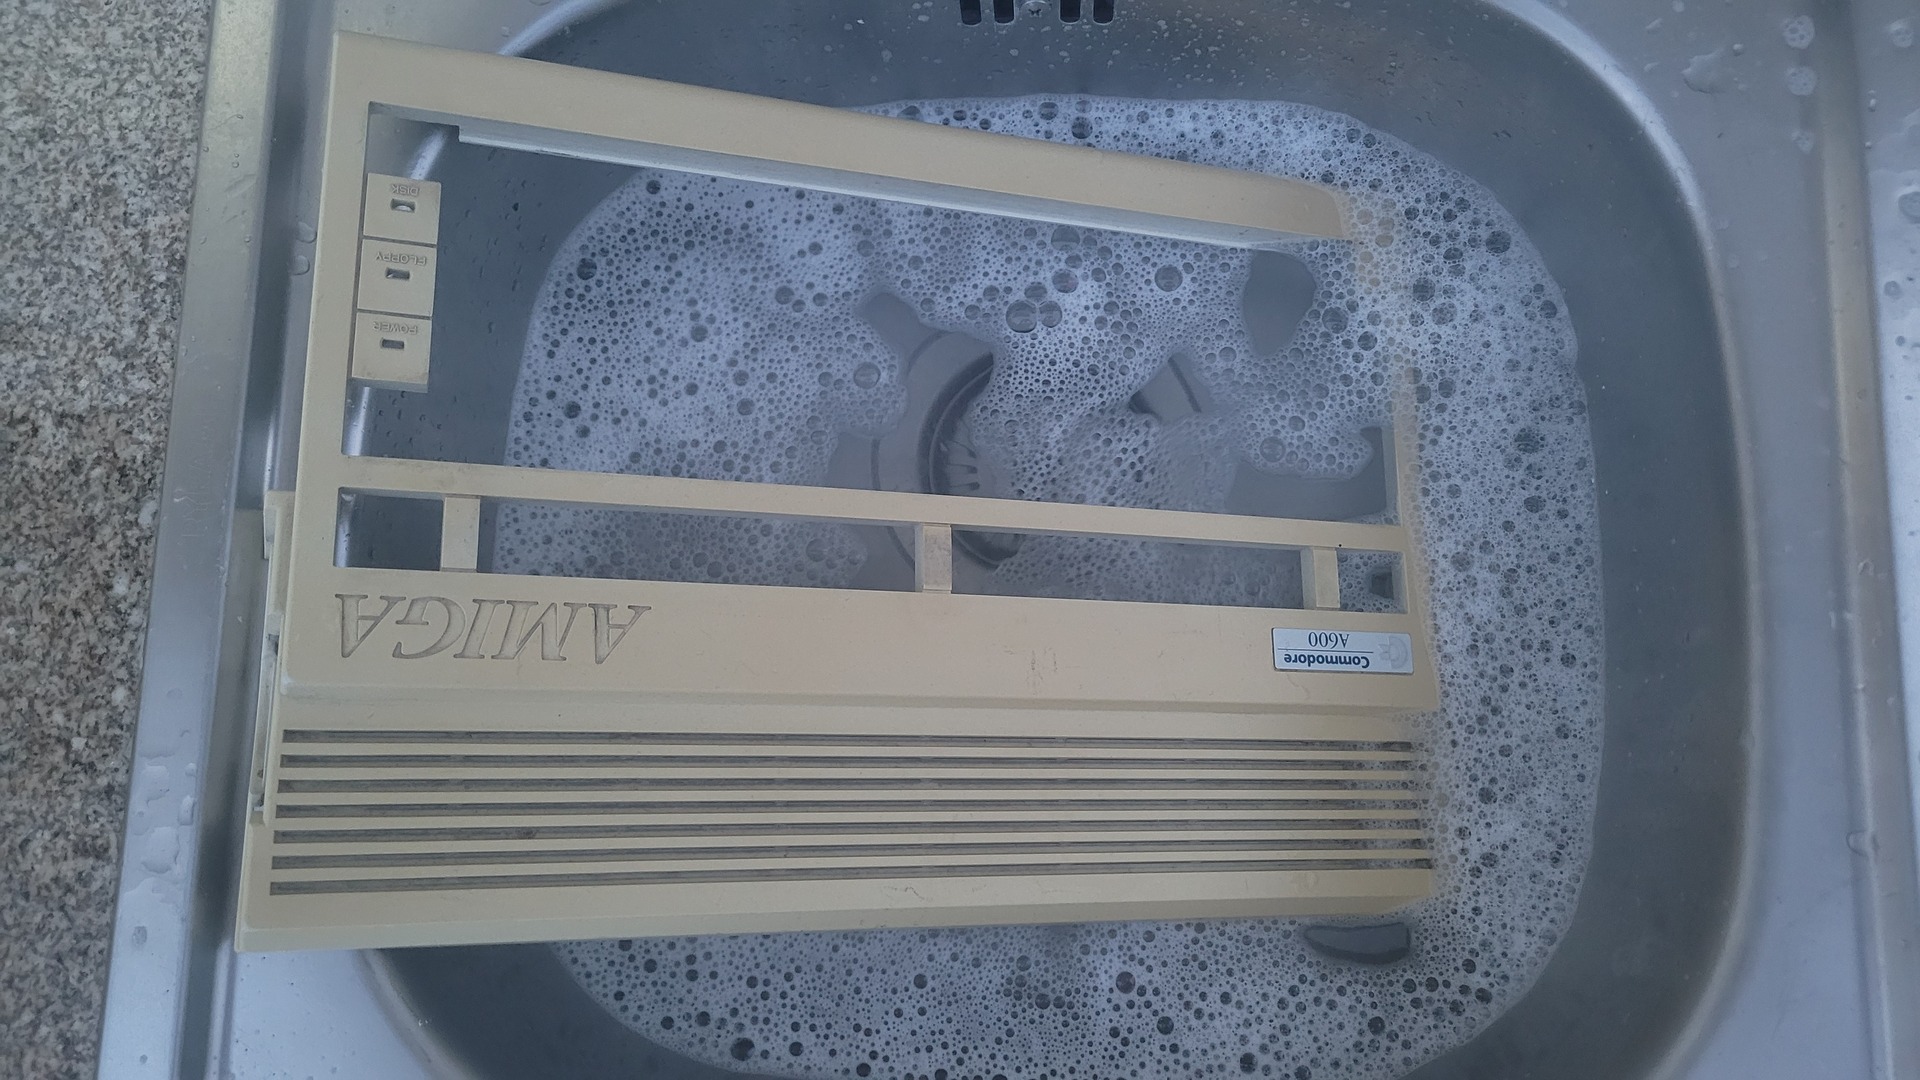
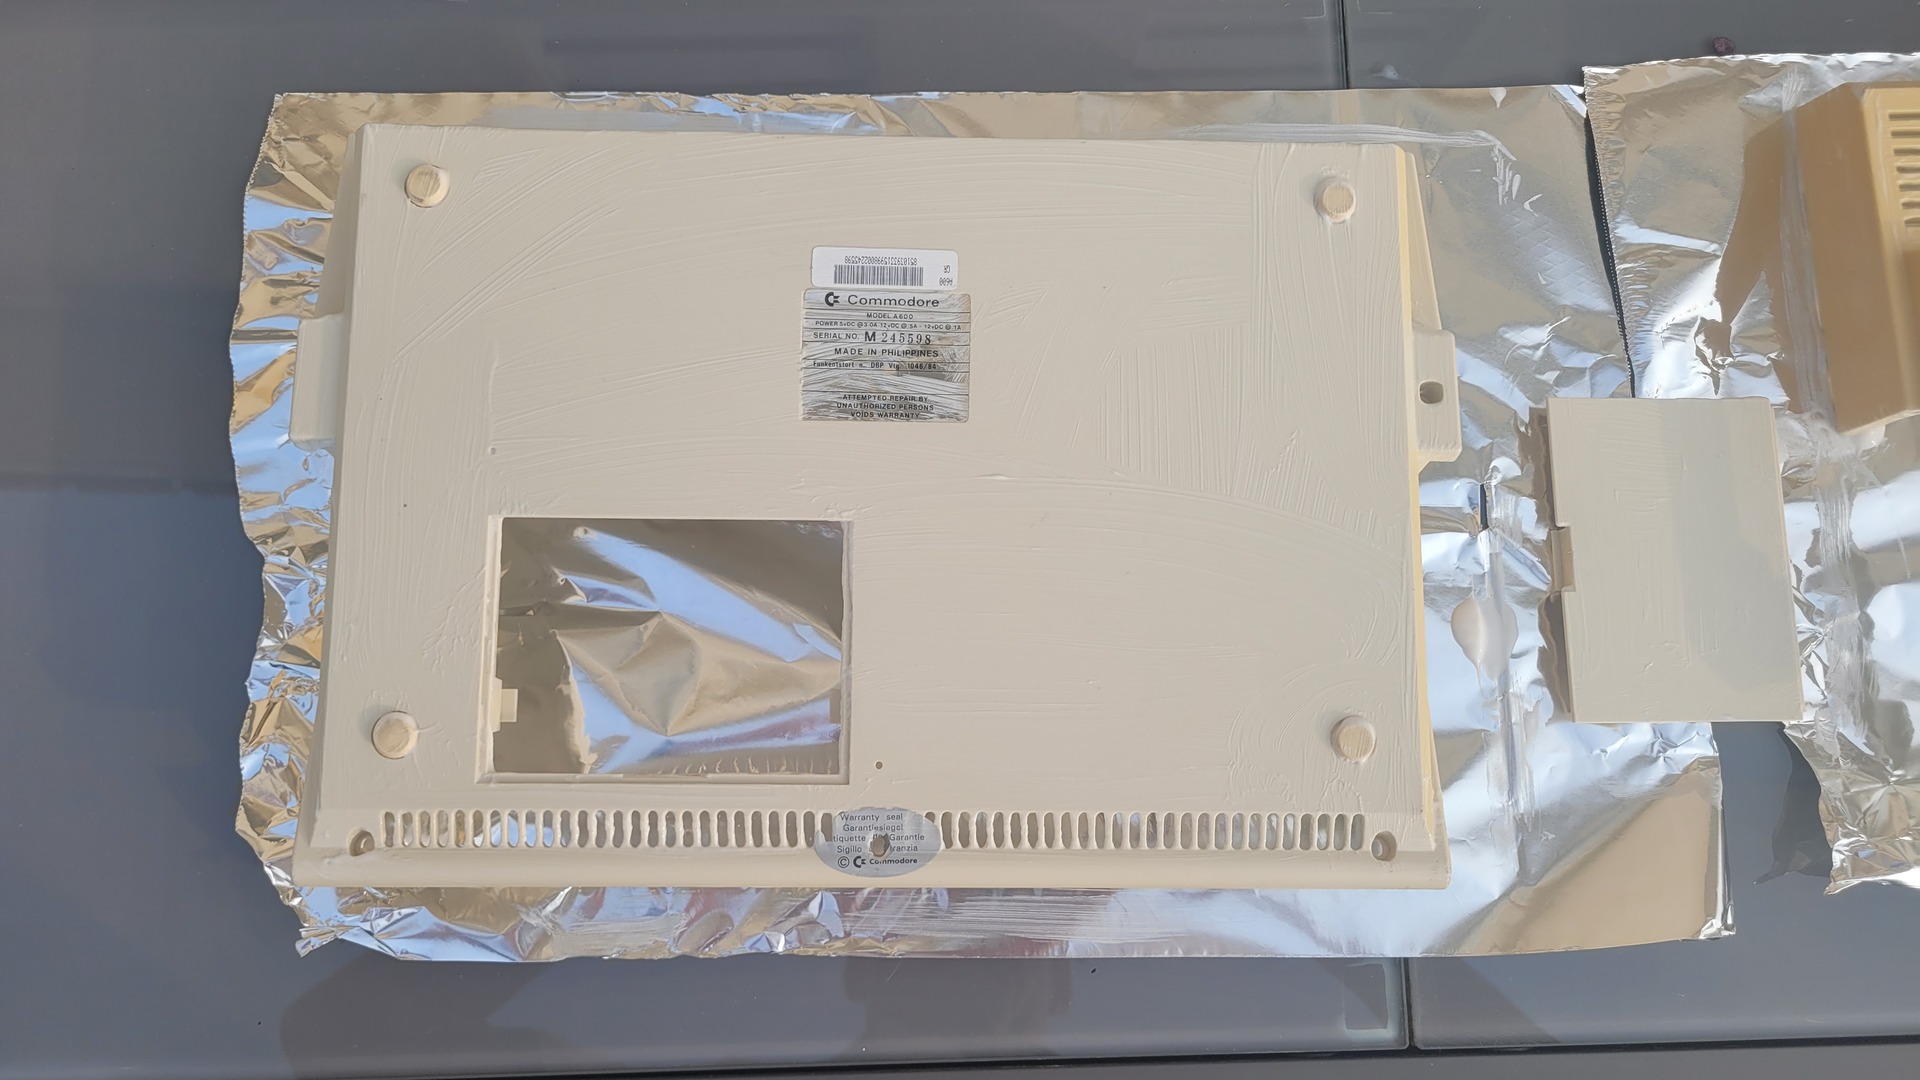
I used water and some liquid soap to clean top and bottom shell parts.
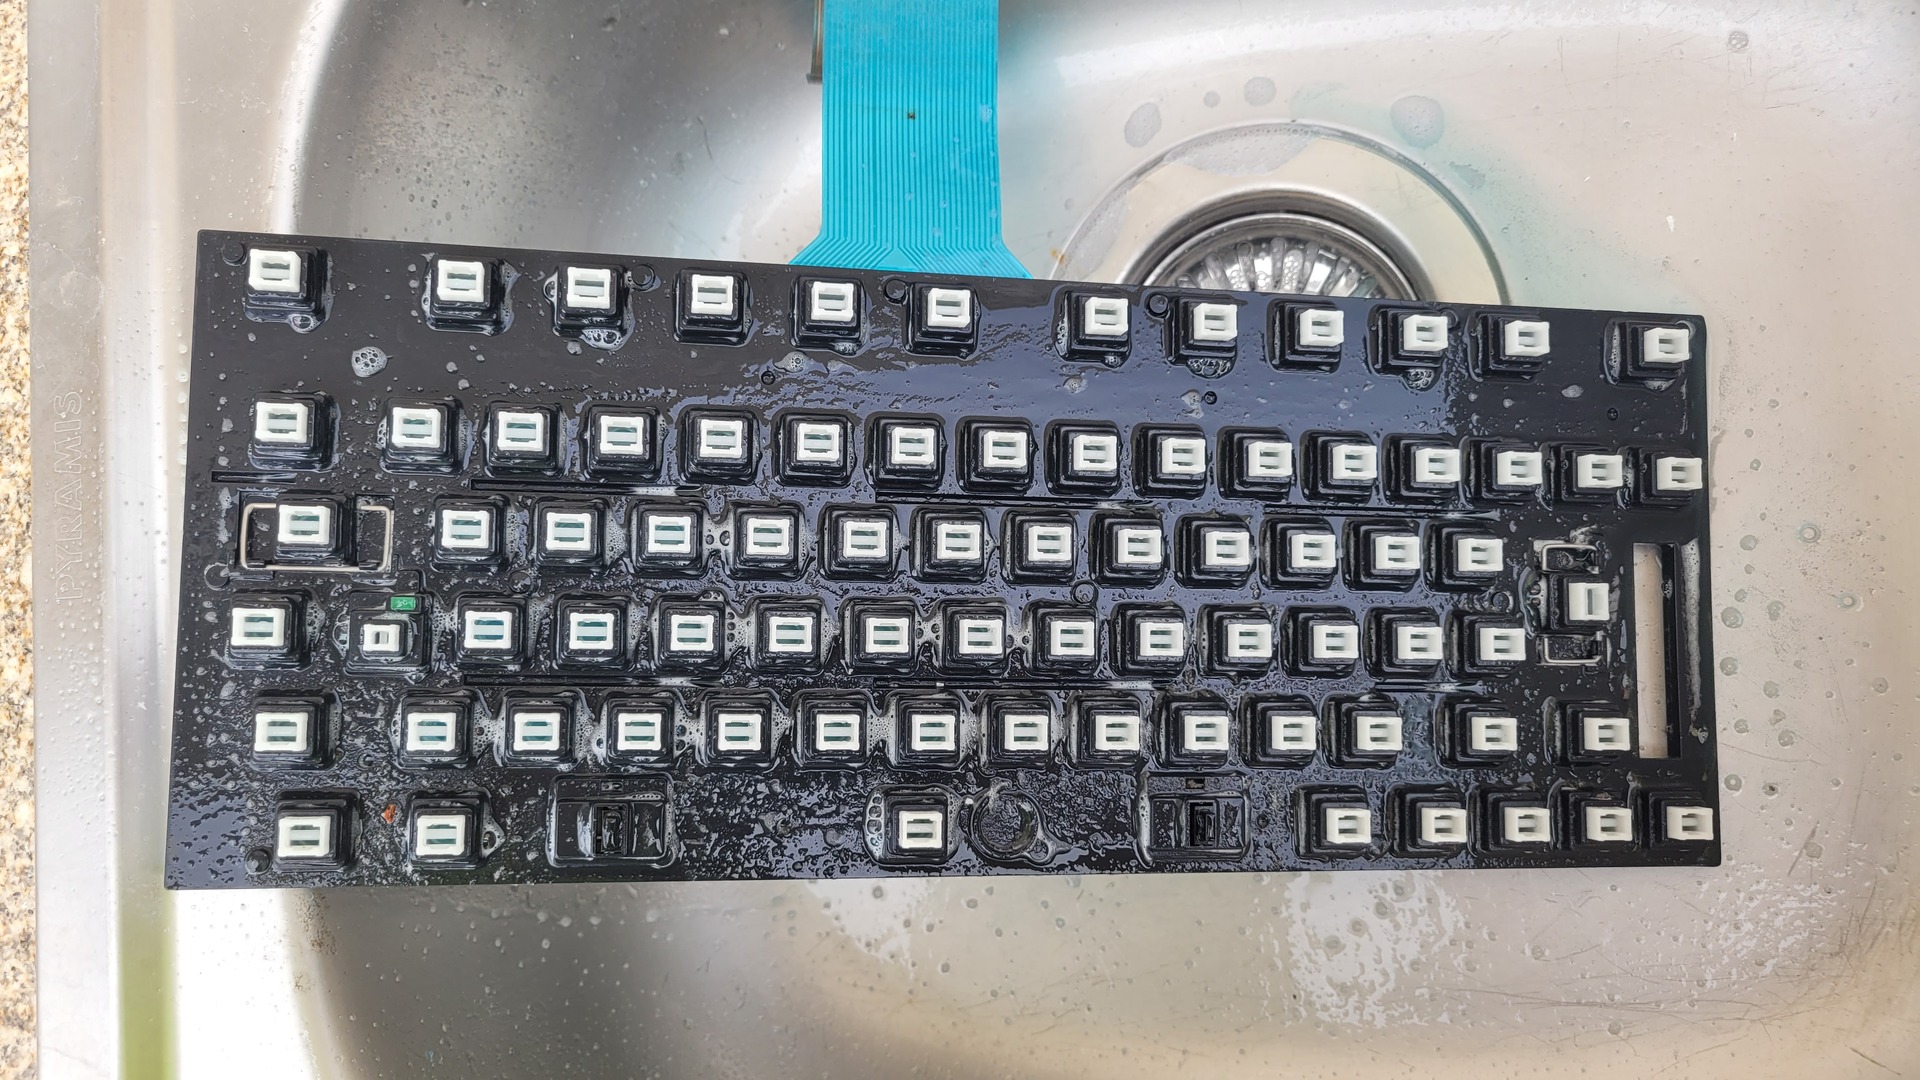
Same for the keyboard and all the rubber pads
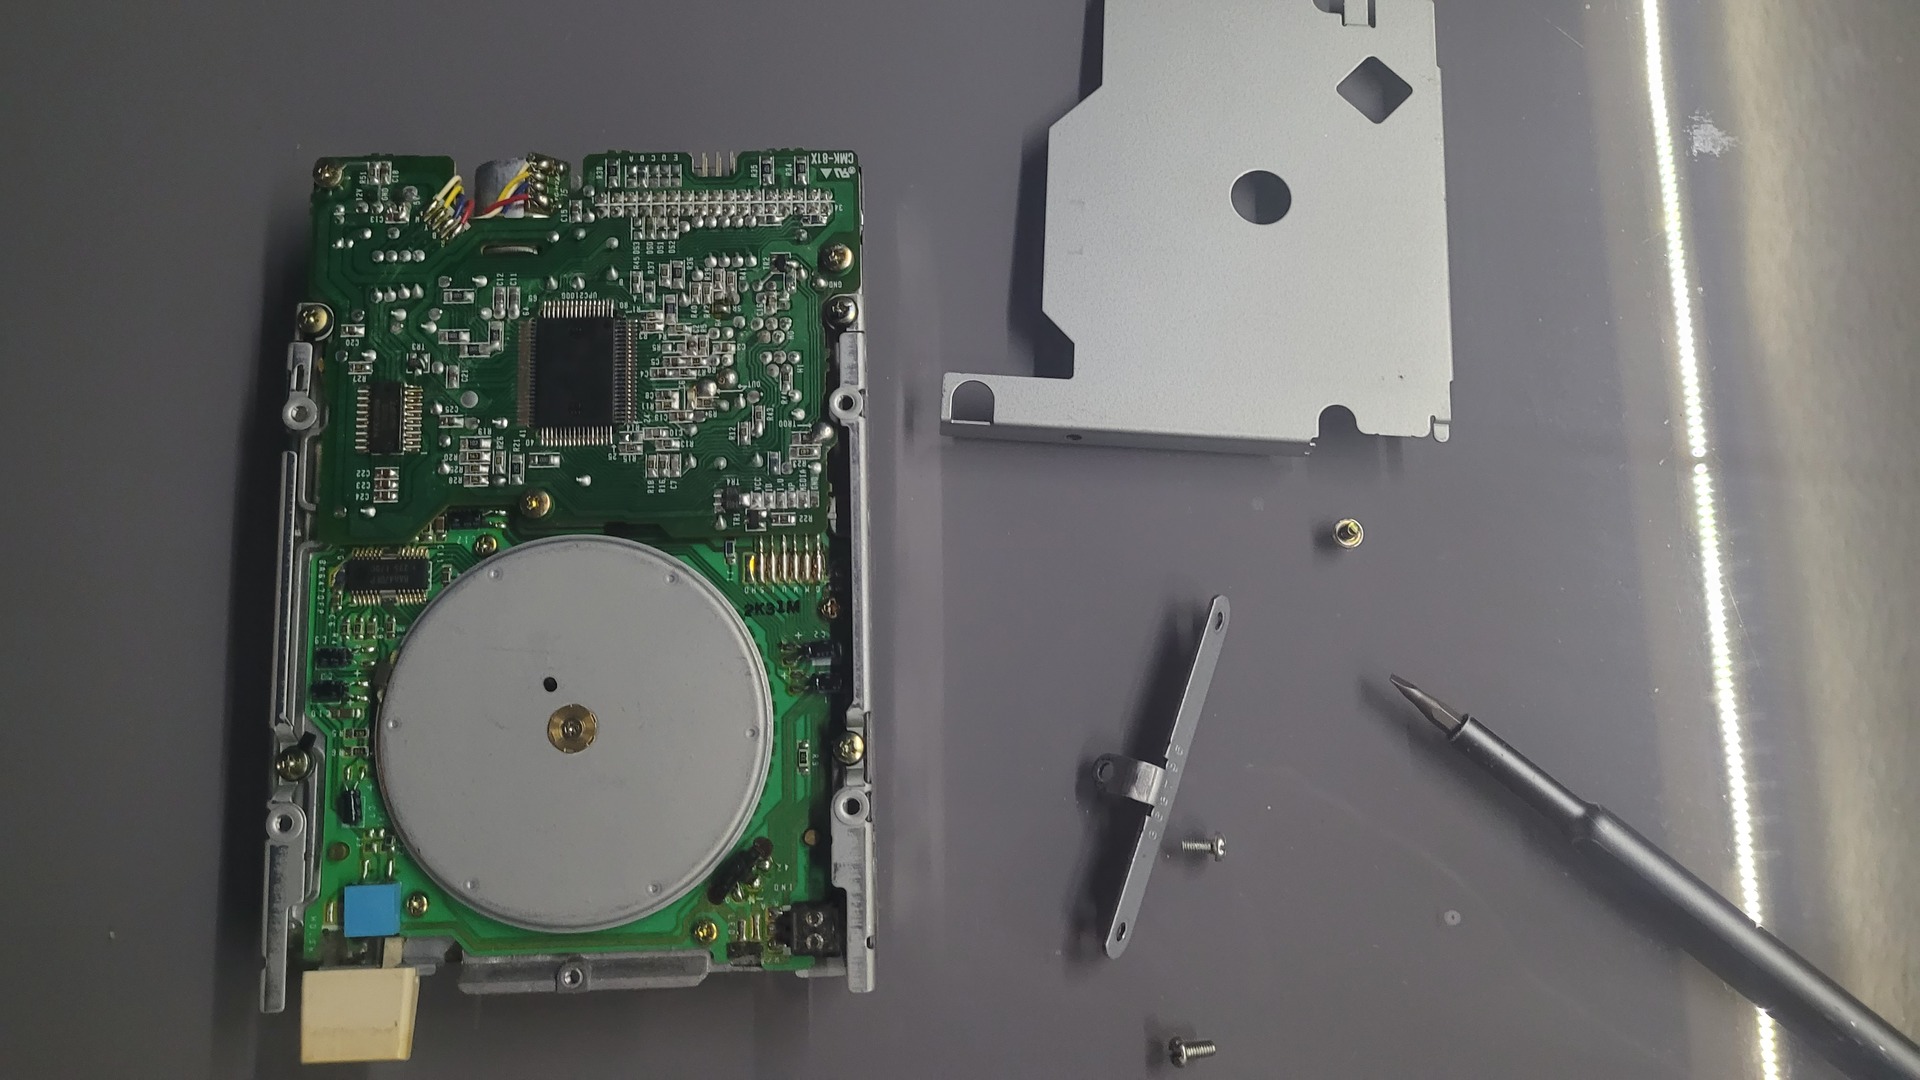
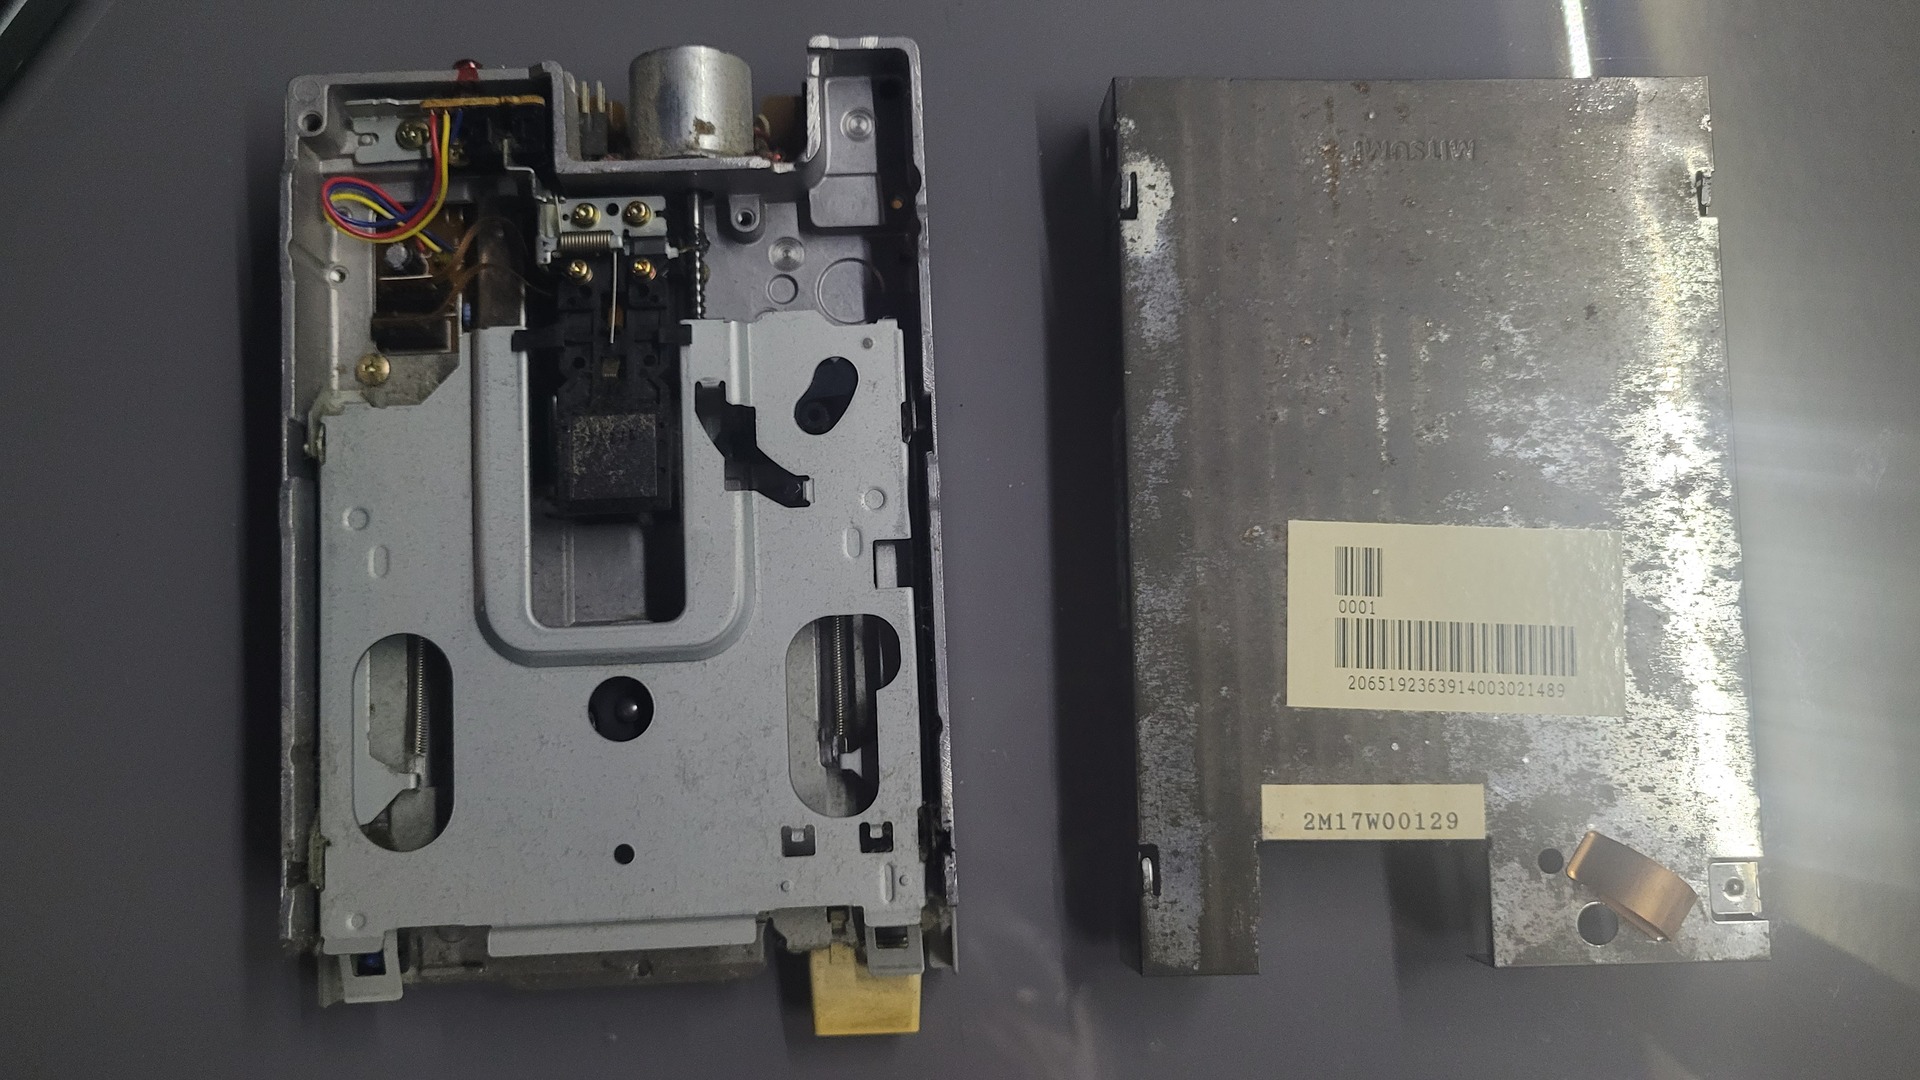
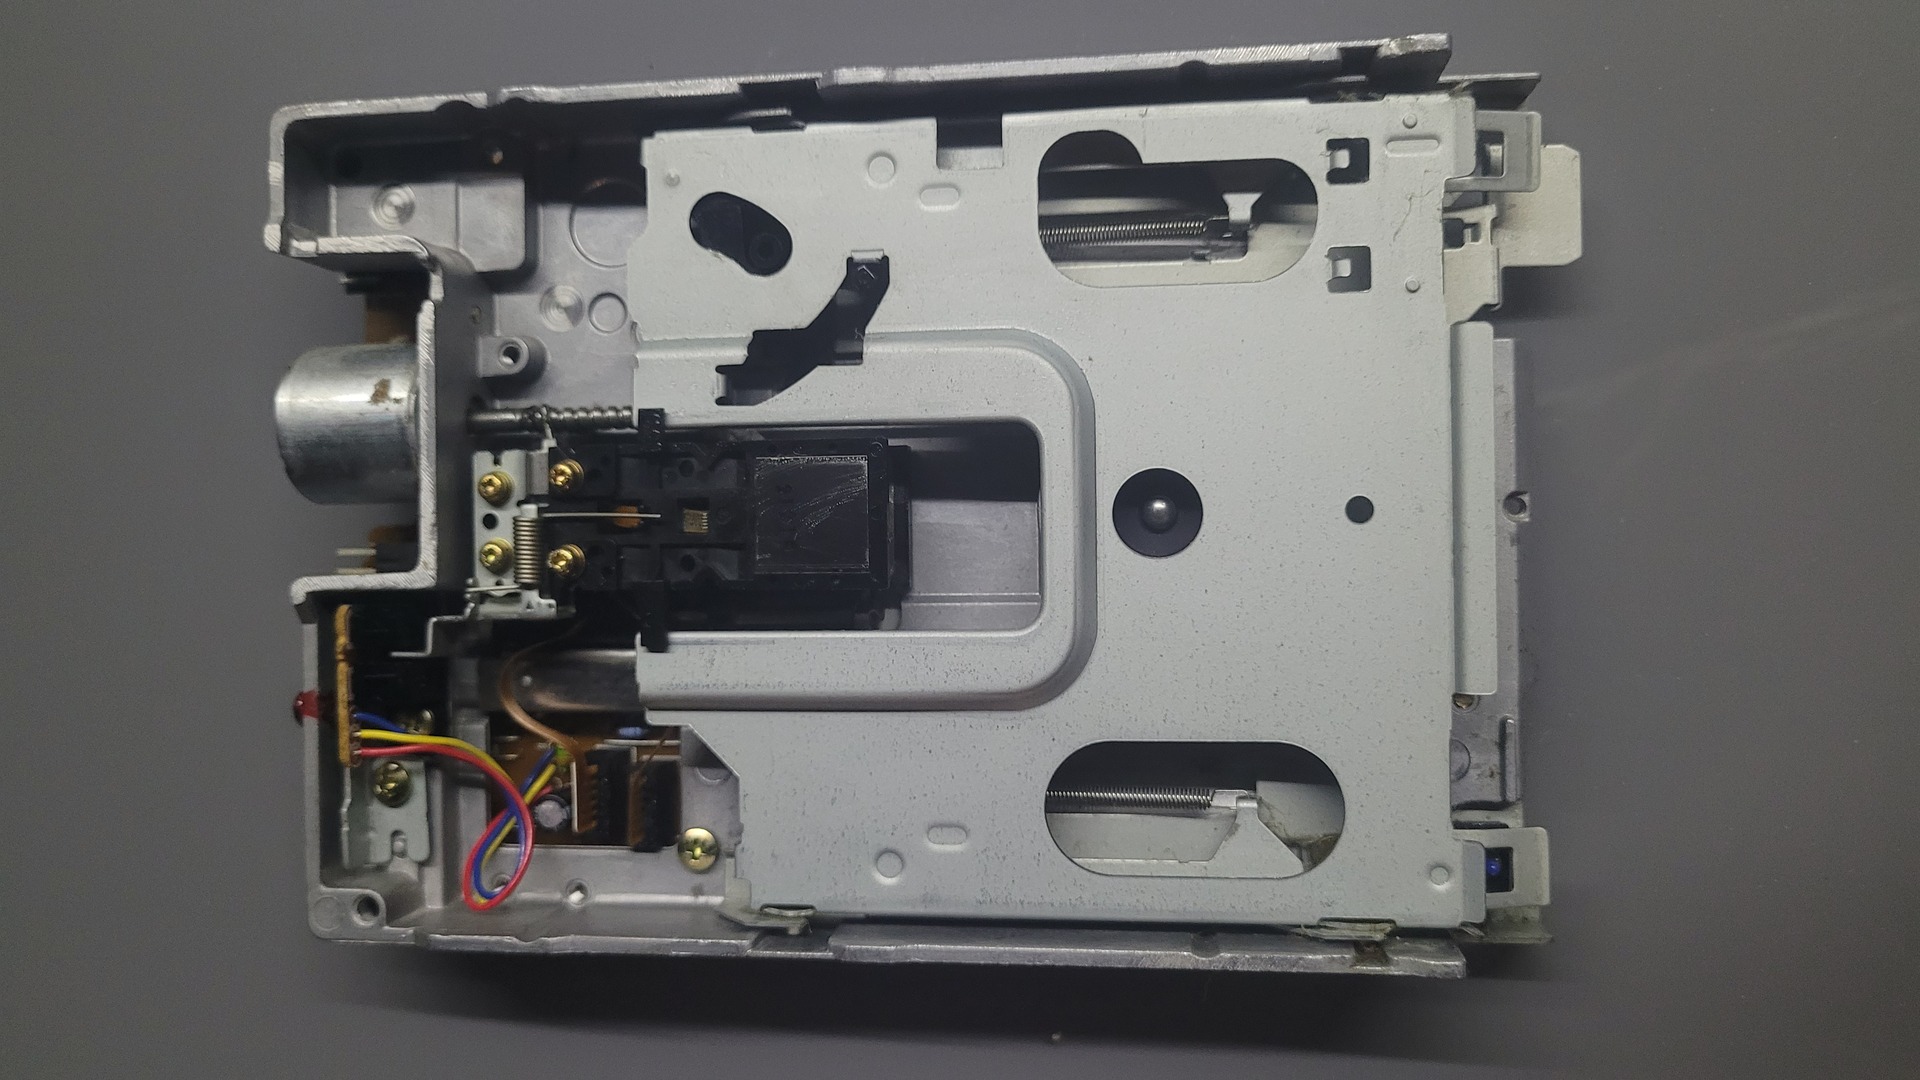
As for the floppy drive, I used Facom contact spray, Isopropyl alcohol and q-tips
Recap
The motherboard has a lot of surface mounted capacitors. They are prone to leaking and may destroy tracks, so they must be changed. The only way I found to remove them without damaging the contacts was to proceed as the following:
- cut the base of each capacitor
- remove the base plastic part
- desolder the remaining legs
- remove / clean the contacts
- add some fresh solder to resolder the new capacitor
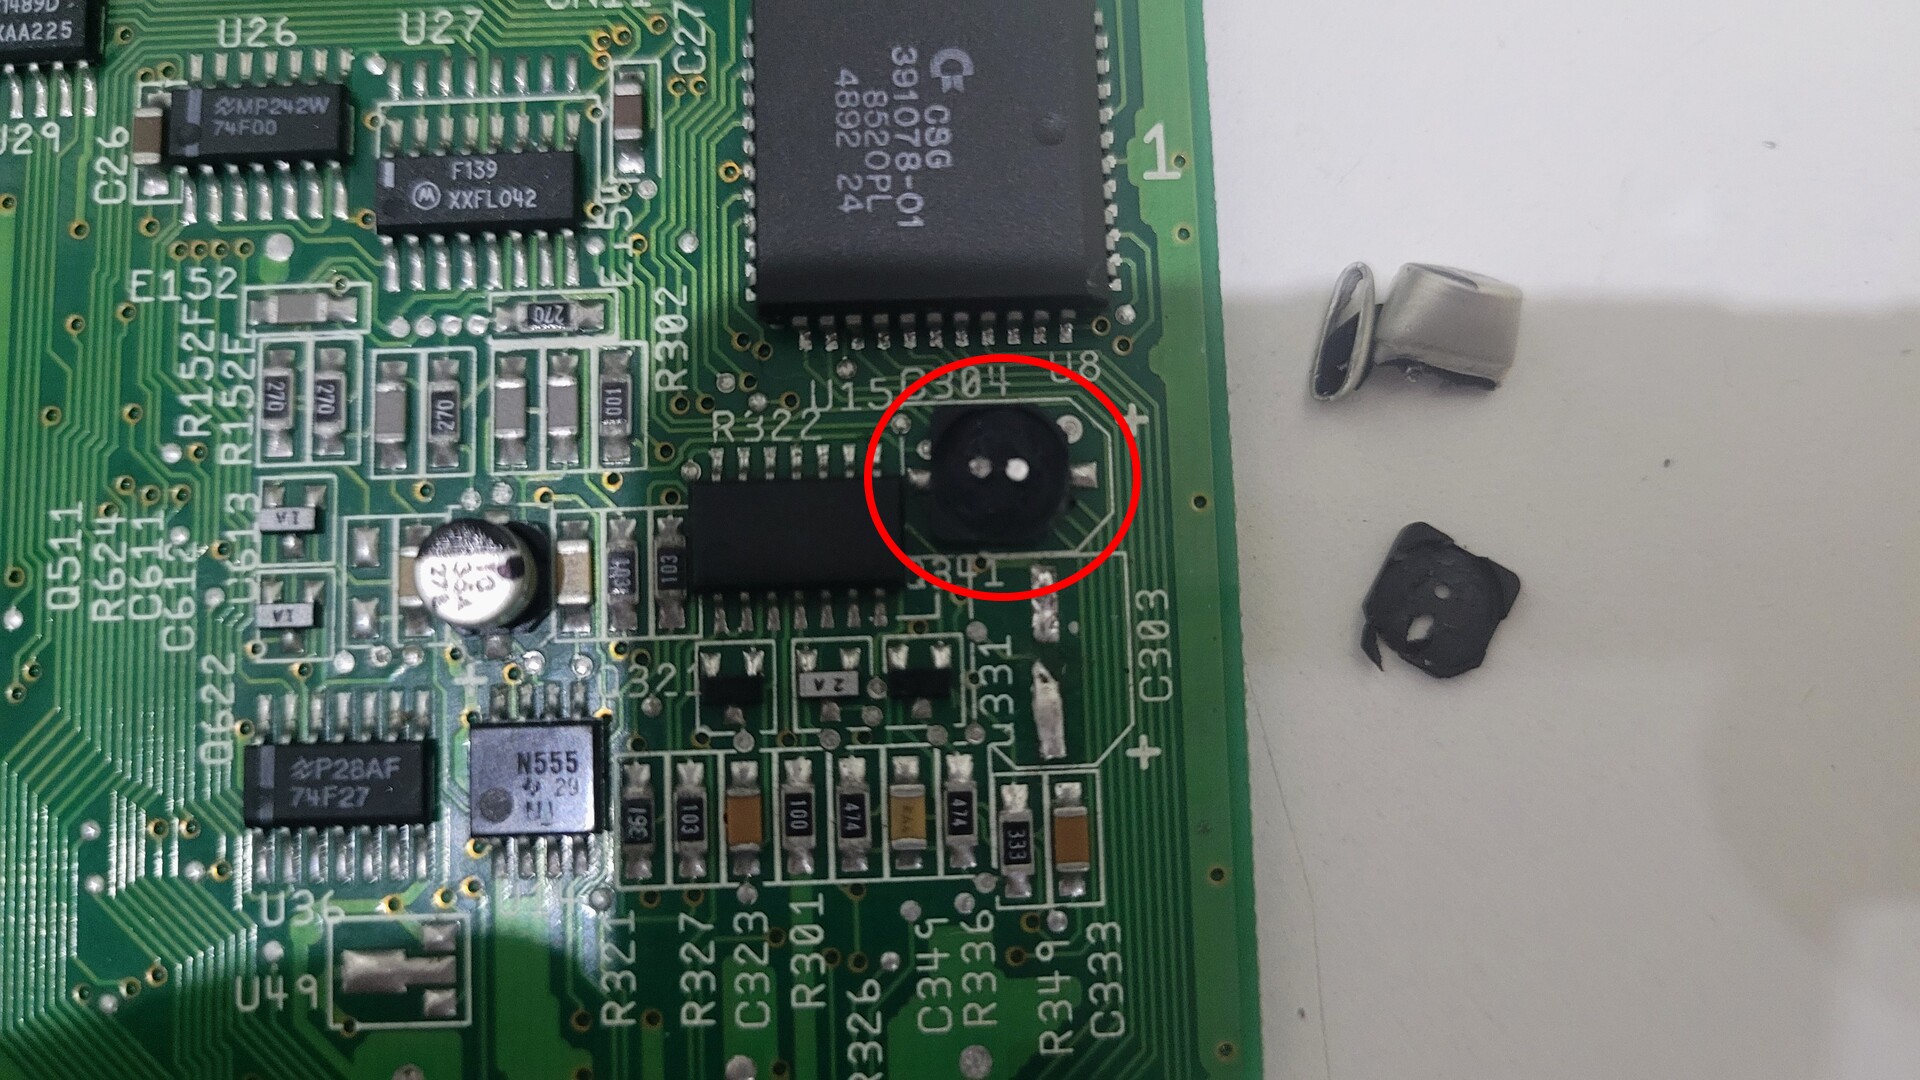

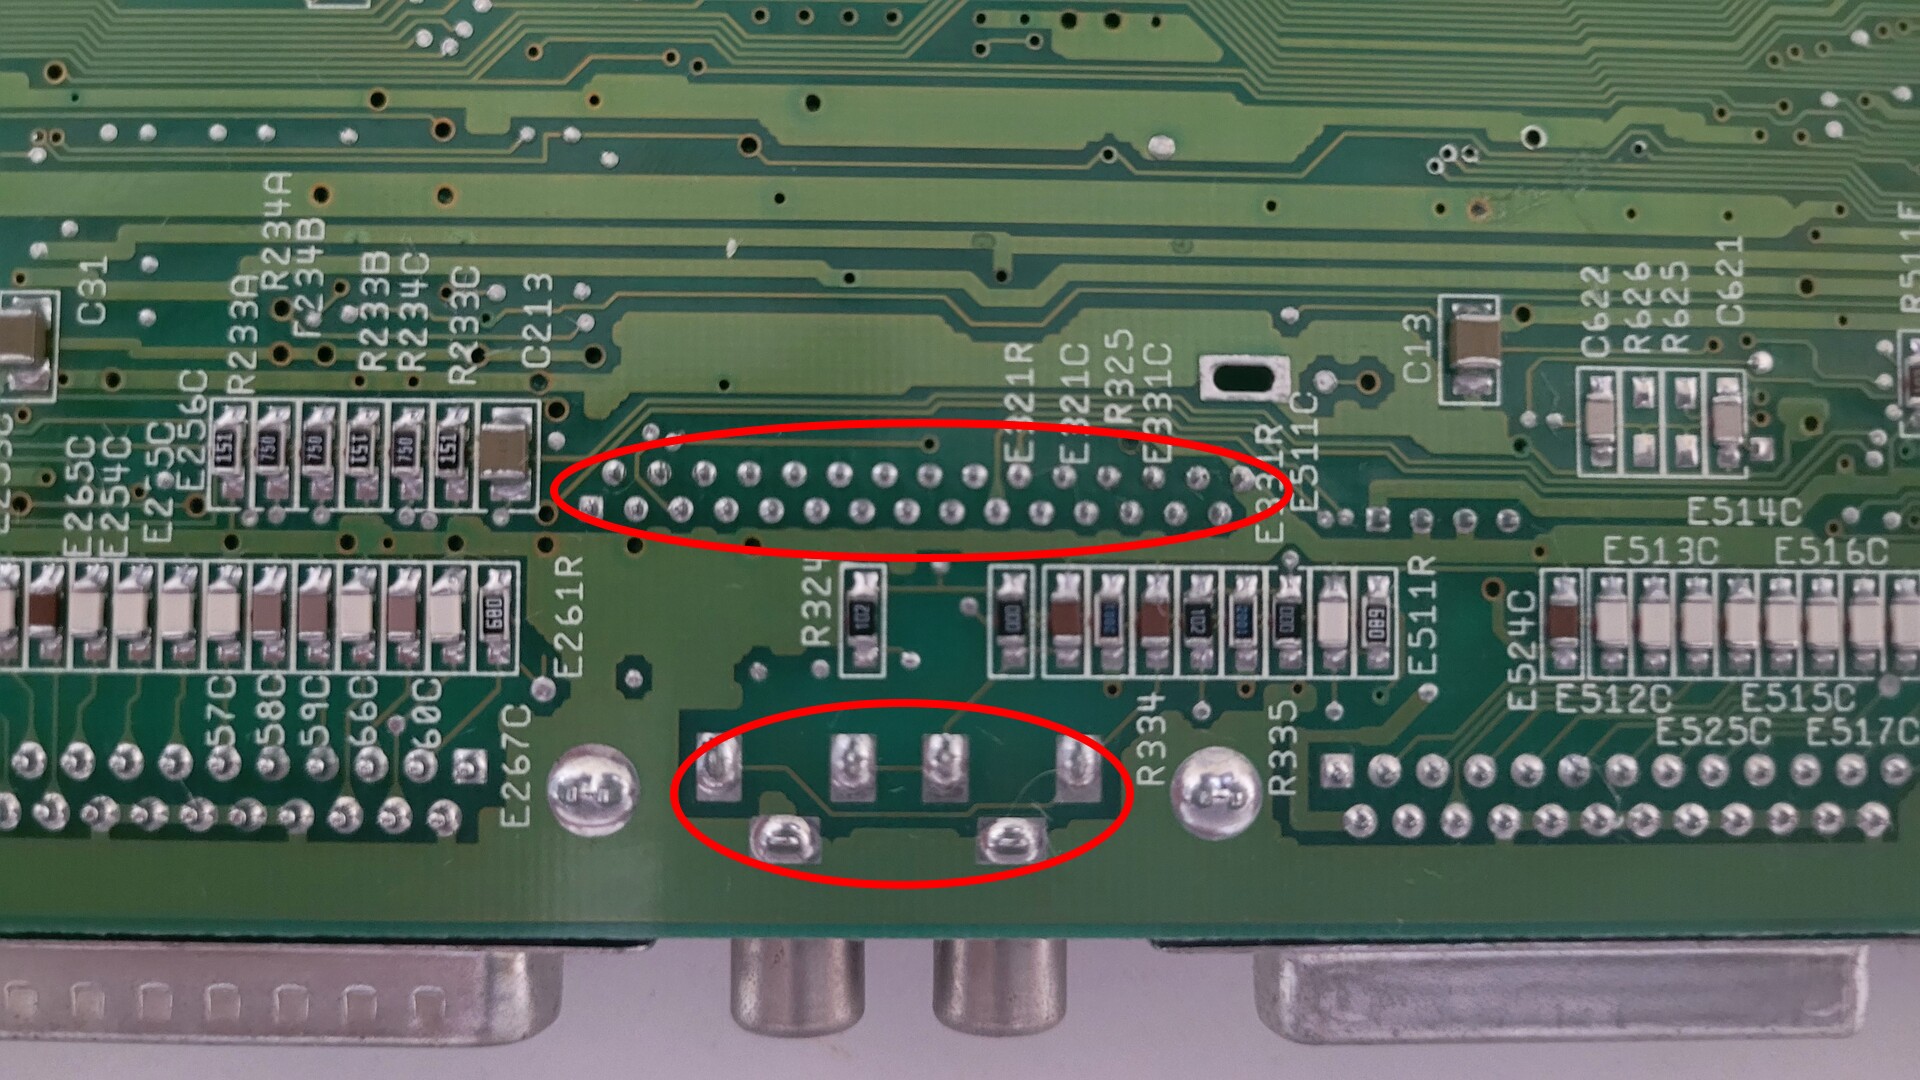
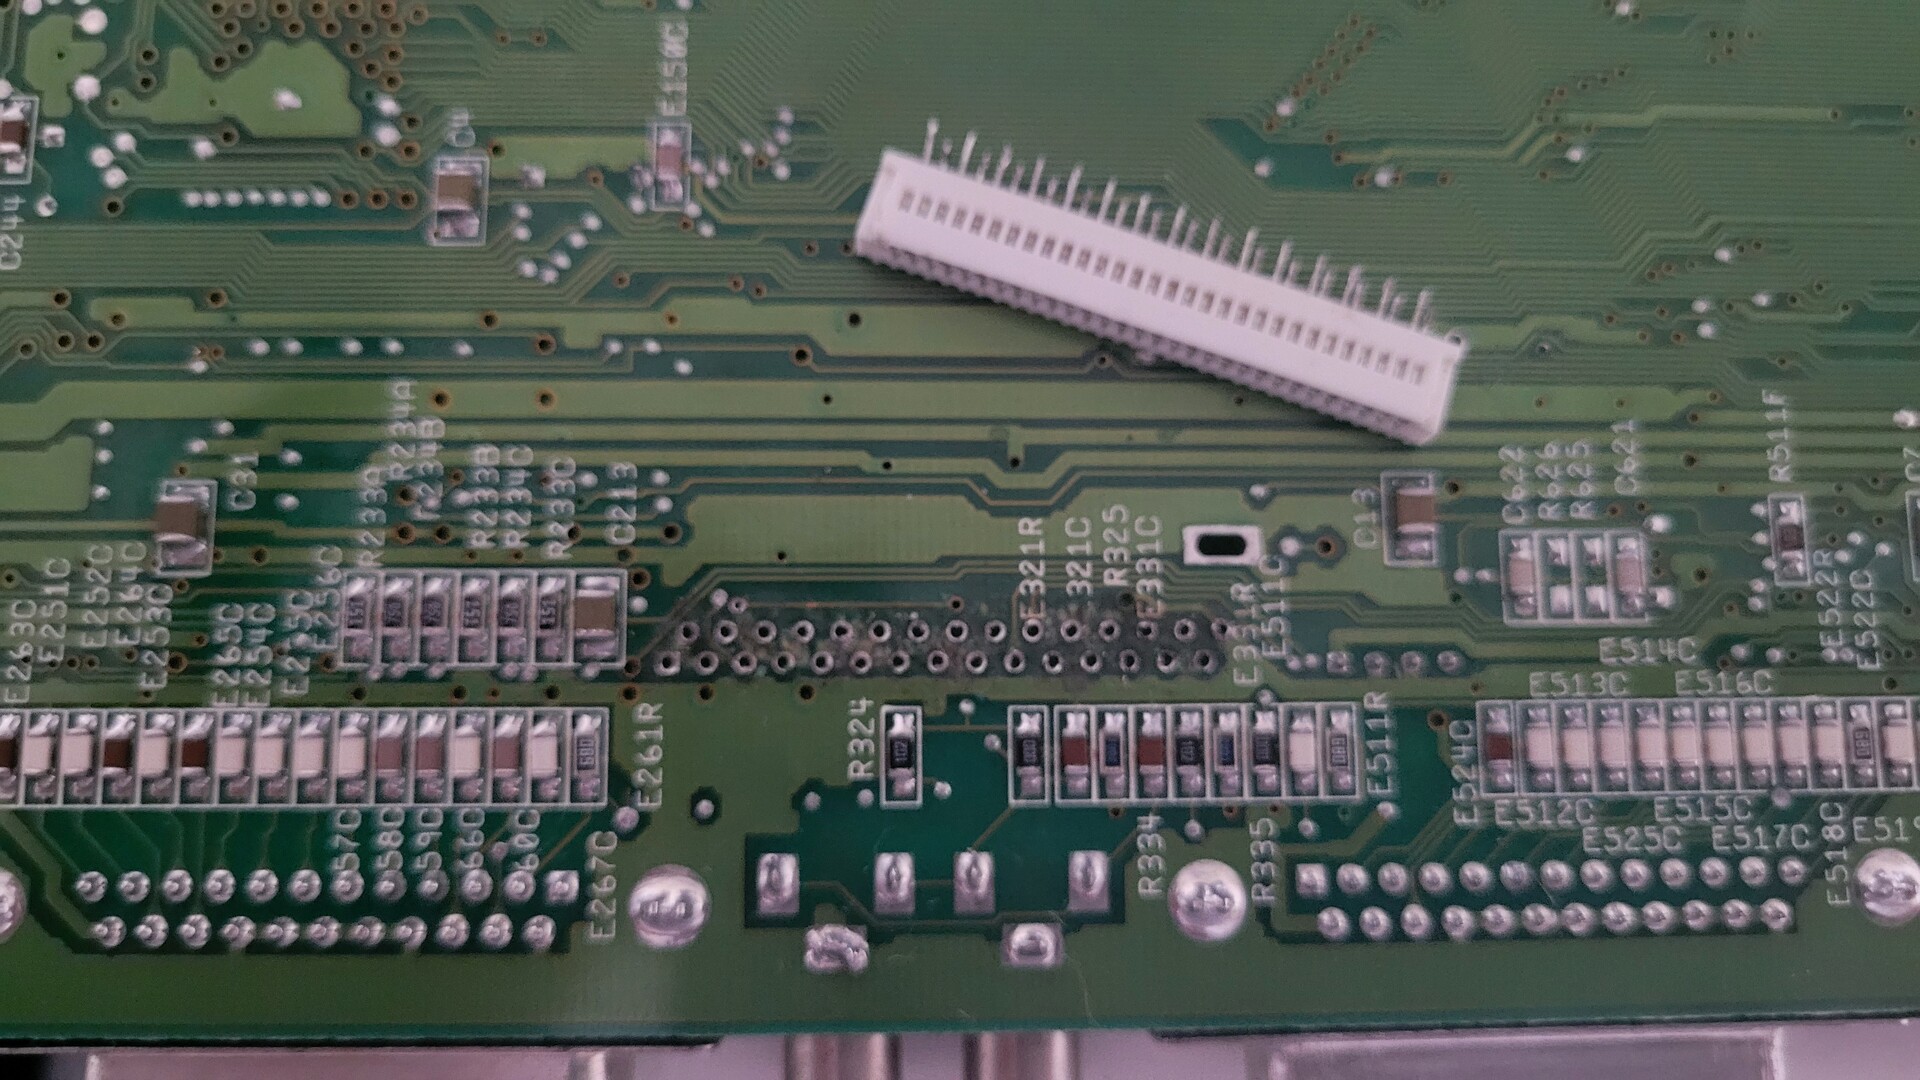
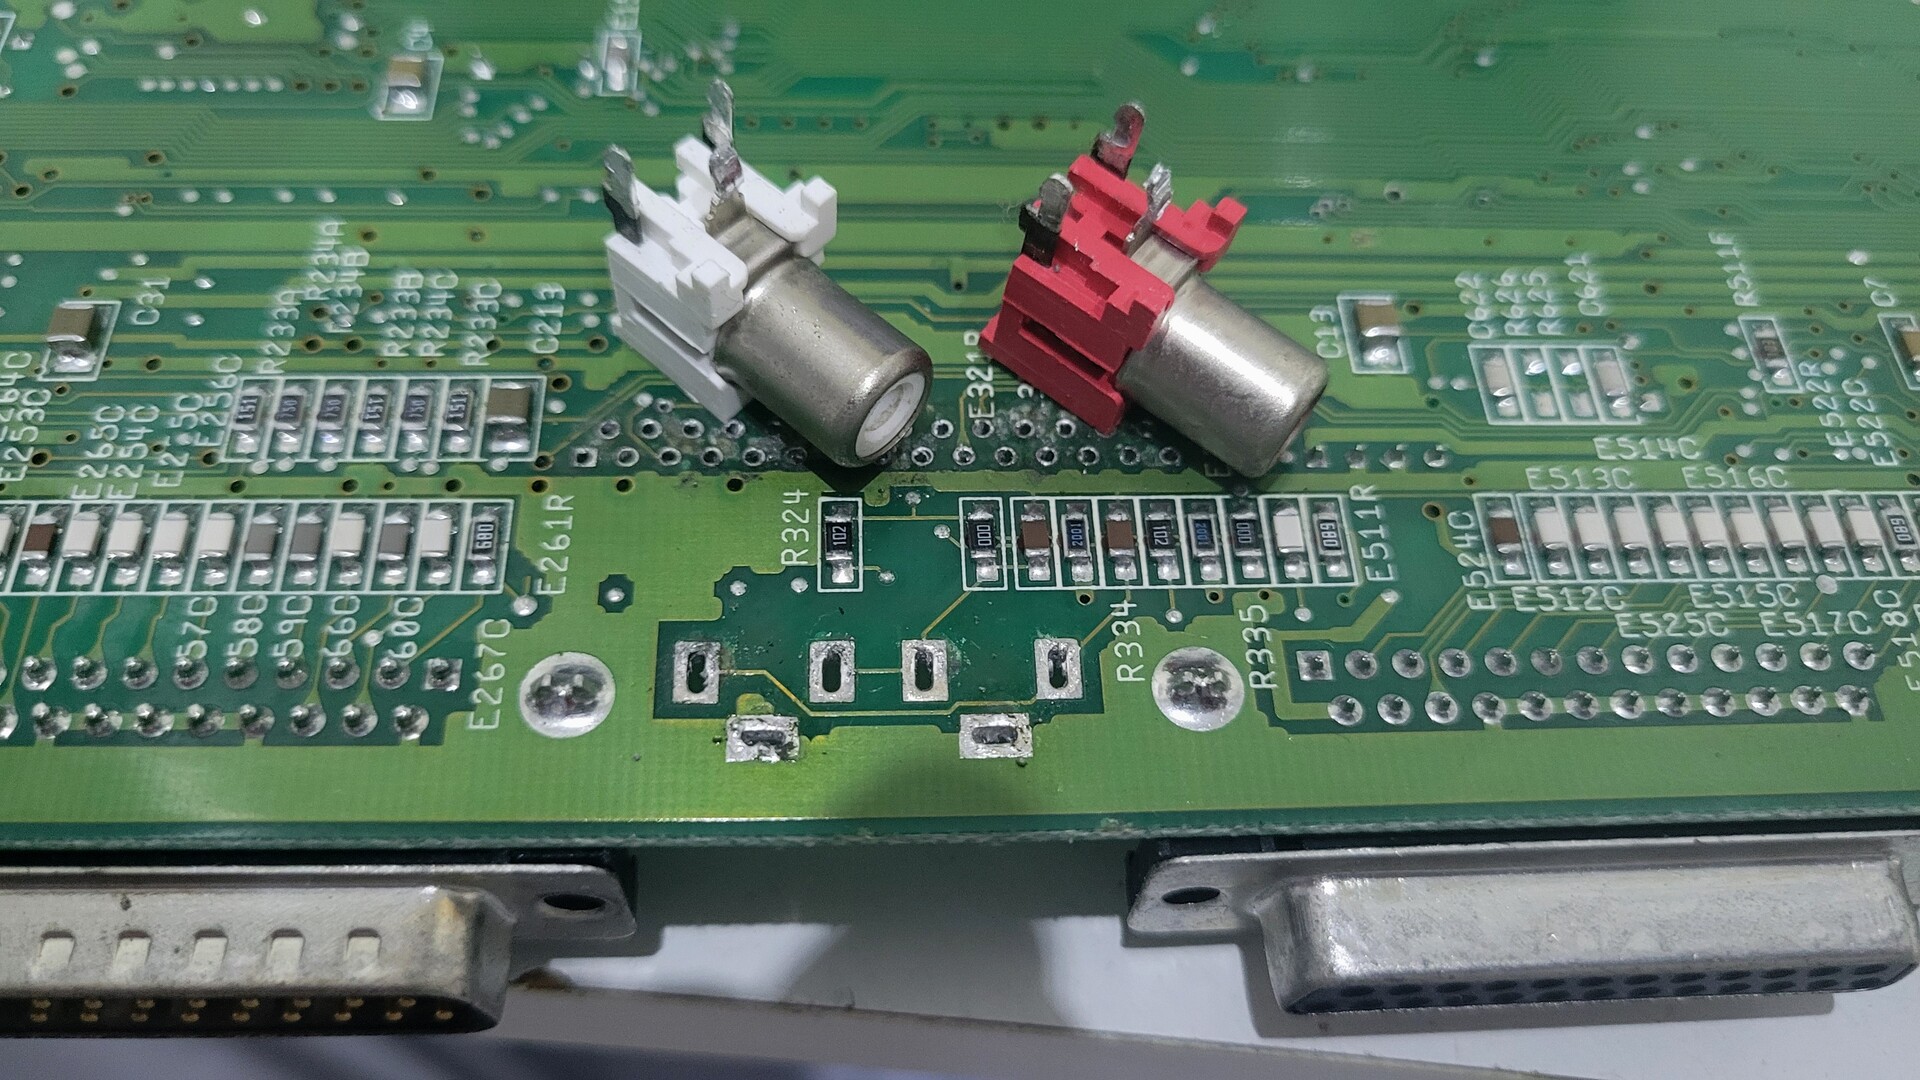
There are two capacitors that need a specific treatment because they are too close to the keyboard and audio connectors :

Theses connectors must be removed in order to replace the capacitors. A soldersucker is of great help here:
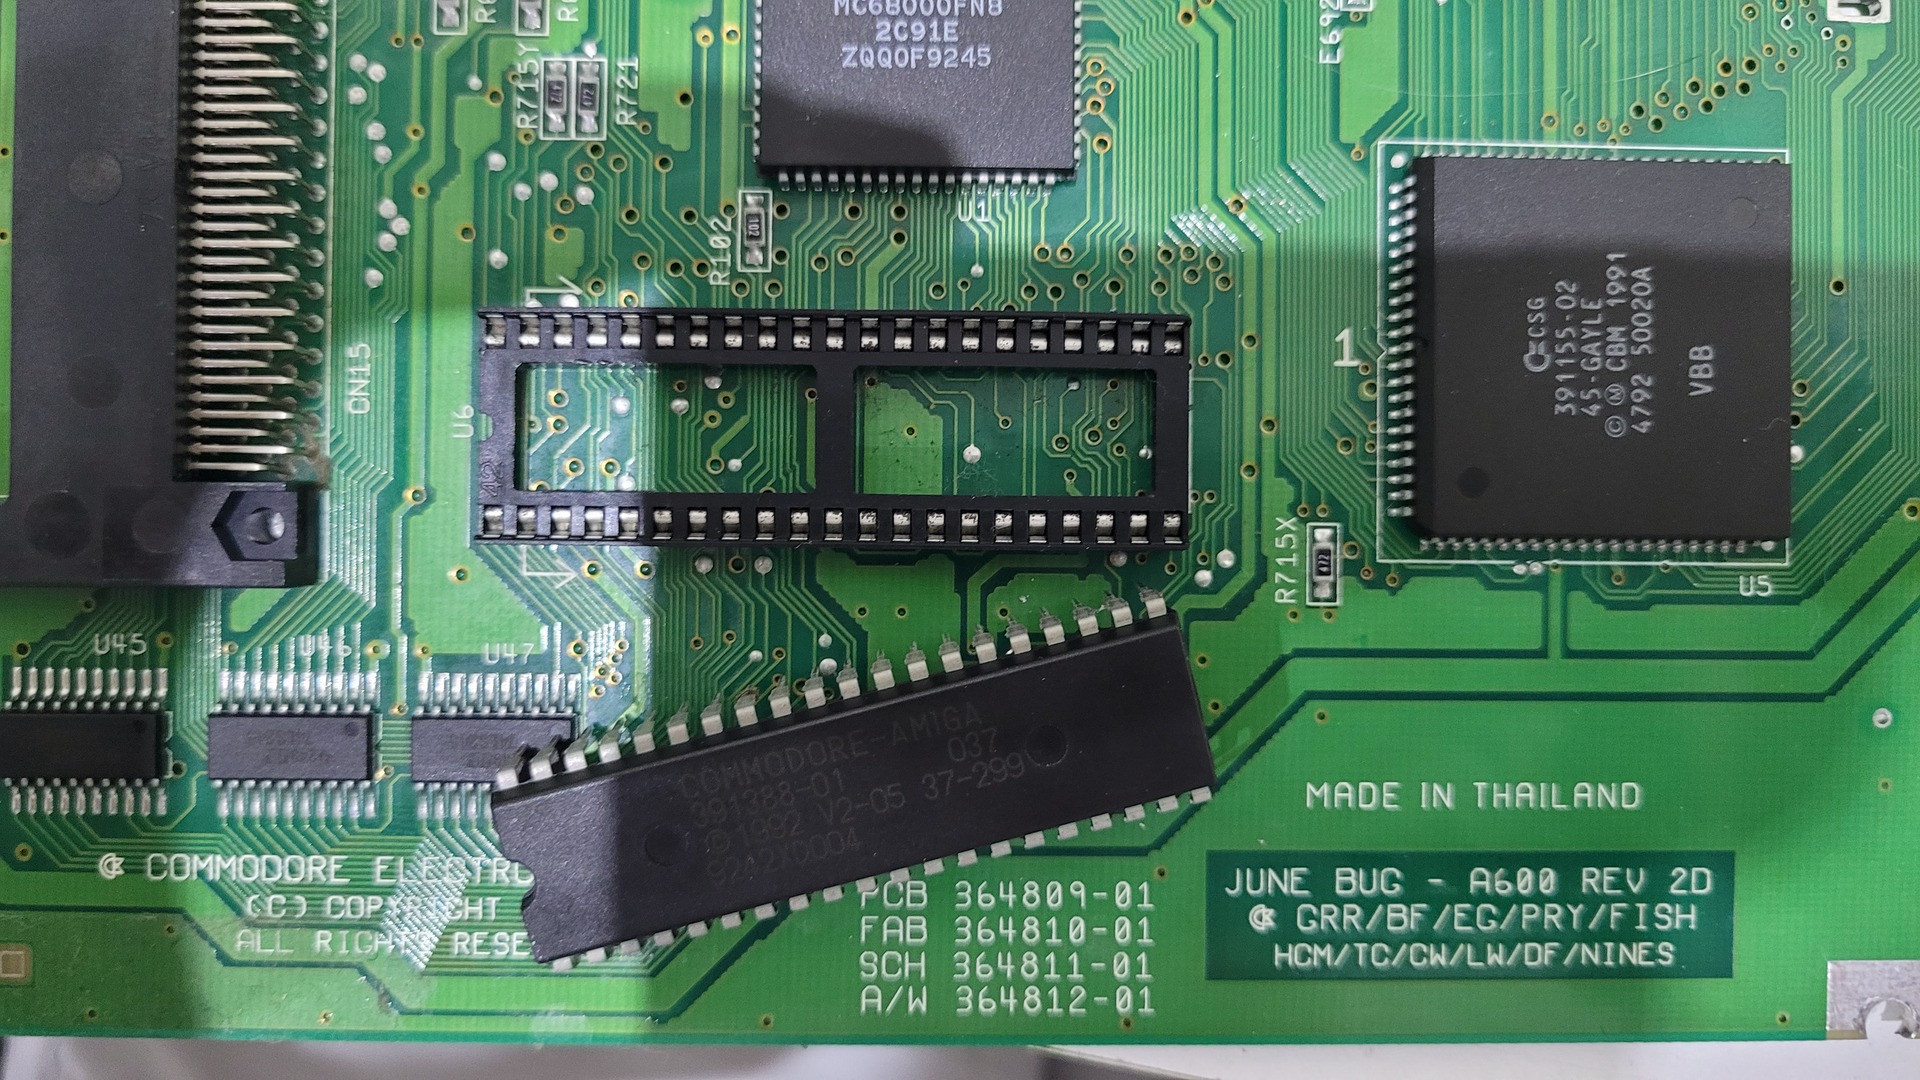
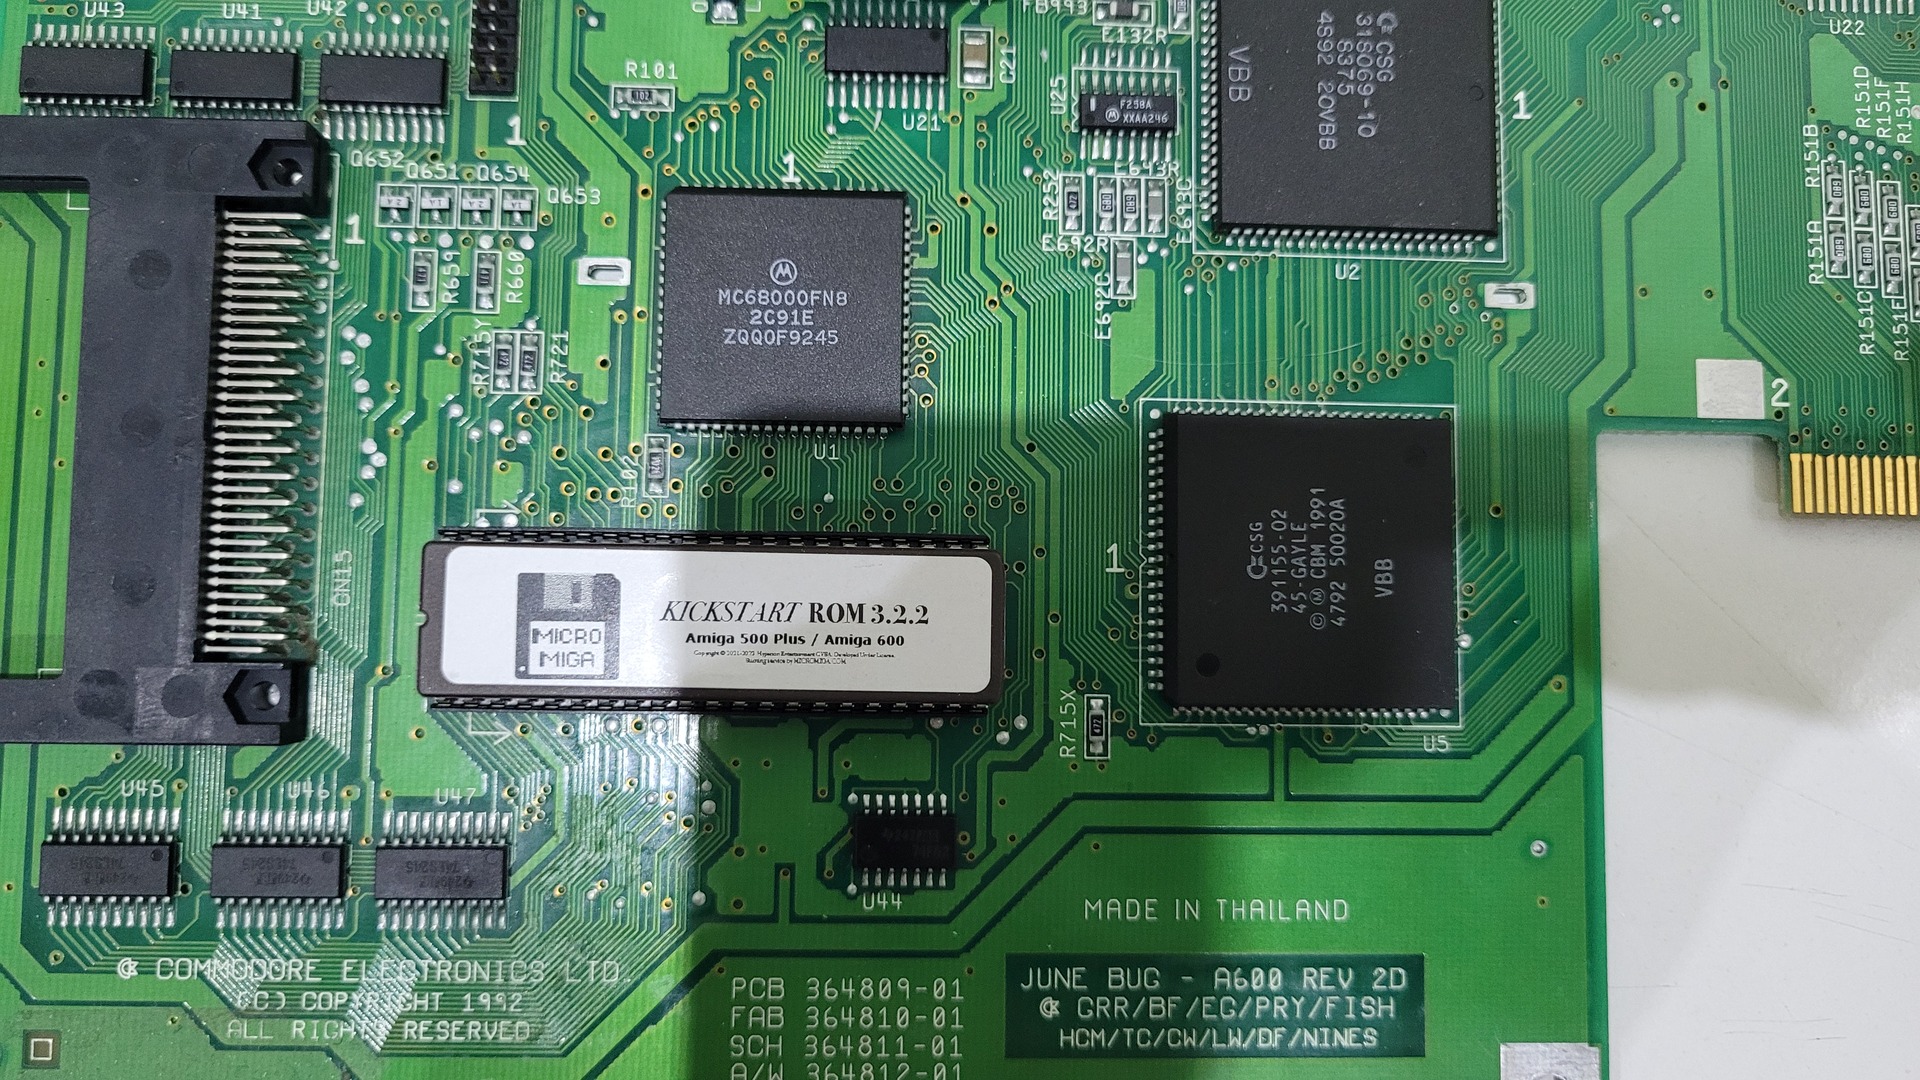
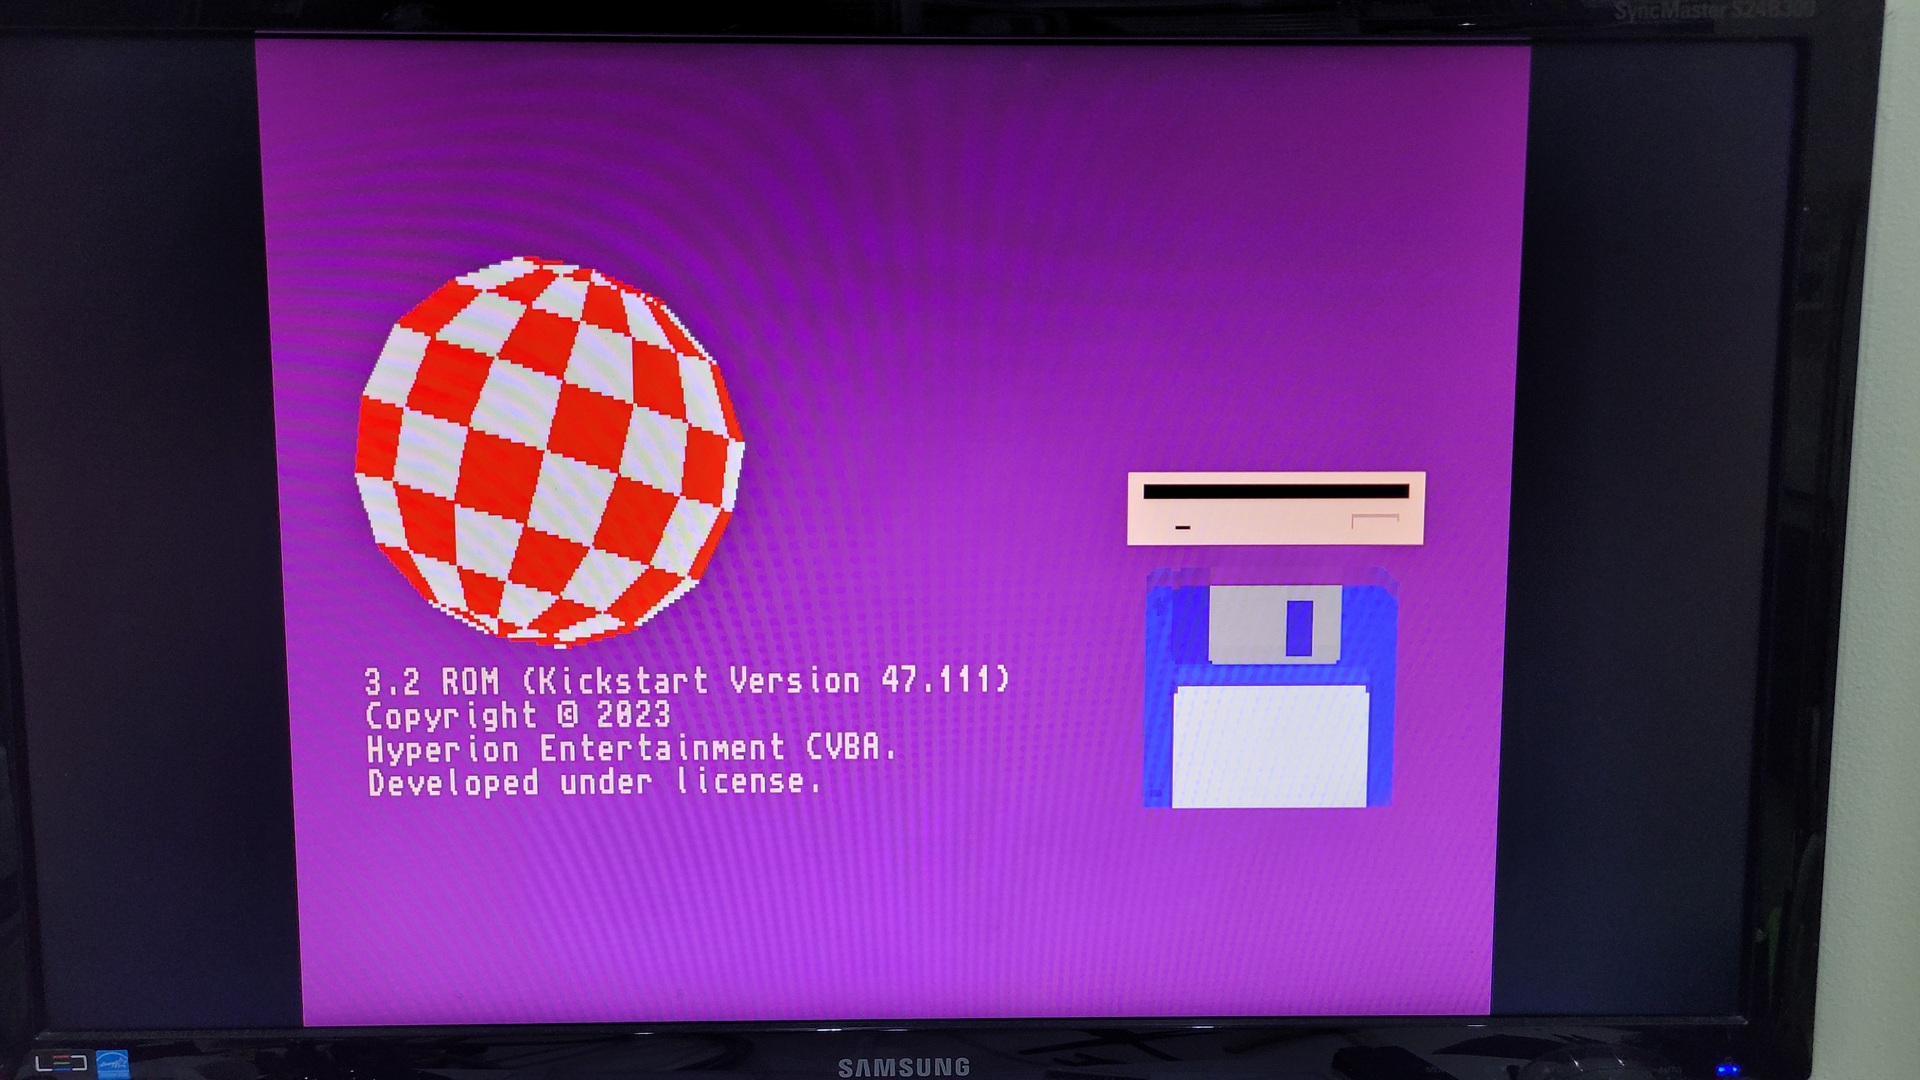
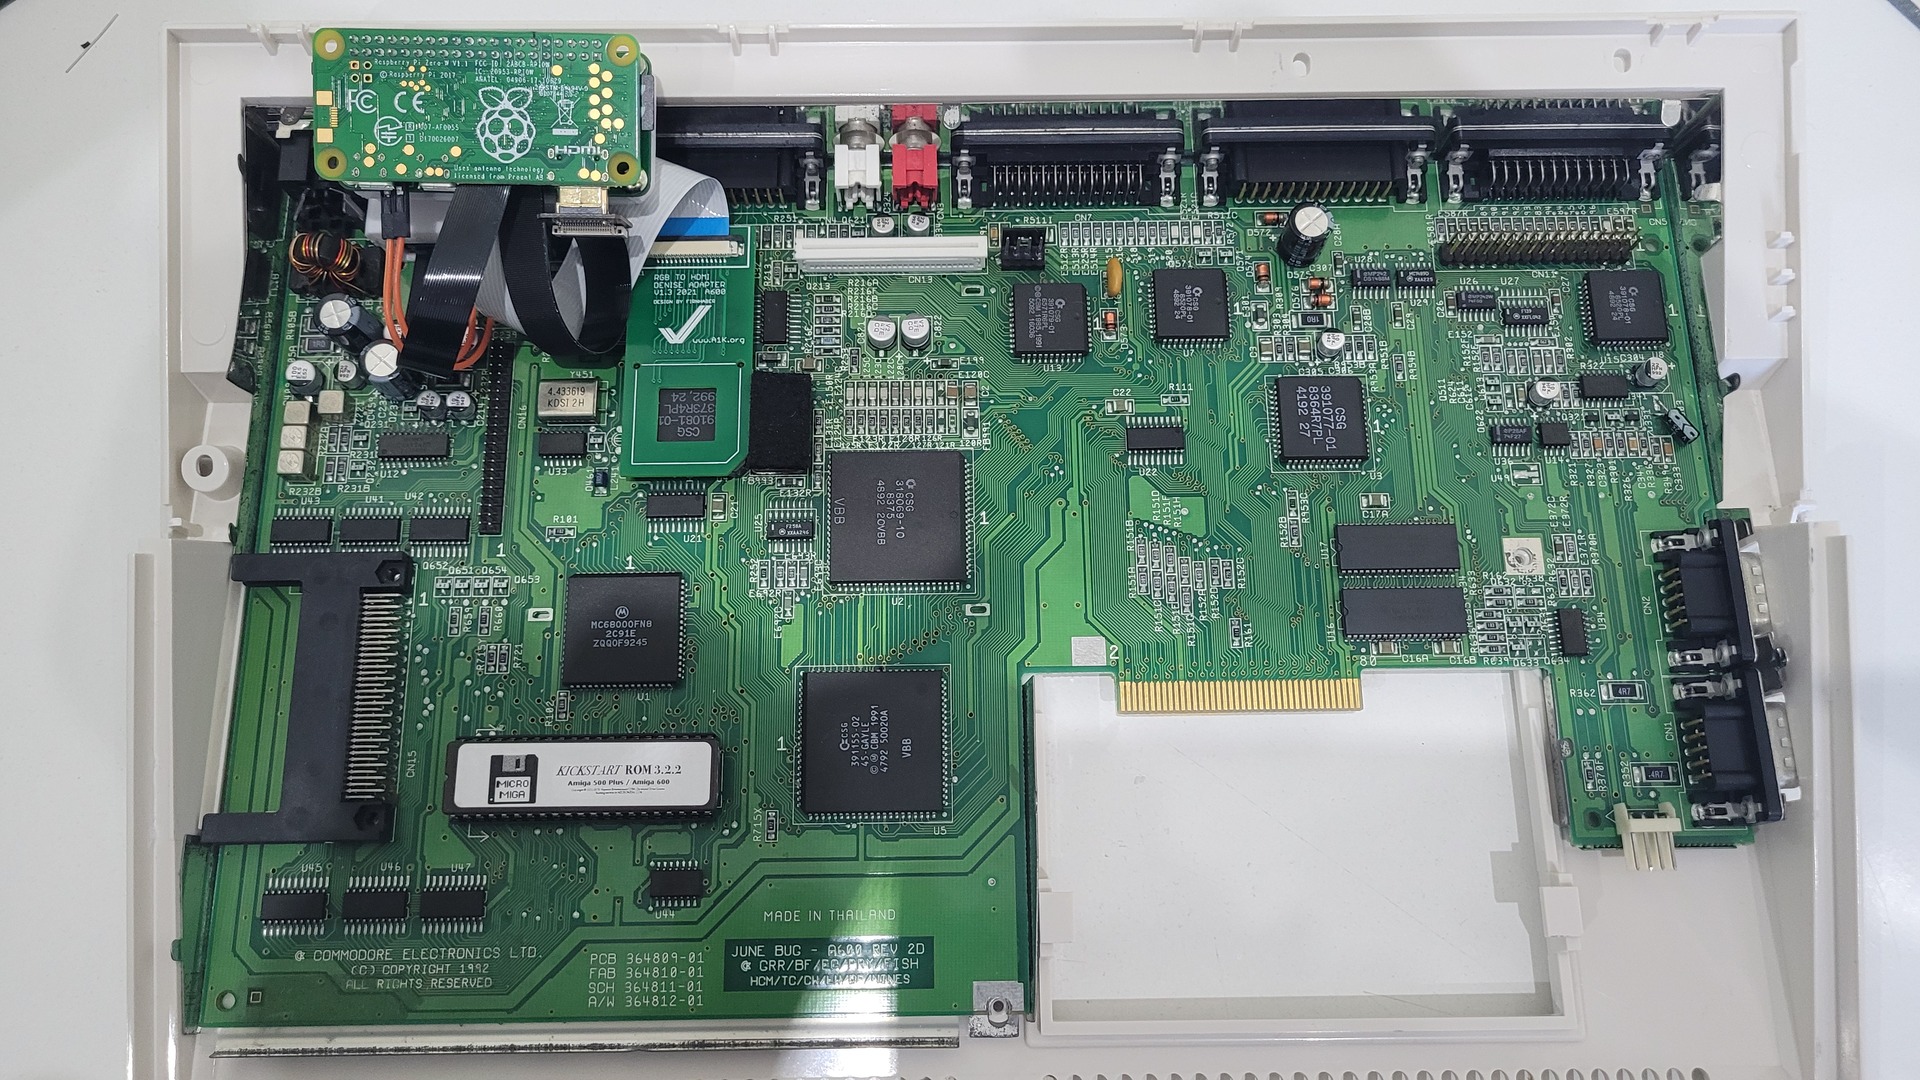
New Kickstart rom
Nothing special here : a simple drop in replacement of the original 2.04 rom by a brand new 3.2.
RGB to HDMI
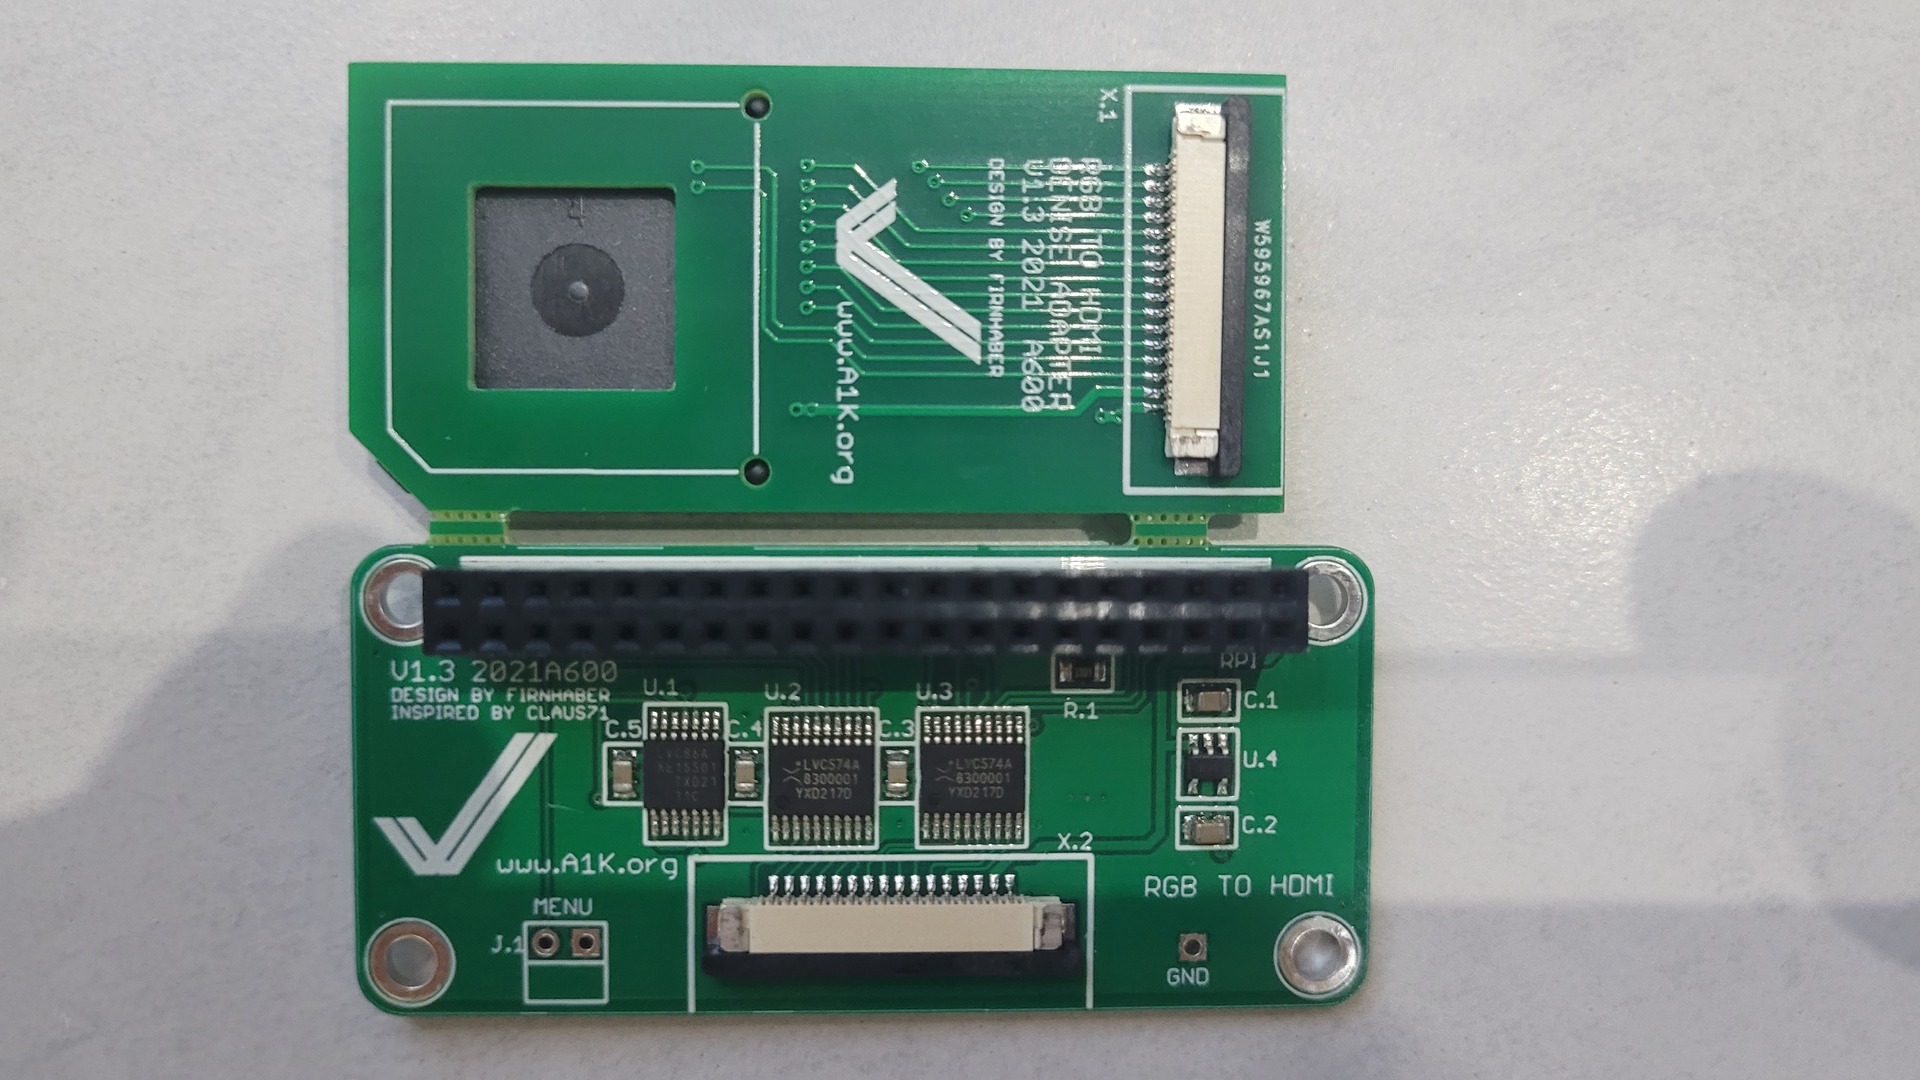
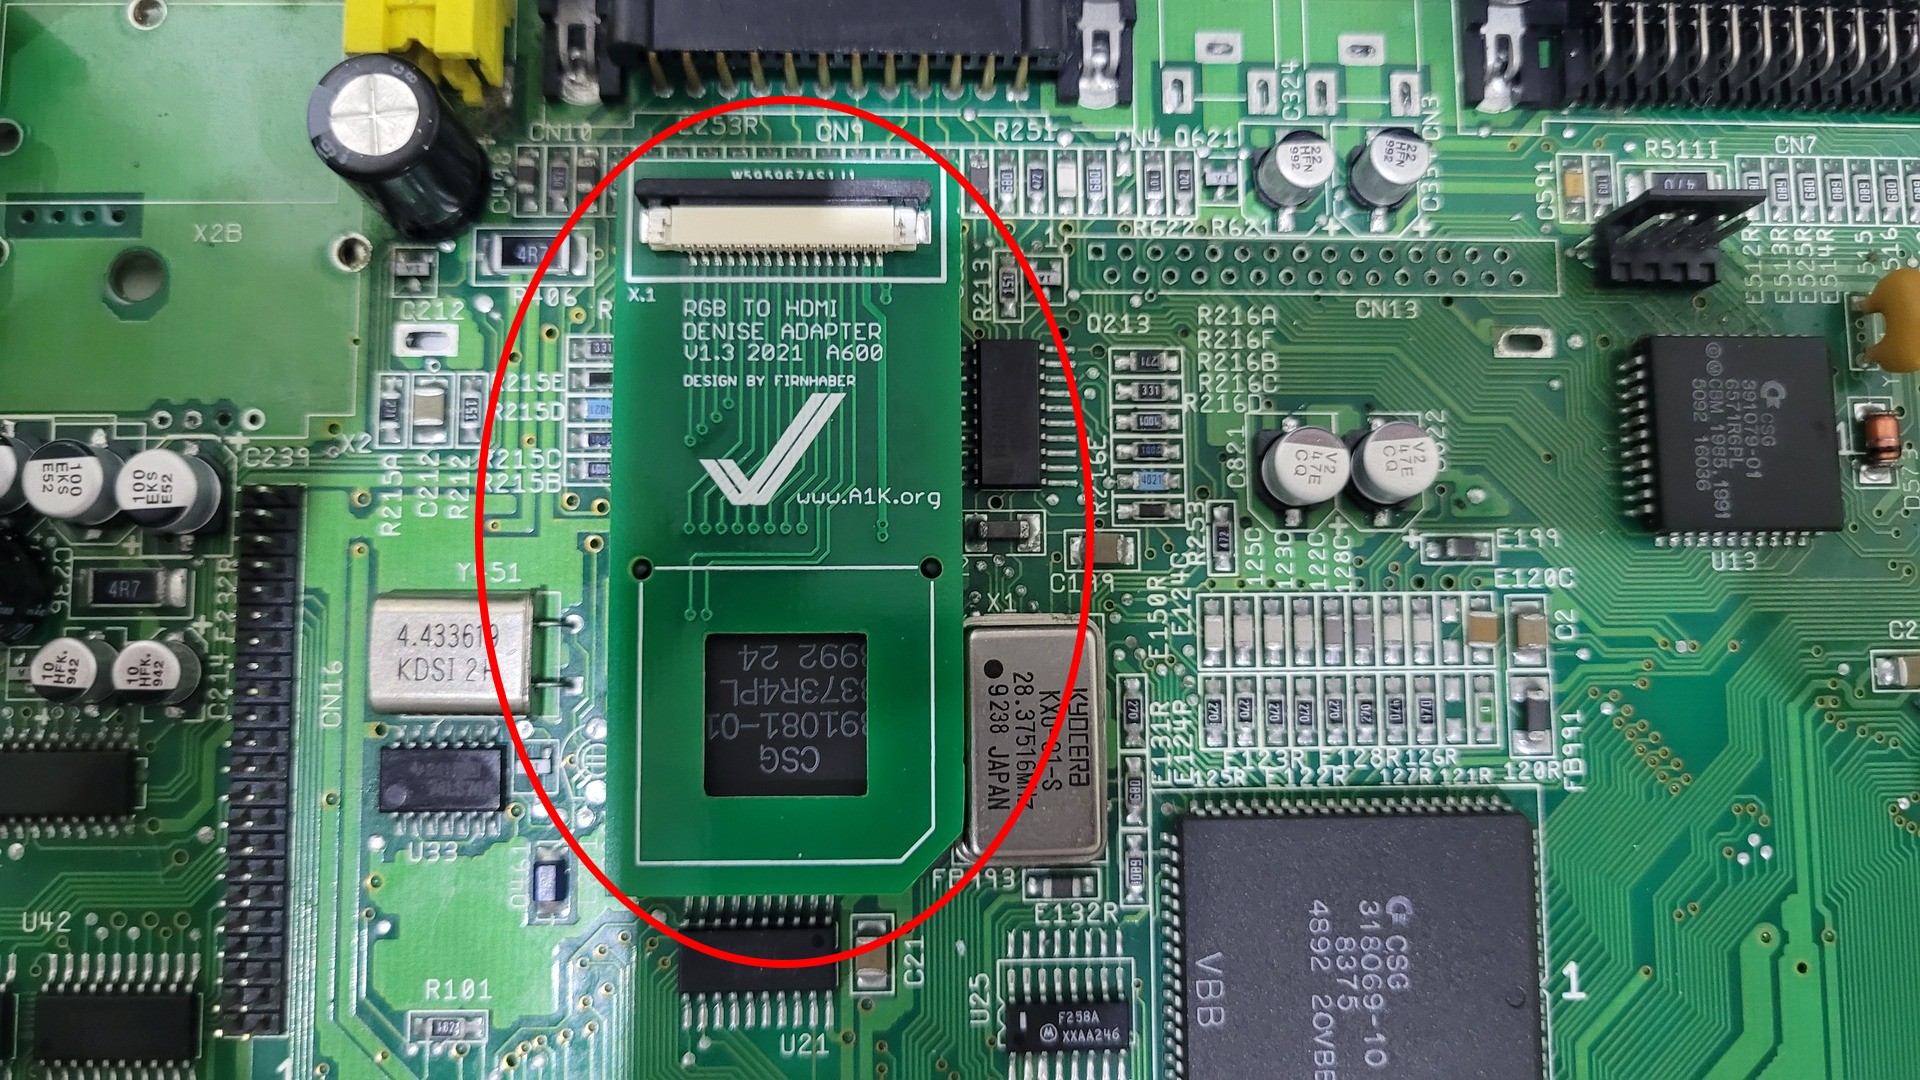
RGBtoHDMI is a really awesome thing for the Amiga : it acts as a pretty cheap scandoubler / flicker fixer with a delay free HDMI output ! Unfortunately, in order to be able to use an accelerator card on the Amiga 600, you need a special version of the kit. This special version has two parts : one that is plugged on the Super Denise chip, and a second part that connects to the Raspberry pi.
This kit is either hard to find or expansive to import, depending on where you live. So I decided to make a new batch from PCBWay, based on the original project files (https://github.com/jockel71/RGB_HDMI_A600). I ordered 5 kits and sold 4 with no benefit (50 euros).
Here is the kit has I received it, minus the ribbon cable needed to link them:
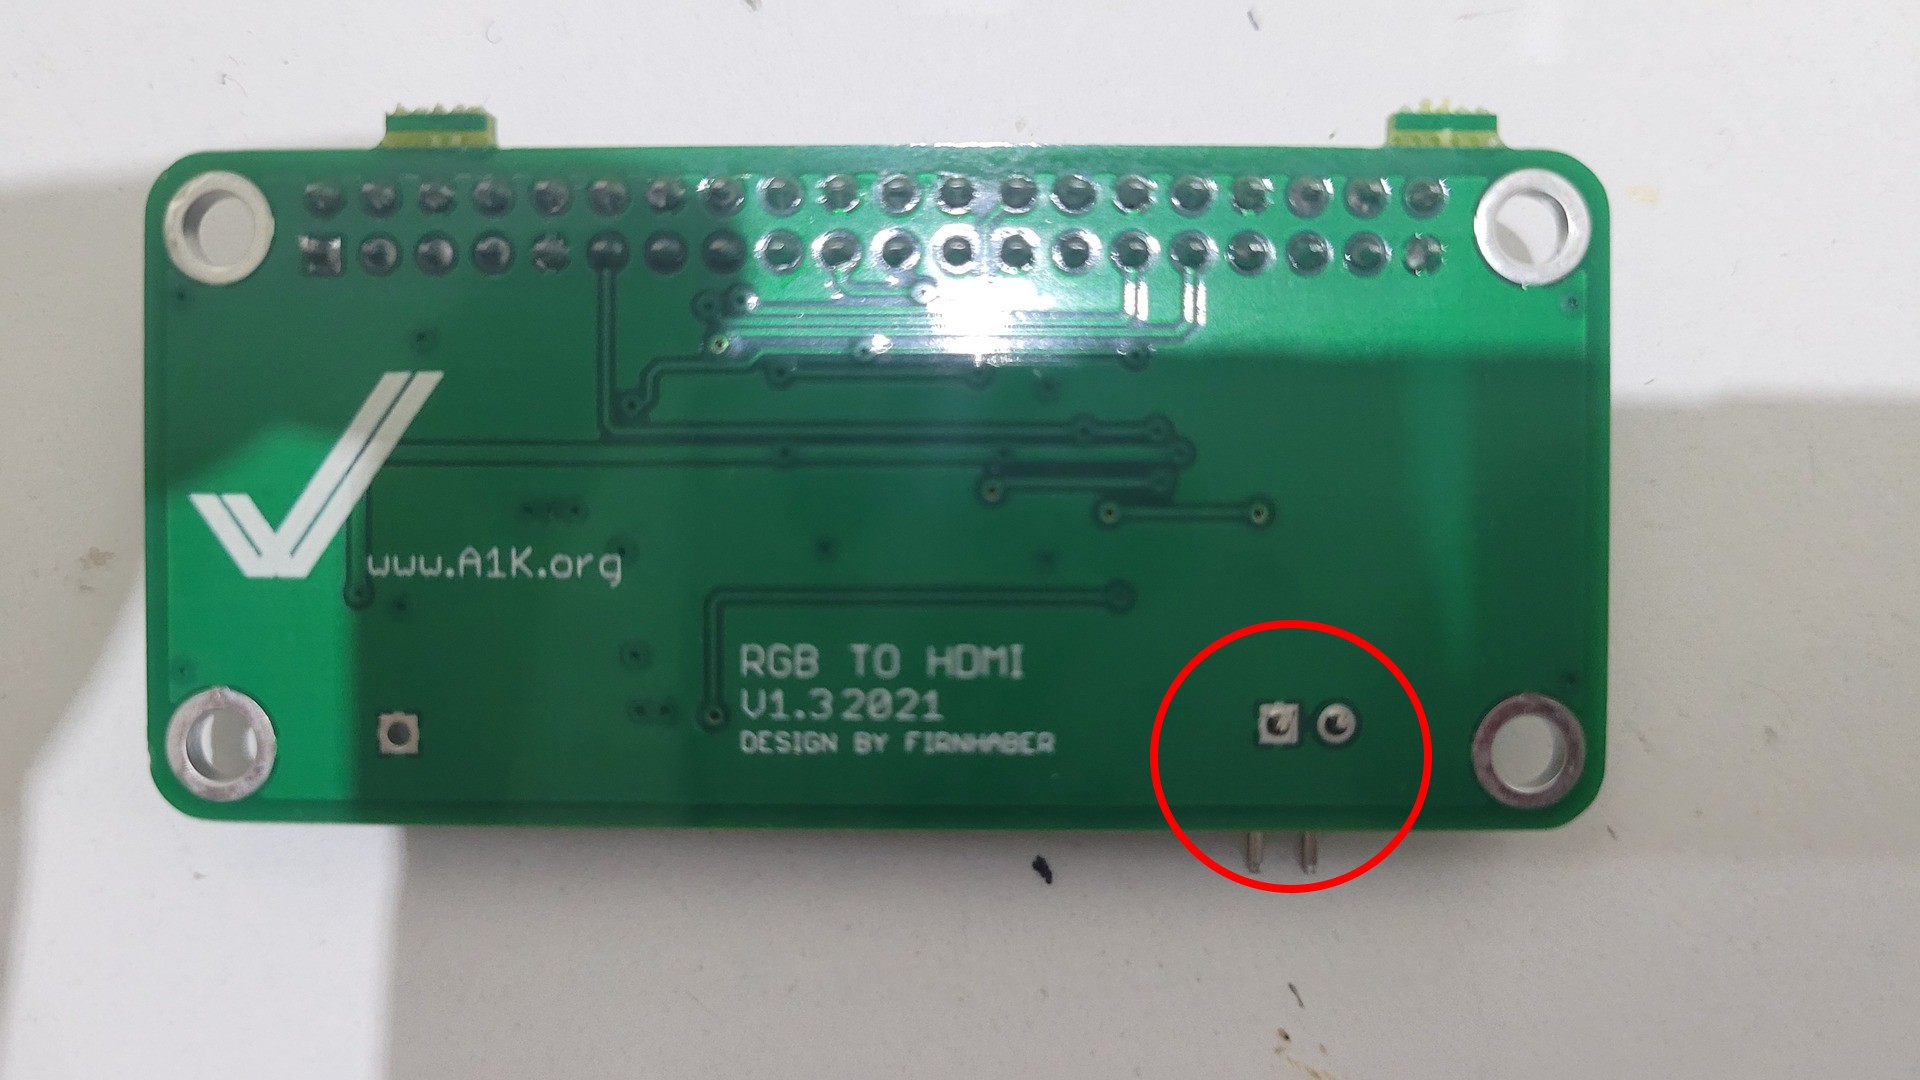
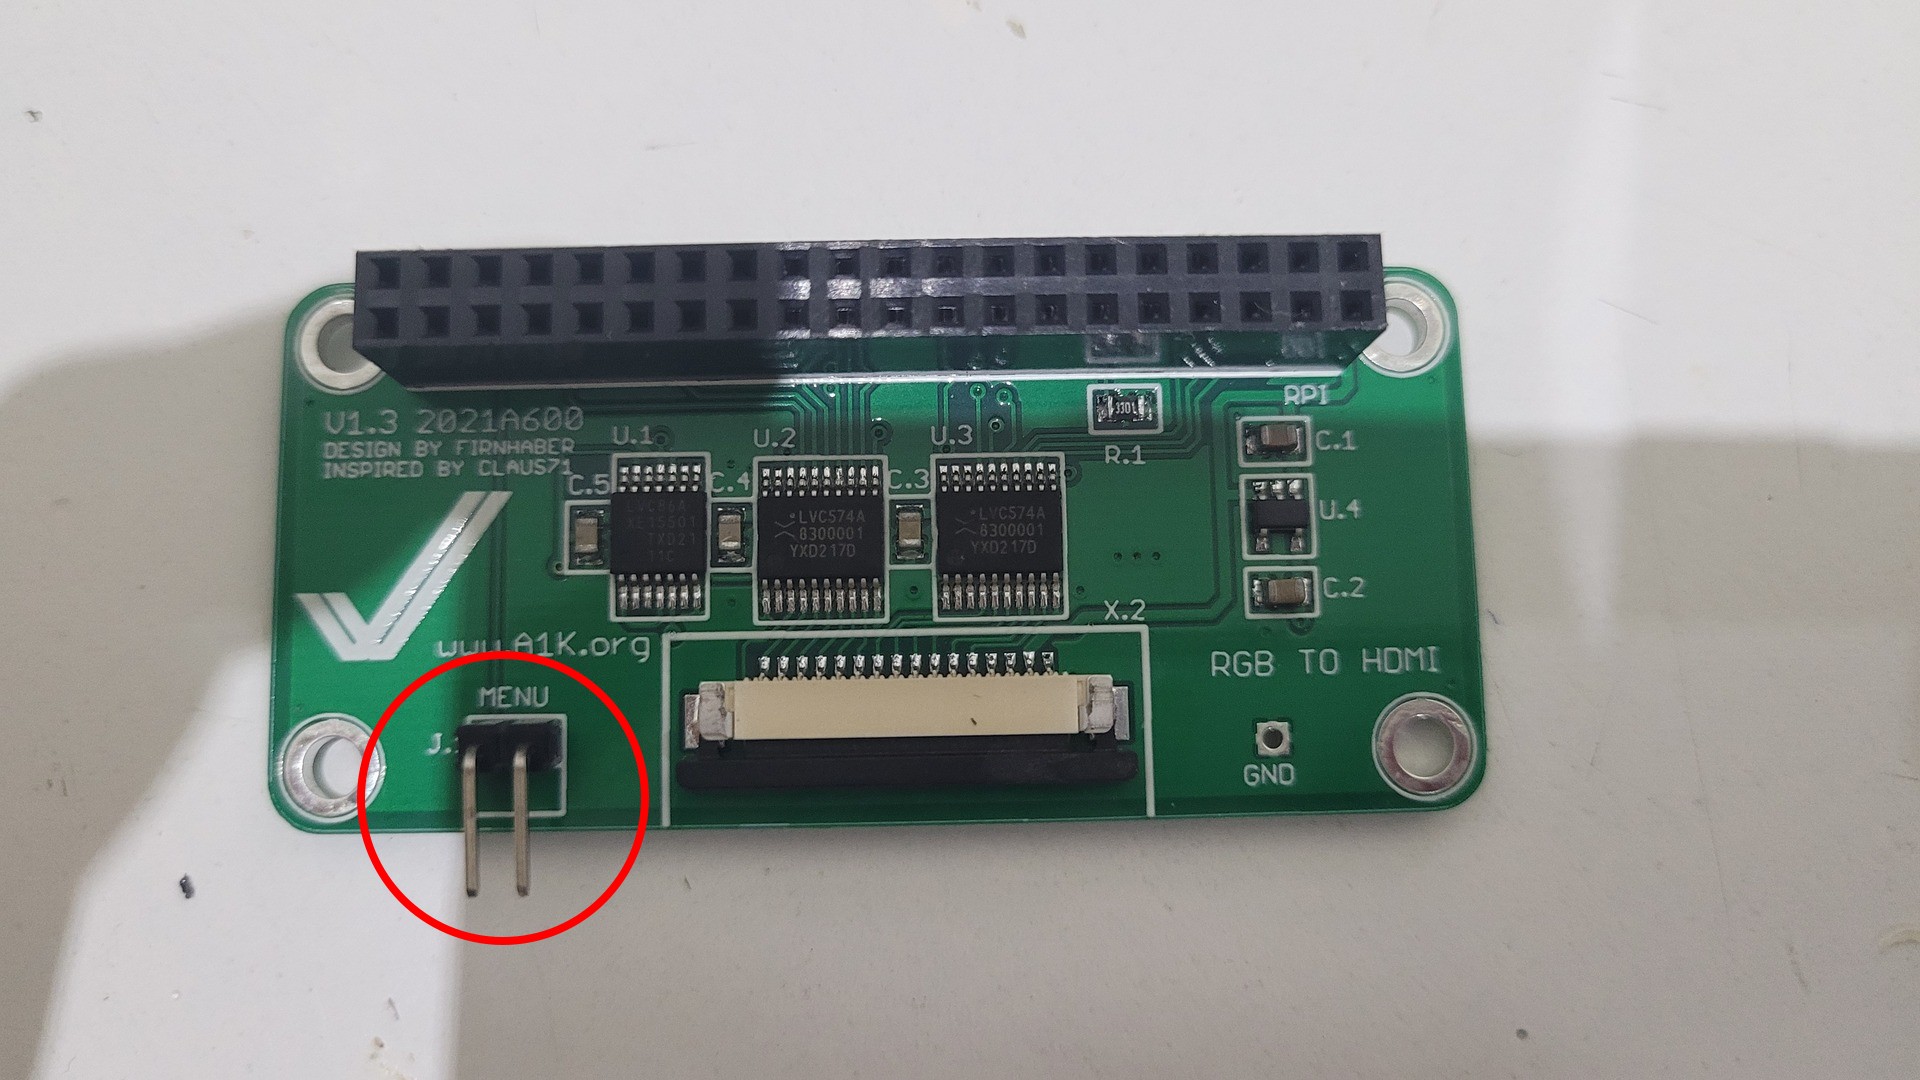
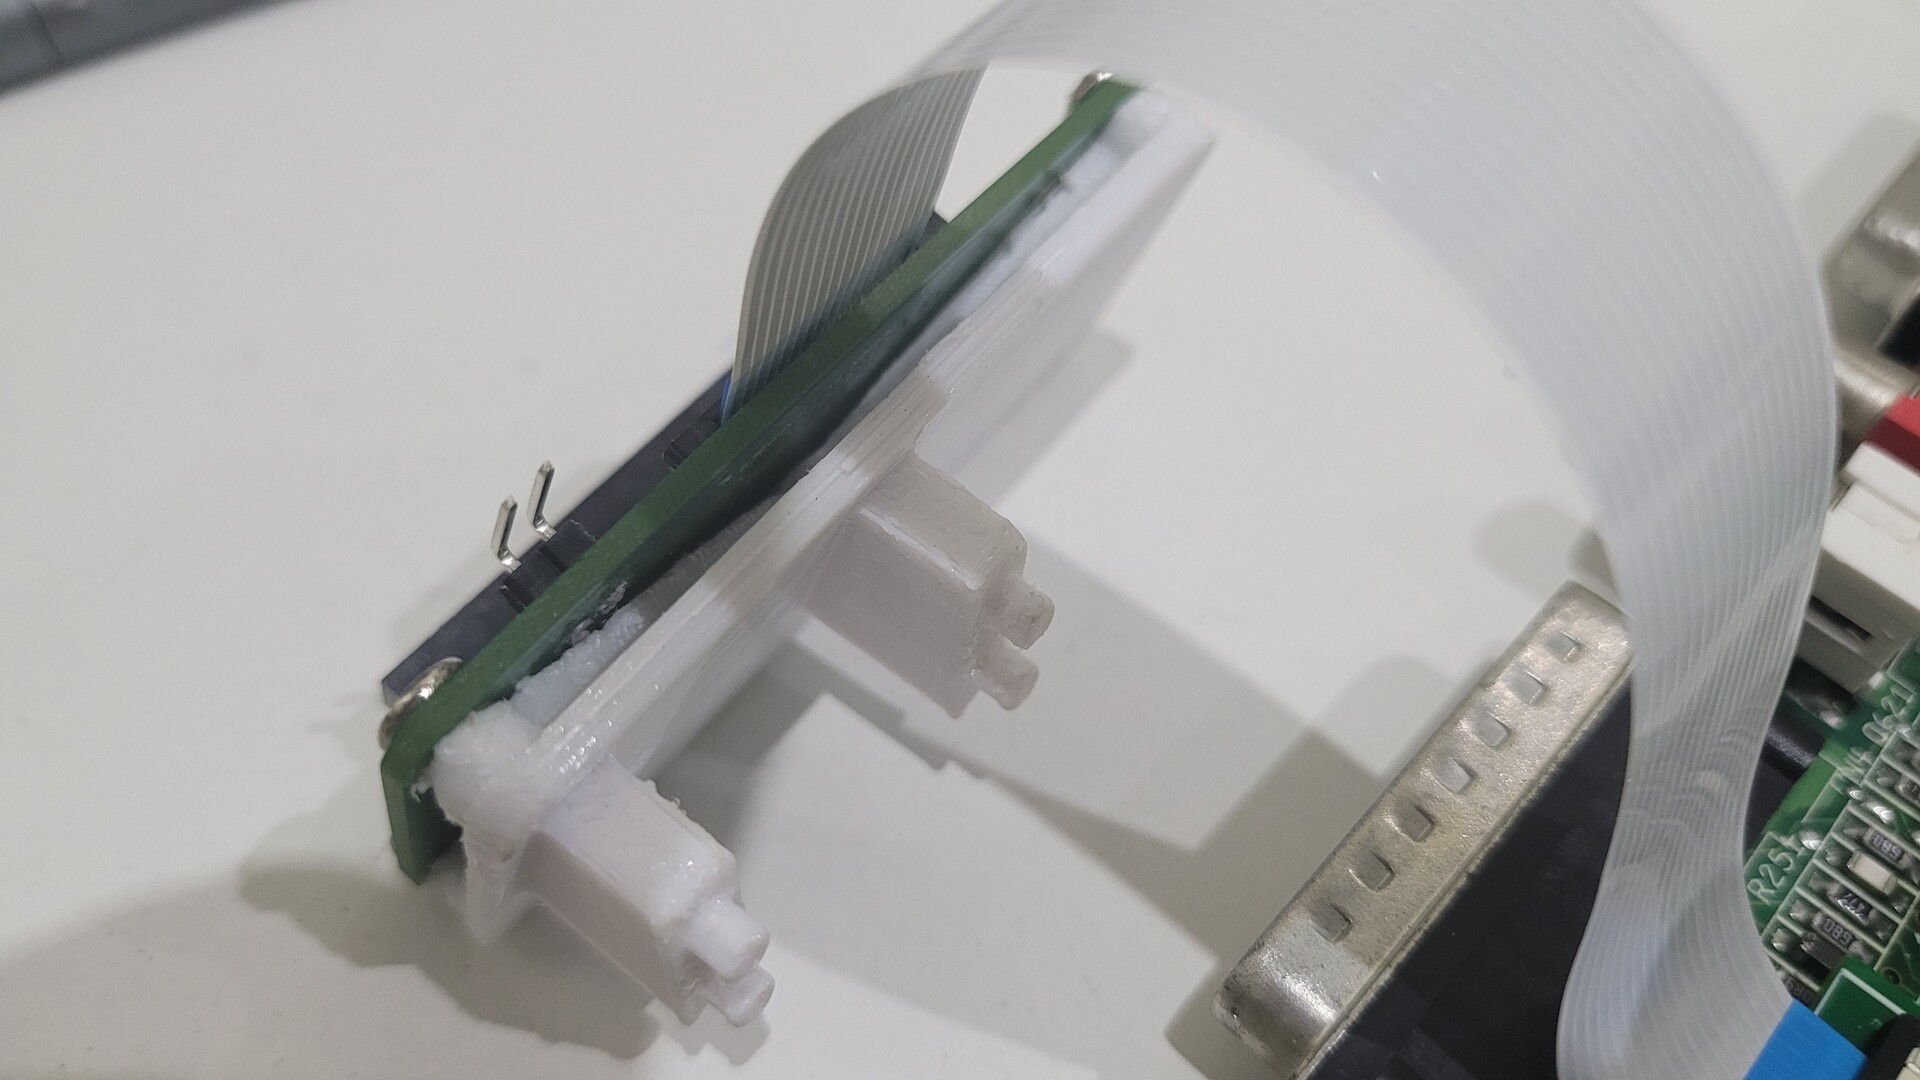
There were few steps to make it fully usable… First, adding two pins for the menu’s navigation button:
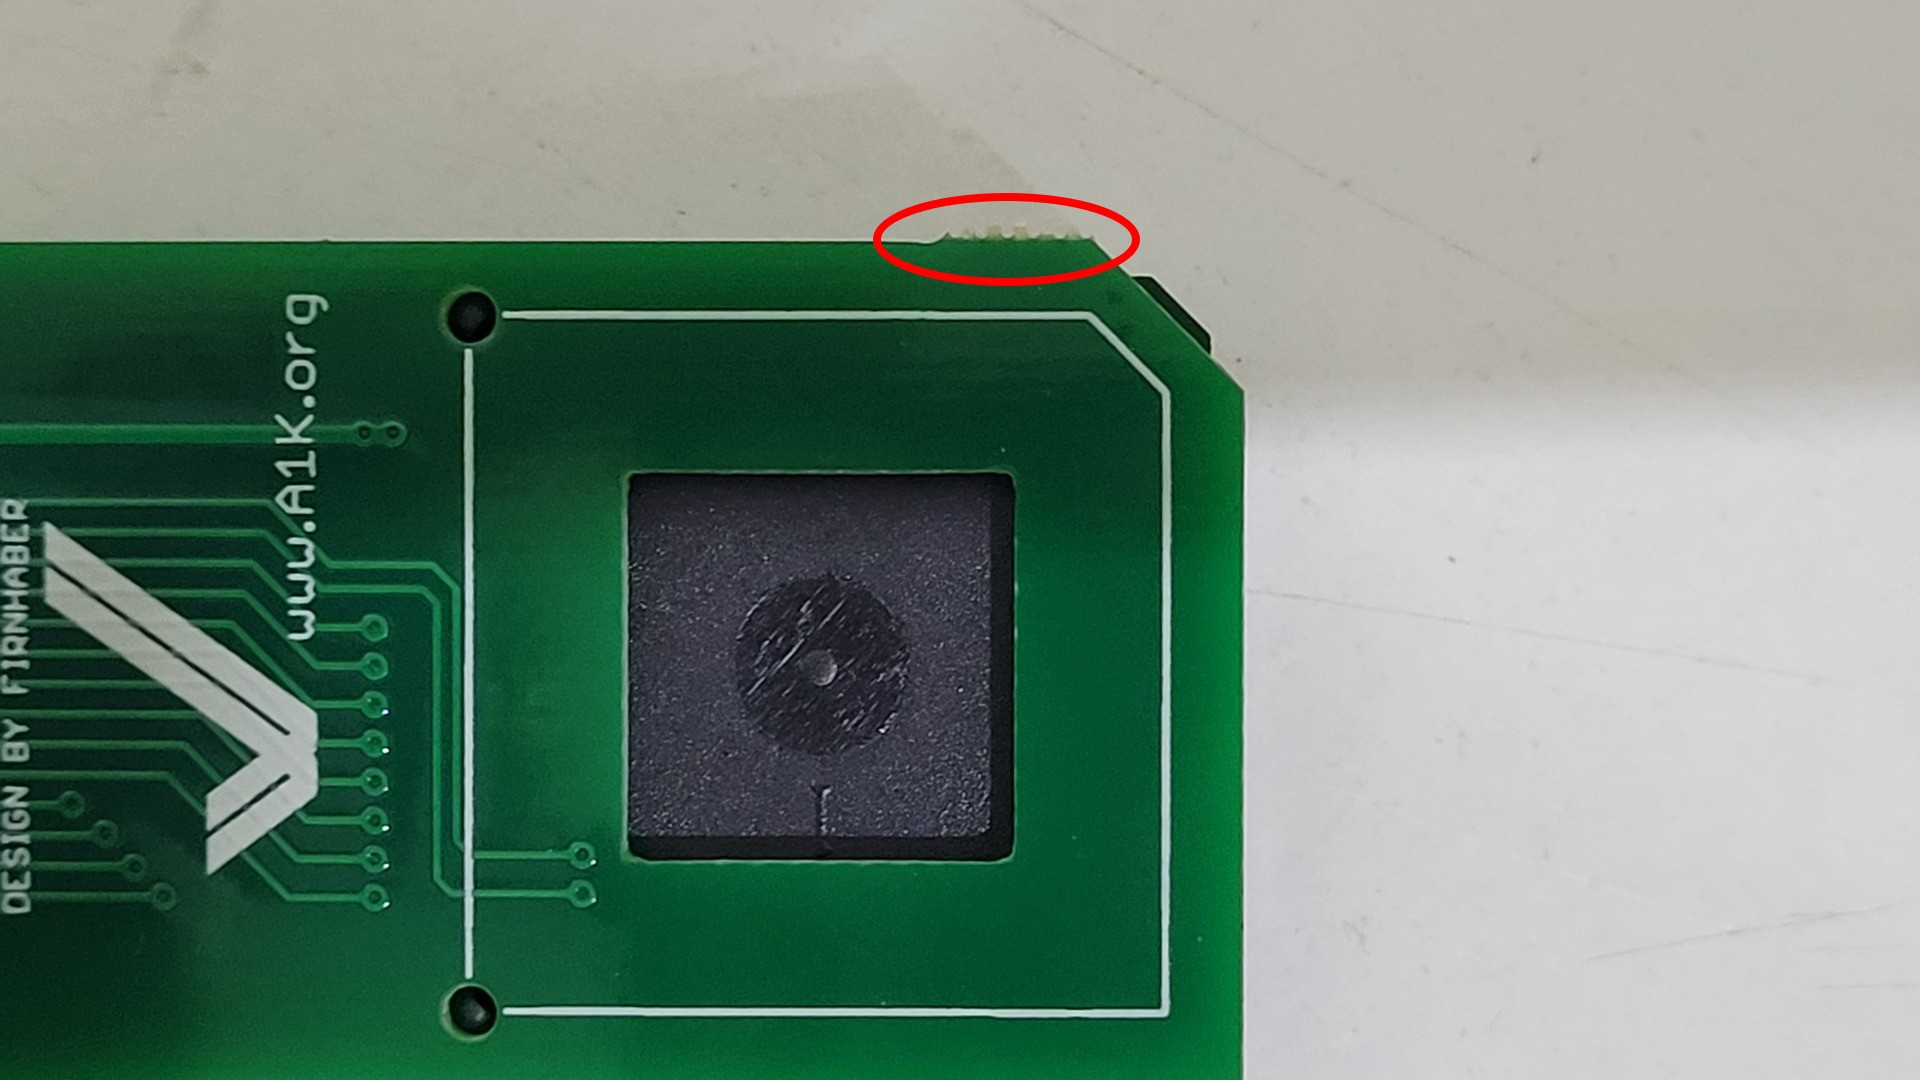
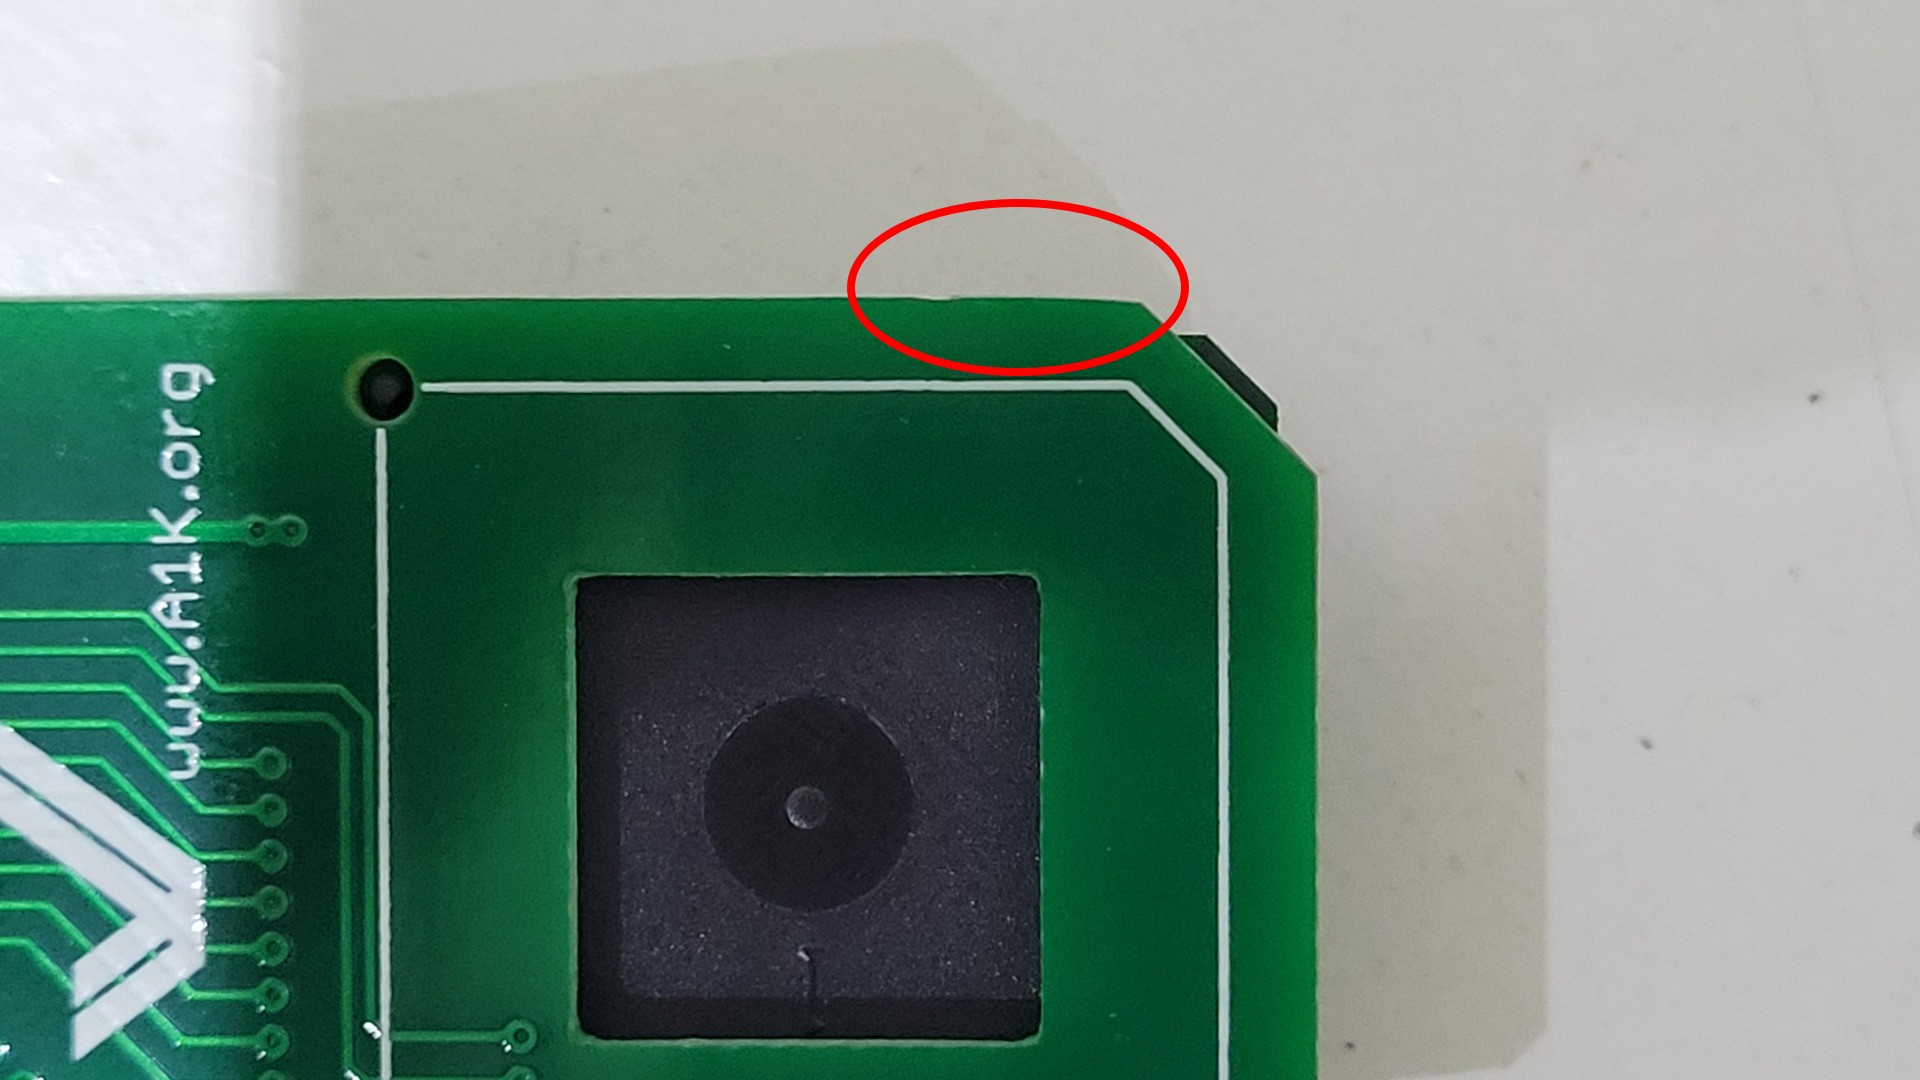
Then, cleaning up the board that goes over Super Denise with a small file:
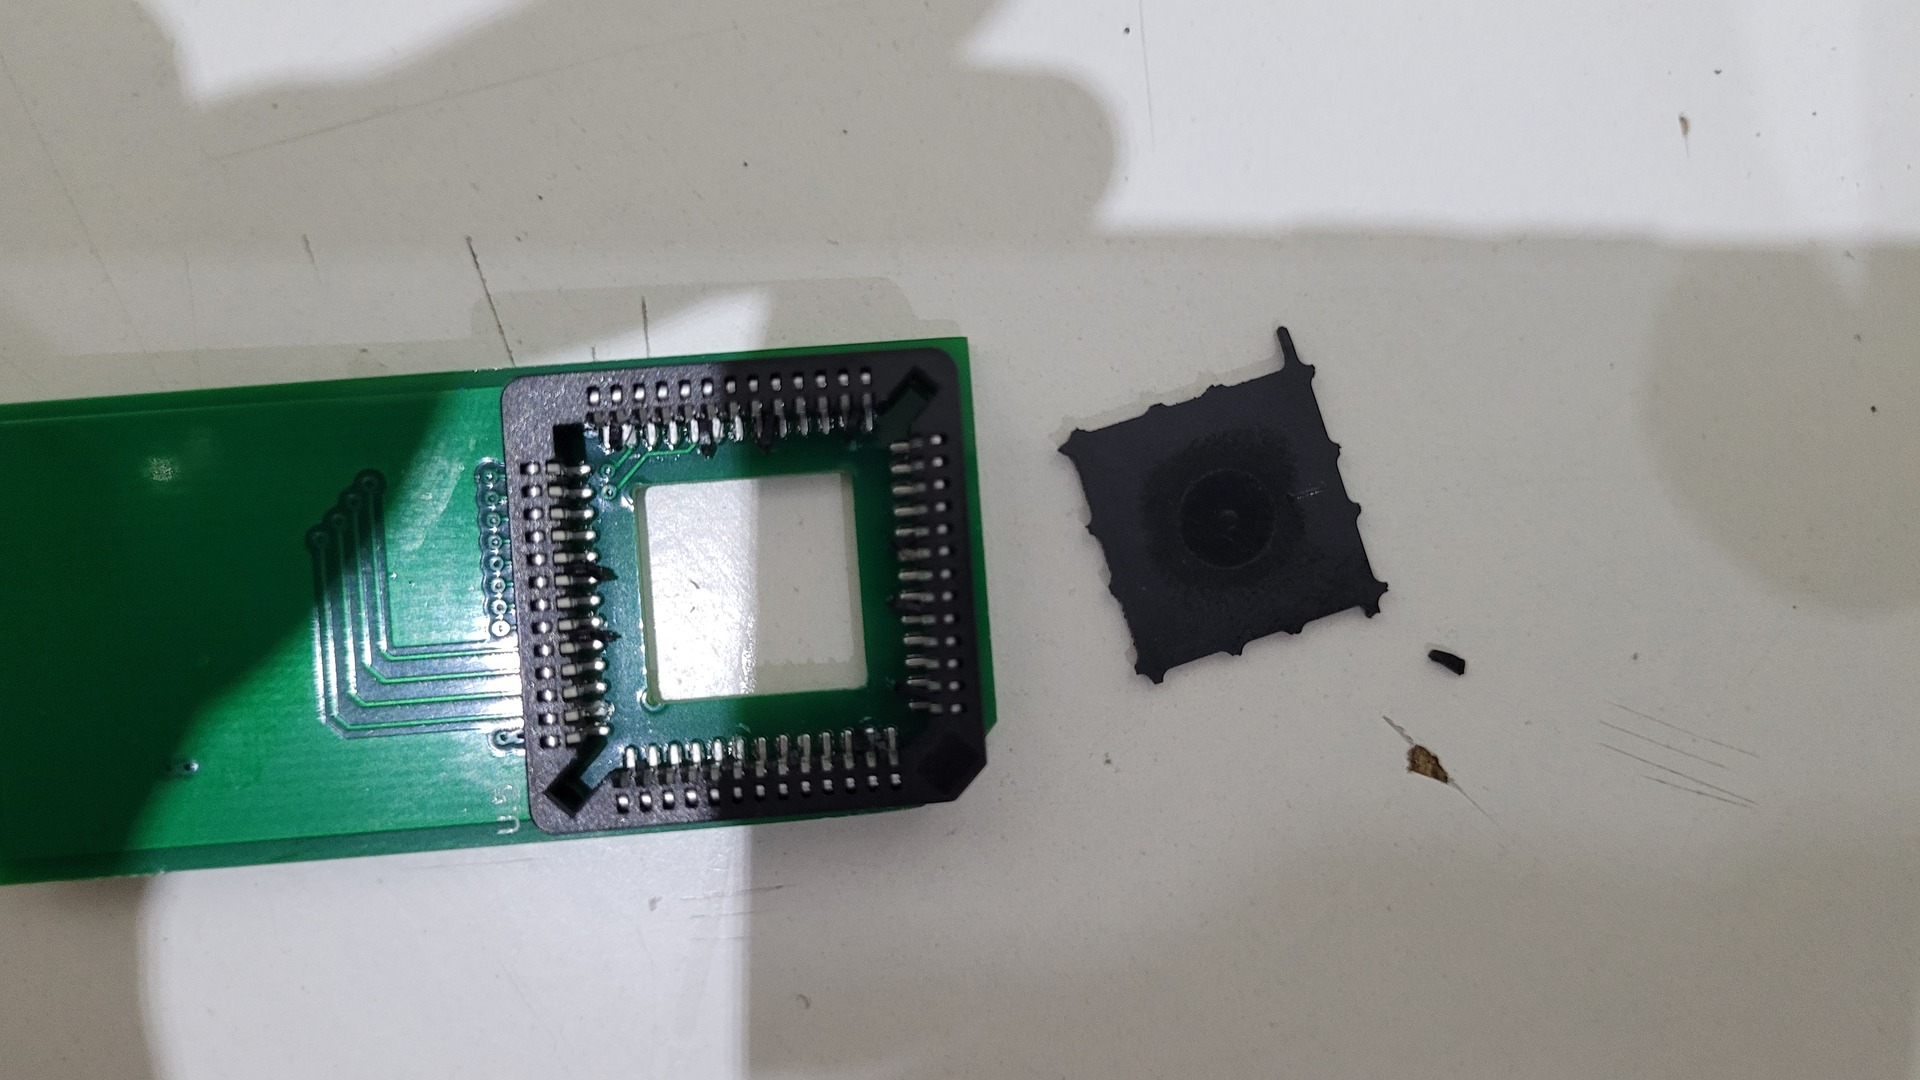
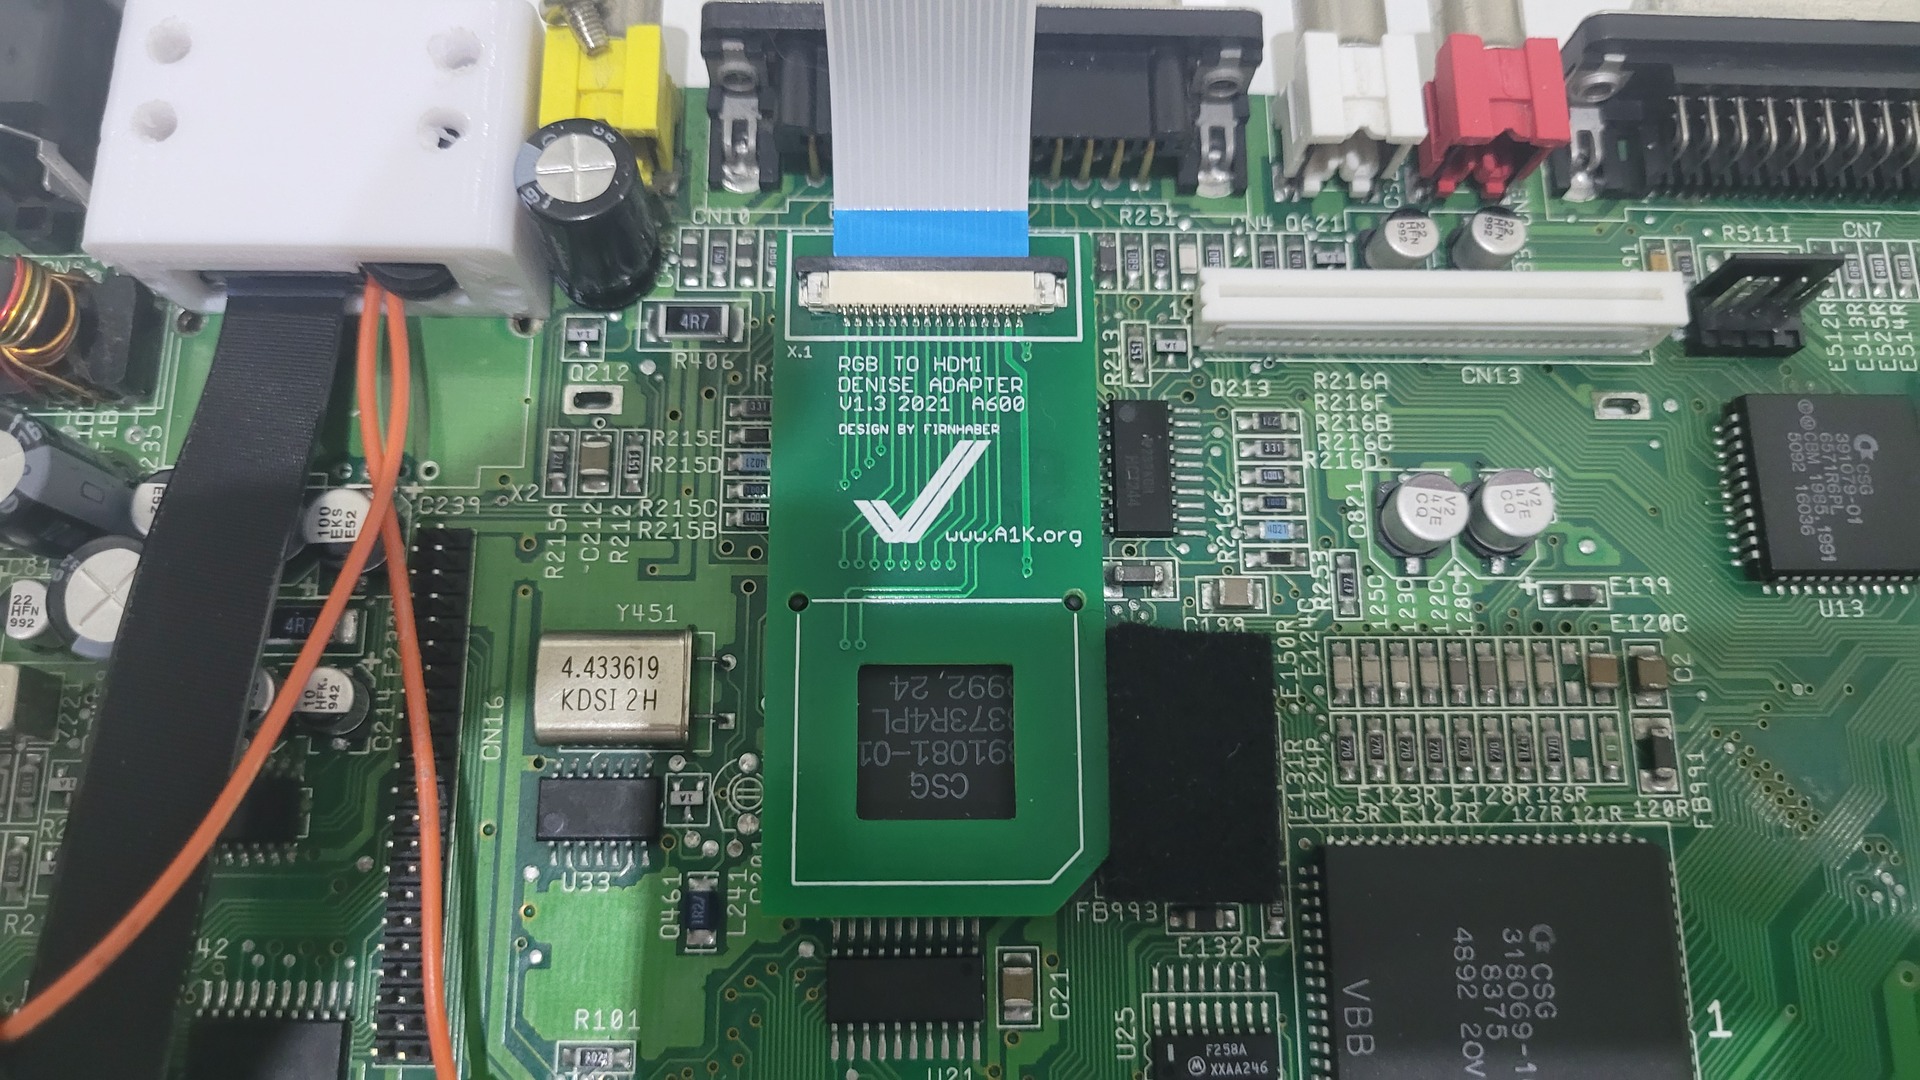
Finally, removing the backplate of the PLCC connector and plug the board in :
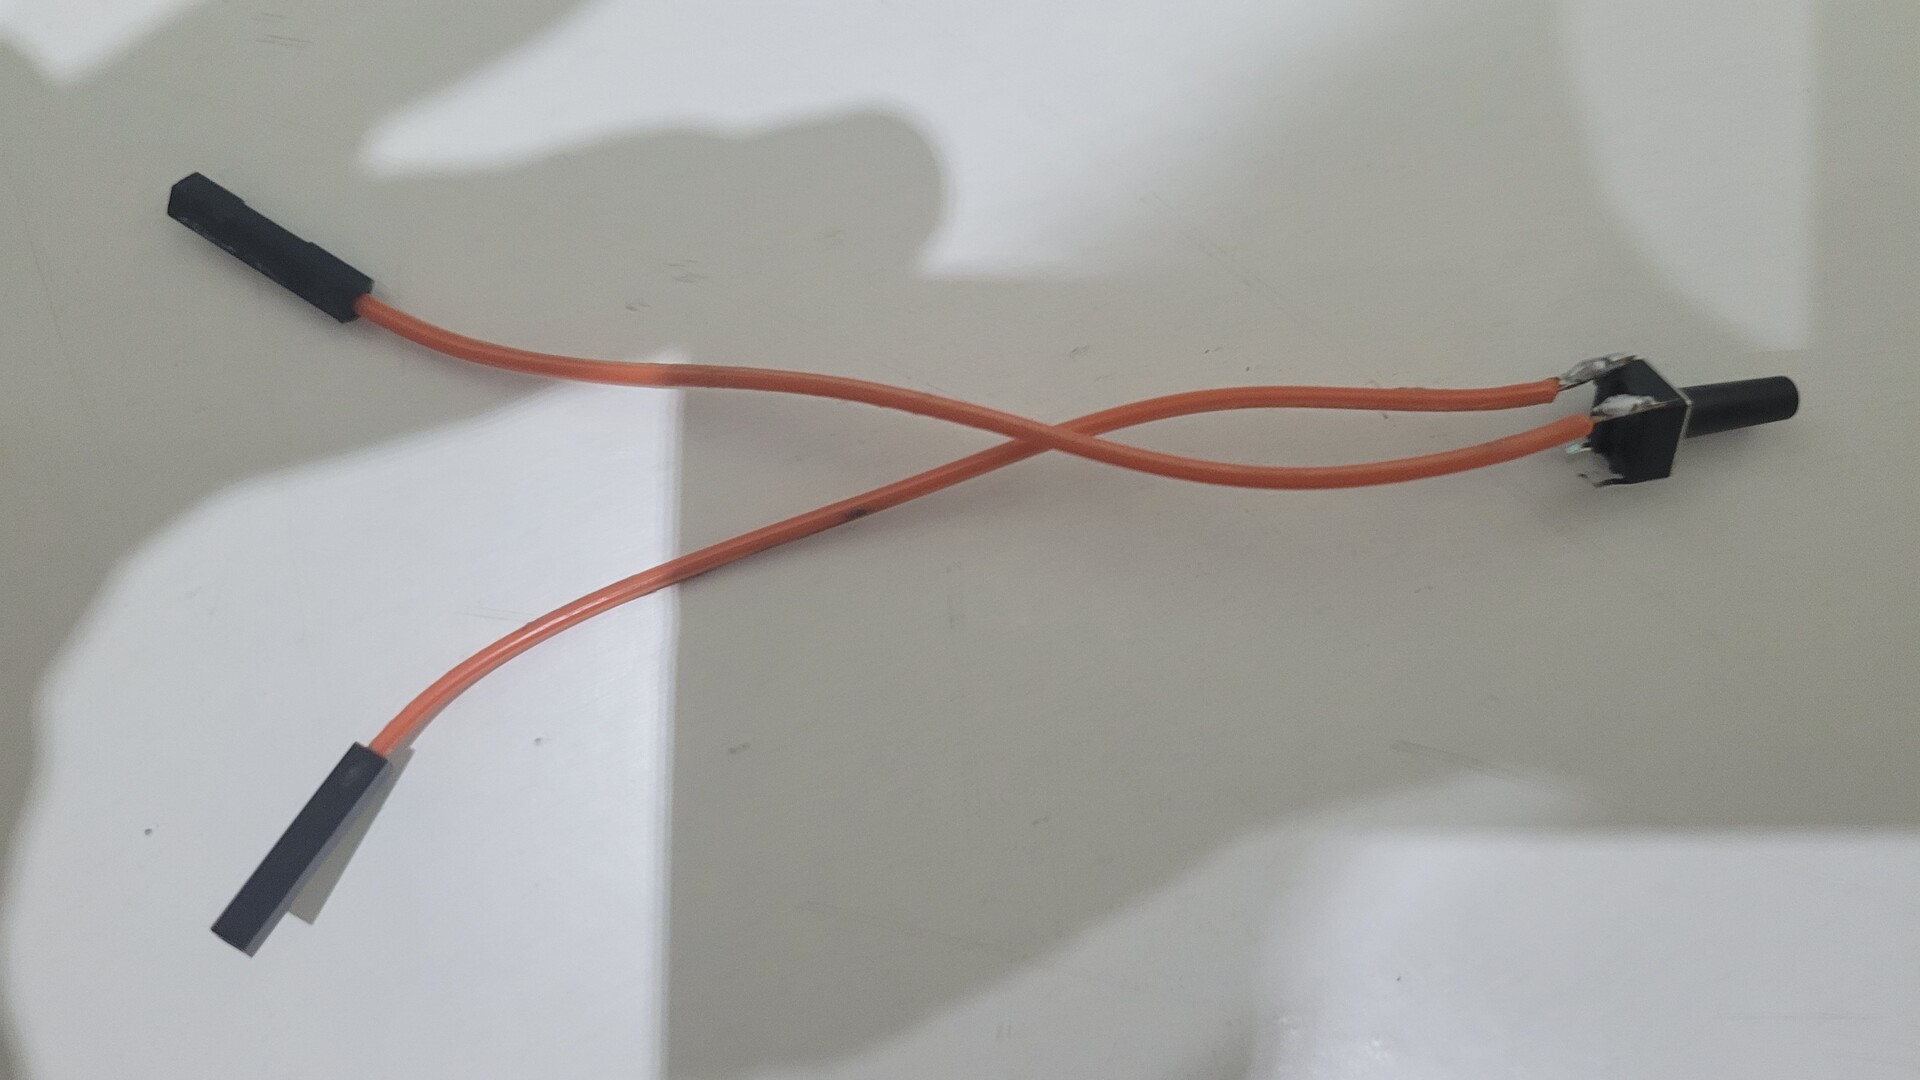
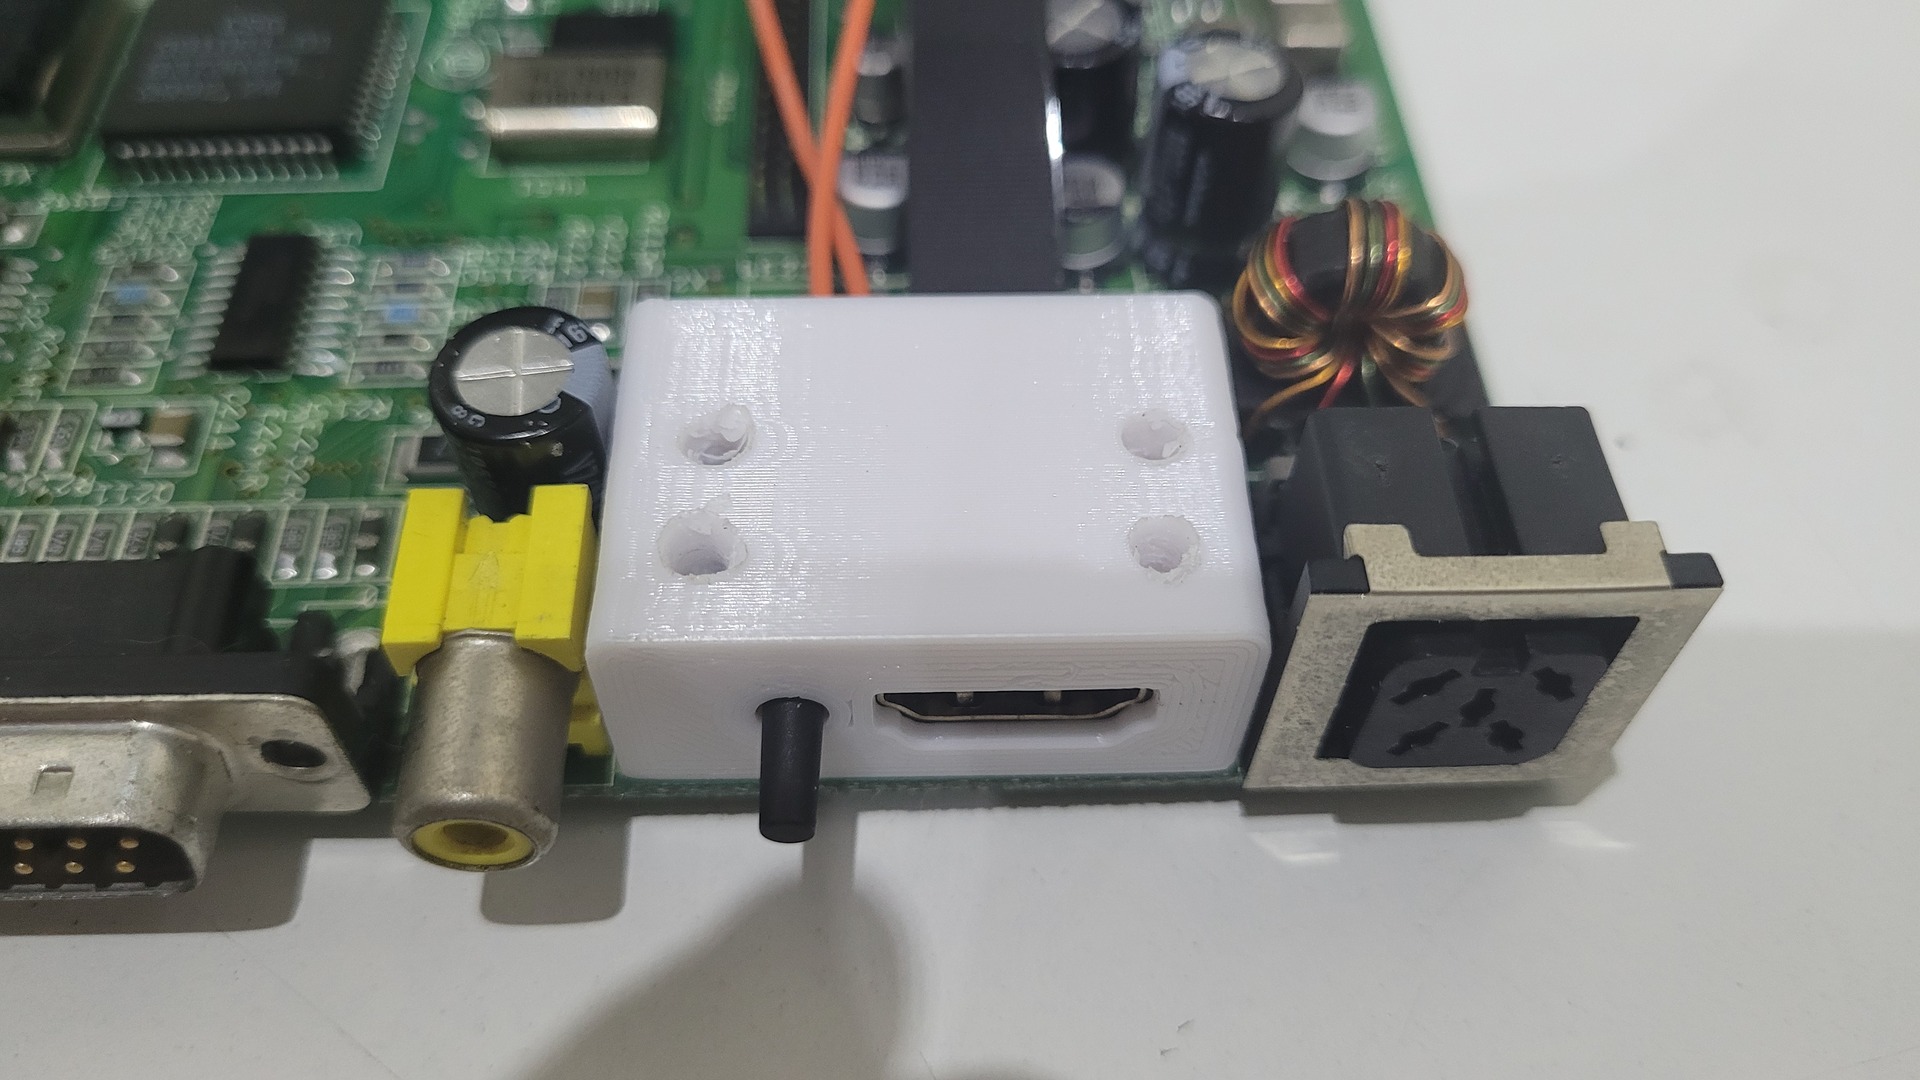
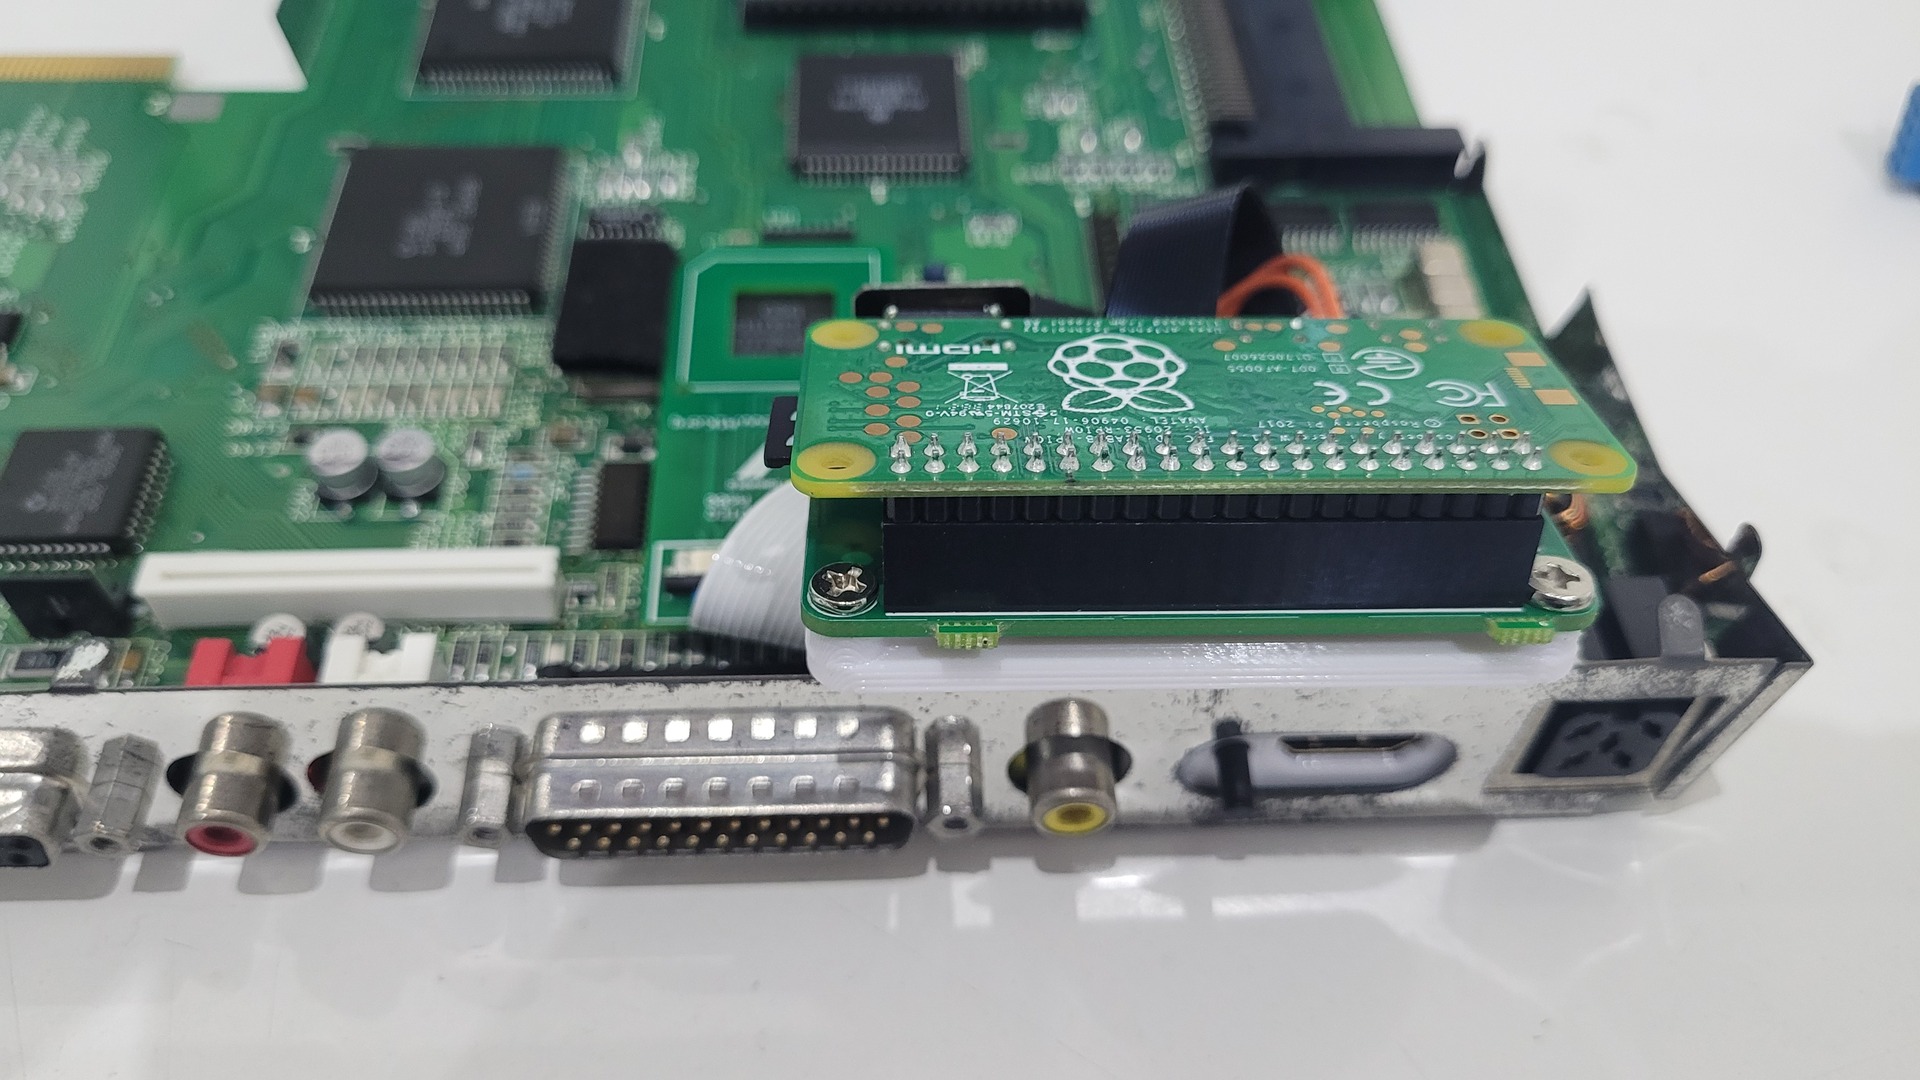
The second part of the kit connects to the Raspberry Pi which then output the Amiga video signal. The best way to integrate everything inside the Amiga 600 is to use a special 3D printed support and replace the RF modulator with the HDMI output. This requires some FPV connectors : one mini HDMI to plug onto the Raspberry Pi video output, and one female full sized HDMI connector to put on the rear of the Amiga.
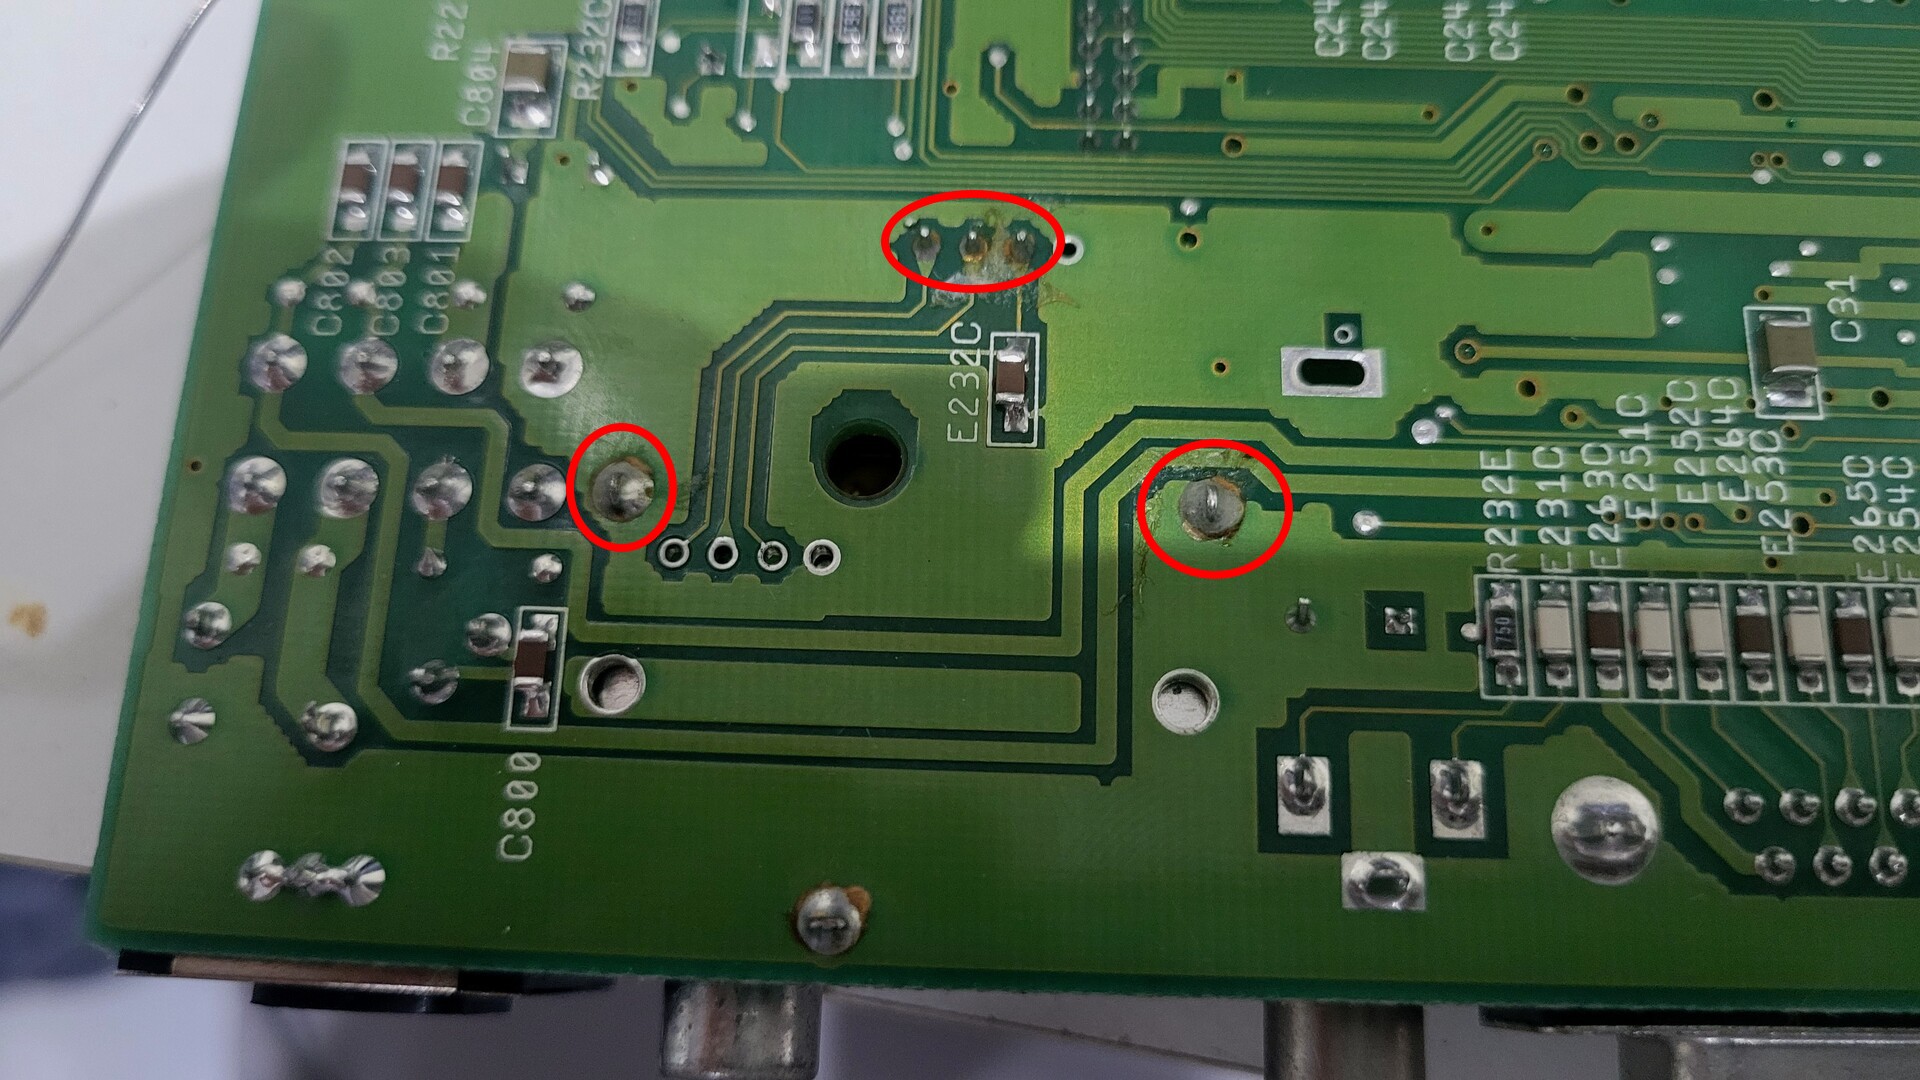
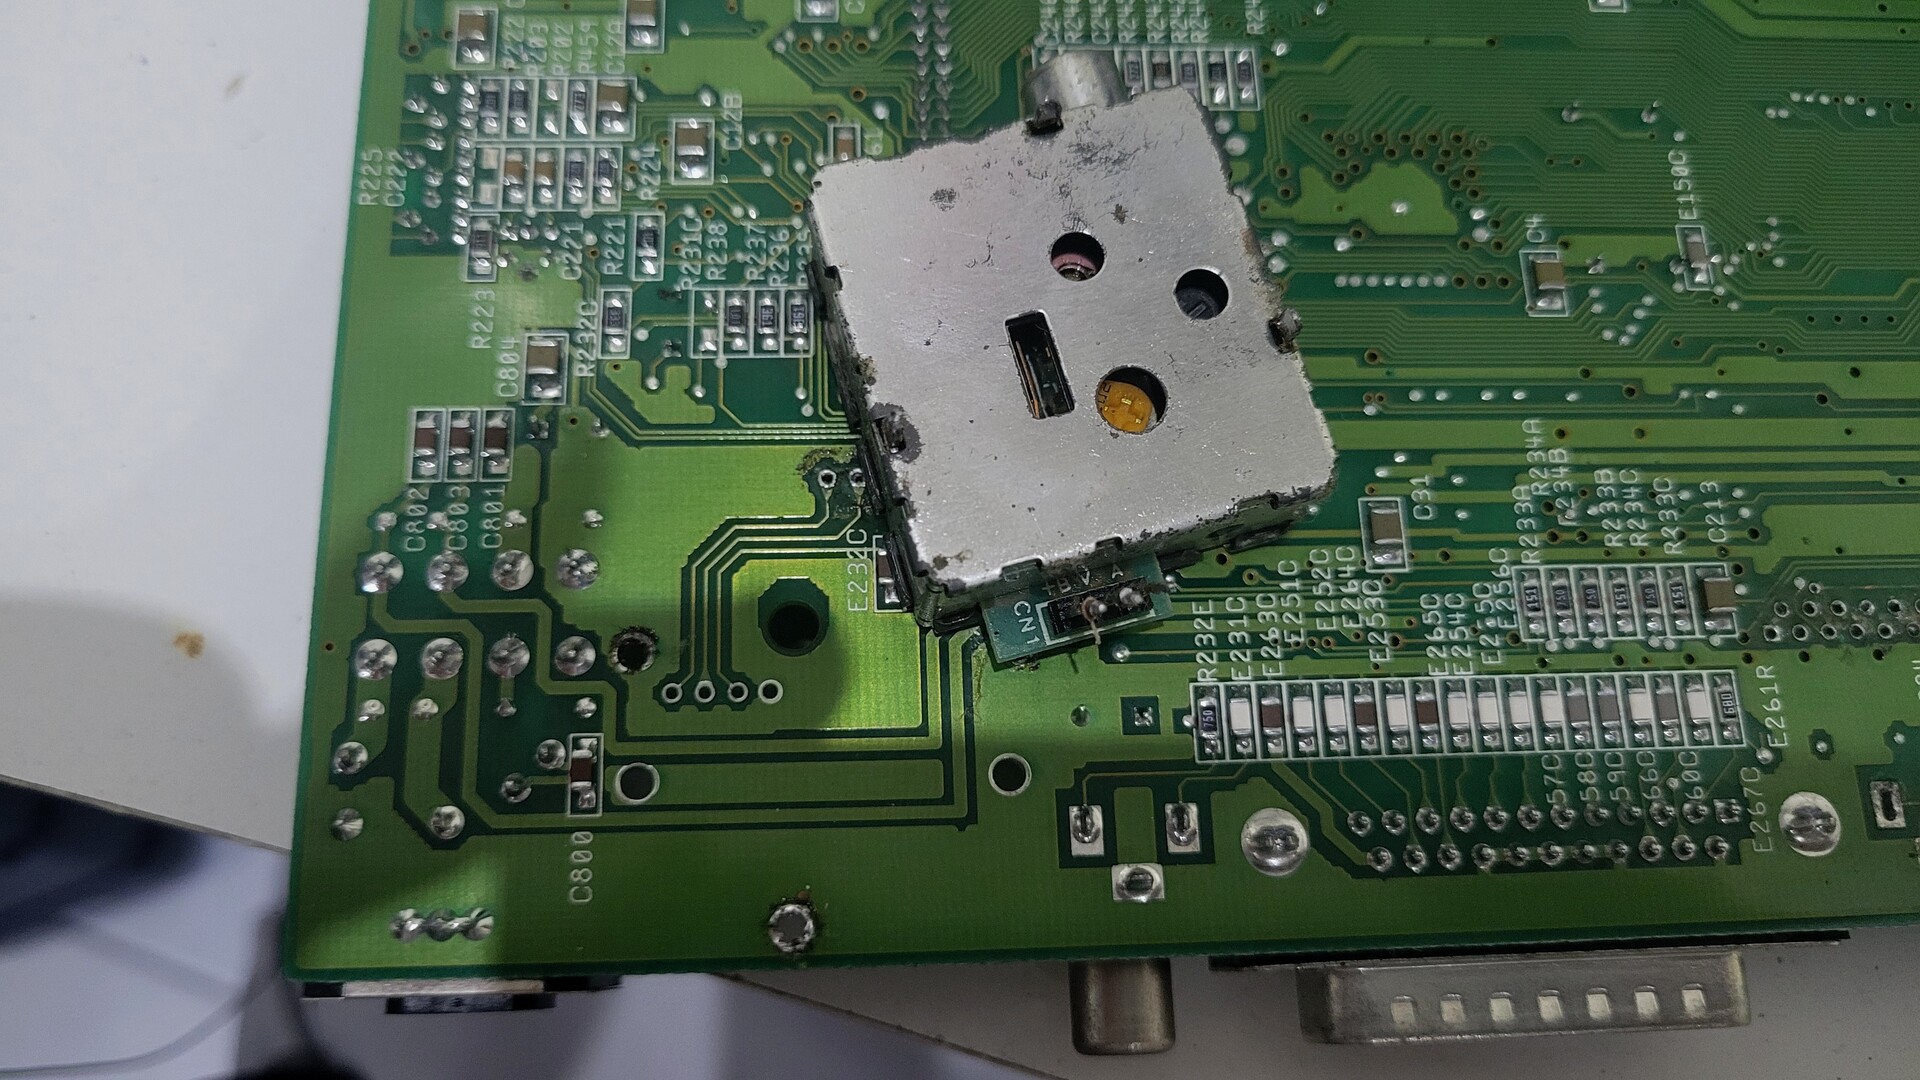
Removing the RF modulator is pretty easy and only requires to desolder 3 connectors with a solder sucker:
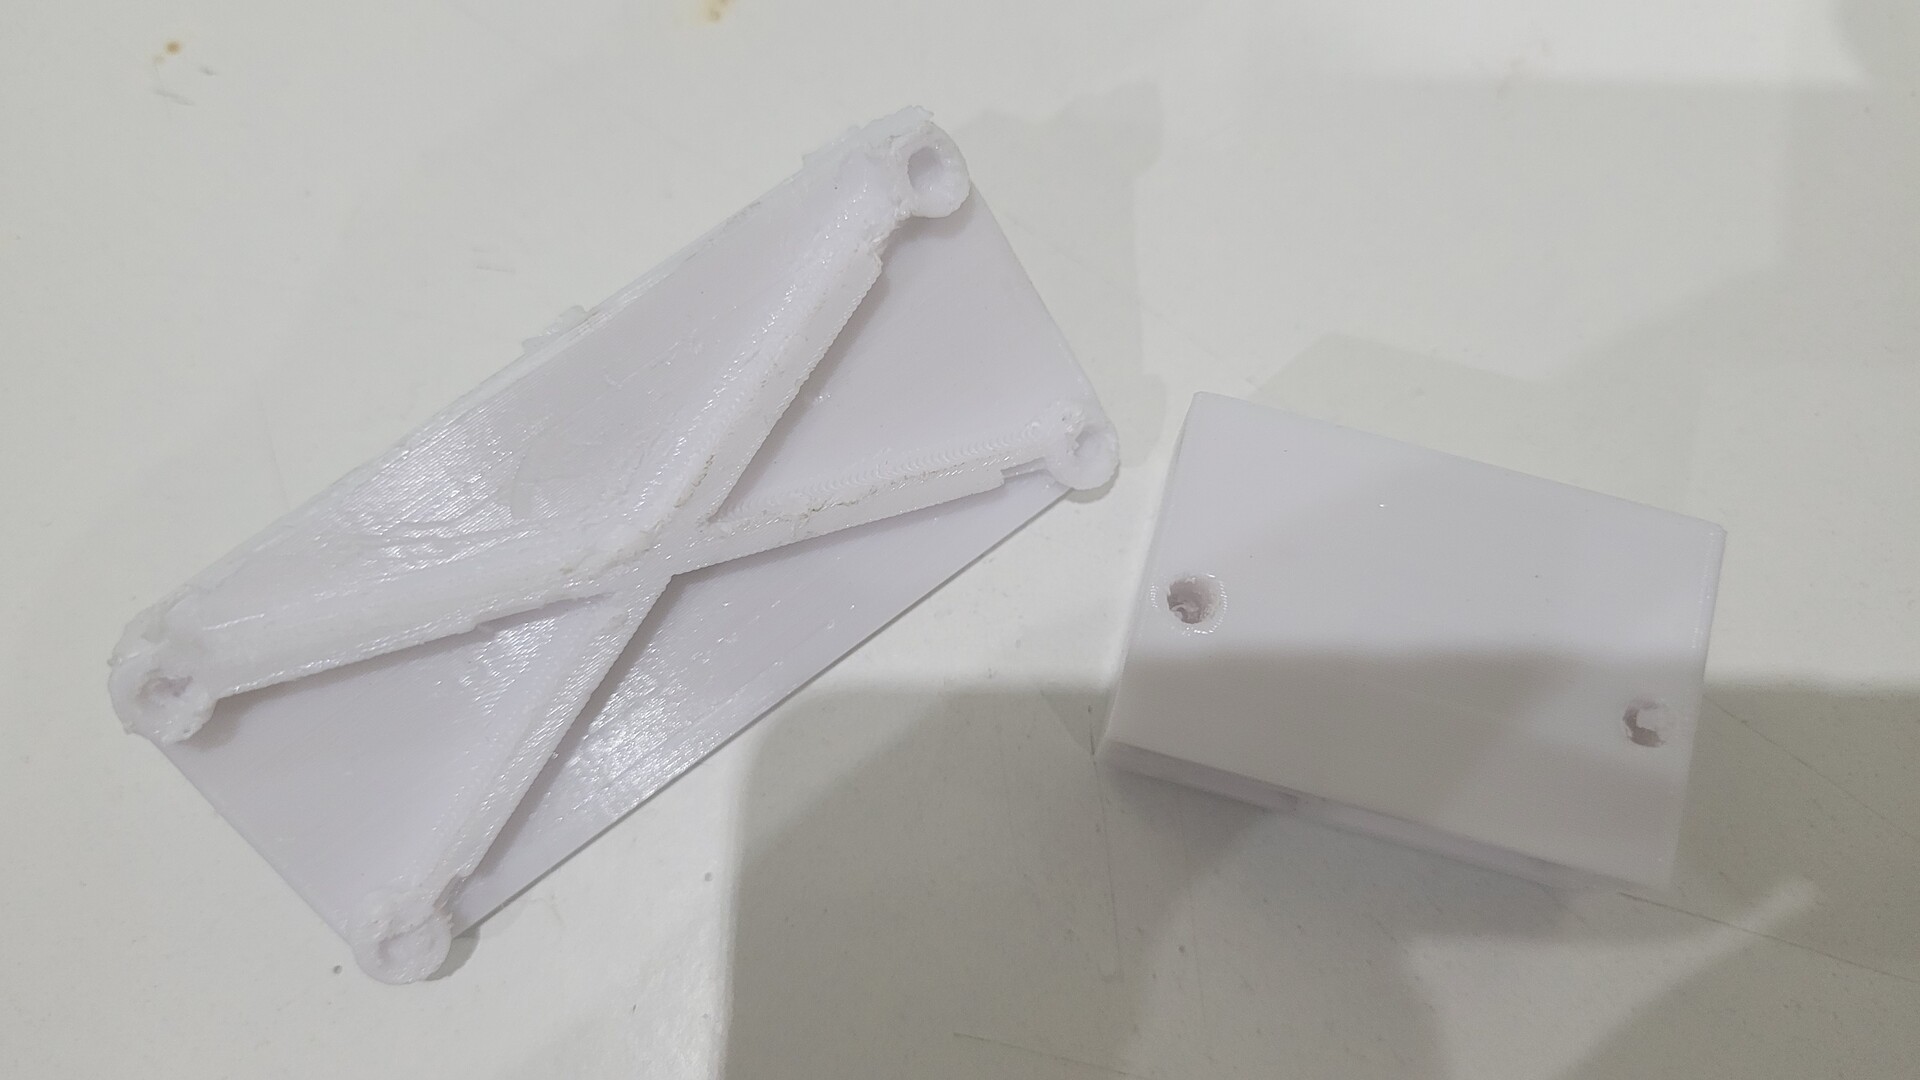
I printed the support in PLA with my Anycubic I3 Mega. On the left, printed parts as is, on the right the same parts with all supports removed. The kit consists in a base part that can be fixed in the place of the original RF module, and an upper part which is mounted on top of the base to support the Raspberry Pi and the second RGBtoHDMI board.

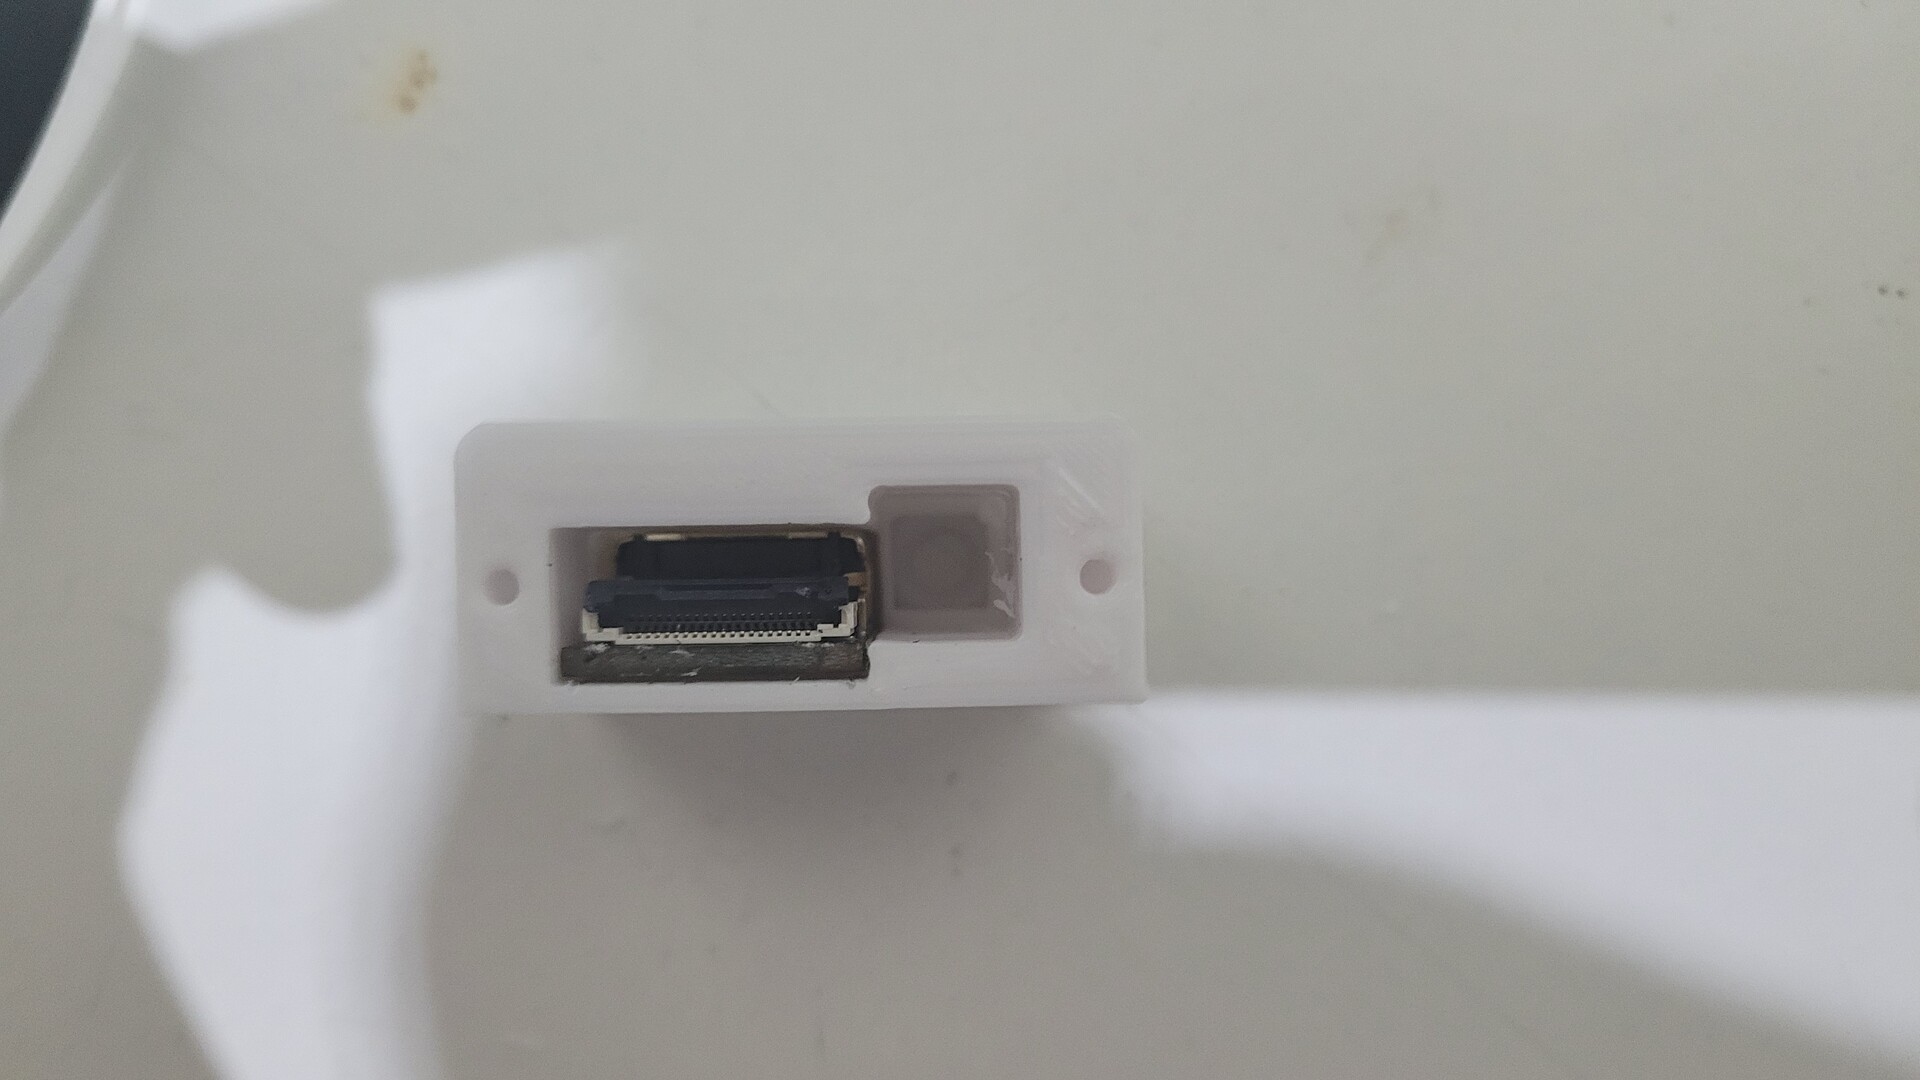
The base part can host the HDMI connector as well as a 6x6x13mm momentary switch for the onscreen menu:
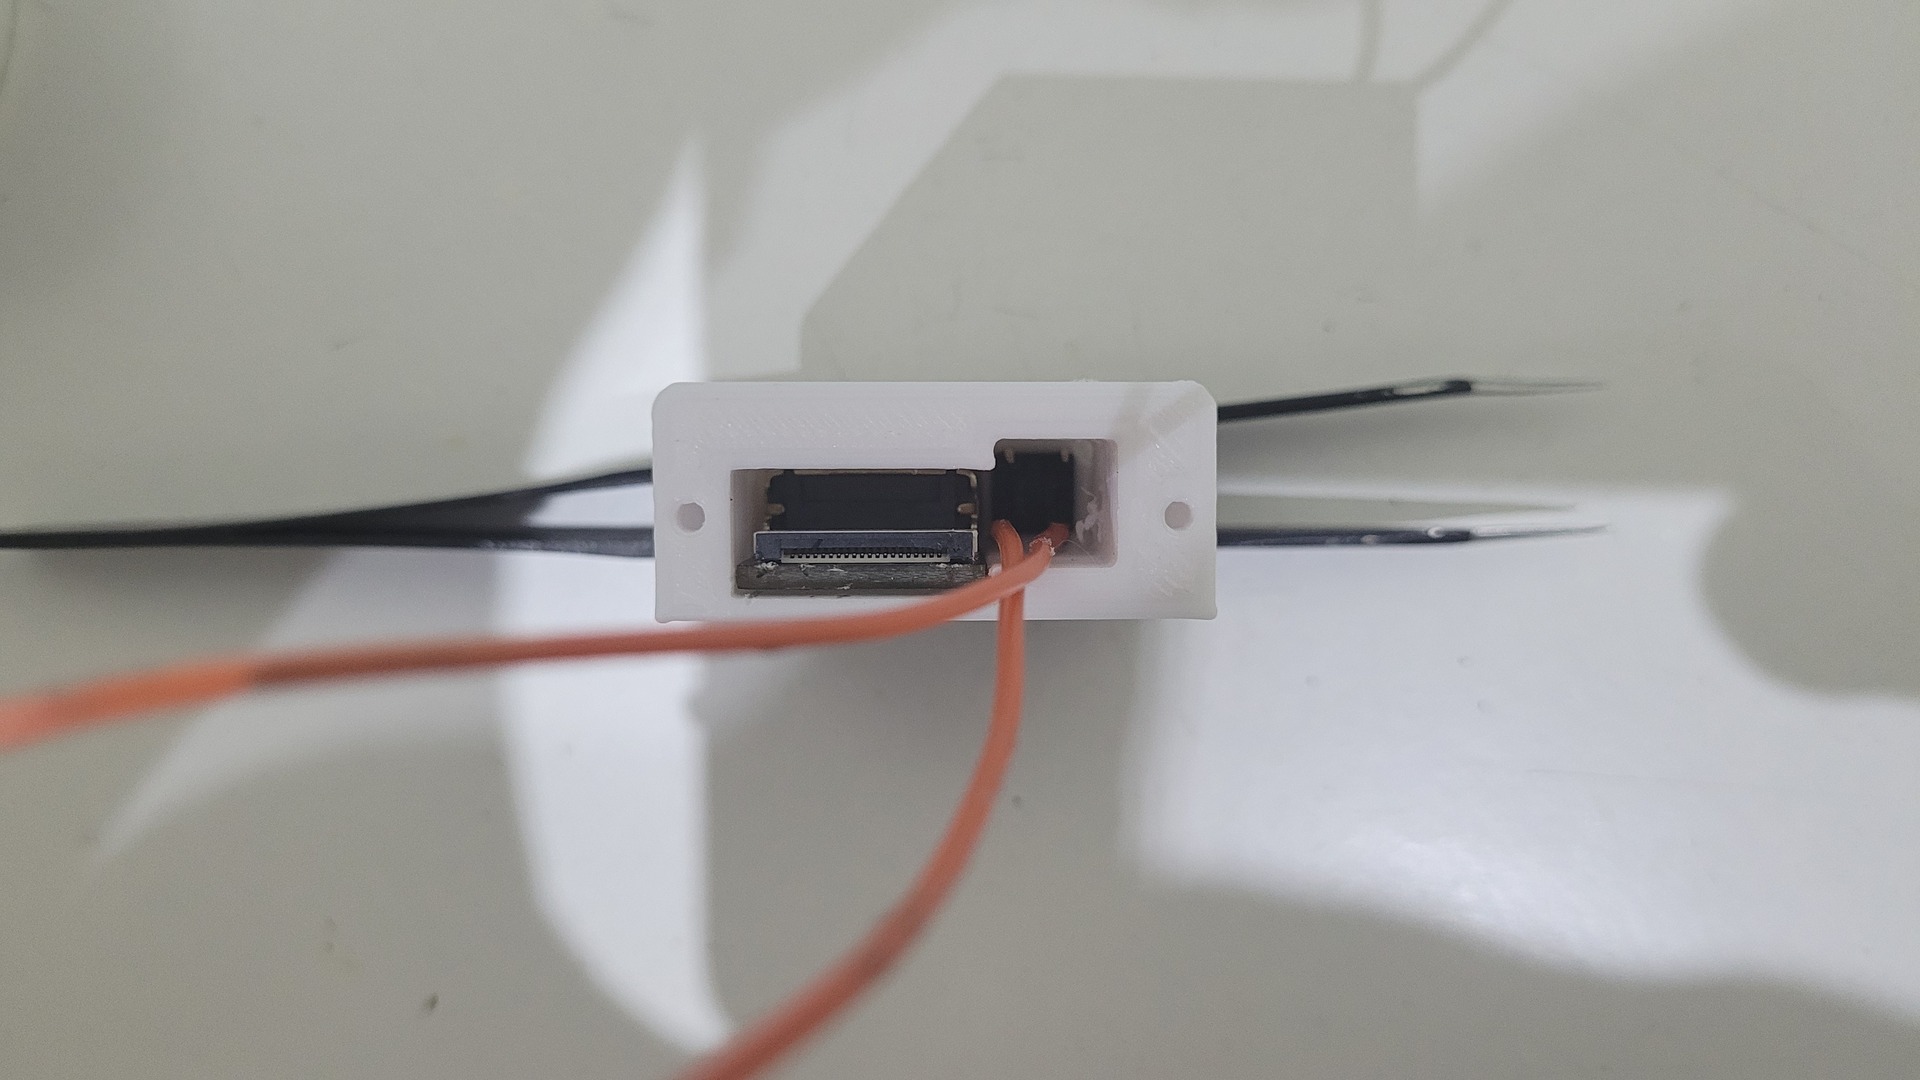
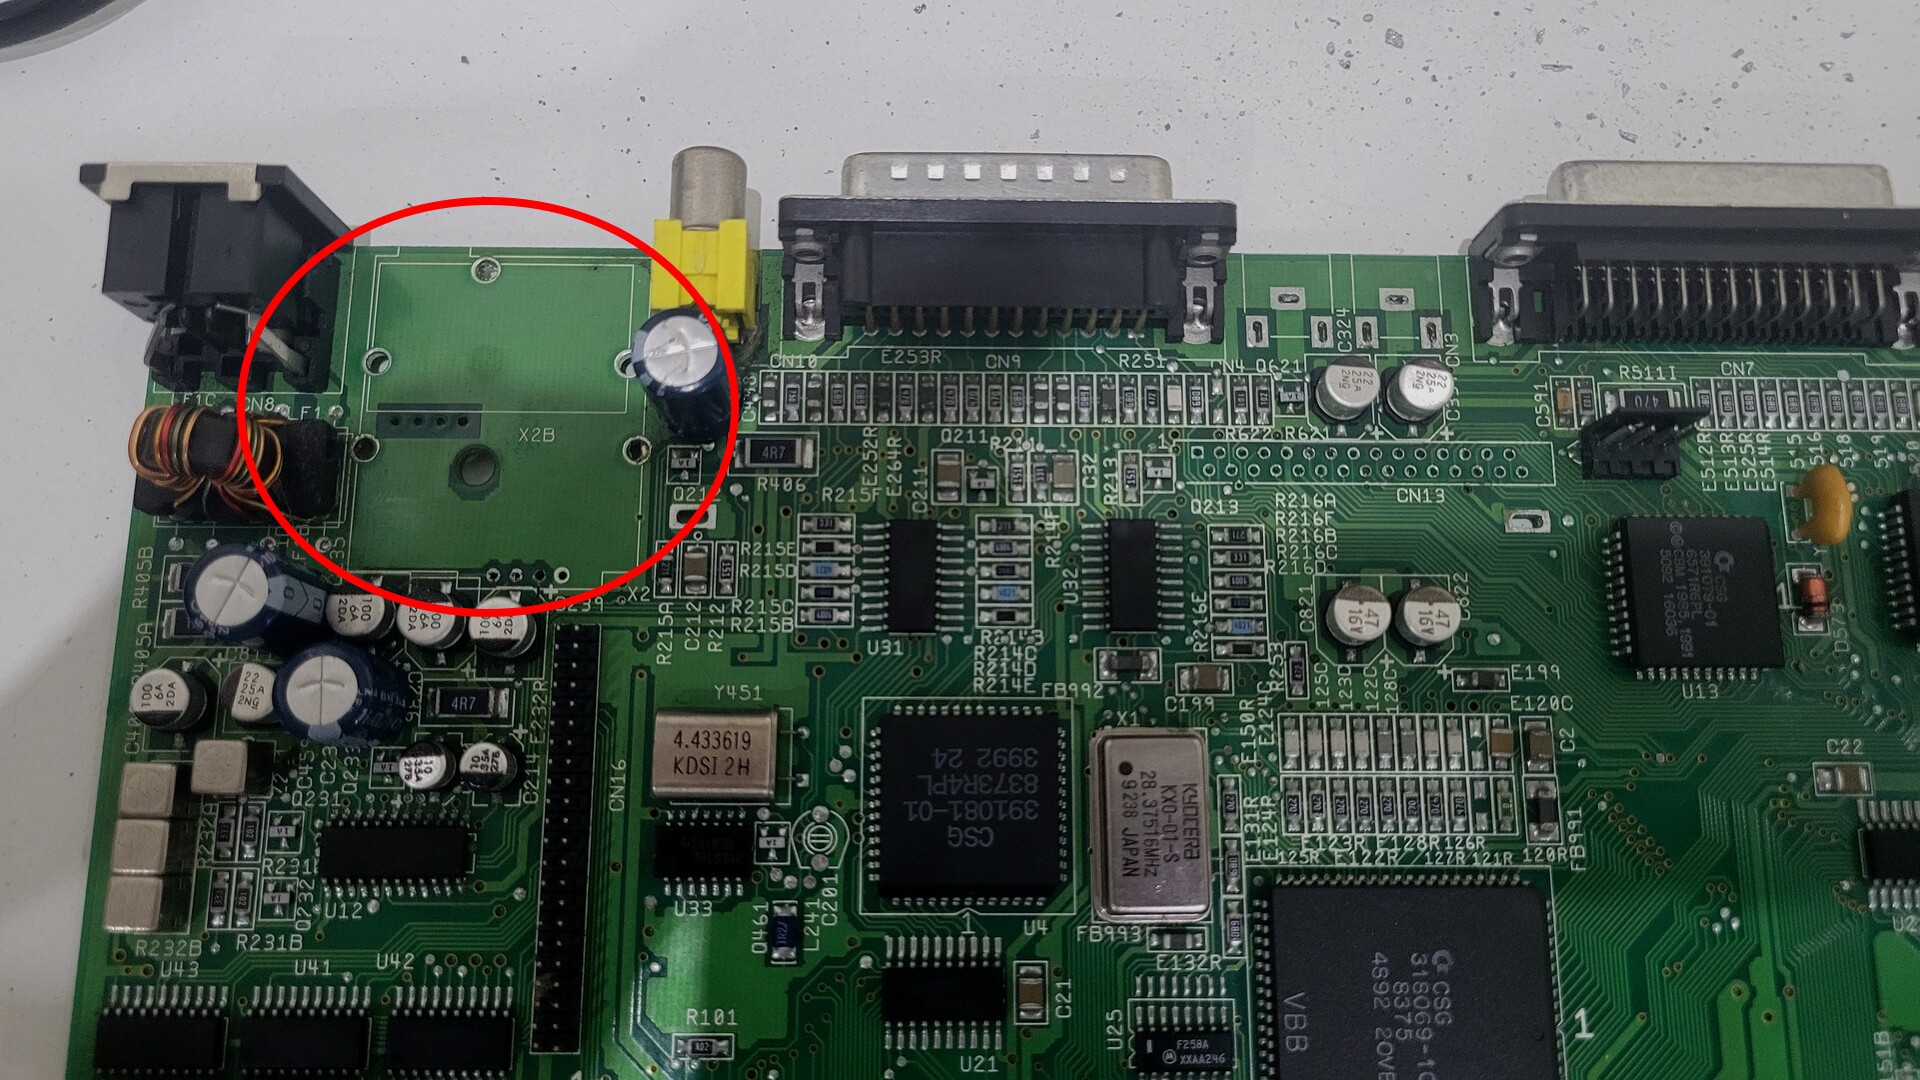
As said earlier, this module is intented to be fixed where the RF module was :

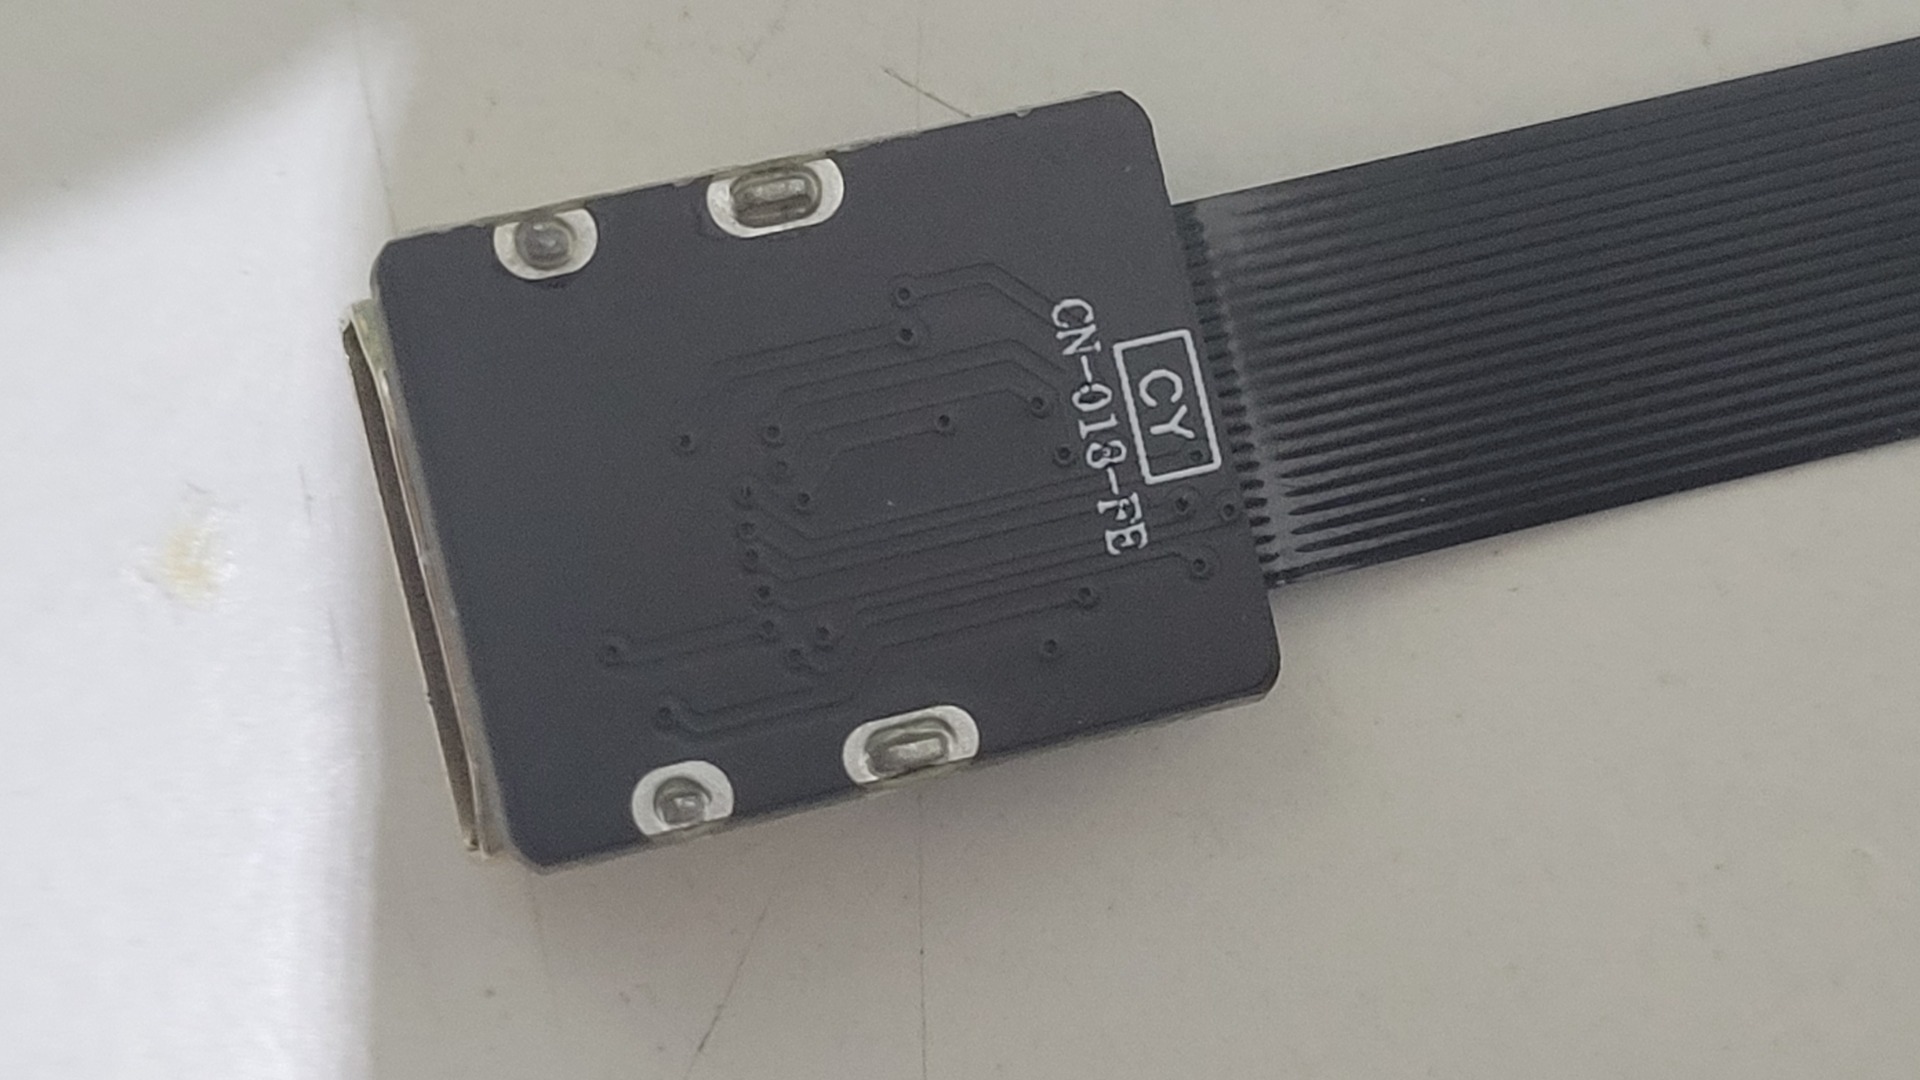
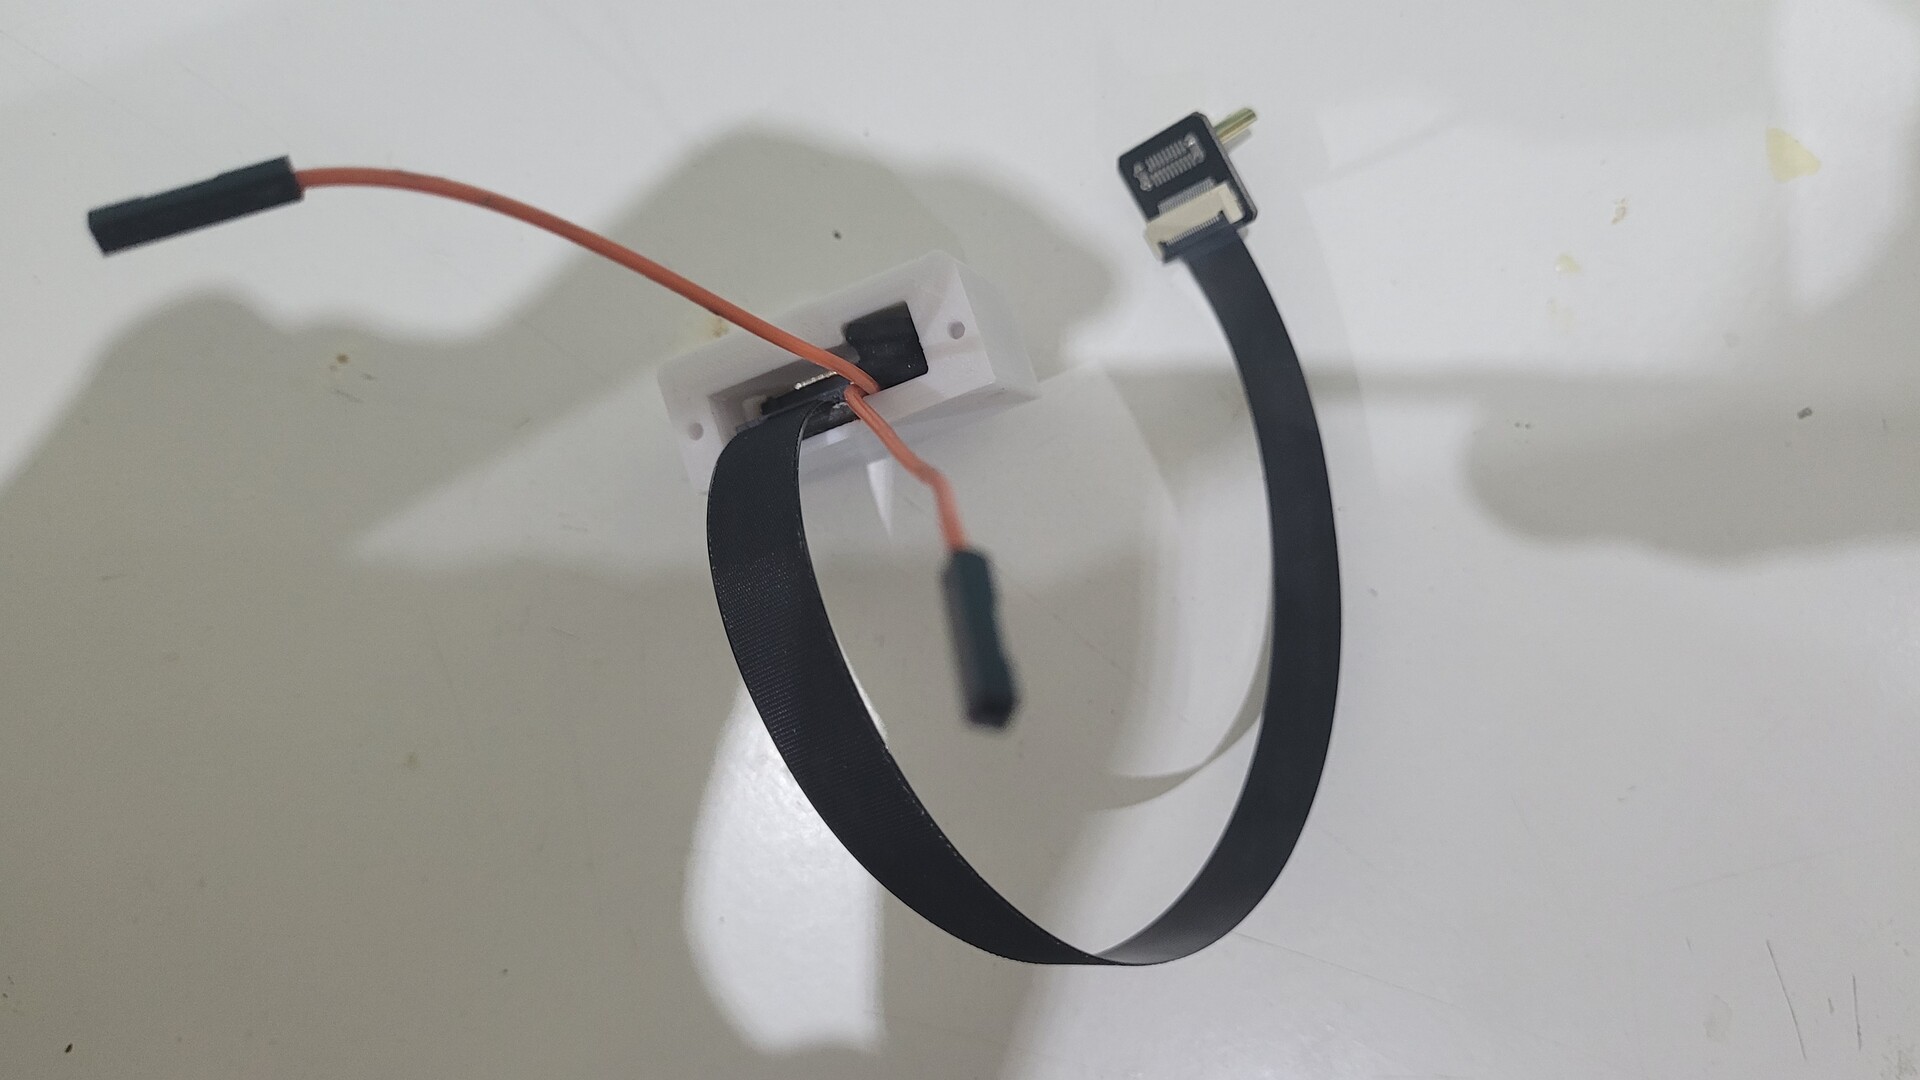
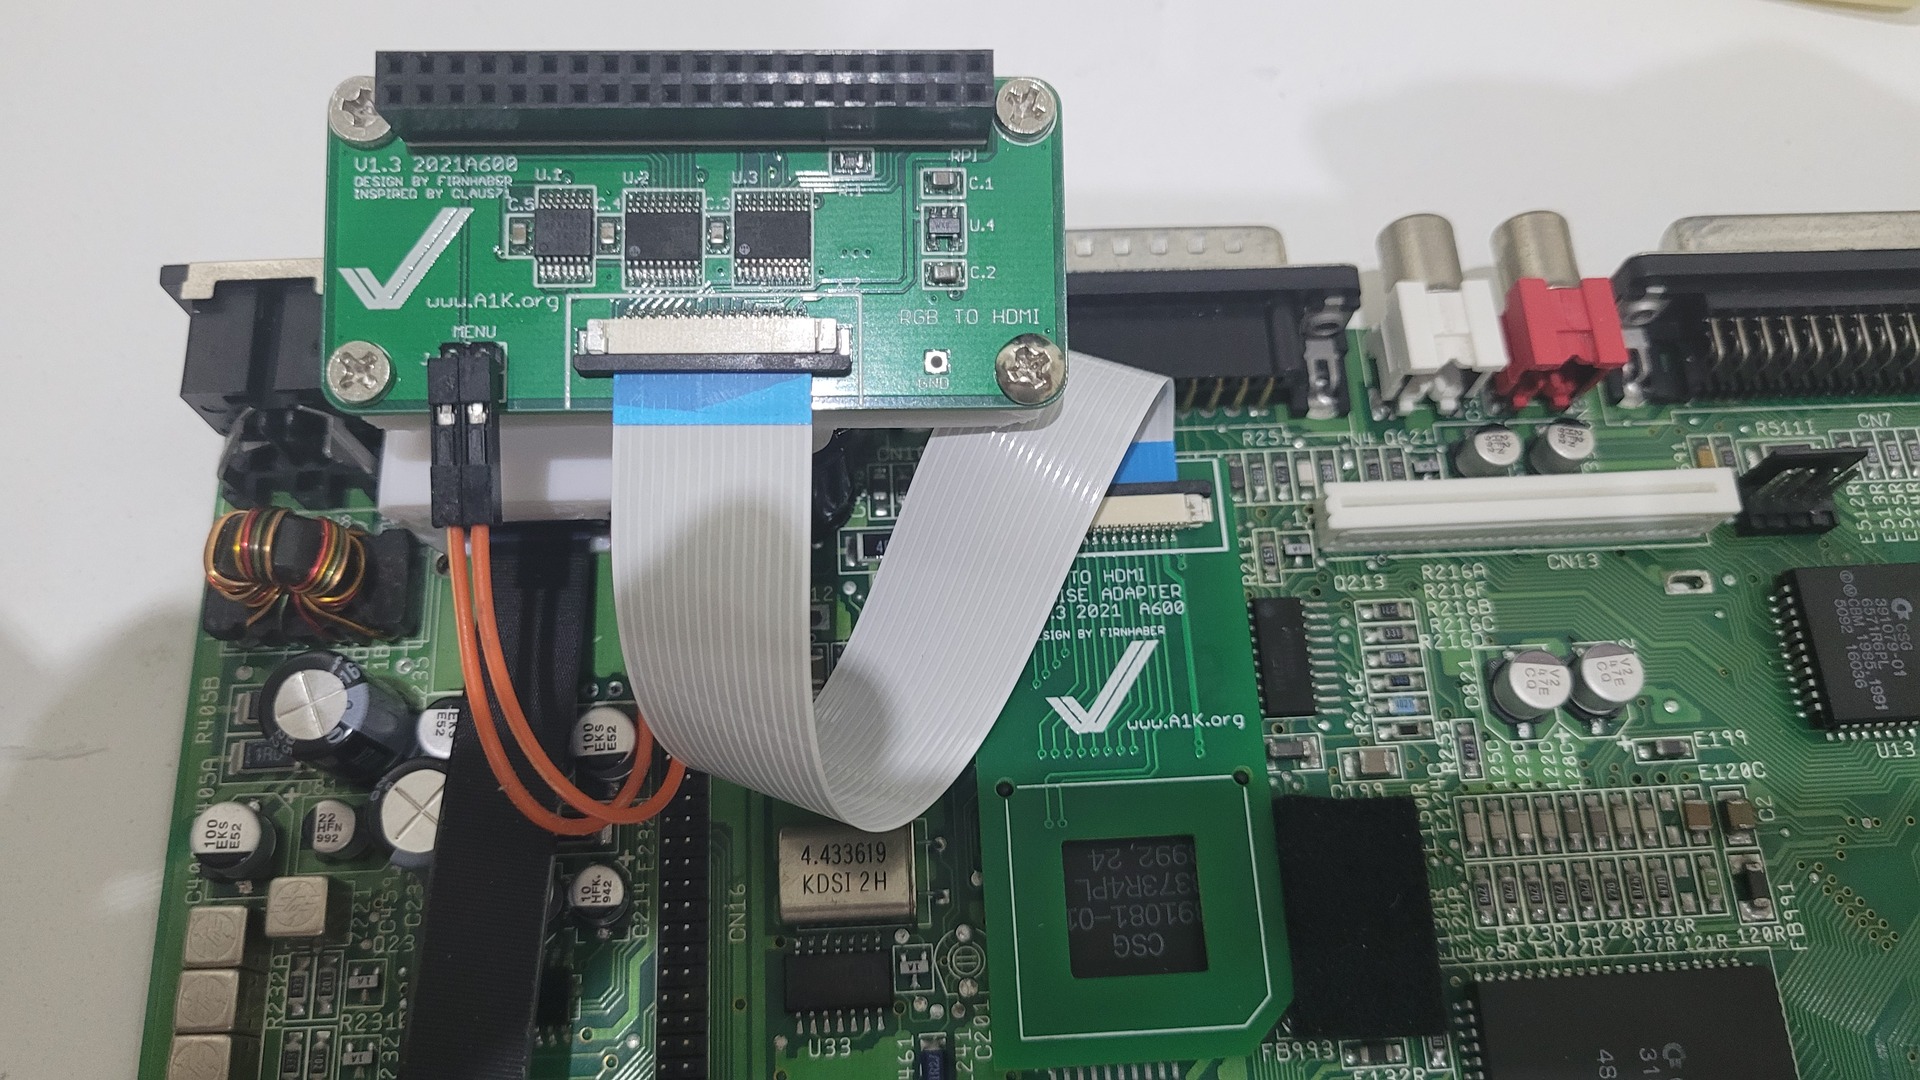
Final steps : fix the second RGBtoHDMI board on the 3D printed upper support, plug the Raspberry Pi on it as well as the HDMI cable FPV cable
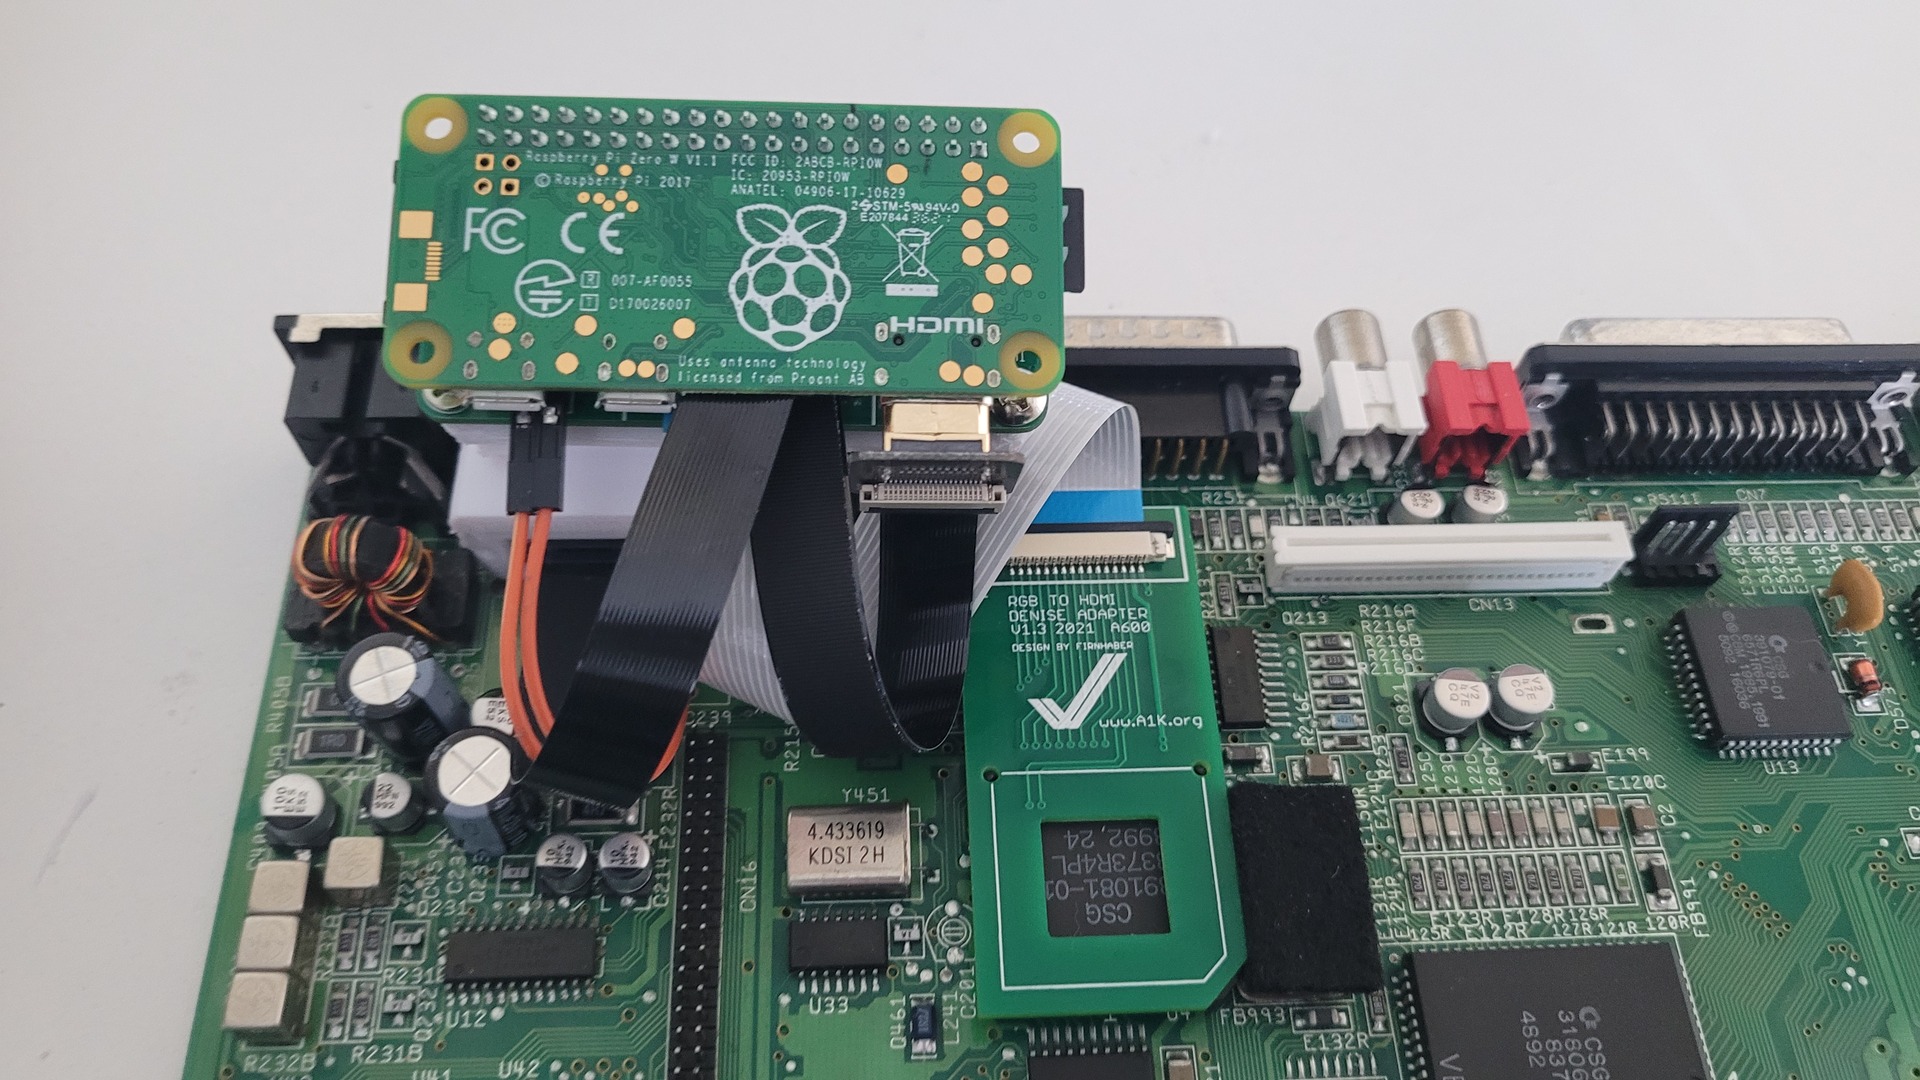
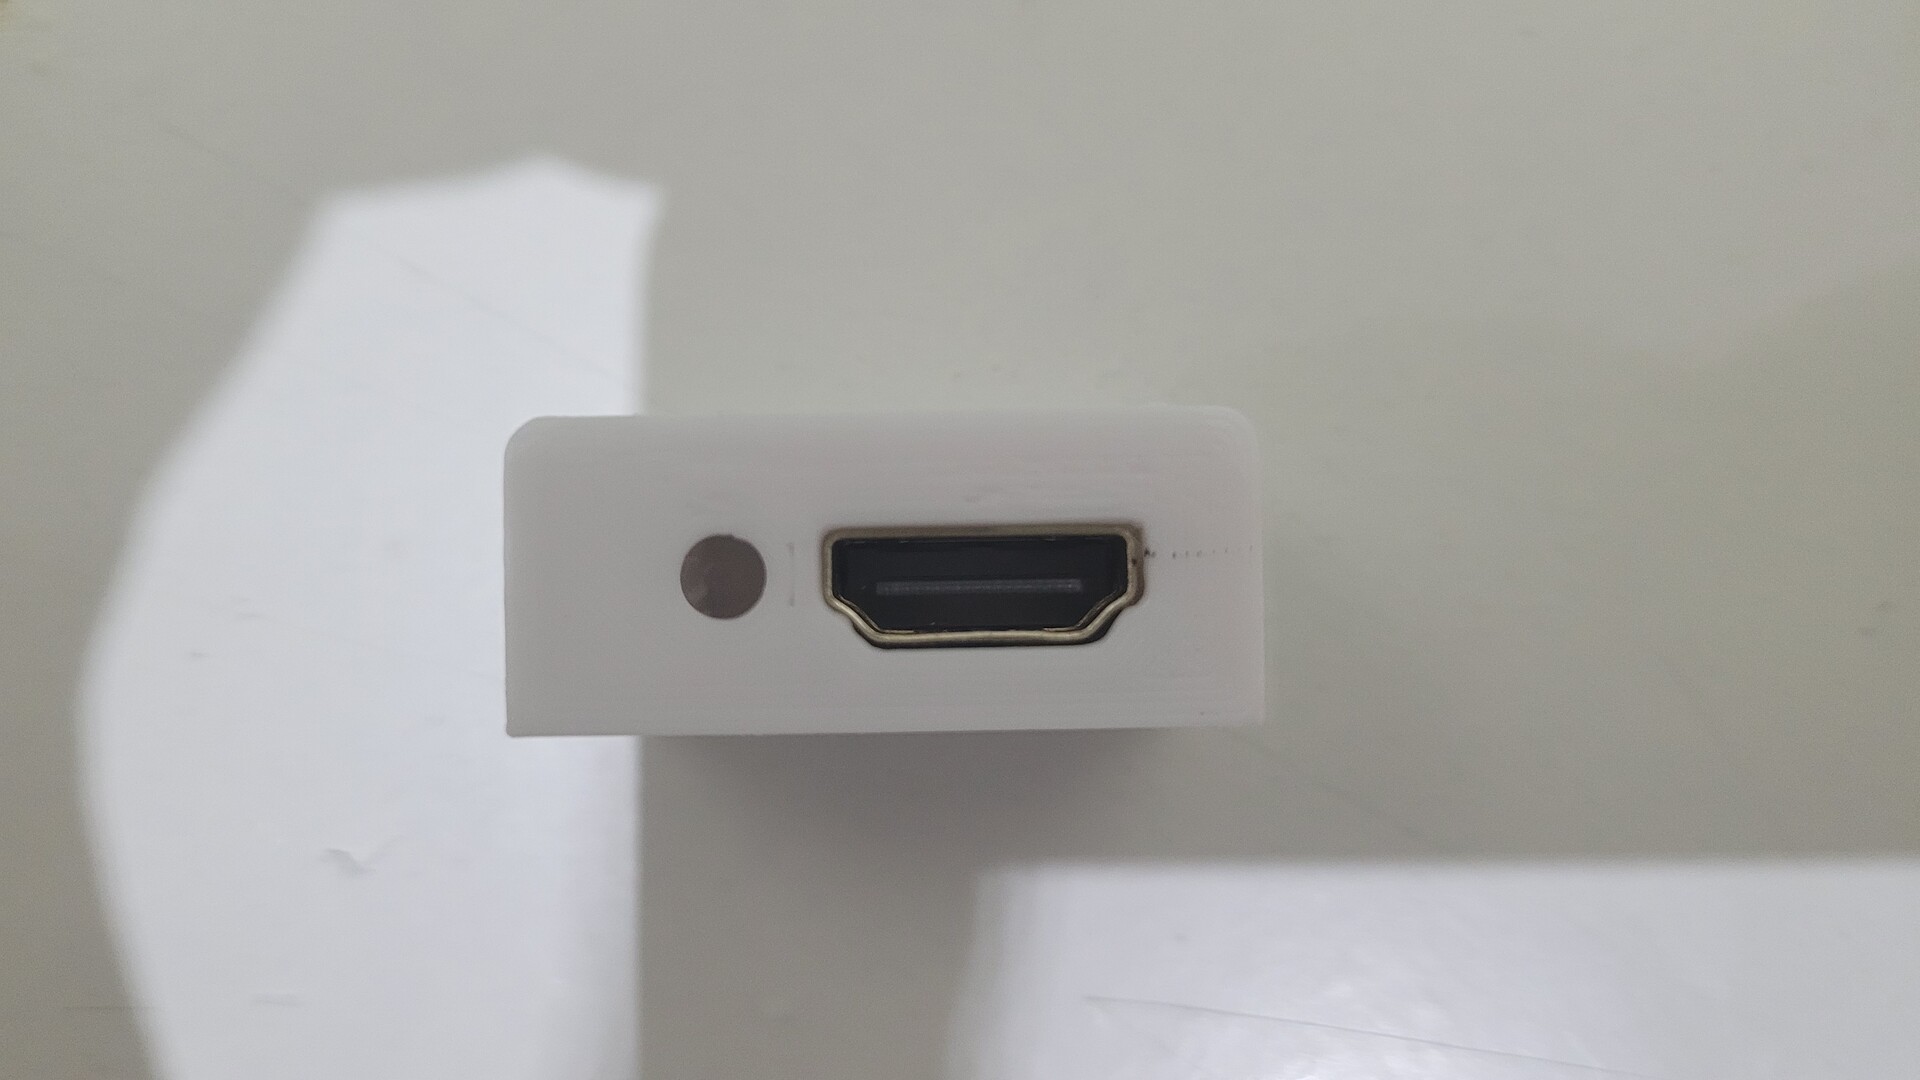
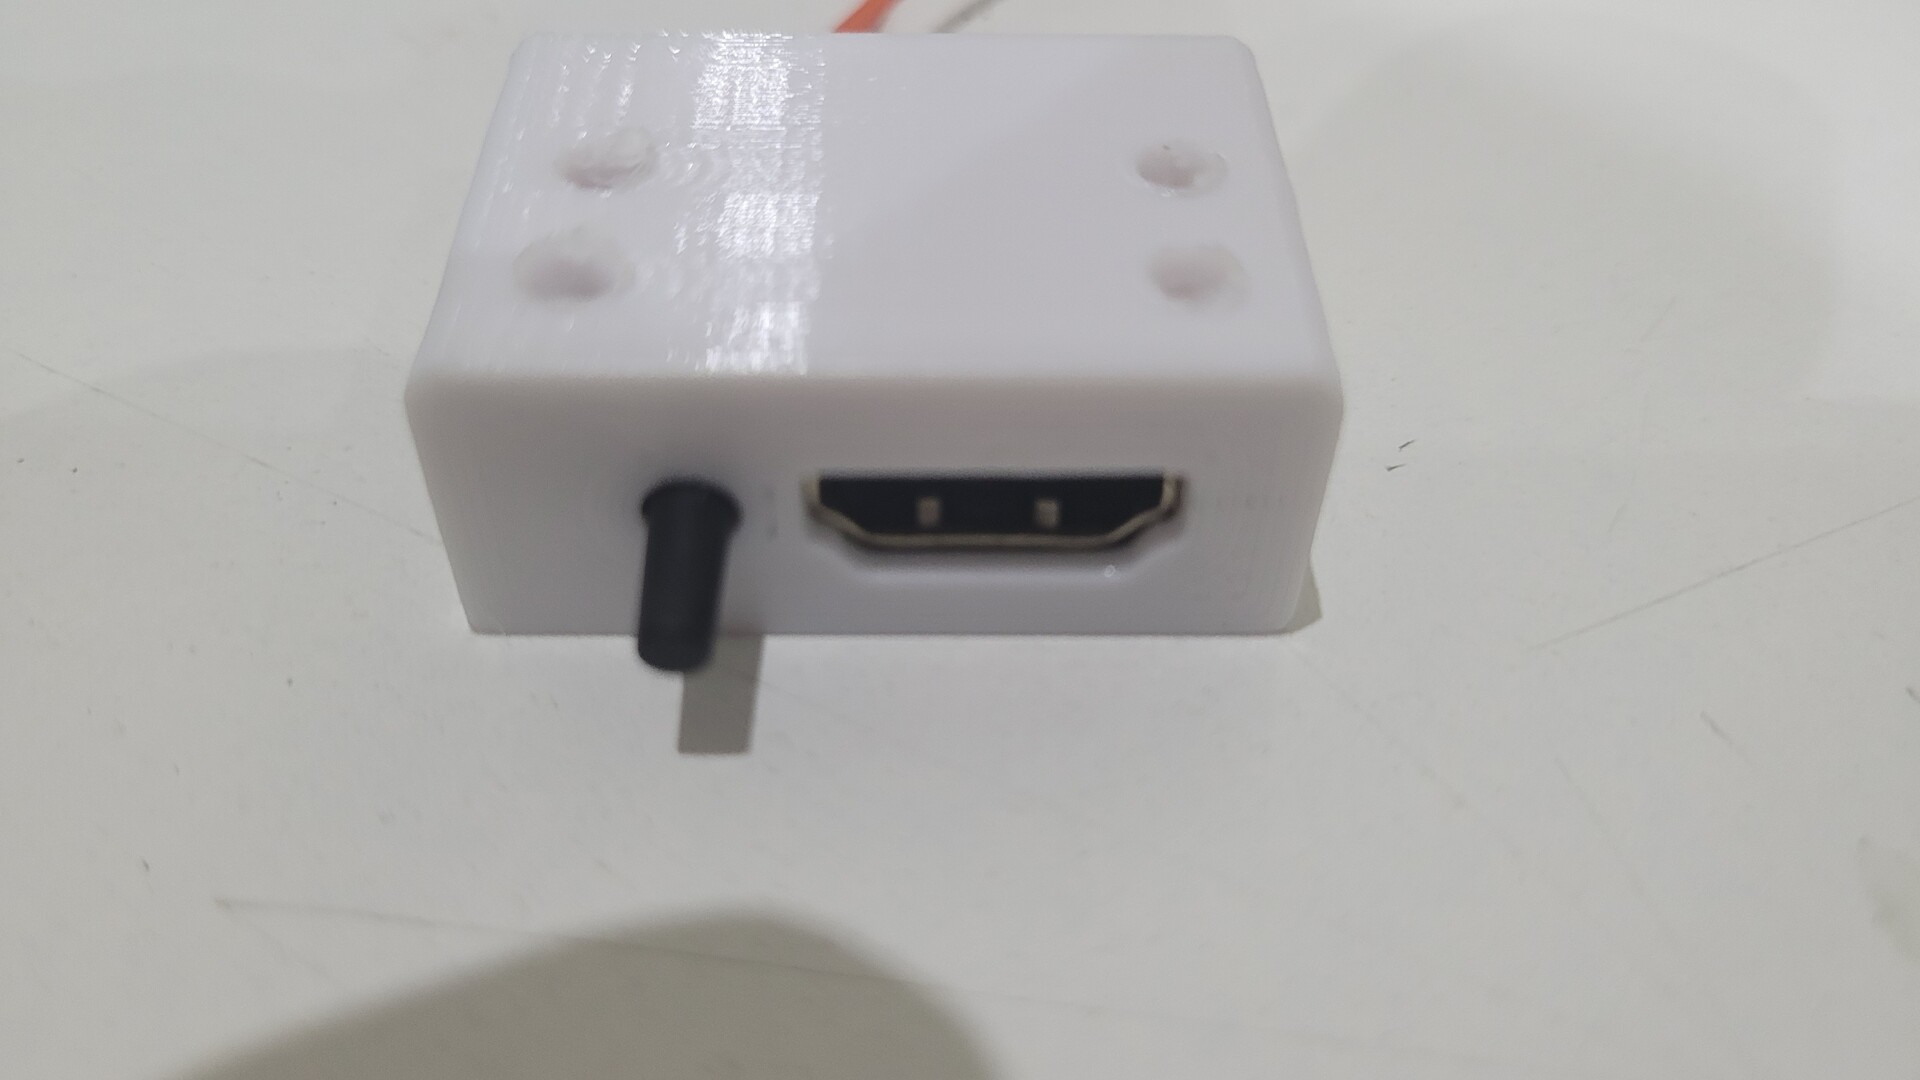
Overview of the new HDMI output :
Retrobright
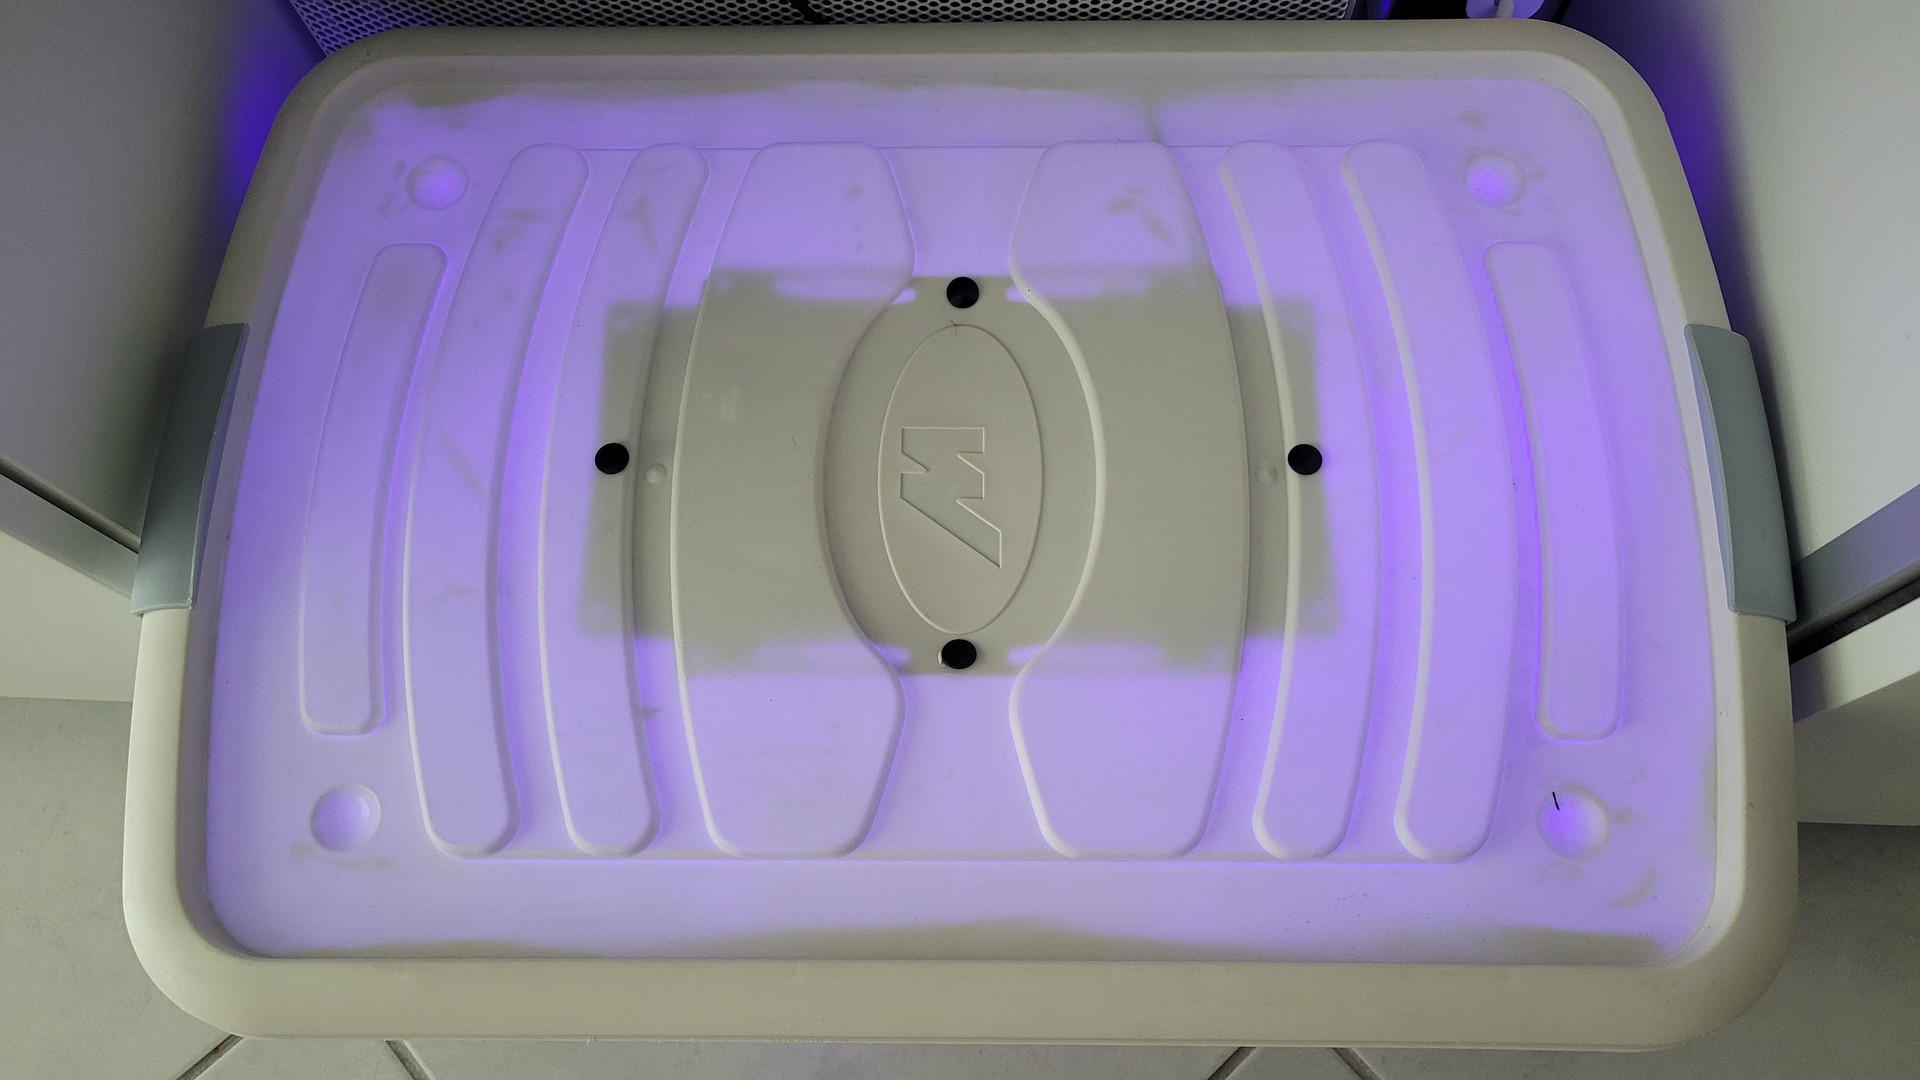
As said in the introduction, the case and the keyboard had a very yellowish aspect, far from the original “cream white”. With the common tips called “retrobright”, this kind of coloration is not really a problem. I used some creamy hydrogen peroxide that is used for hair decoloration. The advantage of this cream is that it is easy to apply and stick well to the plastic during UV exposition. Also, to accelerate the process, I used my own retrobright box which consists in a big plastic box full of aluminium paper and an UV leds lamp fixed on the top cover. The aluminium paper being reflective, the UV rays are very well speaded inside.
Bascicaly, I removed all the keys from the keyboard, applied the peroxyde cream and put all parts into my retrobright case for about 8 – 9 hours:
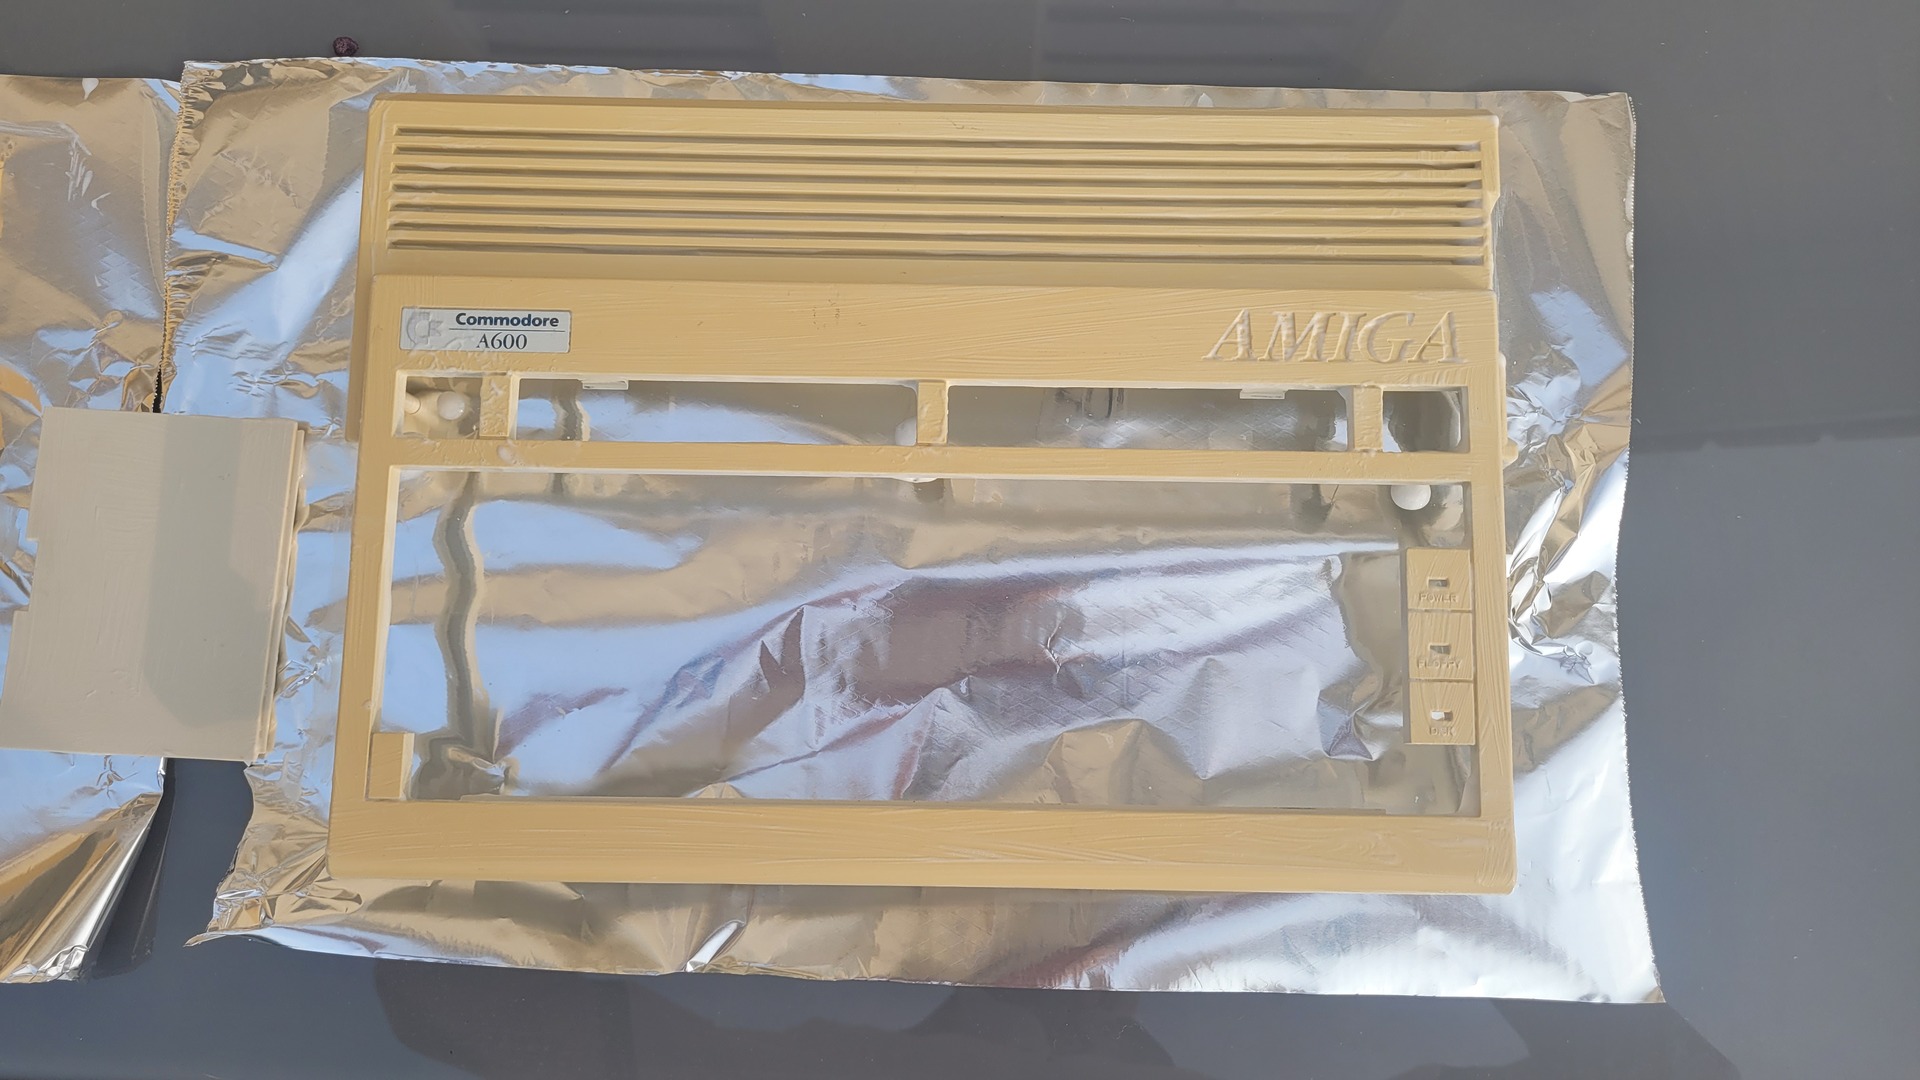

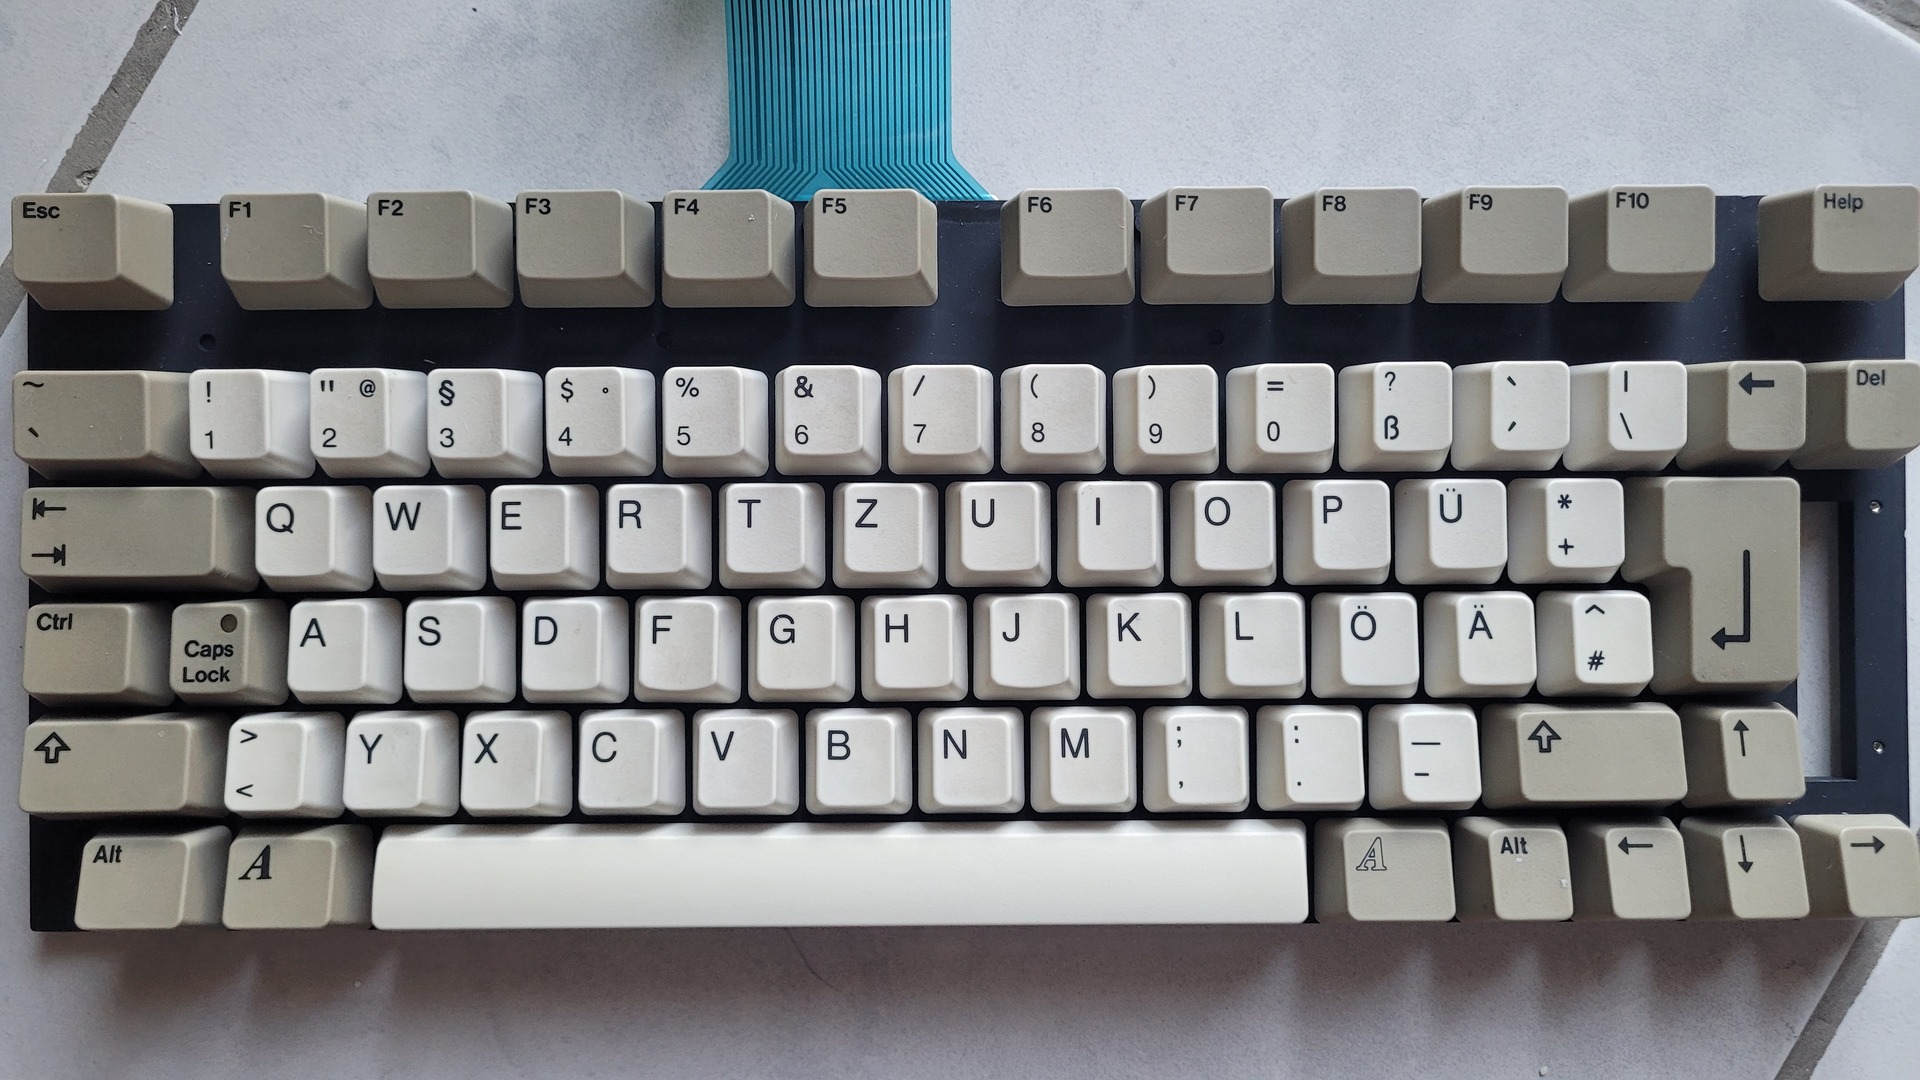
Below are some photos before and after the retrobright process :
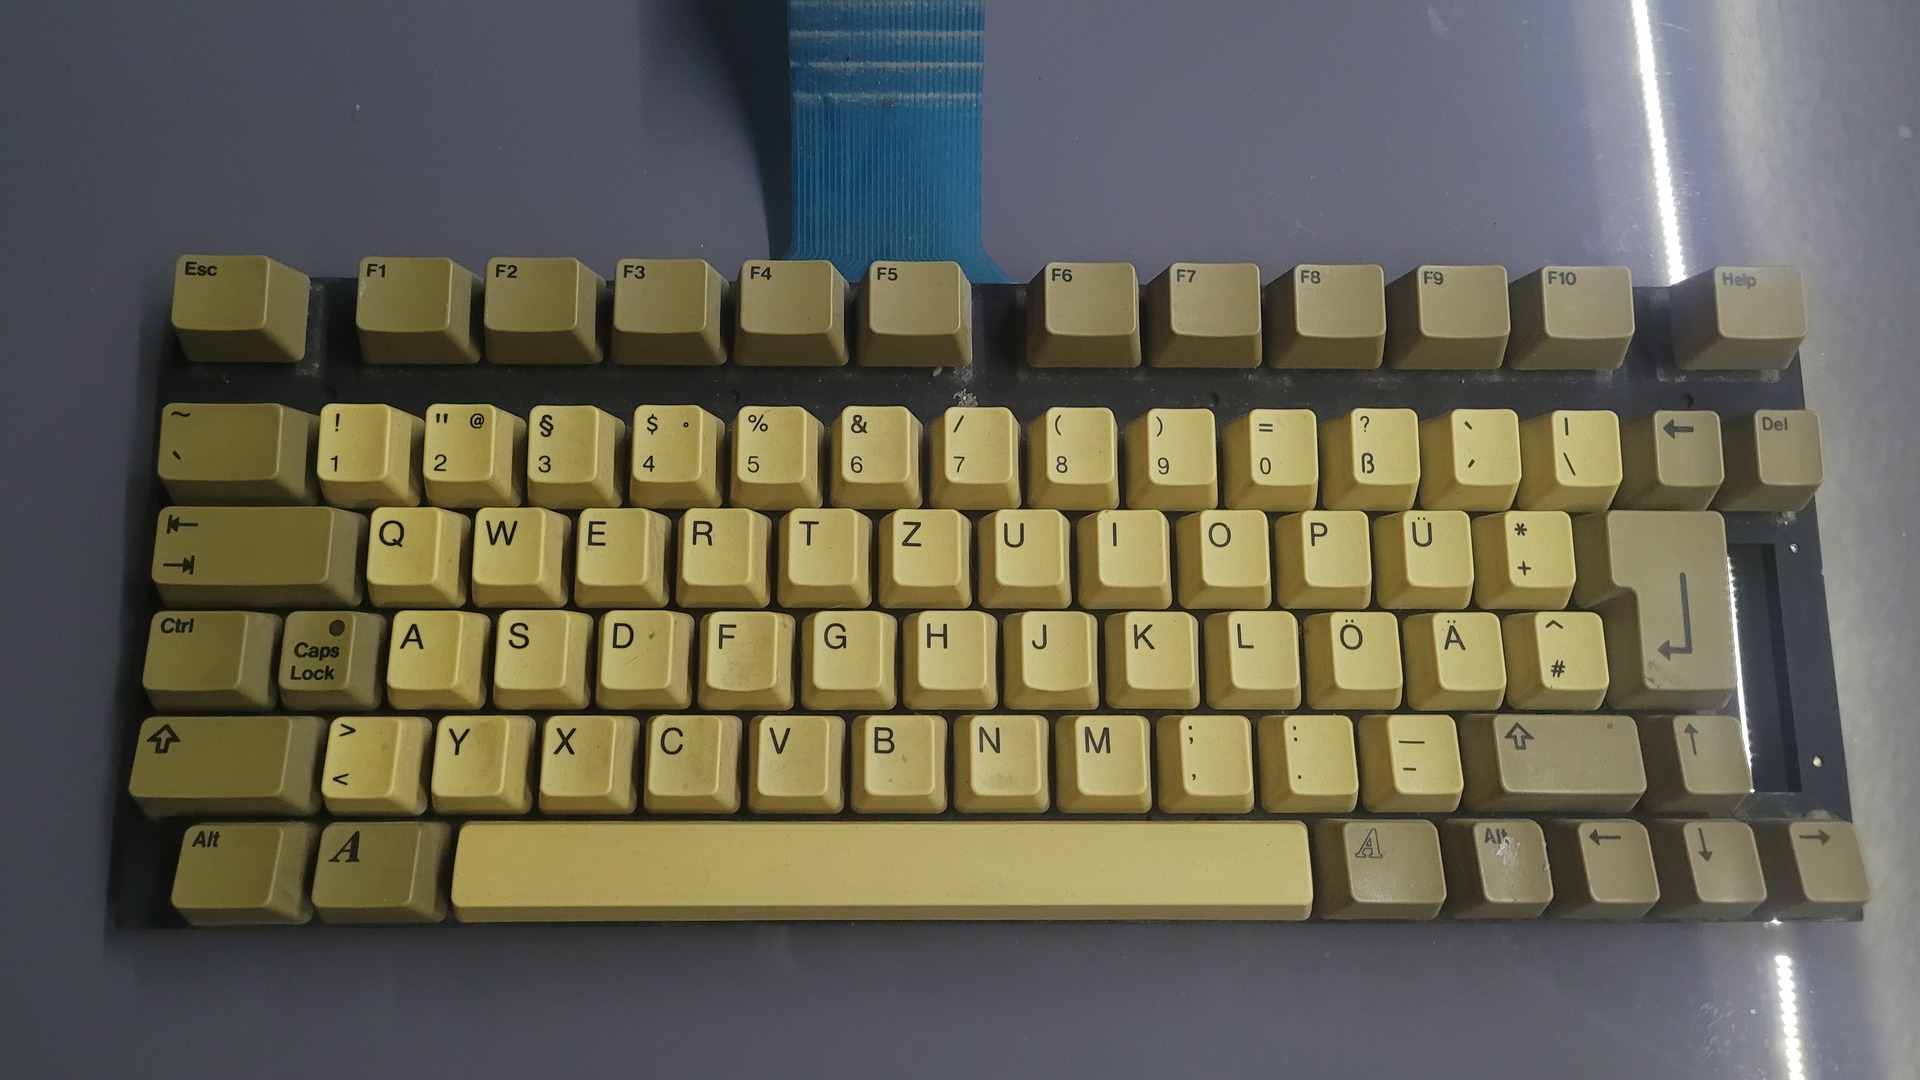

New keyboard circuit
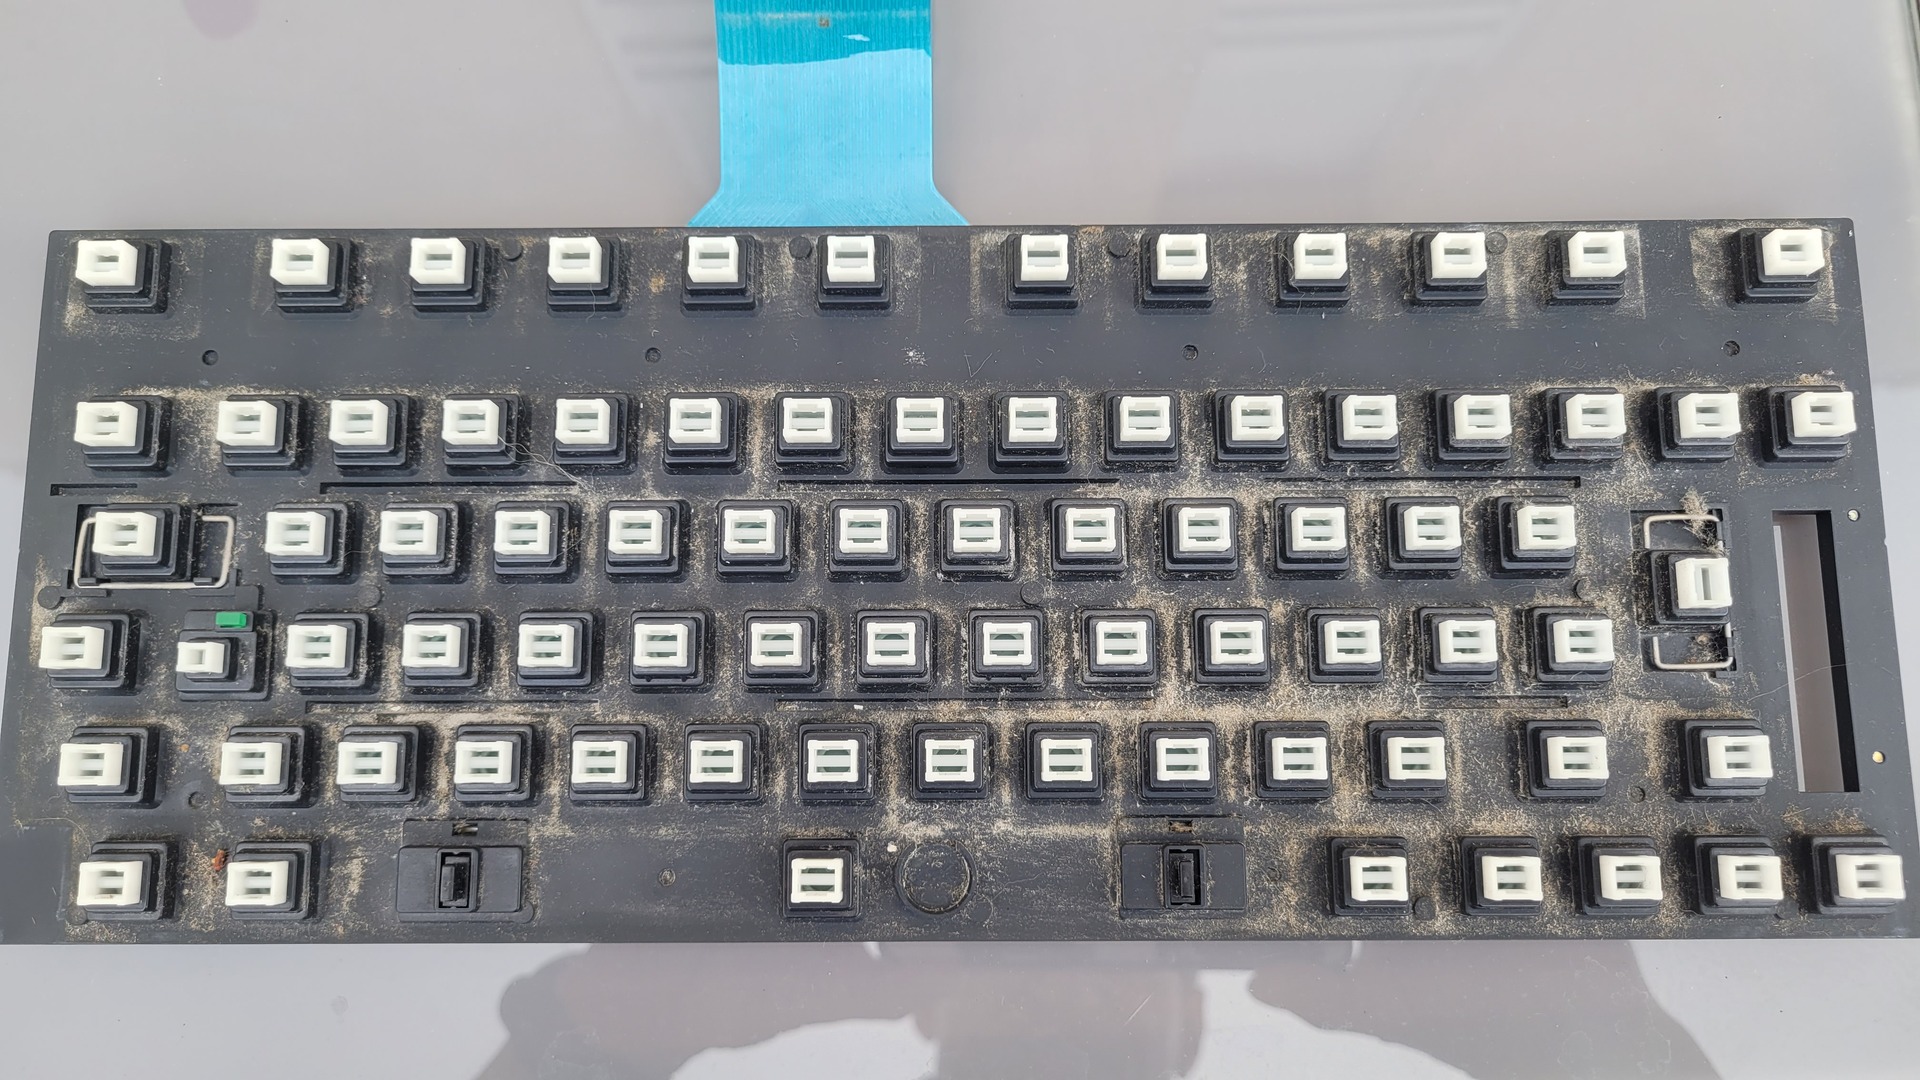
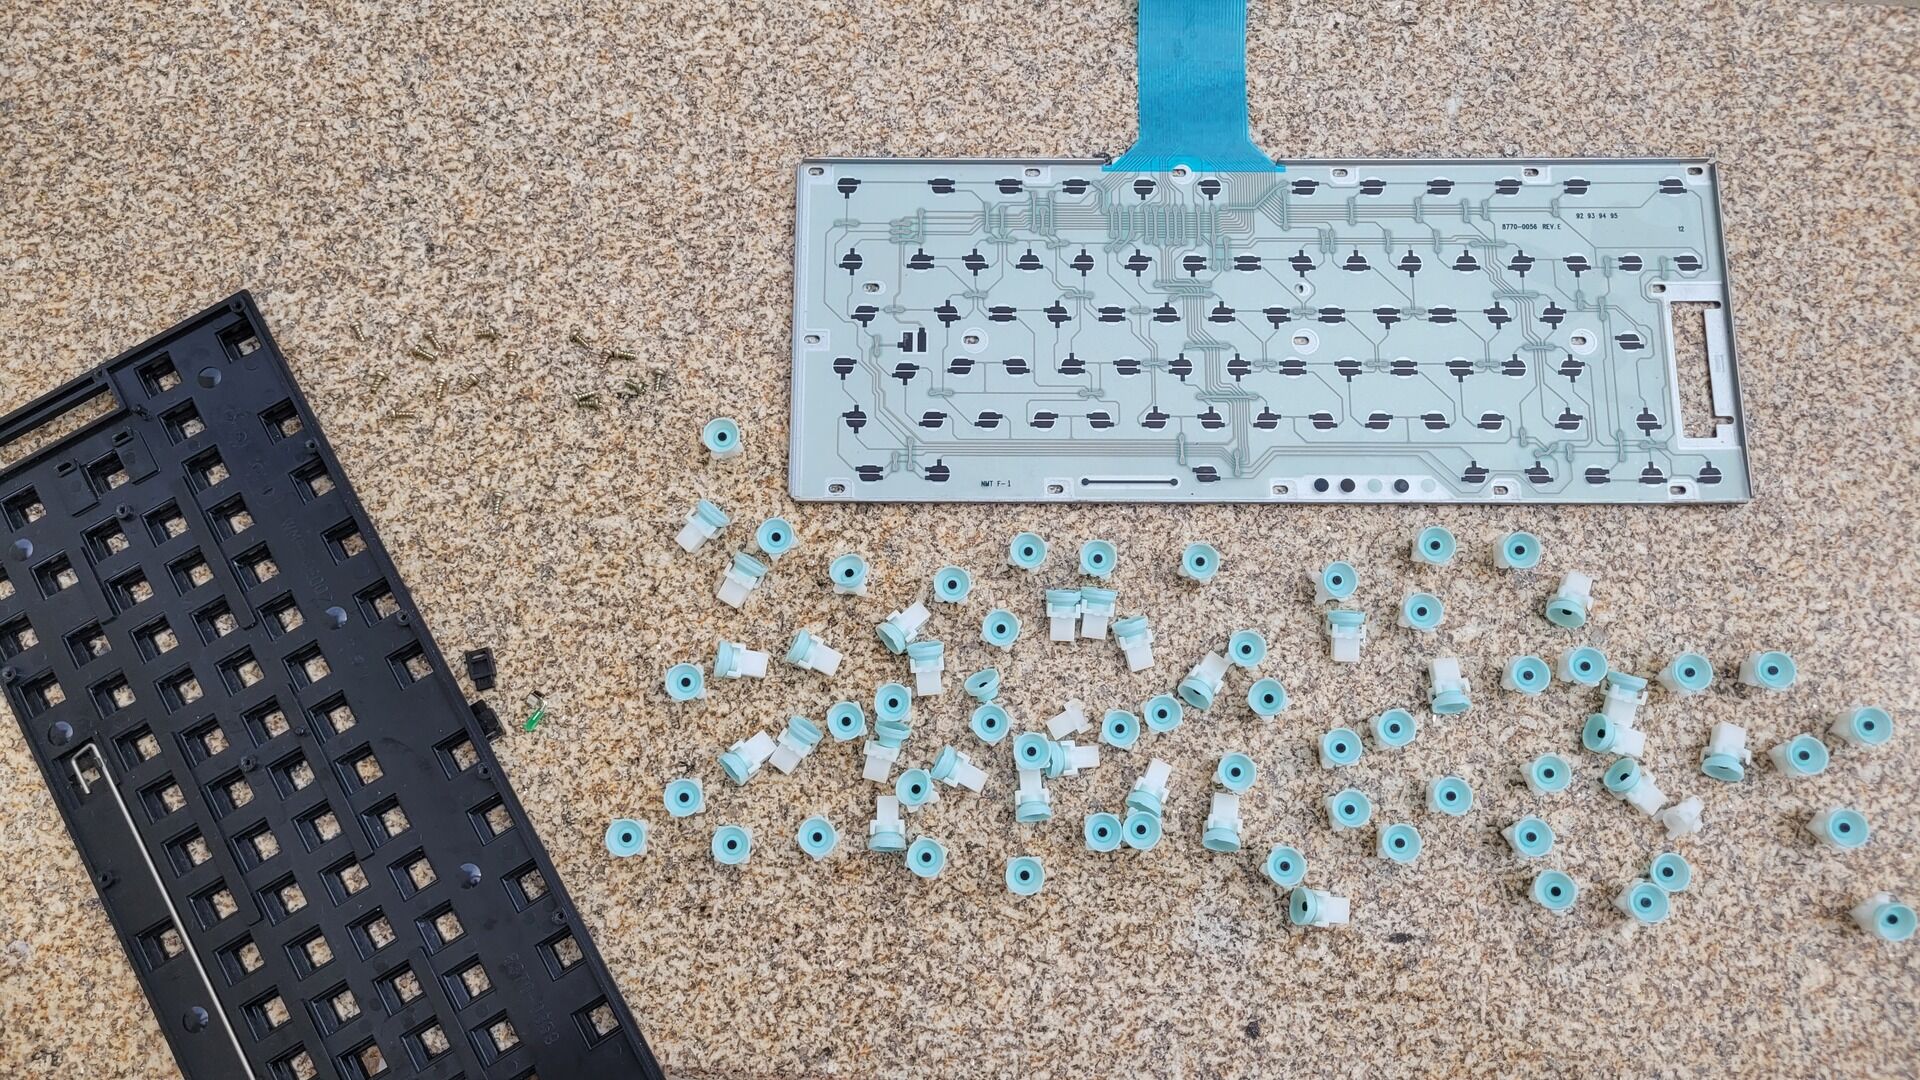
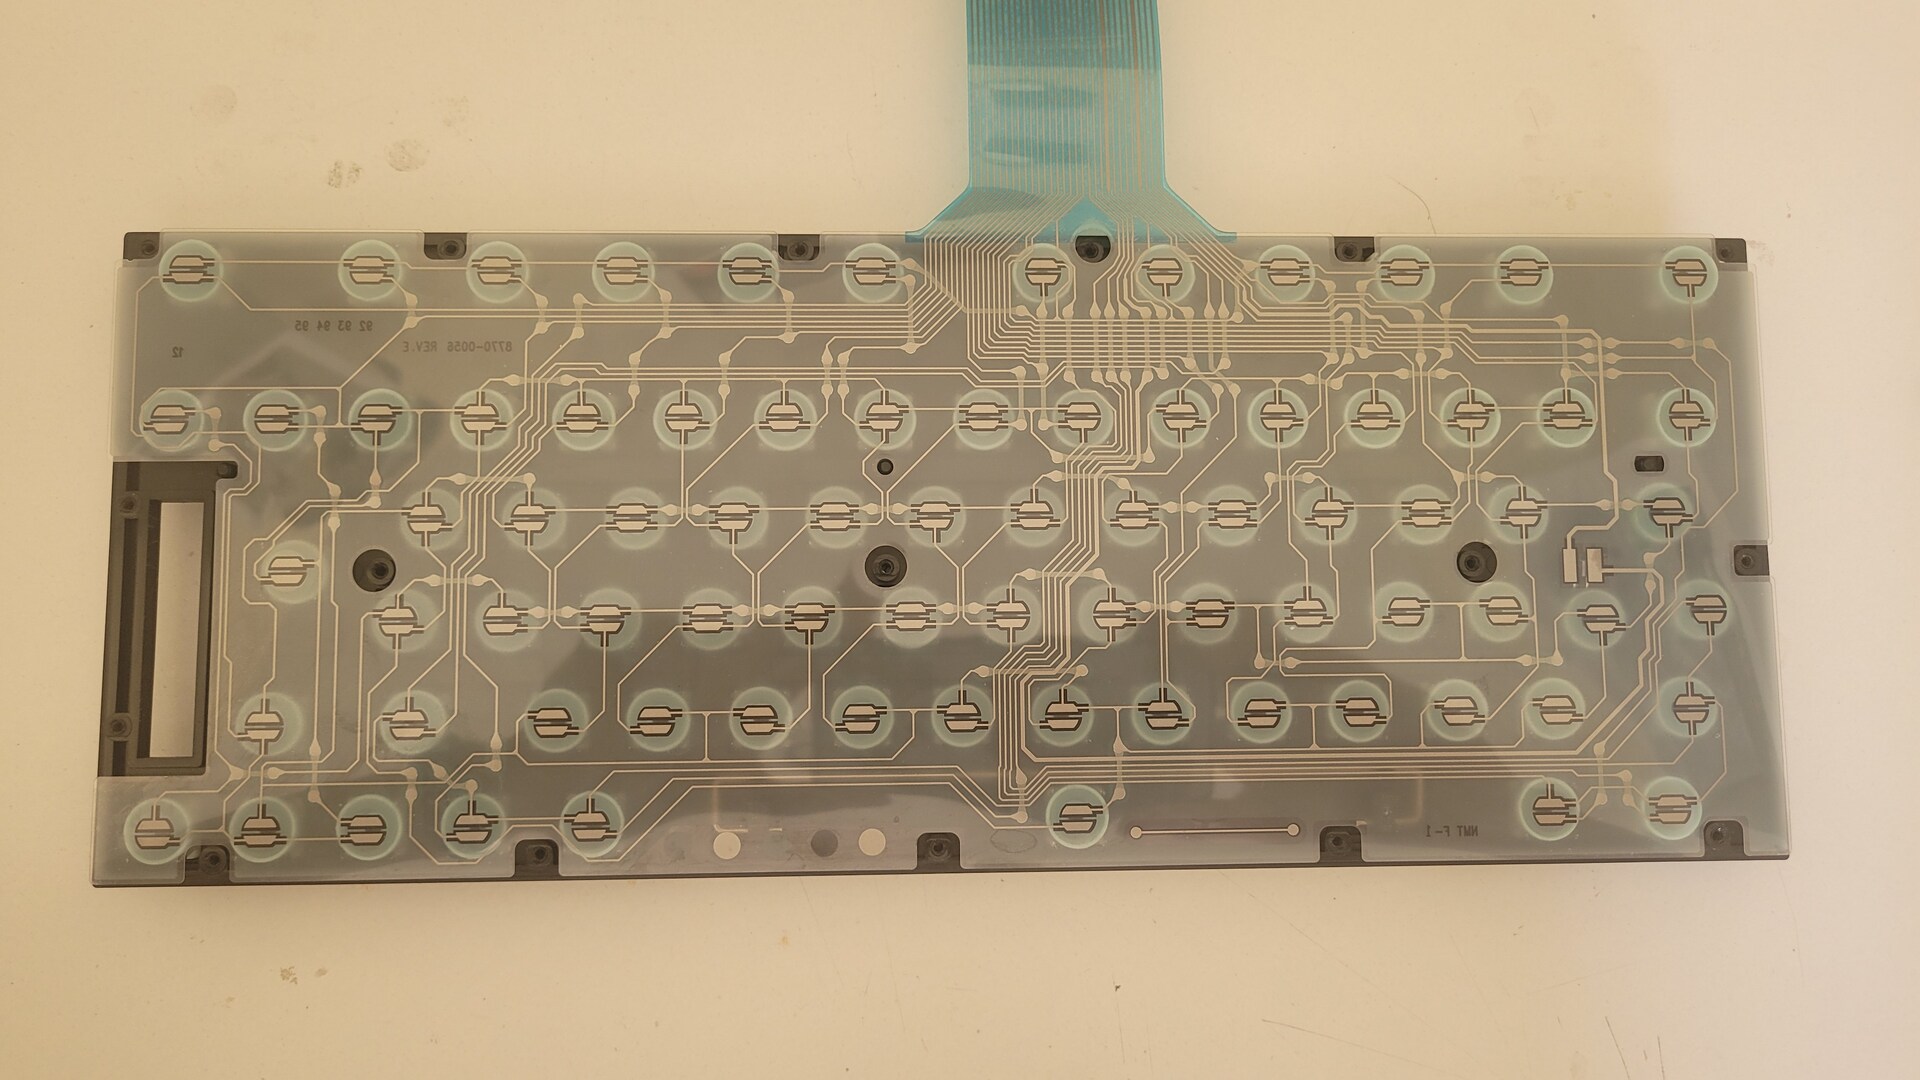
As I mentioned in the introduction, the keyboard had some dead keys. I firstly thought that a good cleaning of the membranes and all rubber pads would do the trick, but in fact the end of the ribbon cable that connect to the motherboard was in a very bad conditions:
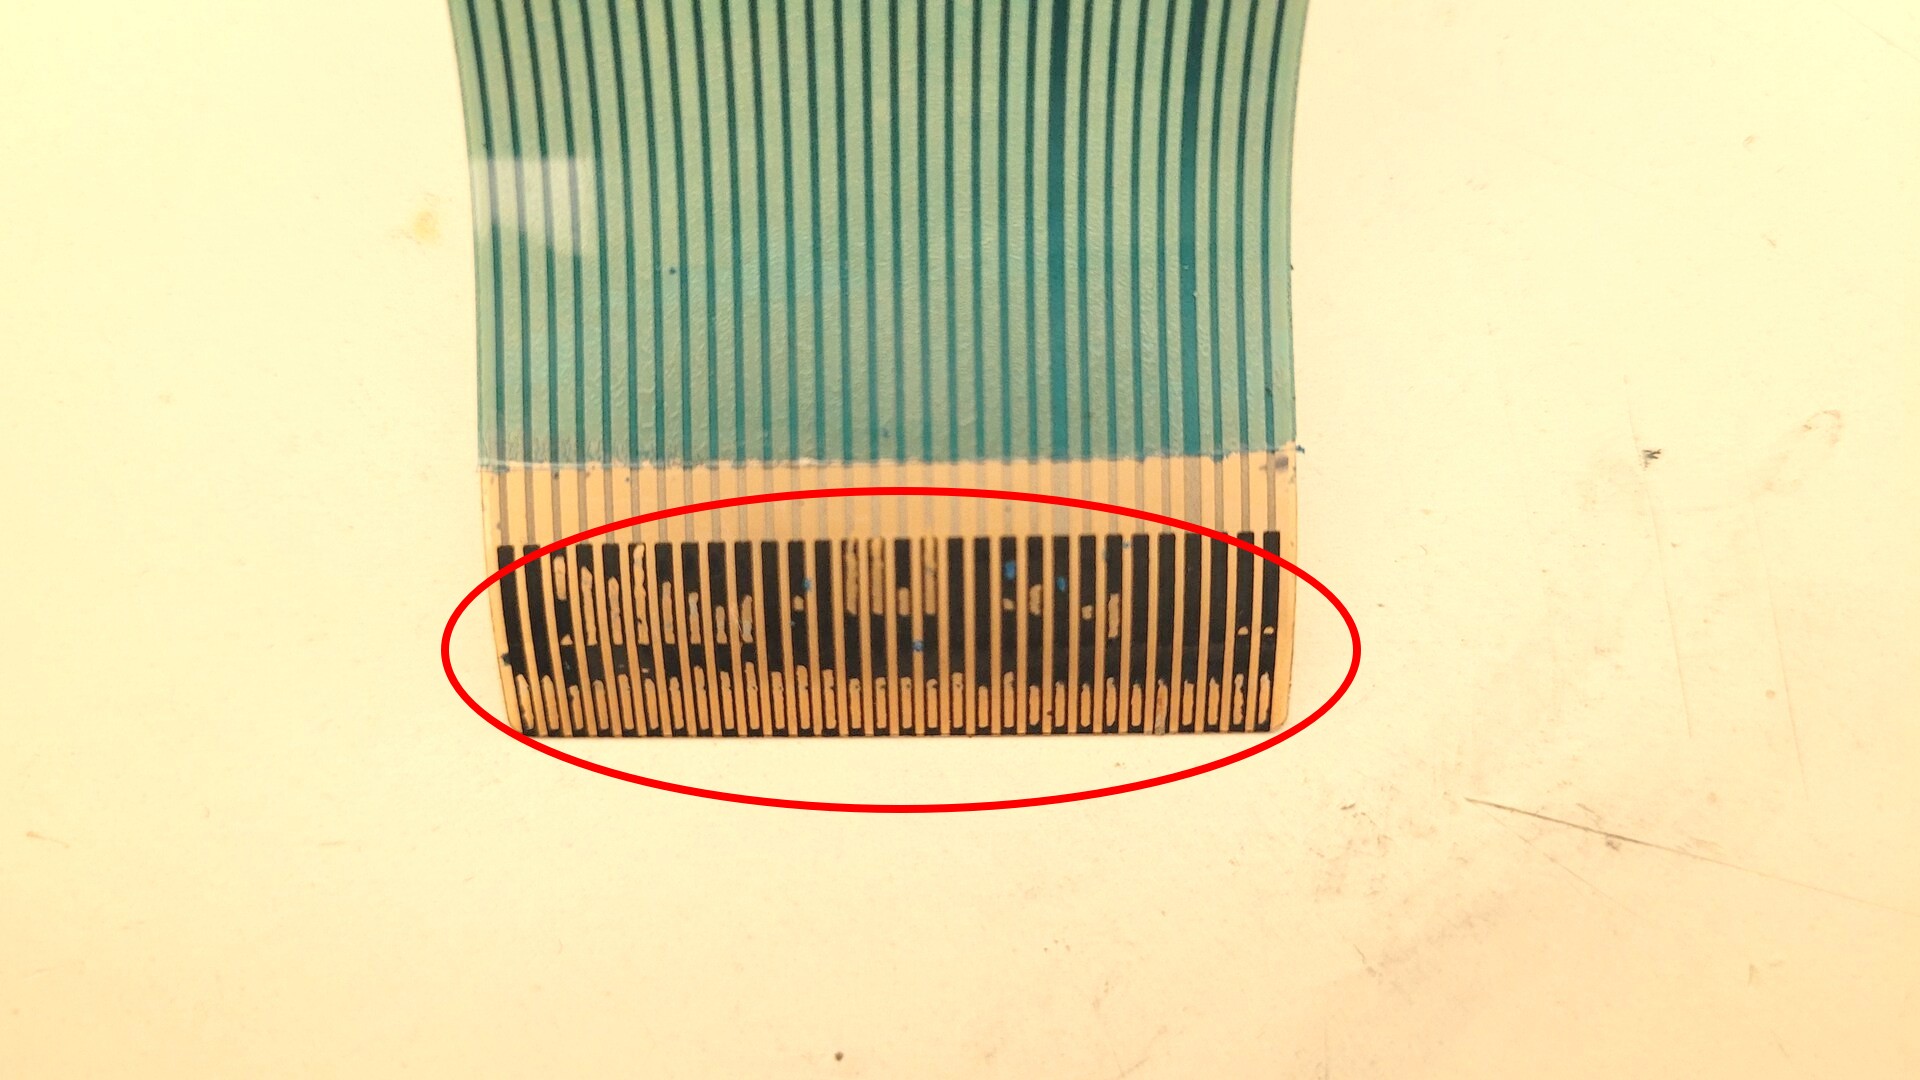
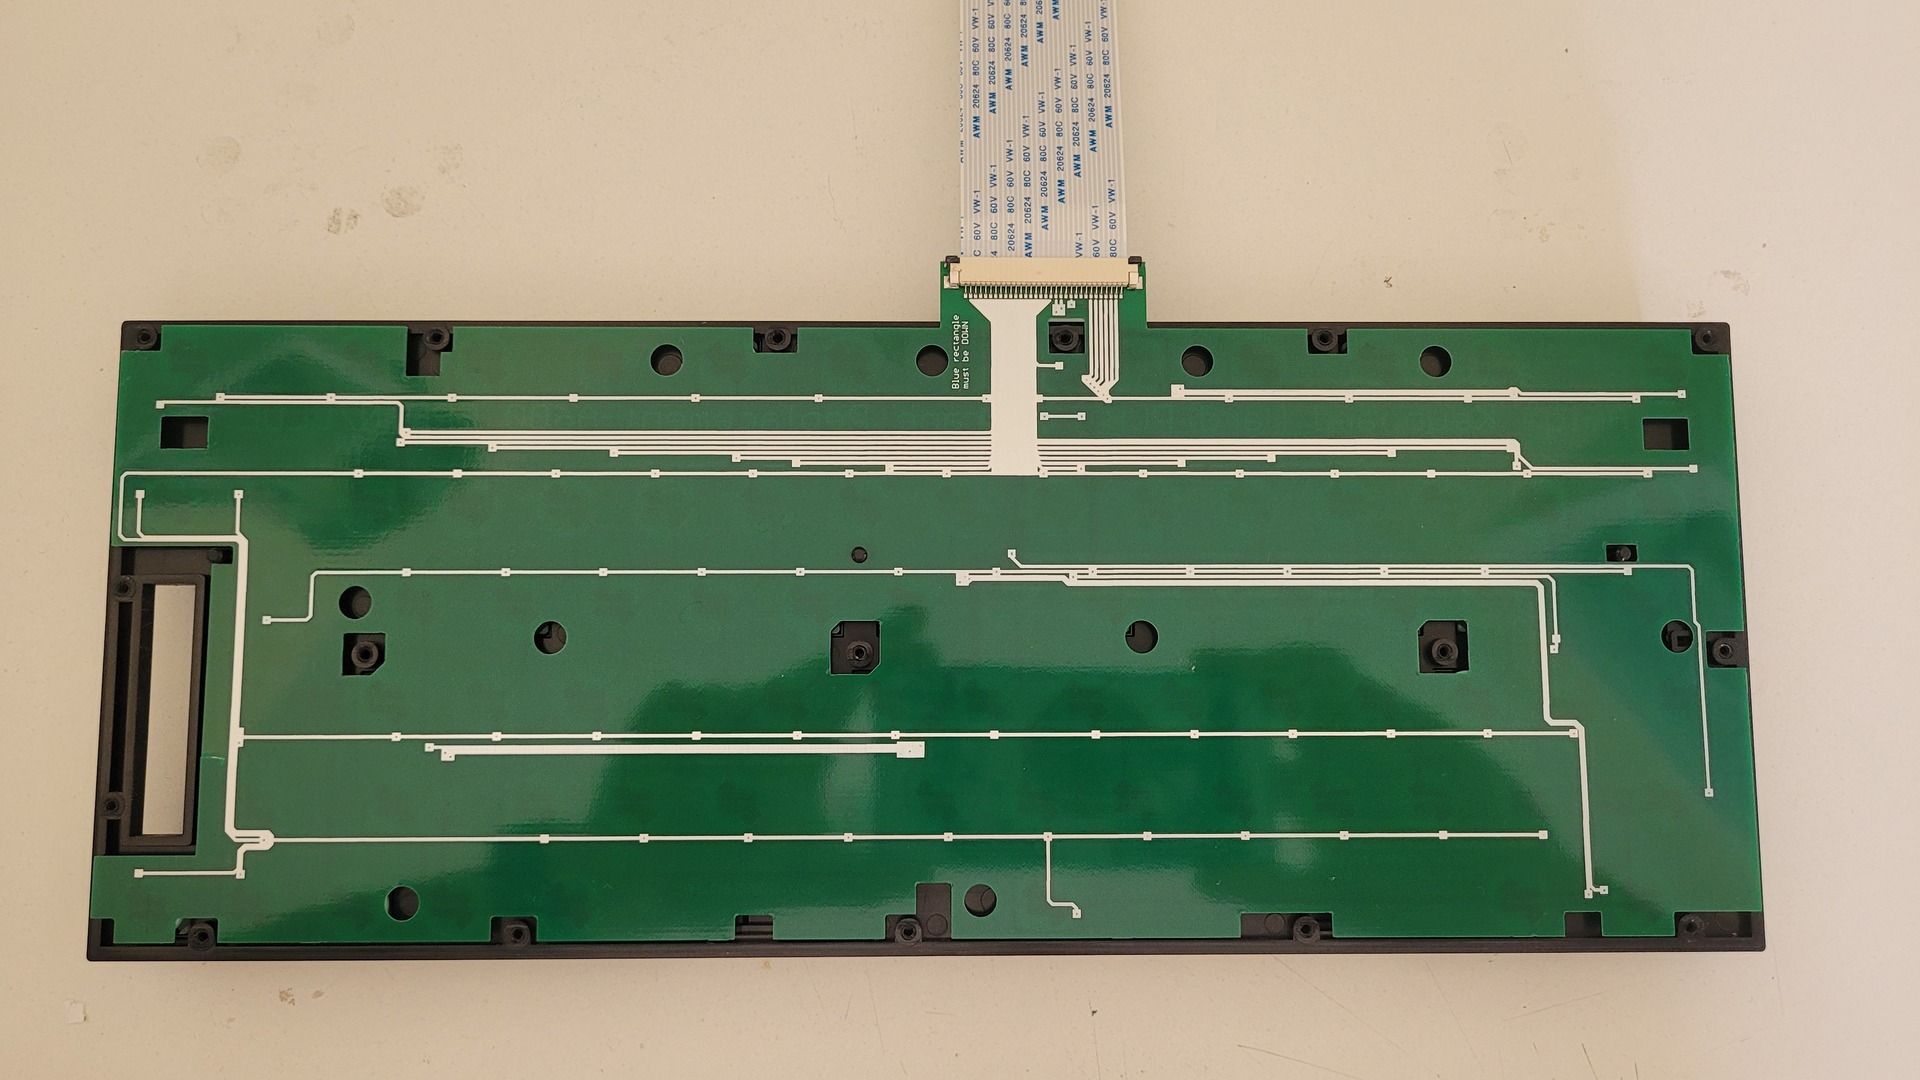
I know that some people repaired this with conductive ink, but I prefered to buy a full membrane replacement since it is available a at reasonnable price (less that 50 euros) :
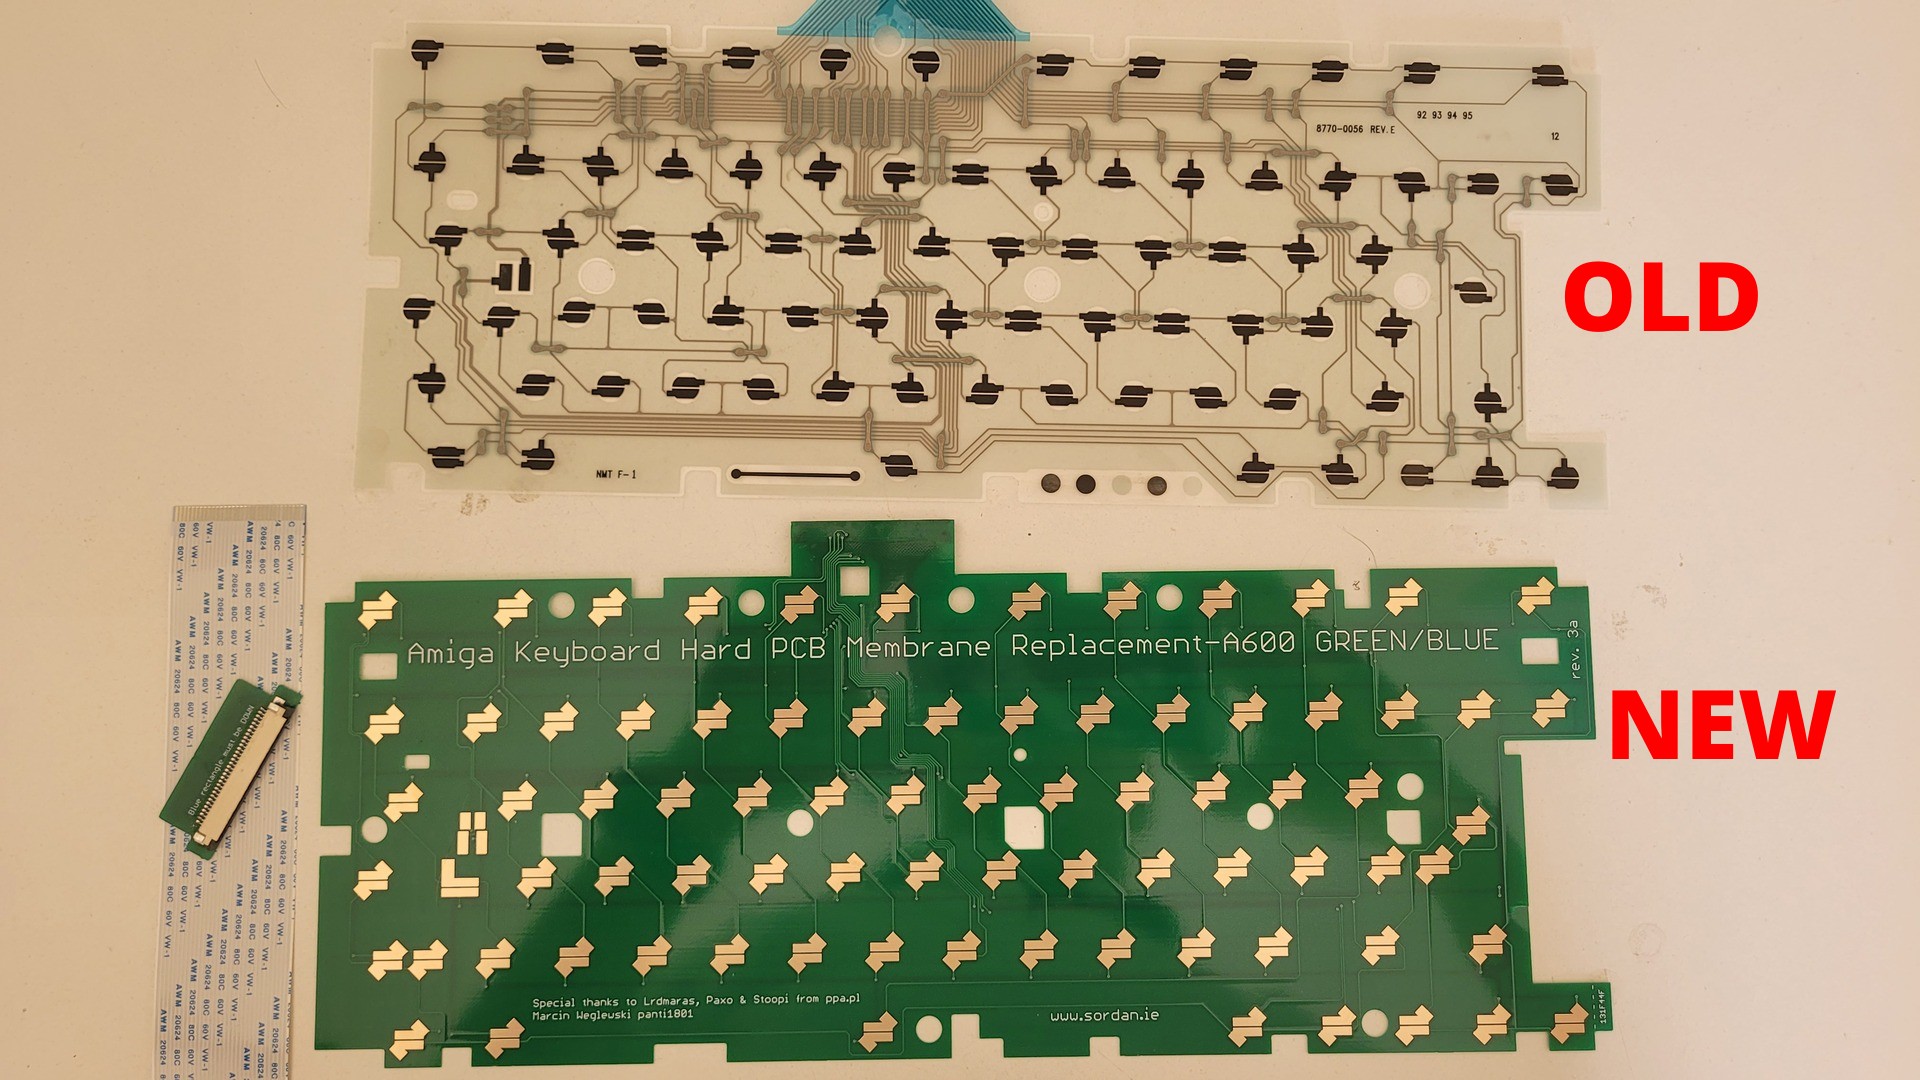
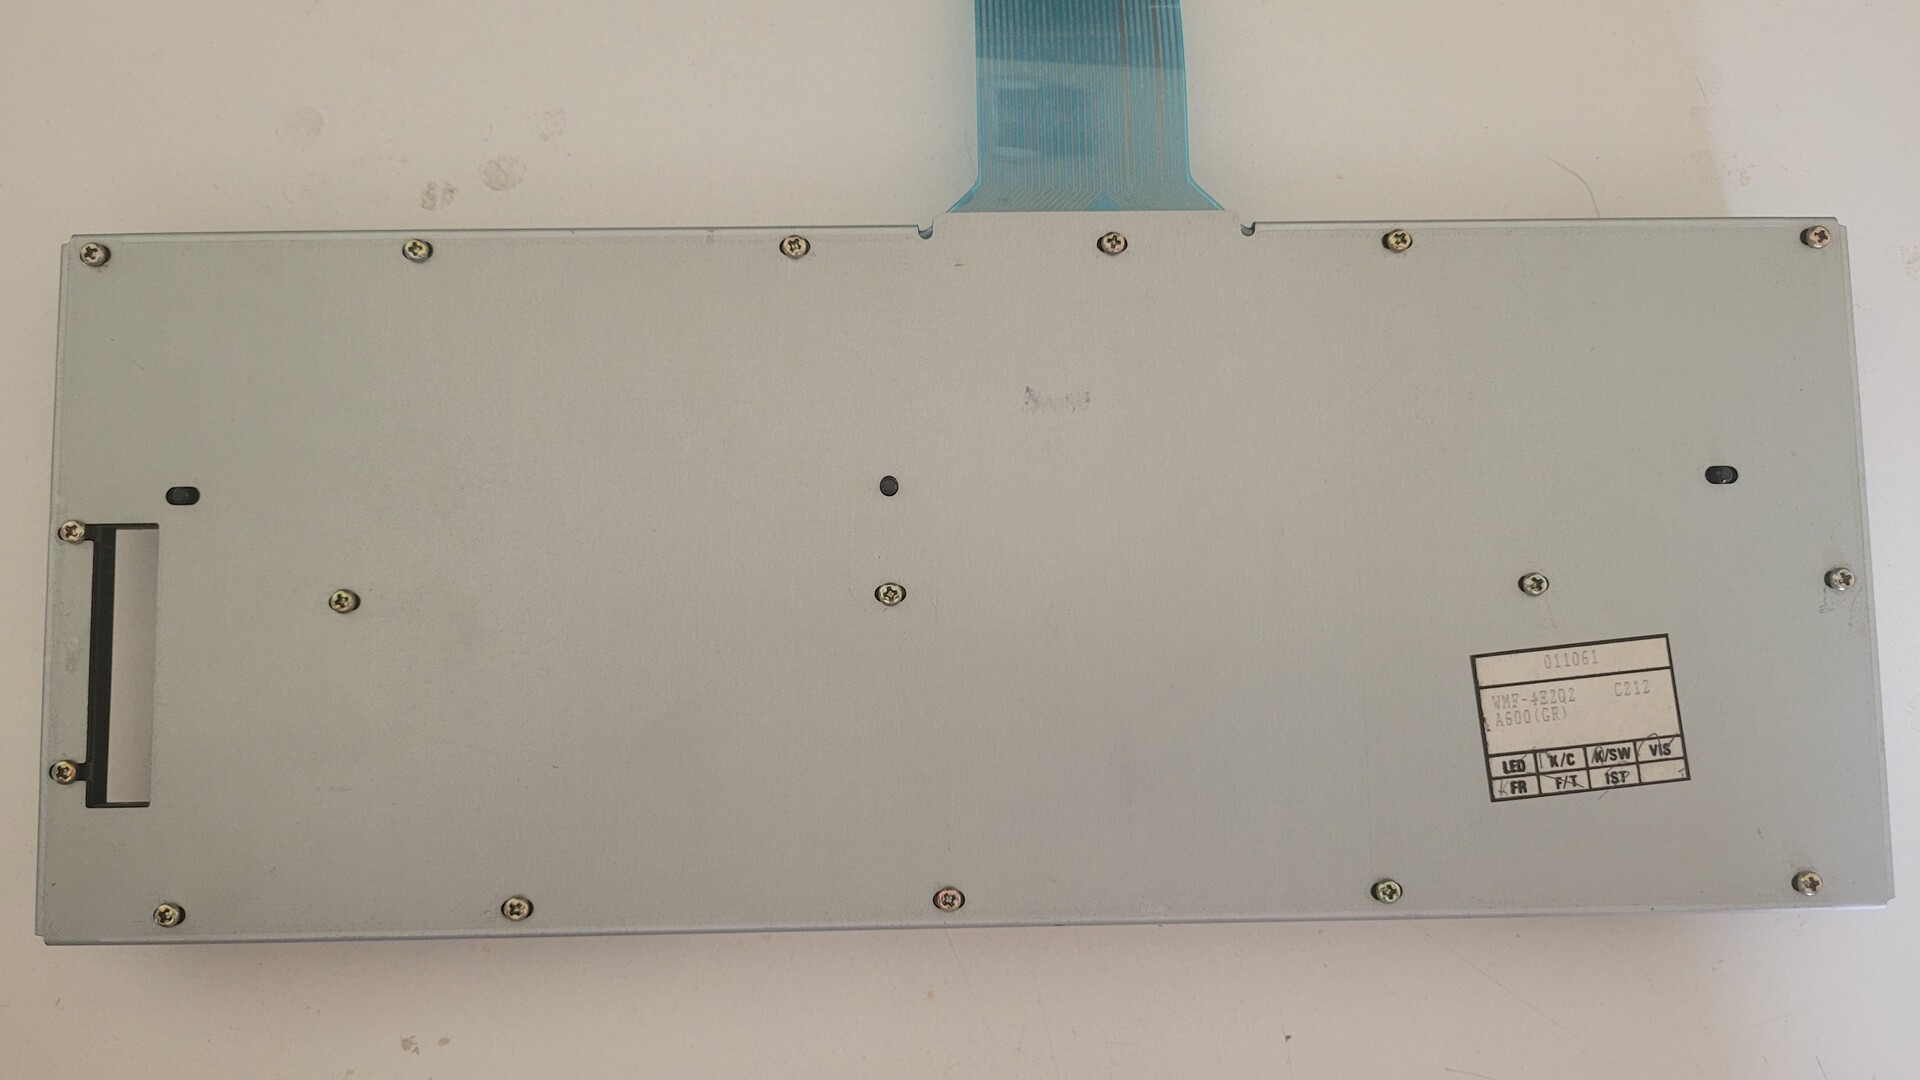
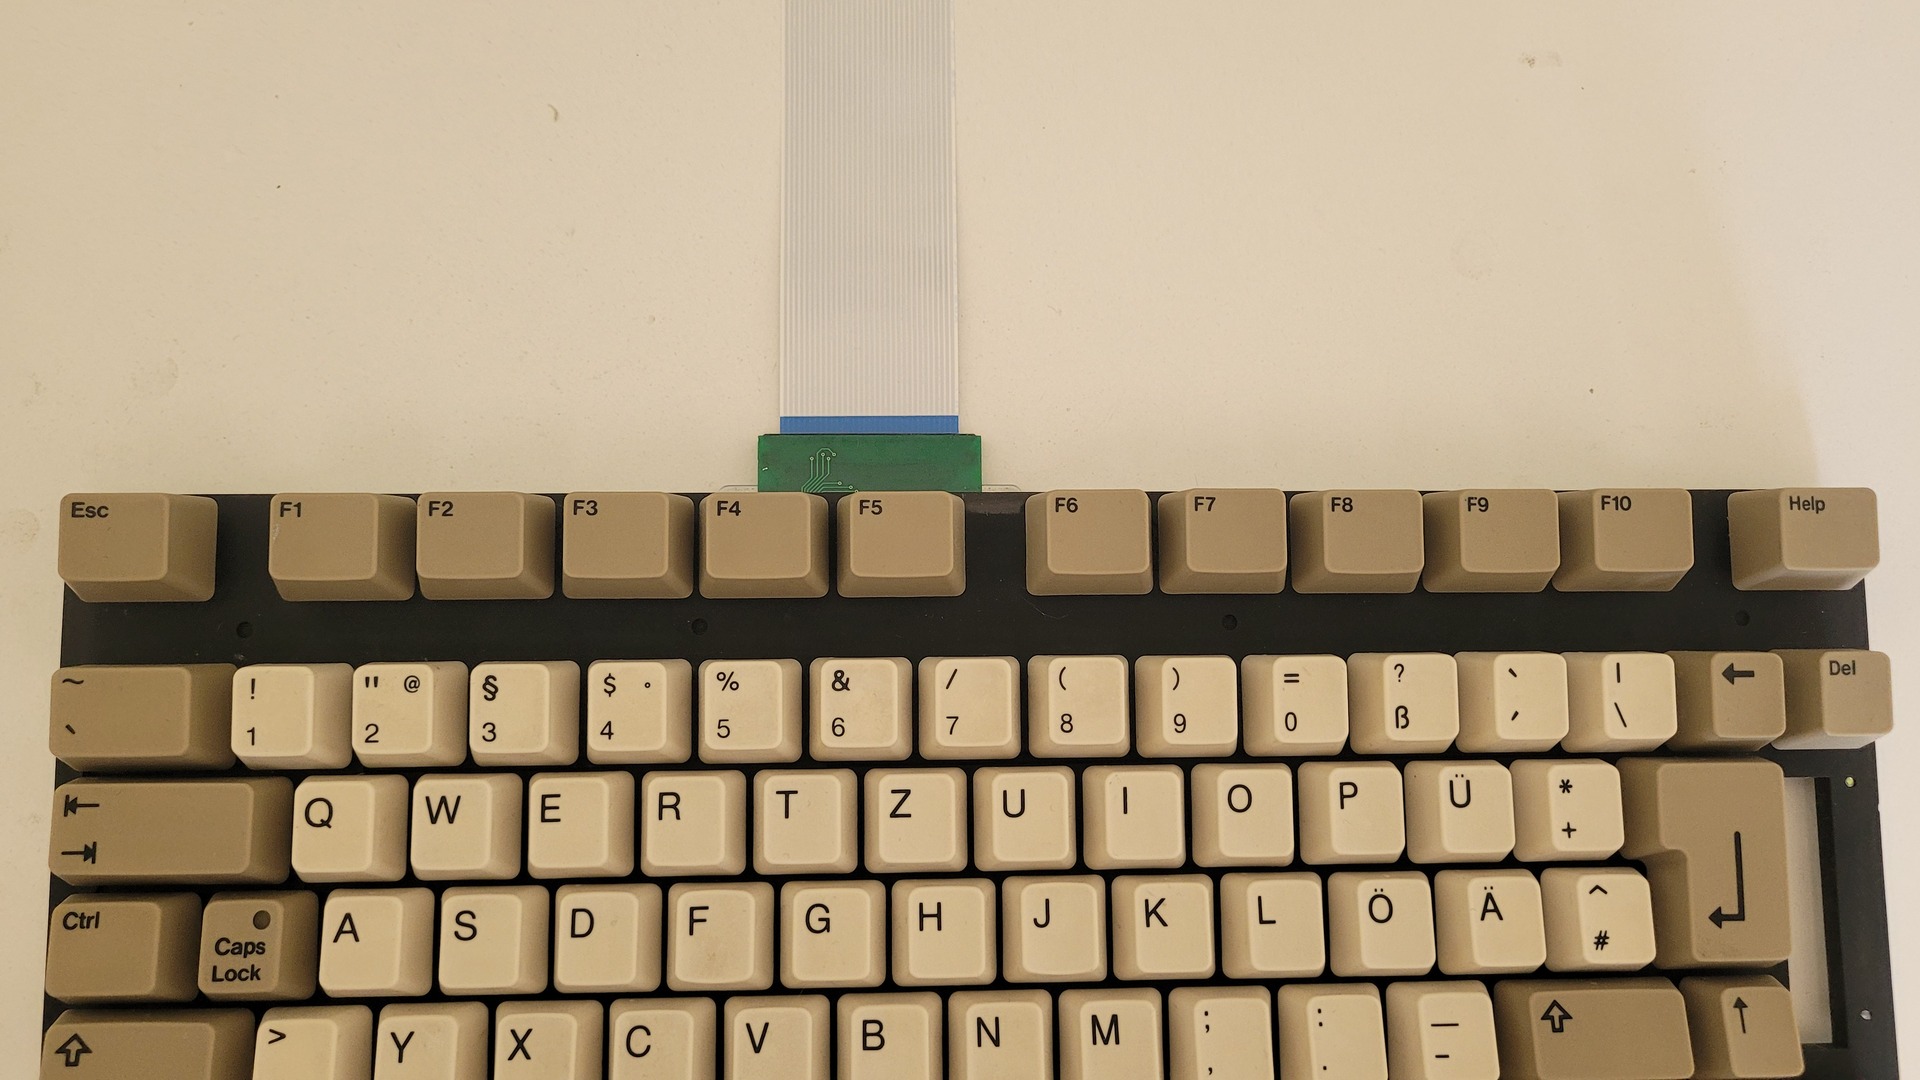
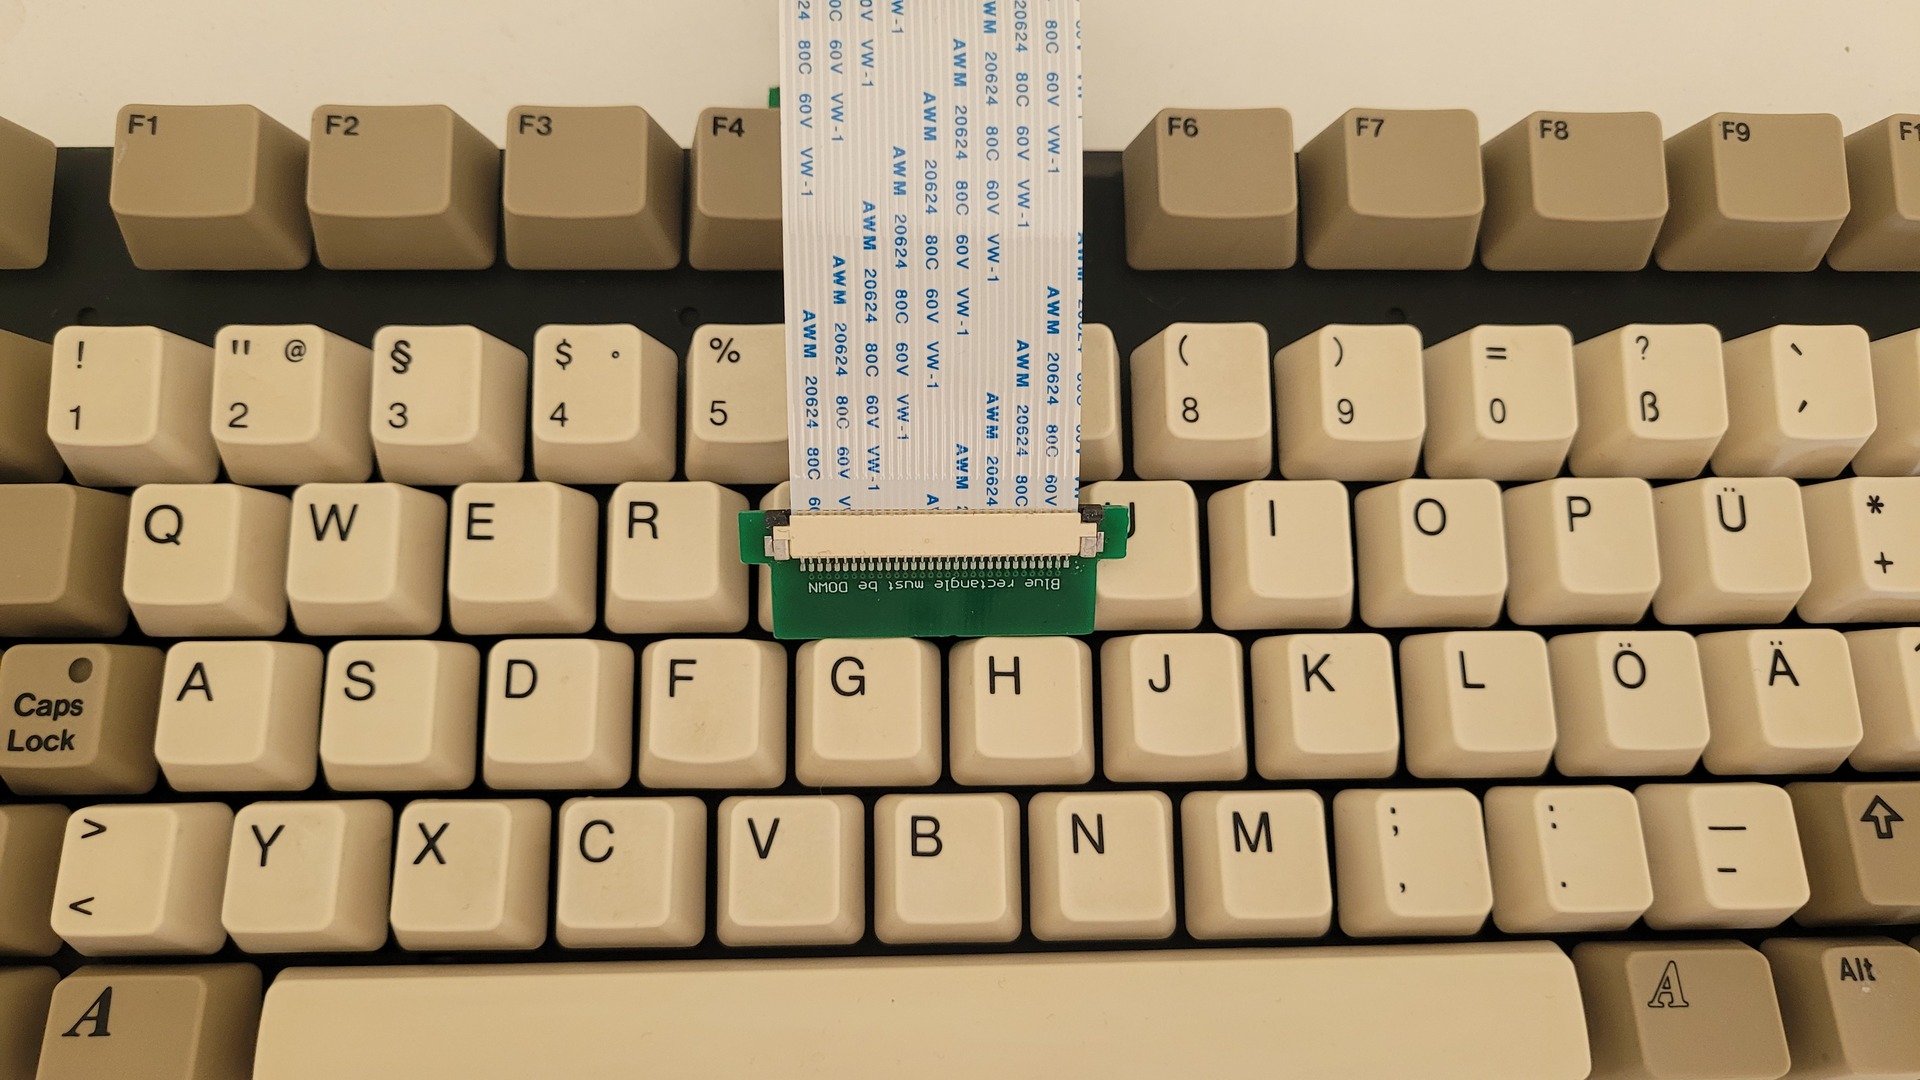
The replacement is very easy to do : just open the keyboard, replace the membrane, and voila ! In addition, the new one comes with a more robust ribbon cable and a hard connector.
Reassambly
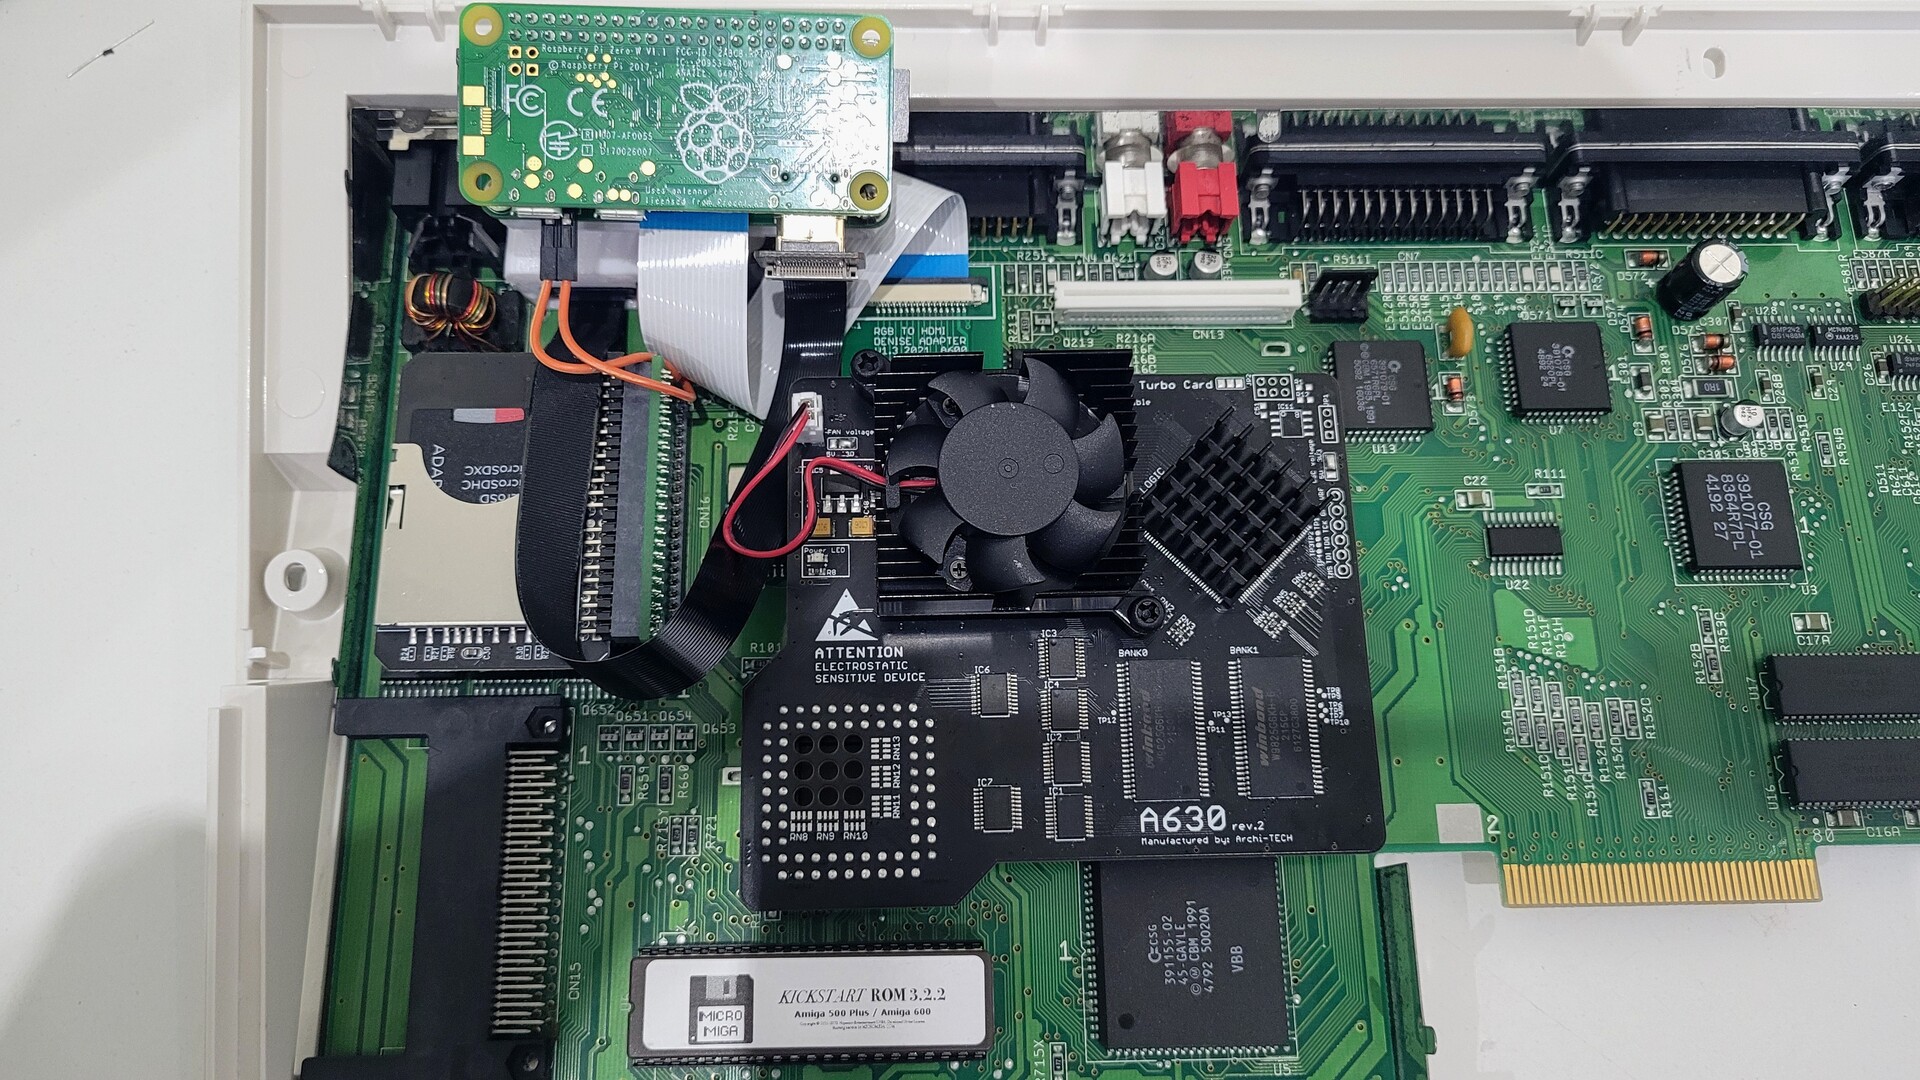
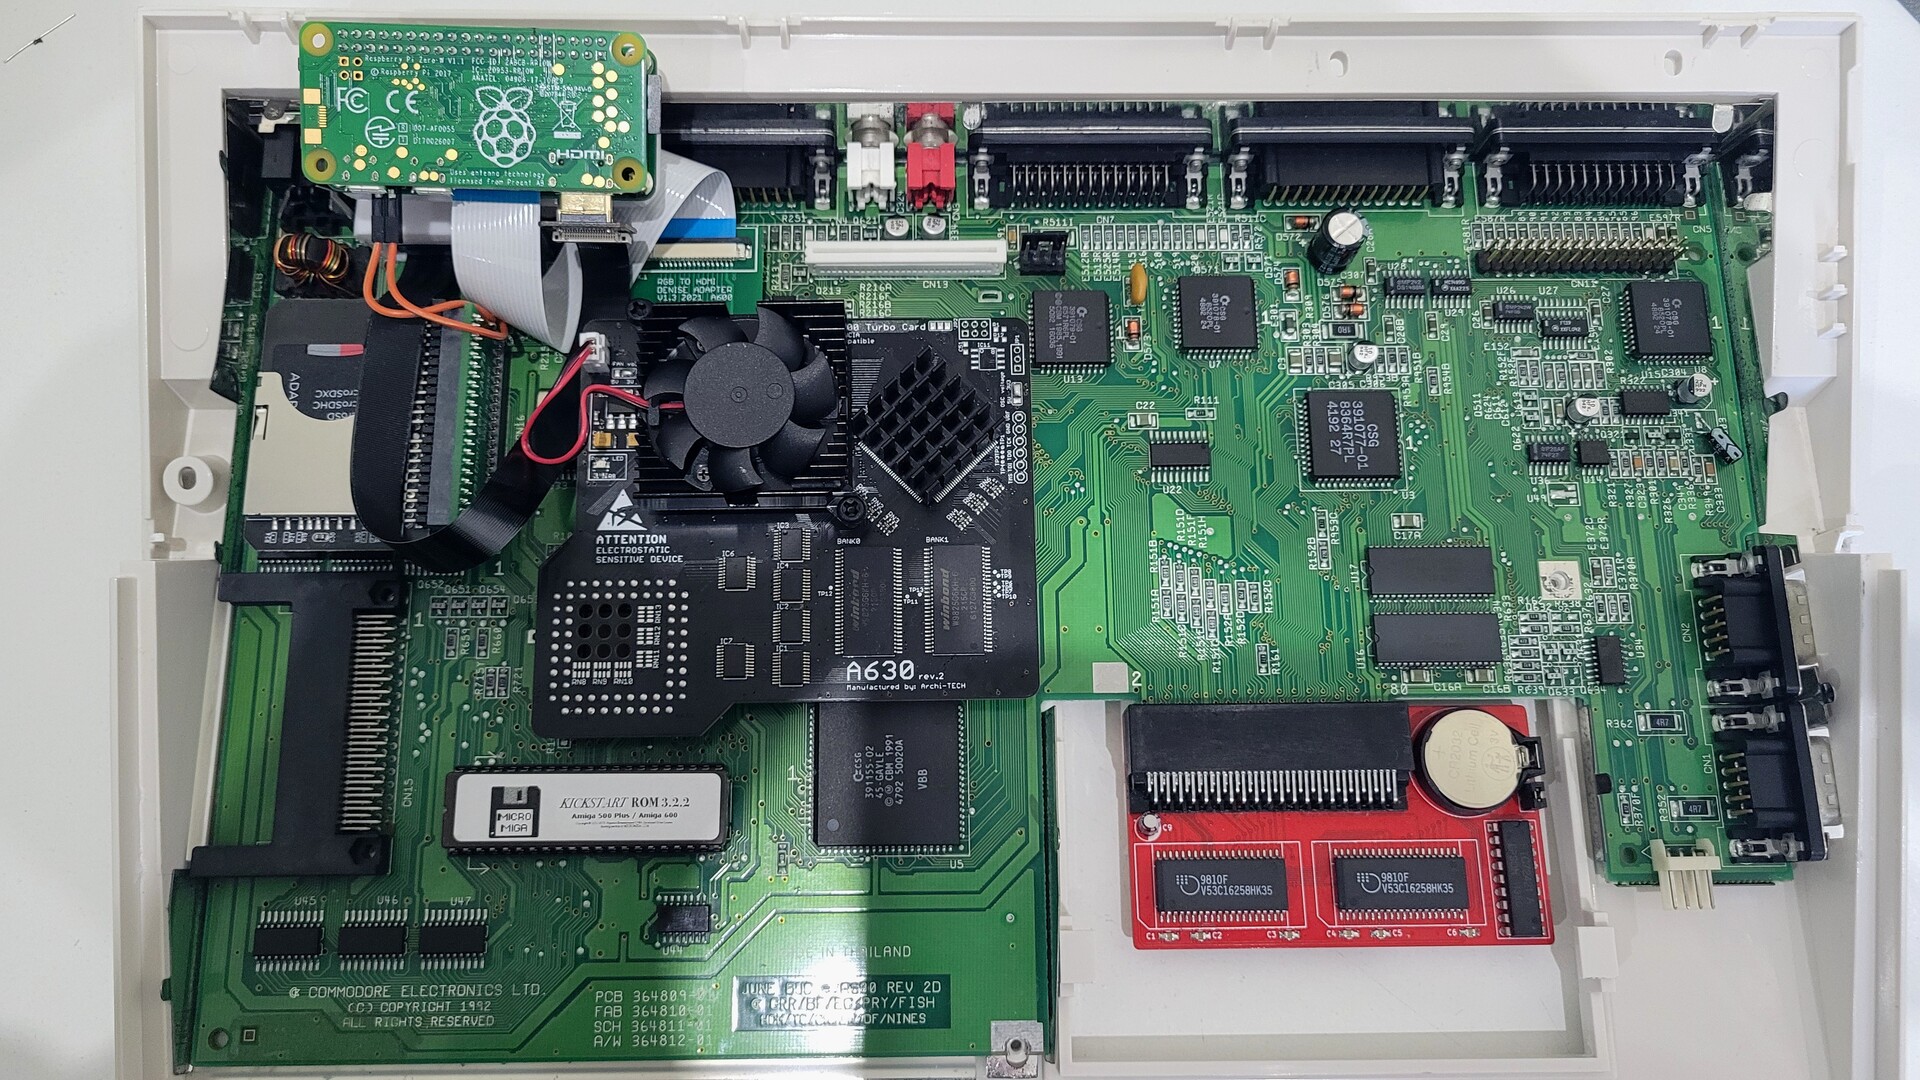
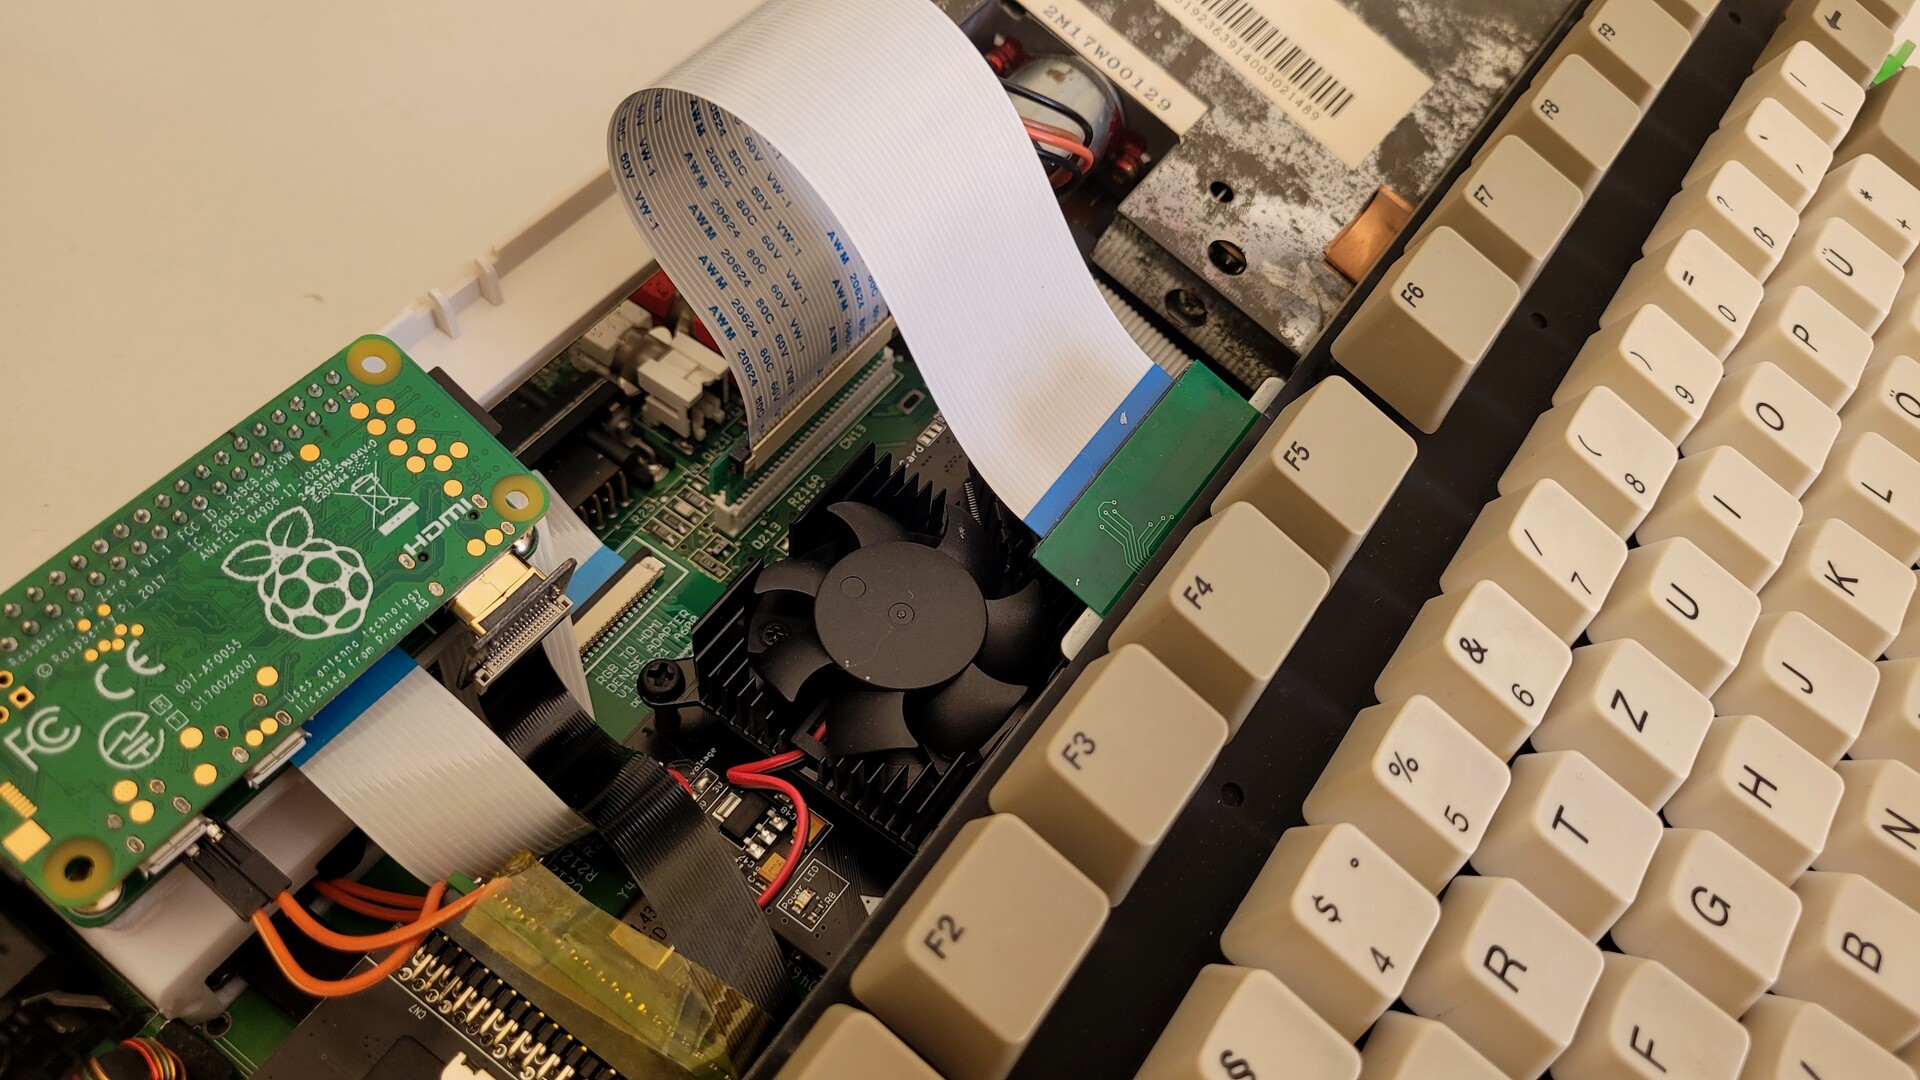
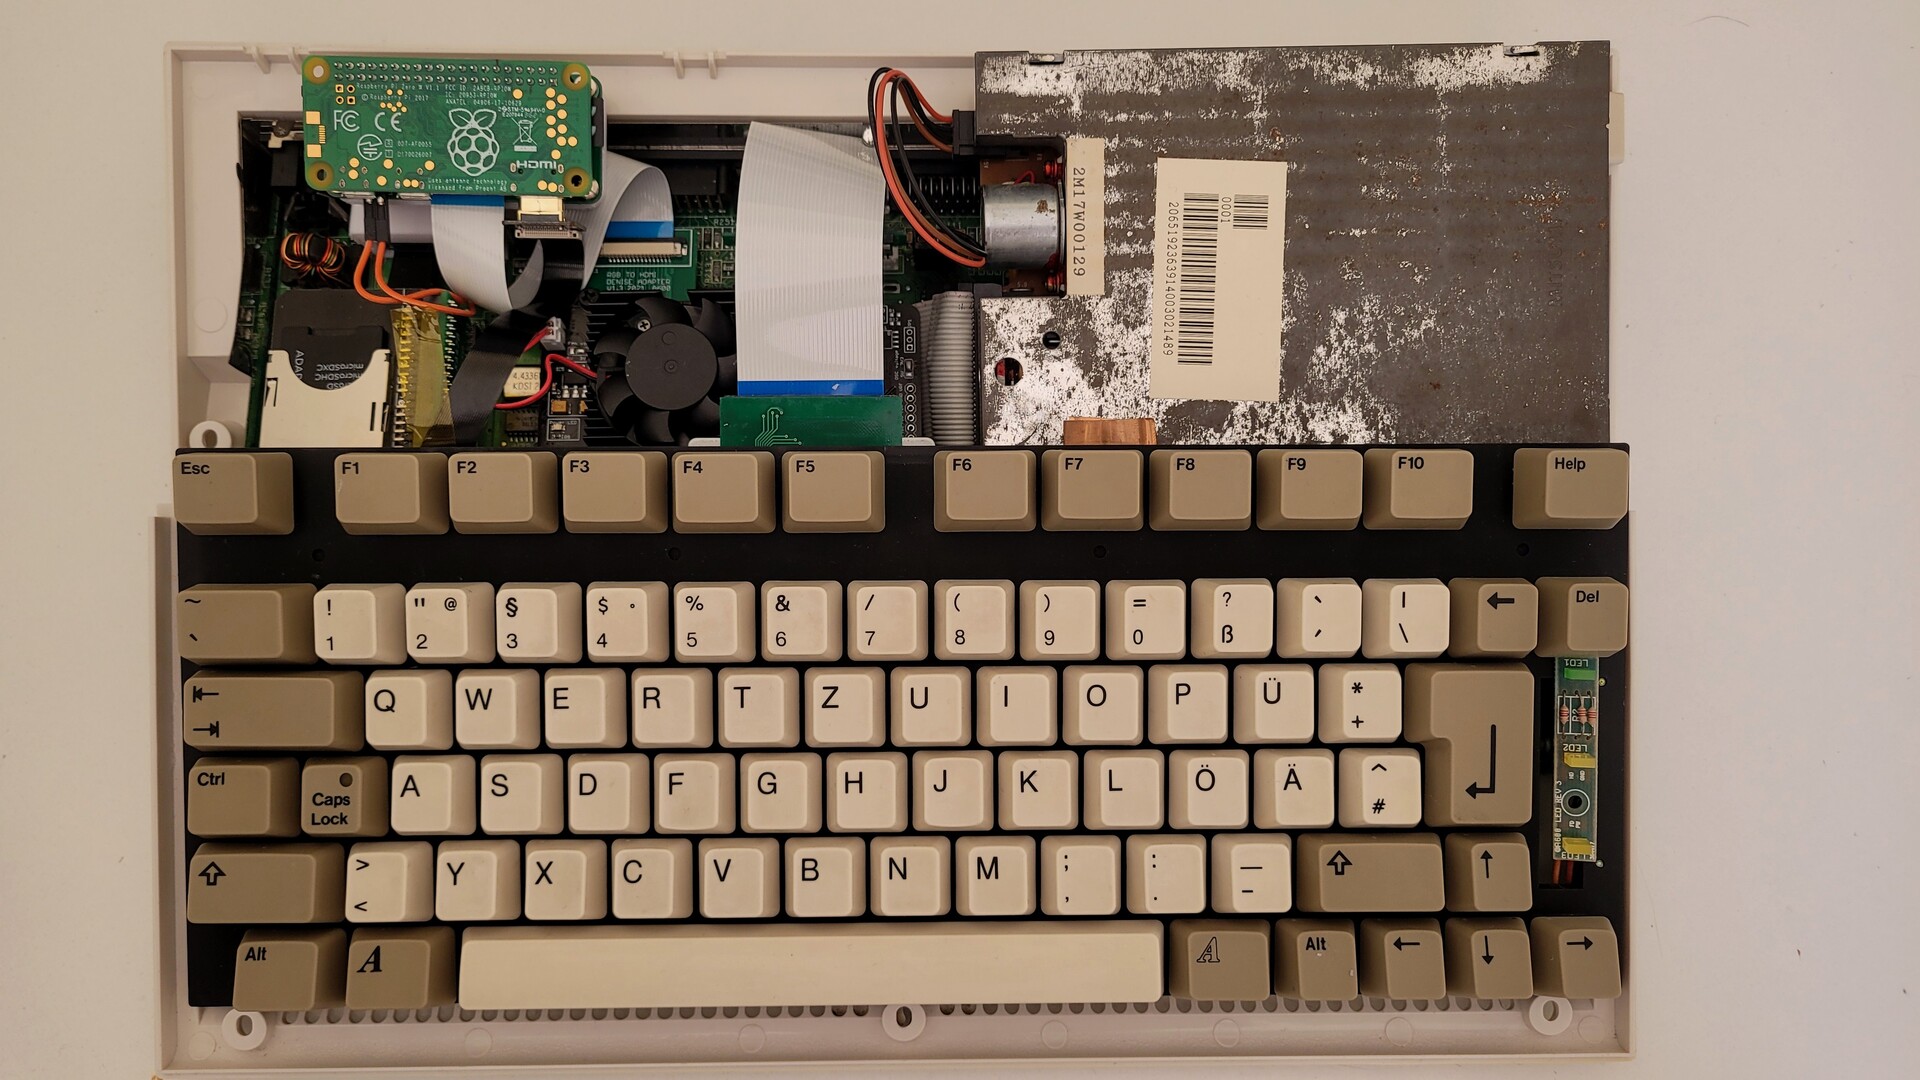
With everything cleaned and repaired, I remounted everything back in the shell with all additional expansions : 1M chip mem, IDE2SD and A630, db9 to usb for a wireless mouse and even the Wifi PCMCIA cards. As you can see, the new keyboard connector requires to remove the original closing part that used to secure the original ribbon cable on the motherboard.

One last thing : I noticed that the Amiga was often crashing after 30 to 40 minutes. The cause was the 68030 that became too hot. In fact, the A630 card has a solder jumper that allows to switch the fan voltage from 3.3v to 5v. Mine was set to 3.3v. I changed it to 5v and I no more had any crash.
Software
For the fun, I wanted to do the install on the real hardware. Thought, I did the very first steps on an emulator, because I had no way to write Amiga floppies with my PC and no IDE CD-Rom drive to plug on my A600.
Preparing the microSD card
I used my Amstaga to prepare the microSD, but any Amiga emulator should do the job.
Basicaly, preparing the SD as an Amiga hardrive consists in:
- Adding the full disk (eg: /dev/sdb in my case) as an IDE Amiga device. Beware not to pick an already used ID (eg. 0) that may be used for your currently emulated Amiga boot disk.
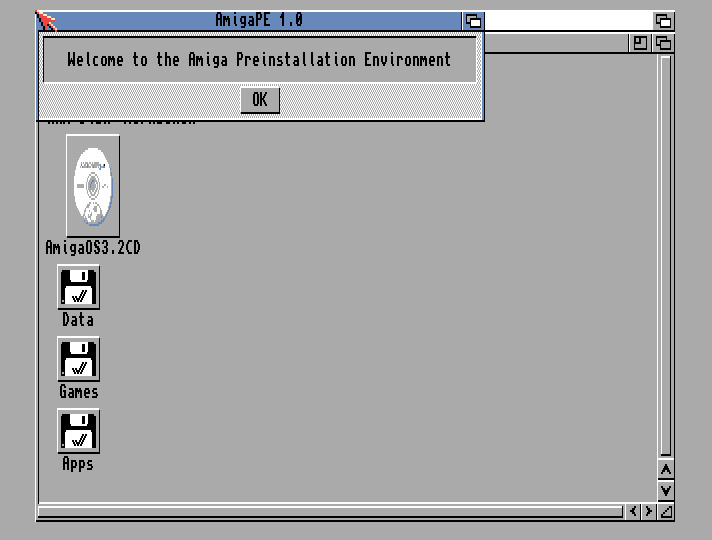
- Booting the emulator from a pre-installed AmigaOS or simply the AmigaOS 3.2 either from the CD, the ISO image or a simple directory in which the files has been copied.
- Making a bootable and FFS formated partition on the SDCard
- Copying AmigaOS 3.2 files from the ISO to this bootable partition
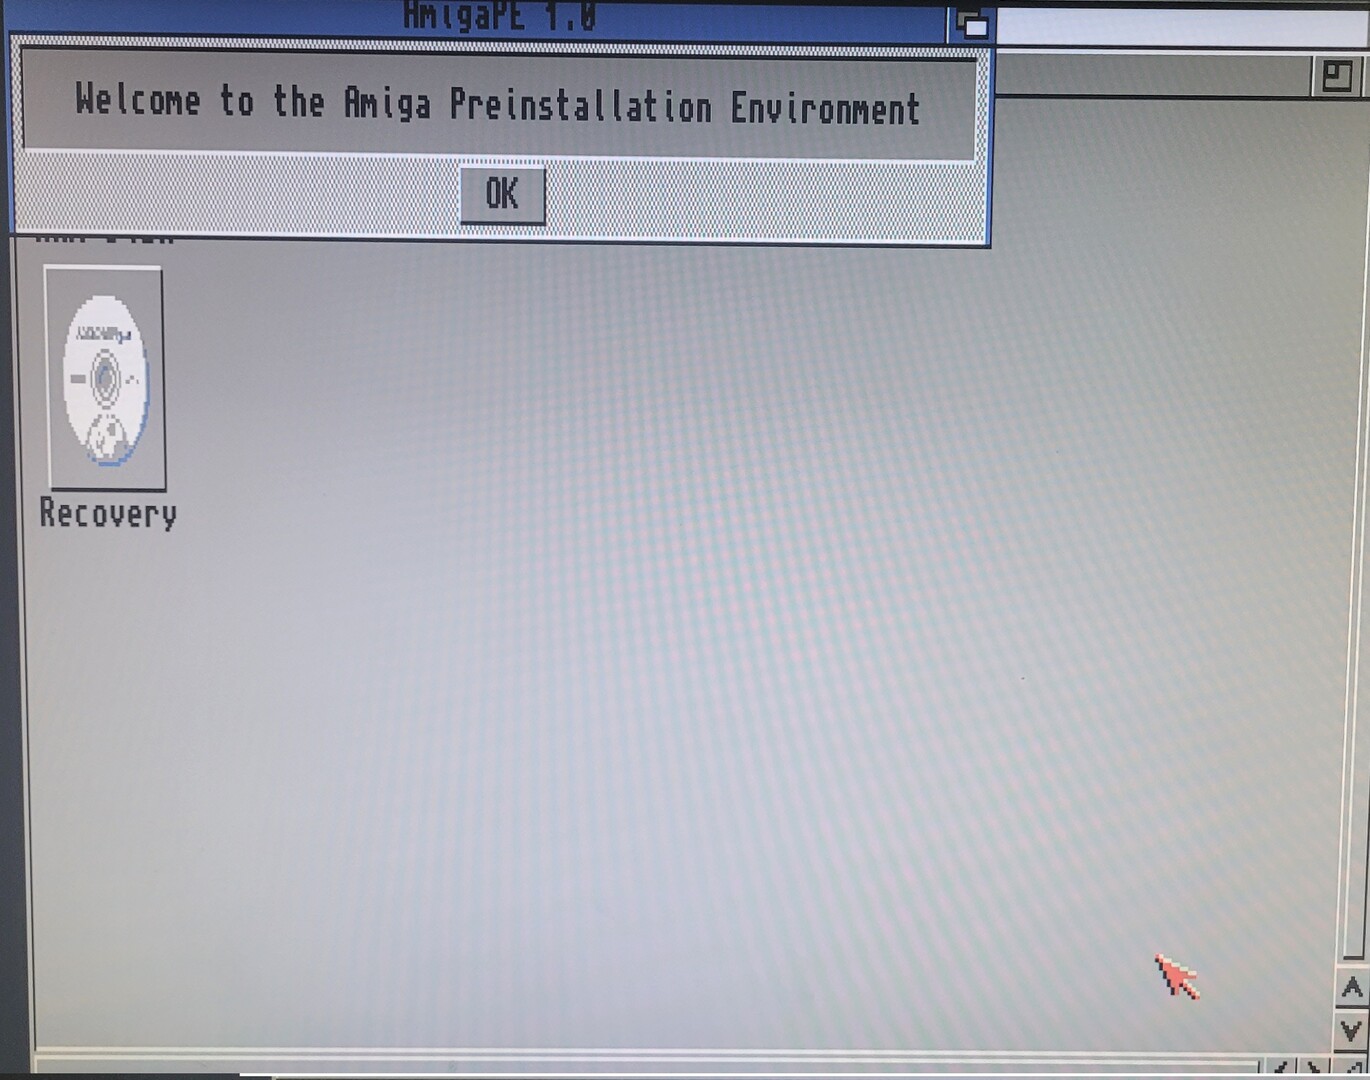
The approach is the following : creating only one partition named “Recovery” which will contains the AmigaOS 3.2 files from the original installation disk, as well as all other “basic” softwares to install on the A600. Other partitions will be created on the real amiga using PFS3.
To make a bootable Amiga partition from the emulated system :
- Launch HDToolsBox
- Select the drive
- click “change drive type”, then “define new”, then “read configuration”
- I personnaly changed the following :
- Manfacturer : Sanedisk
- Identifier : Ultra64Gb
- Drive Revision: 1.0
- Validate with OK
- Back to previous screen : click OK again.
- You will be prompted because the drive definition has been altered : click continue
- Create a 256Mb partition (256Mb, FFS, bootable, priority -1), name “Recovery”
- Validate with ok, then save change to drive.
- Exit : this will trigger a reboot
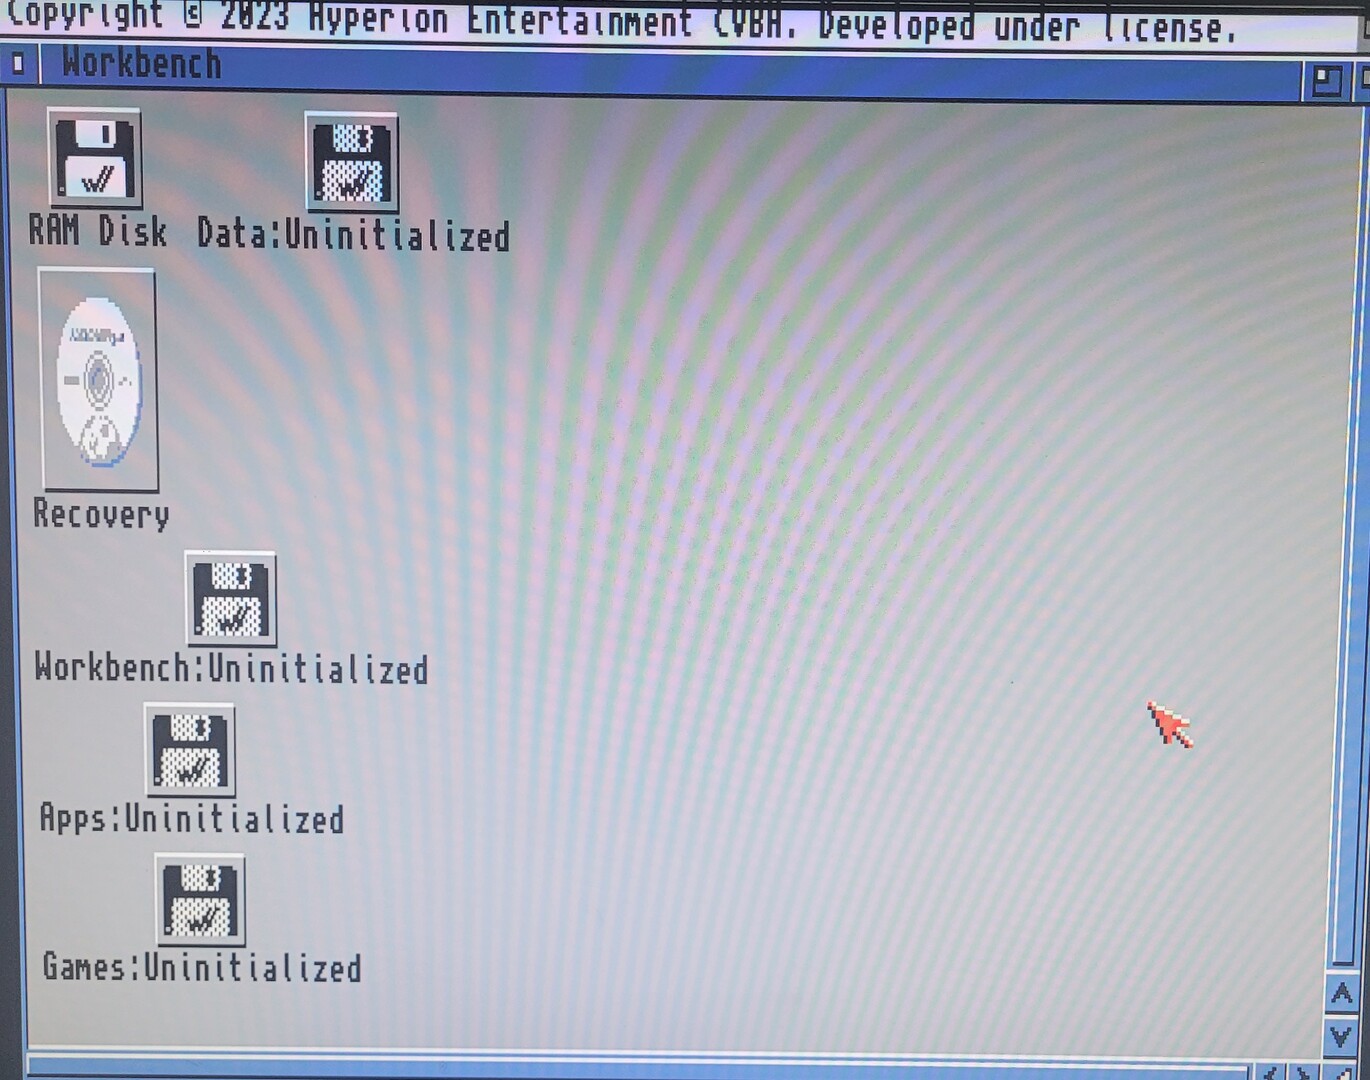
After the the emulator has rebooted, the “Recovery” partition previously created may not appear on OS 3.2. Go to the Workbench 3.2 partition, system directory, then launch “mounter” to mount the partition.
It should appears on the desktop and can now be formated with the default settings (Name : “Recovery”) and “quickformat”.
Now, the Amiga OS 3.2 CD can be copied to this recovery partition from an Amiga shell :
|
1 |
COPY AmigaOS3.2CD: TO Recovery: ALL |
In order to use PFS3 filesystem (more robust and faster than FFS), it must be installed on the Recovery partition to be then used on the real Amiga. Launch the PFS3 installer on the emulator in expert mode to be able to choose the good CPU (030) version and install it to Recovery: (don’t select multi-user versions if you dont have multiuser.library).
When I did the install, even in expert mode, the filesystem files where not copied (pfs3, pfs3ds and floppypfs). So I did another install on my UAE drive with default option except for the CPU version for which I chose 030.
Then, I copied the 3 filesystems file from L: to Recovery:l.
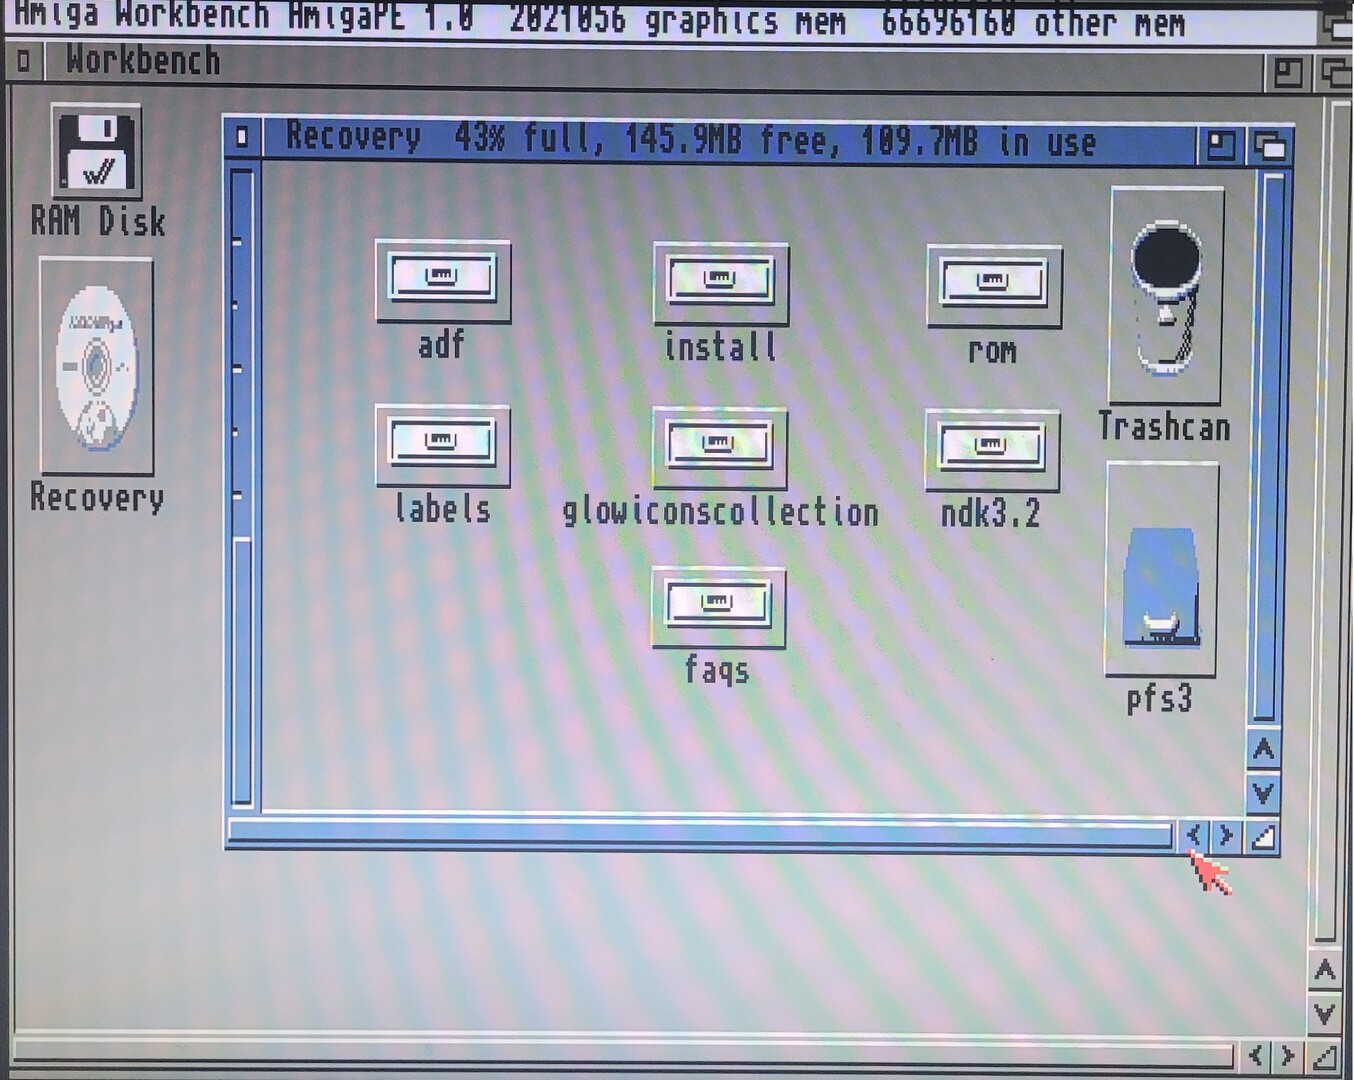
Final step in the emulator : copy every software that may be usefull to install after the OS 3.2. I personnaly added the OS 3.2.2 update and created a “Post install” folder on the “Recovery” partition with the following content :
- Network
- AmiFTP
- AmiSSL
- Aweb (68000 version and APL)
- Miami 3.2b
- Prism2v2
- Samba
- Smbfs
- System
- AHI + AHI-Paula
- BlazeWCP
- CFD133
- Codesets
- CopyMemAIO
- Executive
- Fat95
- FBlit
- FText
- Guigfxlib
- IconLib 46.4
- IDEFix
- Lha
- Mui 5
- PFS3
- PoolMem
- RenderLib
- Rewindcy
- Snoopdos
- Directory Opus 4.12
- Tools
- AdfZ
- Diskspeed
- Dopus 4
- ImageMount
- Xad
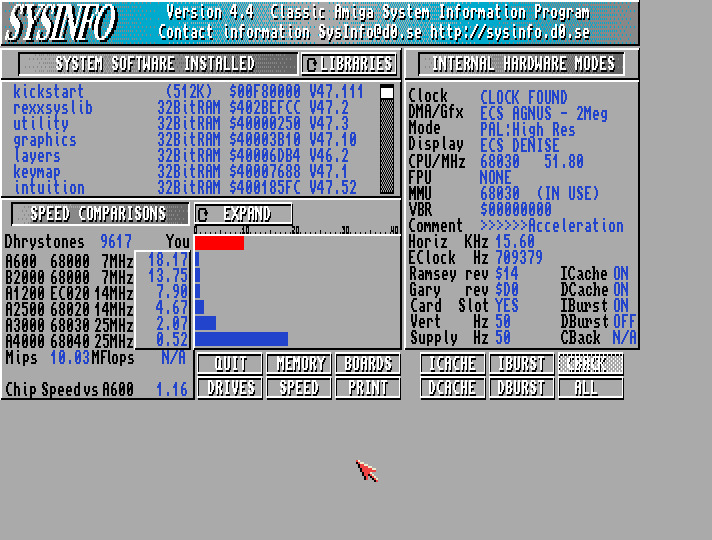
- Sysinfo
- Ux_Ui
- MagicWB
Now the SD can be connected to the real Amiga. The Recovery partition is bootable and will allows to install and re-install at any time, providing that this partition will never be deleted.
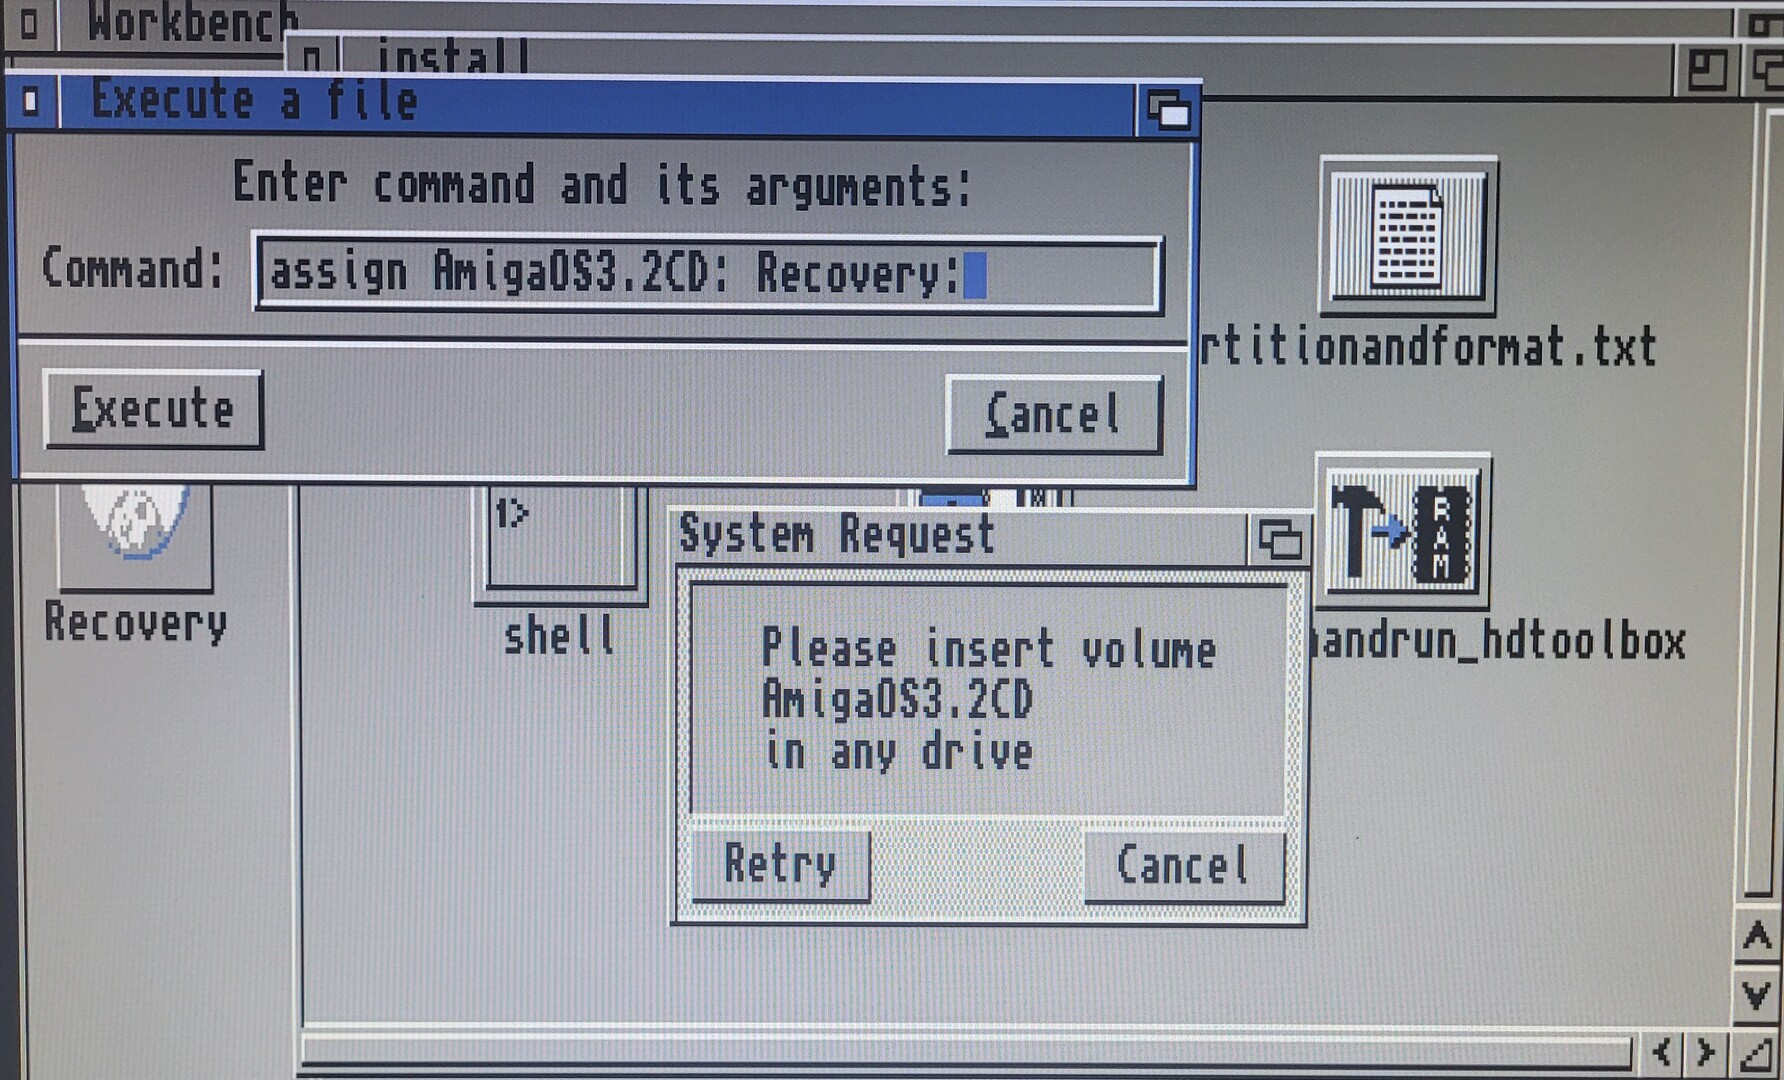
For all operations regarding the Amiga OS 3.2 installation, an assign must be done… Or just rename Recovery to AmigaOS3.2CD
Make PFS3 partitions
The partitions can be done with HDToolBox that comes with OS 3.2 CD install (“copytoramandrun_HDToolsBox”). Don’t forget that any input must be validated by pressing the TAB key, else nothing will be recorded. A very good guide can be found here.
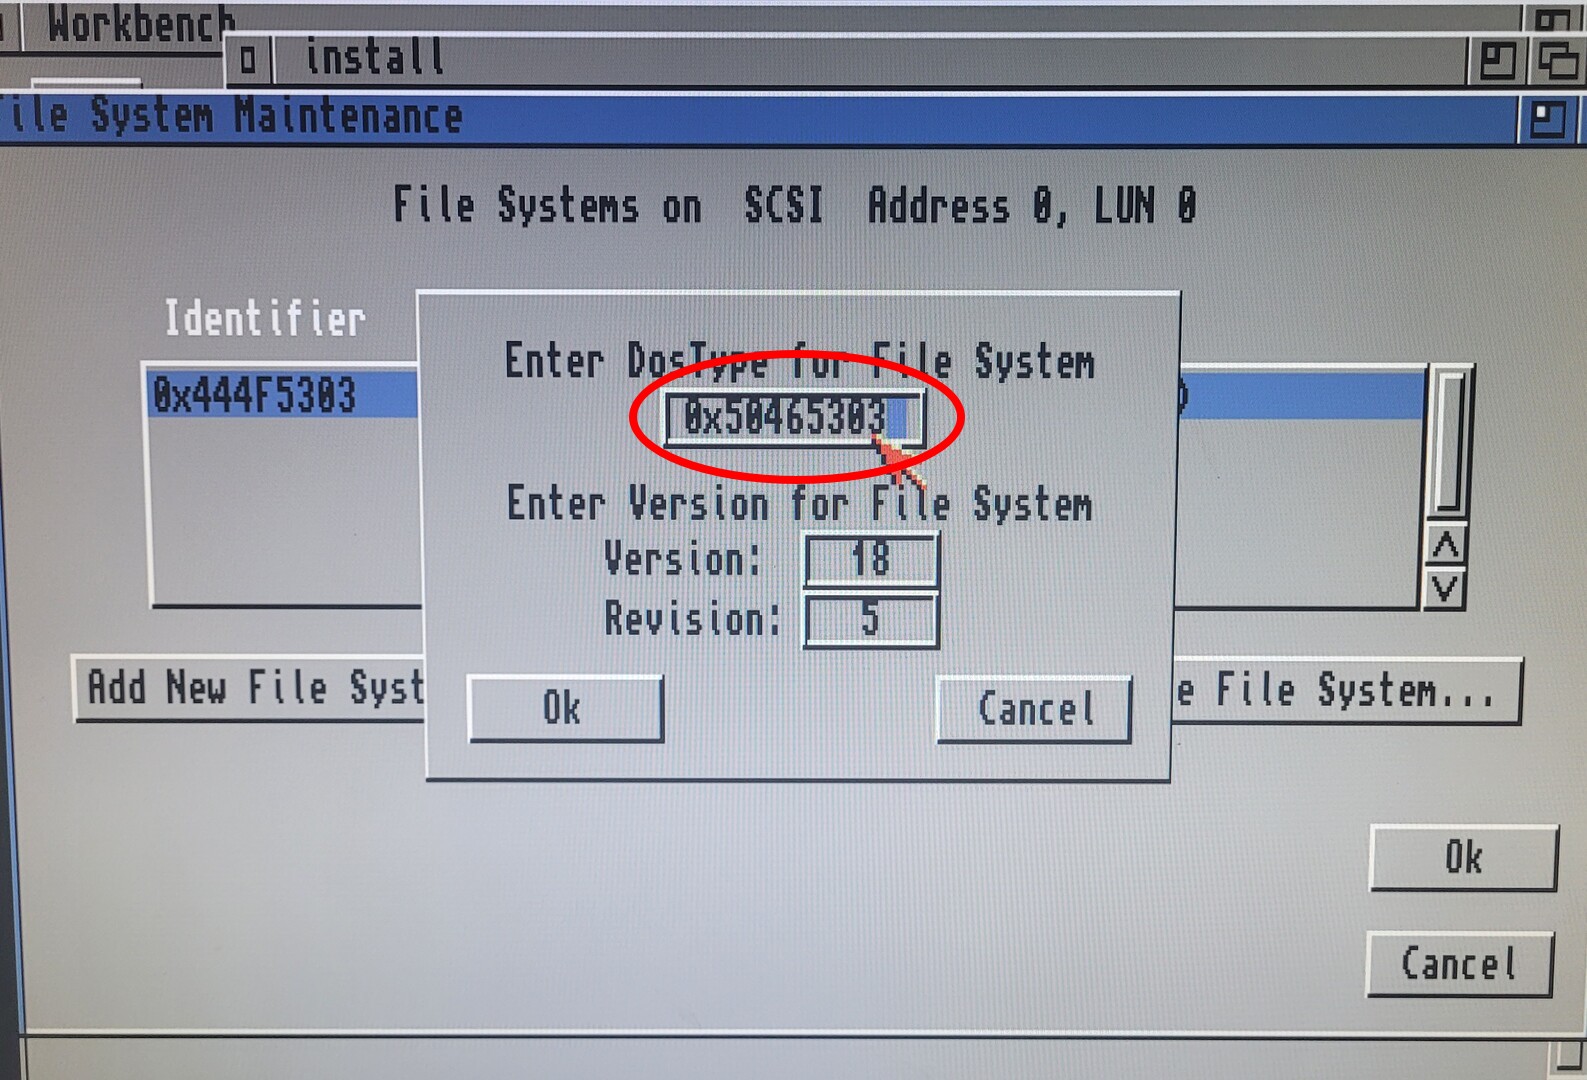
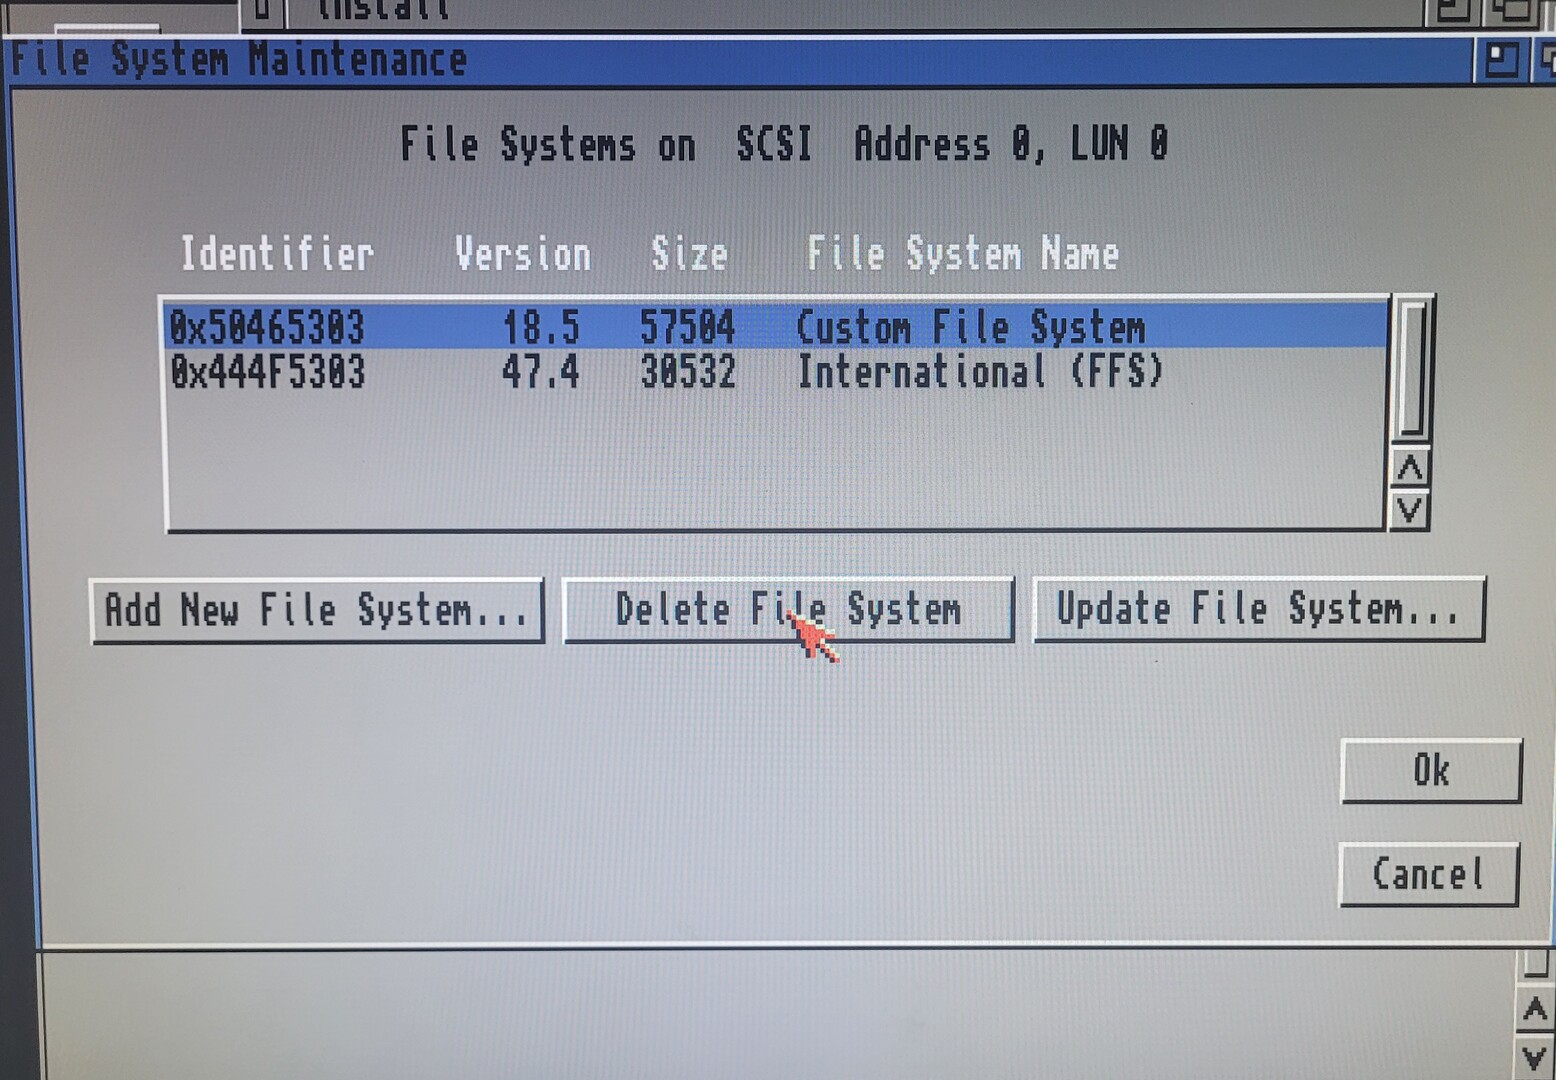
The PFS3 filesystem must be installed on the drive. Go to partition drive menu ot create a new partition, for example “Workbench”, then clic “Advanced option”, then “Add/Update…”, then “Add new File System”, and choose the pfs3 filesystem from L: (or Recovery:l)
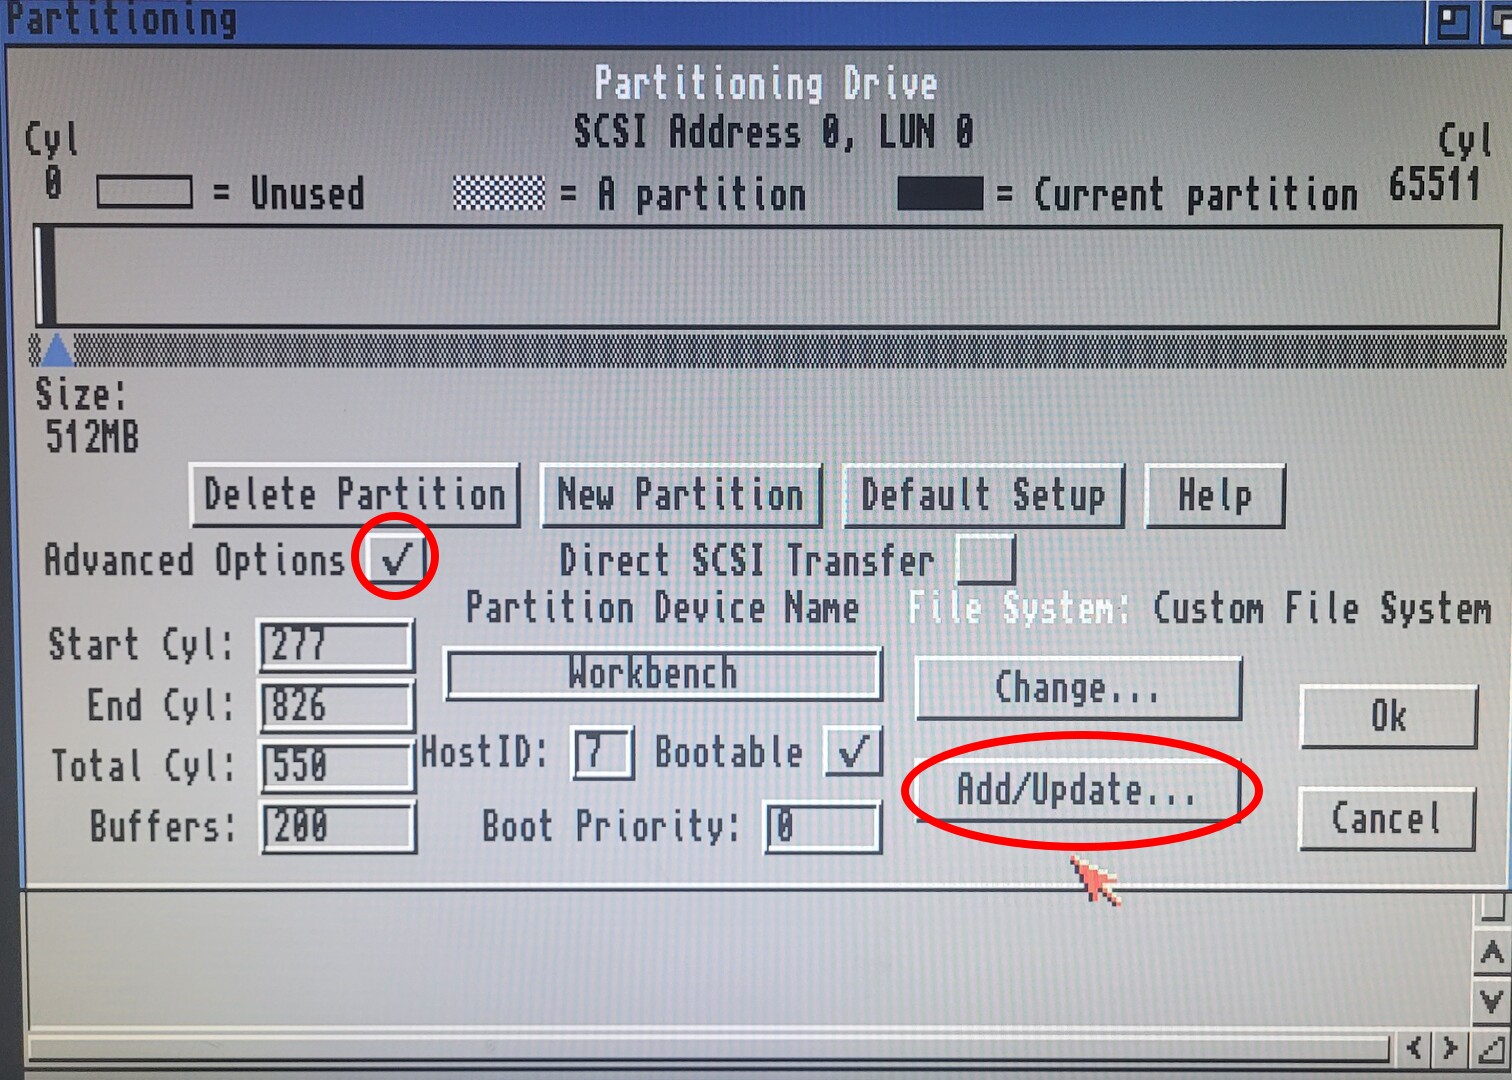

When asked, enter 0x50445303 as DosType (which corresponds to ASCII “PFS\3”), now the filesystem is installed on the dive and can be used for any partition:
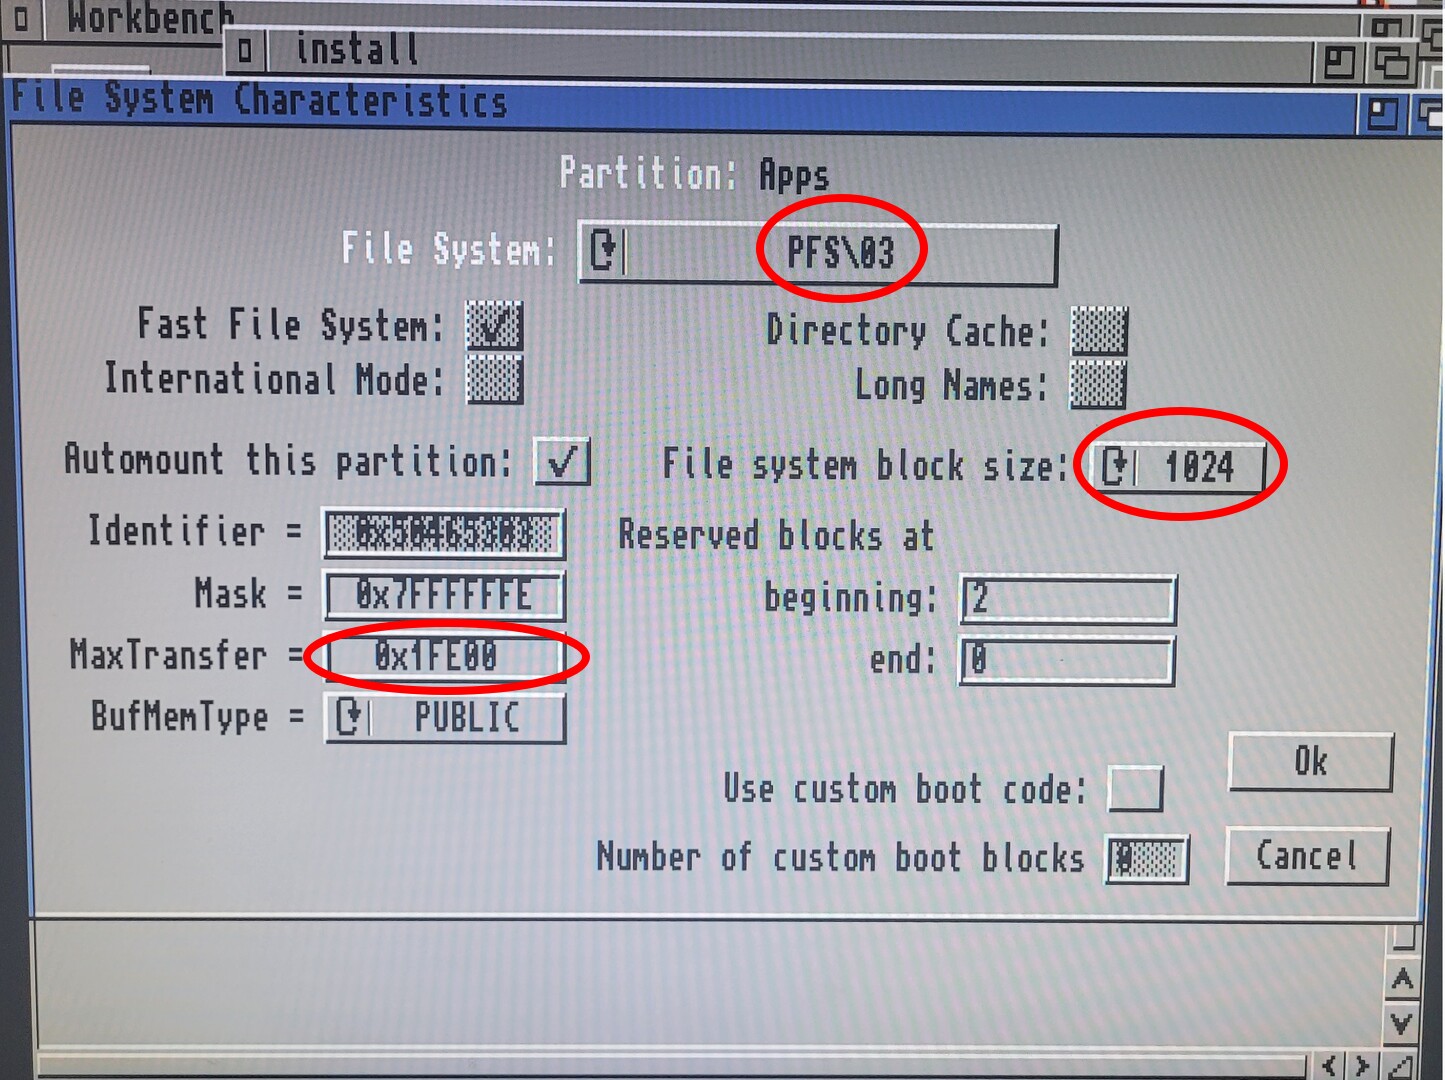
Below is the partition scheme I used. For every partitions, you have to click “advanced” to see all options and click on “Change…” to select PFS3 filesytem. Beware that the max transfert value must be “0x0001fe00”.
Workbench:
- Size: 512M
- Buffers: 200
- Name: Workbench
- check bootable
- blocksize: 512
Apps:
- Size: 4096M
- Buffers: 500
- Name: Apps
- Not bootable
- Blocksize: 1024
Games:
- Size: 20G
- Buffers: 500
- Name: Games
- Not bootable
- Blocksize: 2048
Data (dedicated to misc storage, like mods, pictures…):
- Size: 30G
- Buffers: 500
- Name: Data
- Not bootable
- Blocksize: 2048
Macintosh (dedicated to shapeshifter):
- Size: 5.5G
- Buffers: 500
- Name: Macintosh
- not bootable
- no automount for now, FS is not important
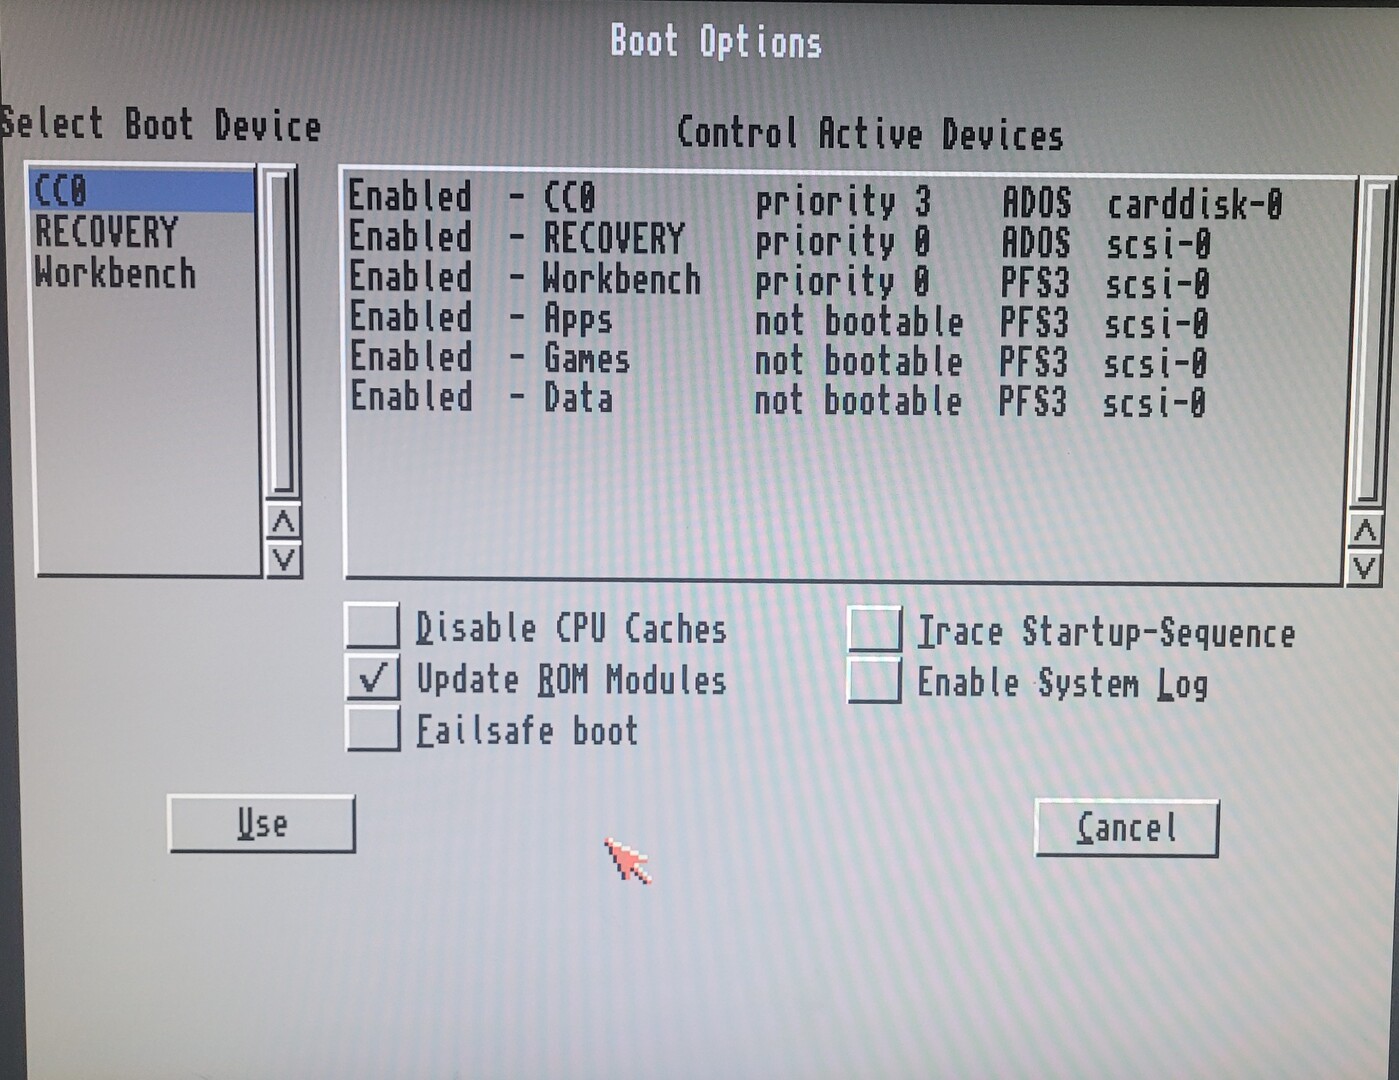
After a reboot, here is the all the partitions as seen in the early startup (Machintosh does not appears because I added it after this screenshot) :
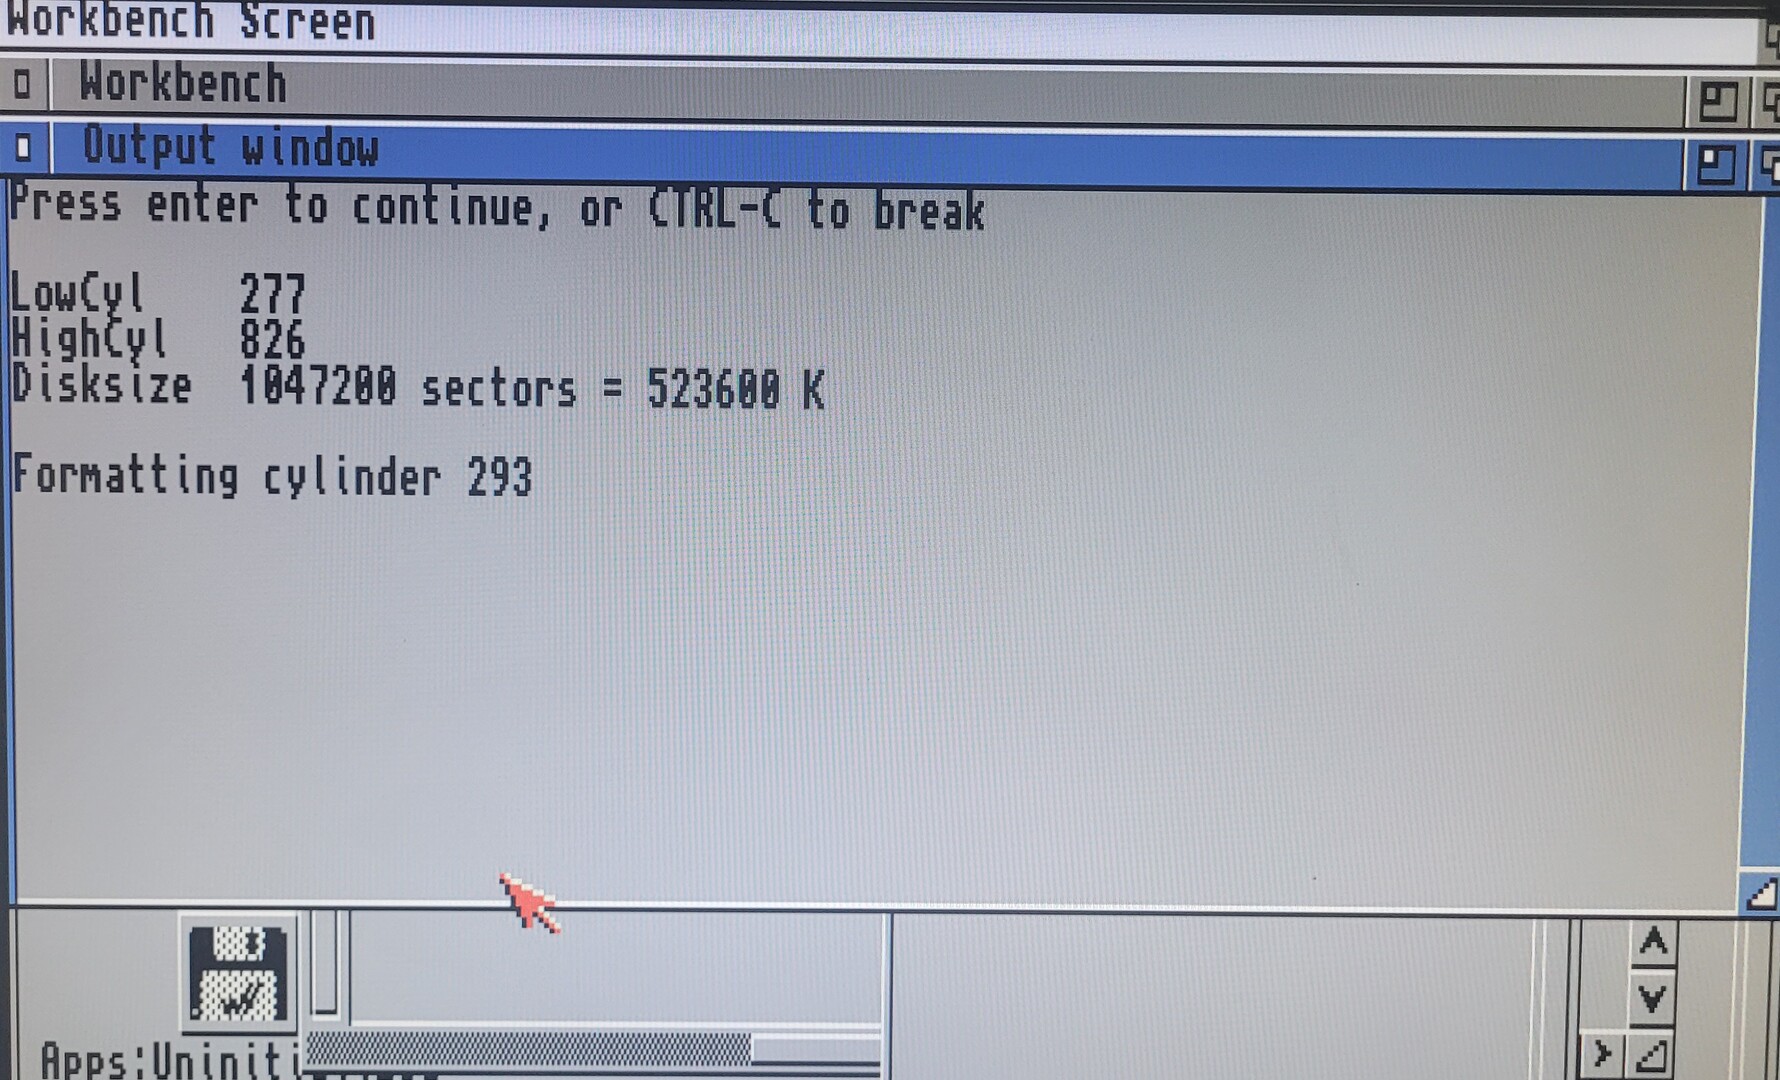
Back in the OS 3.2 install booting the Recovery partition, all partitions have to be formated with “pfsformat”, for example :
|
1 |
pfsformat device Workbench: name Workbench QUICK |

At this time, the Workbench partition being formated and bootable with priority 0, booting from Recovery partition can only be done by selecting it on early-startup.
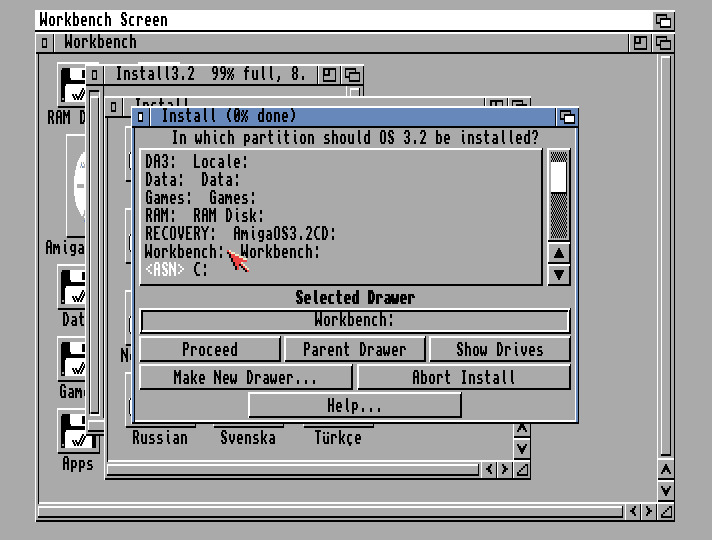
Install OS3.2
To install OS 3.2, I basicaly followed the official instructions. I just had to force boot from recovery and assign AmigaOS3.2CD to Recovery.
The main choices I did were :
- Install to “Workbench” partition
- Postcript printer only
- English language
- Only needed keymap
- No glowicons

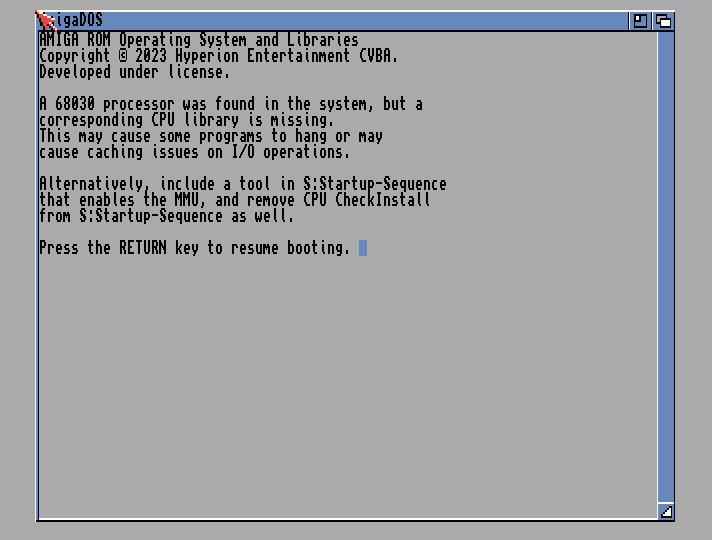
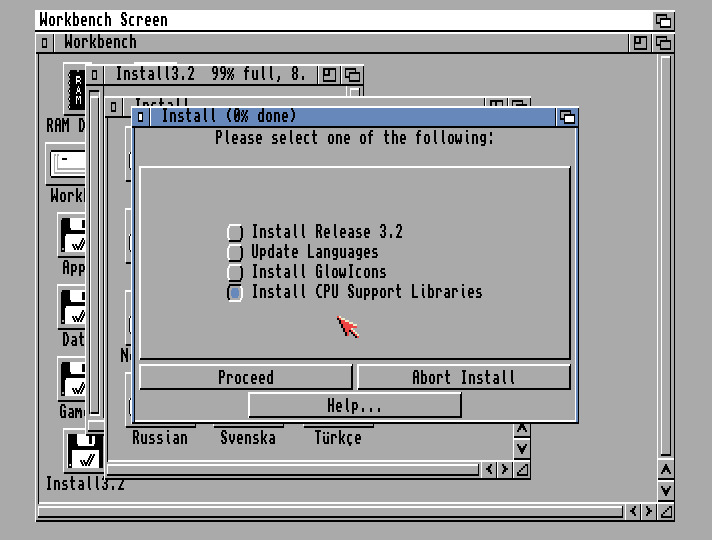
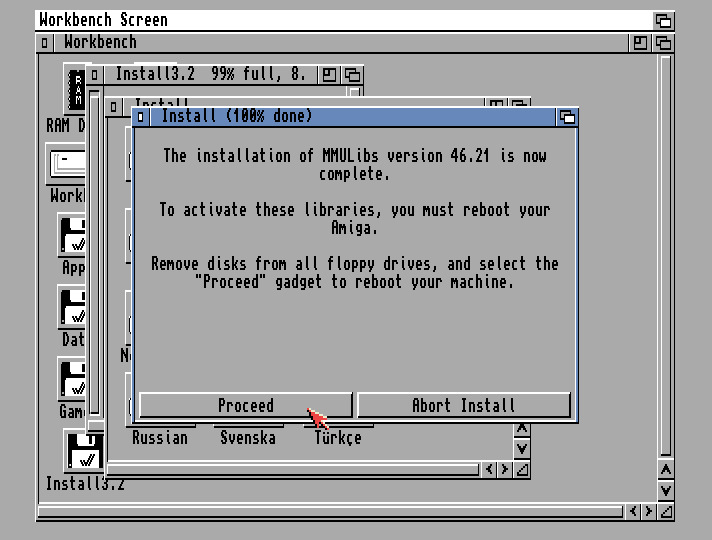
After the first boot, As my A600 has a 68030 with an MMU, the installer must be relaunched to choose the “install CPU support libraries” to install mmulibs.
Finaly, I updated to the latest 3.2.2 (remember: these files have been copied to Recovery partition).
First adjustements I did before continuing:
- Removed workbench windows (menu Workbench/backdrop, then Windows/Snapshot/all)
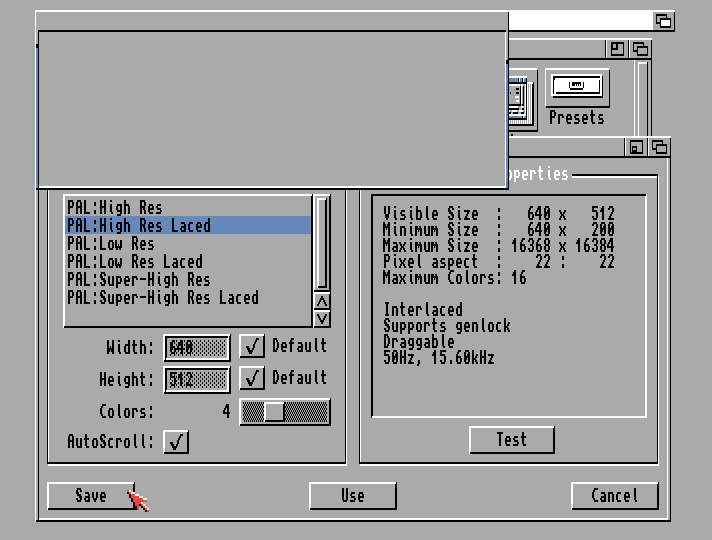
- Changed screen mode to “Pal highres laced”, which gives a non flickering 640×512 display thanks to the RGBtoHDMI
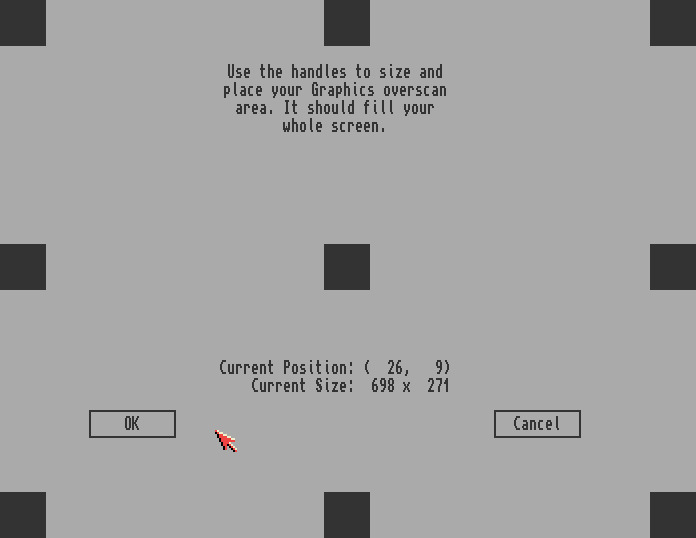
- Set overscan to maximum possible (some RGBtoHDMI adjustements may be needed to maximize the possible overscan)
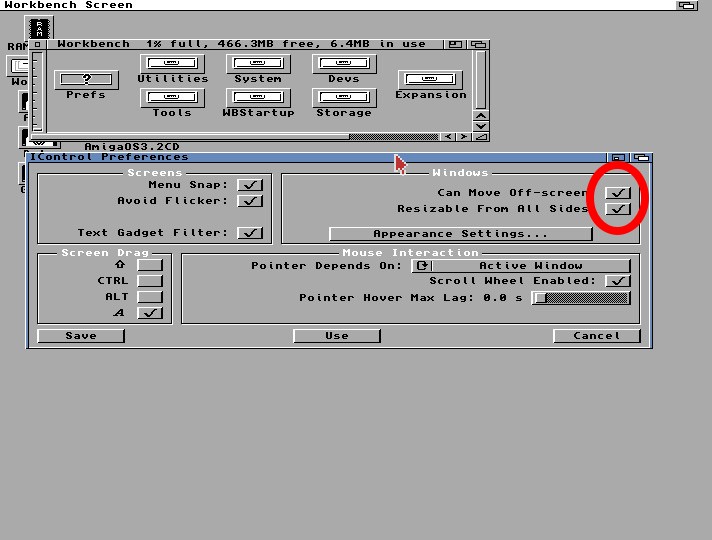
- Icontrol : allowed to move windows off screen, and made them sizeable from all edges
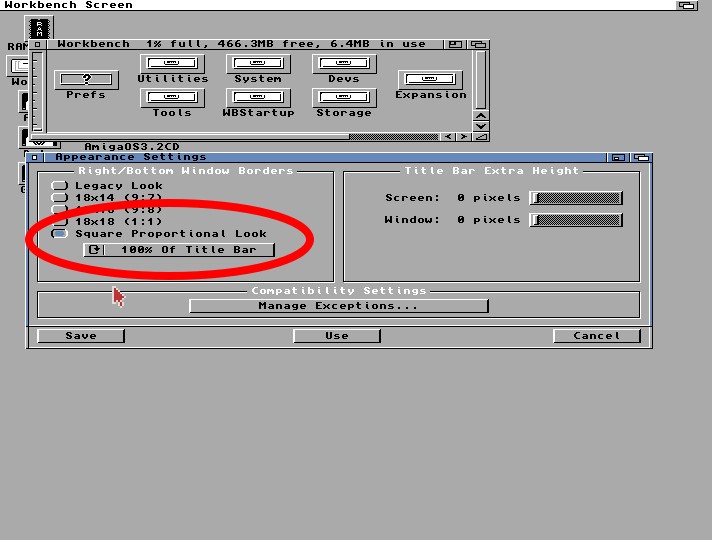
- in “appearances settings”, changed windows borders size to proportional
- Workbench : set the stack size to 32K

Finaly, to make life easier for the next steps, I installed the following tools (I put them in Workbench:Tools):
- Lha
- DOPUS 4.12 or any other filemanager
- XAD (the xadmaster.key must be copied to S:)
- CFD133 and Fat95 to use PCMCIA/CF adapter for easy file exchange
- SnoopDos to be able tackle problems when something unexpected happens
- Mui 5 : some tools and applications use it for their GUI
System enhancements
Even if the Amiga OS 3.2 is relatively new, there are still room to enhance both performance and responsivness of the OS.
From warpclassic68k.blogspot.com/p/dl_30.html:
- BlazeWCP: greatly accelerates some graphic functions on 68020+ CPU. Using WPATest, I got 424 Kpixels/s before and 1361 Kpixels/s after !
- Fblit : use the CPU instead of the blitter for some OS drawing, which makes them faster with a fast CPU and 32 bits memory
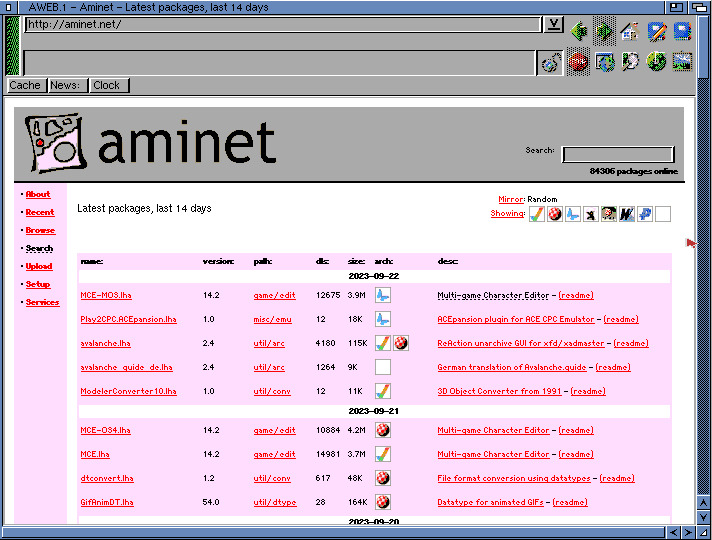
Other enhancements from from Aminet :
- Ftext : render text in fastram with fblit
- Iconlib46.4 : fastest way to display any Amiga icon
- Executive (+fix and key) : better and preemptive task scheduler
- Codeset : needed to handle charsets for some applications, like SMBFS
- CopyMemAIO : faster replacement of the native copymem()
- PoolMem : reduce memory fragmentation
In addition, I also installed IDEFix, even if I don’t have any hardware adapter over the original IDE. It provides a slighly better read performances. Here is what I measured with Sysinfo on the workbench partition (PFS3 and 200 buffers):
- without IDEFix : 1.12Mb/s
- with IDEFix : 1.27Mb/s
Power Computing released the Key some years ago, so IDEFix is now totaly free :
- SerNo / Name: PWR005175
- Company/Email: Power Computing
- Personal Key: 8114051B4AD795E5
Some adjustements in Commodities:
- disabled NOHISTORY tooltype in AsyncWB to get Execute history
- enabled SHORTDATETIME, AUTOCLOSE, AUTOGETVERSION tooltypes in RawWBinfo
- Installed ClickToFront and MouseBlanker
- installed Rewincy so LAmiga+Tab cycle windows
With a compatible PCMCIA card, networking and even (very) simple web browsing is possible. Here is what I installed :
- Prism2v2 (in my case, for a netgear wifi card). I do not let the networkmanager run in background. I prefer to launch it when I need it.
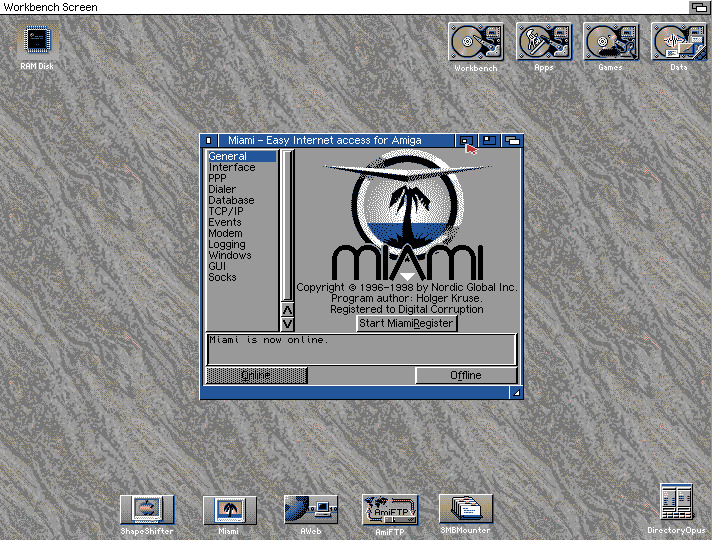
- Miami with ClassAct prefs, which is less demanding than the MUI version (key can be found on eab forum)
- AmiSSL + AmiSSL-3.6-68k (http://amithlon.snkbitten.com/files/patches/). You need to install the latest version then copy amisslv097g.library from the 3.6 version on libs:AmiSSL else, Aweb won’t be able to load https sites.
- Aweb APL (get 3.5 package, and copy over AWeb-3.5.09-68000 because standart one crash if no FPU)
- AmiFTP
- Samba bin
- SMBFS + SMBMounter
Finaly I also customized the Tools menu via the MenuTools commodities (which is in fact a simple Arexx script) :
- Enable Wifi : launch Wirelessmanager to initialise Wifi connexion
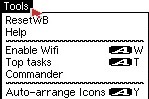
- Top tasks: launch Executive’s Top
- Commander: launch Executive’s Commander
- SnoopDos
- Shell
Here is the corresponding part of MenuTools file from WBStartup :
|
1 2 3 4 5 6 7 8 9 10 |
MENU ADD NAME MenuSeparator2 TITLE '"~"' CMD "" MENU ADD NAME MenuWifi TITLE '"Enable Wifi"' SHORTCUT 'W' CMD "'address command ''C:WirelessManager prism2.device >NIL:'''" MENU ADD NAME MenuToptasks TITLE '"Top tasks"' SHORTCUT 'T' CMD "'address command ''C:WBLoad SYS:Executive/Top'''" MENU ADD NAME MenuCommander TITLE '"Commander"' SHORTCUT 'R' CMD "'address command ''C:WBLoad SYS:Executive/Commander'''" MENU ADD NAME MenuSeparator1 TITLE '"~"' CMD "" MENU ADD NAME MenuSnoopDos TITLE '"SnoopDos"' SHORTCUT 'S' CMD "'address command ''C:WBLoad SYS:Tools/snoopdos'''" MENU ADD NAME MenuShell TITLE '"Shell"' SHORTCUT 'E' CMD "'address command ''C:WBLoad SYS:System/Shell'''" |
Visual enhancements
A thing that catch eyes on an ECS/OCS Amiga with Hires display is the mouse cursor : contrary to AGA machines, the cursor stay in LowRes even on interlaced screen. A small tool named “LacePointer” change the pointer resolution to HiRes, which makes it more proportional on a interlaced resolution.
Below is comparison : left = default, right = with lacePointer

Another visual enhancement: as you can see on the previous screenshots, there is a small empty space on the right. This can be adjusted in RGBtoHDMI settings on the Geometry/H-offset. I set it to 112 in my case, which allowed me to turn this empty space into a usable usable with overscan preferences. The result is a nice resolution of 712×540.
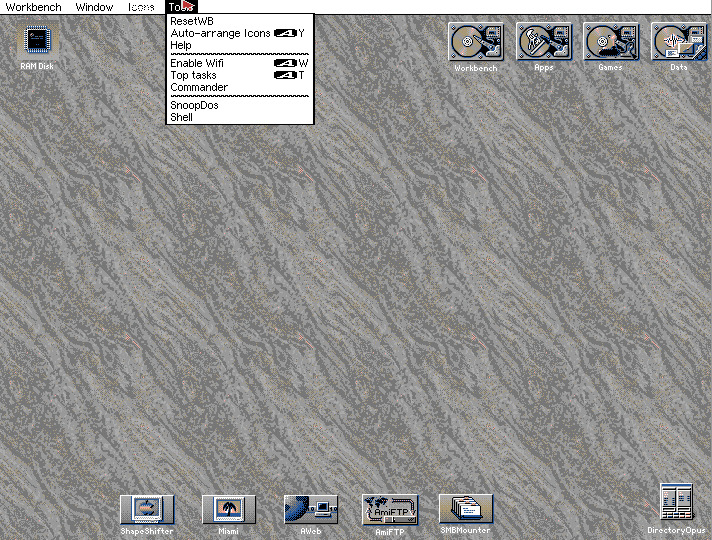
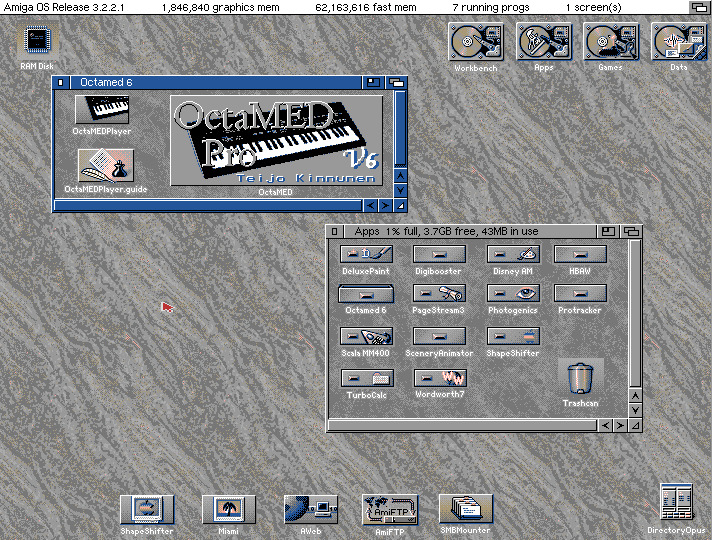
The finale touch, a good old MagicWB with some adjustements to better suit my taste:
- Set Icon text to outline, and white color instead of black
- Changed palette to darken the blue by one step on each component
- Changed active windows title color to white
- Replaced some icons
Mac emulation
The beauty of the Amiga is that you also get a Machintosh with it. I used Shapeshifter, but Fusion may also do the job.
Graphic drivers
The fastest graphic driver for ECS and Amiga with an MMU is MuEVD. The settings of the driver must be written in a file named “MuEVD.prefs” in ENV: and / or ENVARC:. Here is the content of my preference file (you can check the doc for more informations):
|
1 |
BORDERBLANK yes OWNREFRESH yes REFRESHRATE 0 |
Dedicated partition
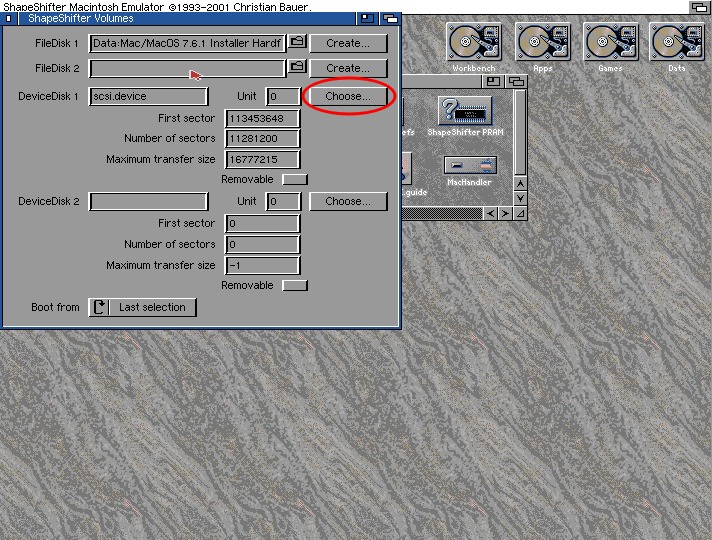
A dedicated partition or a whole disk is faster than a hardfile. As explained earlier, I made a specific partition. In order to use it with Shapeshifter, it must be first formated as FFS, so the partition become selectable in Shapeshifter throught the “choose” button in the “Volumes” settings. This is the easiest way to make shapeshifter set the good value automaticaly:
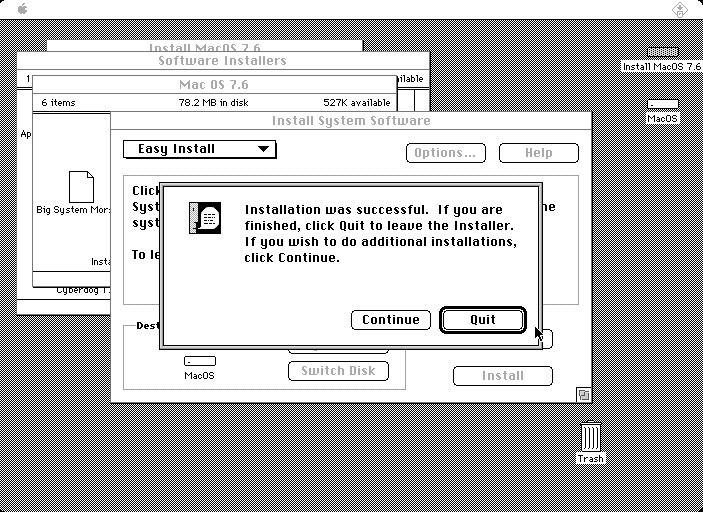
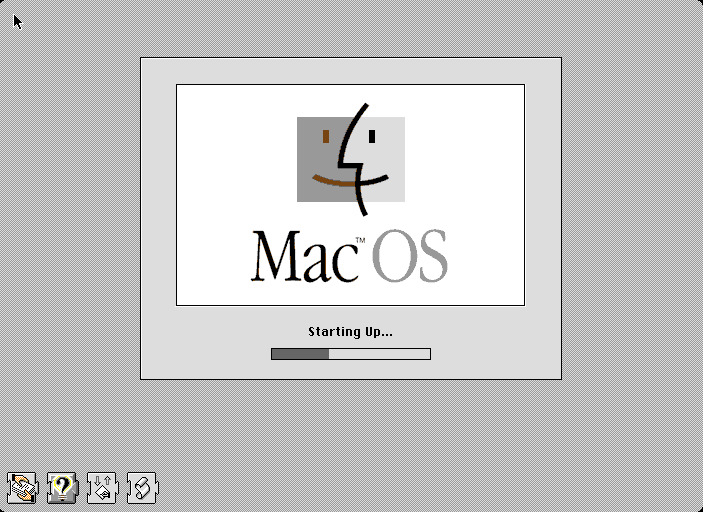
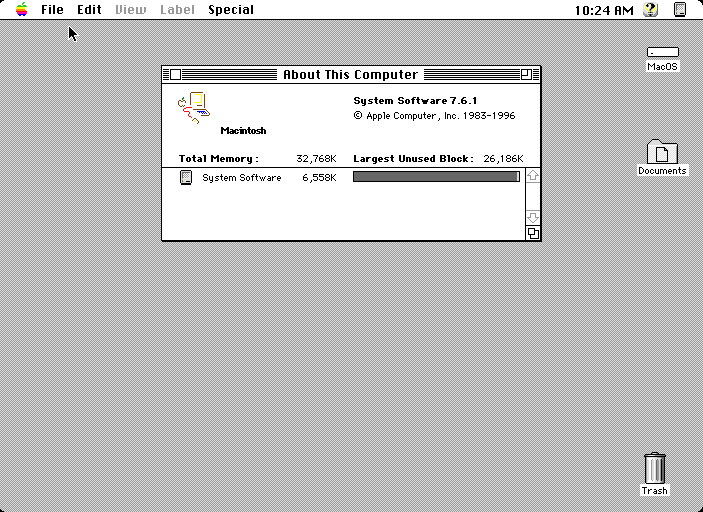
MacOS 7.6 installation
This step may seems trivial, but it is not that easy. The first difficulty may even seems silly… But this article is about an Amiga 600 without any CD Rom drive and ShapeShifter does not support ISO image as a virtual CD Rom. Chance is that someone make a bootable HDF file of MacOS 7.6 on EAB. There is also a 7.5 version, they can be found here : https://eab.abime.net/showthread.php?t=63102&page=2.
In fact both versions are needed: 7.6, obvisouly to insall it directly, but the 7.5 HDF file also contains an installer of Stuffit Expander. And trust me, you absolutly need this because it’s very hard to find an m68k of a self extracting Stuff-it archive, and without it, it is practicaly impossible to install anything on MacOS without a CD reader !
One last thing about MacOS 7.6 : right after the installation, it was just freezing during the boot process. I had to boot MacOS without extension disabled (old shift key during boot). Then I disabled all extentions in MacOS, before activating only usefull ones regarding a 68030 based Mac with no printer.
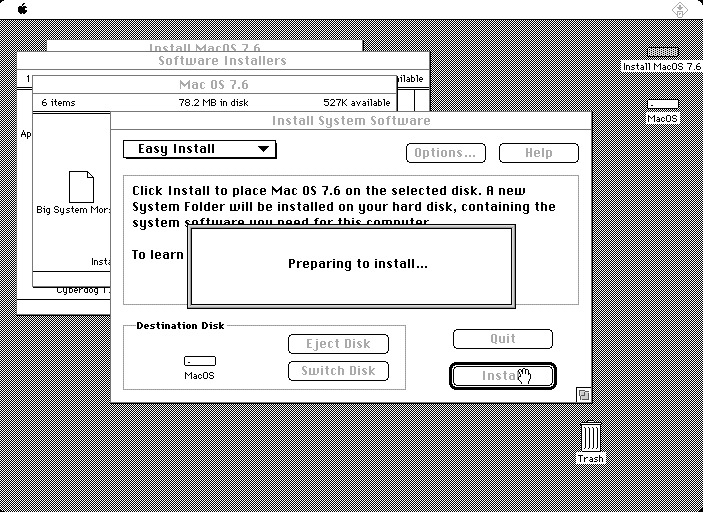
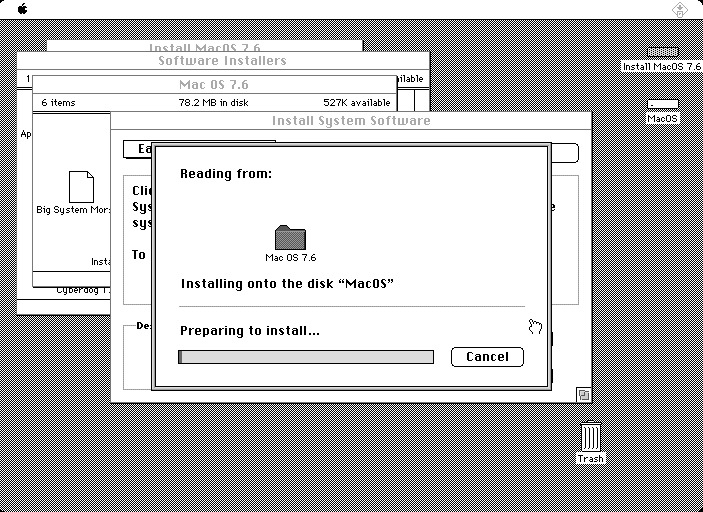
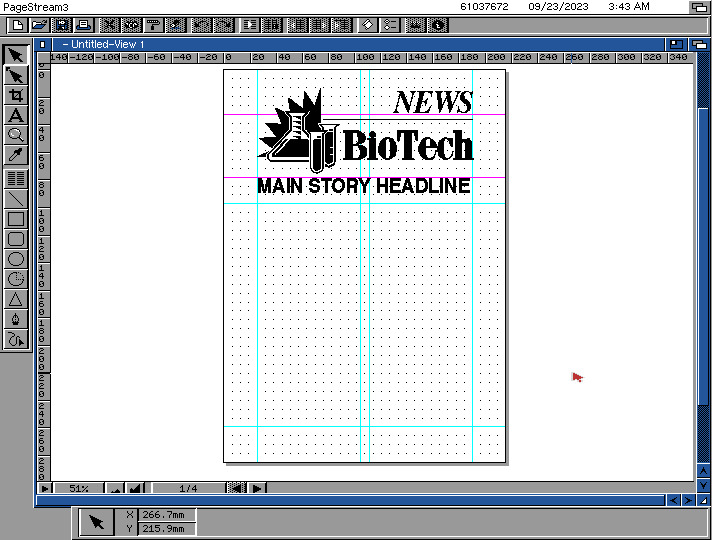
Below are some screenshots of the installation process and the freshly installed OS 7.6:
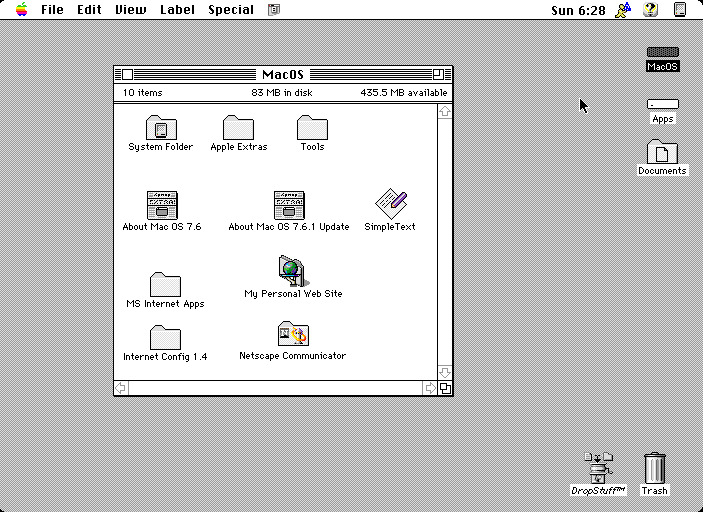
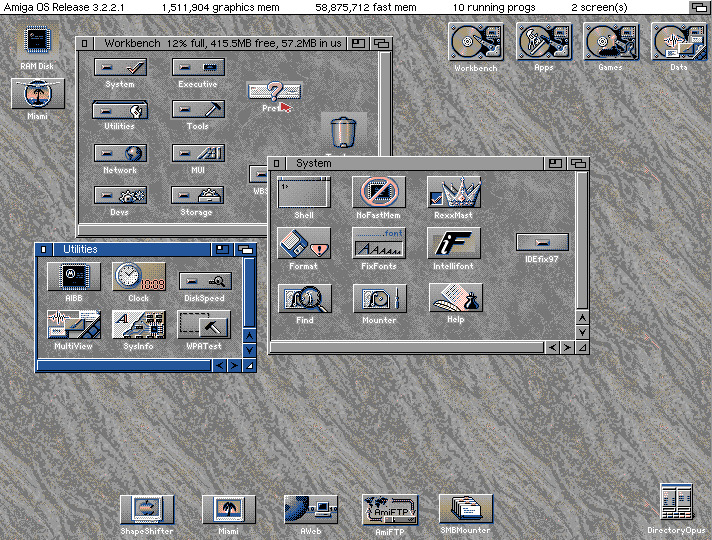
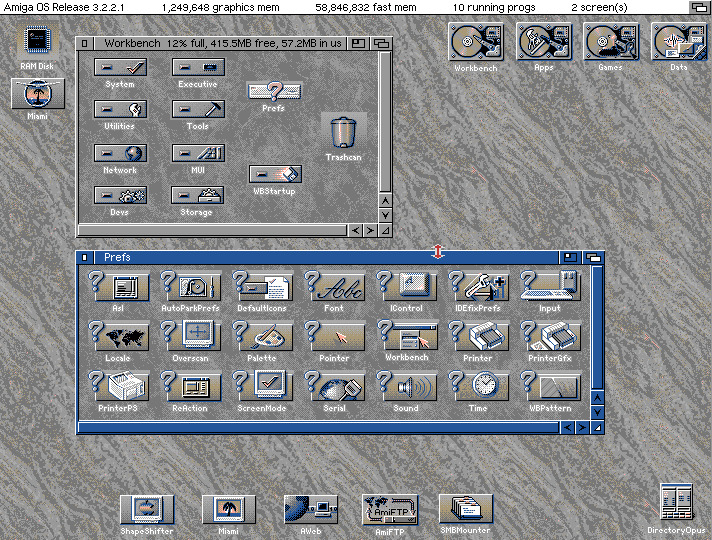
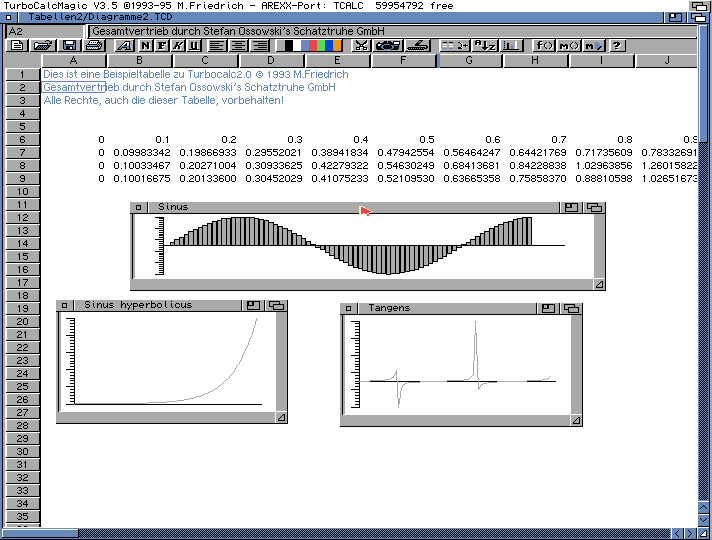
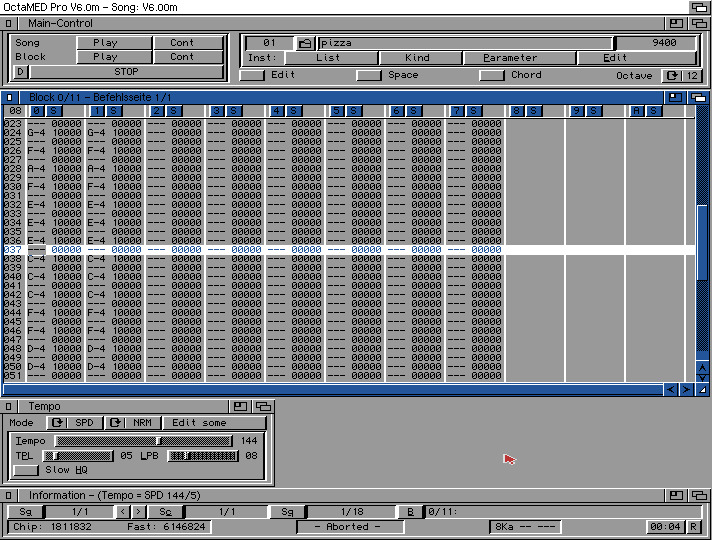
More Screenshots
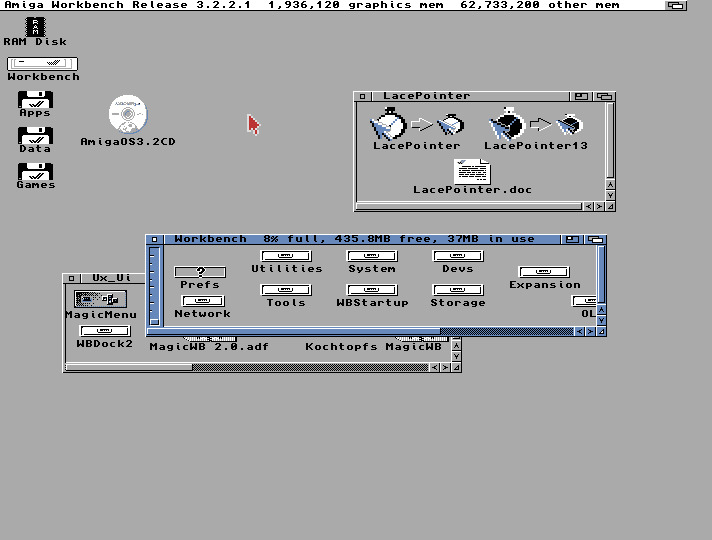
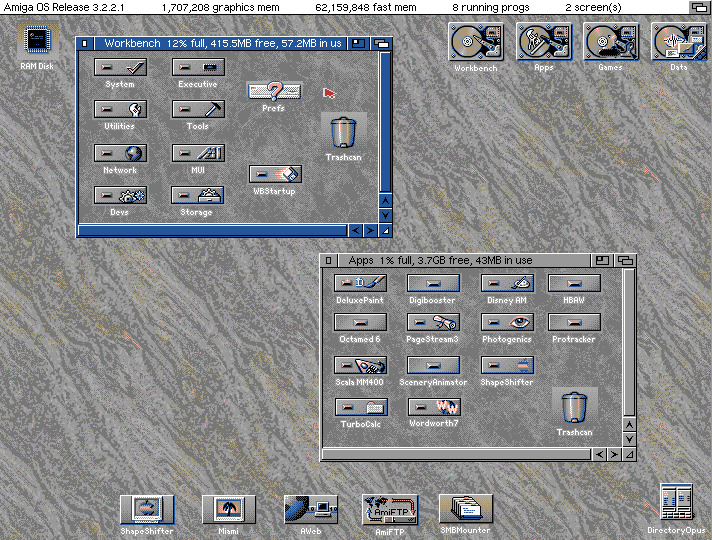
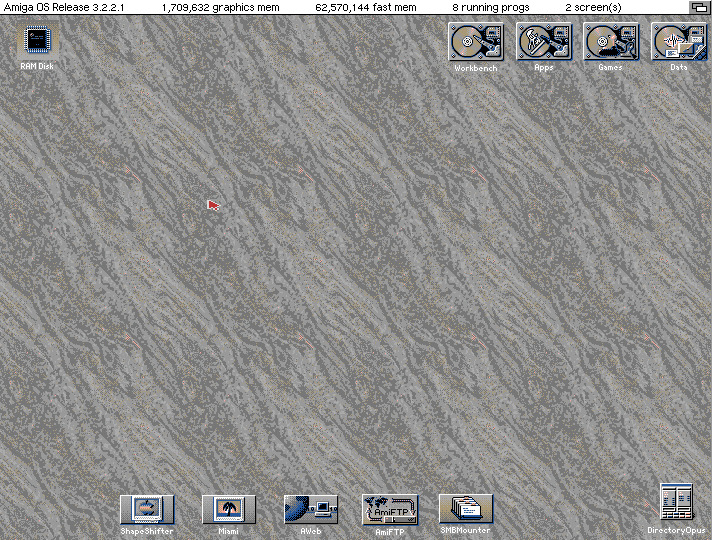
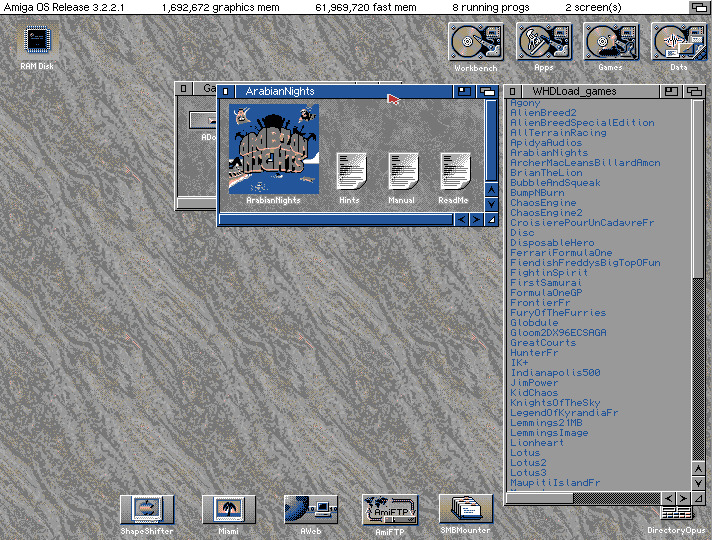
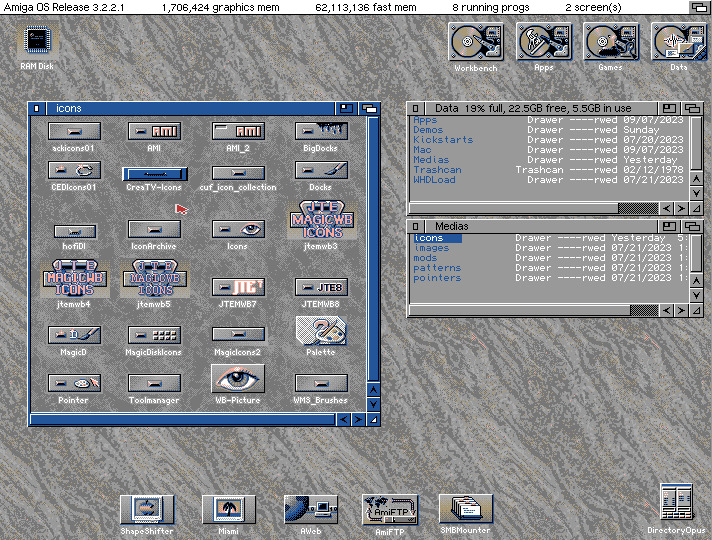
Below are some more screenshots of this Amiga 600 running Amiga OS 3.2 (I took them with RGBtoHDMI):

[…] I disassembled yellowish parts to put them in my retrobright case (which can be seen in a previous article): […]
That is a beefed up Amiga 600! 😍😎🤓
I have one with a similar setup, but no accelerator…yet!
I have a few questions regarding a630. I’ve read about other users problems with the socket becoming loose after a year, the heating issue and problems closing the case because of the fan being to big.
Have you experienced any of above issues. The heating issue you mentioned and solved by changing the fan voltage (any more issues regarding that?). I’m interested in buying the a630, but not sure if it will cause more problems than solutions.
Noticed you’re on amigaos 3.2 like me. Mmu-libs…did you copy them from the cd to a specific folder?
I didn’t have any problem closing the original A600 case. There is cleary enough room if it is plugged correctly (and has to be pushed hard on the 68000).
All the videos and installation I made for this article was with the fan at full speed (changing the voltage). The Amiga was litteraly running for more than 1h30 without any heat issues… And I still don’t have any issue as of today (I recently played with Jim Power for 1h).
However, I have to admit that I’m not using my A600 everyday 🙂
For mmu libs the AmigaOS 3.2 intall handle directly. I guess it copies them to SYS:Libs
All in all, I’m pretty happy with this A630 and my Amiga 600 in general ! It’s an excellent Amiga platform as well as a nice piece in my collection.
Very cool! Your build is my future goal.
How’s the noise level when the fan is at full speed?
I’m on os 3.2.2.1 so I guess the right mmu lib is already installed…or is it a an option not included in the standard installation?
I did not measured the fan noise, but I definitely hear it a bit when there is no sound (eg. on workbench).
MMUlib are installed only via a dedicated option on OS 3.2
Nice!
In my opinion, the A600 offers the best ROI of all Amiga models and is an absolute pleasure to work with. My A600 setup is pretty similar, but with a few differences:
• I went with a 020 accelerator since it doesn’t need a fan, making the machine completely silent.
• I don’t use HDMI solutions — I prefer the native Amiga picture on SONY PVM HR Trinitron CRTs. (I also have a couple of 1080s, but the PVMs deliver a superior image and perform PAL/NTSC auto-resizing.)
• For Wi-Fi networking, I use an IMP-box. It provides a streamlined, dedicated experience for all my needs and doesn’t take up the convenient PCMCIA slot, which I reserve for file transfers. Honestly, I can’t recommend the IMP-box strongly enough — it’s the best piece of modern hardware I’ve ever used on an Amiga.
• I installed Kickstart 3.1 (the last official one from Commodore) but opted to run Workbench 2.1, since it’s leaner than the 3.x series and is what the A600 originally shipped with. All the software I use runs fine — most just need Kickstart 3.1 and don’t care about Workbench version. In the rare cases they do, a simple specific library update solves it.
Before doing any upgrades, I also sent my A600 to a specialist for a full recap and ultrasonic motherboard cleaning.
[…] The plastics on this Amiga were just a bit yellowed — nothing too severe. I was able to recover them easily using the same Retrobright box I used for my pimped Amiga 600. […]
[…] Pimped AMIGA 600 from Bad Condition to Fully Working OS 3.2 with 68030 CPU. https://www.pimyretro.org/pimped-amiga-600/ […]