Some time ago, I had the chance to buy a used PlayStation 2 for cheap because it was sold as “defective.” In fact, the console was unable to read any discs, whether DVD or CD. I thought that wouldn’t be a problem, as installing FreeHDBoot is easy, and replacing the DVD lens should be straightforward and inexpensive. It turned out I was right—except for the lens replacement.
Here is the story of my upgraded PS2, featuring a new DVD lens, a silent fan, and FreeHDBoot…
References
First, I’d like to list some references that helped me on this modding journey:
FreeHDBoot
FreeHDBoot (or FreeMCBoot) is almost mandatory when replacing the DVD lens, as it requires running a specific tool to update the firmware. So I started with this part, which is actually the most important. Even if the console can’t read discs, FreeHDBoot allows games to be launched from an HDD or SSD.
Preparation
I’m not going to rewrite a tutorial on how to install or use FreeMCBoot and FreeHDBoot, as there are already plenty of good guides available online. Personally, I used this one, which is in French.
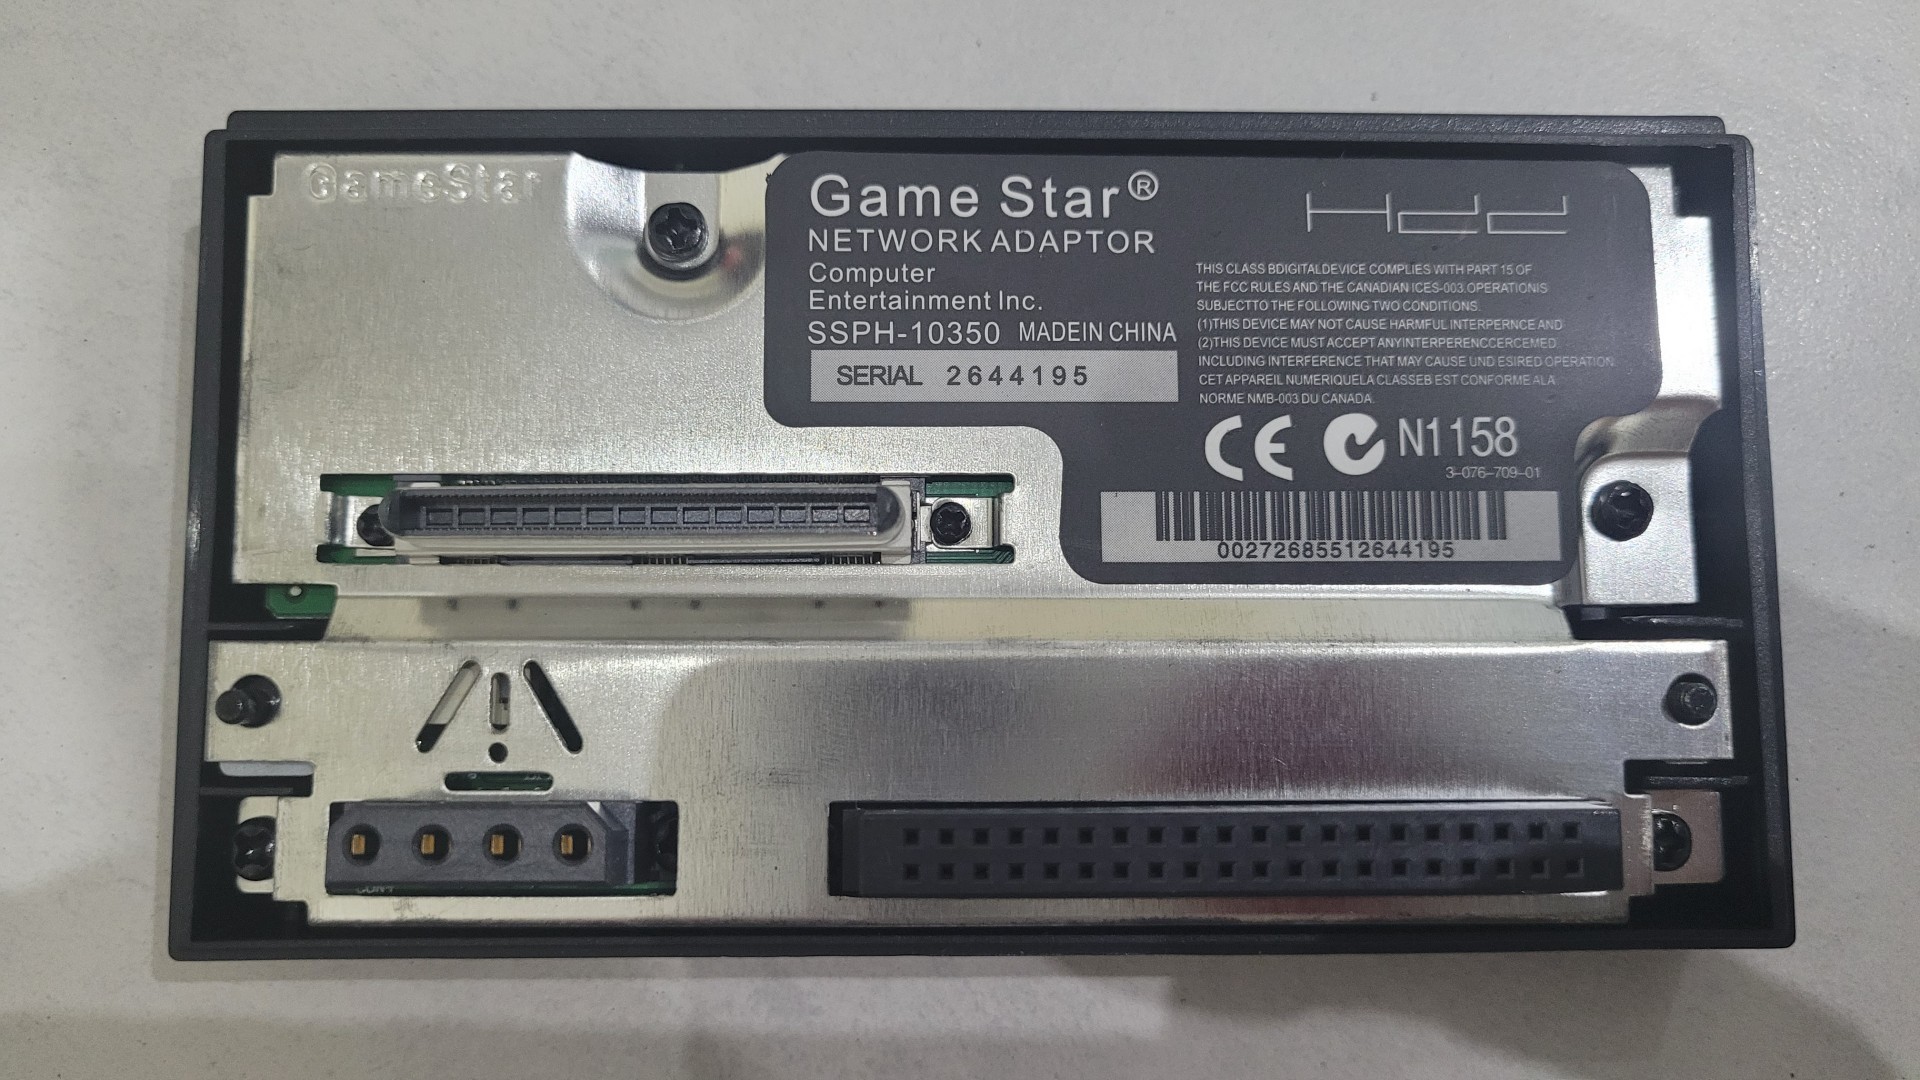
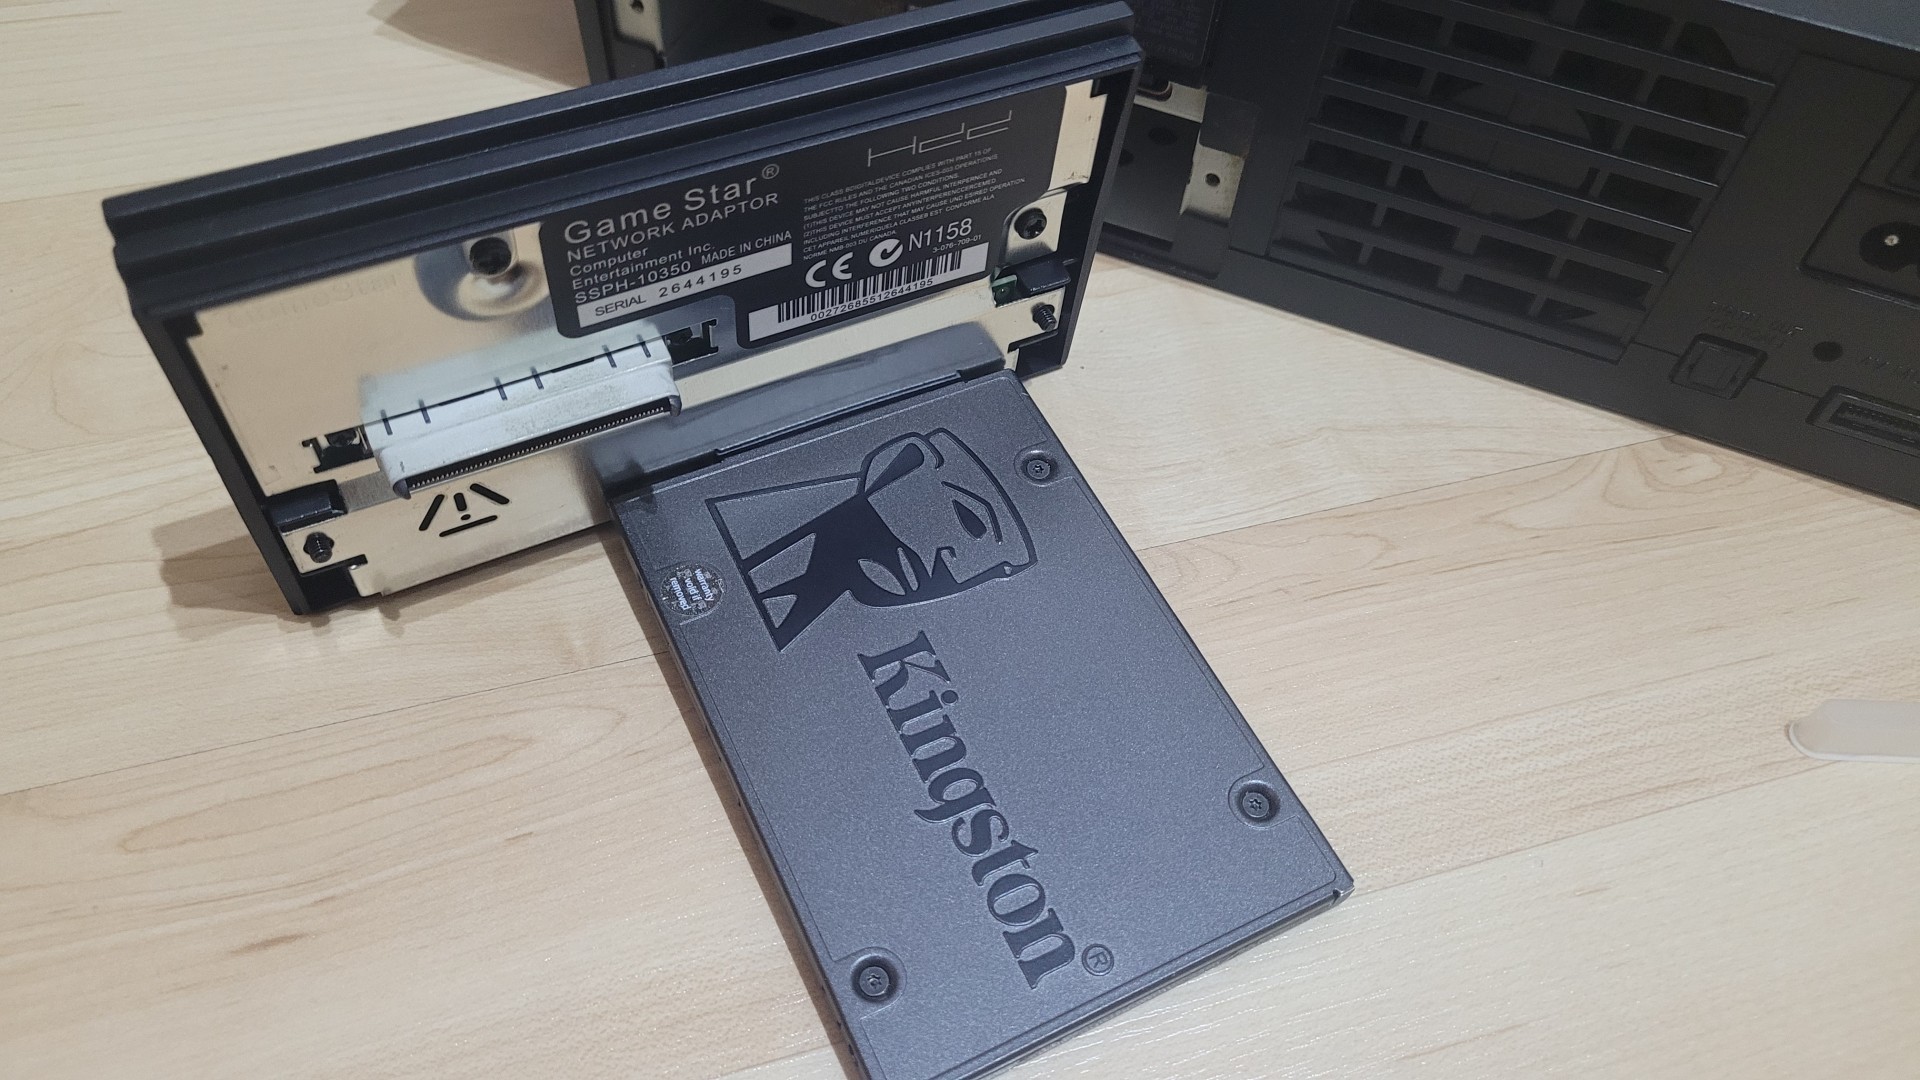
I used a cheap SATA adapter from AliExpress and a good old Kingston A400 SSD I had lying around.
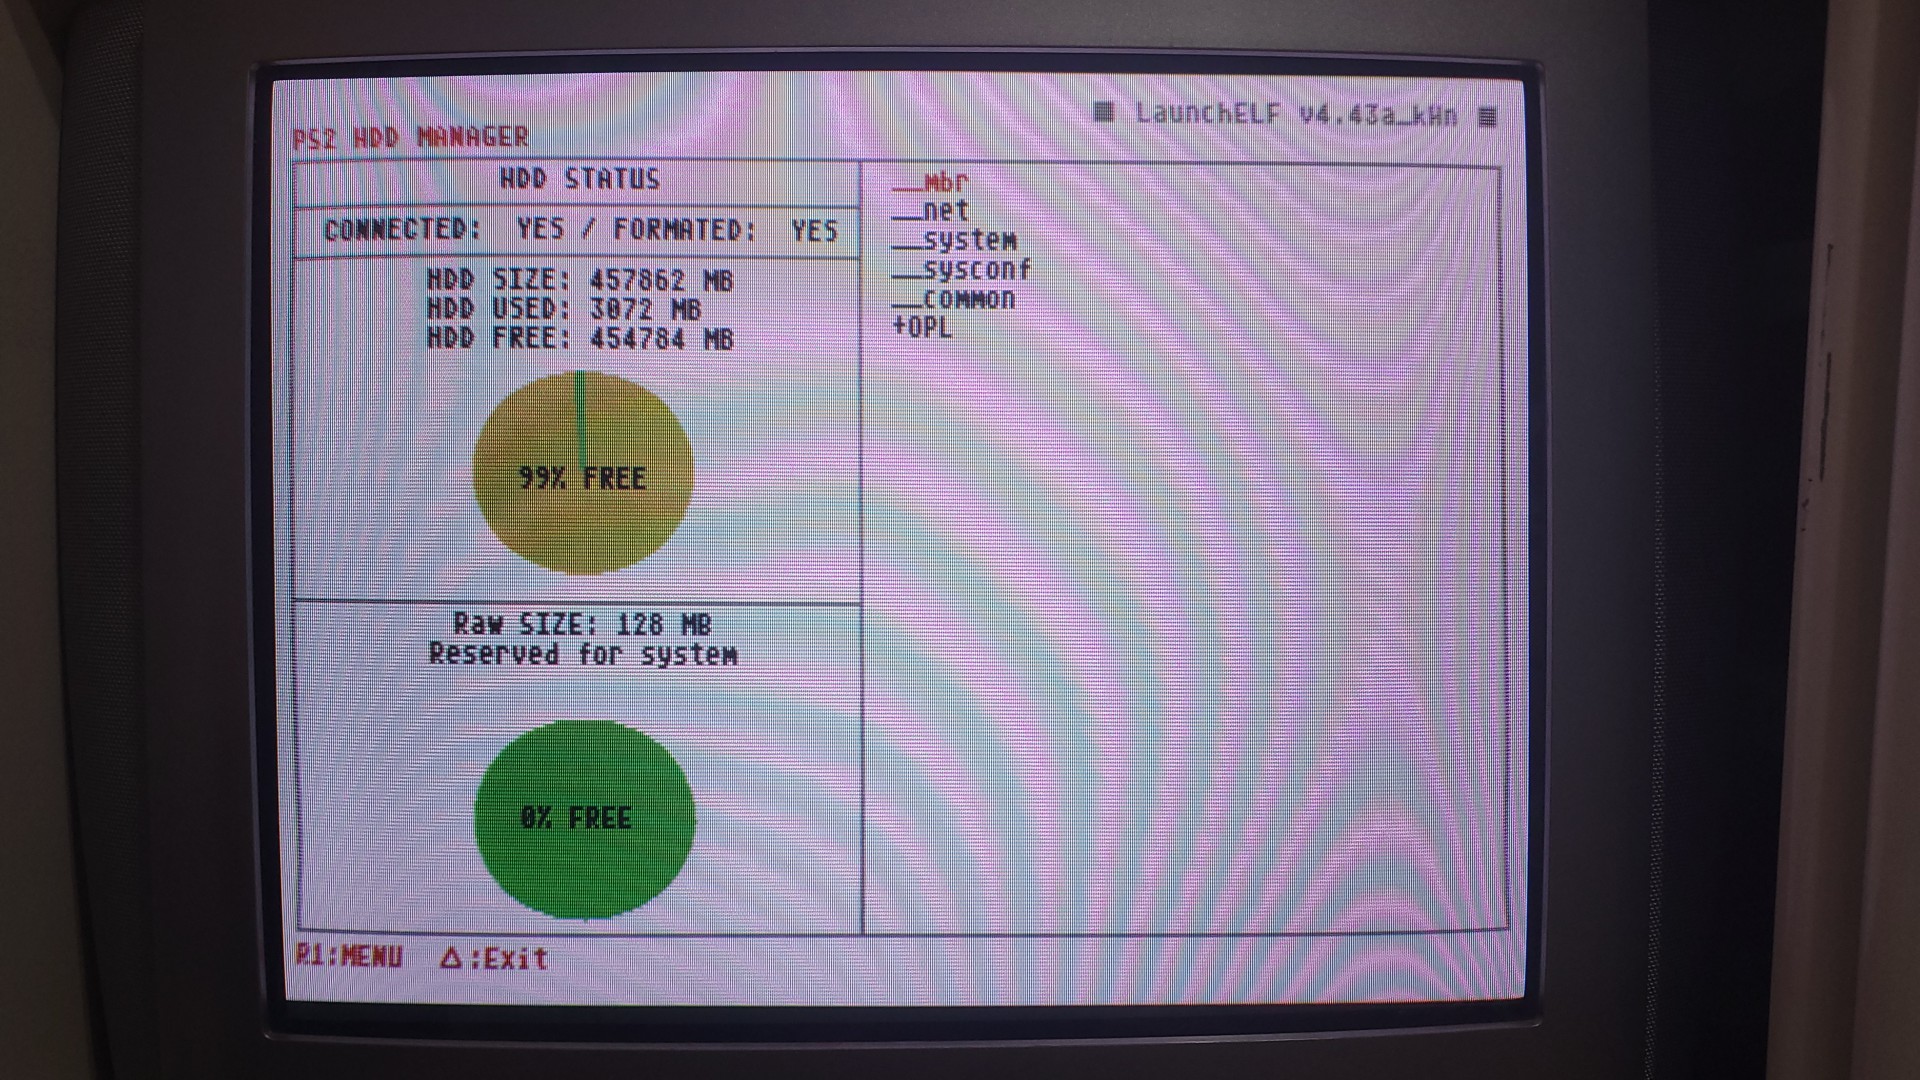
I set the “+OPL” partition to 4 GB because it stores all the game artwork and can quickly fill up when many games are installed.
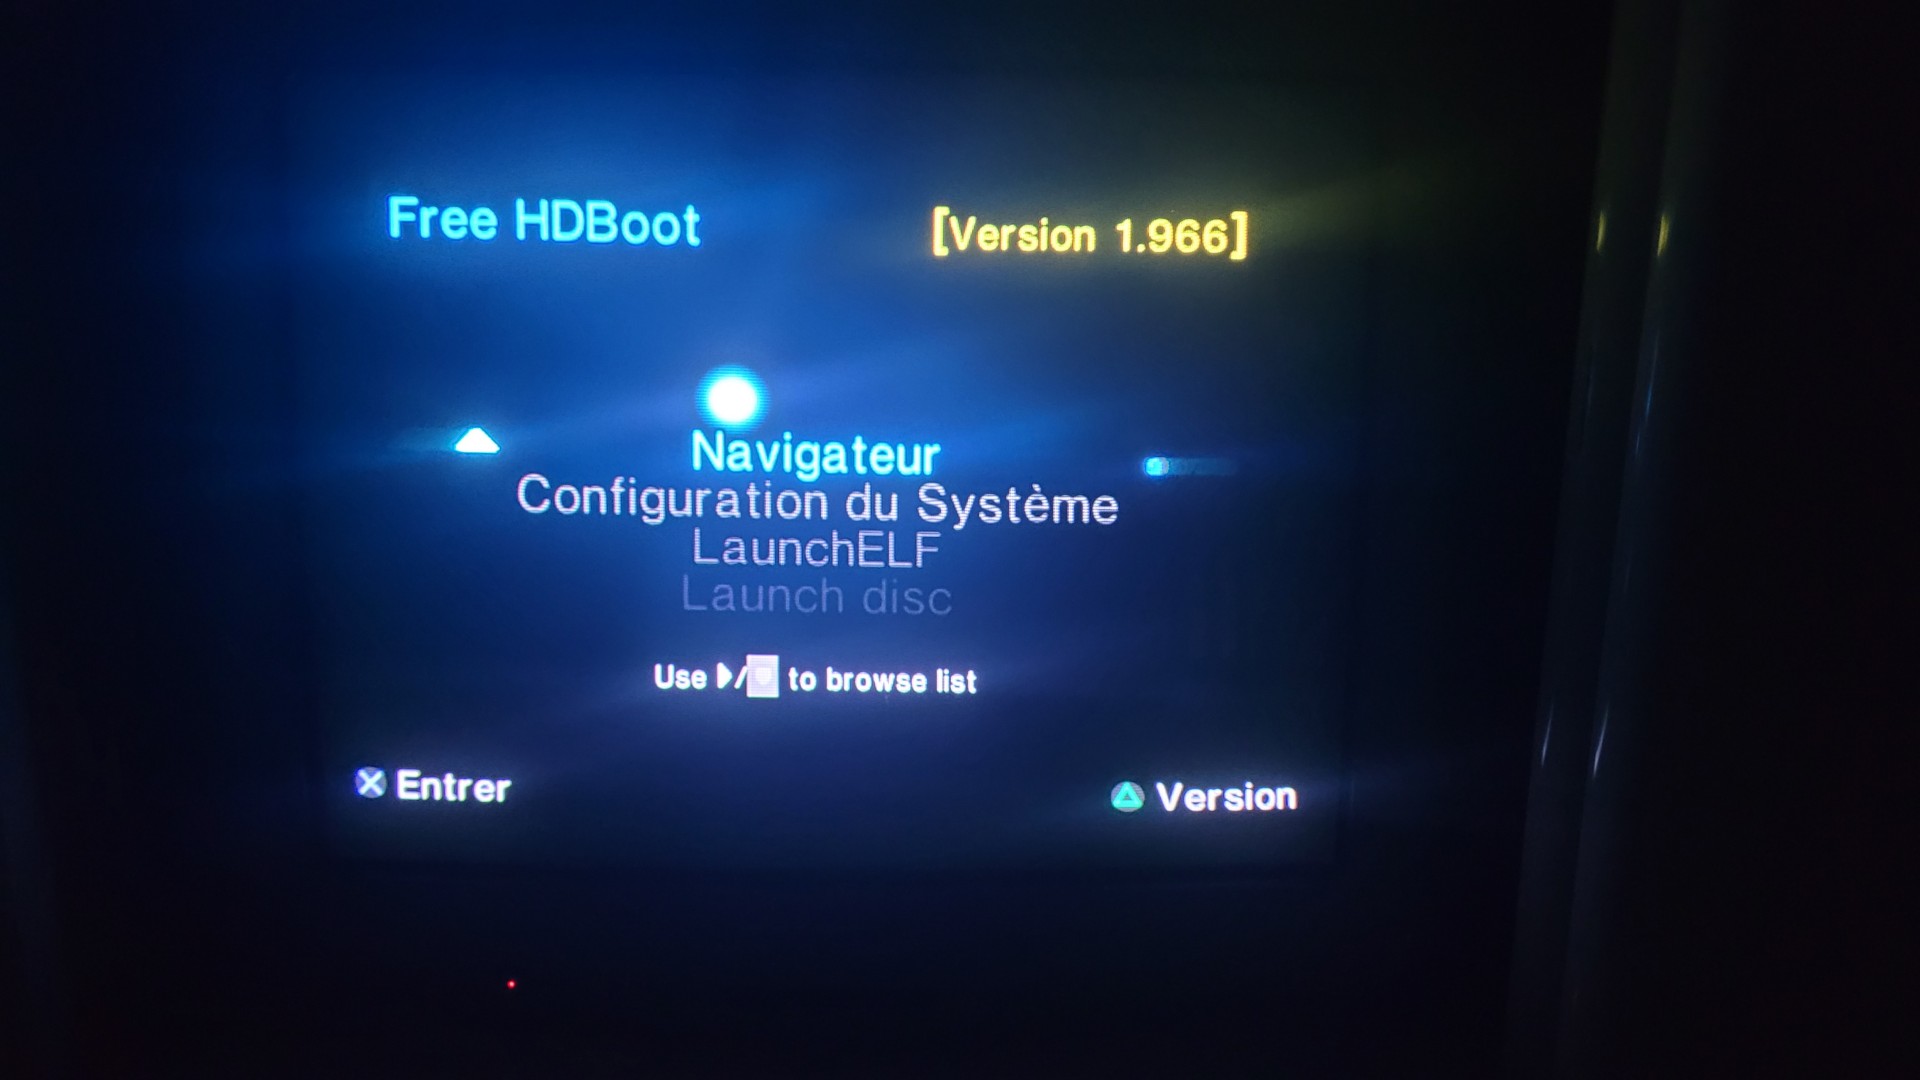
The two photos below show the “+OPL” partition created via wLaunchELF/HDDManager on the left and the PlayStation 2 booted into FreeHDBoot on the right.
Installing PS2 games
I downloaded the lastest release of Open PS2 Loader the github page, also known as OPL, as well as HDL Batch Installer. It seems that HDL batch installer is also capable of preparing the HDD, but I discovered that later and did not try…
I used both tools because downloading ARTS files does not work with HDL batch installer but work with OPL. However, OPL (v24) is able to download ARTS files to “hdd_hdl/ART” subdir, but not to copy them on hte PS2 disks (At least, I did not manage to do so) whereas I managed to copy files with HDL.
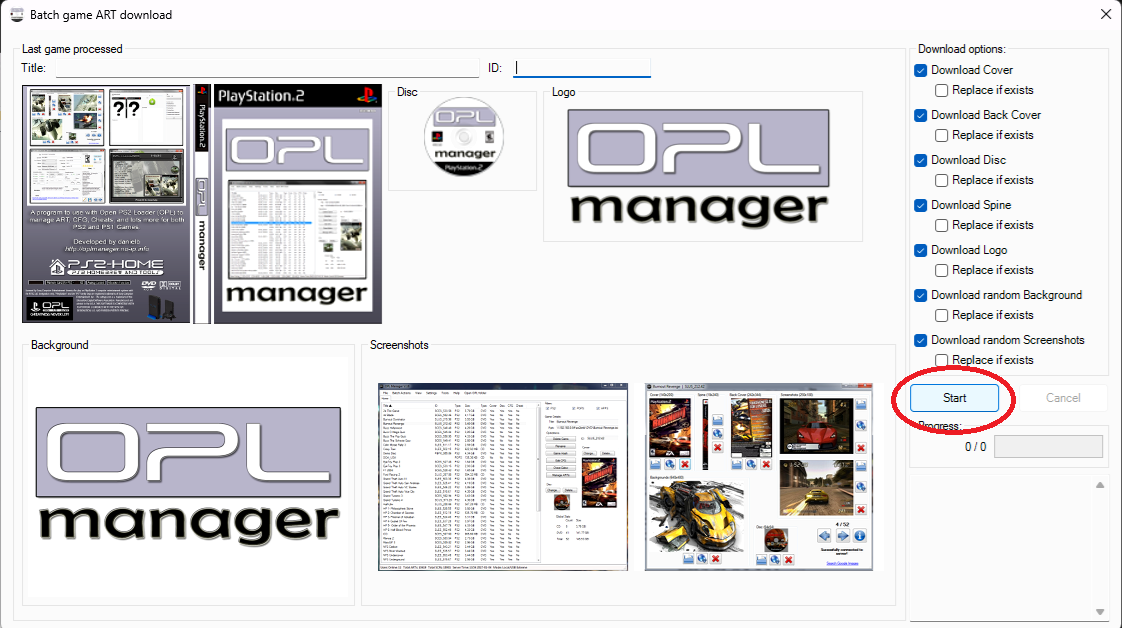
Here is how I downloaded ARTS files for all my games with OPL:
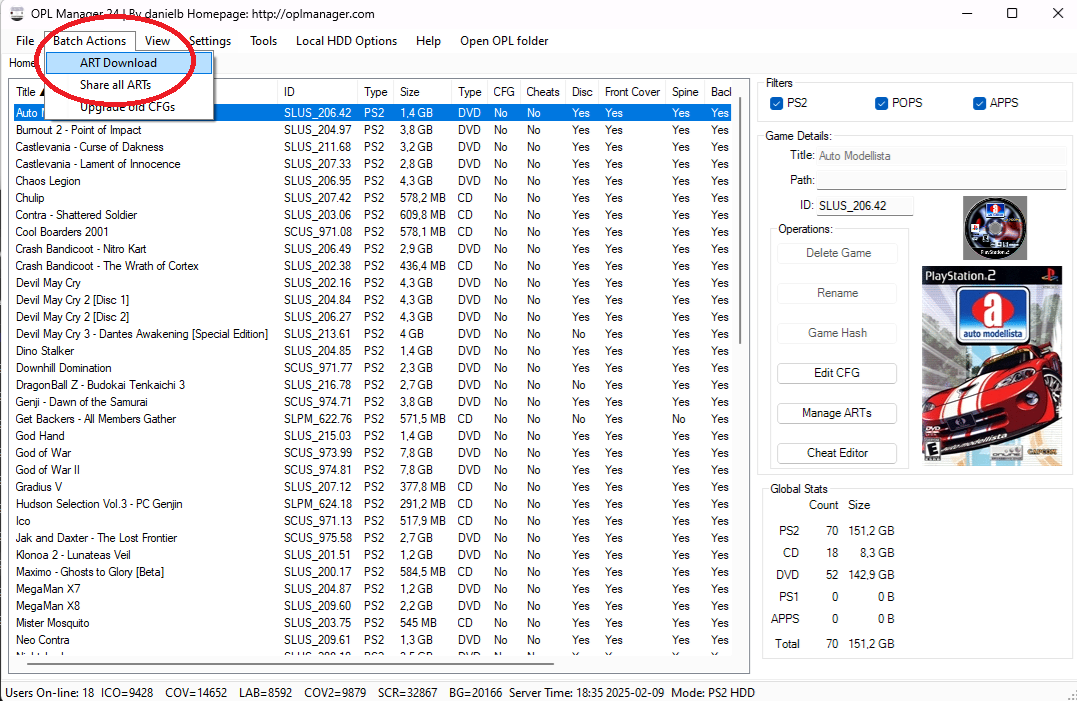
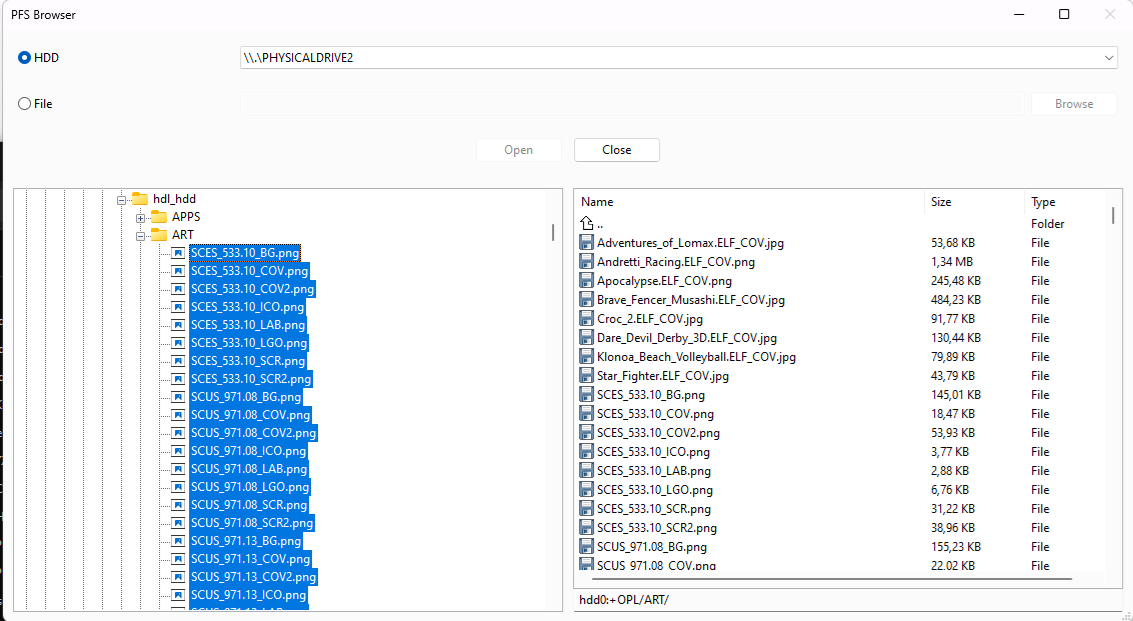
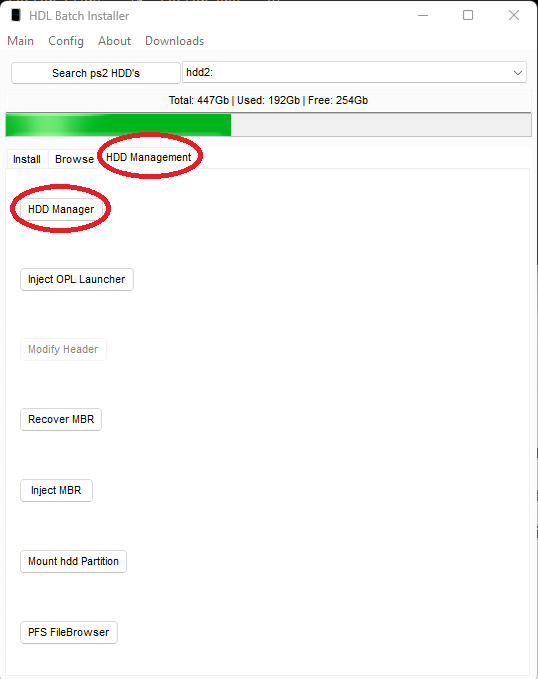
I copied files all ARTS file to the PS2 HDD with HDL Batch installer, HDD Management tab → PFS Browser
As a side note: I also found a lot of PS2 ARTS files on archive.org, but I did not used them.
Installing PS1 games
I already have a modded PSOne with a custom BIOS, so I only installed some PS1 games on my PS2 for fun. However, games launched from the HDD/SSD cannot use the PS1 hardware present in the PS2, so a software emulator (POPS) is used. Unfortunately, it’s far from perfect—not all games work, and some have graphical glitches.
There are quite a few tutorials available, some more complete and up-to-date than others. I basically followed this one: Quickstart HDD Guide
I used several tools:
- POPStarter – A wrapper to launch the POPS emulator with an ISO image: POPStarter
- POPS Binaries – The core PS1 emulator by Sony: POPS Binaries
- cue2pops – A tool that converts BIN/CUE images to VCD: cue2pops
- binmerge – A tool that merges multiple BIN files from a CUE/BIN: binmerge
- HDL Batch Installer – A tool to manage the PS2 HDD: HDL Batch Installer
Copying POPS files via a mounted PS2 HDD partition doesn’t work (invalid MS-DOS command). Instead, I copied the files onto a USB stick and transferred them from the PS2 using the LaunchELF browser.
PS1 games must be stored in a dedicated partition named "__.POPS". I created this partition using HDL Batch Installer (10 GB, which allows storing about 15–20 games). This can be done through the HDD Management tab → HDD Manager button → Create Partition.
Before copying PS1 games, they need to be converted to VCD format with cue2pops. Some of the games I wanted to try had multiple BIN files (e.g., for audio tracks), but cue2pops doesn’t support them. So, I merged them into a single BIN file using binmerge.
For example:
binmerge.exe '.\Apocalypse (USA).cue' Apocalypse
To install a converted game, here’s the process I followed:
- Created a copy of POPSTARTER.ELF with the same base name as the game.
- Example: Apocalypse.ELF for Apocalypse.VCD
- Copied the ELF file to the +OPL partition in the APPS folder.
- Copied the VCD file to the __.POPS partition using the PFS Browser included in HDL Batch Installer (HDD Management tab).
- Copied the PNG cover to the +OPL partition in the ART folder (e.g., Apocalypse.ELF_COV.png).
- Declared each game as an application in the conf_apps.cfg file at the root of +OPL:
|
1 2 3 4 5 6 7 |
Apocalypse=pfs0:/APPS/Apocalypse.ELF Andretti Racing=pfs0:/APPS/Andretti_Racing.ELF Adventures of Lomax=pfs0:/APPS/Adventures_of_Lomax.ELF Brave Fencer Musashi=pfs0:/APPS/Brave_Fencer_Musashi.ELF Croc 2=pfs0:/APPS/Croc_2.ELF Dare Devil Derby 3D=pfs0:/APPS/Dare_Devil_Derby_Volleyball.ELF Star Fighter=pfs0:/APPS/Star_Fighter.ELF |
DVD lens replacement
Replacing the lens on a PlayStation 2 is not as simple as a plug-and-play operation, unlike many other consoles. The first thing I learned was that the firmware must be changed according to the lens type.
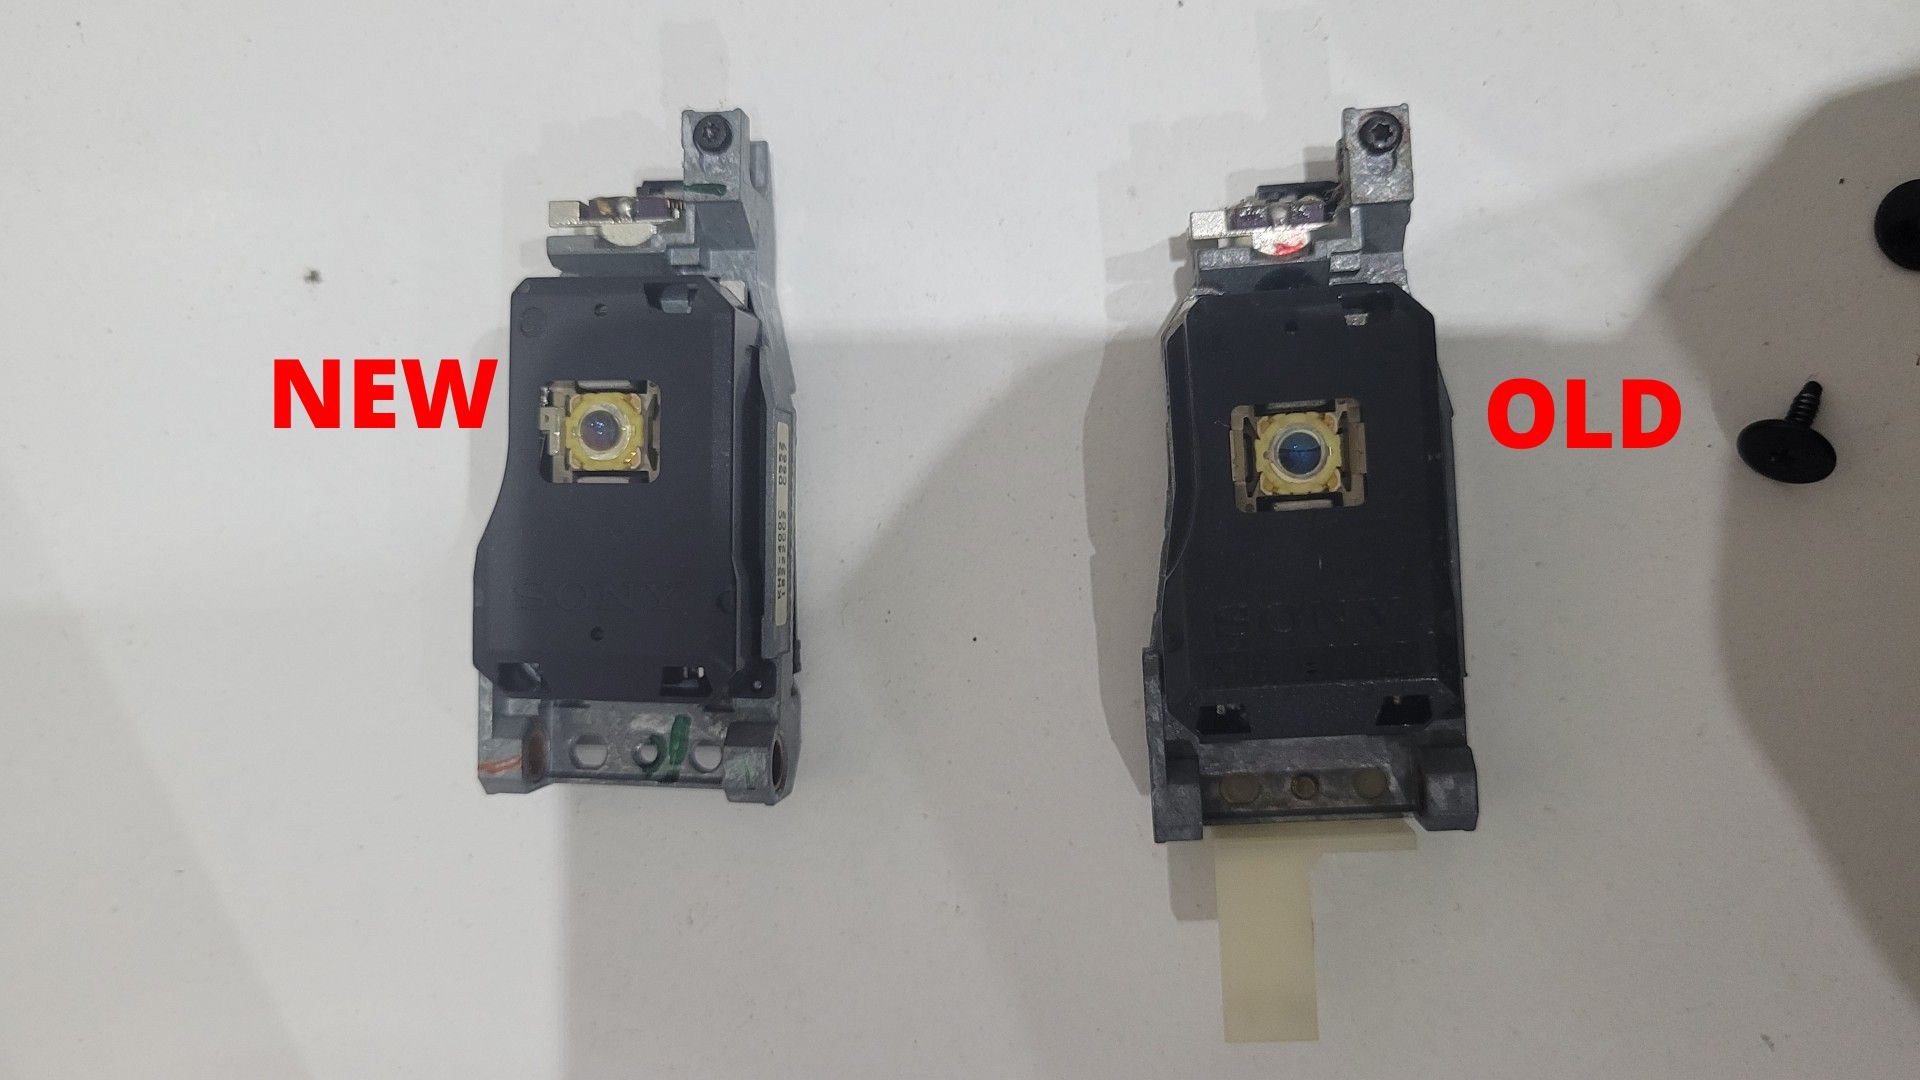
For example, my PS2 originally had a KHS-400B lens, but the replacement I bought was a KHS-400C, which requires a different firmware.
Then, I discovered that the PS2 has a sort of self-lens calibration, but it cannot be triggered without an external tool (PMAP) and some wires soldered onto the motherboard. Additionally, some motherboard models require that the internal battery (used for the clock) is not empty.
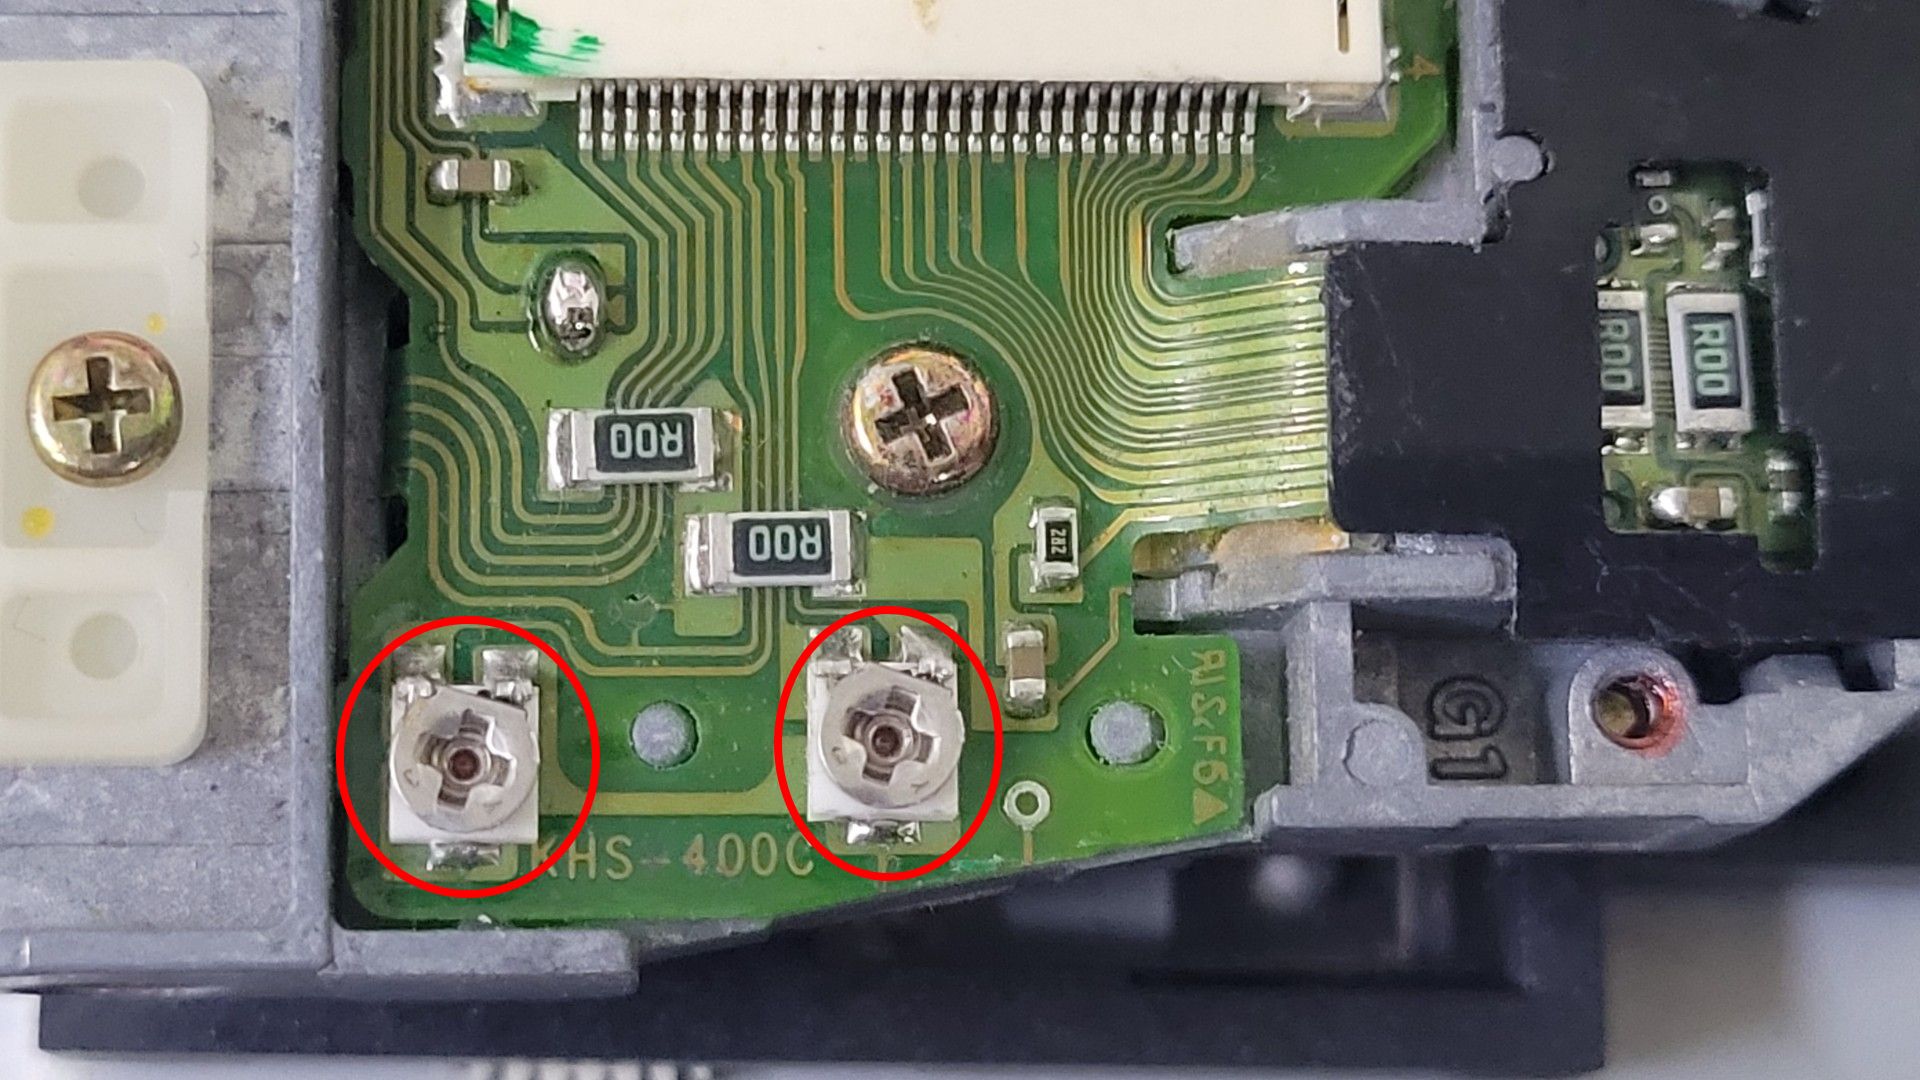
Finally, even though many people on the internet say that there’s no need to adjust the potentiometers on the lens, I actually had to tweak them myself.
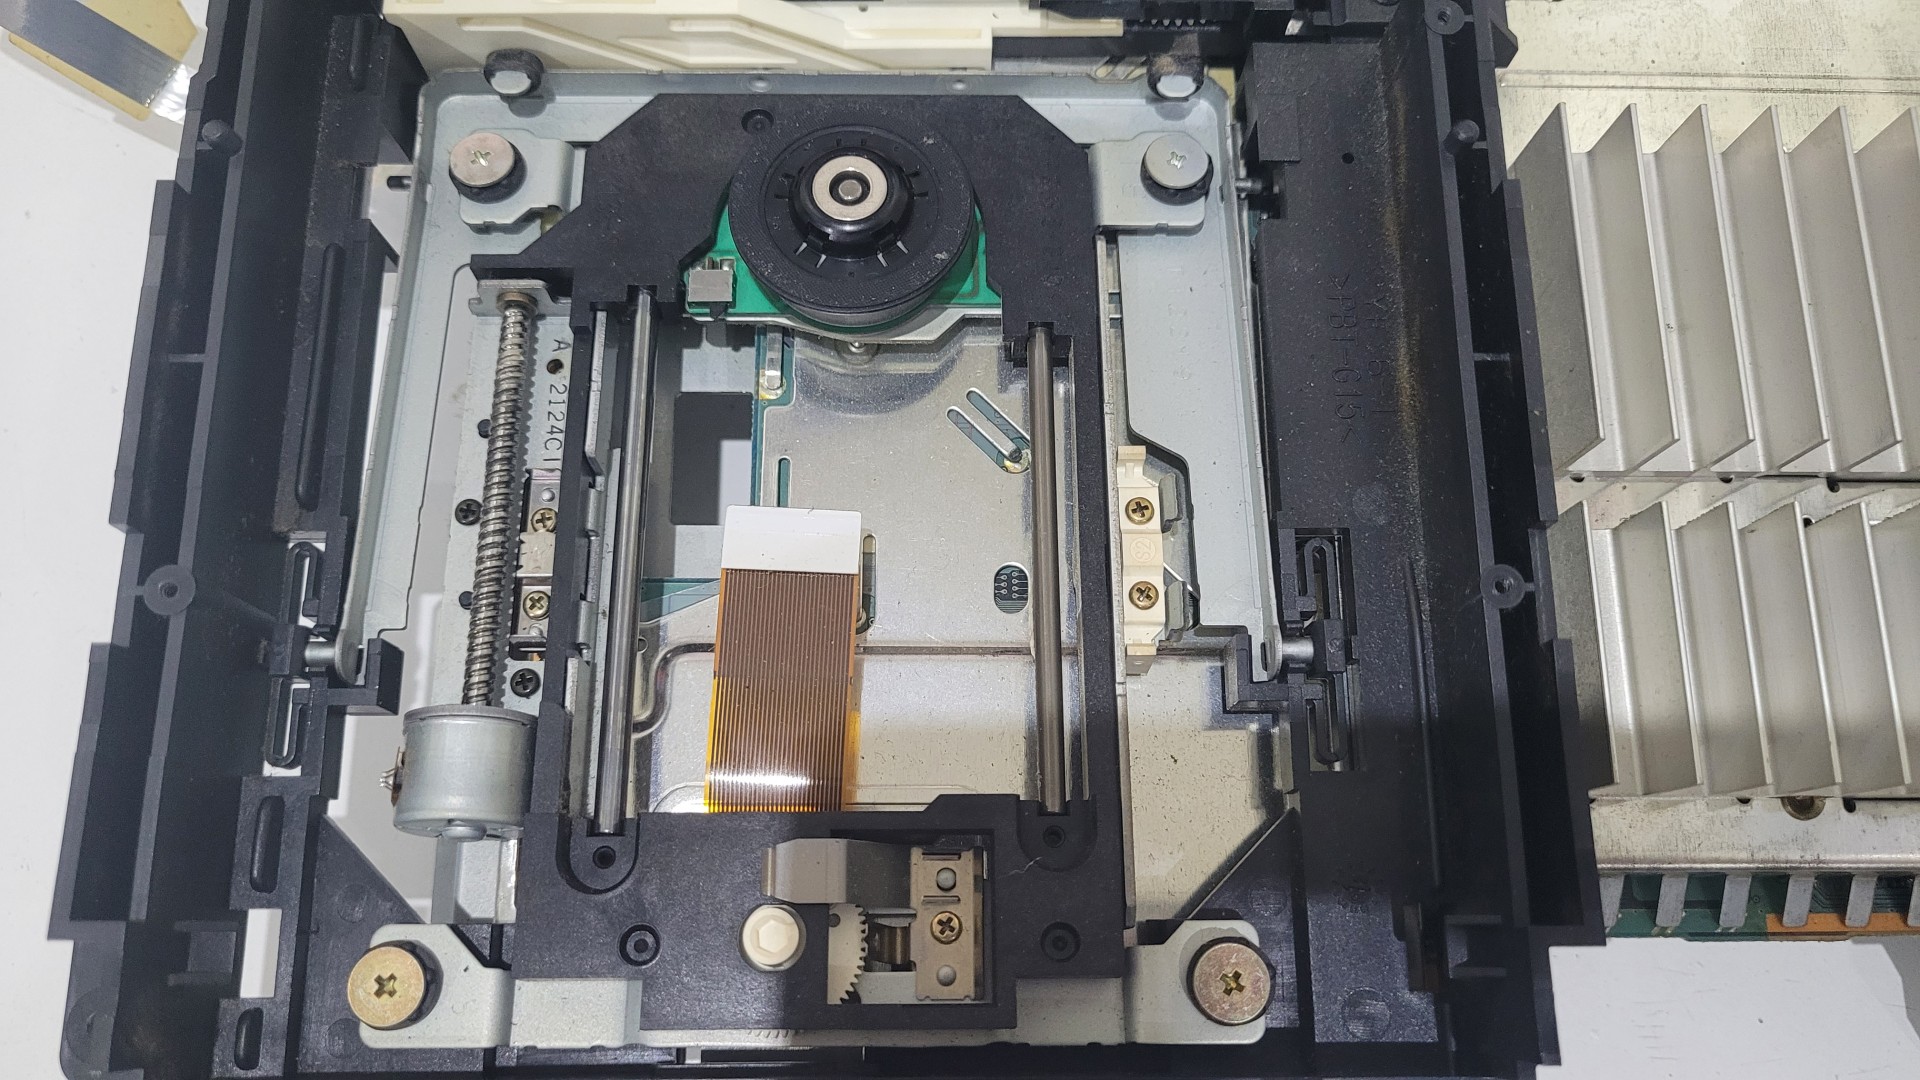
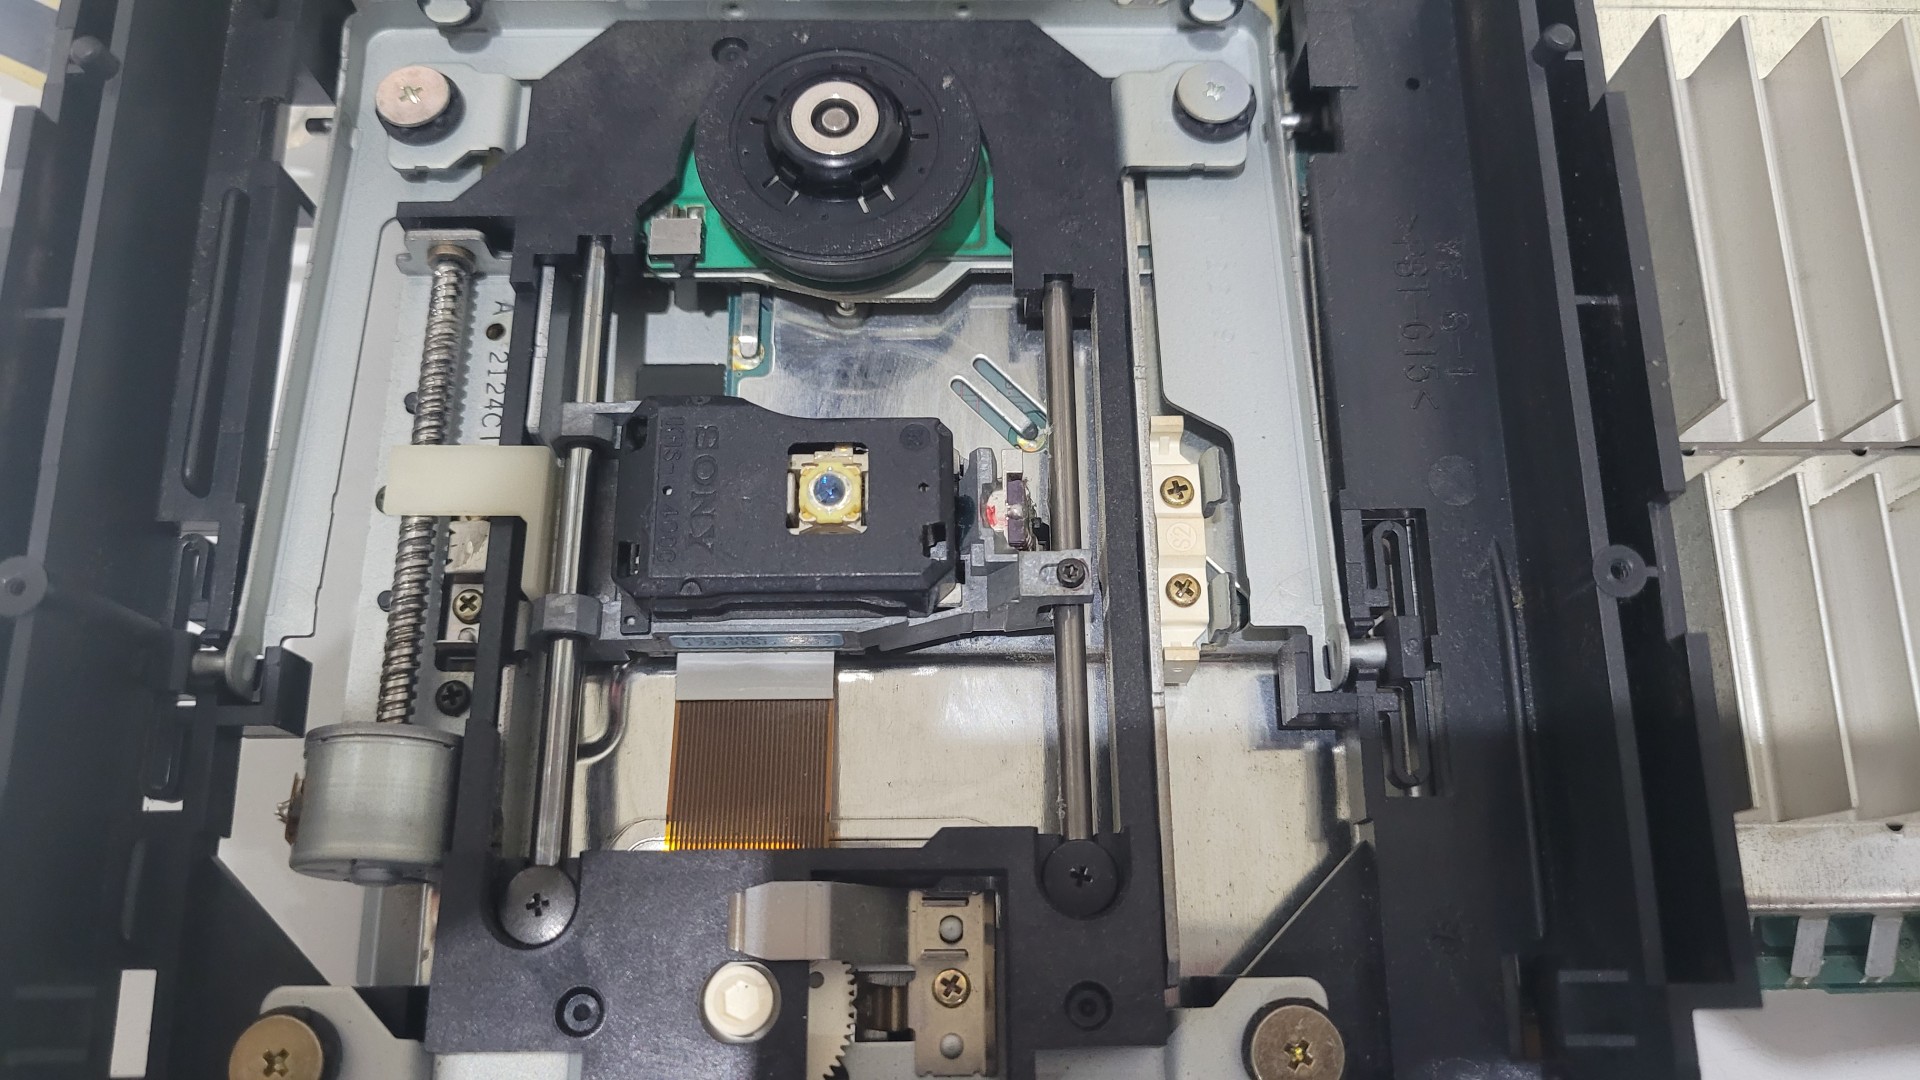
Below are photos (from left to right):
- Removed lens
- Old vs. new lens
- New lens installed
Firmware change
With a PS2 running FreeHDBoot or FreeMCBoot, the process is very simple. I just ran Lenschanger: Lenschanger by Dampro
Unfortunately, after this operation, the console still wasn’t reading discs…
Lens calibration
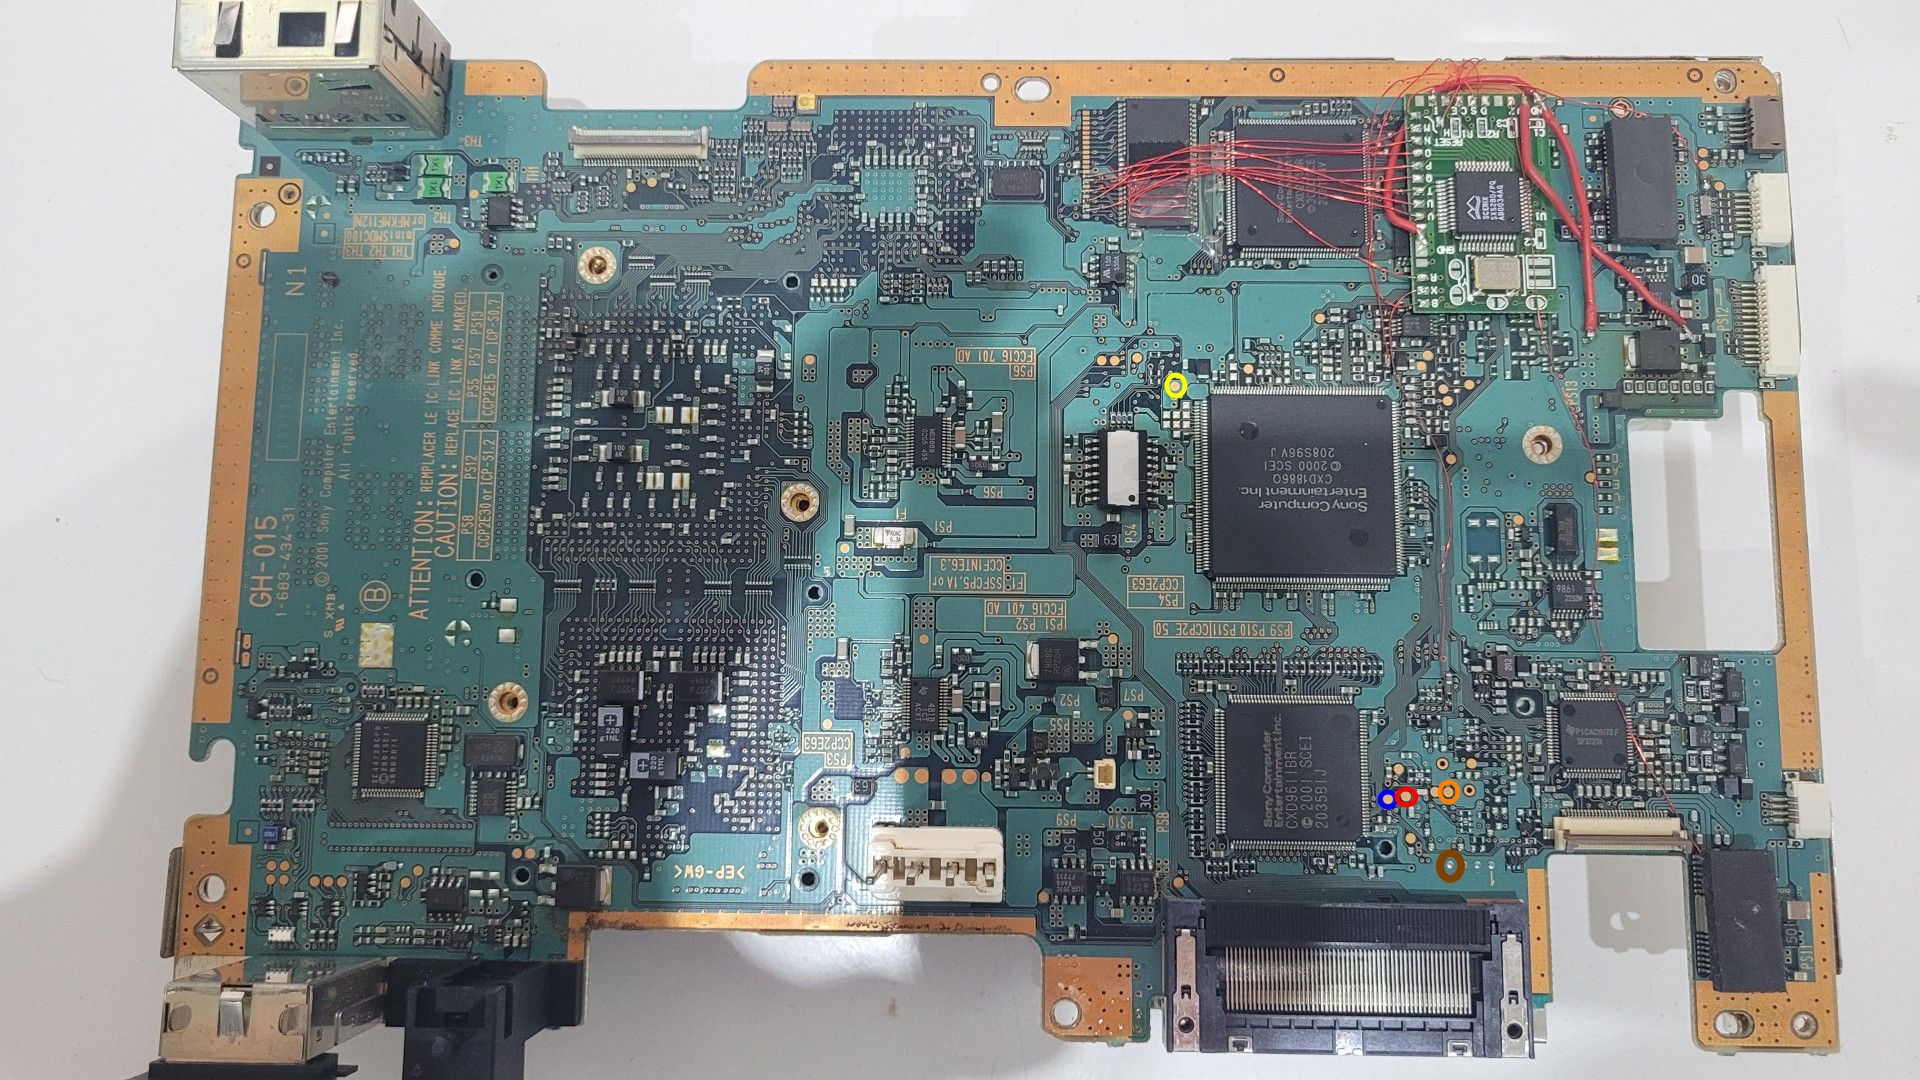
Lens calibration can be done using a program called PMAP. As far as I understand, it communicates with the MechaCon (the PS2’s disc controller) via UART. The UART interface is not directly exposed, but all the necessary solder points are present on the motherboard.
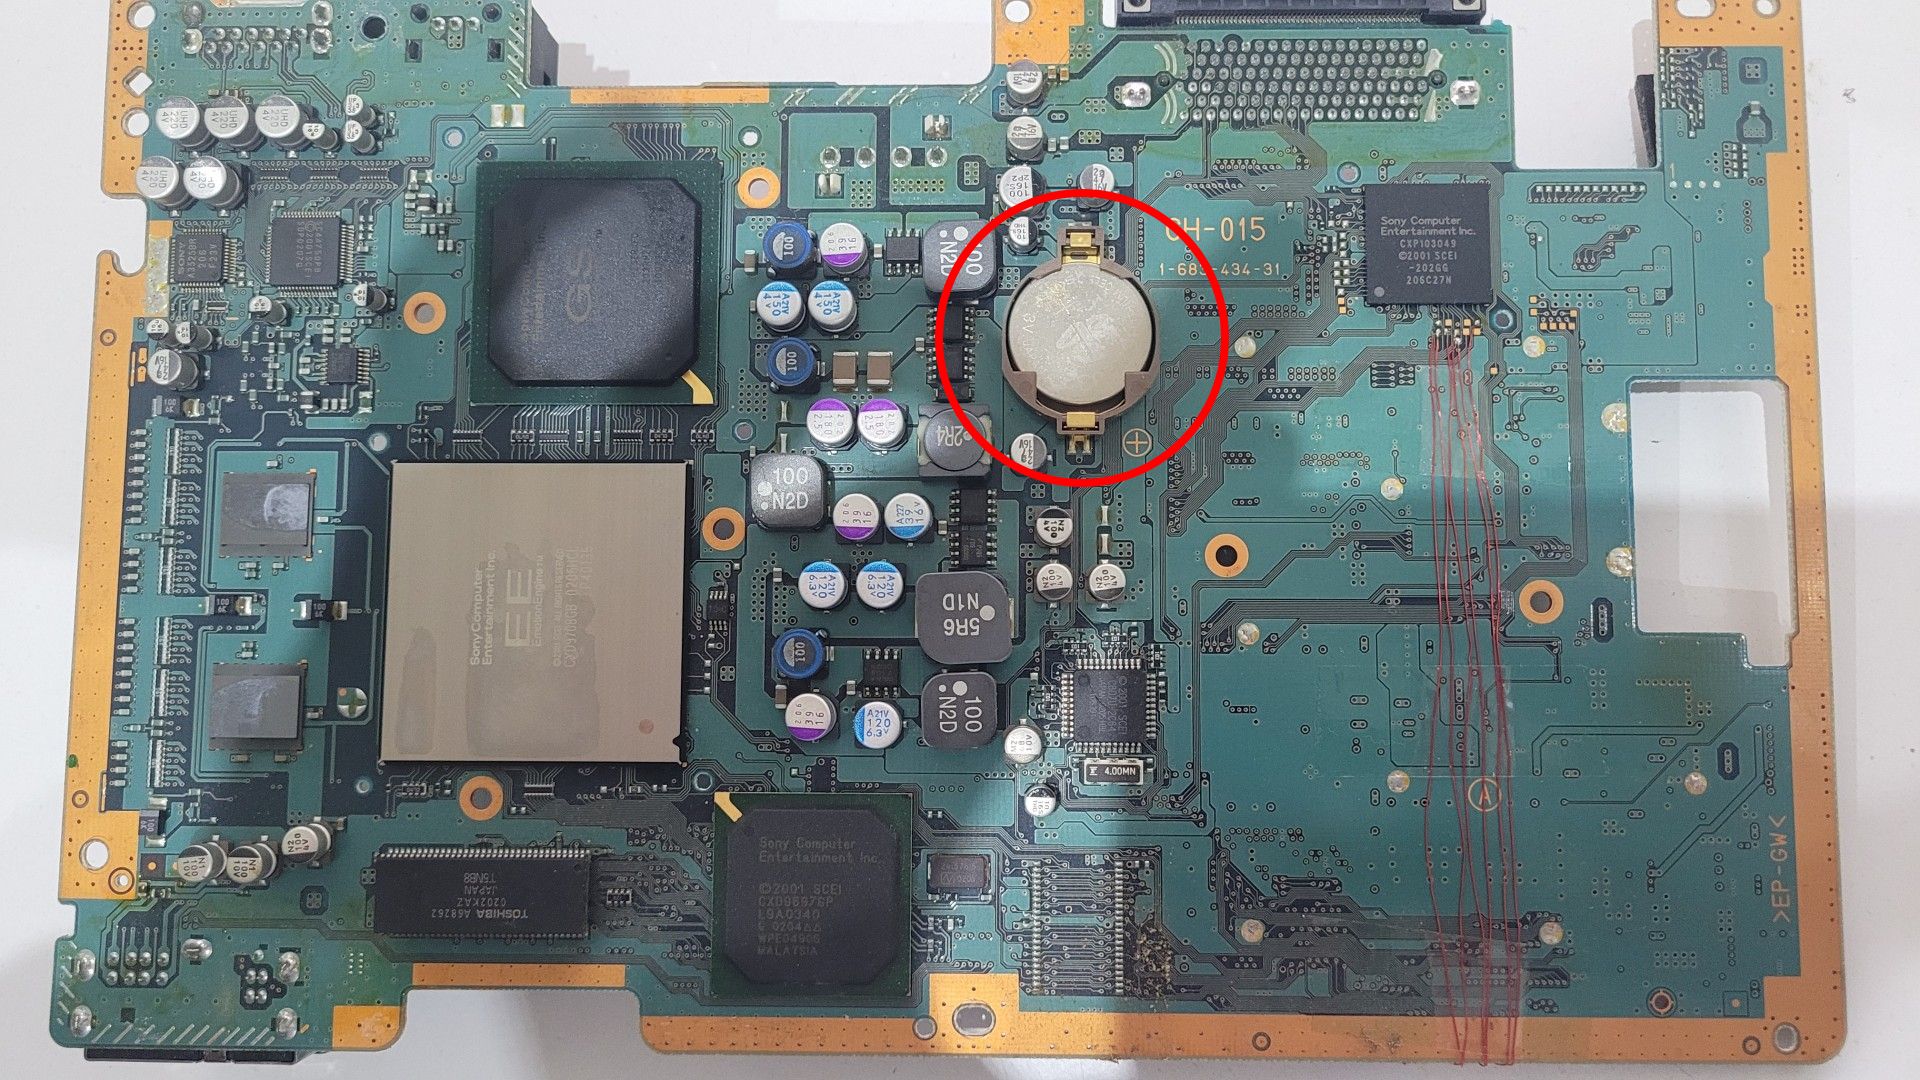
My model is a GH-15, and I was able to find the solder points on the PSDevWiki site: MechaCon UART Test Points
By the way, I also discovered that this PlayStation 2 had already been modded with a modchip (possibly a Messiah Pro 2)! 🙂
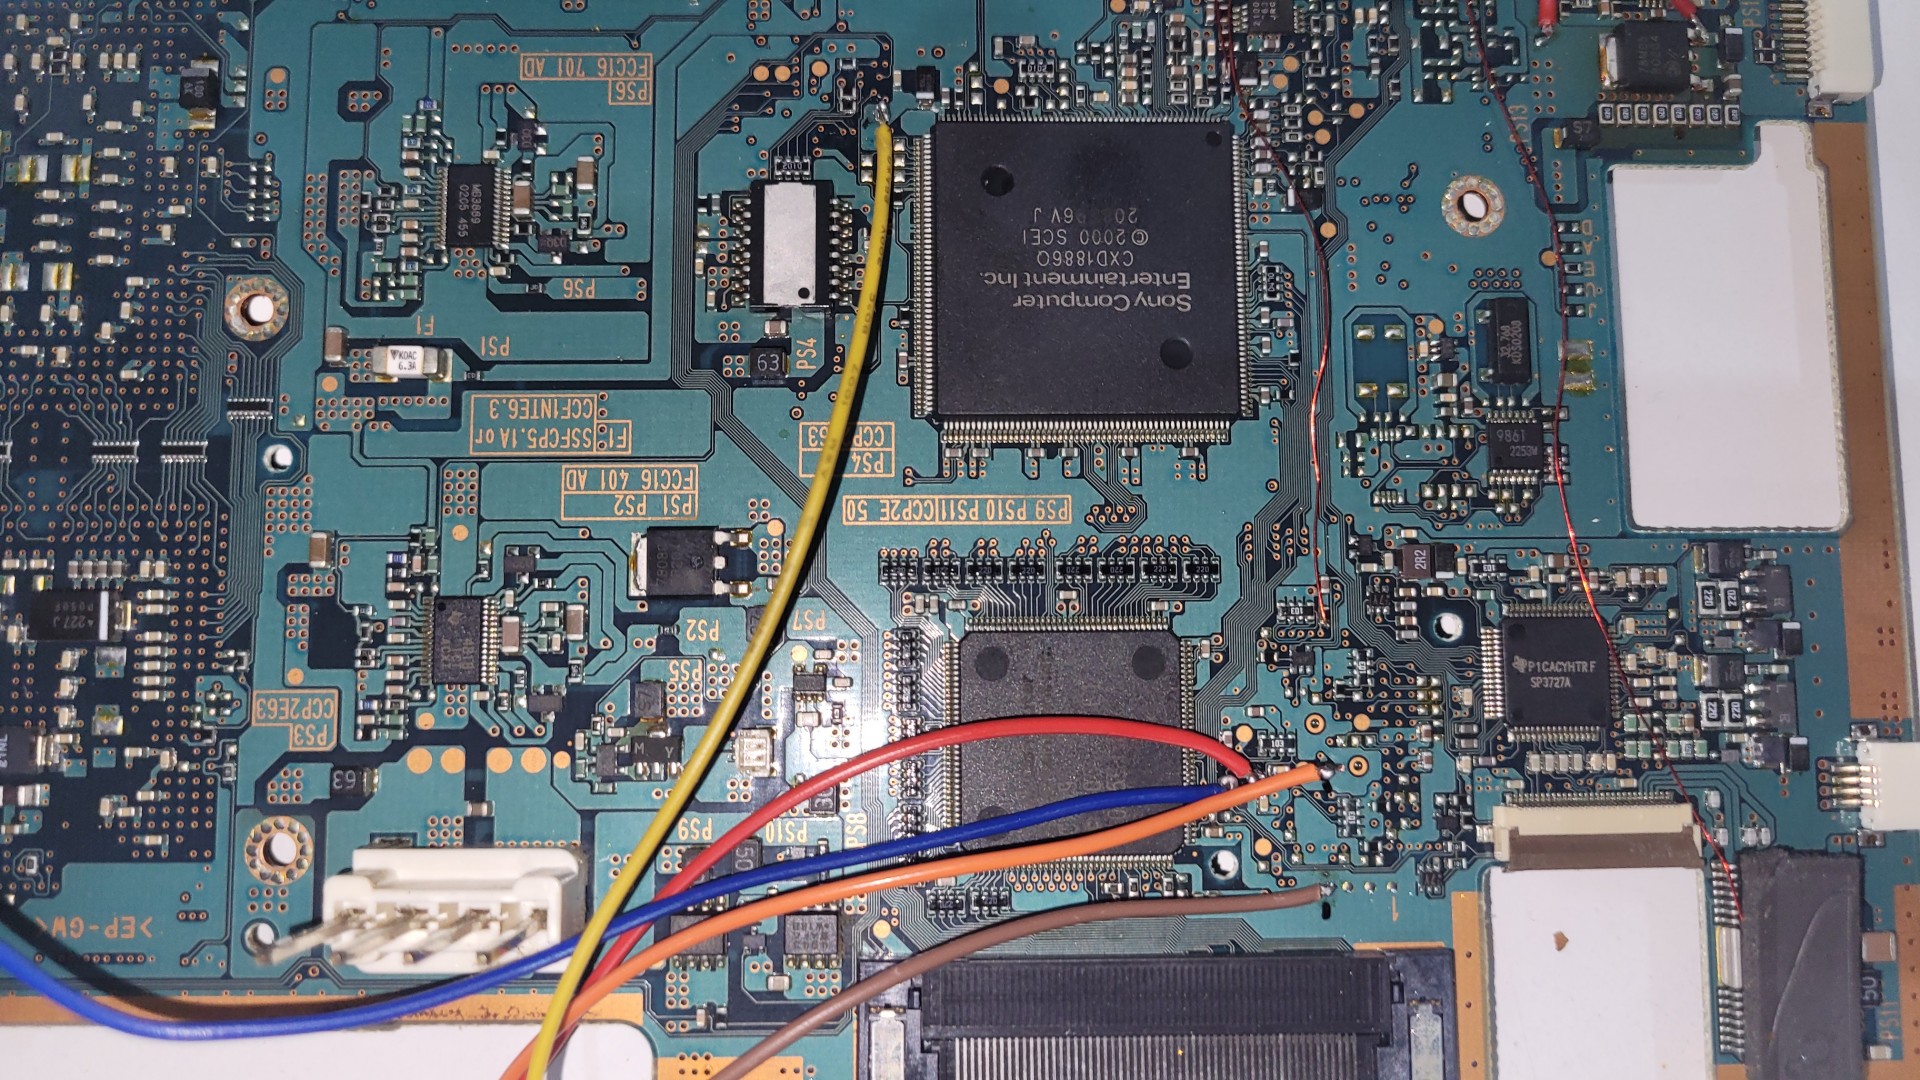
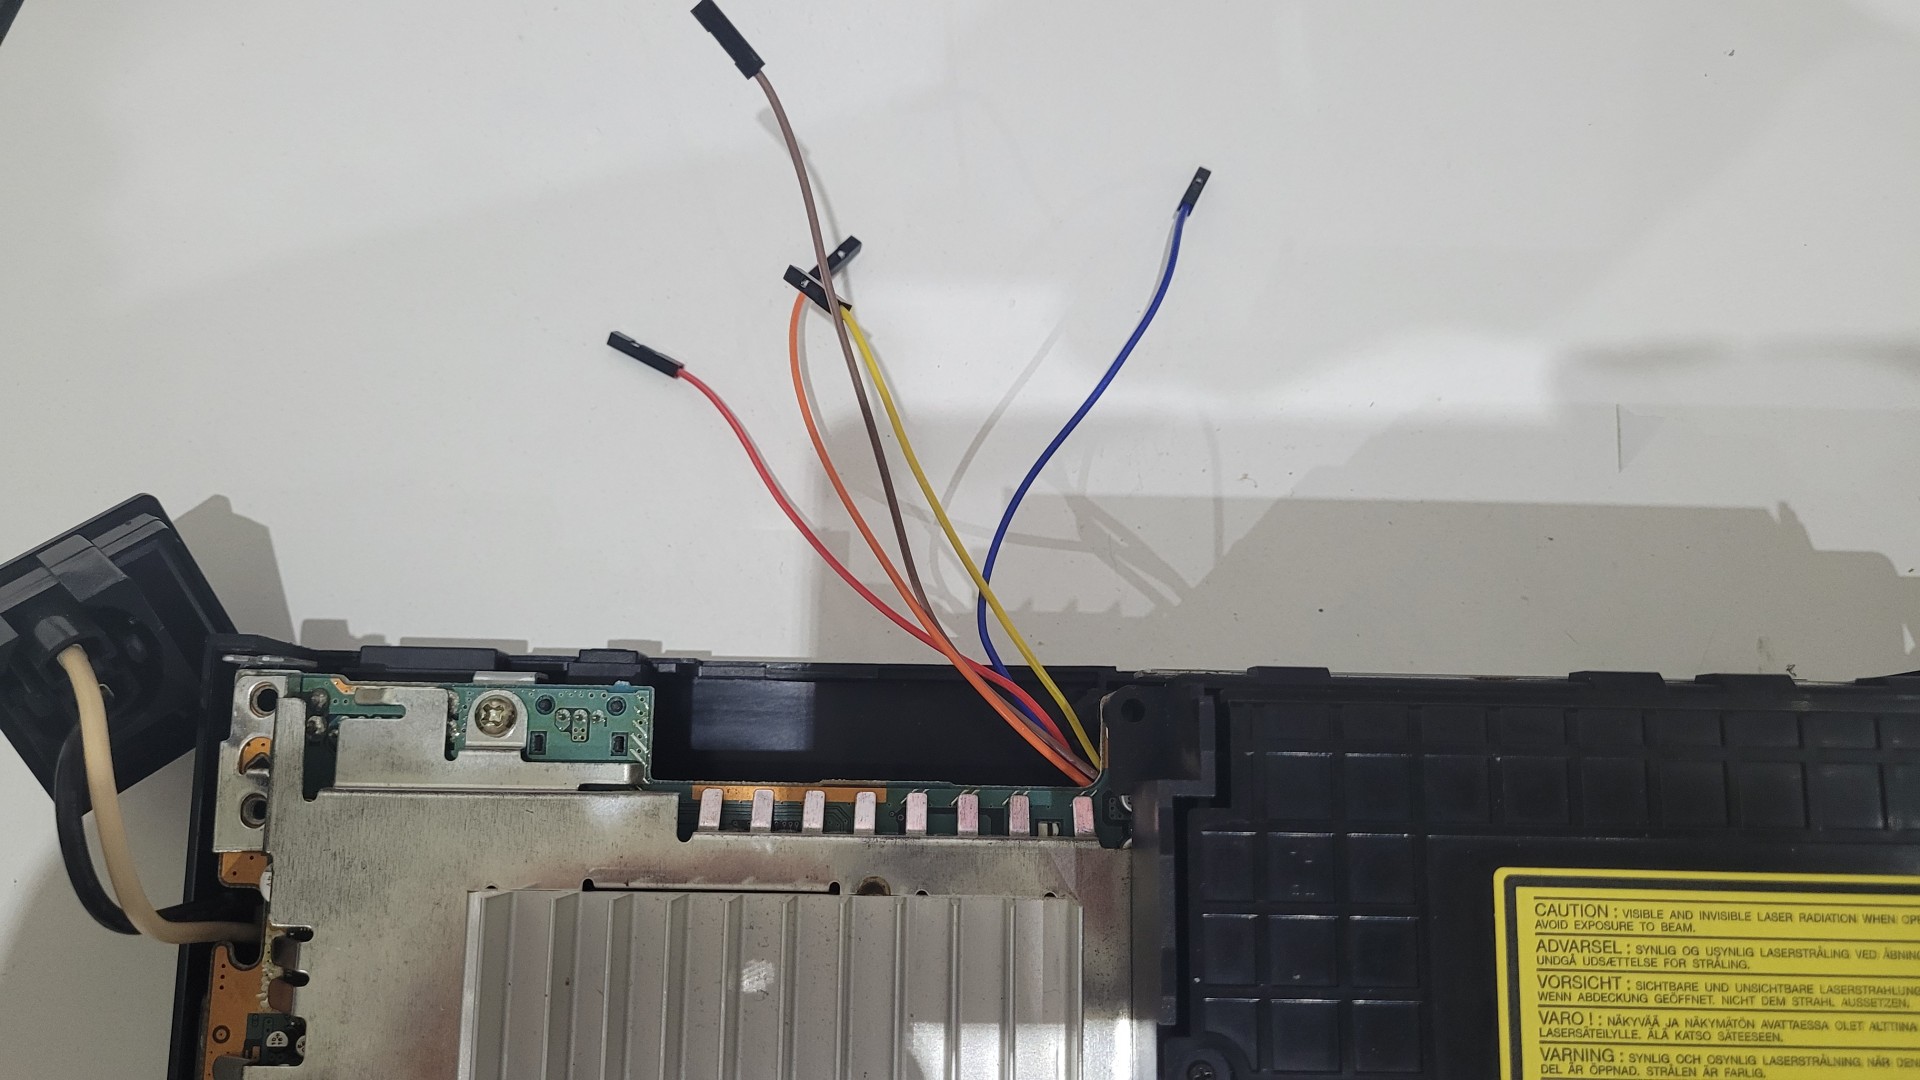
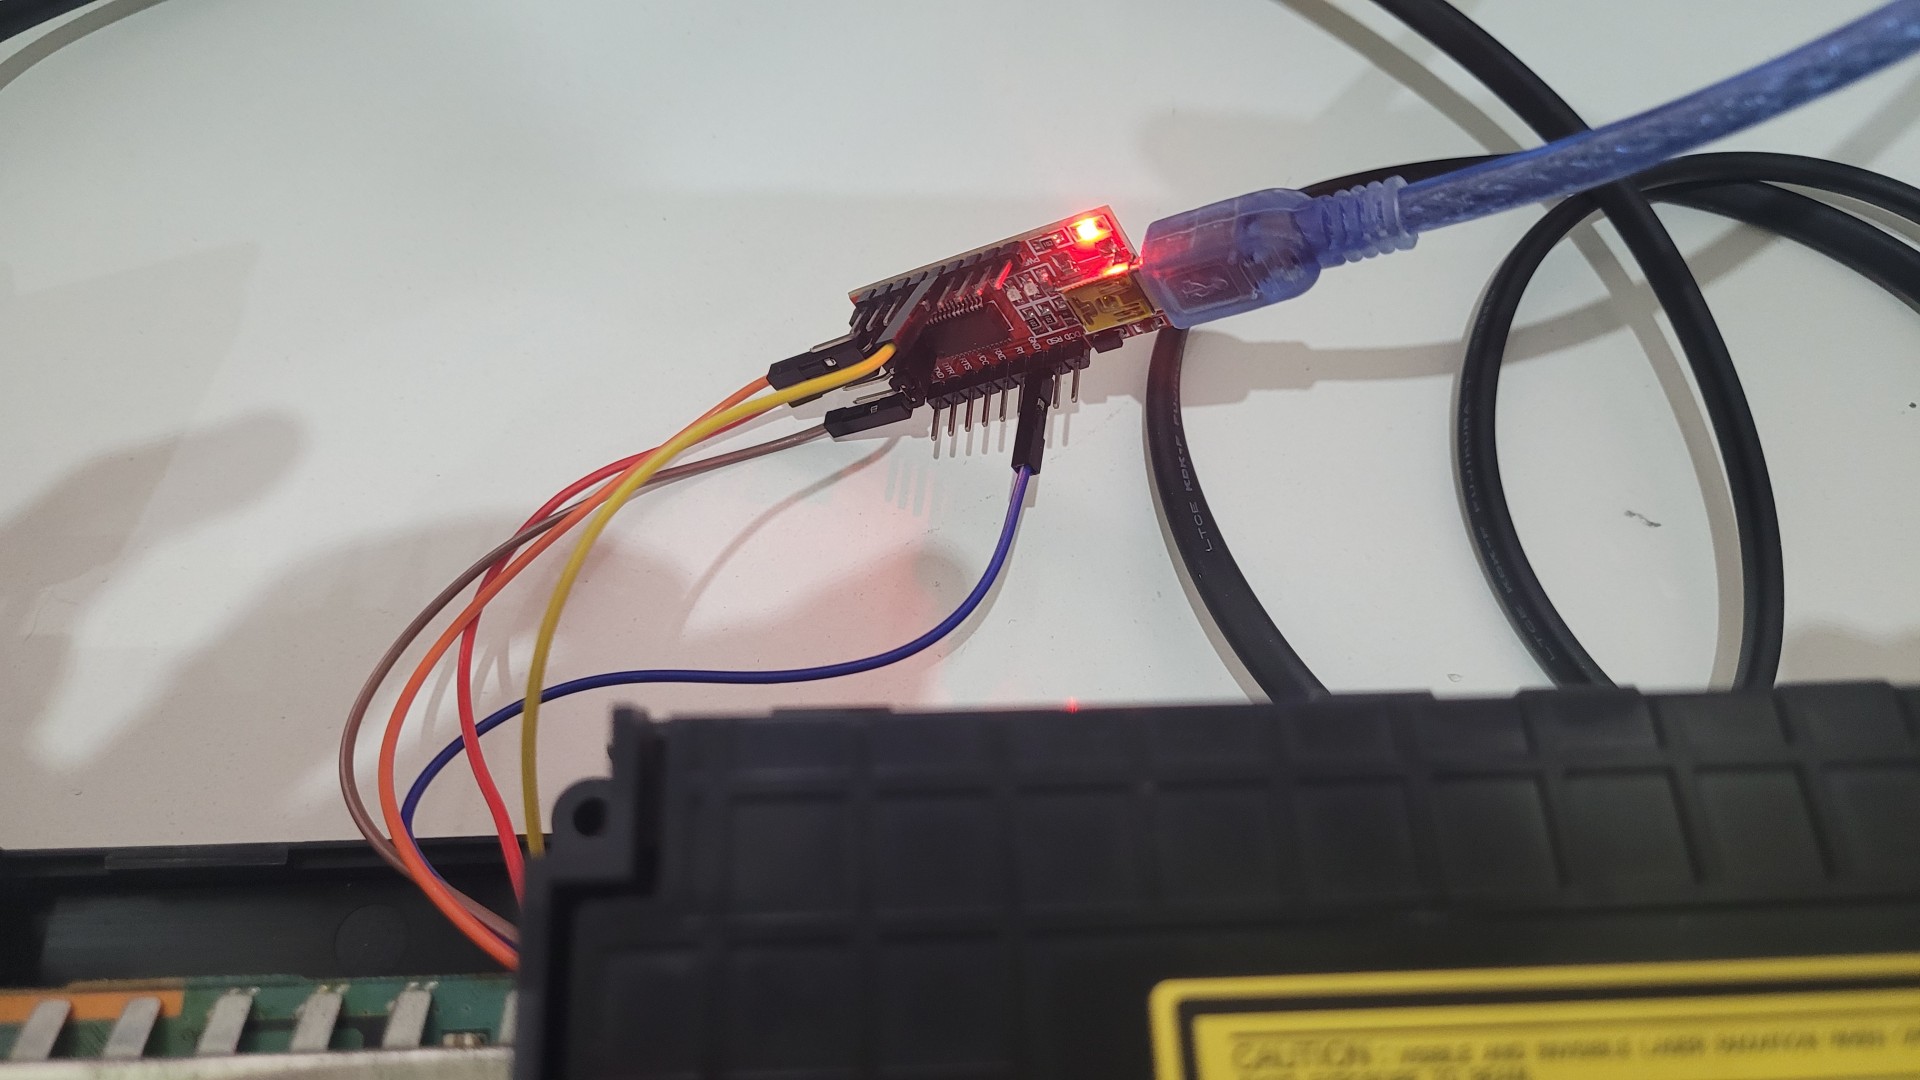
With the UART interface wired, I compiled PMAP on my Linux workstation and launched it:
|
1 2 3 4 |
git clone --depth 1 https://github.com/ps2homebrew/PMAP cd PMAP/PMAP-unix make ./pmap /dev/ttyUSB0 |
By looking at the EEPROM management menu, I saw that my model is a CXP-103049-202GG, which, according to the documentation, requires the RTC battery to be present and charged. Since the installed battery was a Sony, probably in place for 20 years, I replaced it.
|
1 2 3 4 5 6 7 8 9 |
TestMode.13 MD1.39 Checksum: OK MECHA: CXP103049-202GG (CEX) Serial: 5358466 EMCS: 00 MODELID: d206 TV: PAL Model: SCPH-30004 R RTC: BU9861FV-WE2 (No Battery) OP: SONY Lens: T609K Chassis: 7. F-chassis (SCPH-30000/SCPH-300xx R) |
After that, I attempted the Automatic ELECT Adjustment in PMAP, but it kept returning various errors until I adjusted the lens potentiometers.
I measured the initial resistance values for CD (left) and DVD (right), which were 1561Ω and 1469Ω, respectively. I wasn’t able to proceed with PMAP until I adjusted them to 815Ω for CD and 765Ω for DVD.
After these modifications, the lens finally detected the disc, and the ELECT adjustment procedure was completed successfully. I then followed the jitter optimization procedure from the README file, and now my PS2 correctly reads both CDs and DVDs!
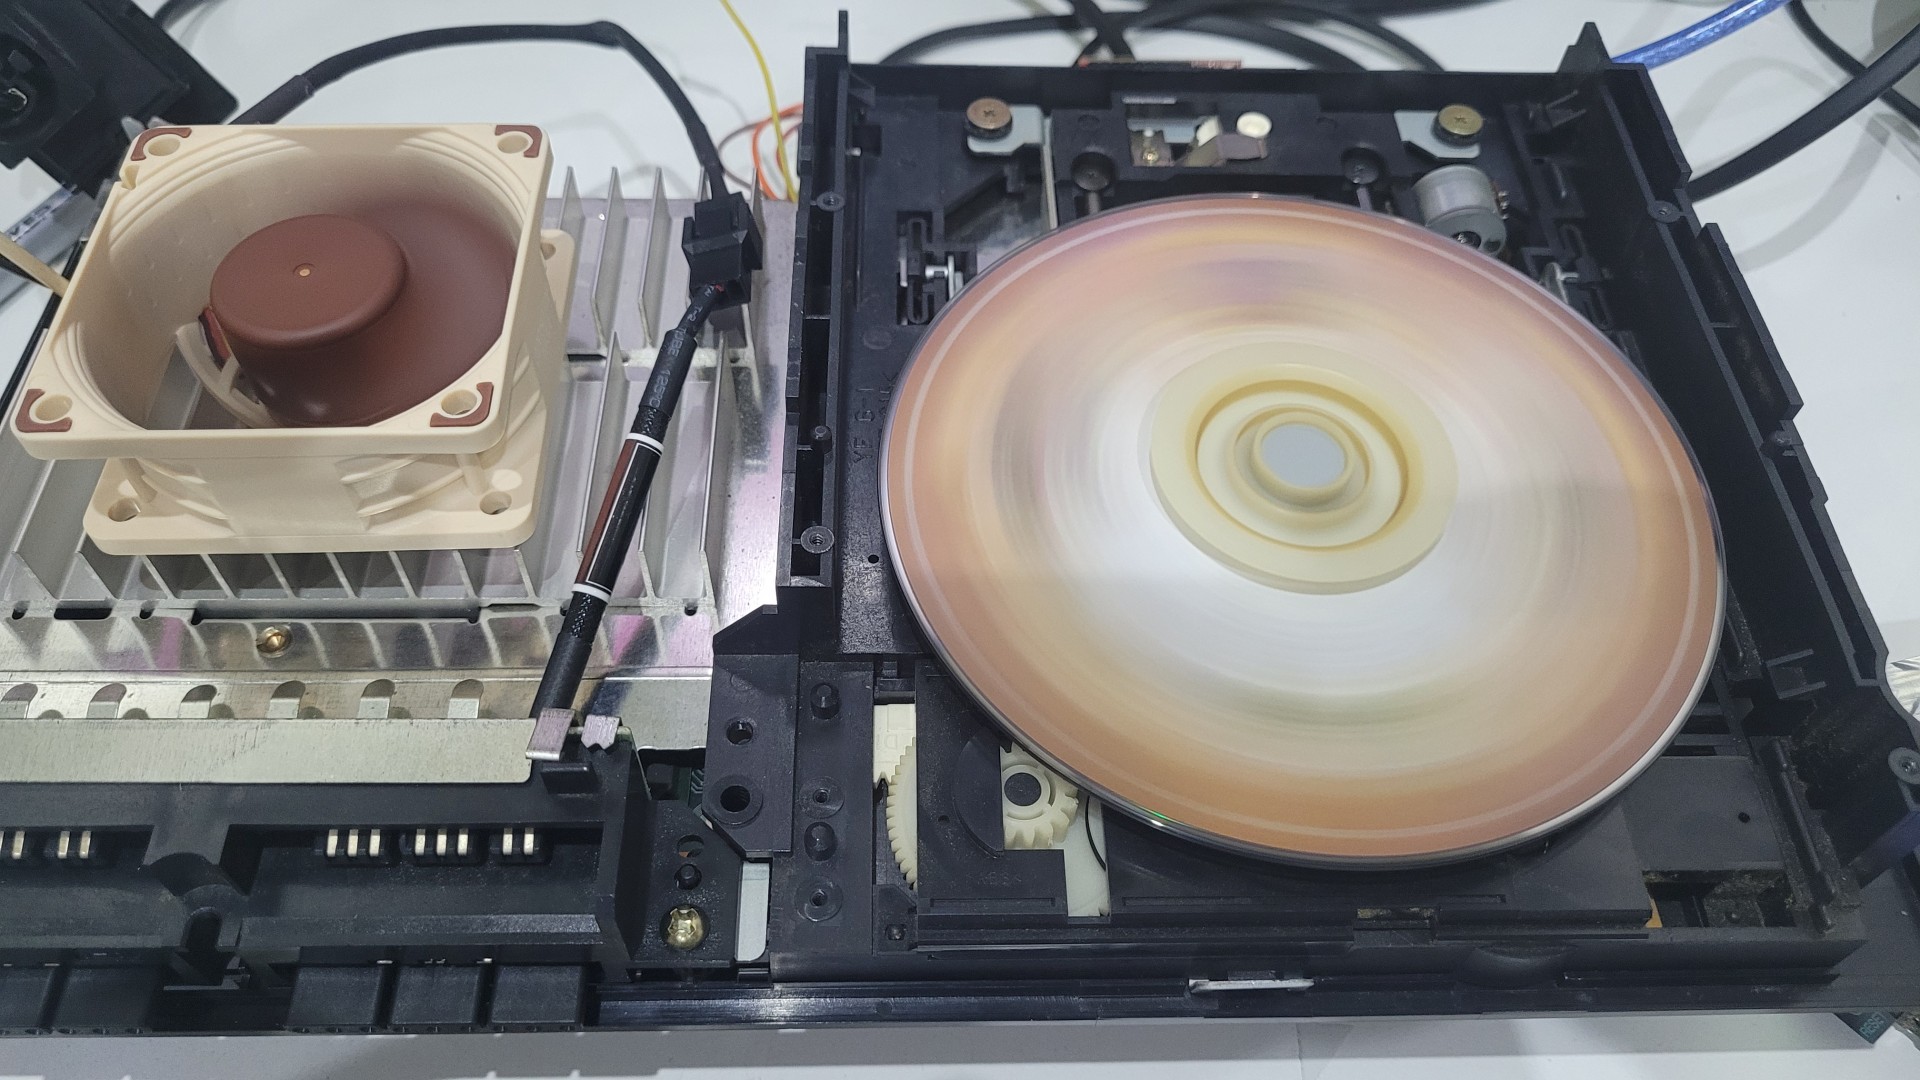
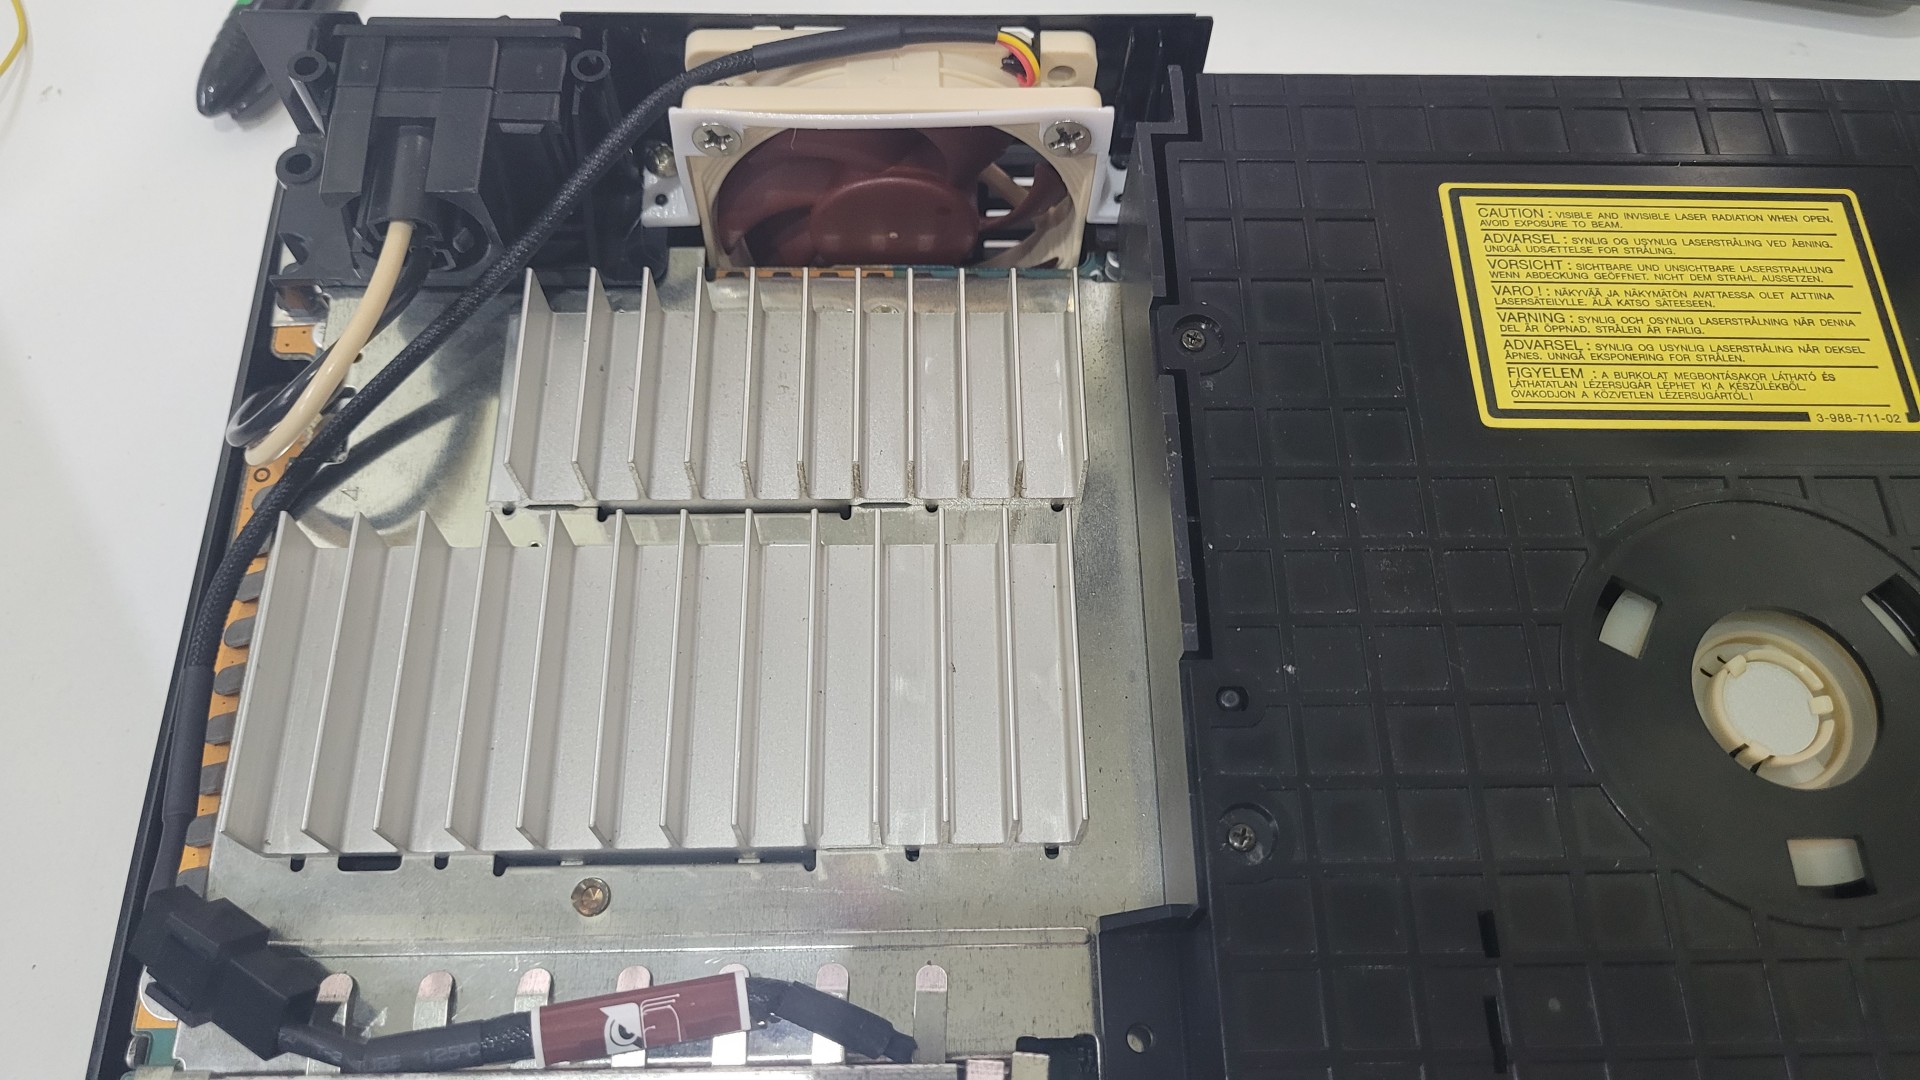
FAN replacement
My PlayStation 2 was really noisy. With the original fan, I measured around 59 dBa. After replacing the fan, I measured 35 dBa with a similar airflow. A popular mod involves using a Noctua 60×25 fan, but this mod requires a special 3D-printed IO panel, which I personally find unattractive.
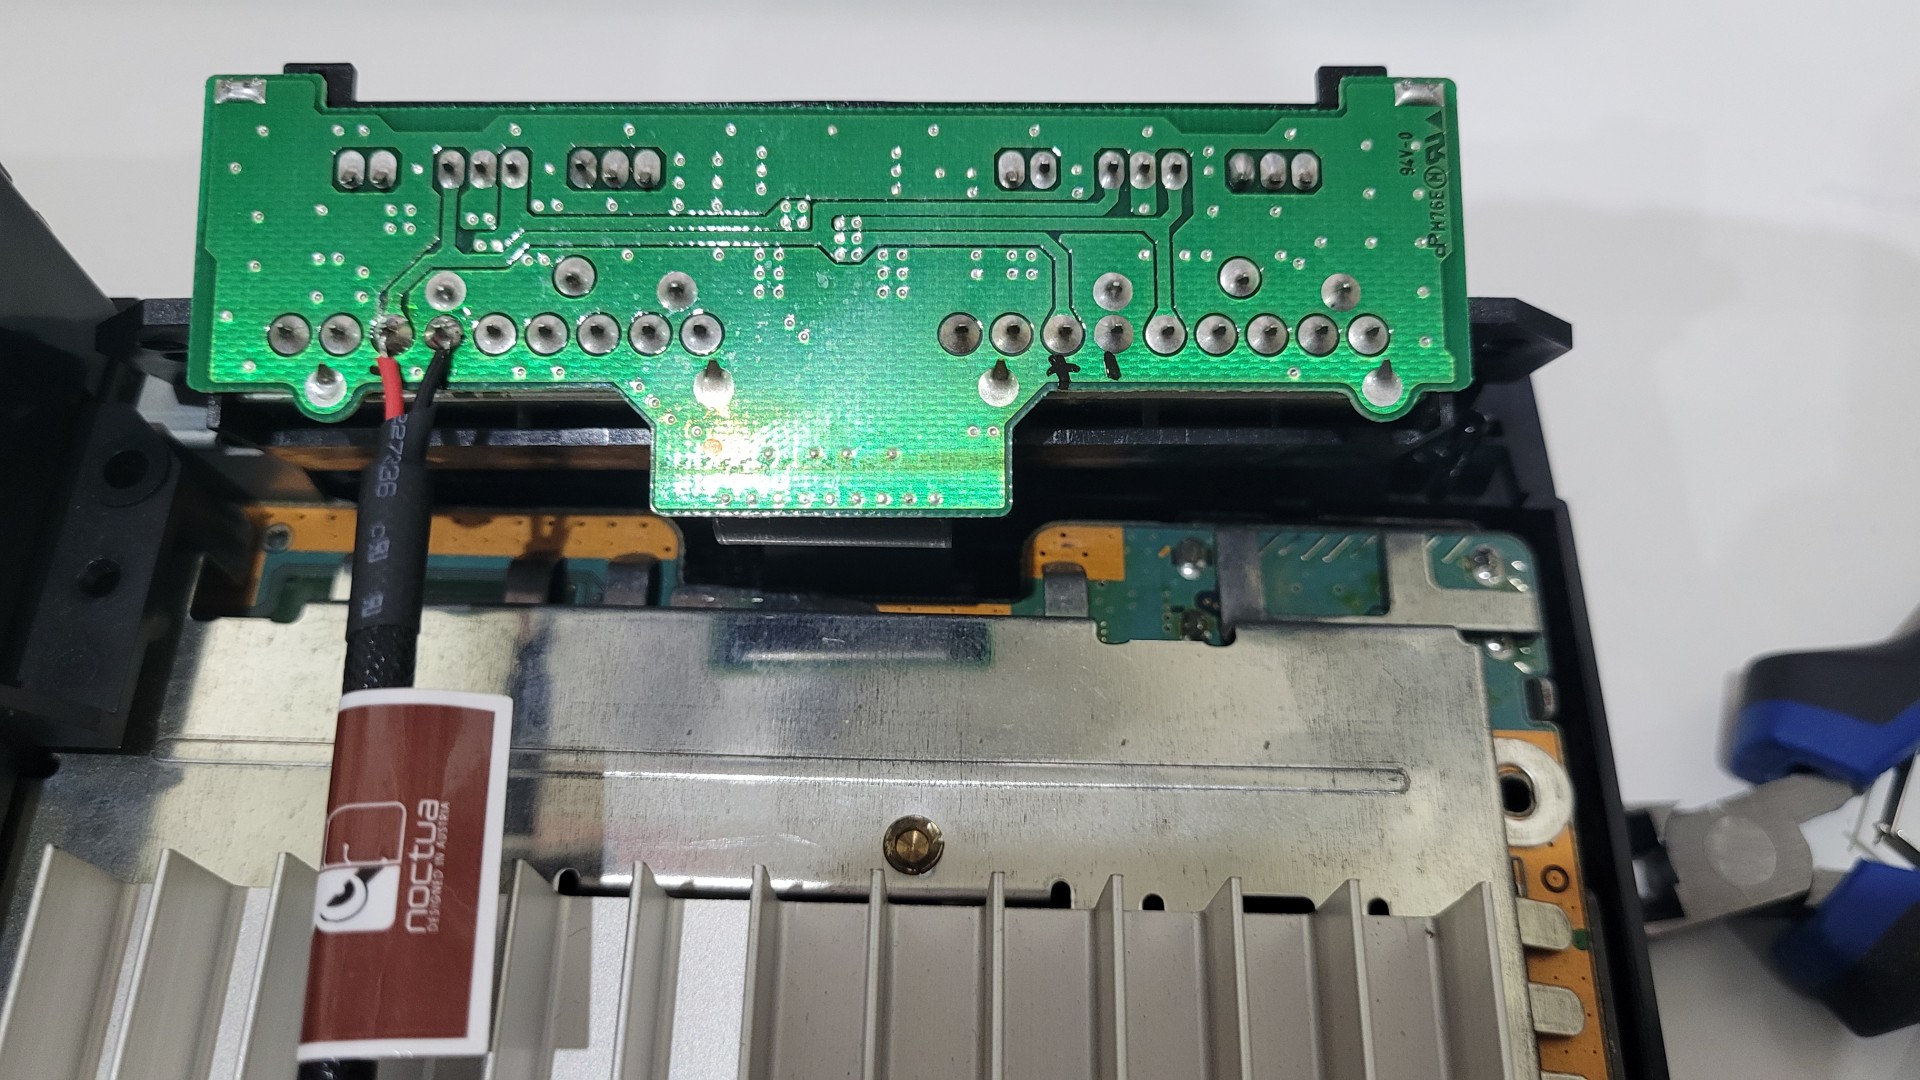
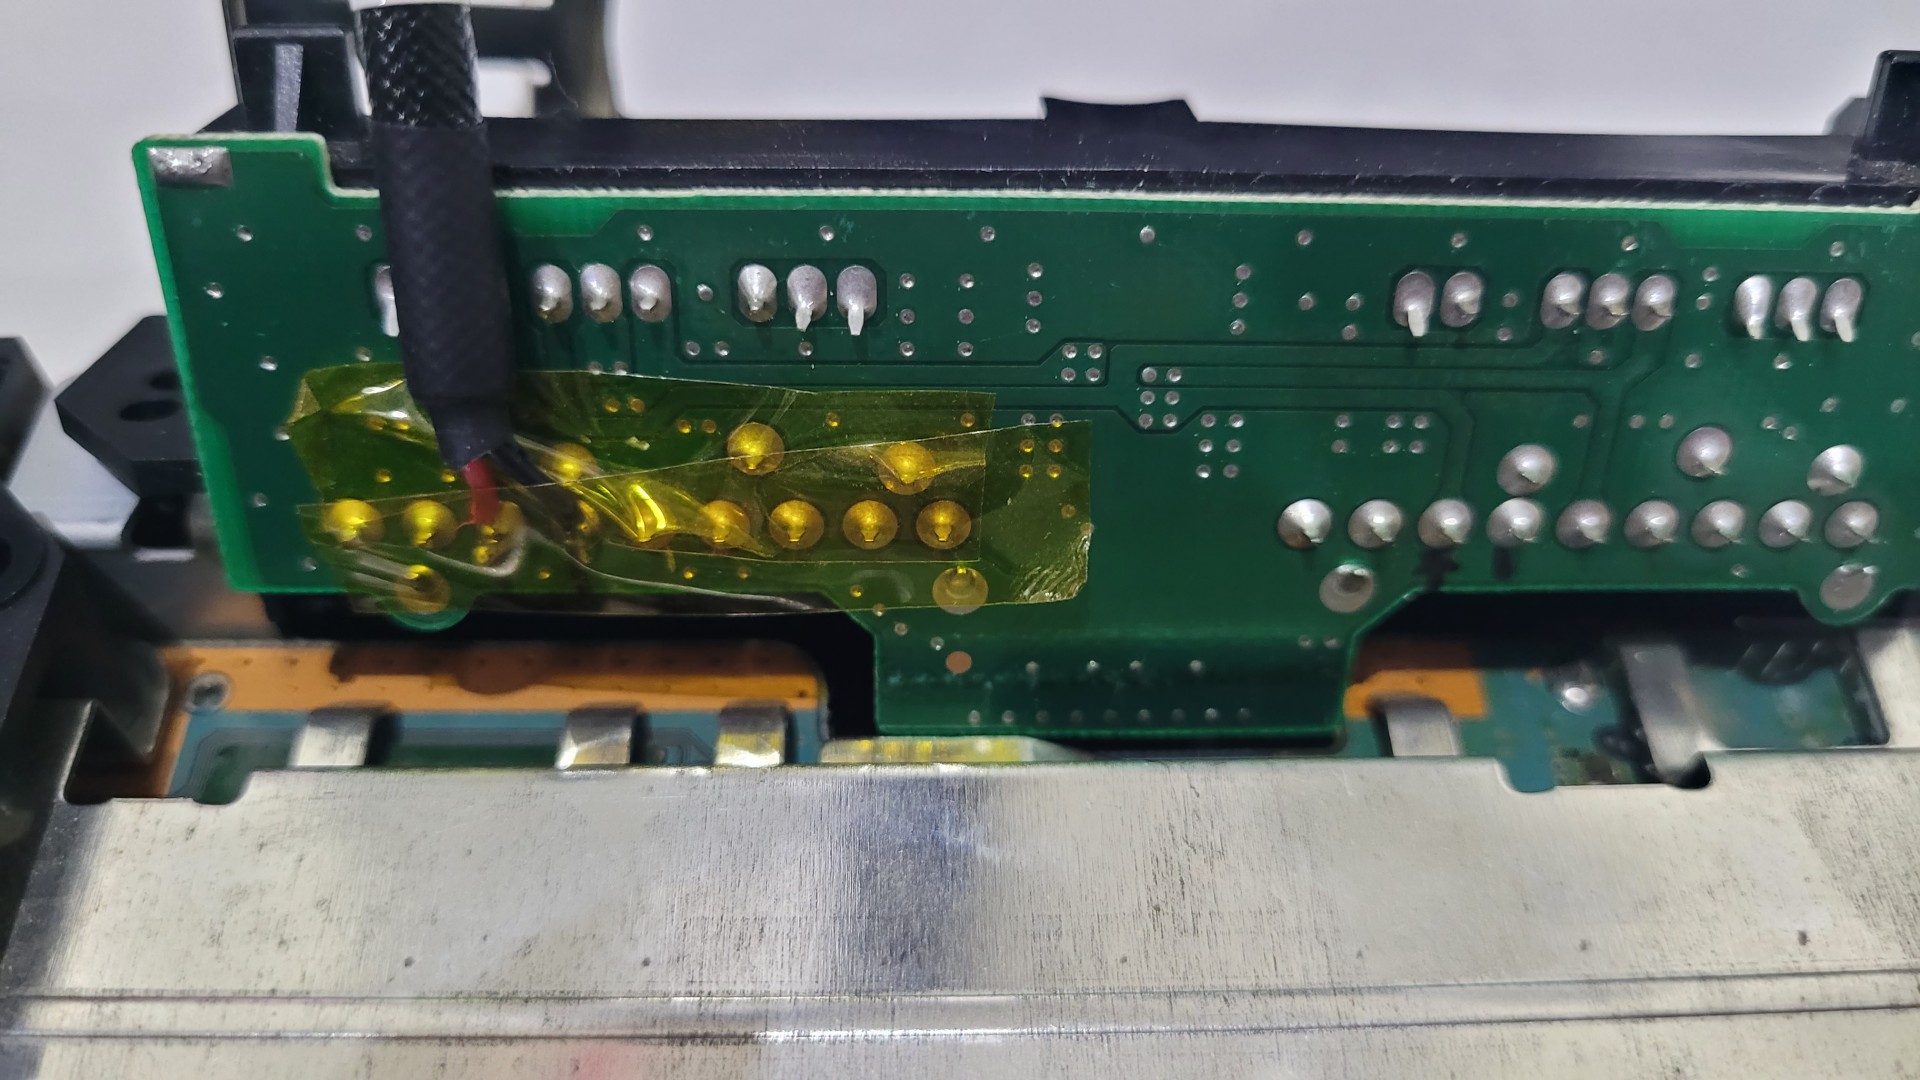
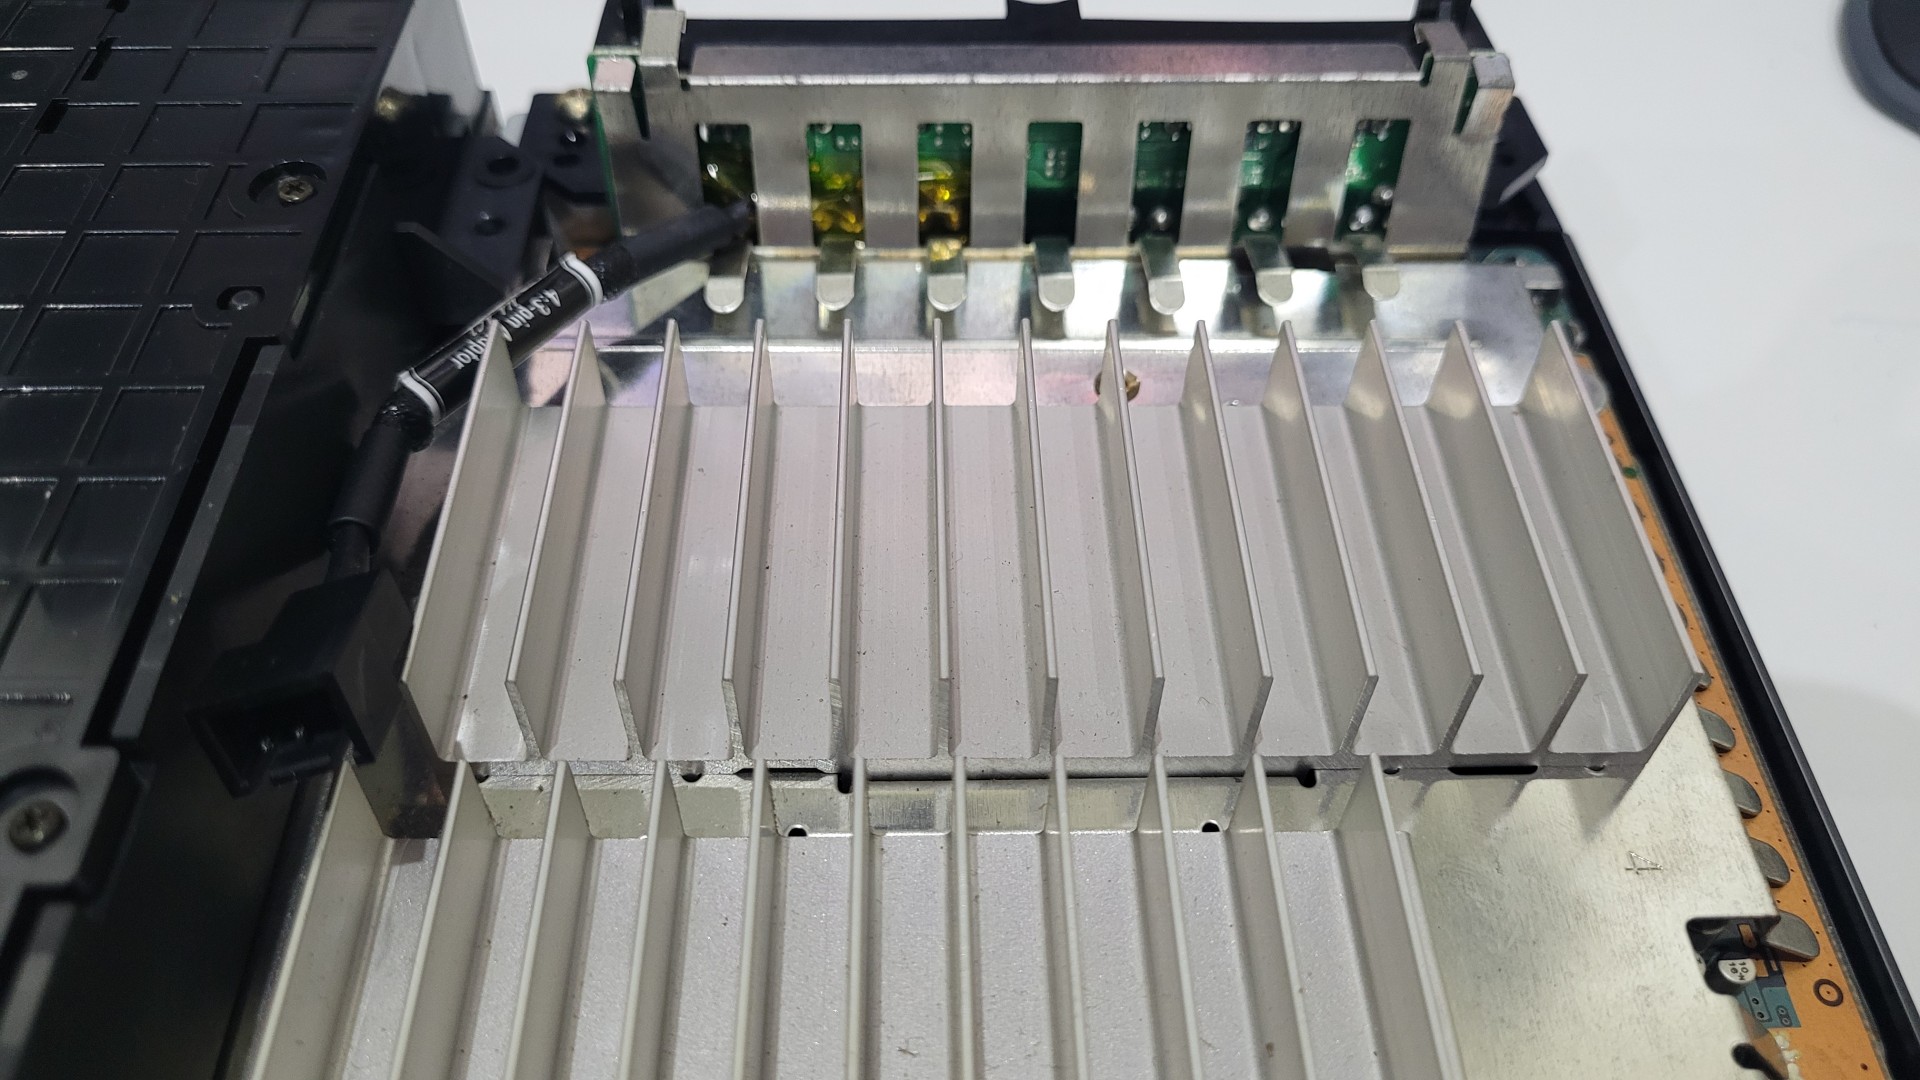
Another solution is to use a Noctua 60×15 fan with a small 3D-printed adapter that can be found here: https://www.thingiverse.com/thing:6893848/files. However, like the 60×25, this Noctua fan requires 12V for full speed, while the original fan connector delivers between 6V and 7V, which is insufficient for proper airflow. But there is a way to get 9V from the controller connectors board, as shown in the photo below.
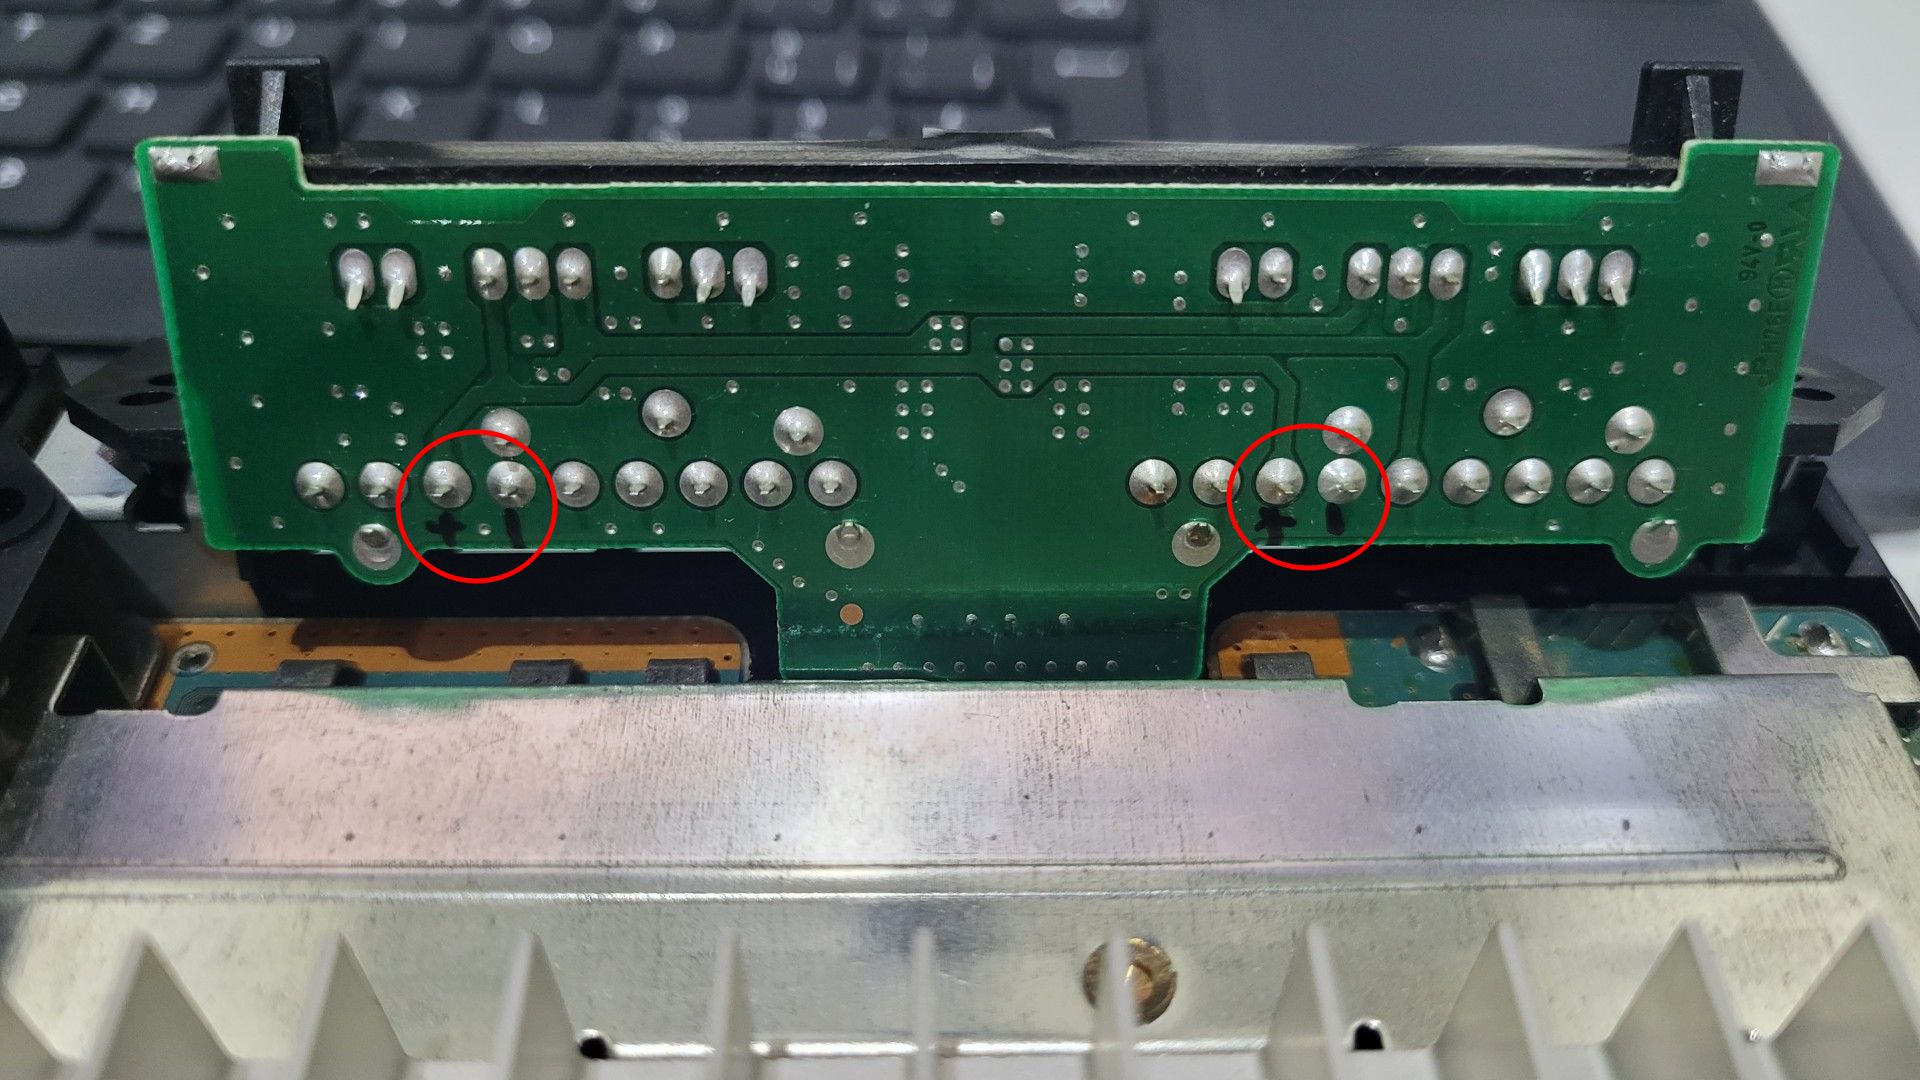
I used one of the cables included with the Noctua fan to solder it onto one of the two controller connectors. Now, I can use any Noctua fan, provided it supports 9V.