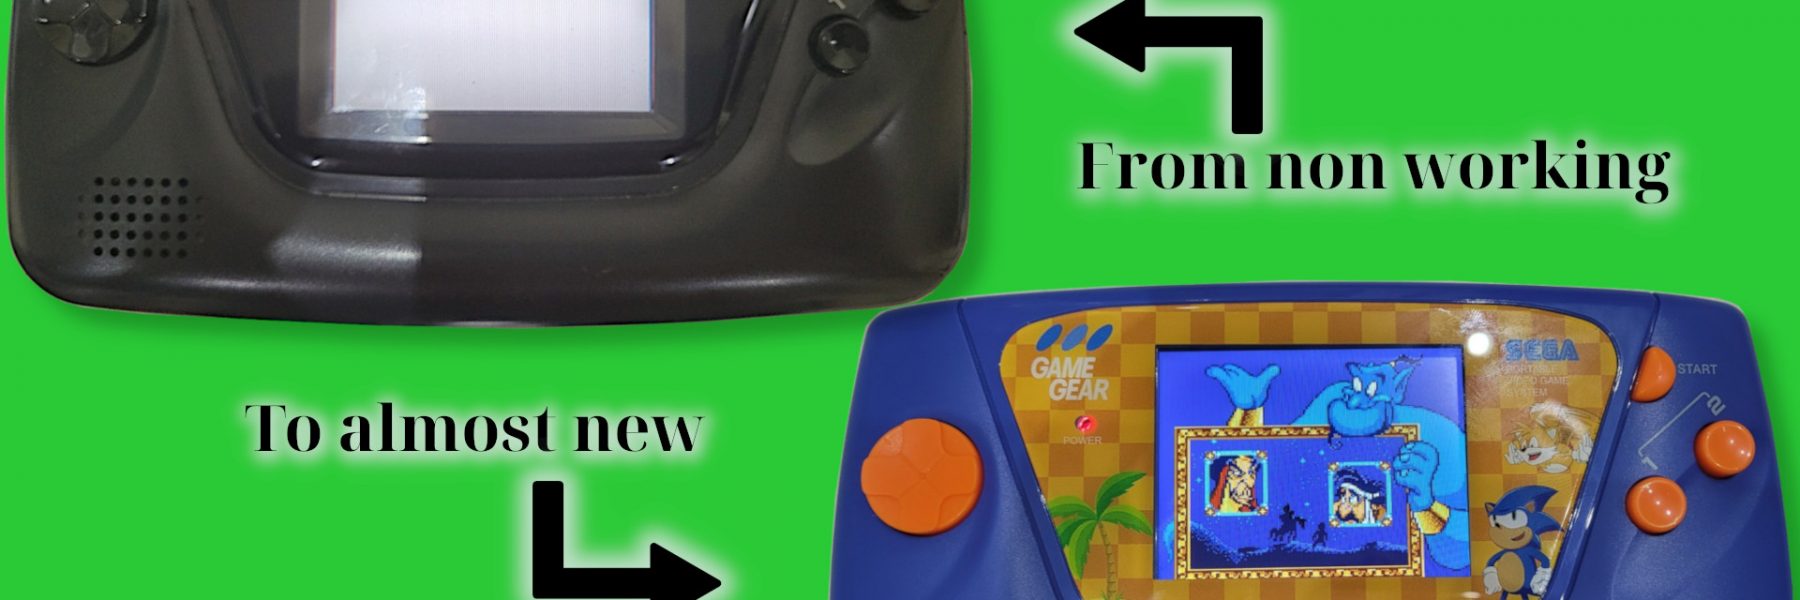
The Sega Game Gear, like all gameboy variants, has received some good aftermarket attentions. It’s quite easy to find replacement parts, including better display, complete shell replacement and even some custom screen protection glasses. However, the Game Gear seems to be a bit more fragile than it’s direct competitors : the Game Boy and the Atari Lynx 2. The most common issue is probably bad capacitors and fortunately, it is easy to repair if you are used to solder. However, changing the display is more complicated but worth so much the effort !
This is the story of my pimped (broken) Game Gear…
Needed materials
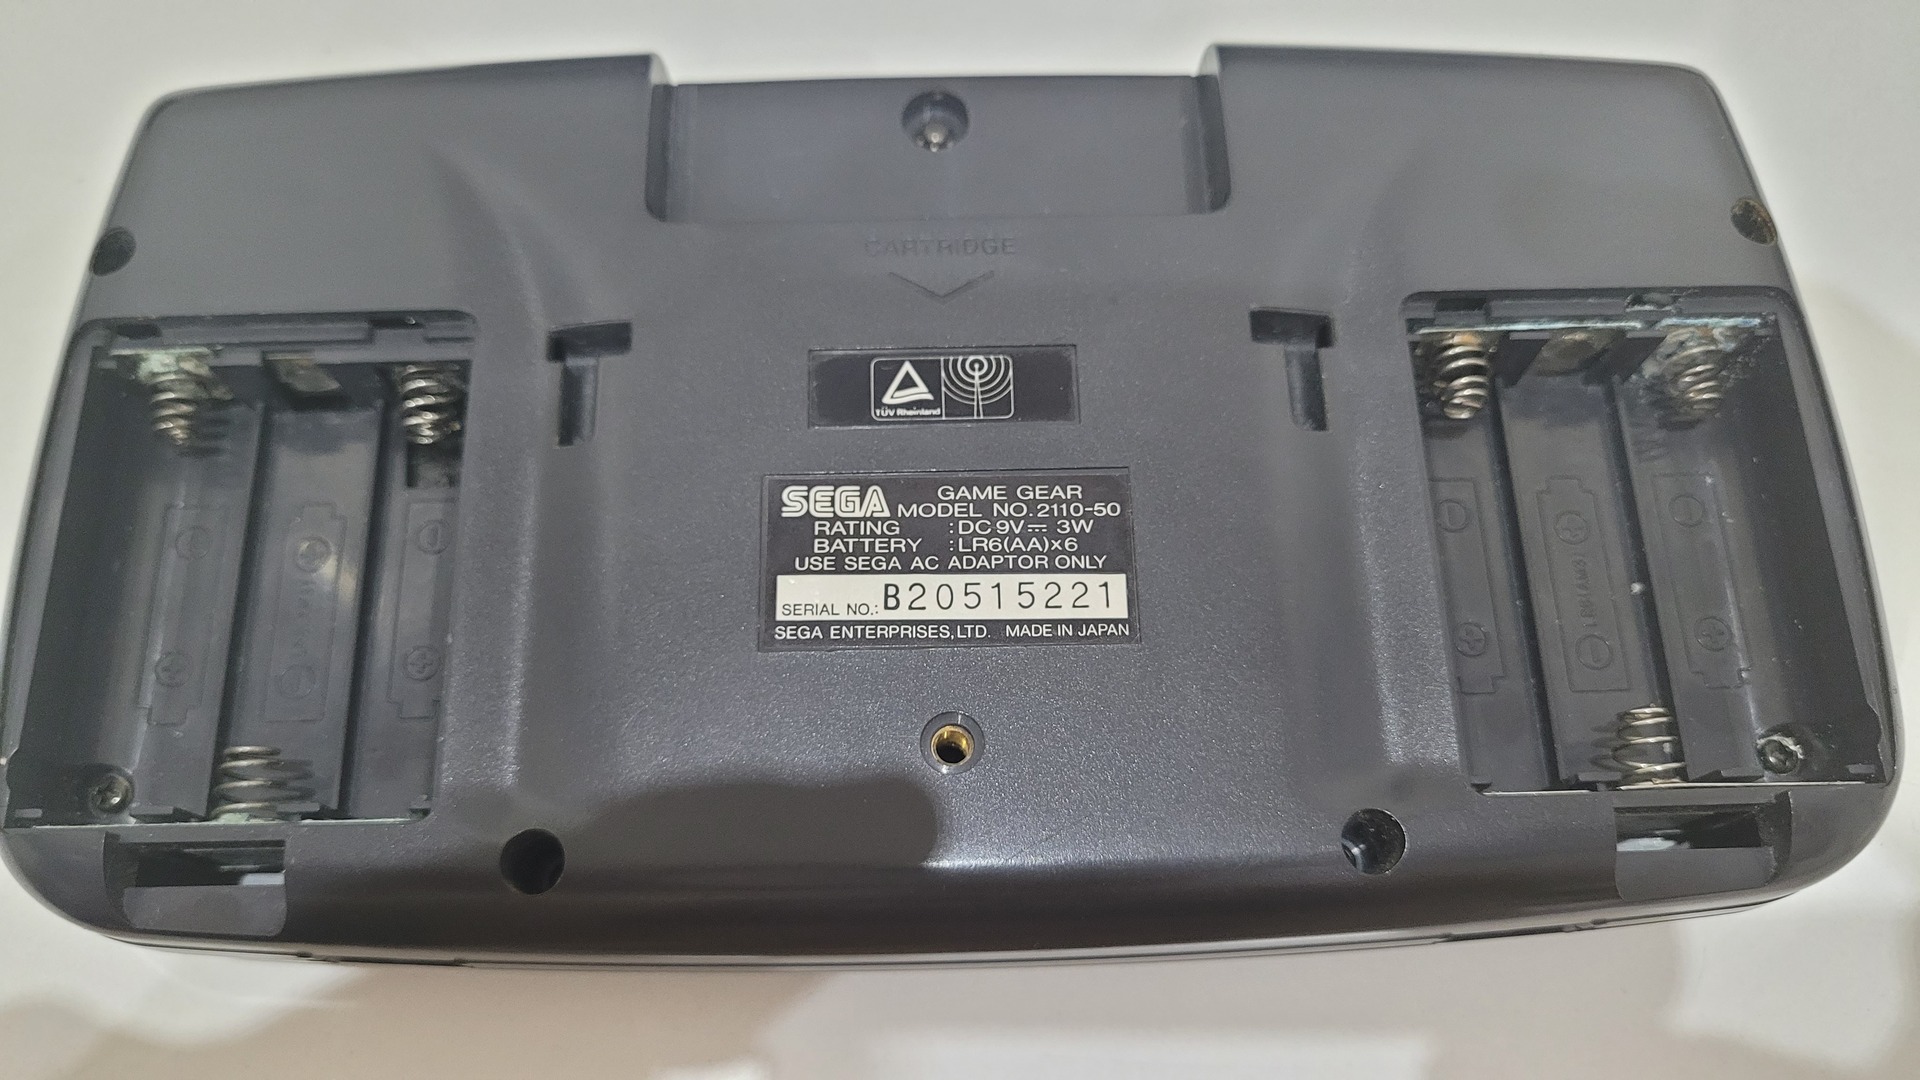
- A Game Gear, mine had a bad display, but obvisouly a working one is fine
- Retrosix TFT display
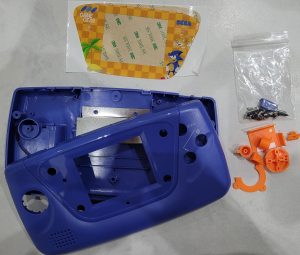
- A brand new shell and buttons (mine come from Retrosix)
- Gamebit 4.5mm
- Flat pliers
- A solder Iron
- Solder flux
- Desoldering pump
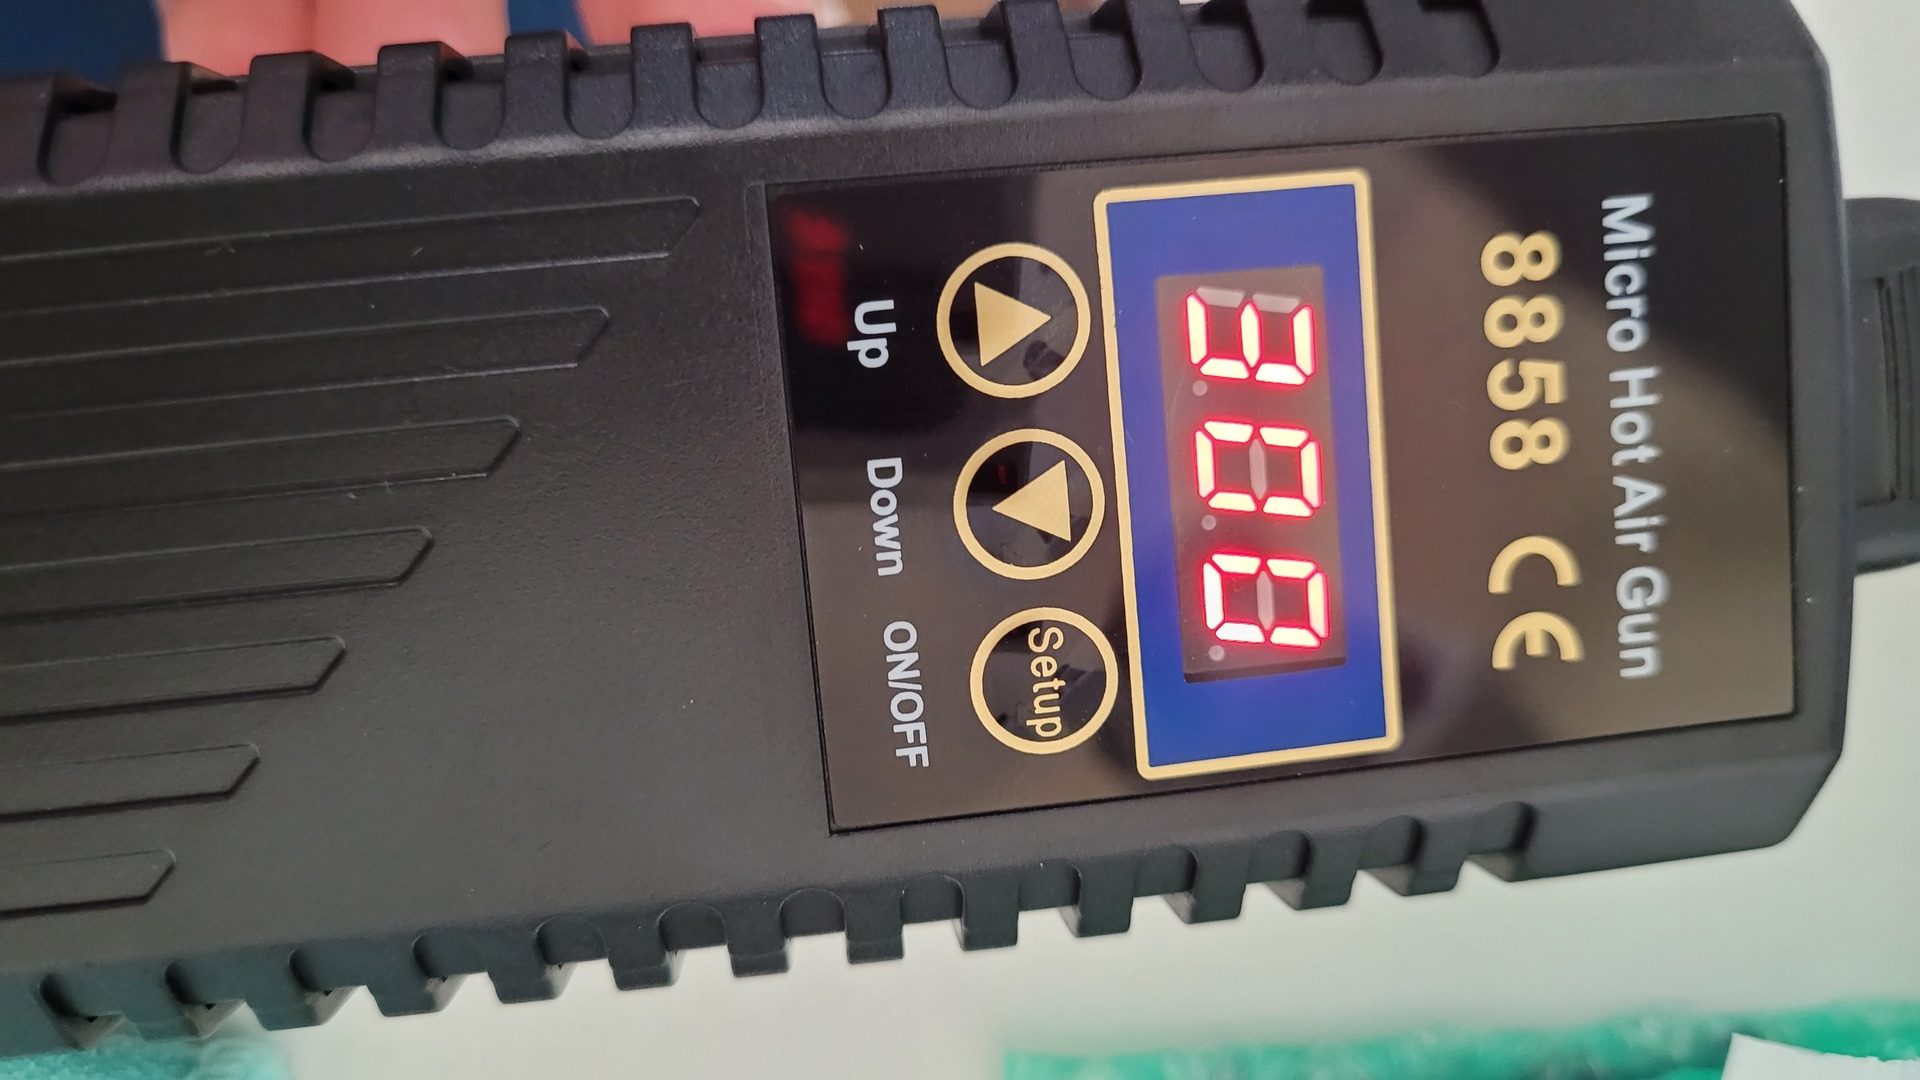
- hot air gun (optional, but easier with one)
- Alcool vinegar and Isopropyl acool
- Sandpaper 1200 grit (I used it to remove some corrosion)
- Q-tips
- A Game Gear capacitors replacement kit (ebay)

Repairing the display
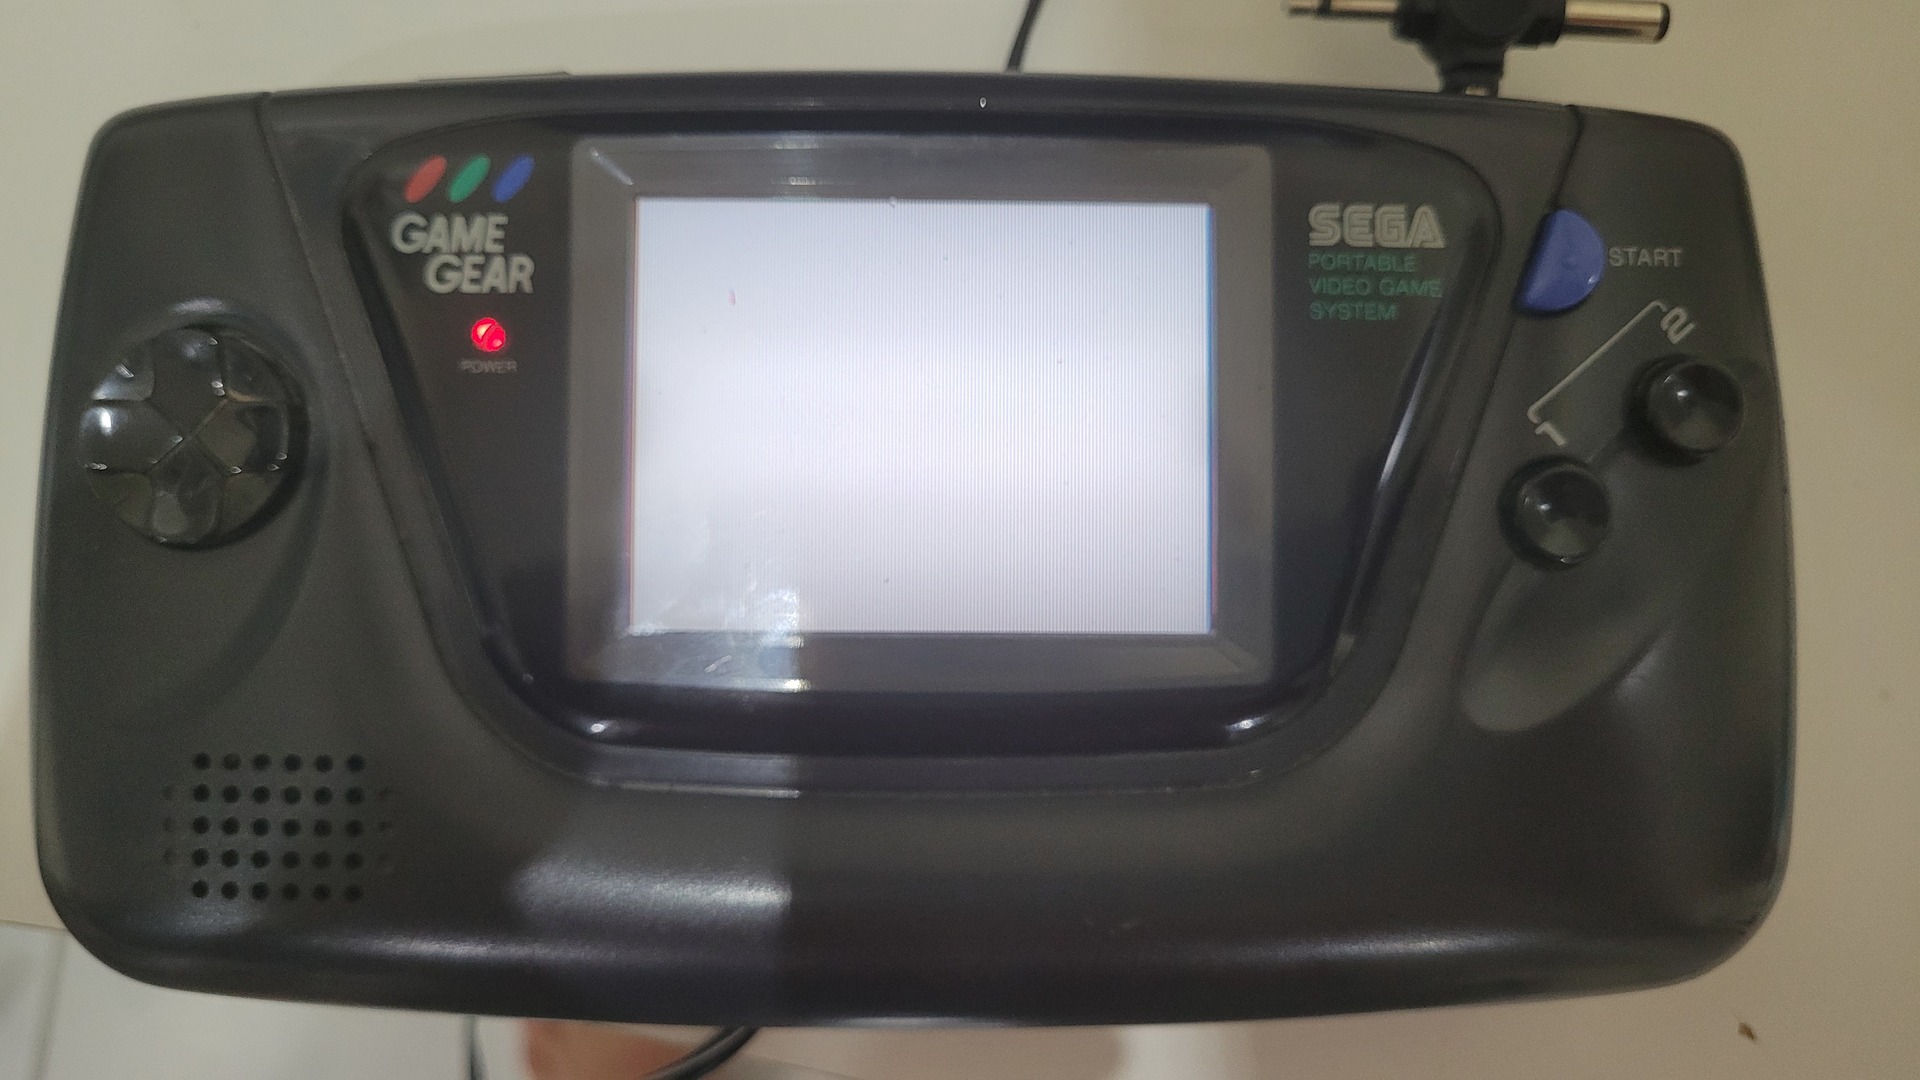
Symptoms
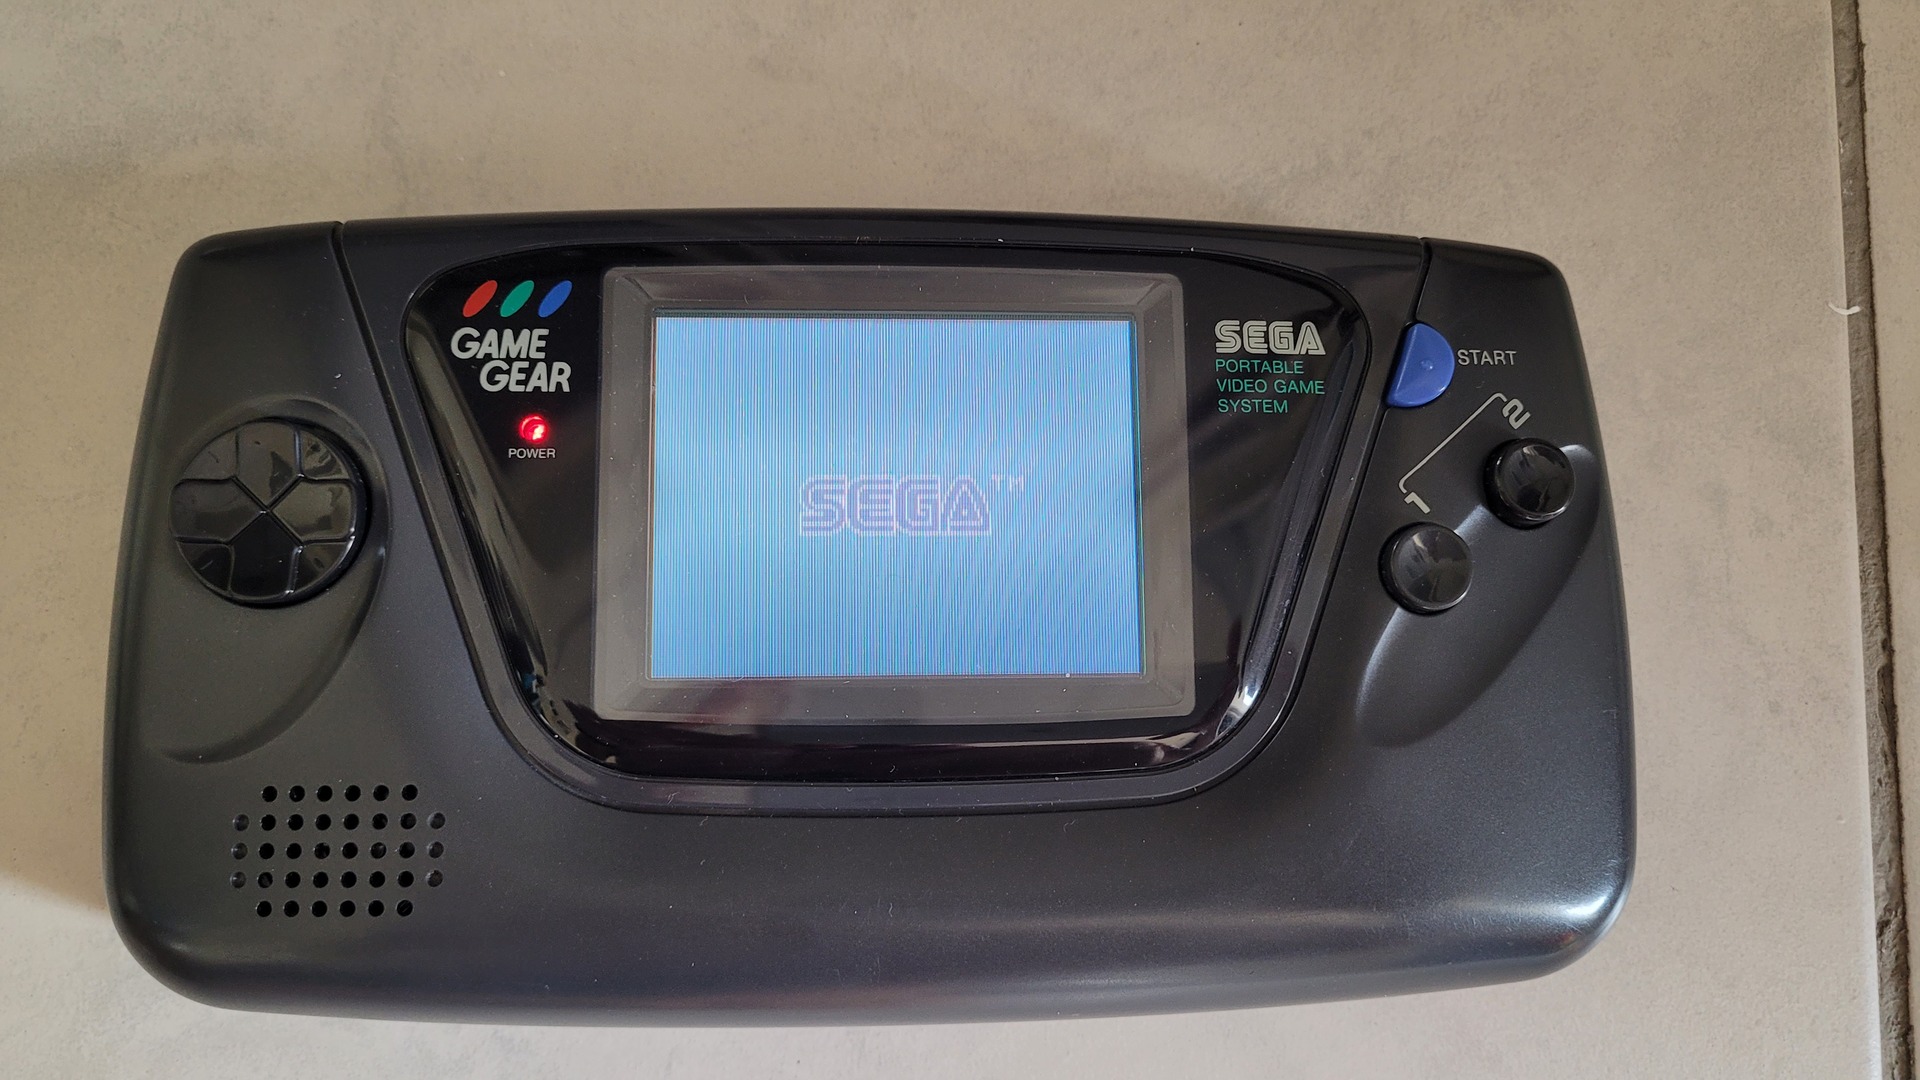
My screen was staying blank, no sound, games seemed not to be launched:
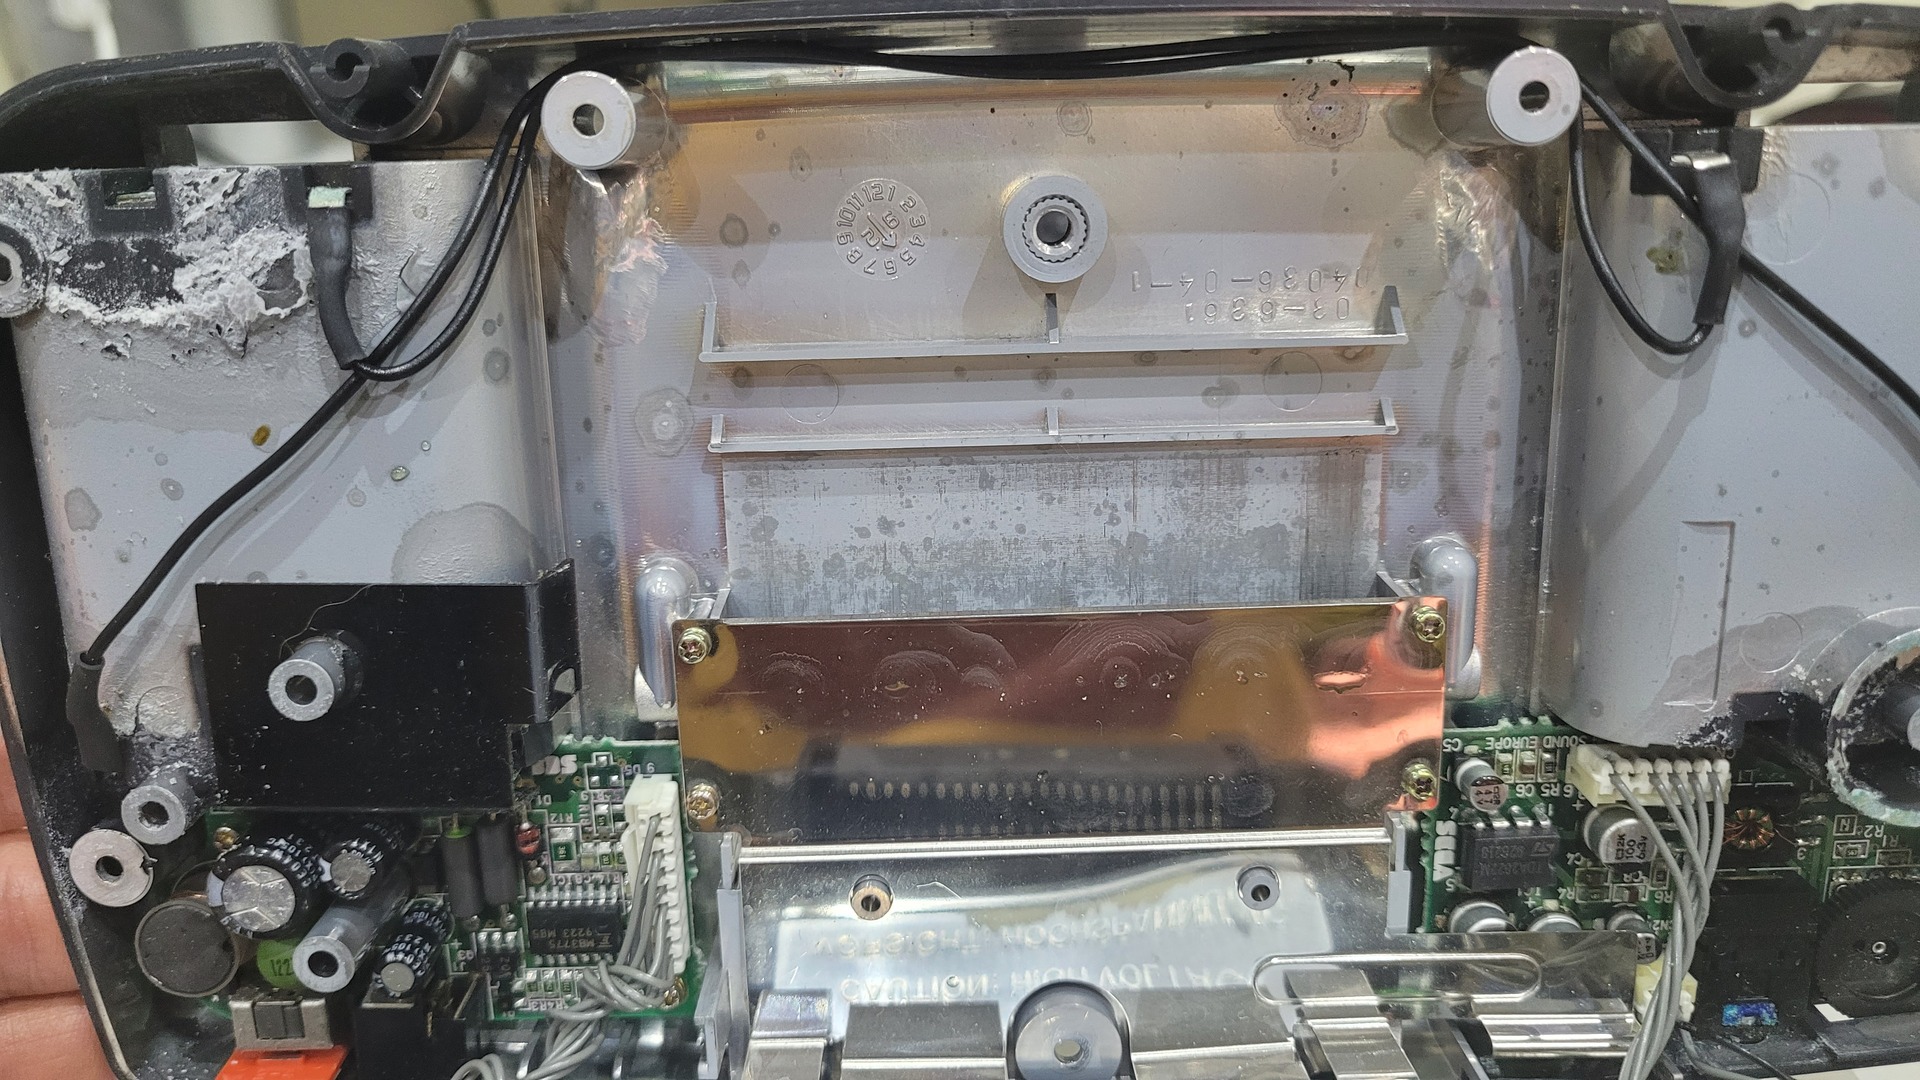
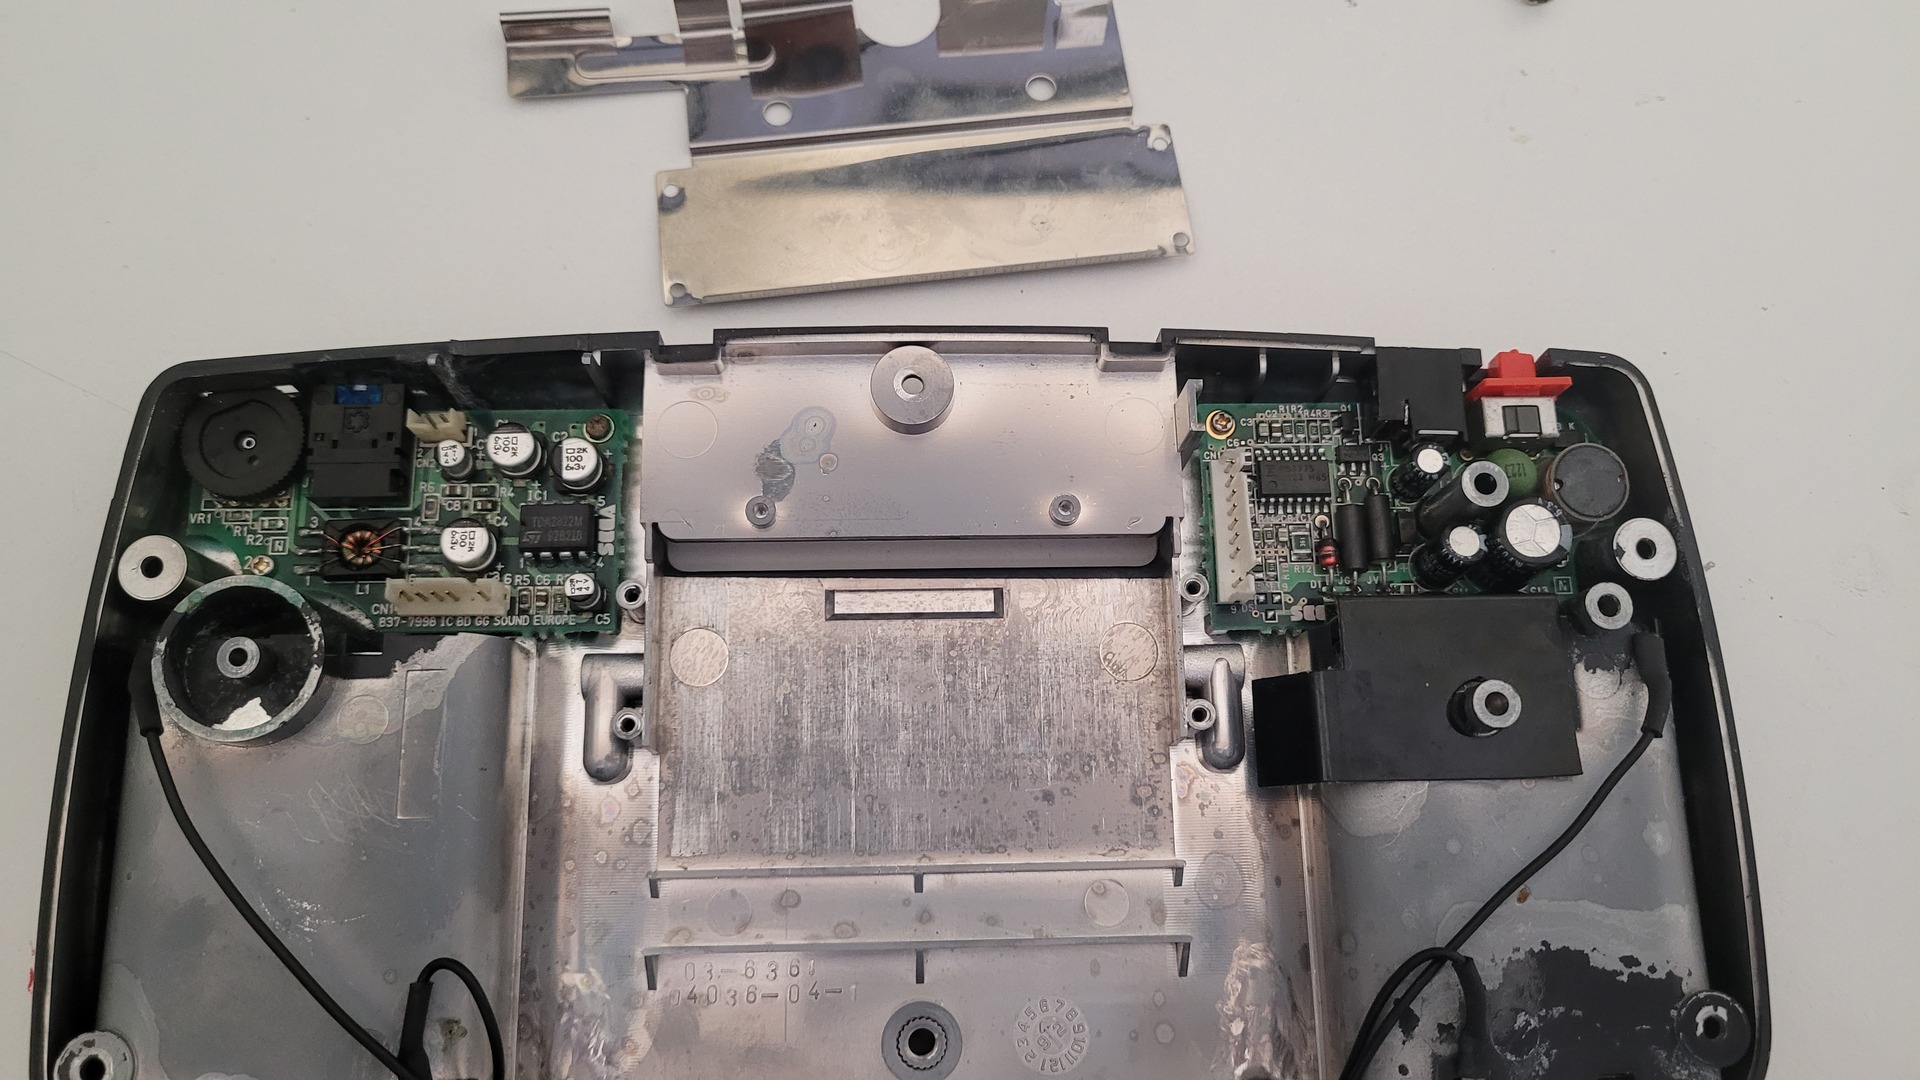
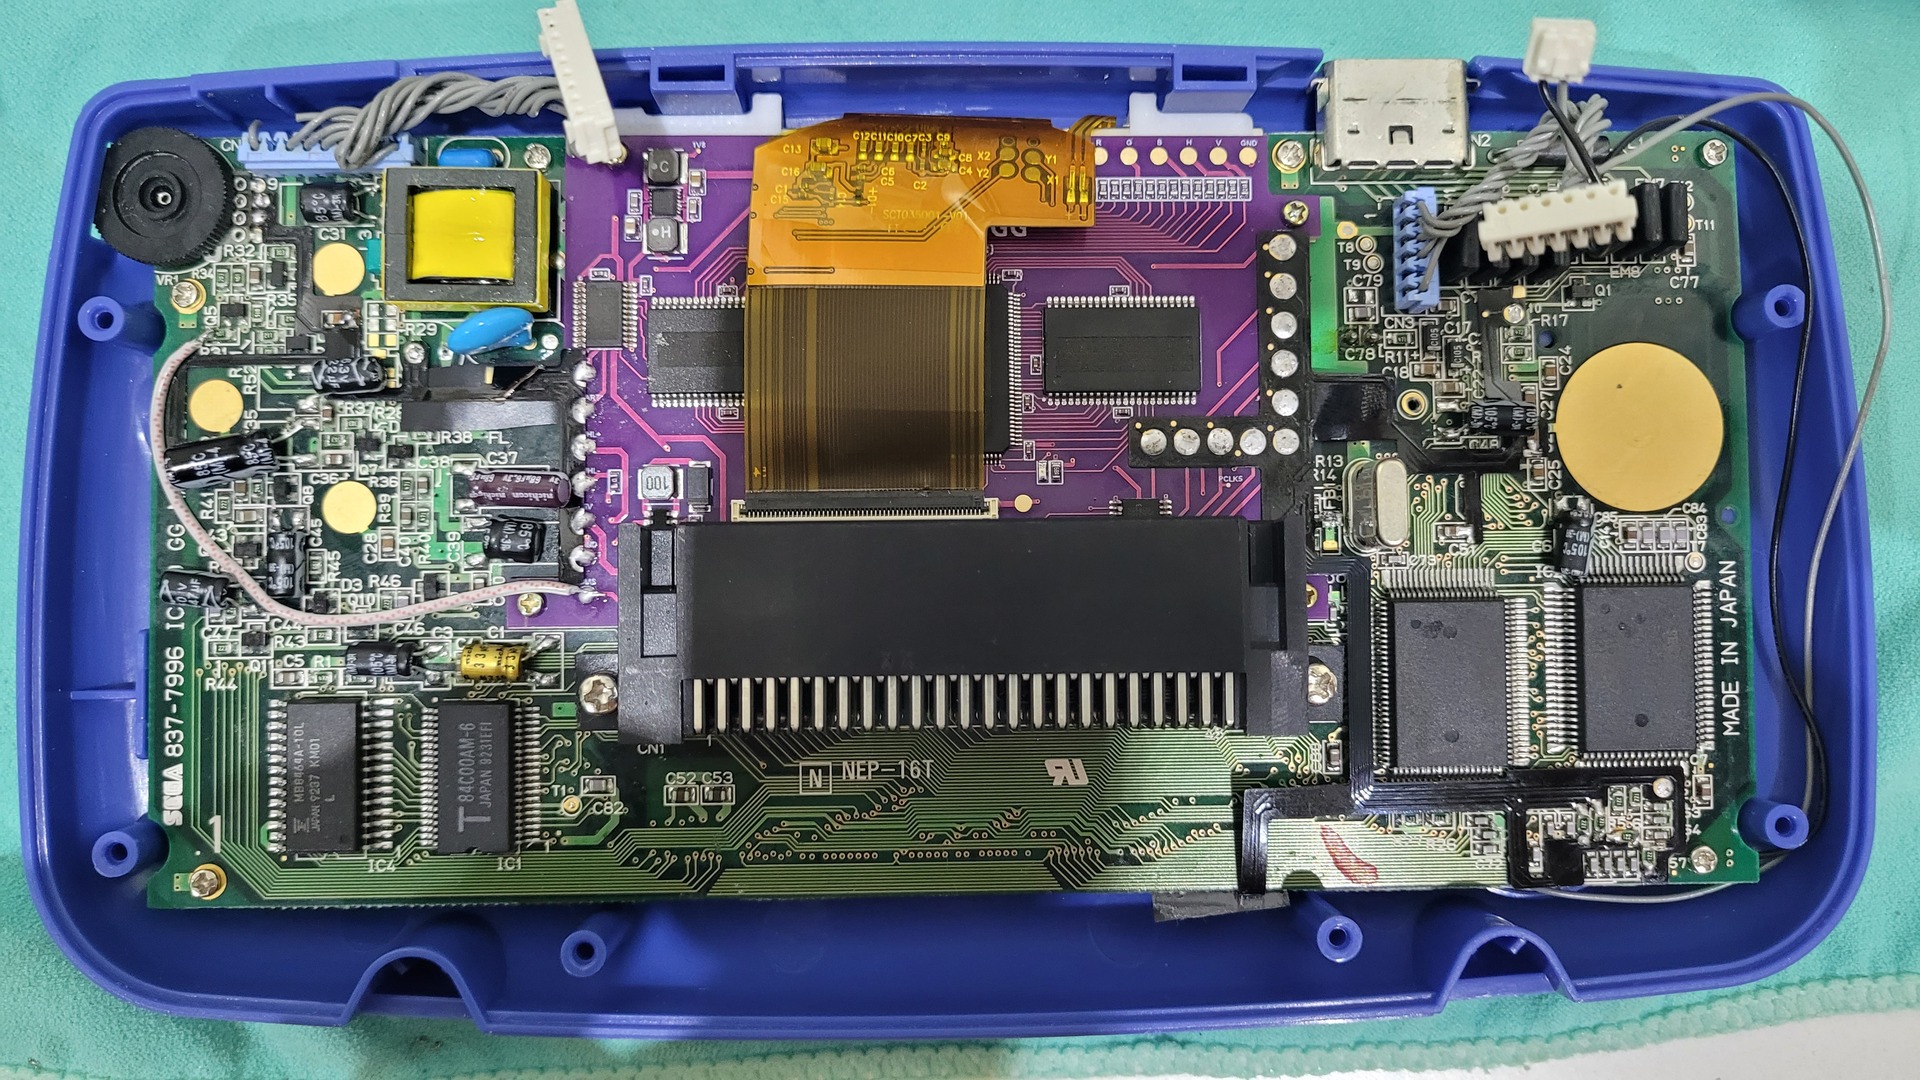
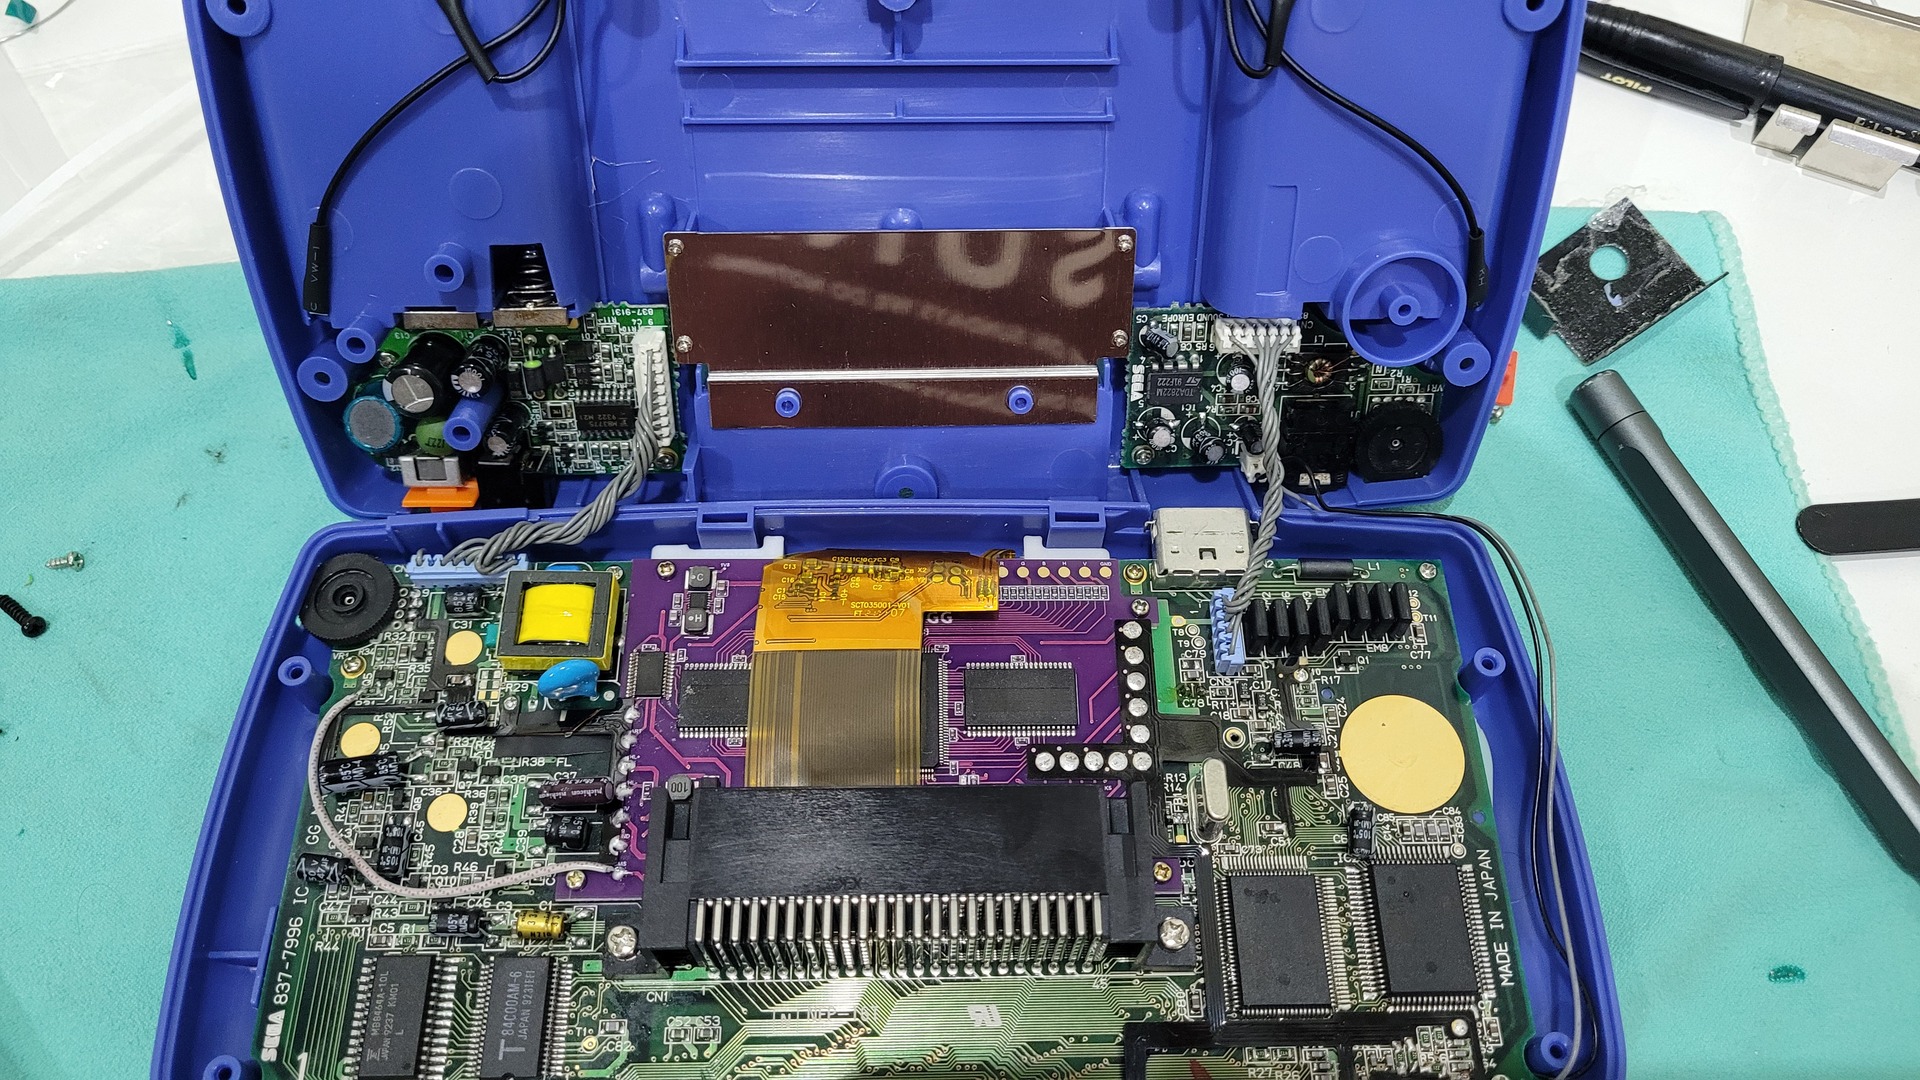
Open and extract motherboard
I did not took a lot of phtos, but this step is very well covered on Ifixit here.
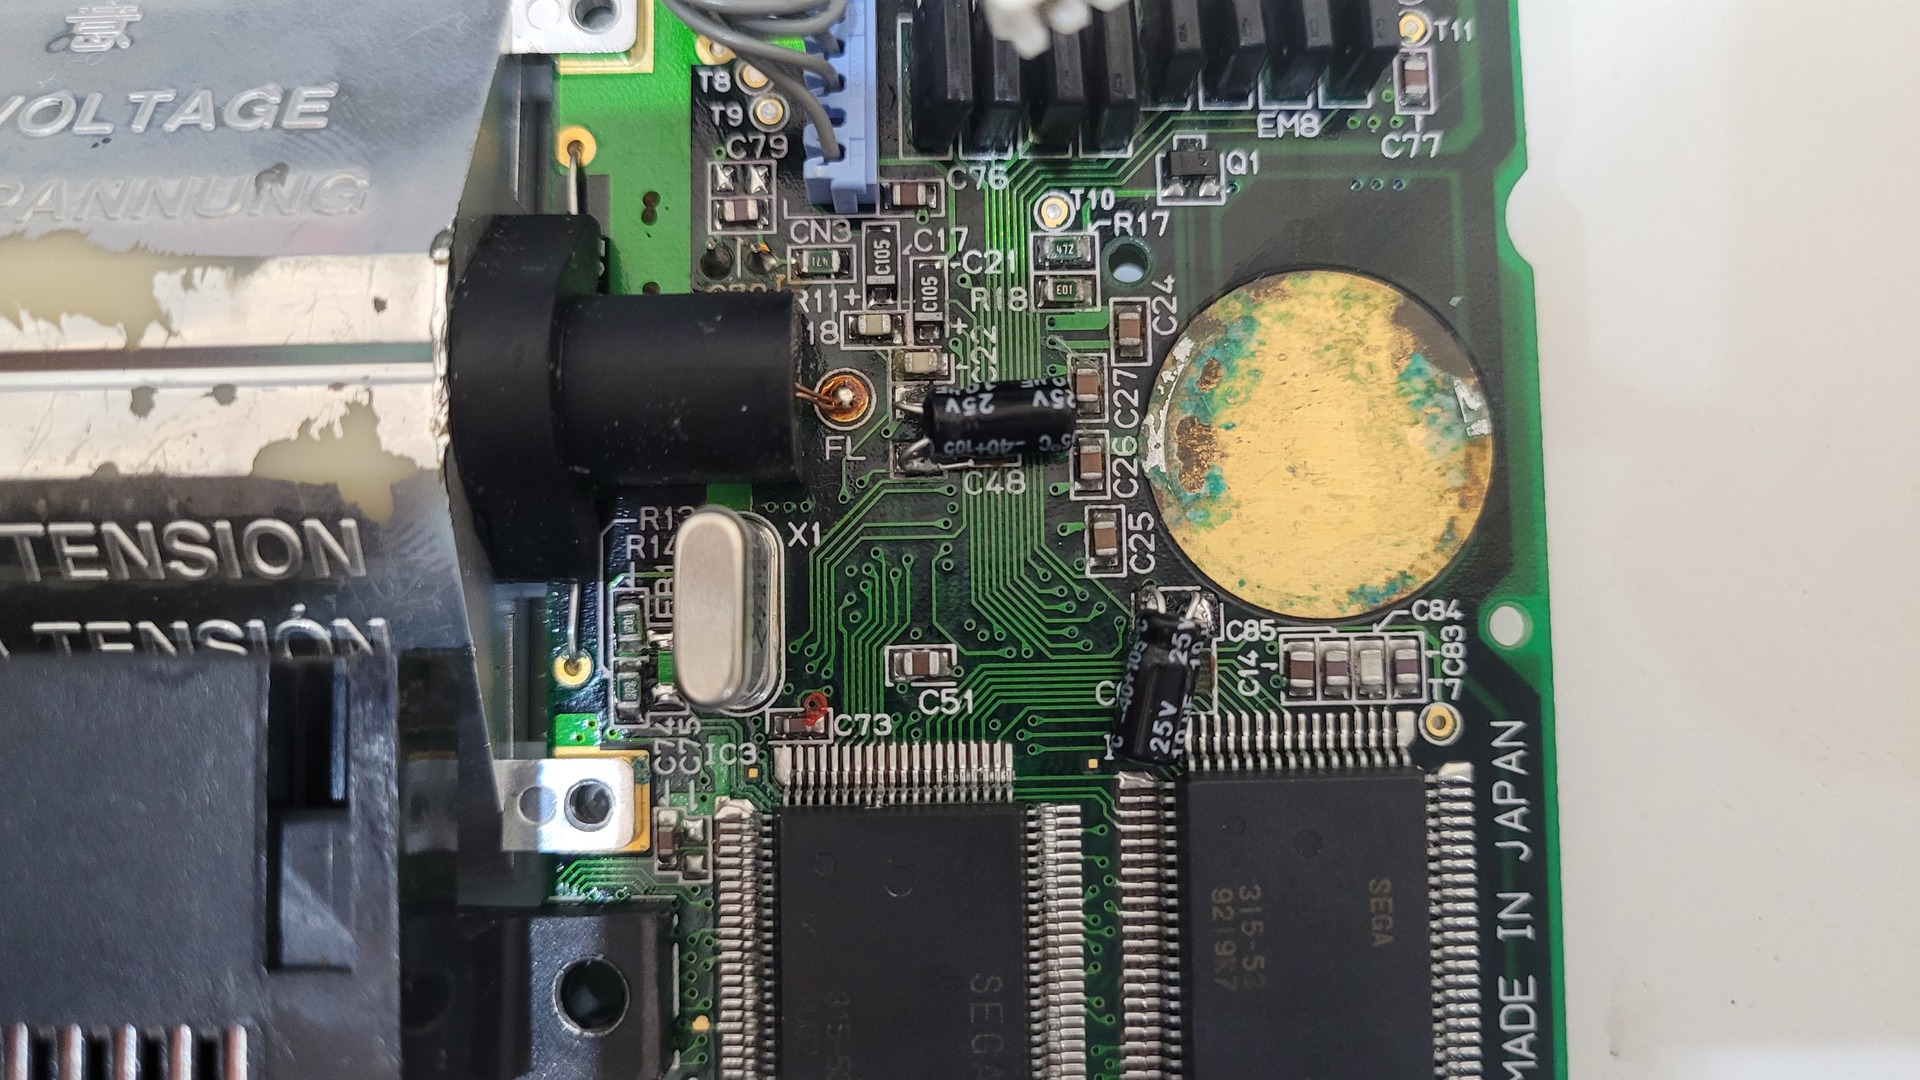
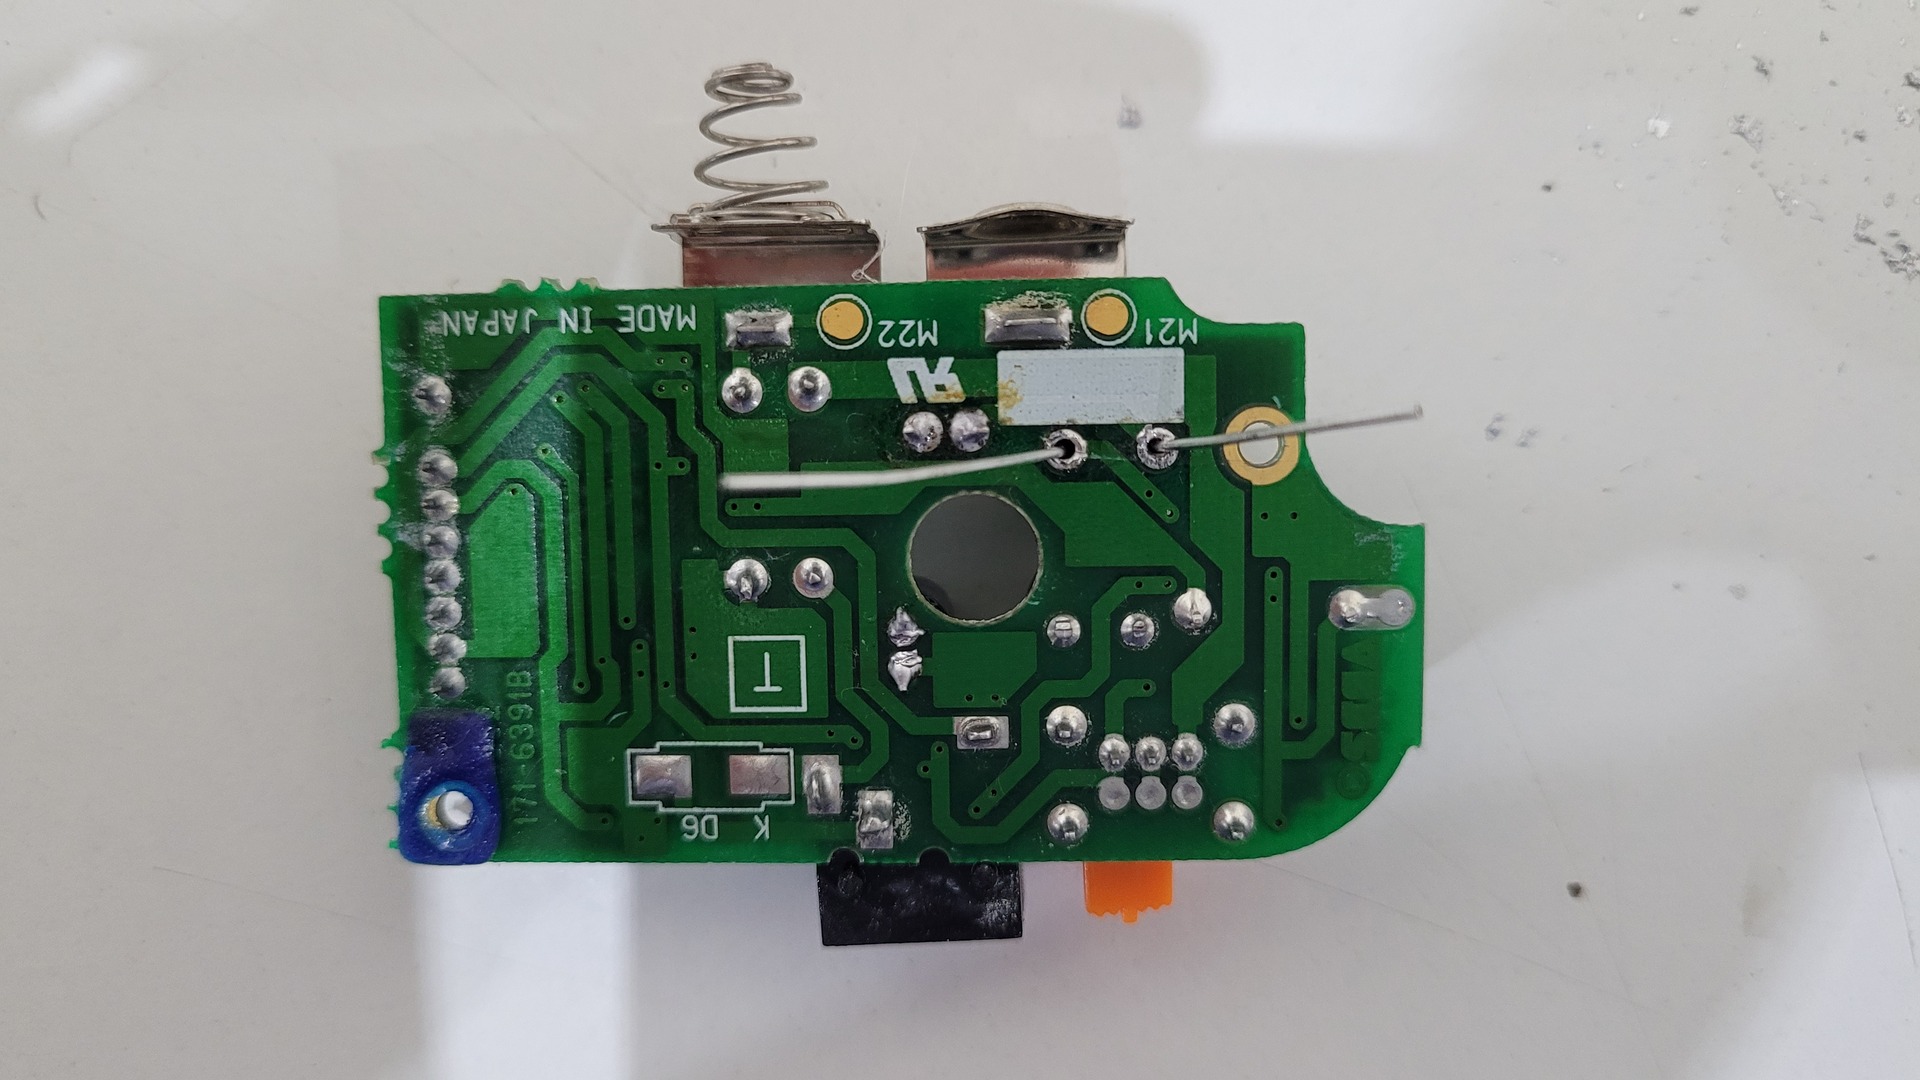
As you can see, mine has some corrosion, probably to to batteries that have leaked. This is why I used vinegar and isopropyl alcool to clean it (see below)

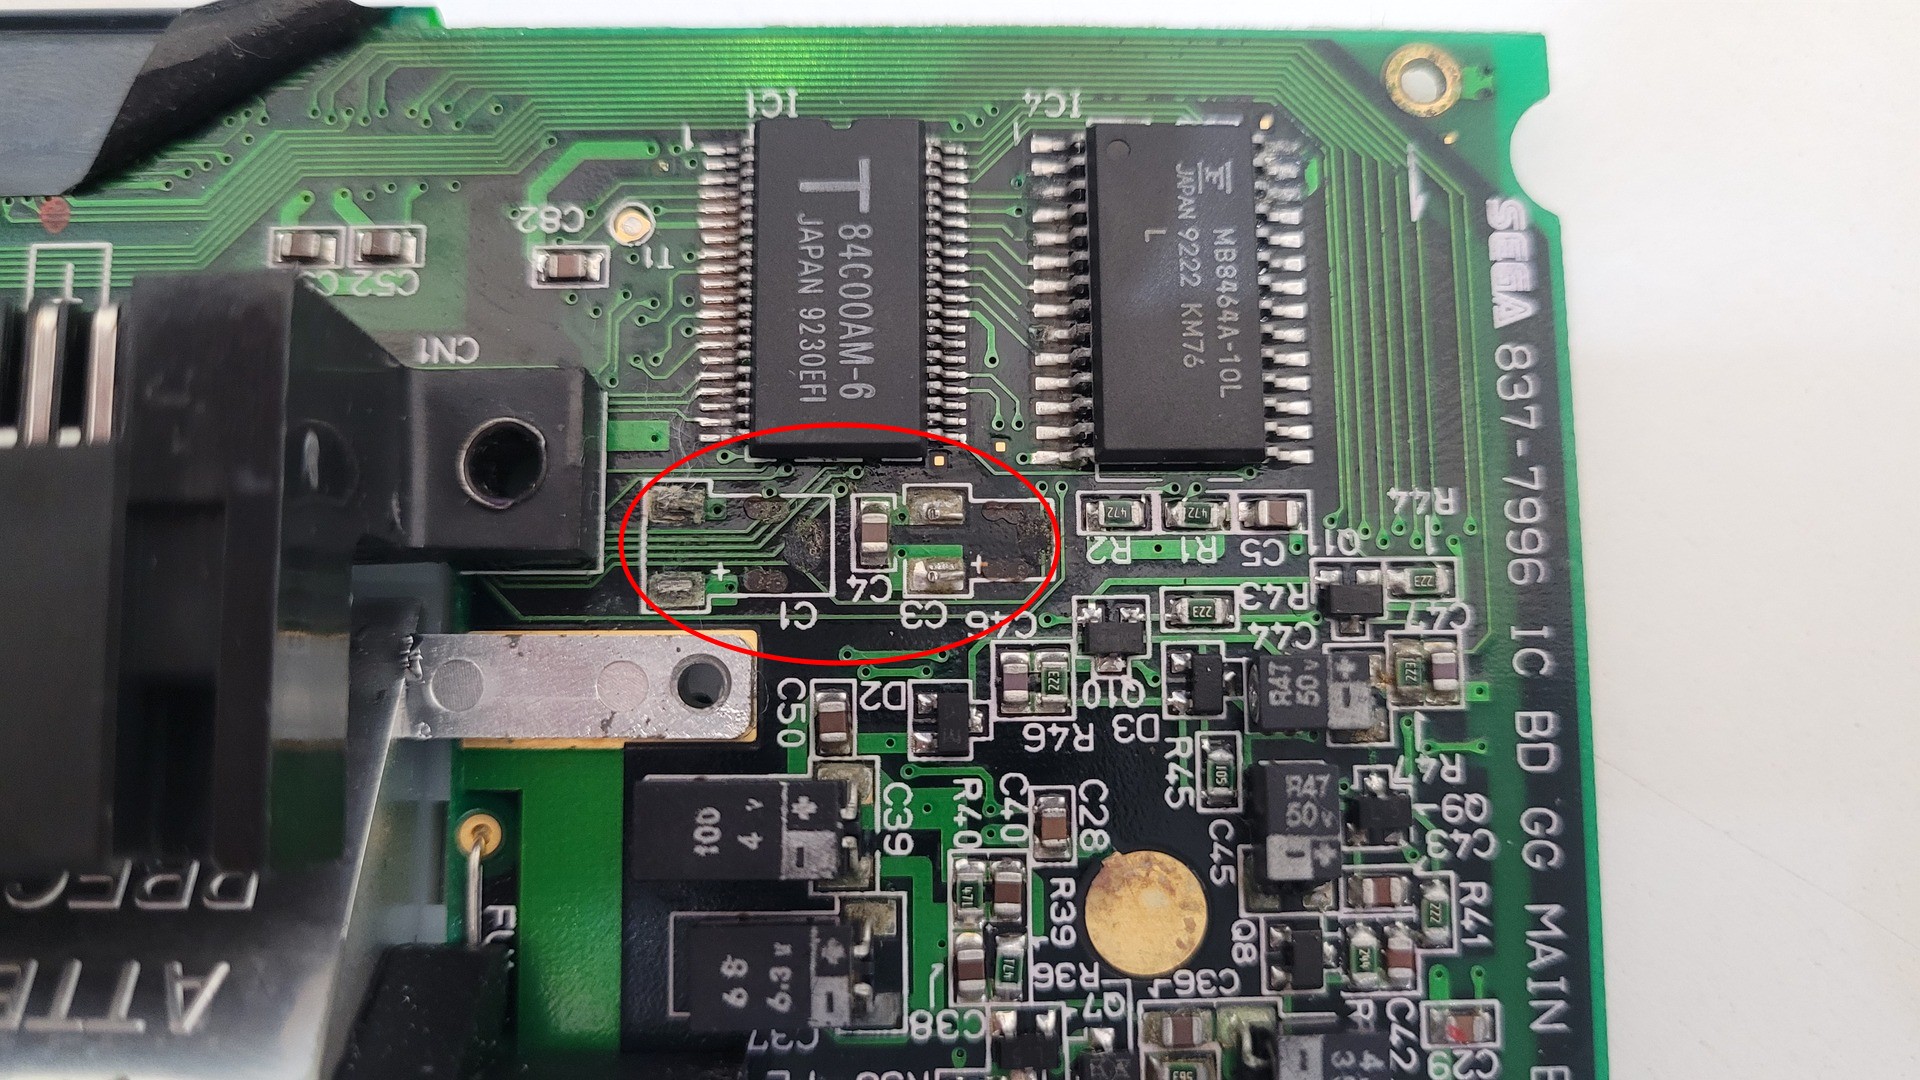
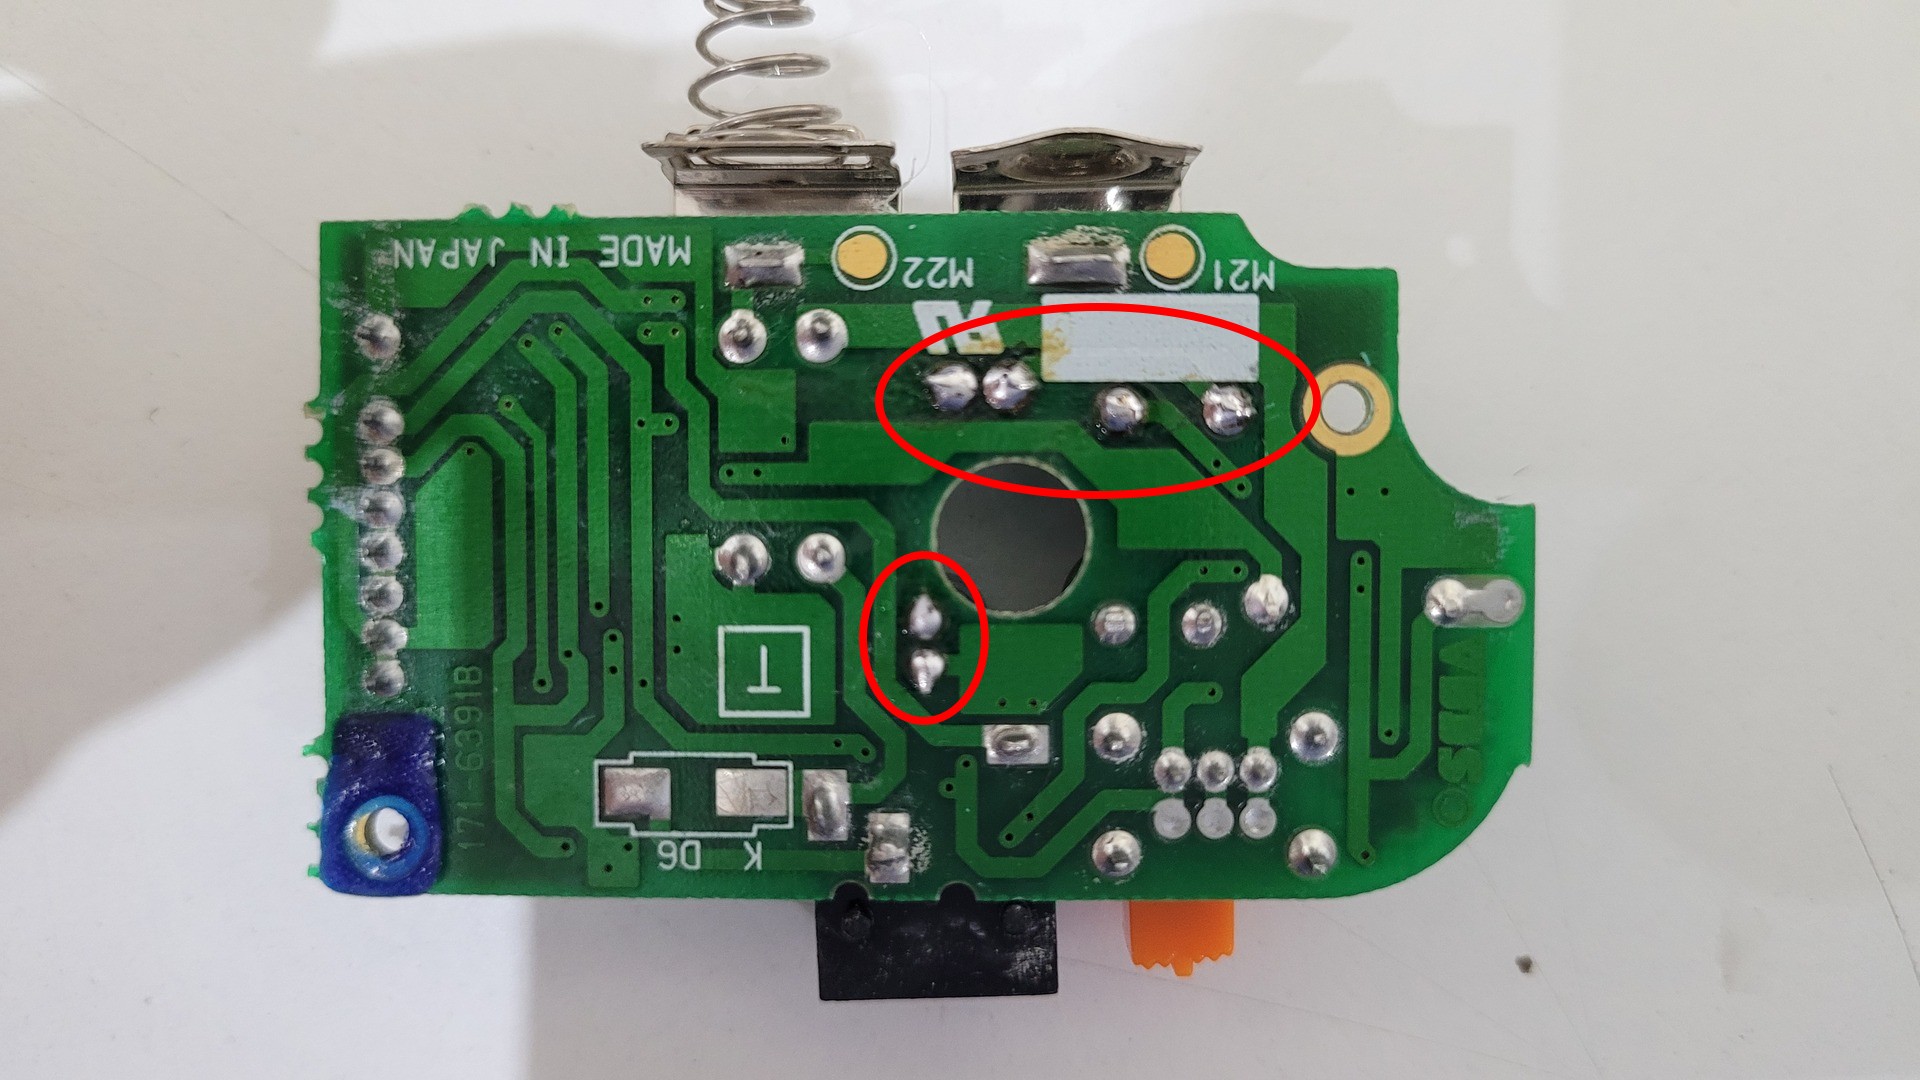
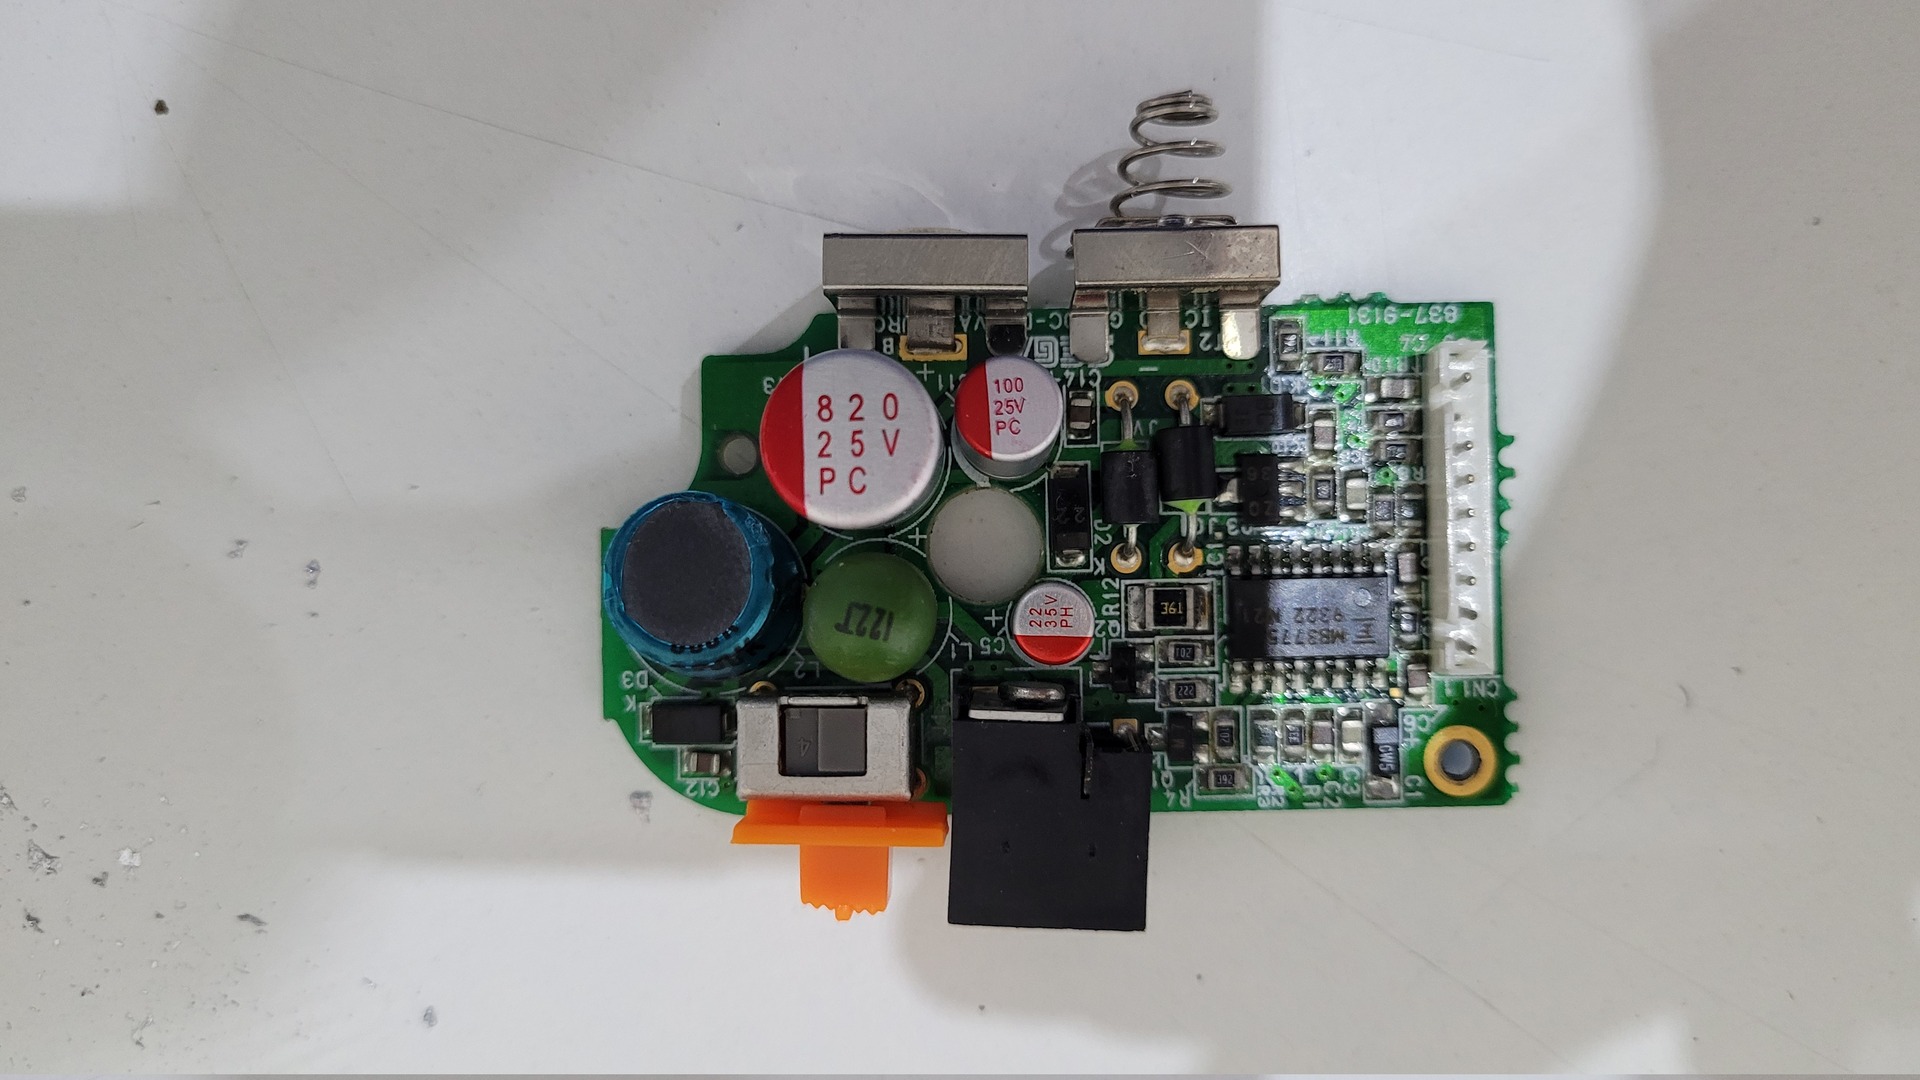
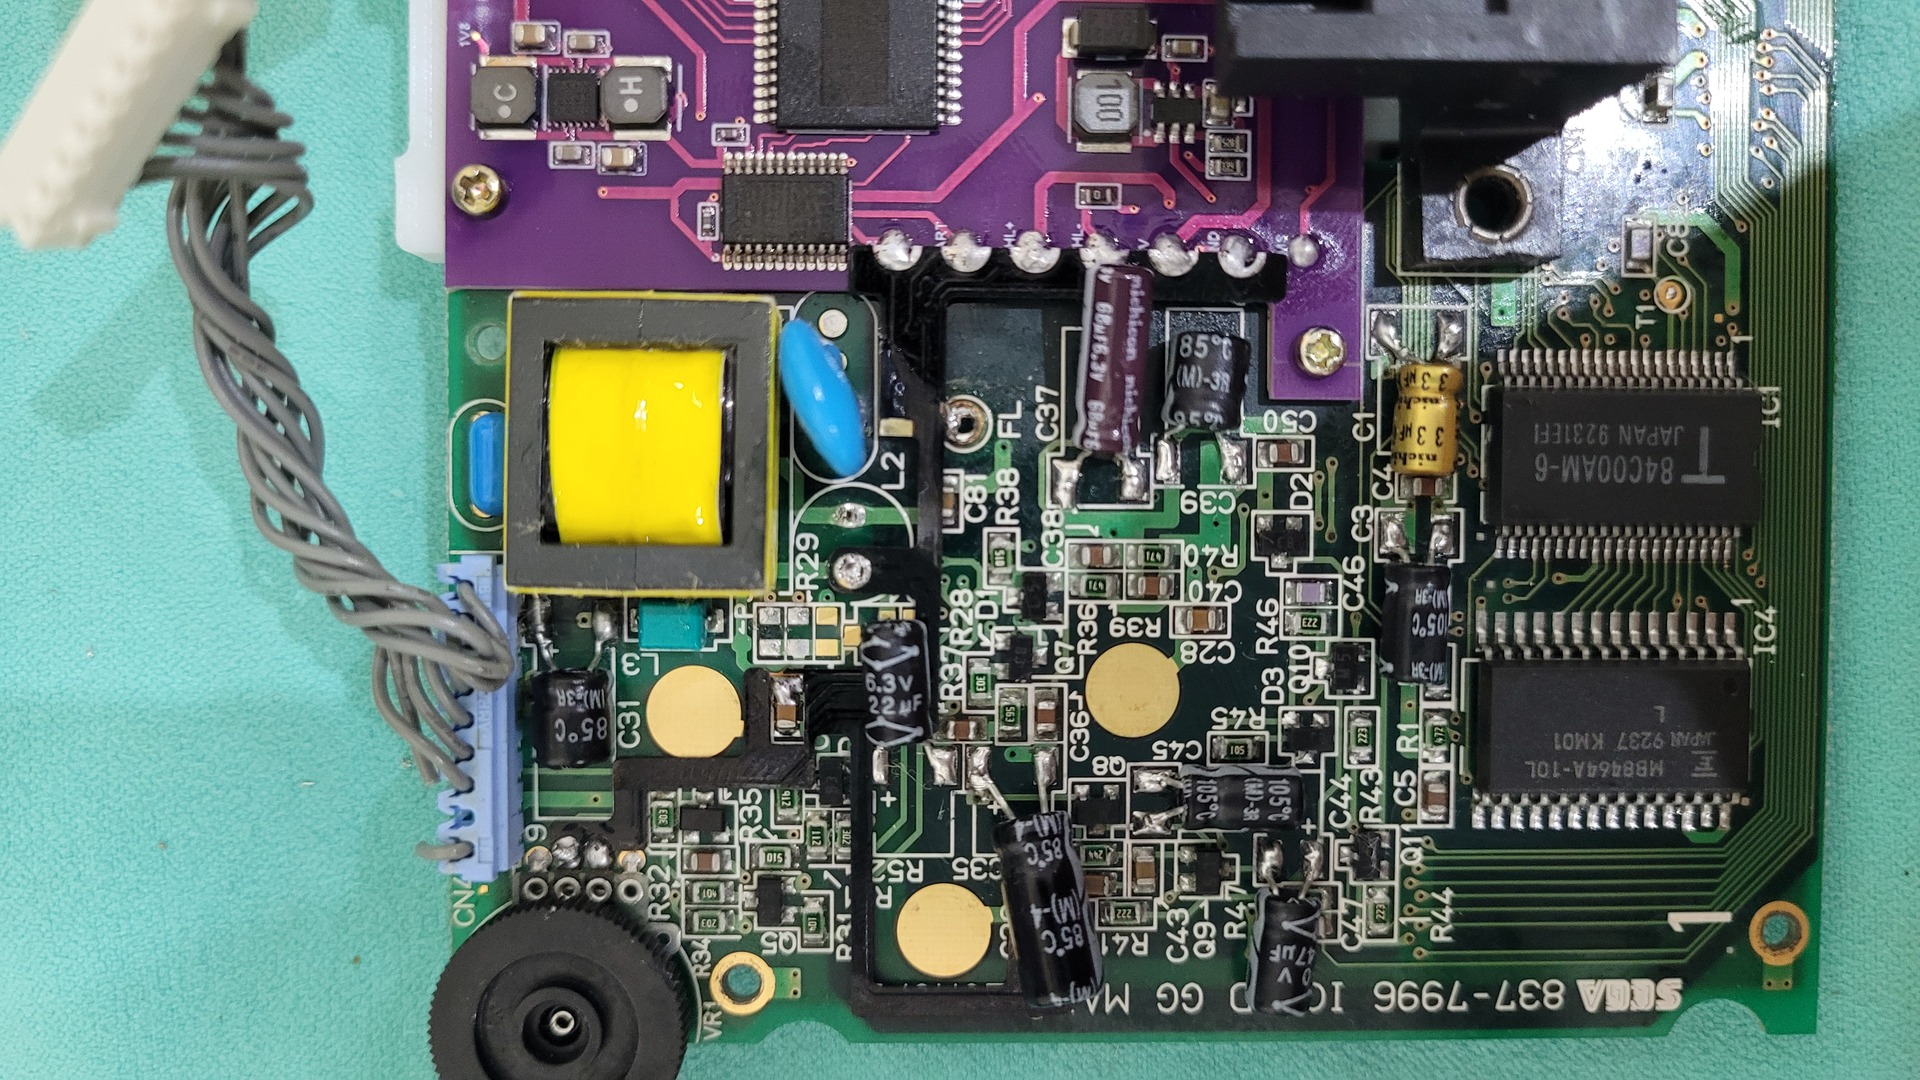
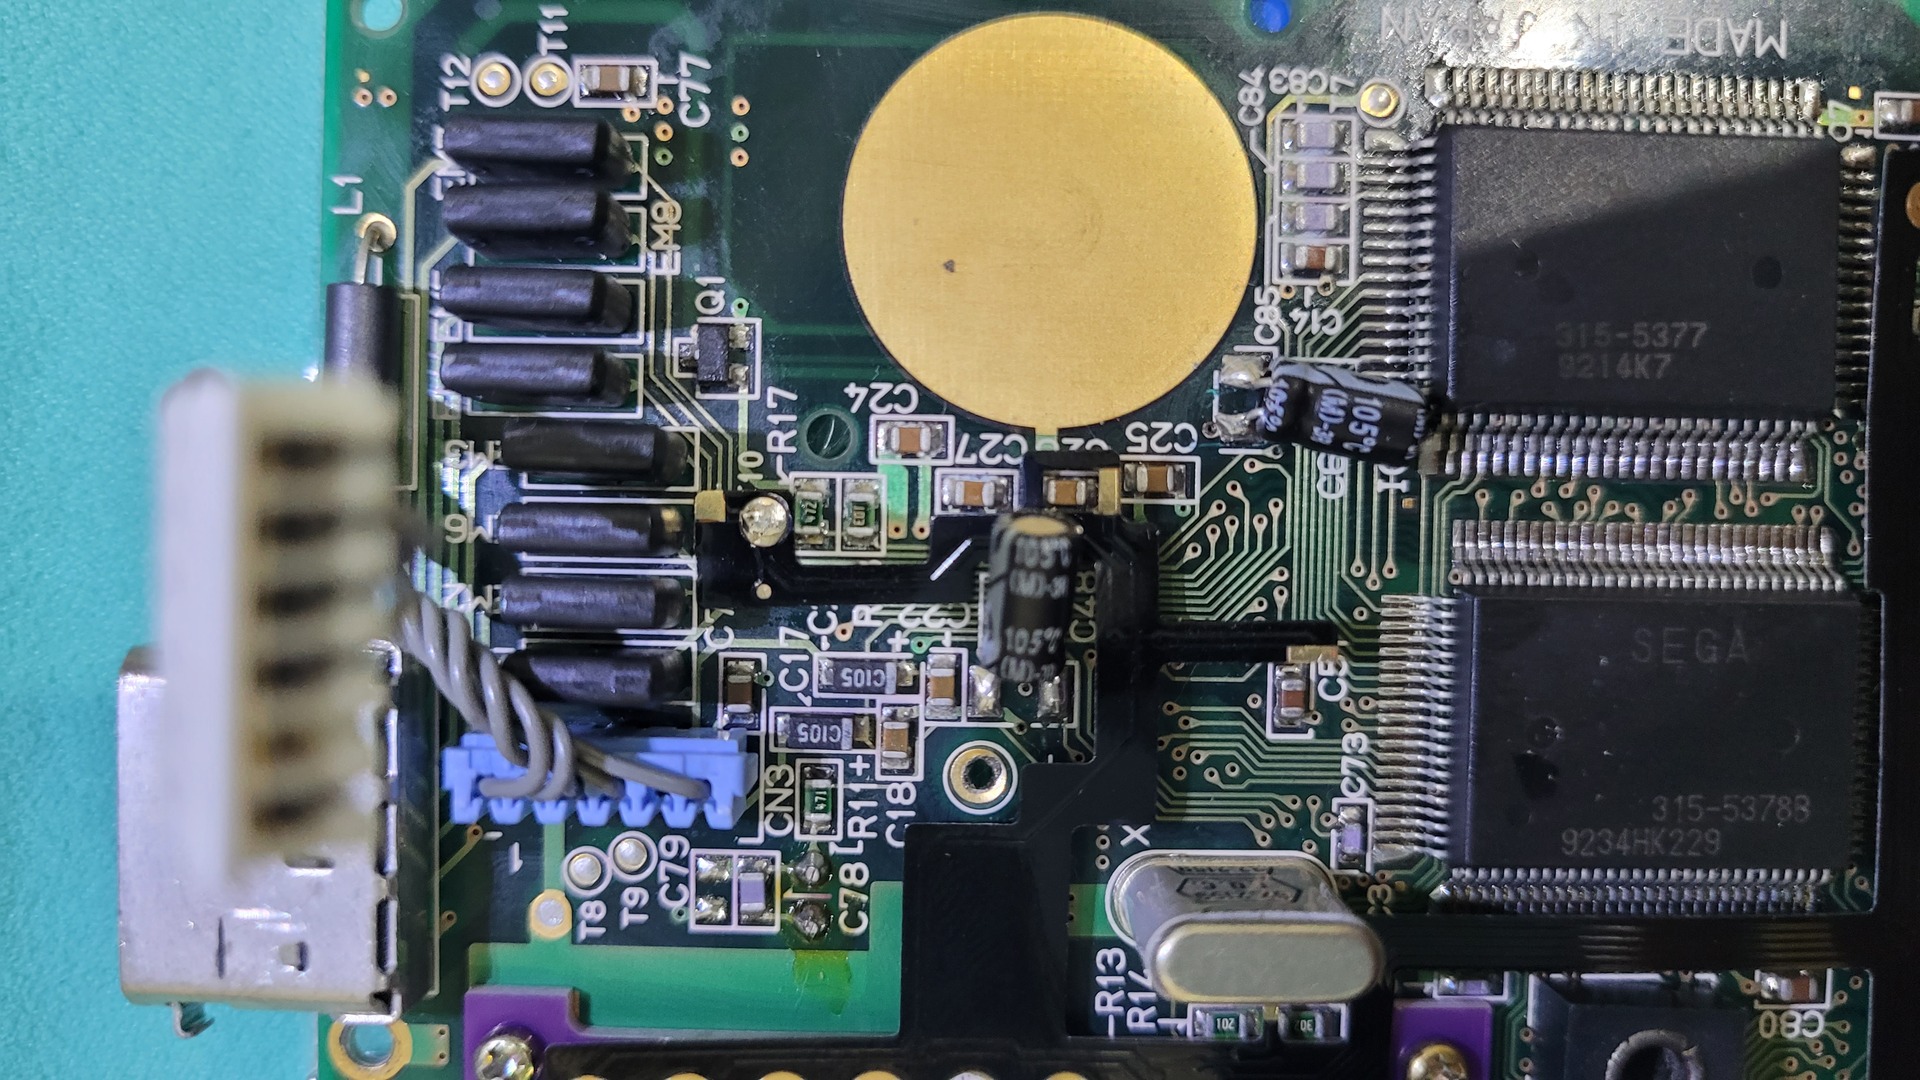
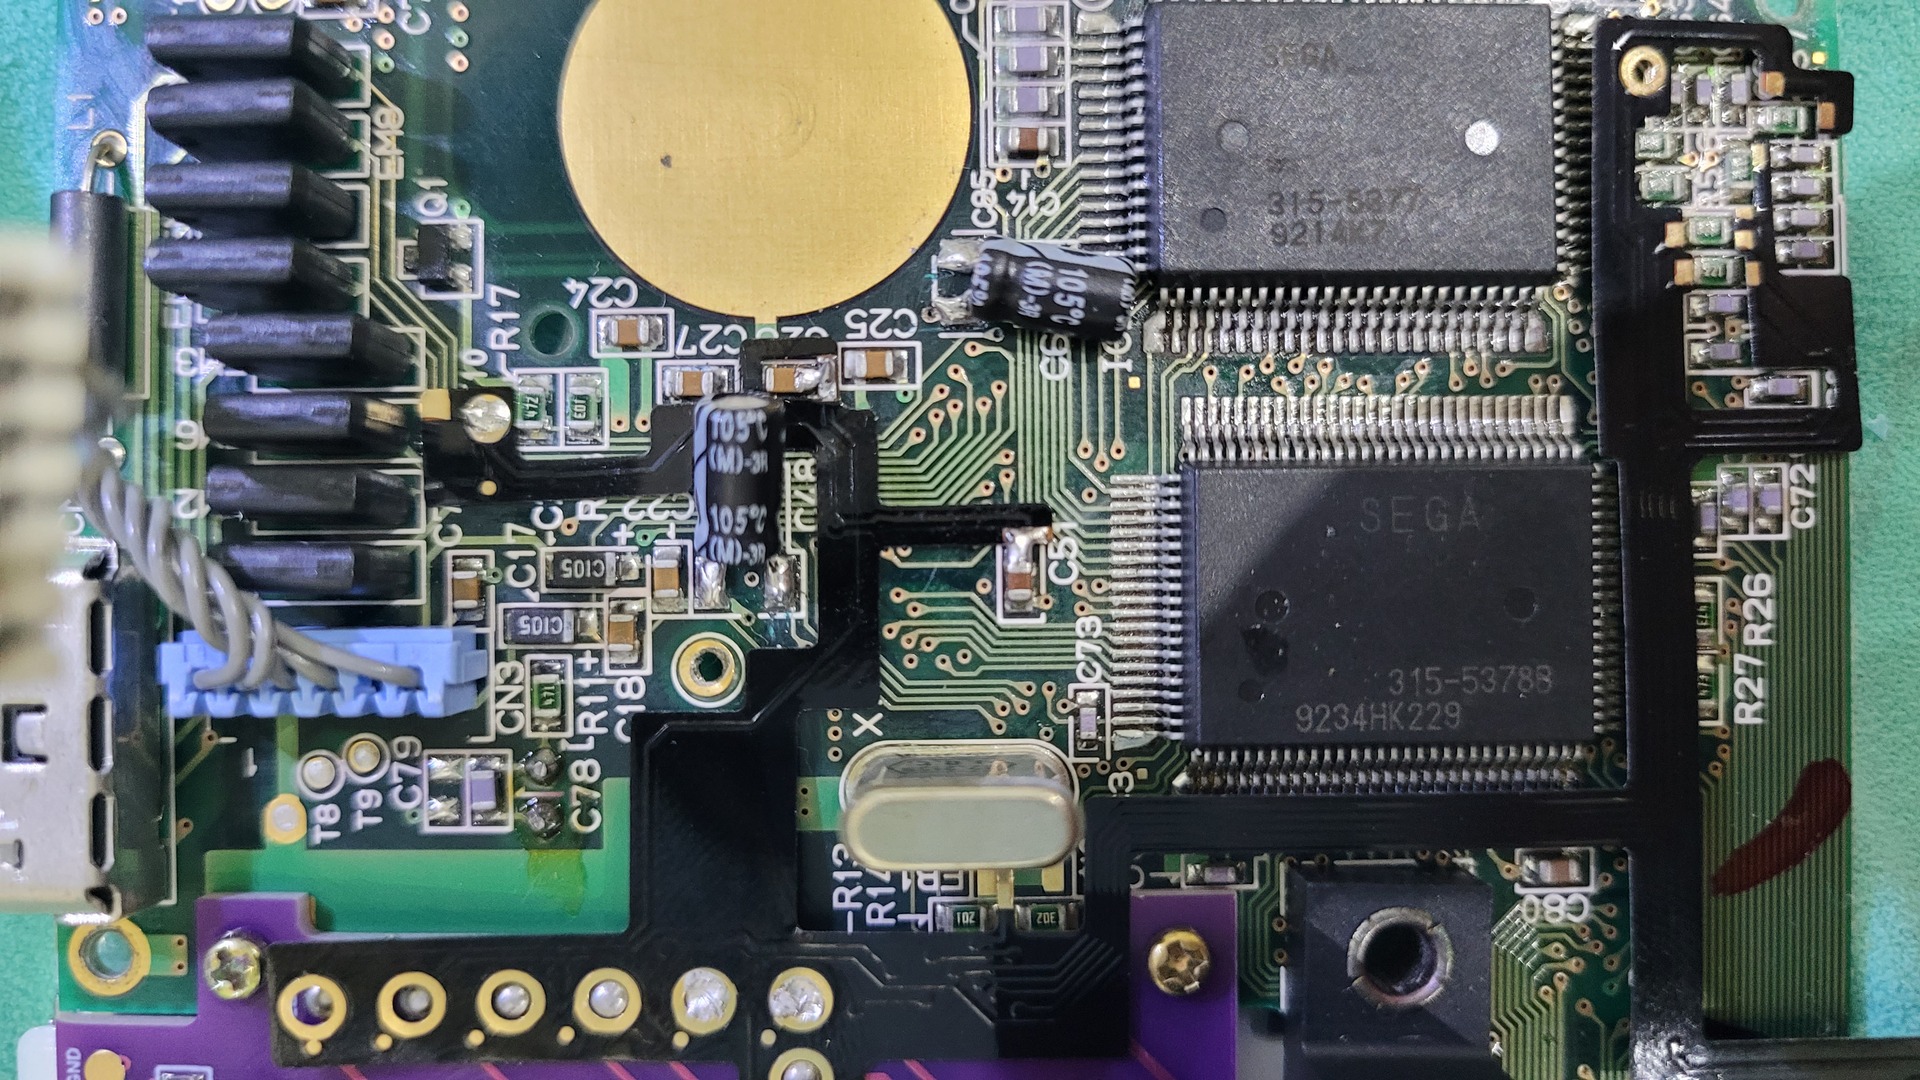
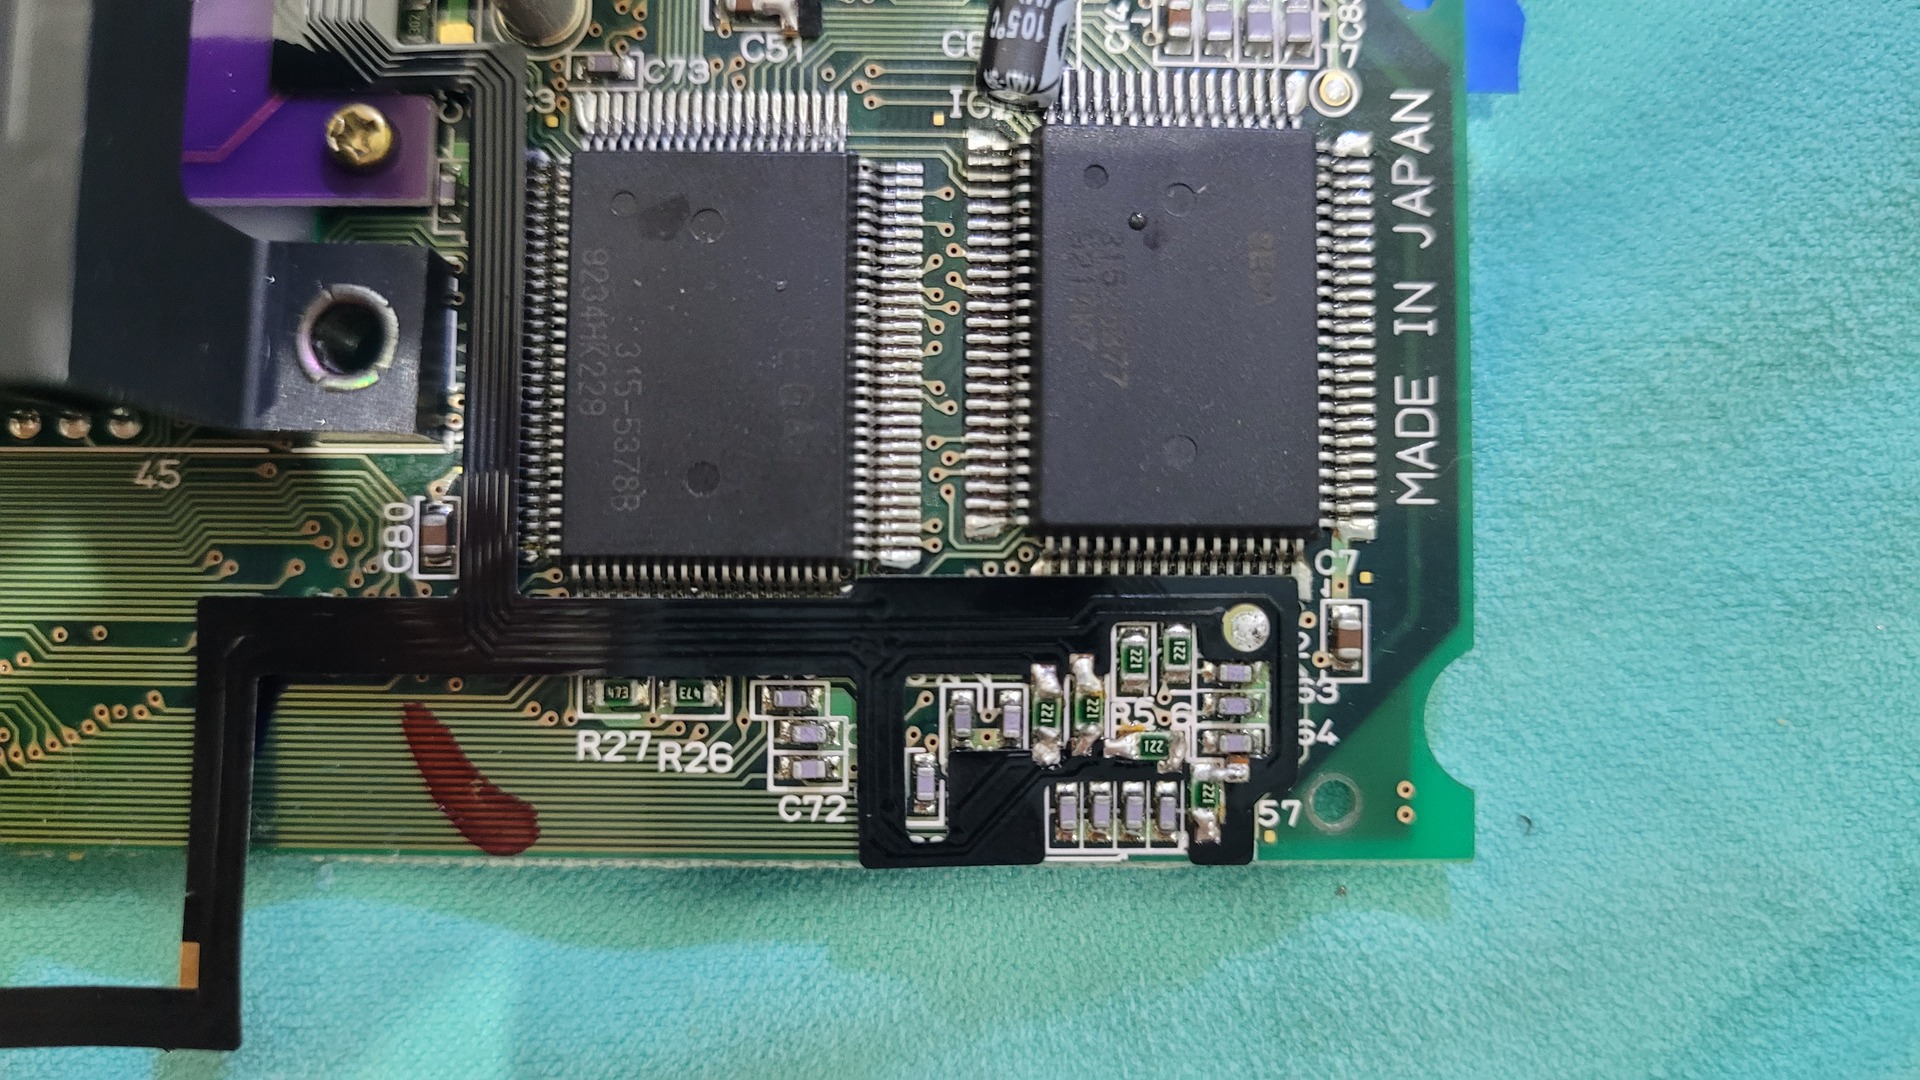
Changing capacitors
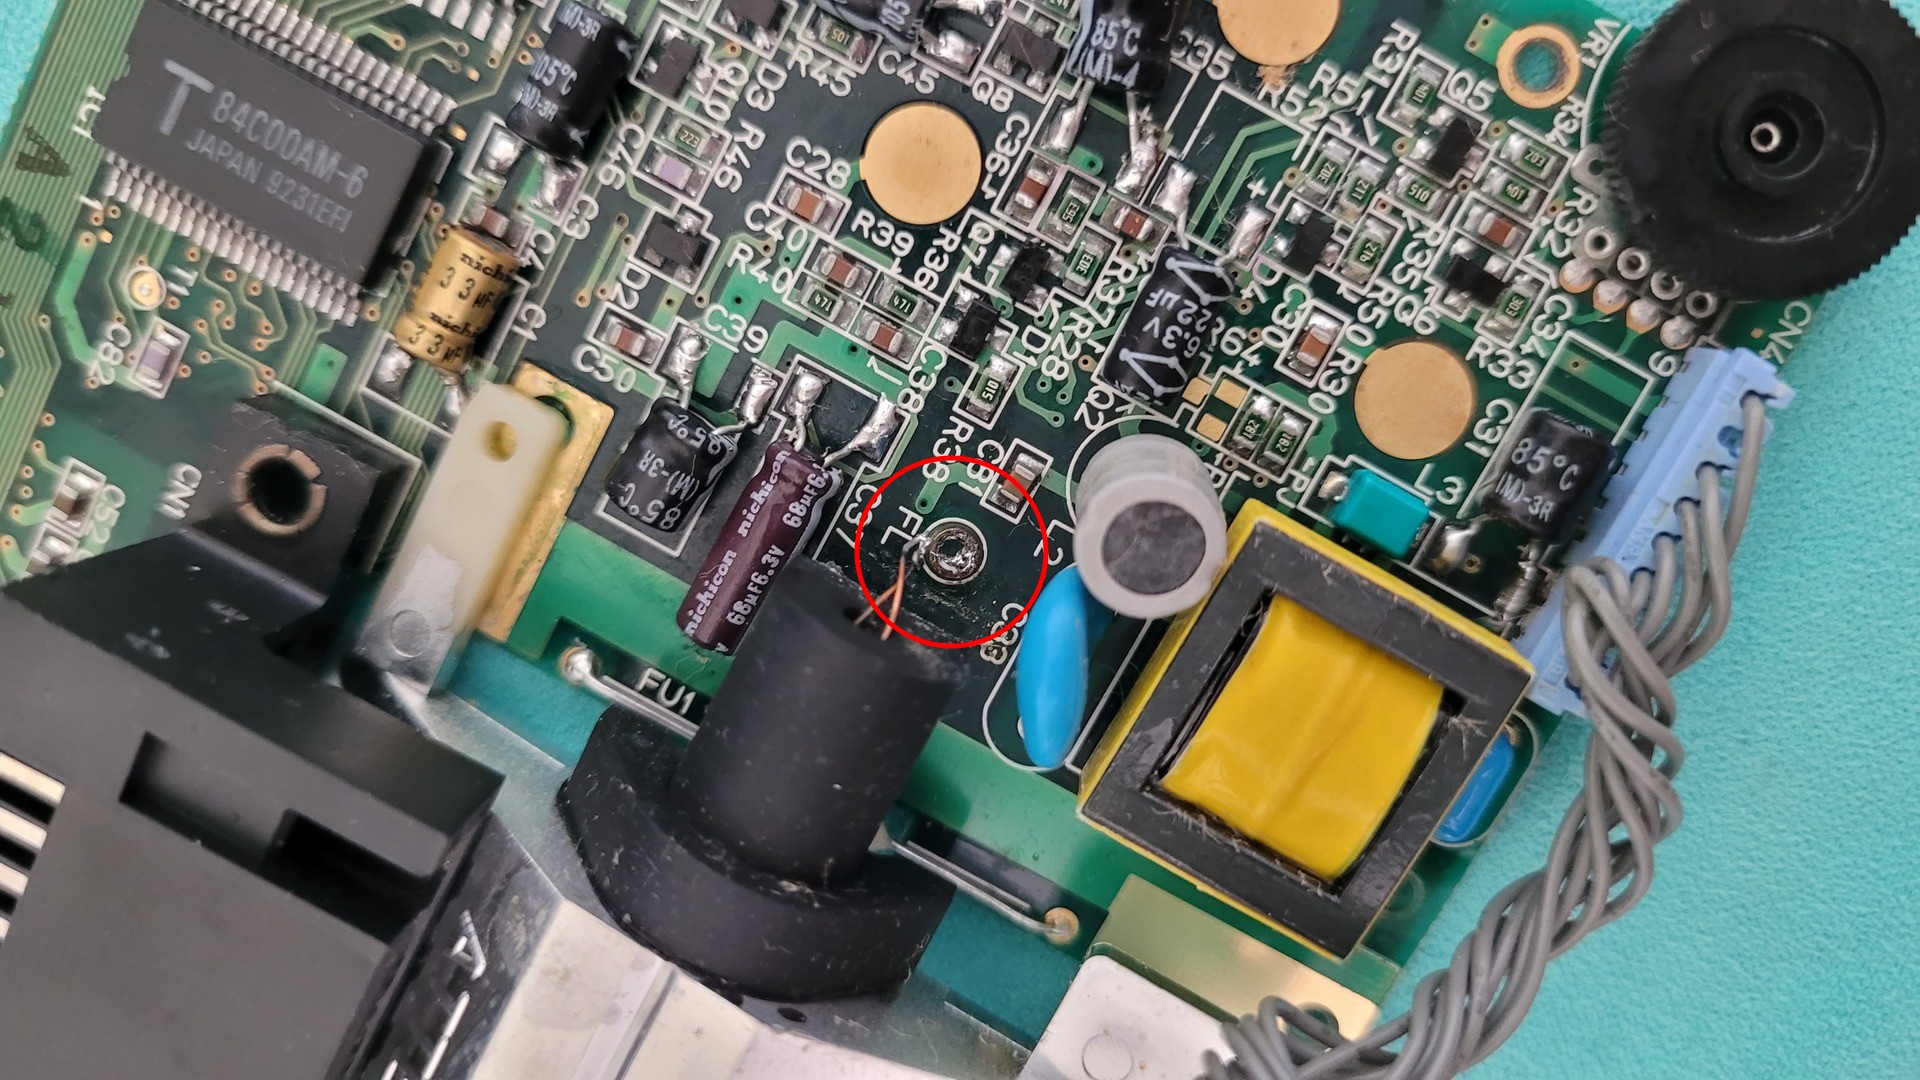
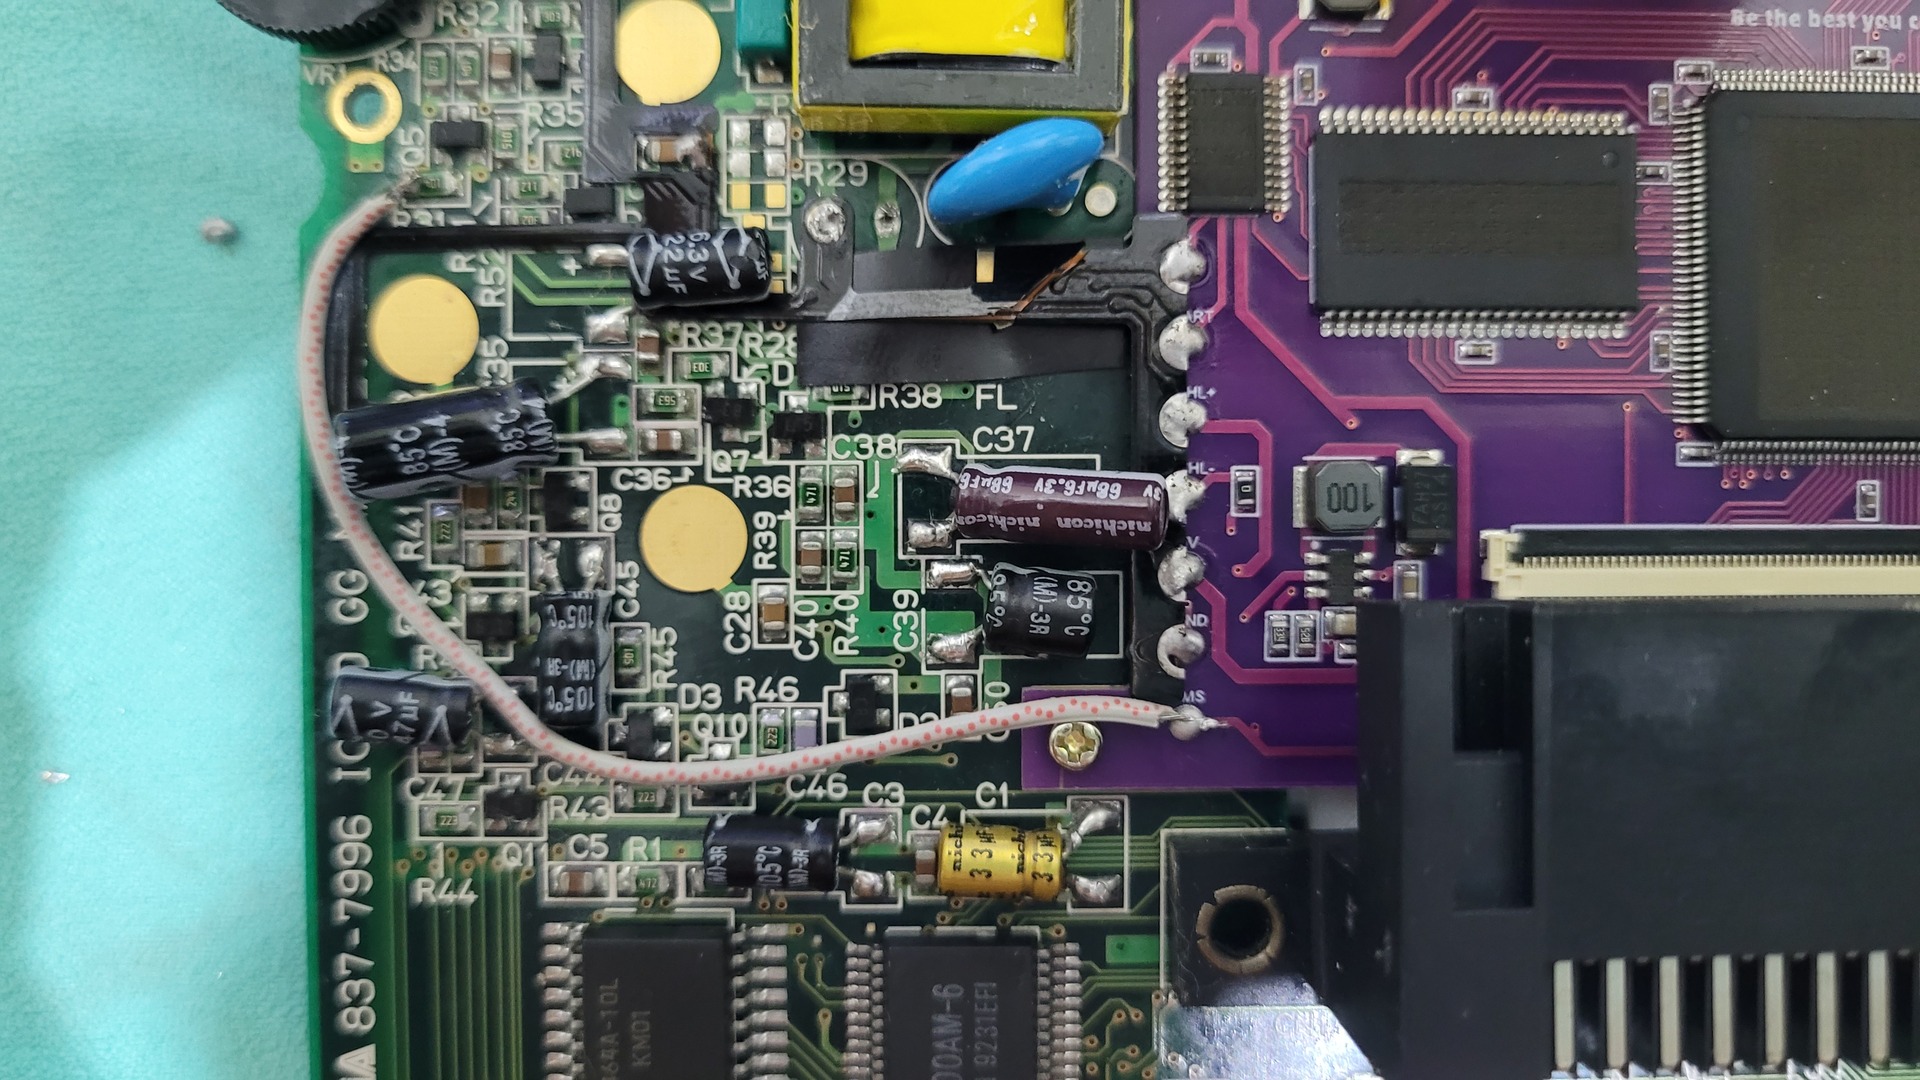
Most of the time, one of he first thing to try with a broken Game Gear is to replace the following capacitors (see red marks)

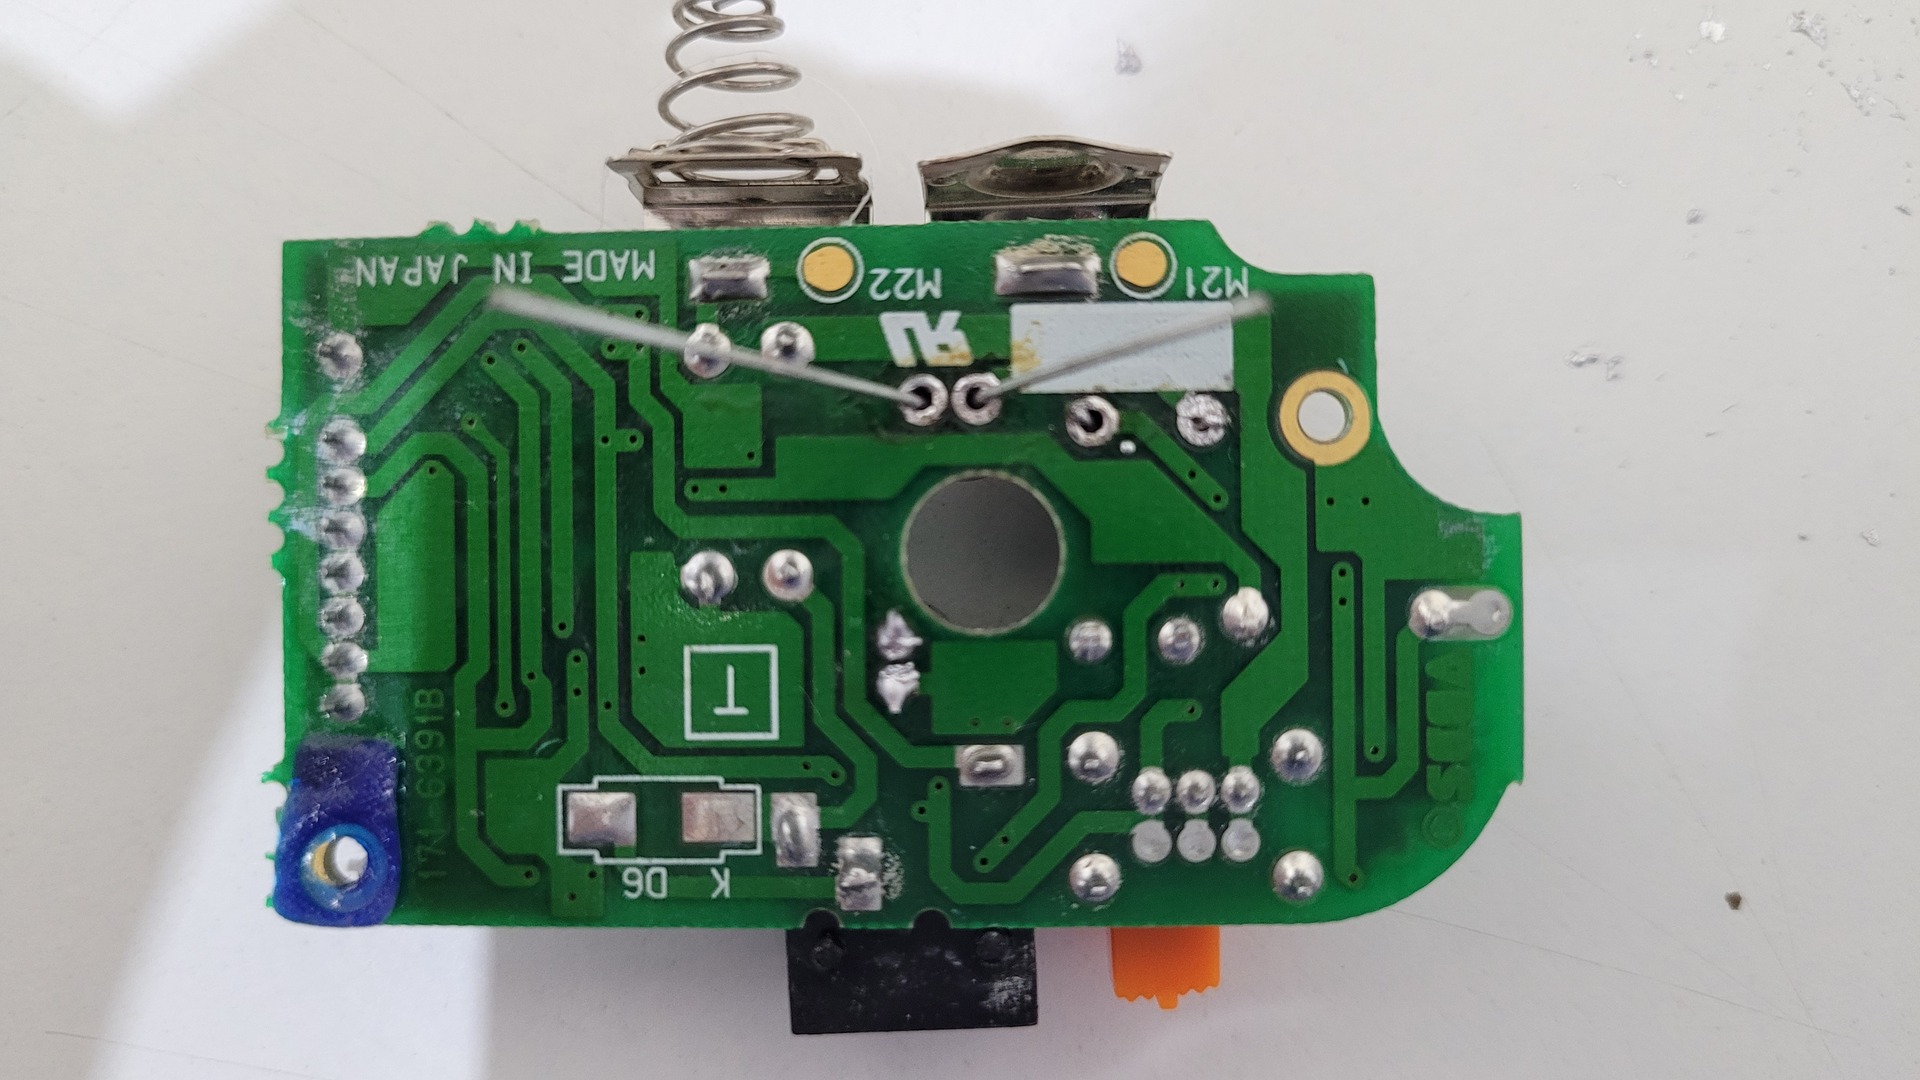
To remove old capacitors, I used flat pliers and gently pulled each one to free the solder points for new capacitors :
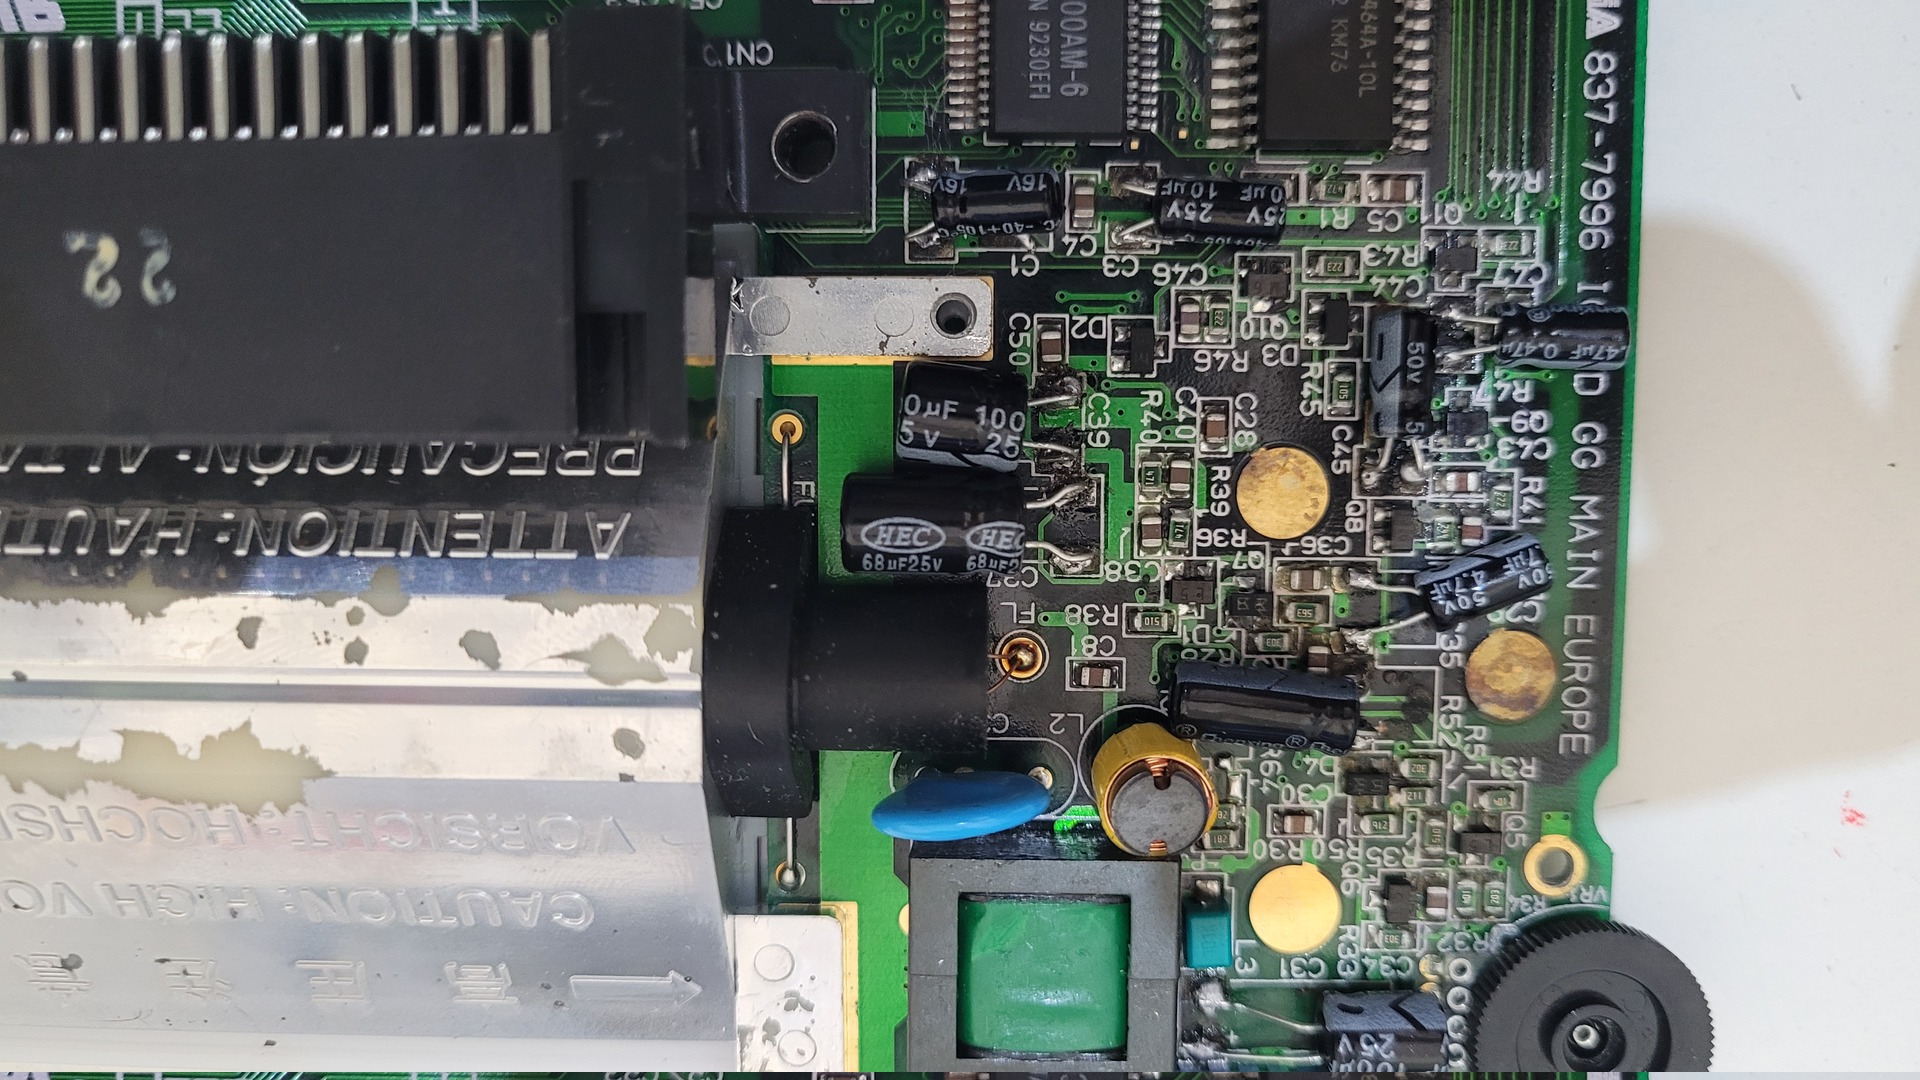
I did that for all capacitors, and replaced them with brand new ones. Note That I did it in two times. The first time was a quick and dirty job to just check if I could bring the console back to life (photo below). Then, I removed the capacitors, cleaned up a bit and resoldered them properly (I sometime even used differents capacitors).
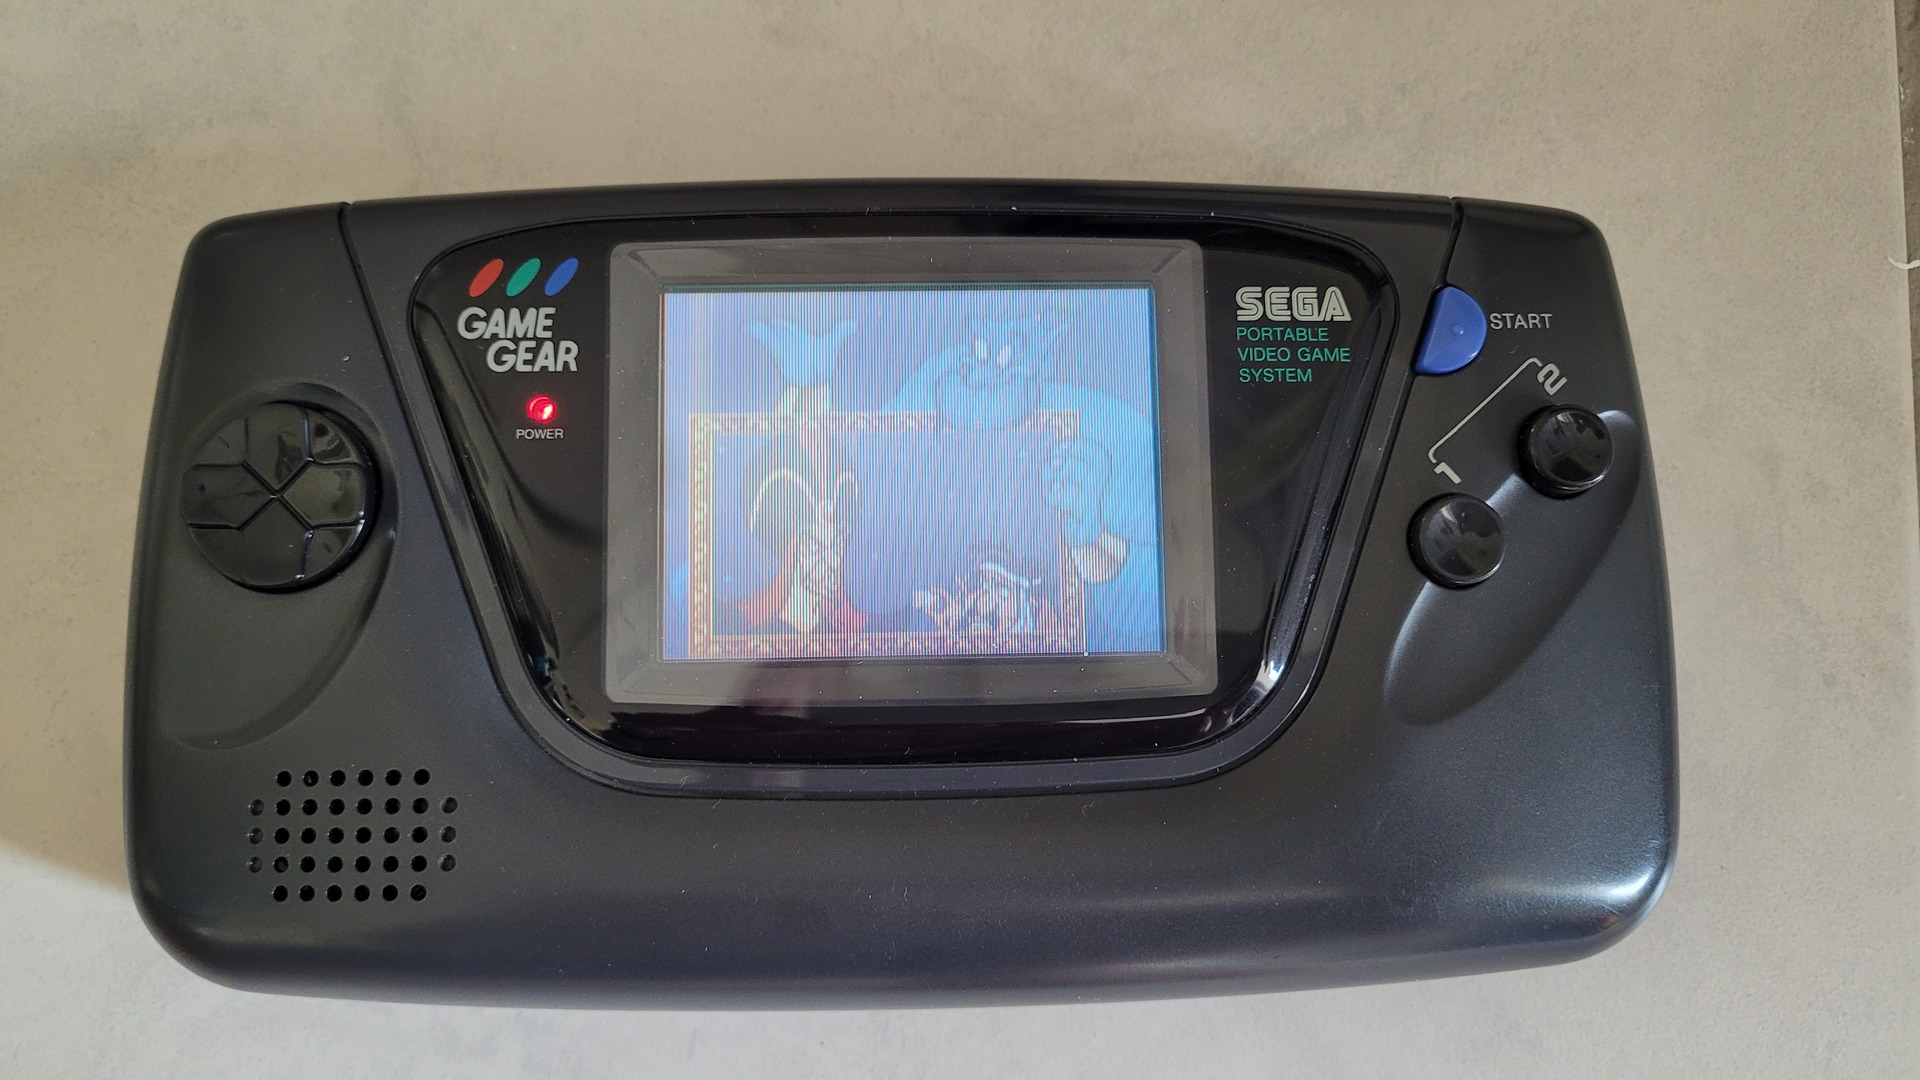
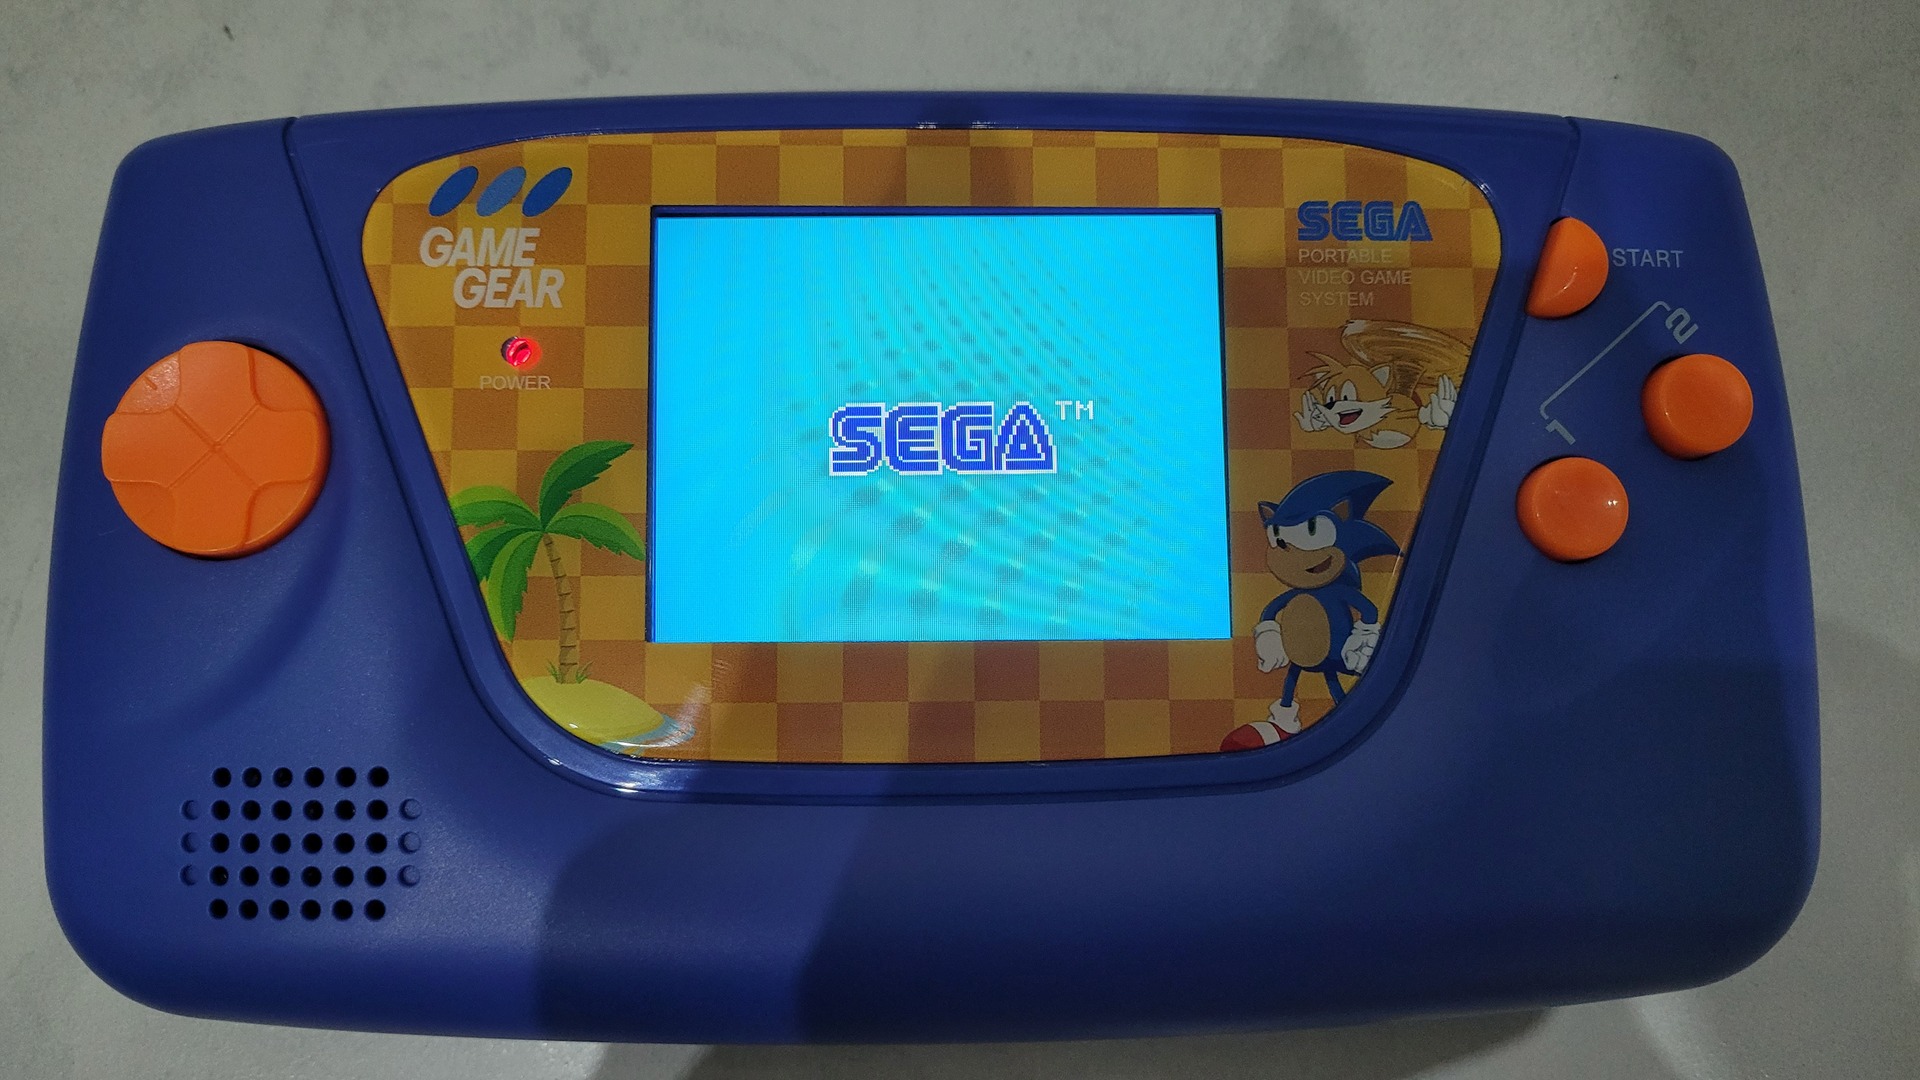
Tests
After I had cleaned up the batteries compartment, I remounted everything, put some full charged NiMH batteries, and fortunately, the console was back to life ! Ok the screen is not very readable regarding 2021 IPS and 4k displays, but this is the original display… And this is also the reason why I replaced it 😉
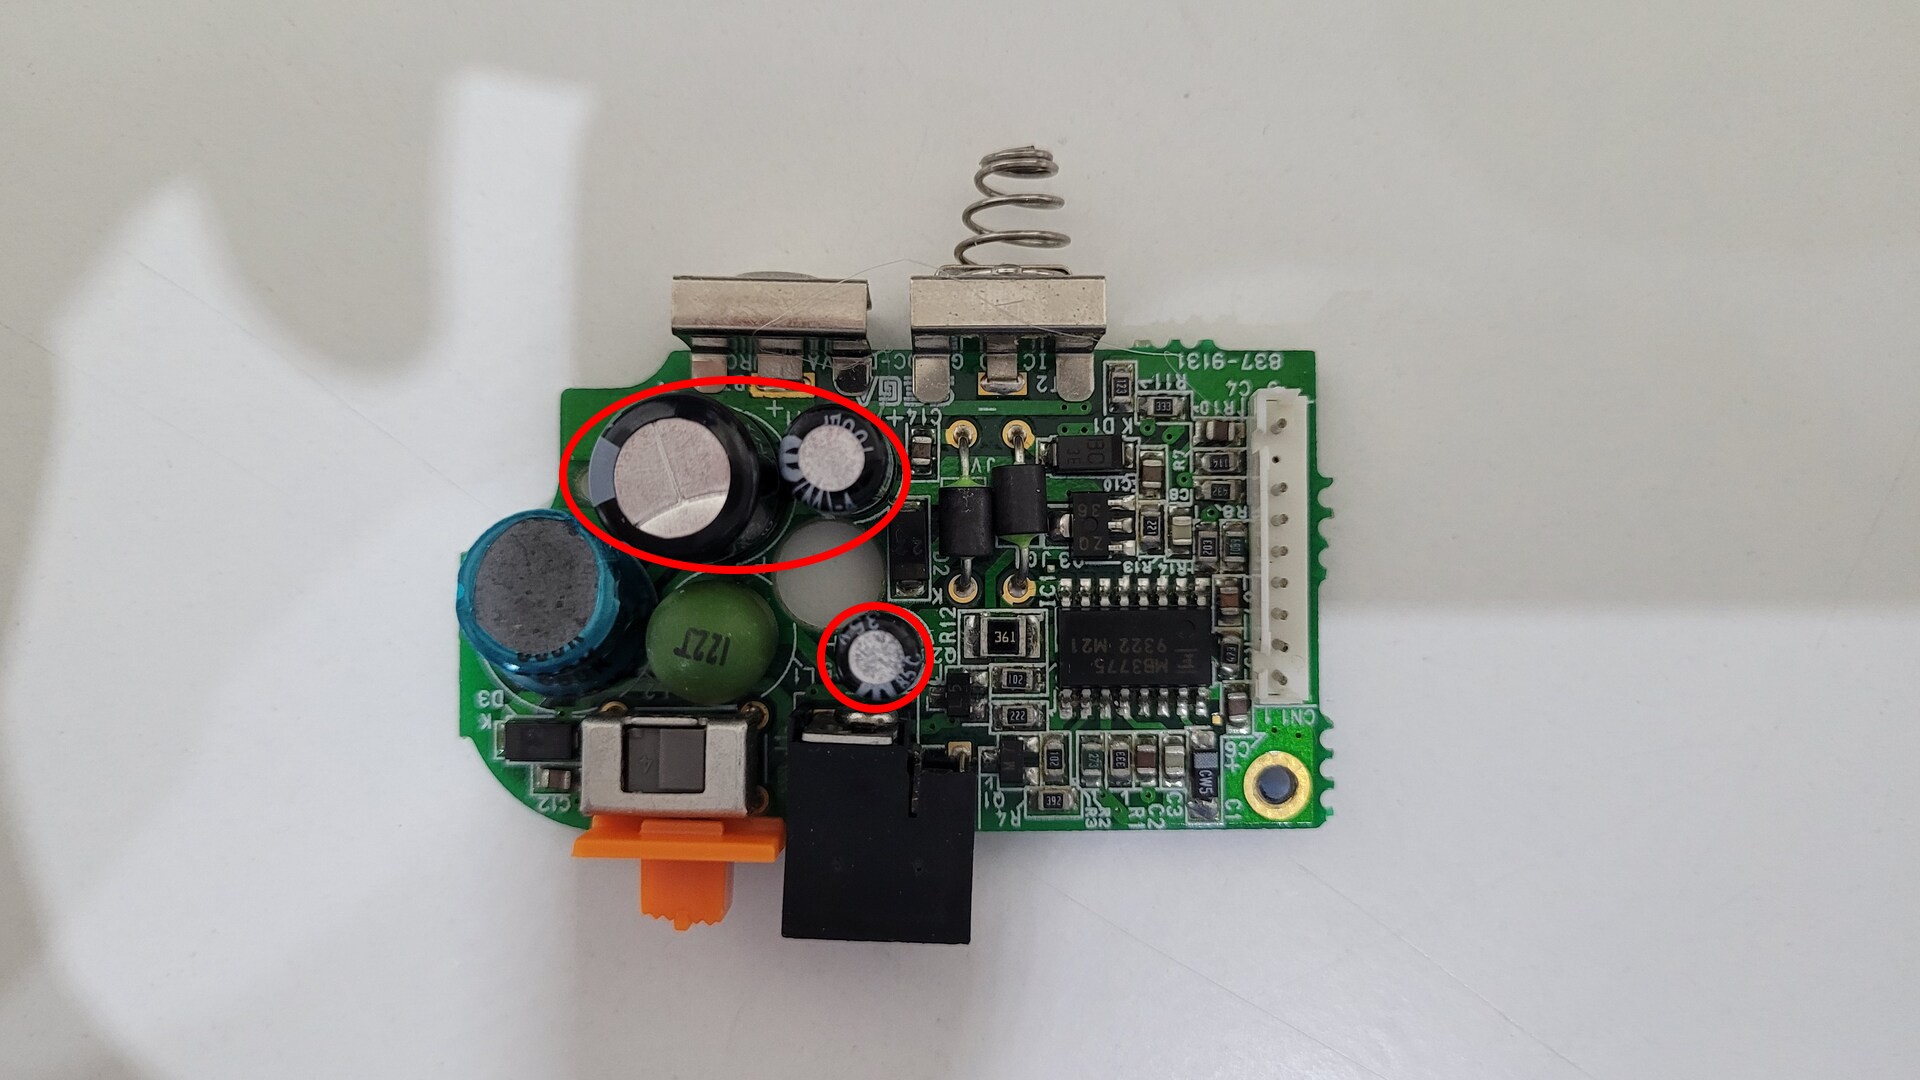
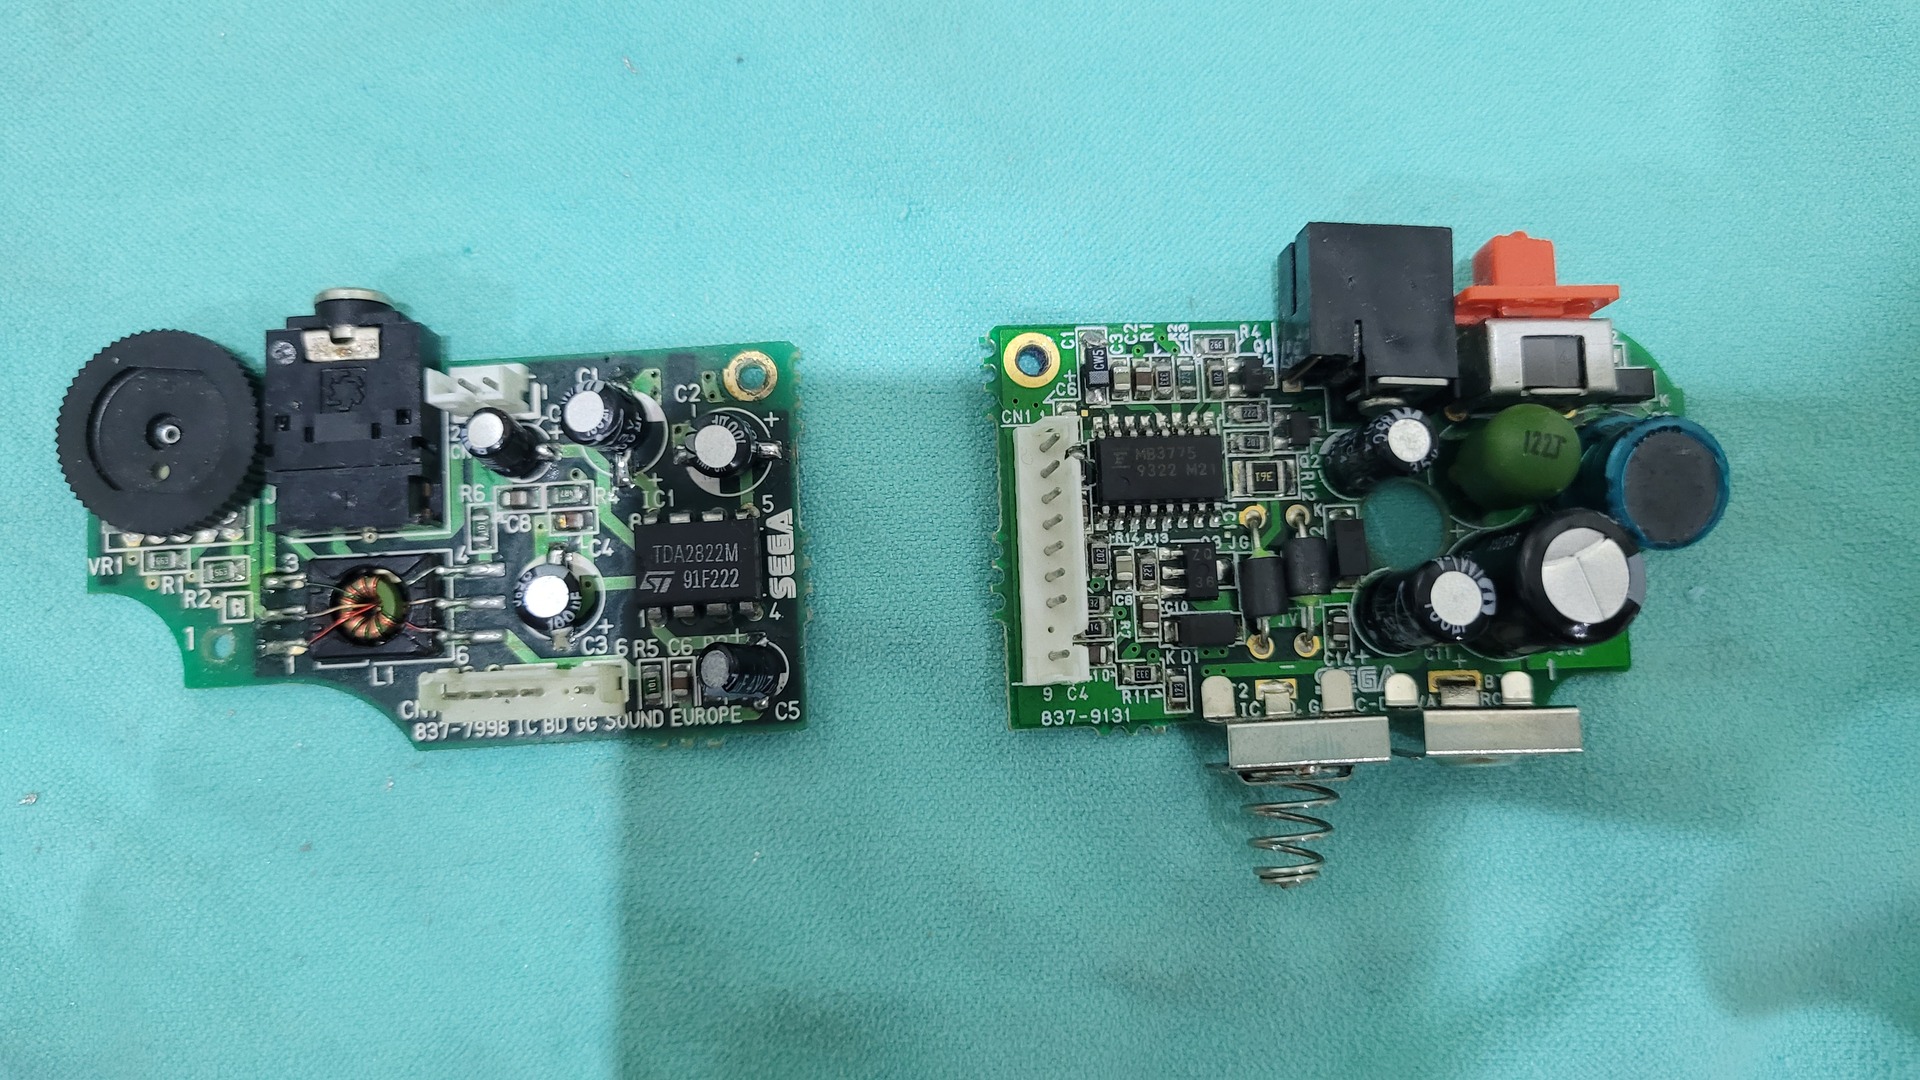
Power Board capacitors
After the first test, I saw that the console had also some problems to turn on. I had to sometime switch it off/on multiple times before it actually turns on. This symptom is typical from bad power board’s capacitors. So I changed them to, but they are far more easy to change as they are not surface mounted.
For each capacitor, I used the desoldering pump to remove the solder, add the new capacitor, solder it and cut legs.
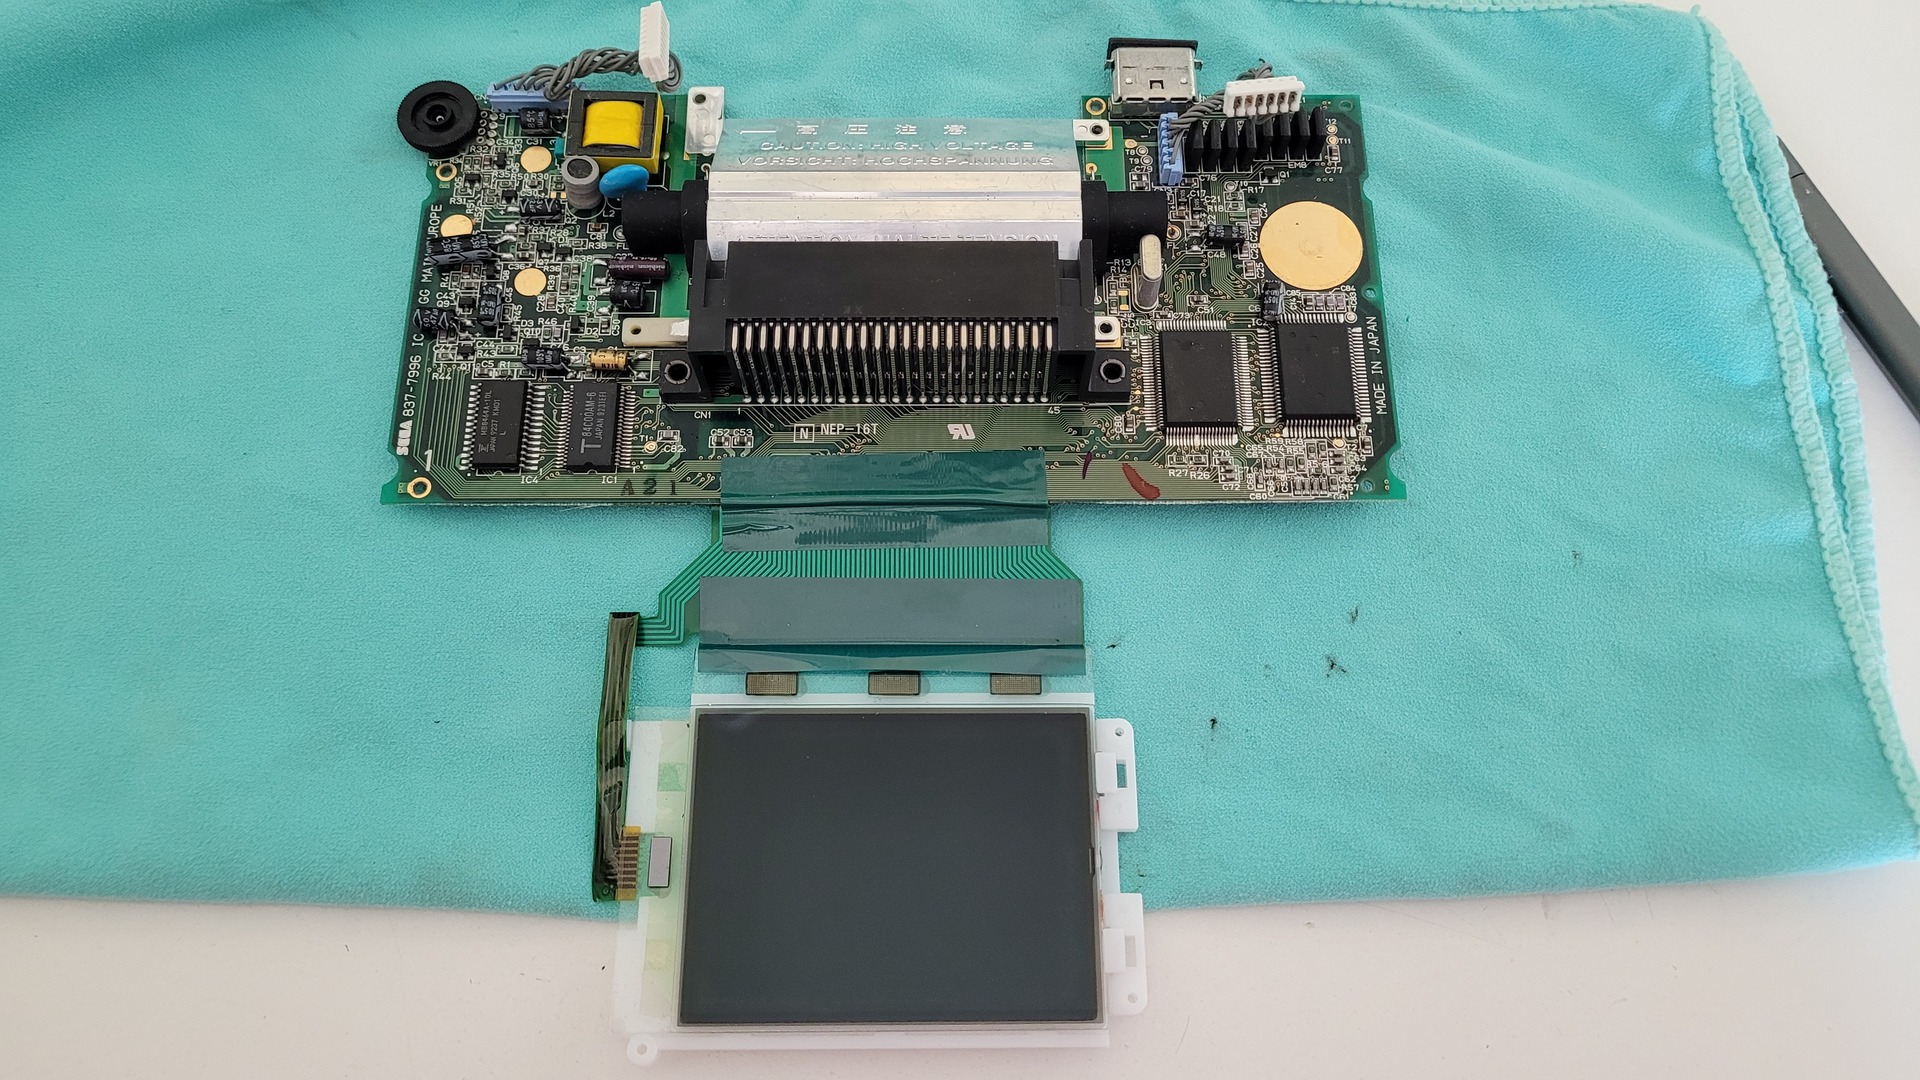
Installing the new display
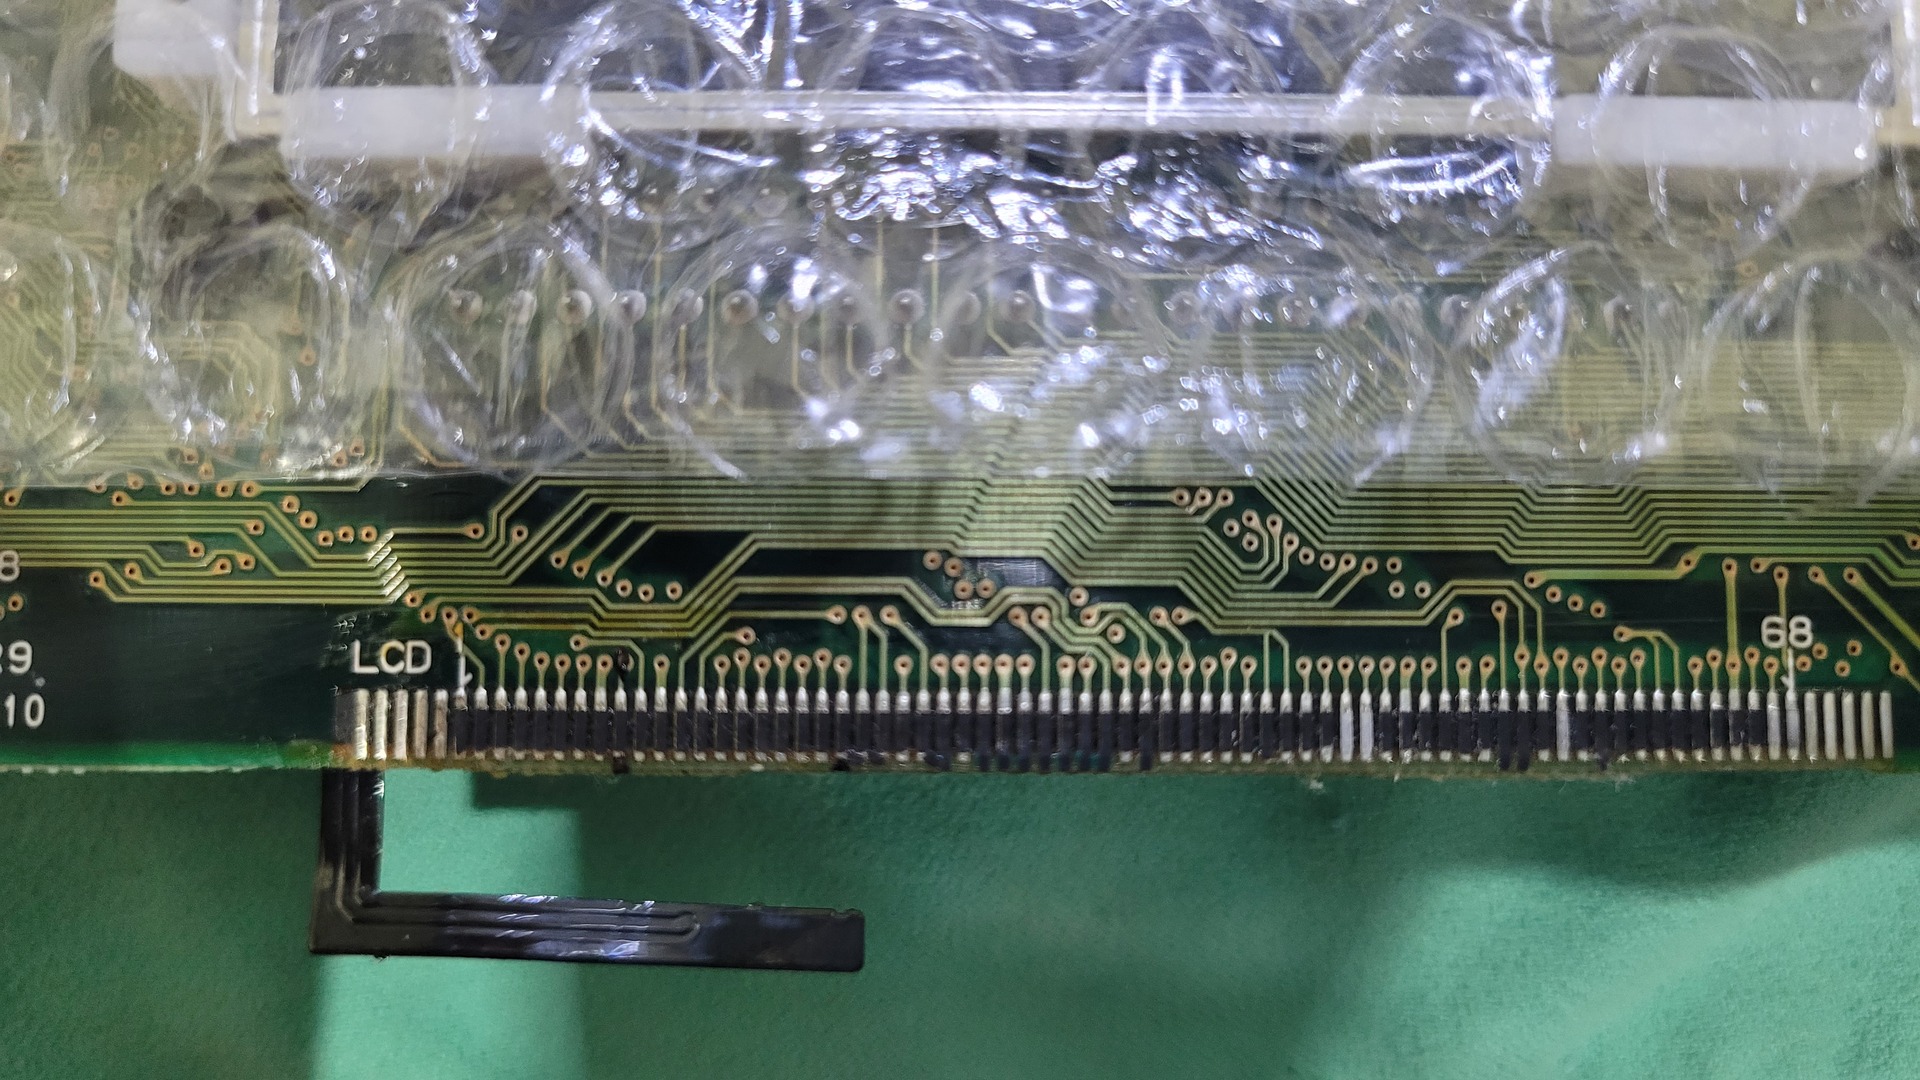
Removing the existing screen
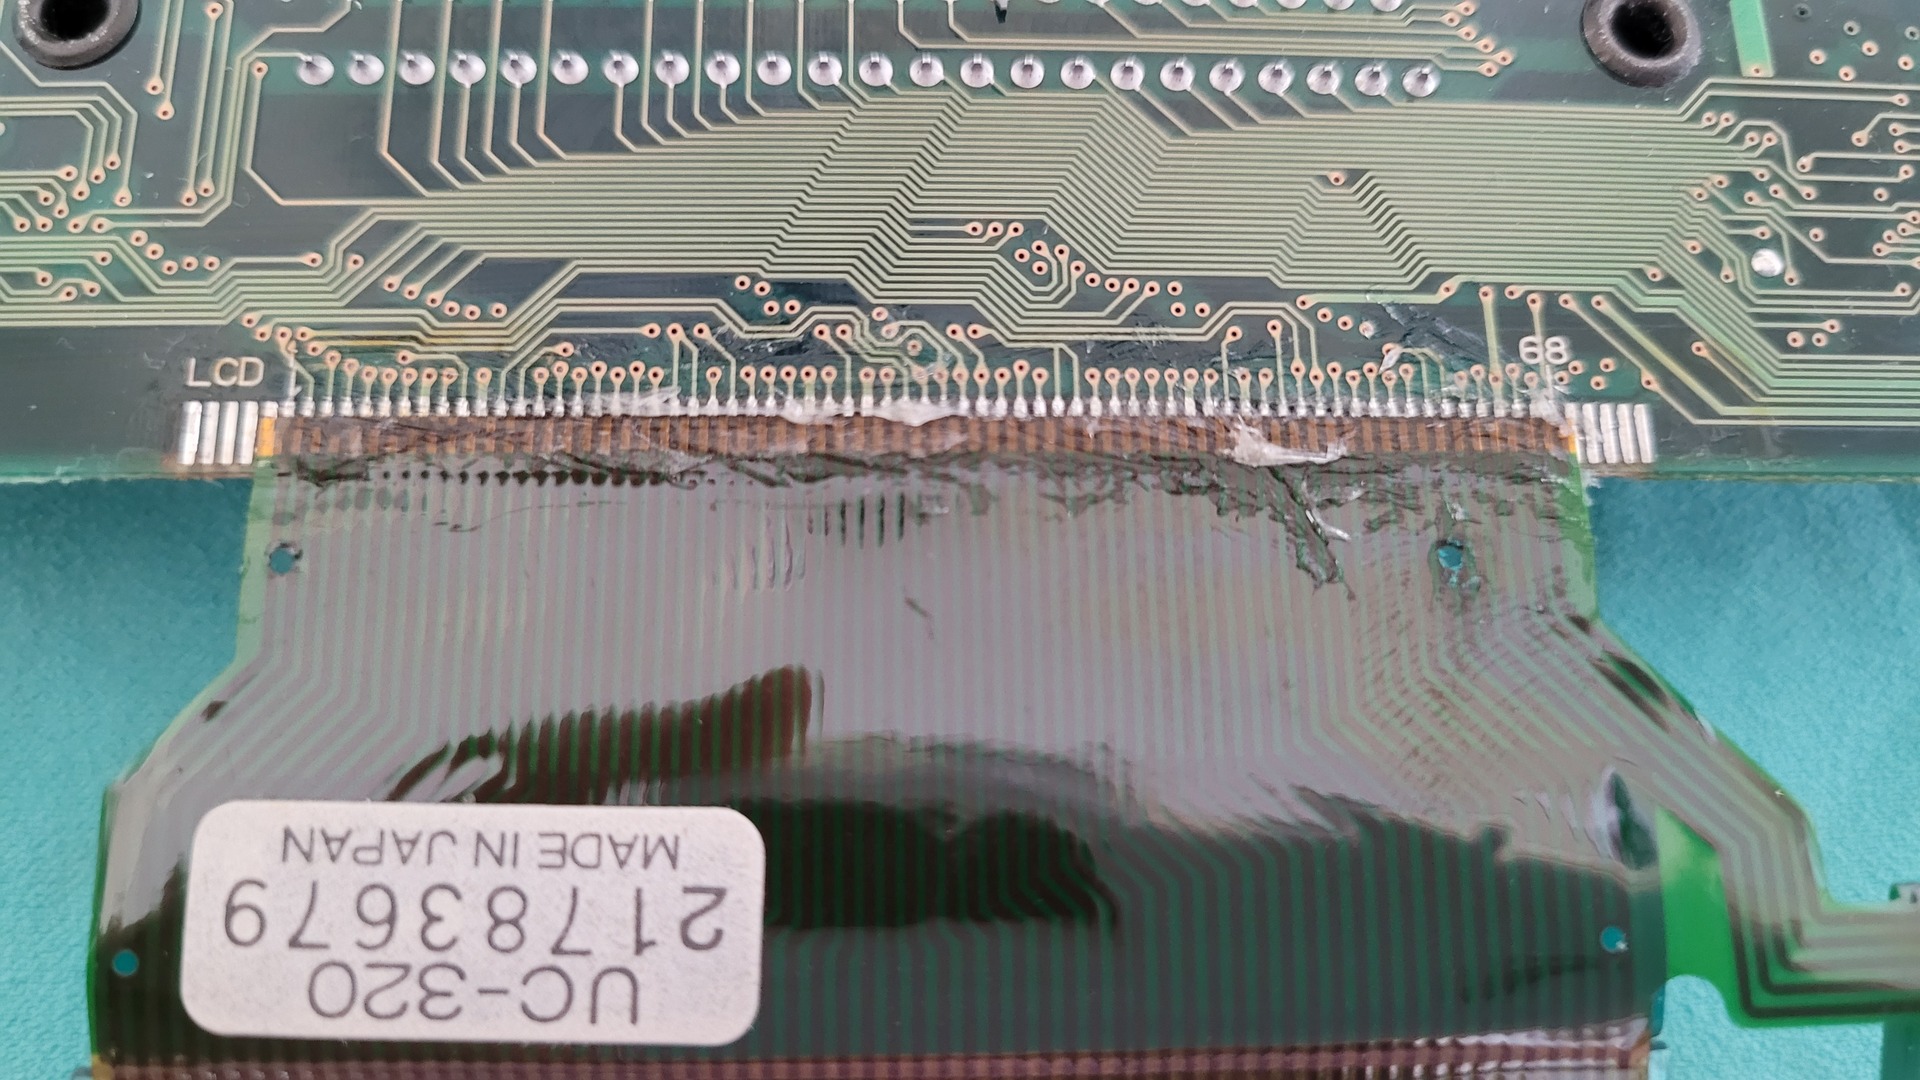
This part is destructive, or at least it will be difficult to rollback. The original display has a ribbon cable that is directly soldered to the motherboard.
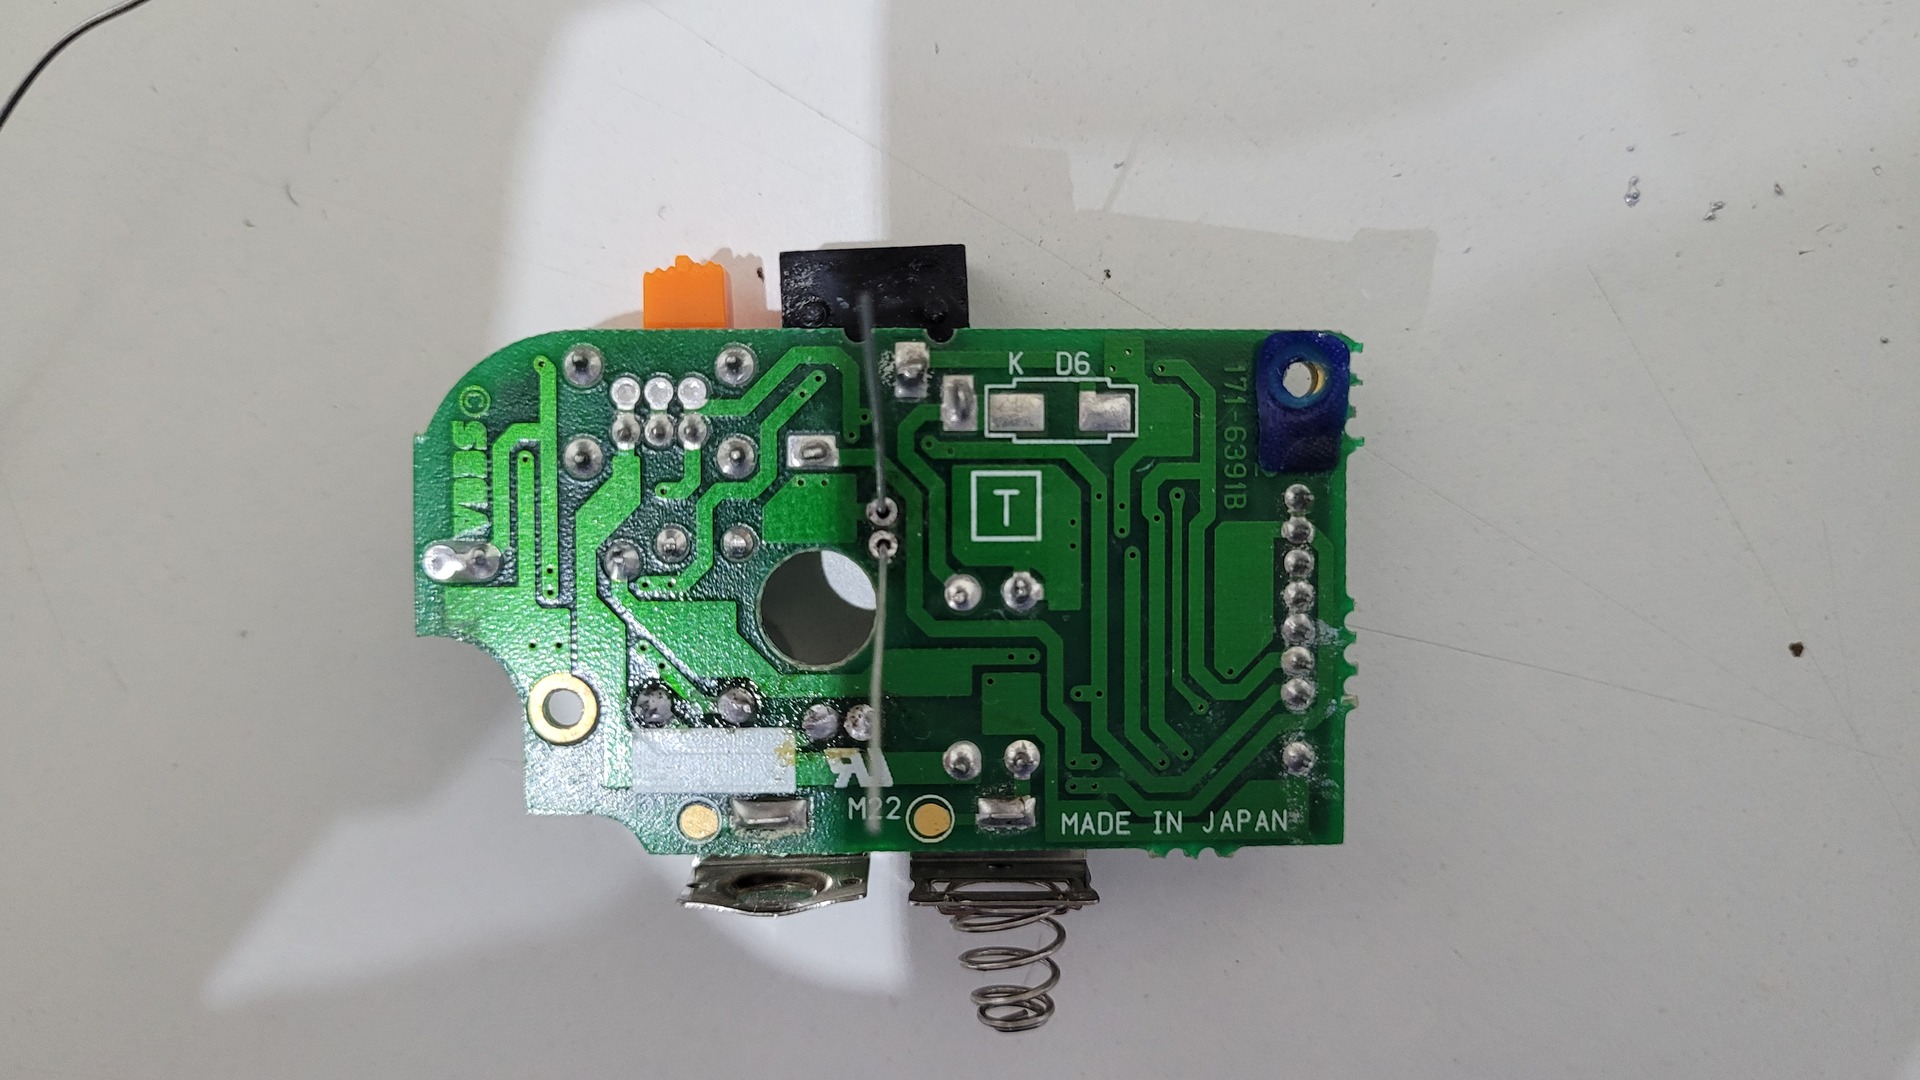
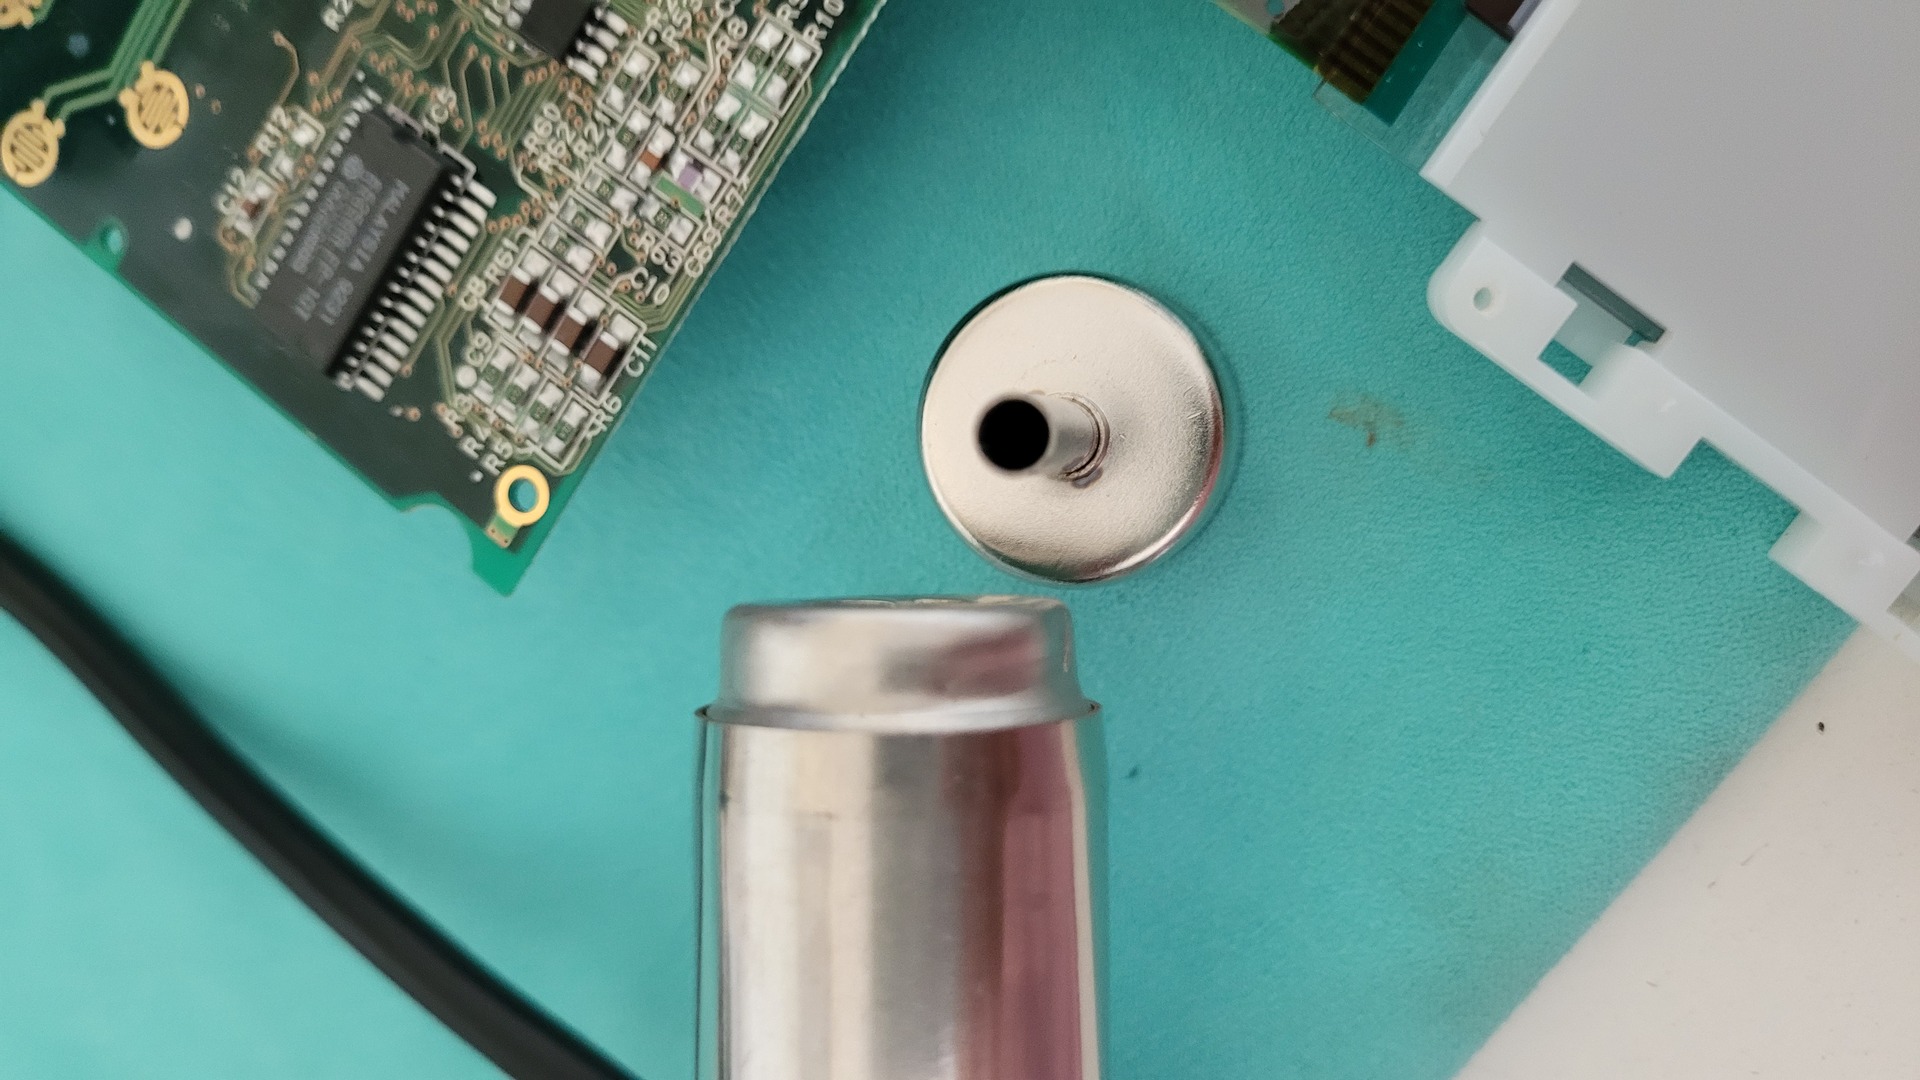
As you can see in the photo below, I cleaned up all corrosion with an alternative mix of Q-tips soaked vinegar or Isopropyl acool and the sandpaper.
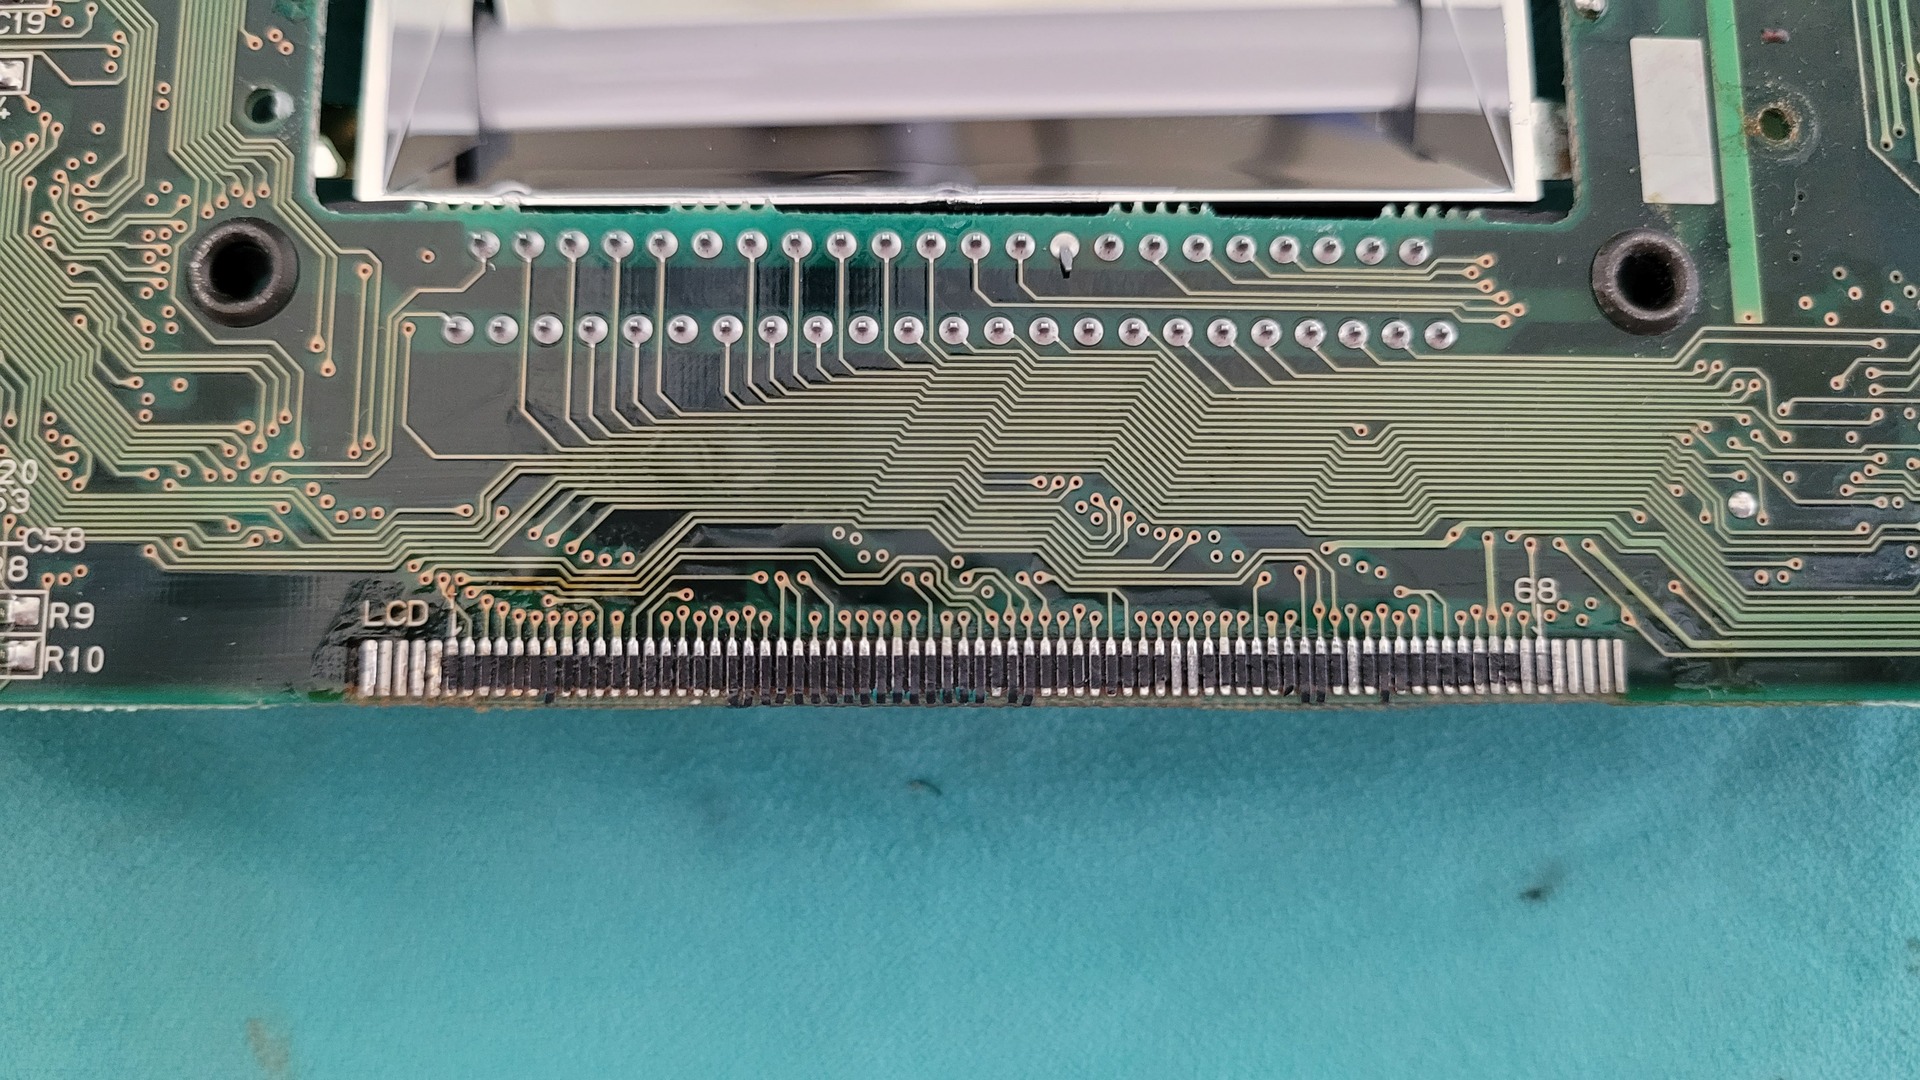
To remove the ribbon cable I used a hot air gun with a small nozzle and some flux to avoid creating solder bridge while heating up the ribbon cable.
Next step was to remove the backlight. This consists in desoldering both side of the neon with a desoldering pump and unscrewing the protective plastic part. Unfortunately, I only took photo of one side, but it’s the same thing on both.
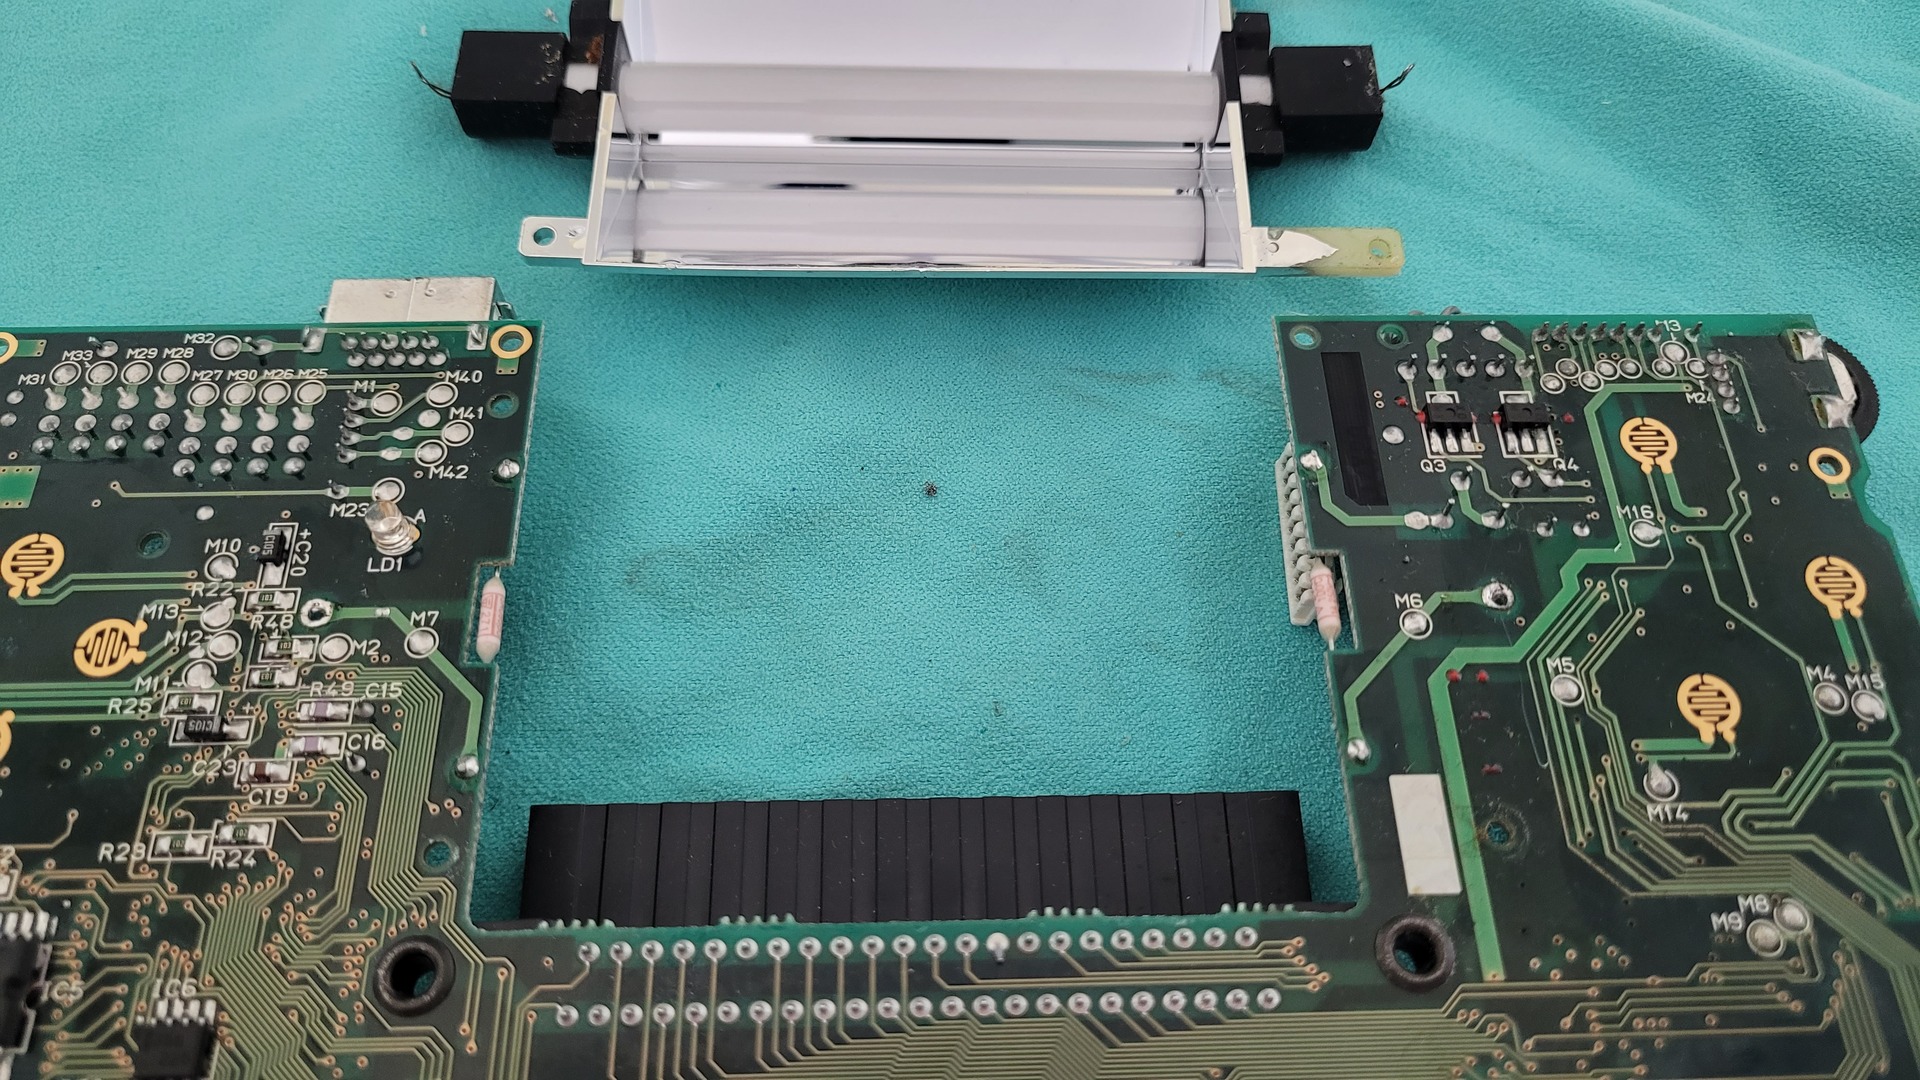
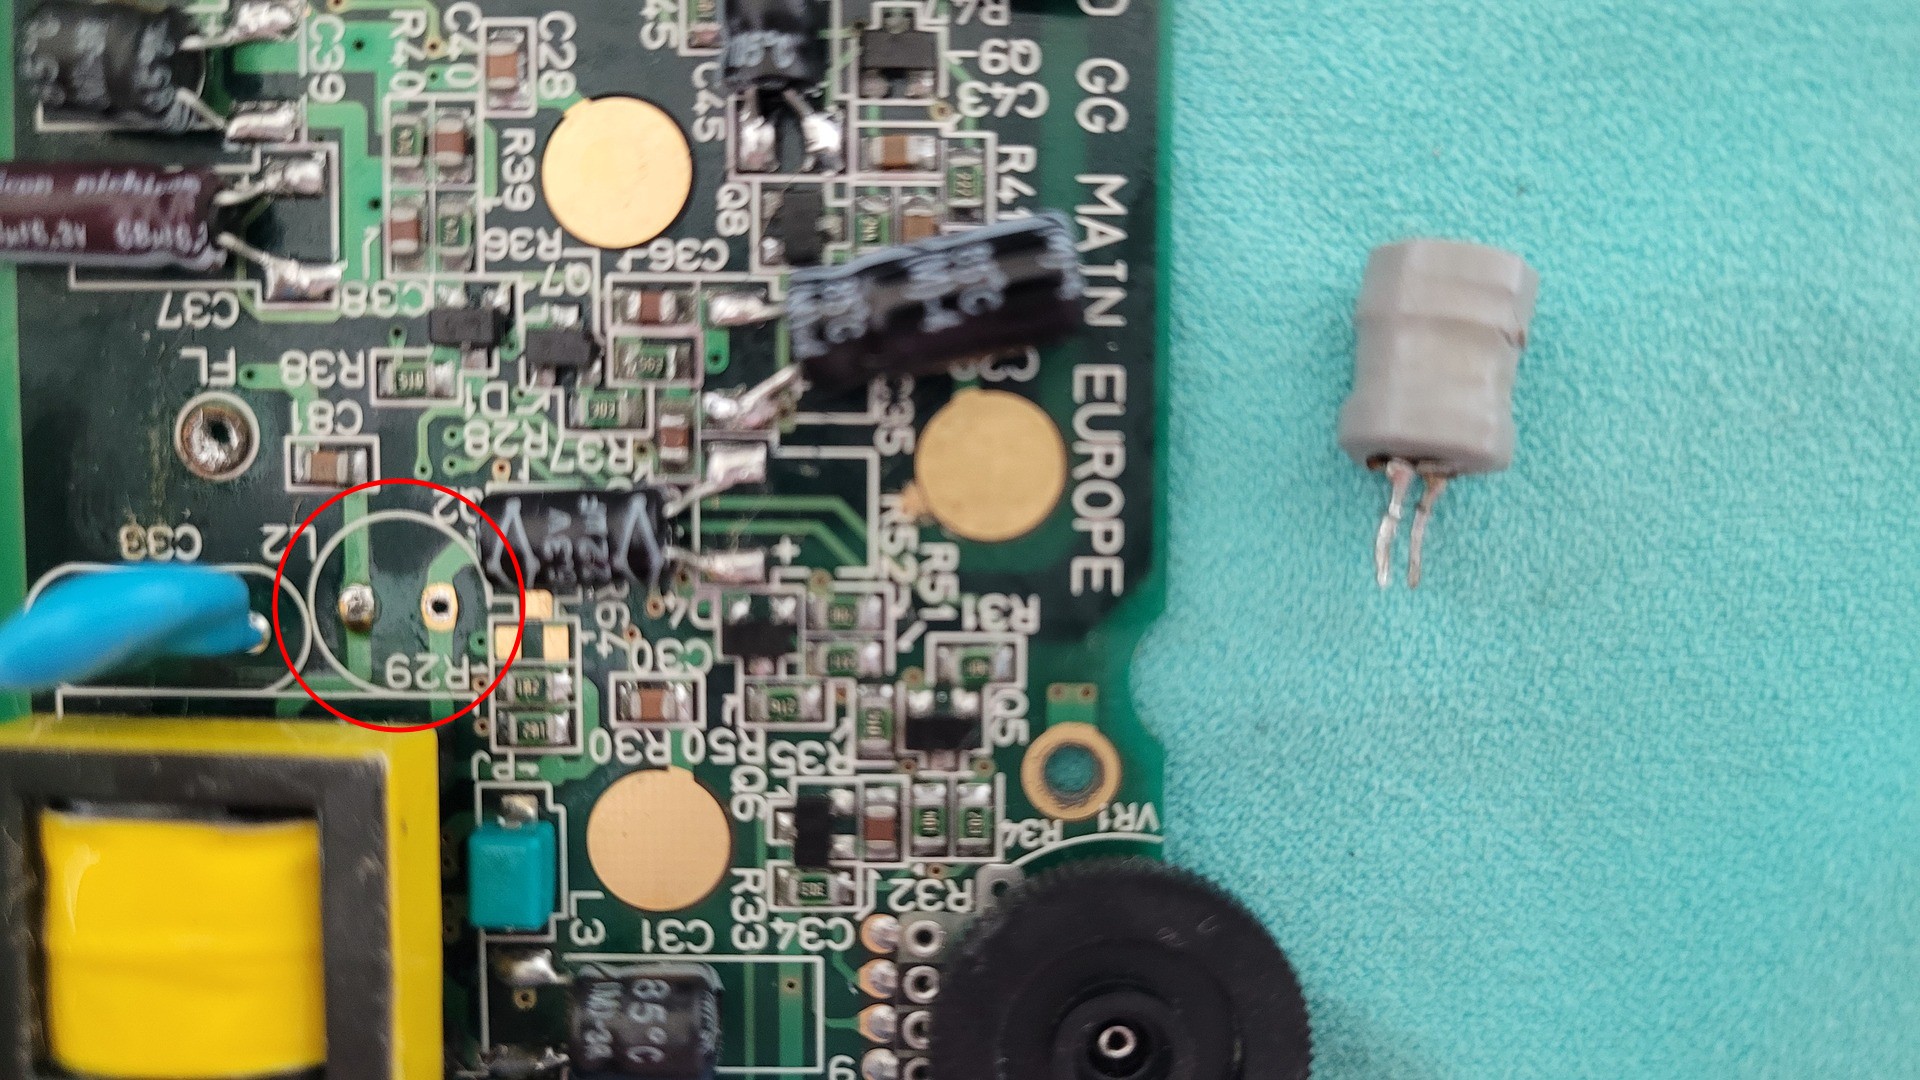
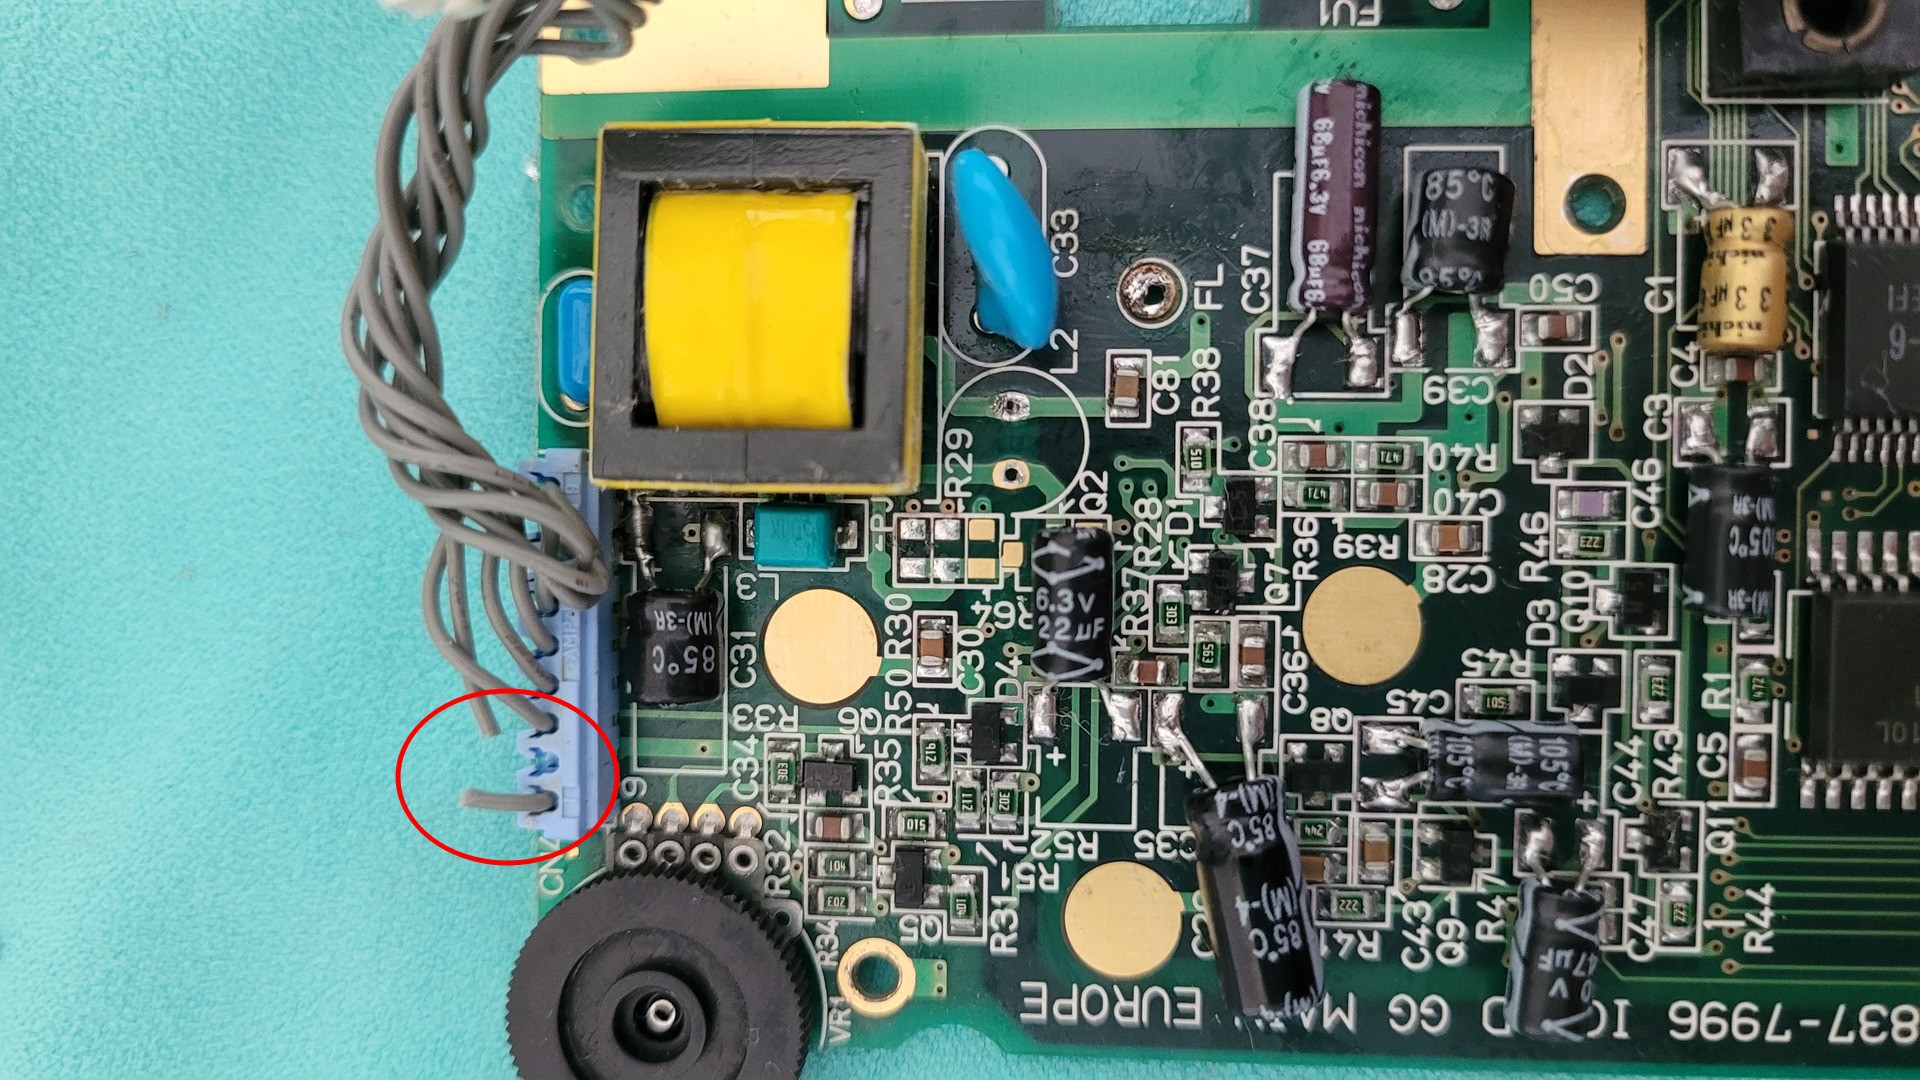
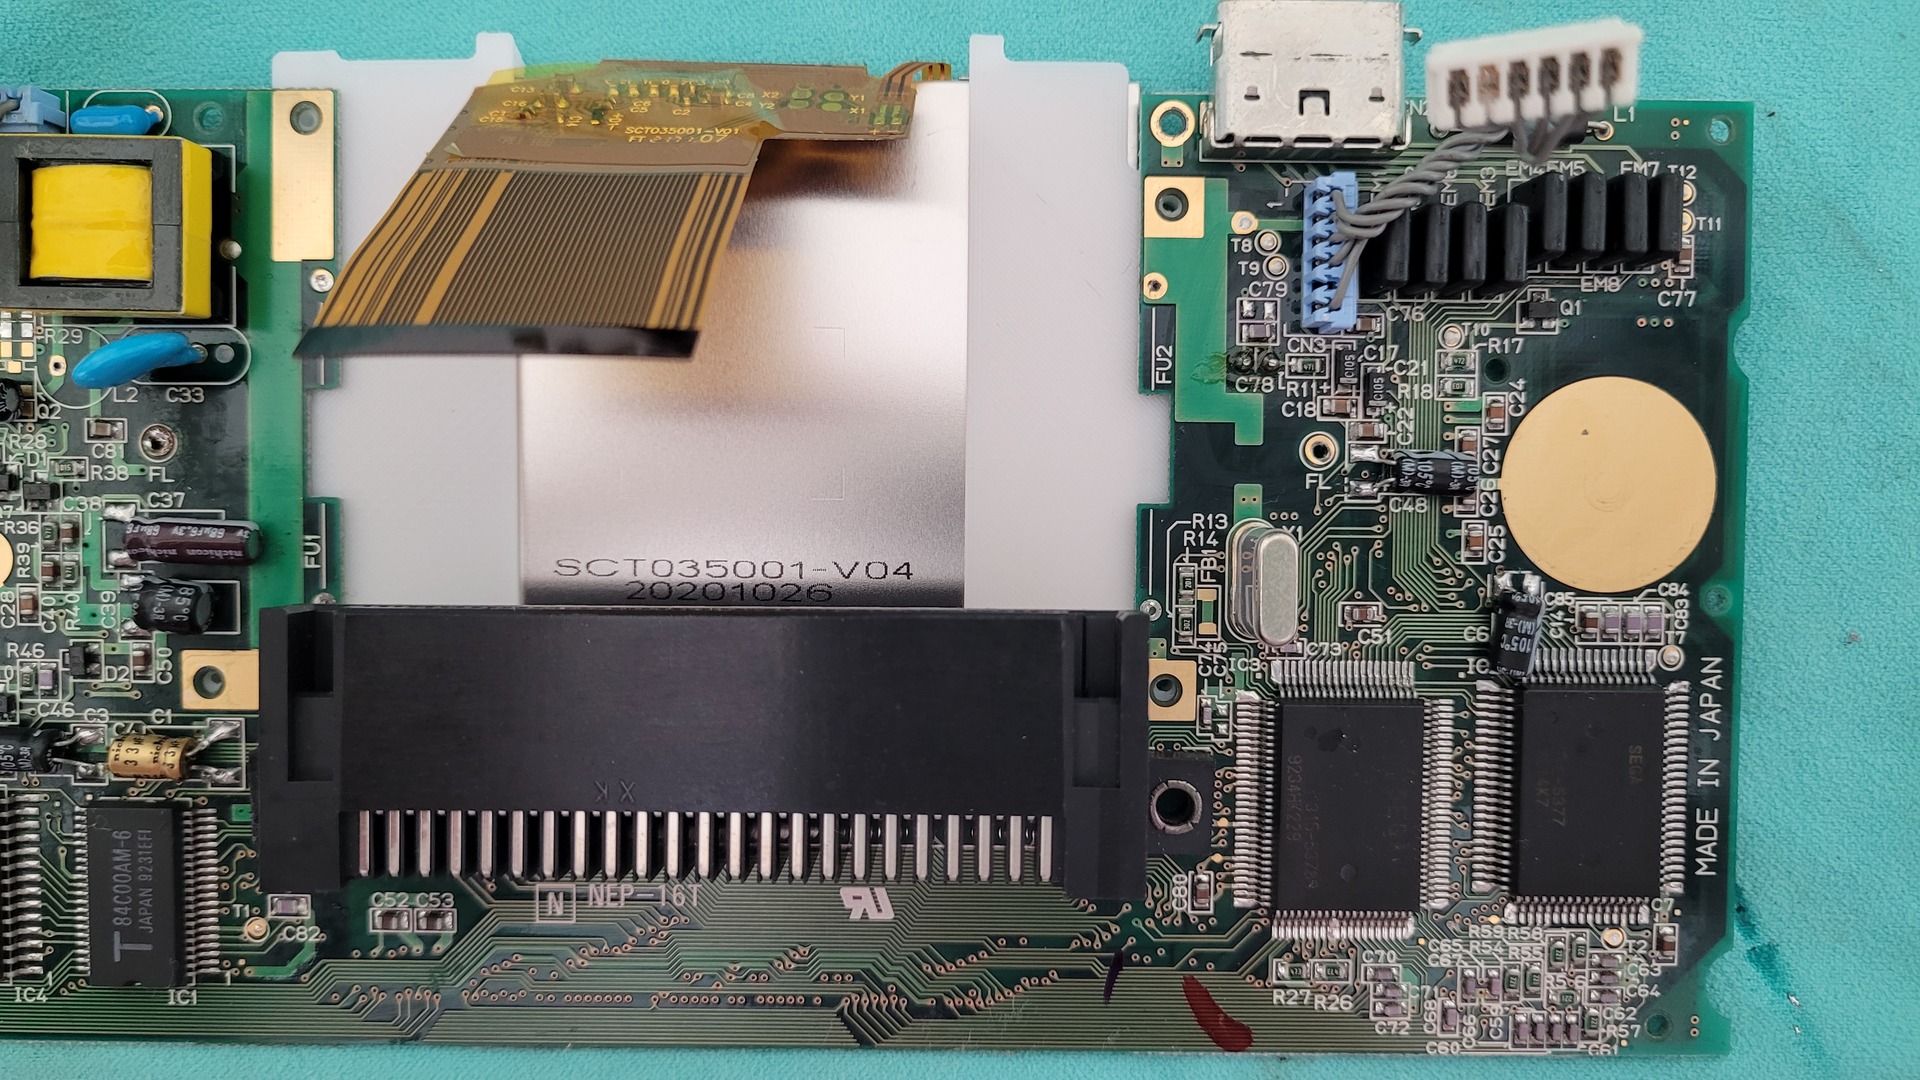
Preparing the motherboard
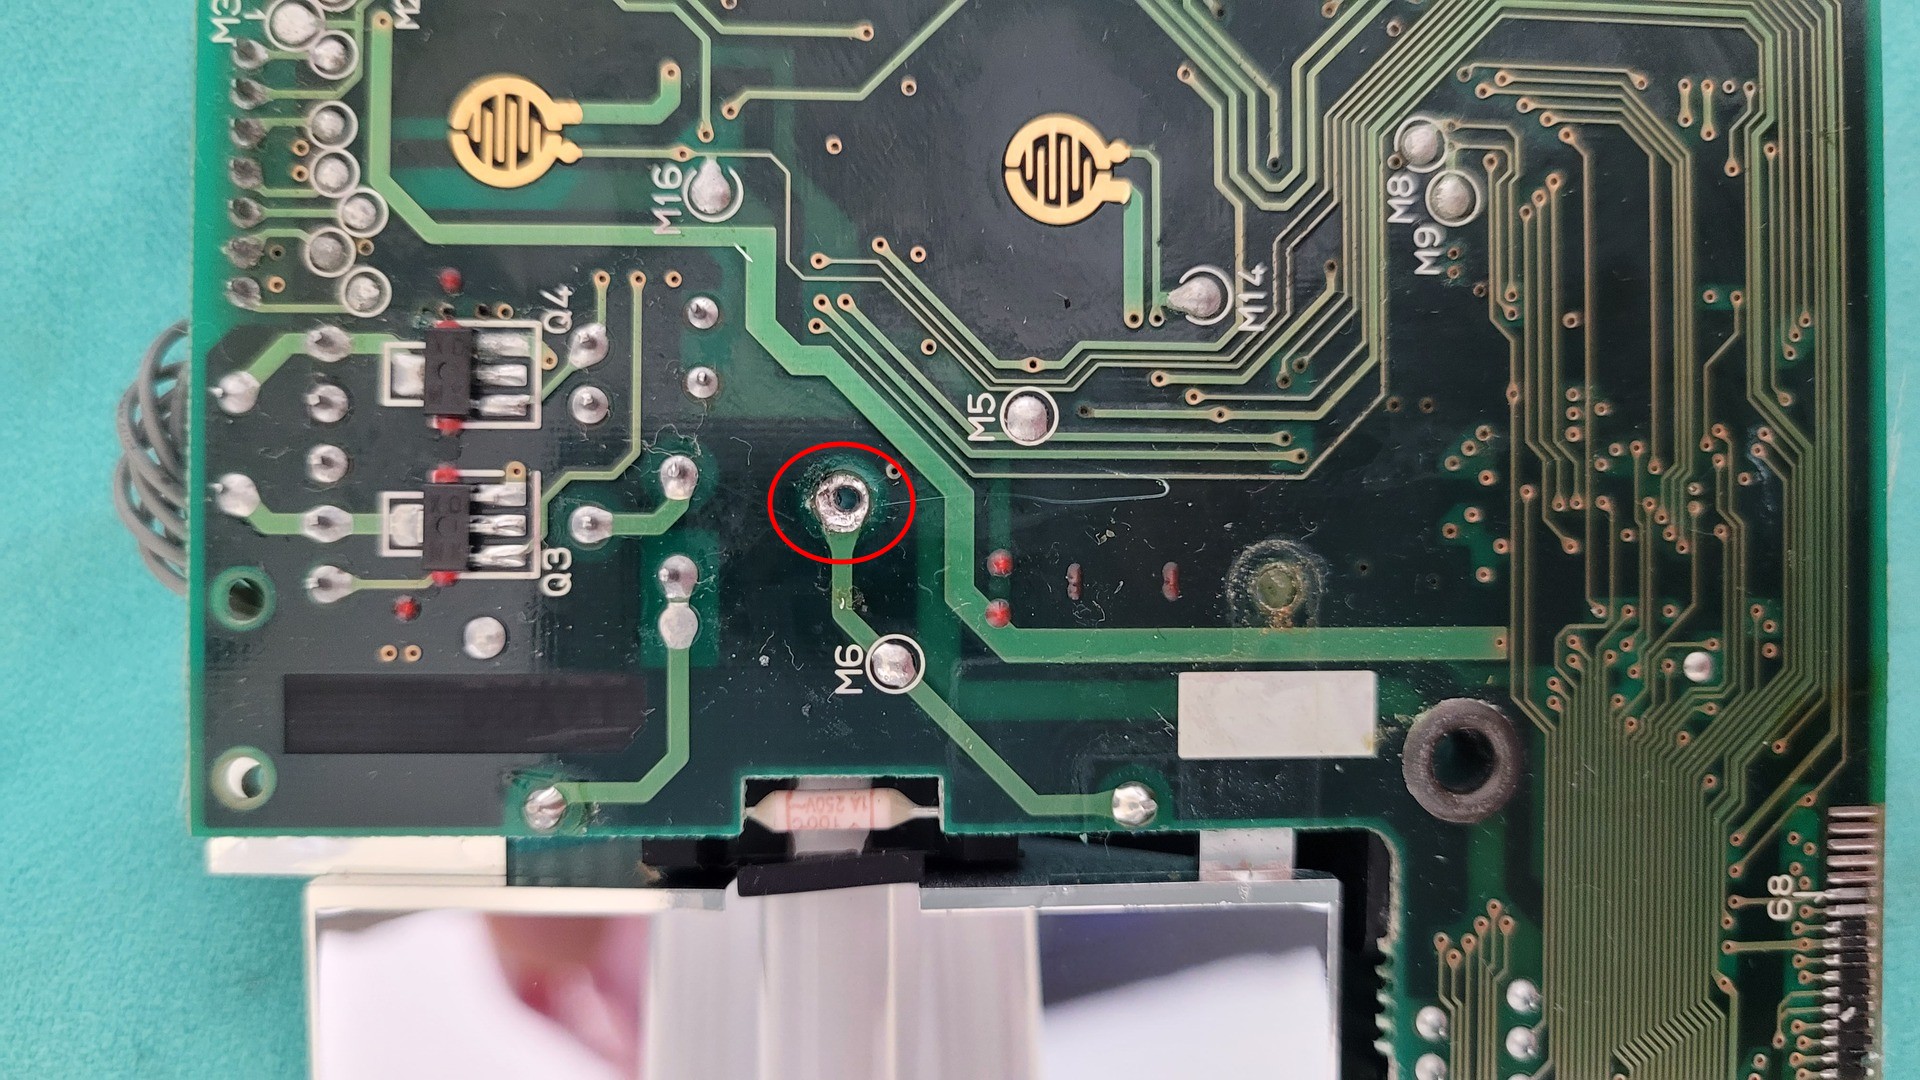
With the old display removed, we still have to do some more modifications : removing L2 coil and cuting a wire on the plug that comes from the internal power supply
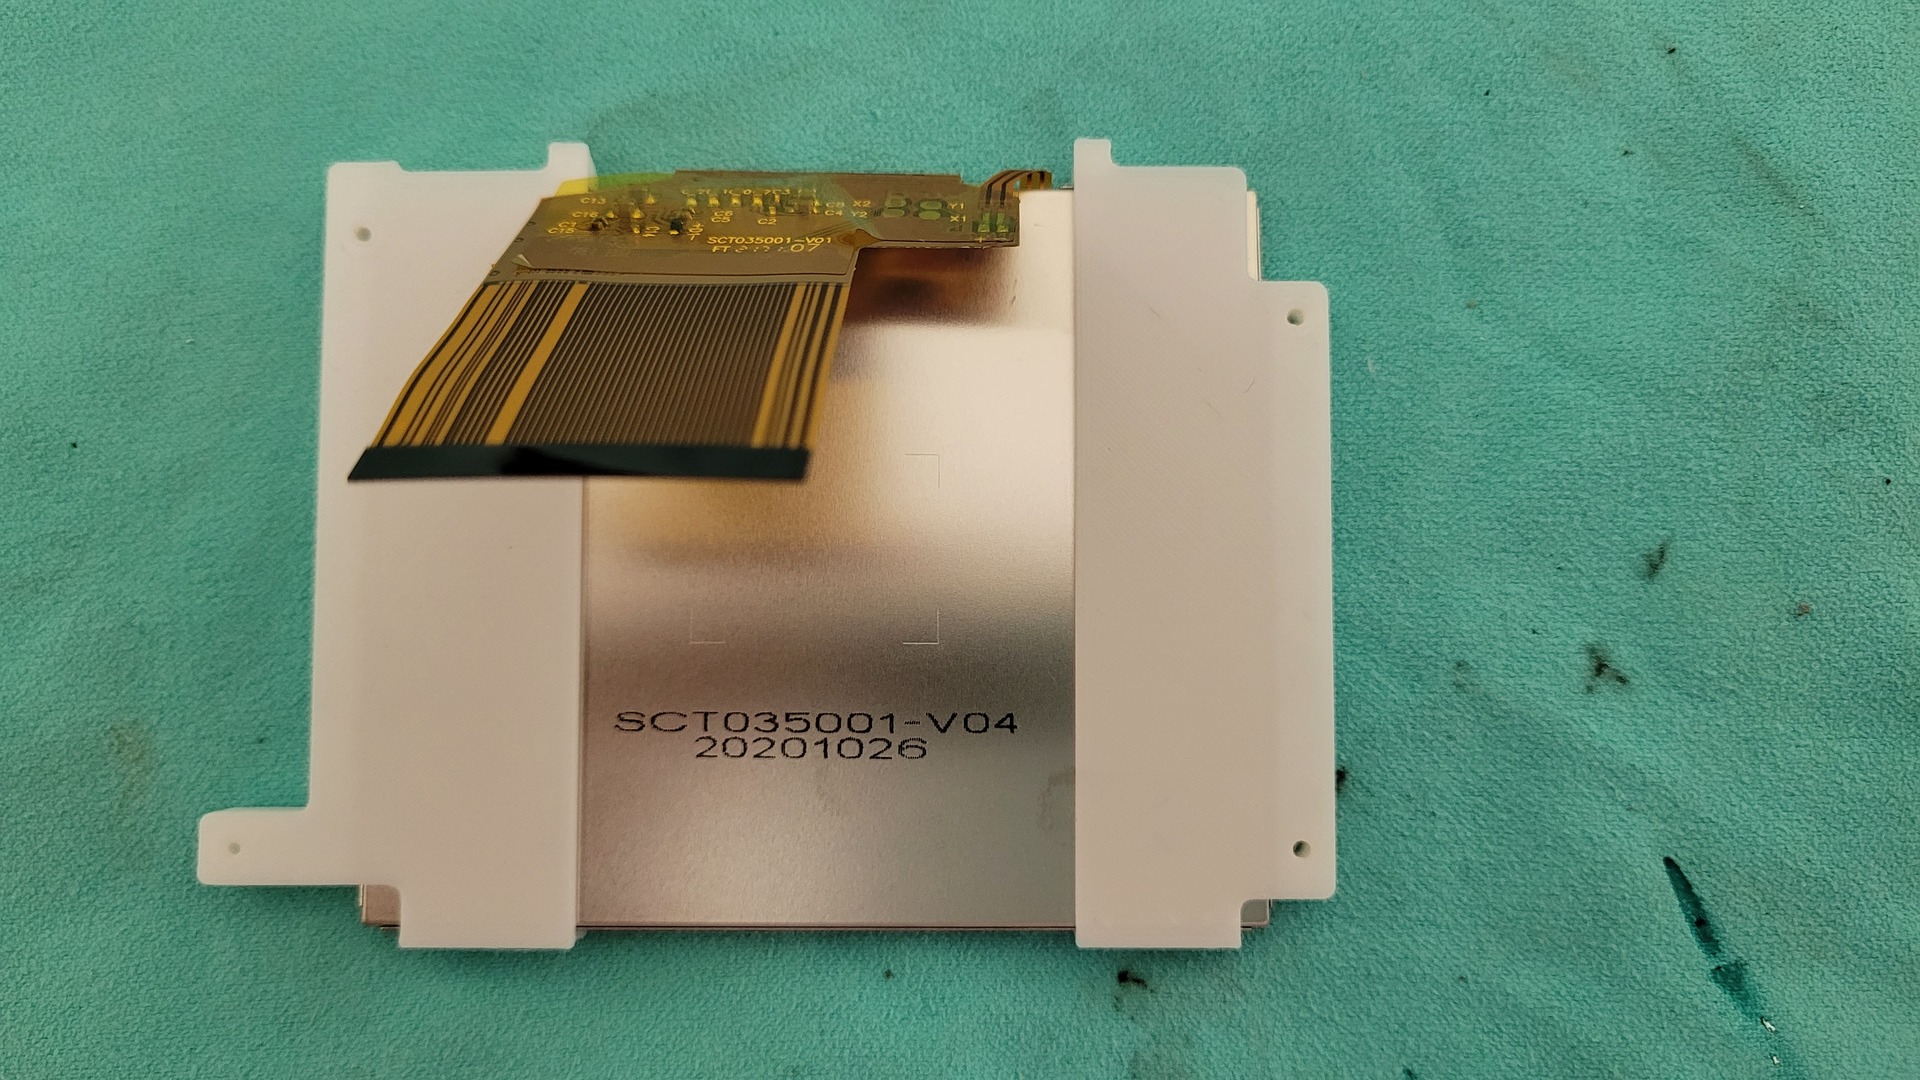
Mounting the new TFT display
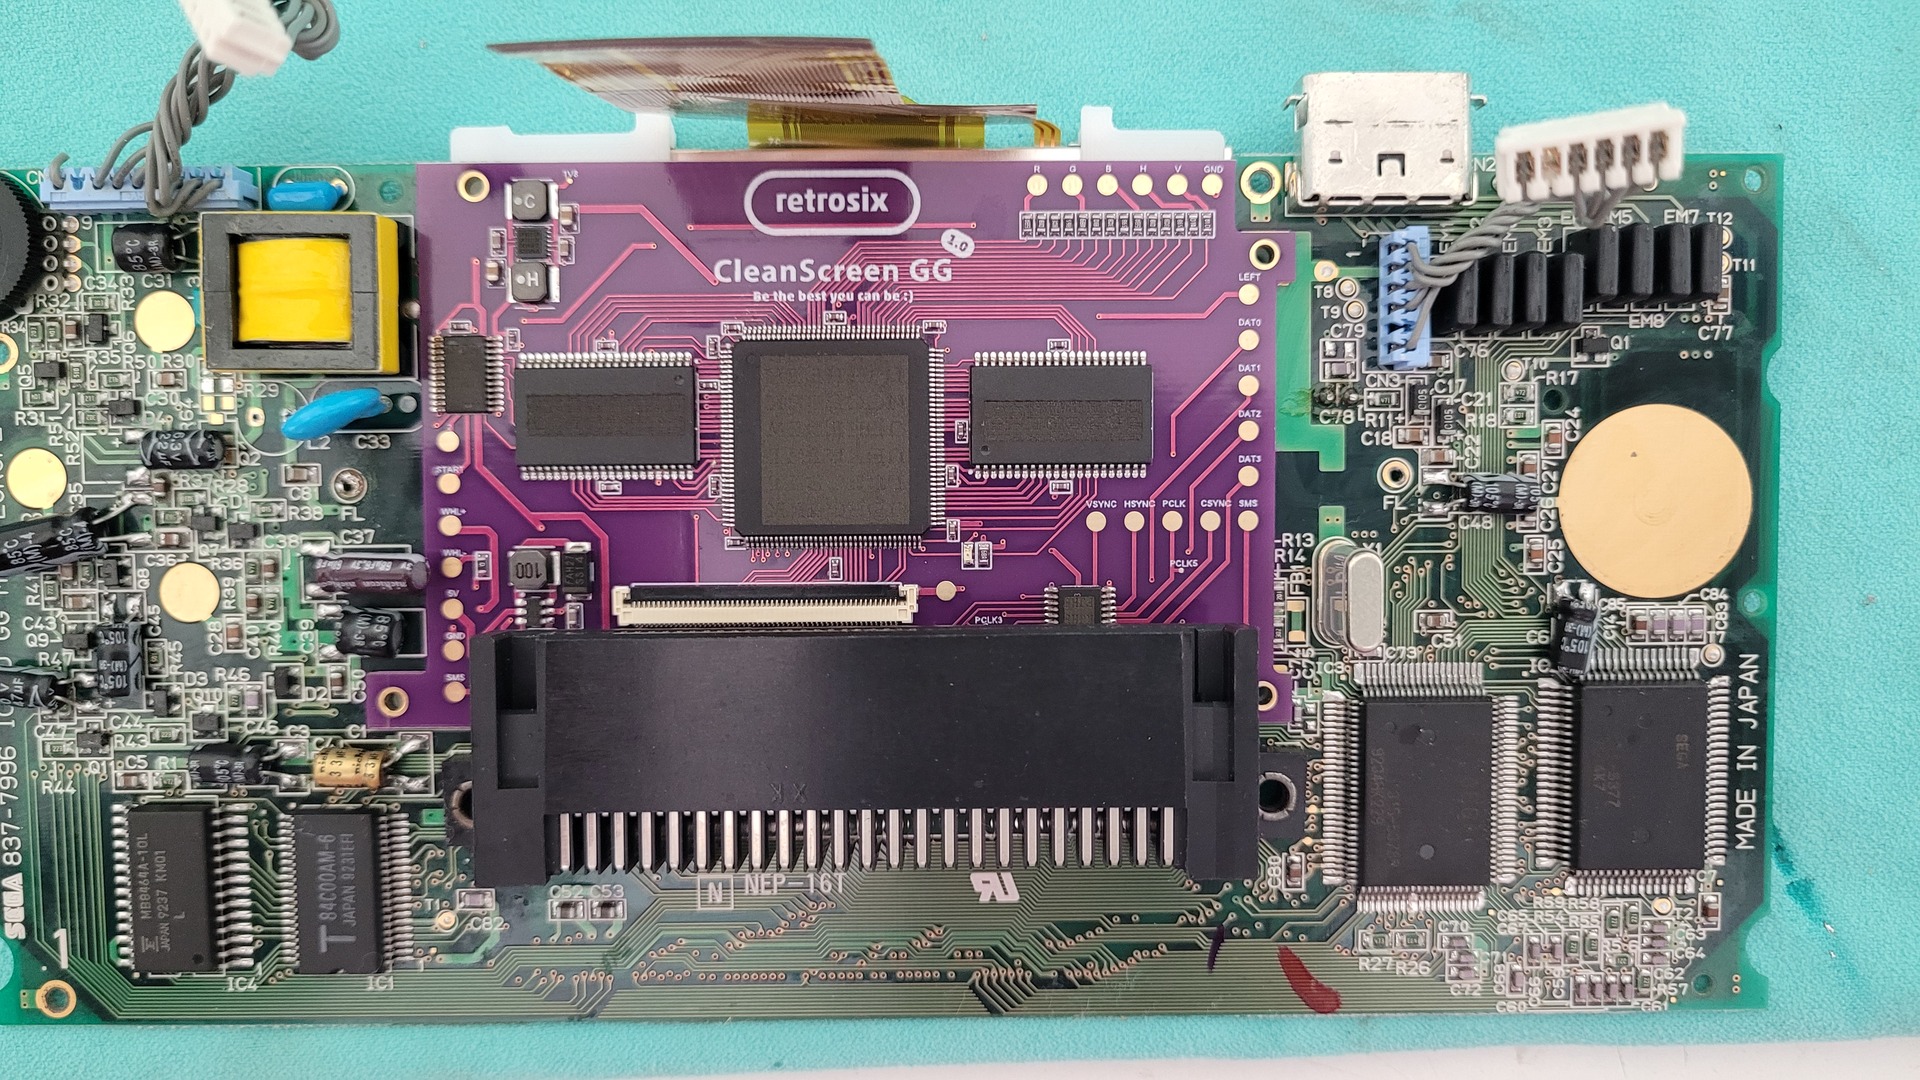
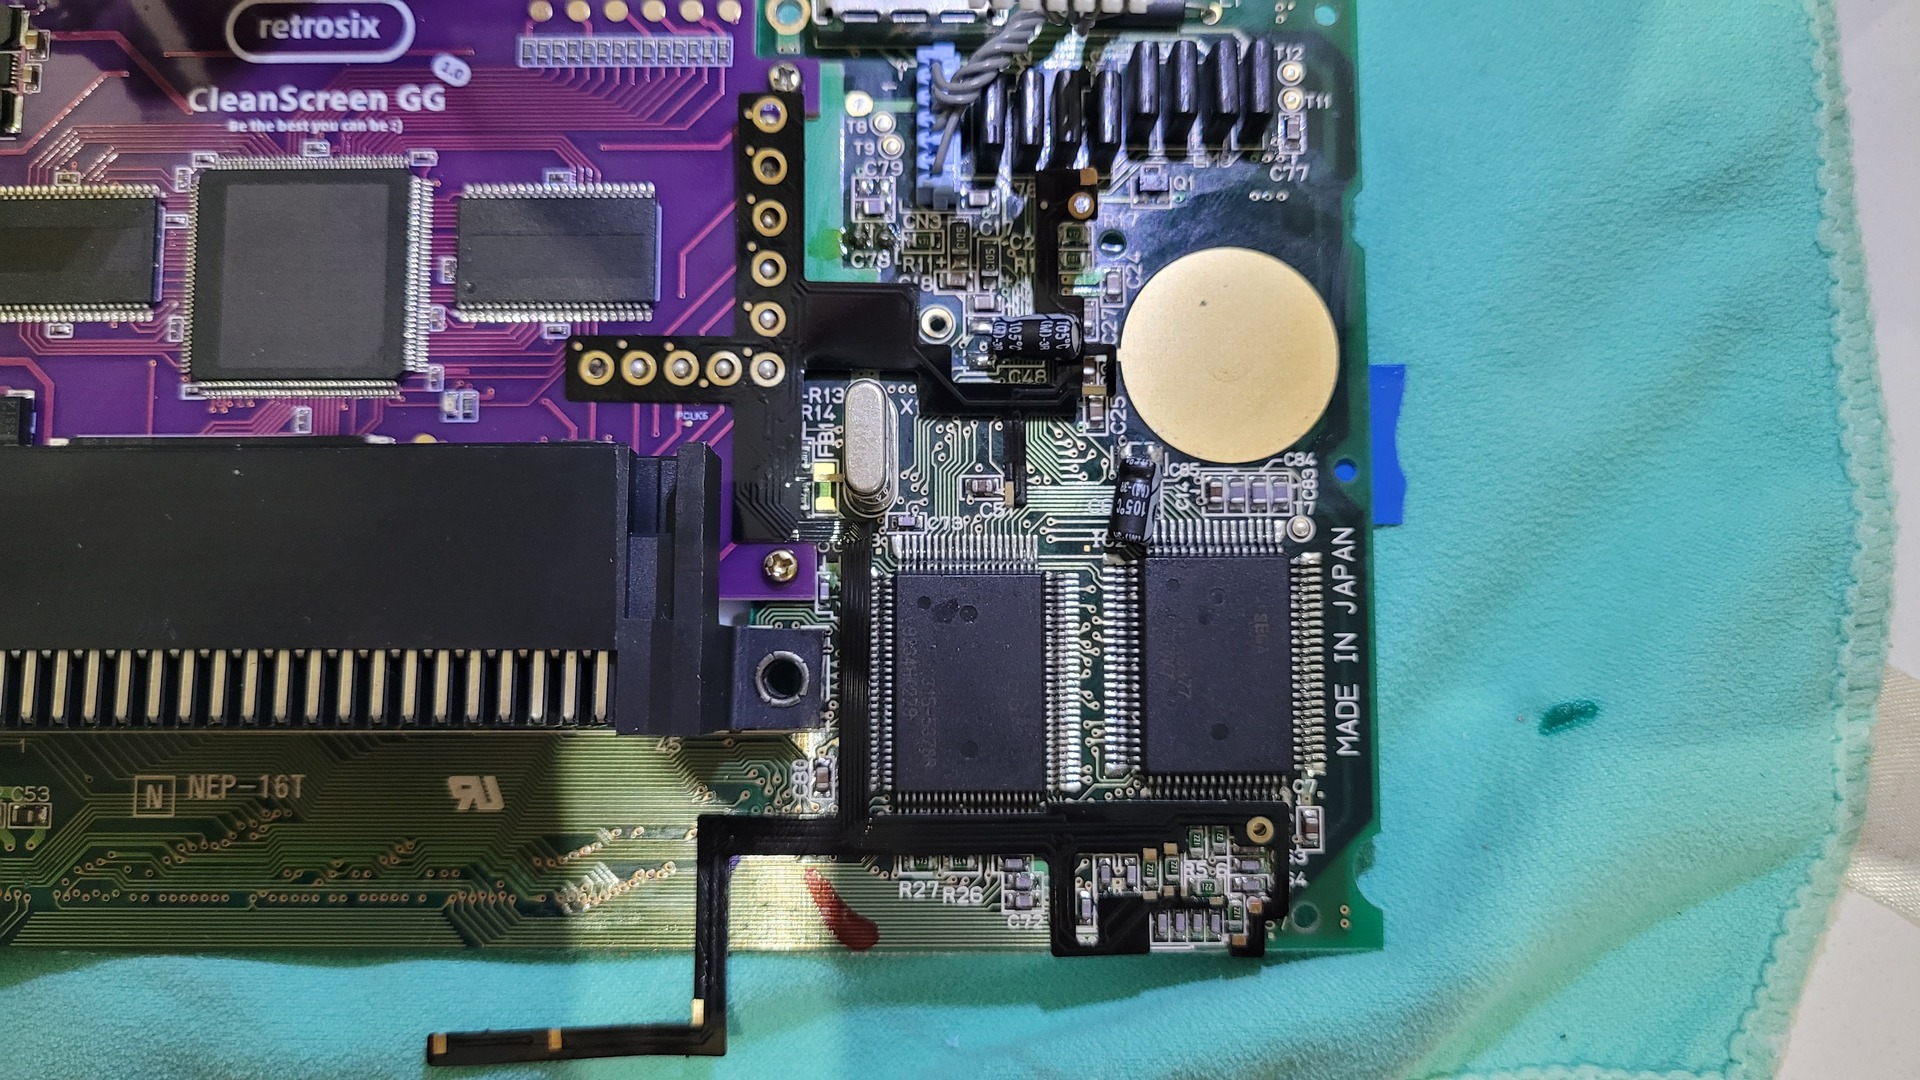
The Retrosix kit come with a 3d printed guide that fits perfectly on the motherboard. The display controller board come over and the Game Gear motherboard is then taken in sandwich between the display and the controller board.
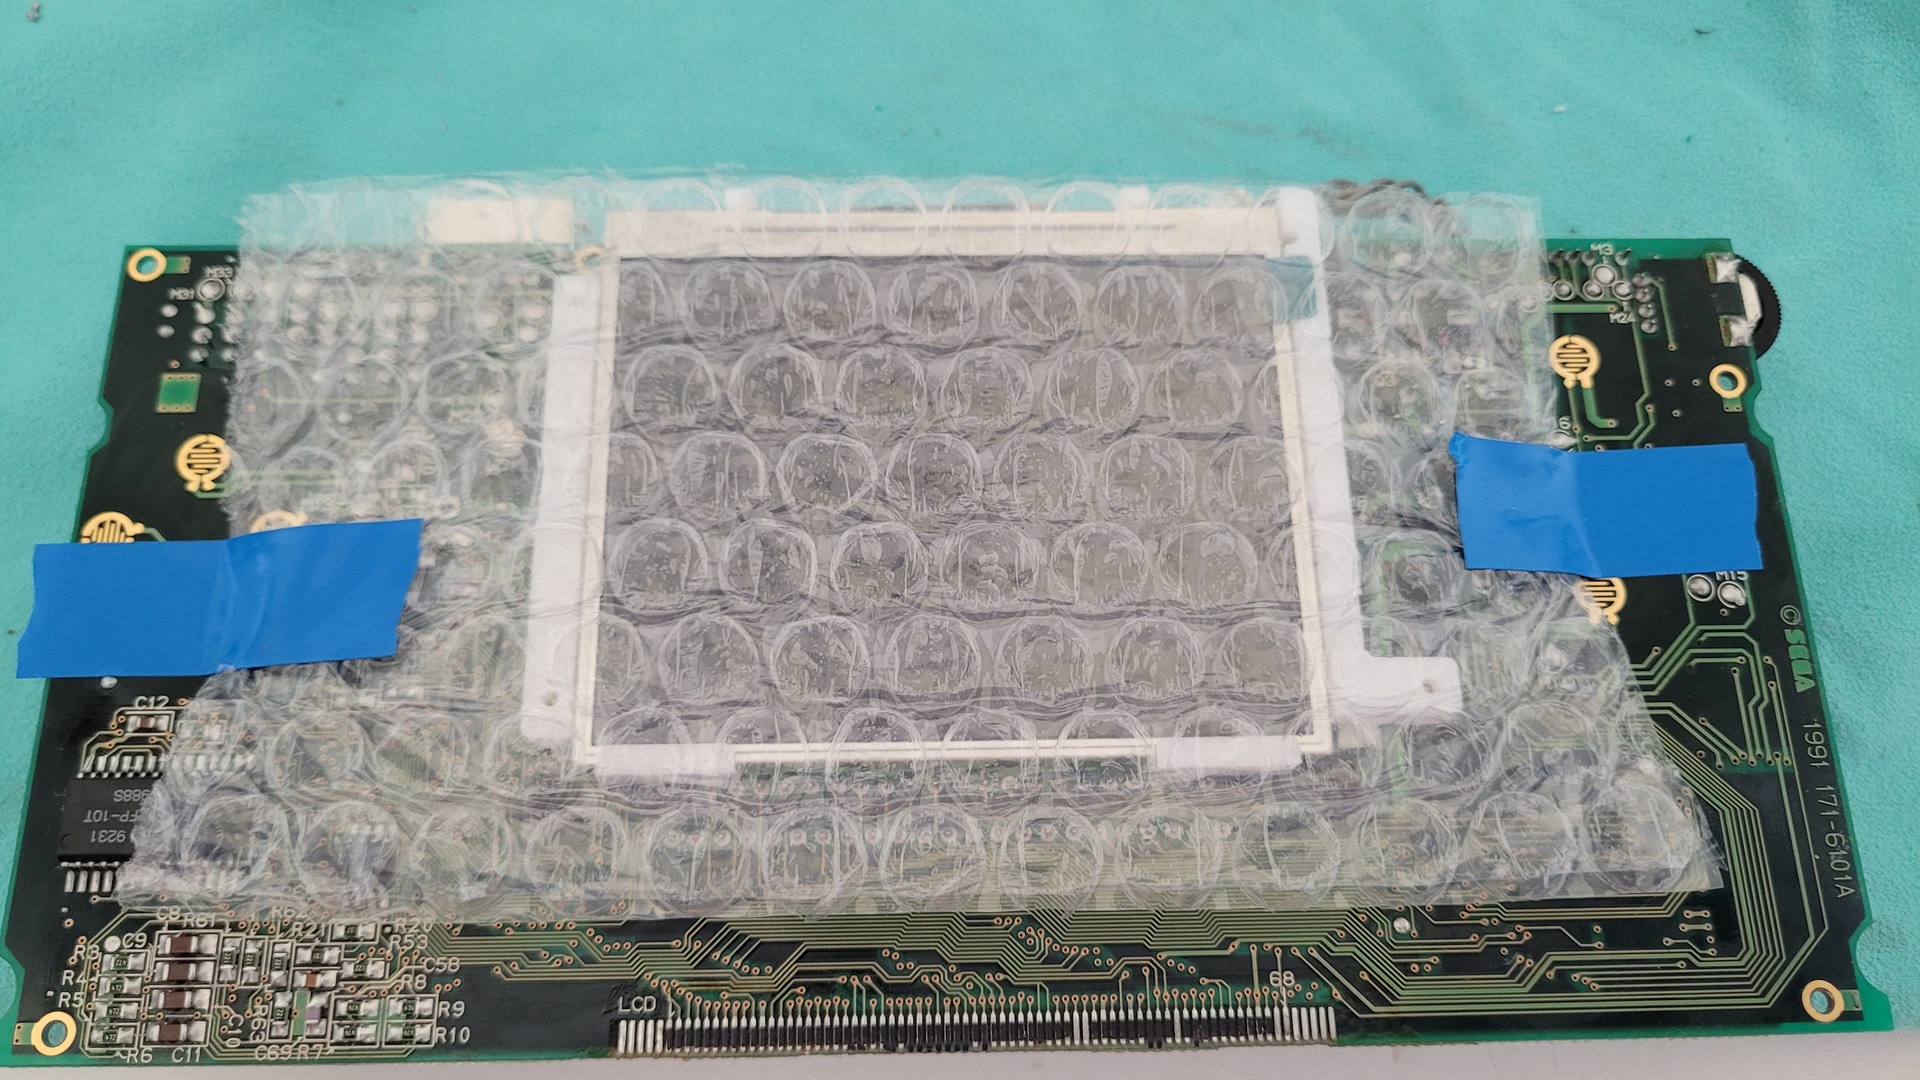
Before going further, I protected the display to avoid scratching its surface.
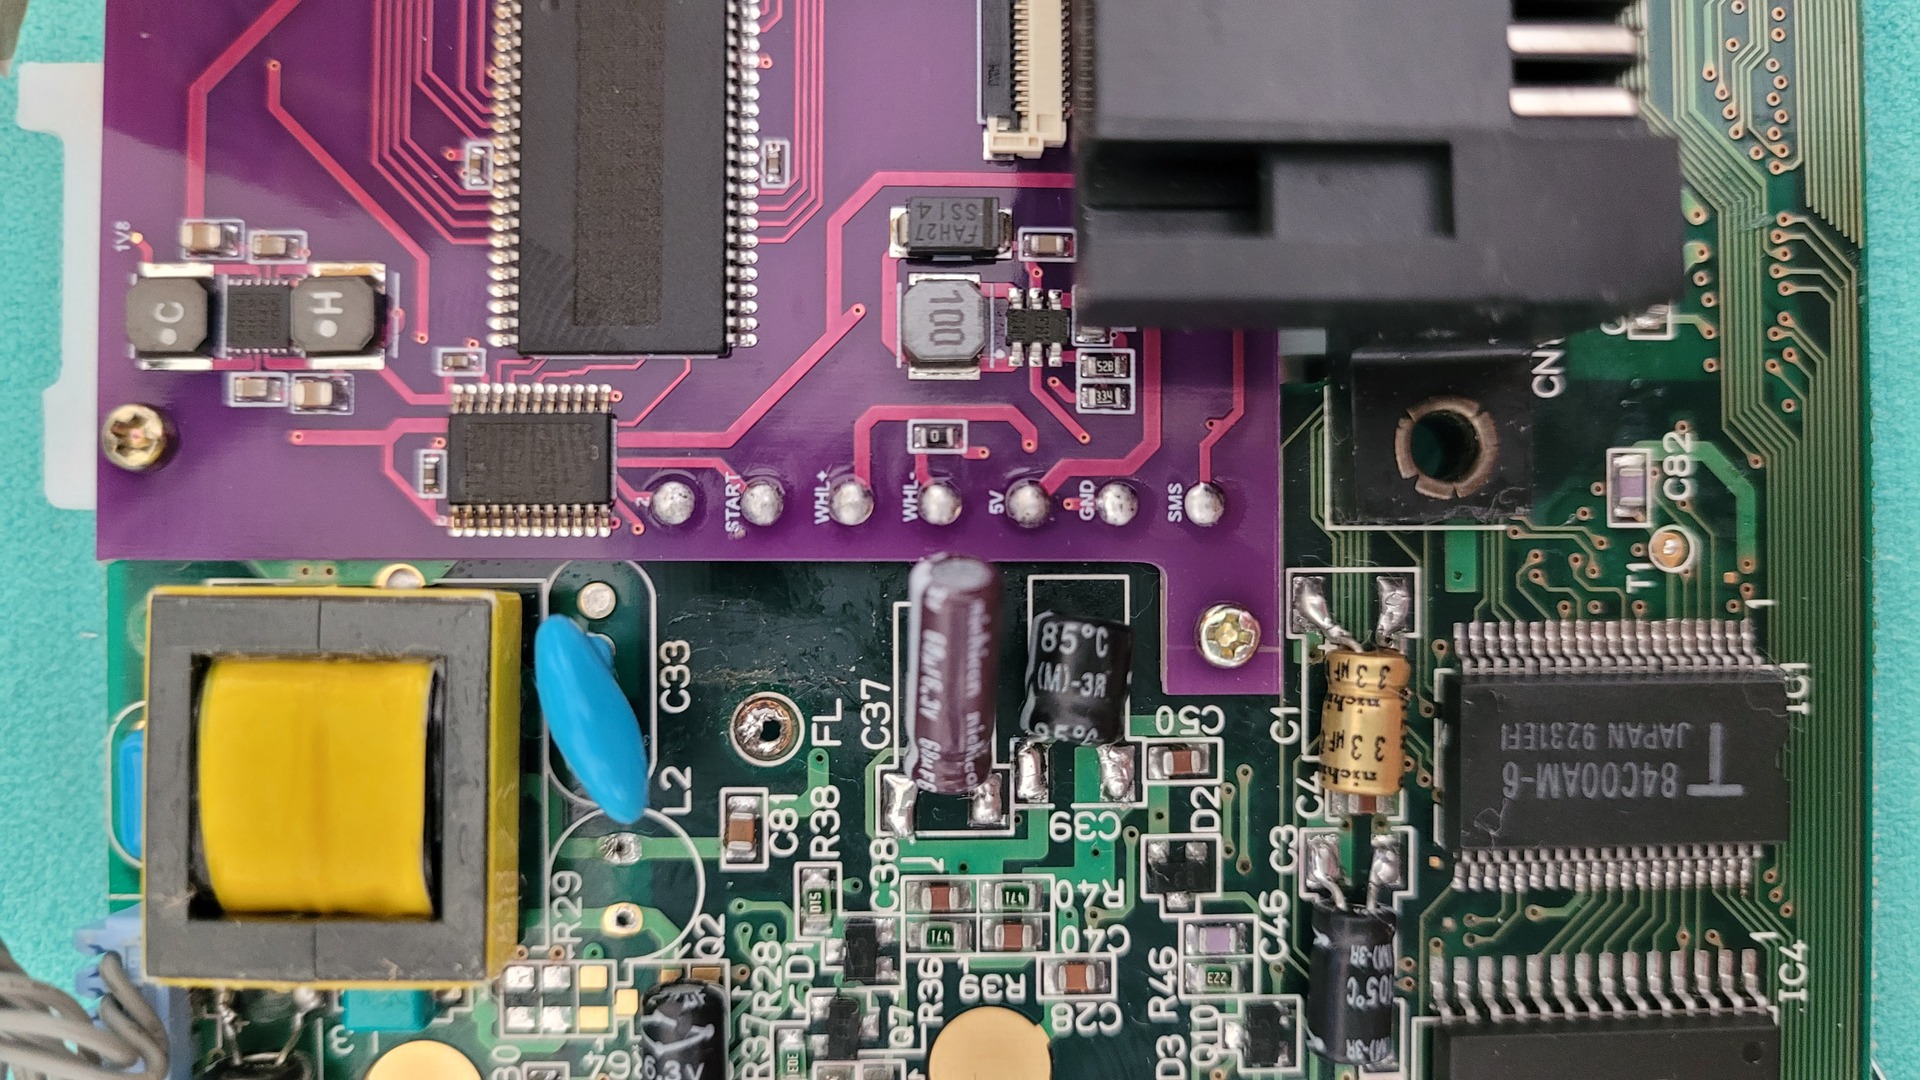
Wiring display controller
The controller takes all the needed signals directly from the motherboard. The Retrosix kit comes with a wire-free install kit (for 1 or 2 chips model). While this allows a clean installation, a lot of soldering points are still required.
The left side is the easiest to do because the flat ribbon cable only has few angles so it is quite easy to align all solder points. On this side, the version of the kit I received also needed one wire for the “sms” signal. My advice here is to solder only one point first on the controller board and re-heating it to adjust the flat ribon cable in order to align all solder points
The right side of the screen is more complicated because there are a lot of small solder points and the flat ribbon cable is not easy to align. In fact, I had to bend it a little bit sometime. To install it I started to solder the corner on the controller.
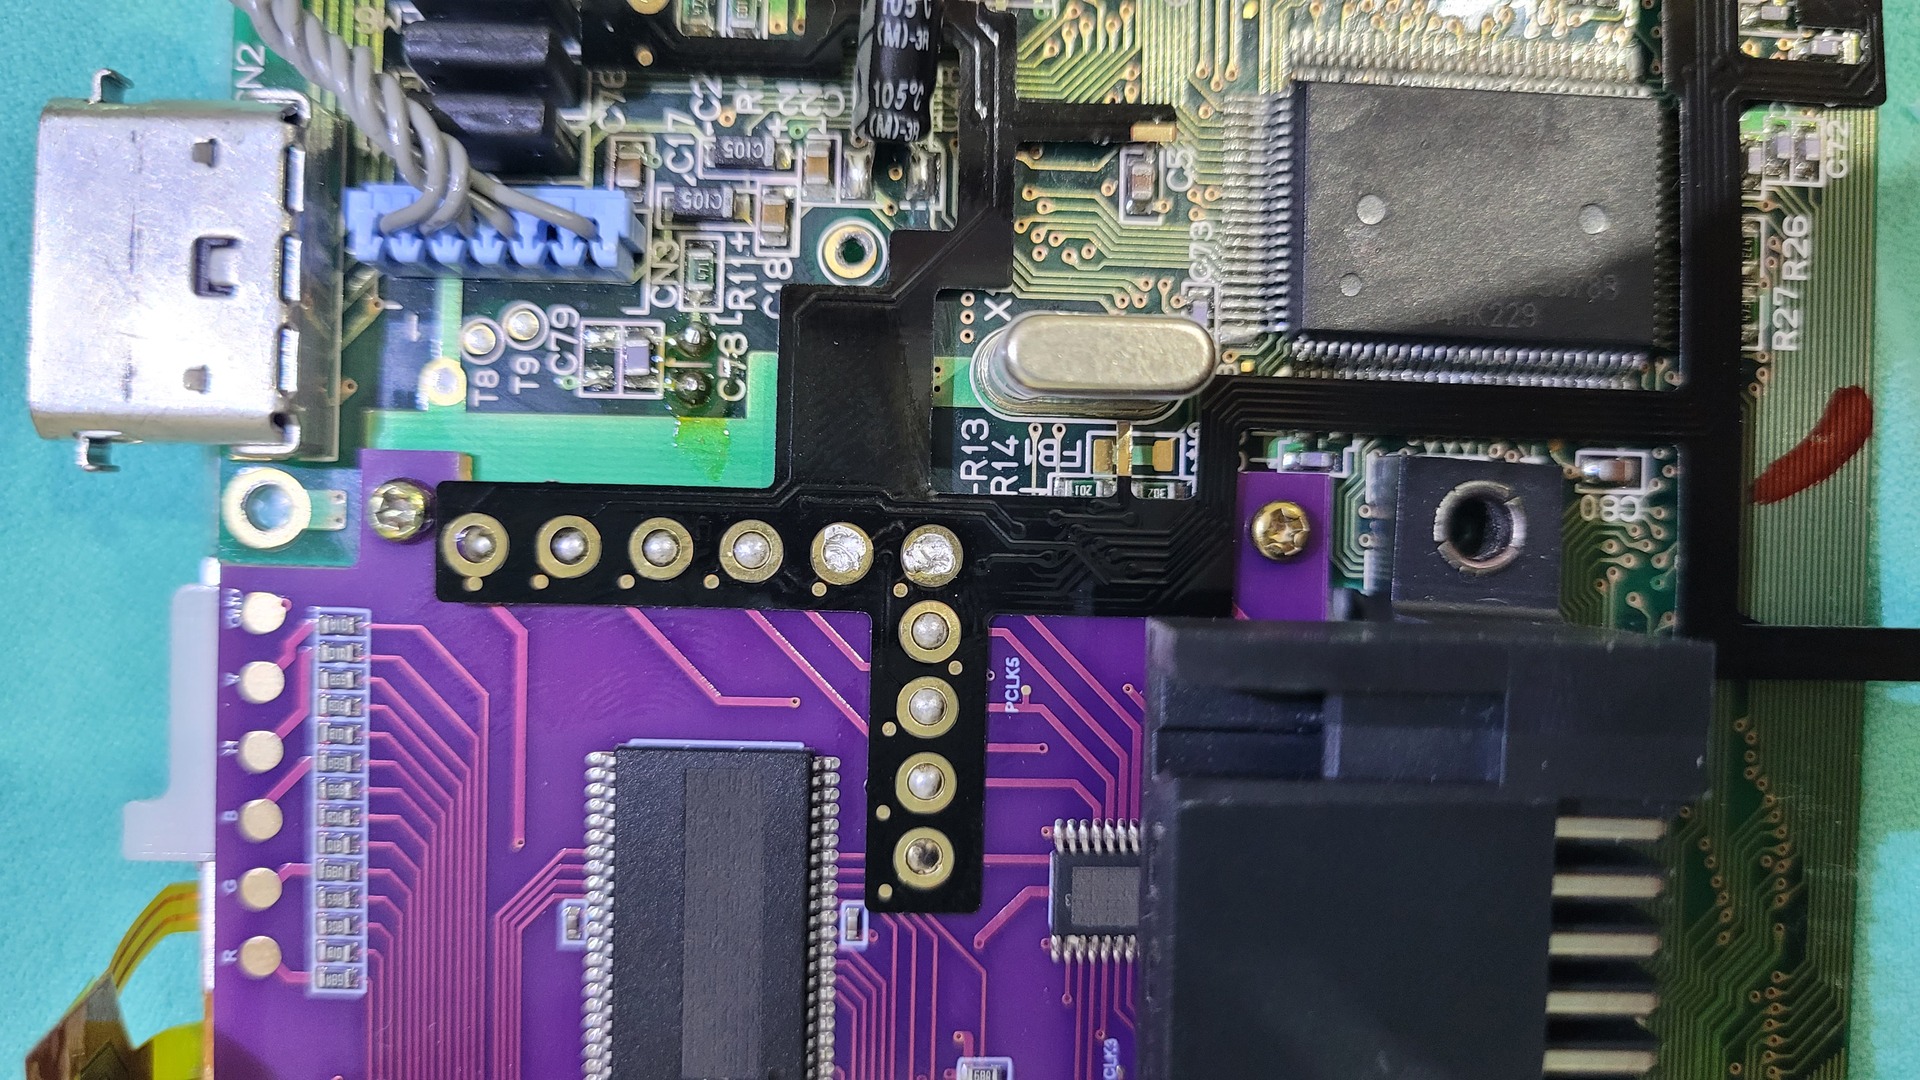
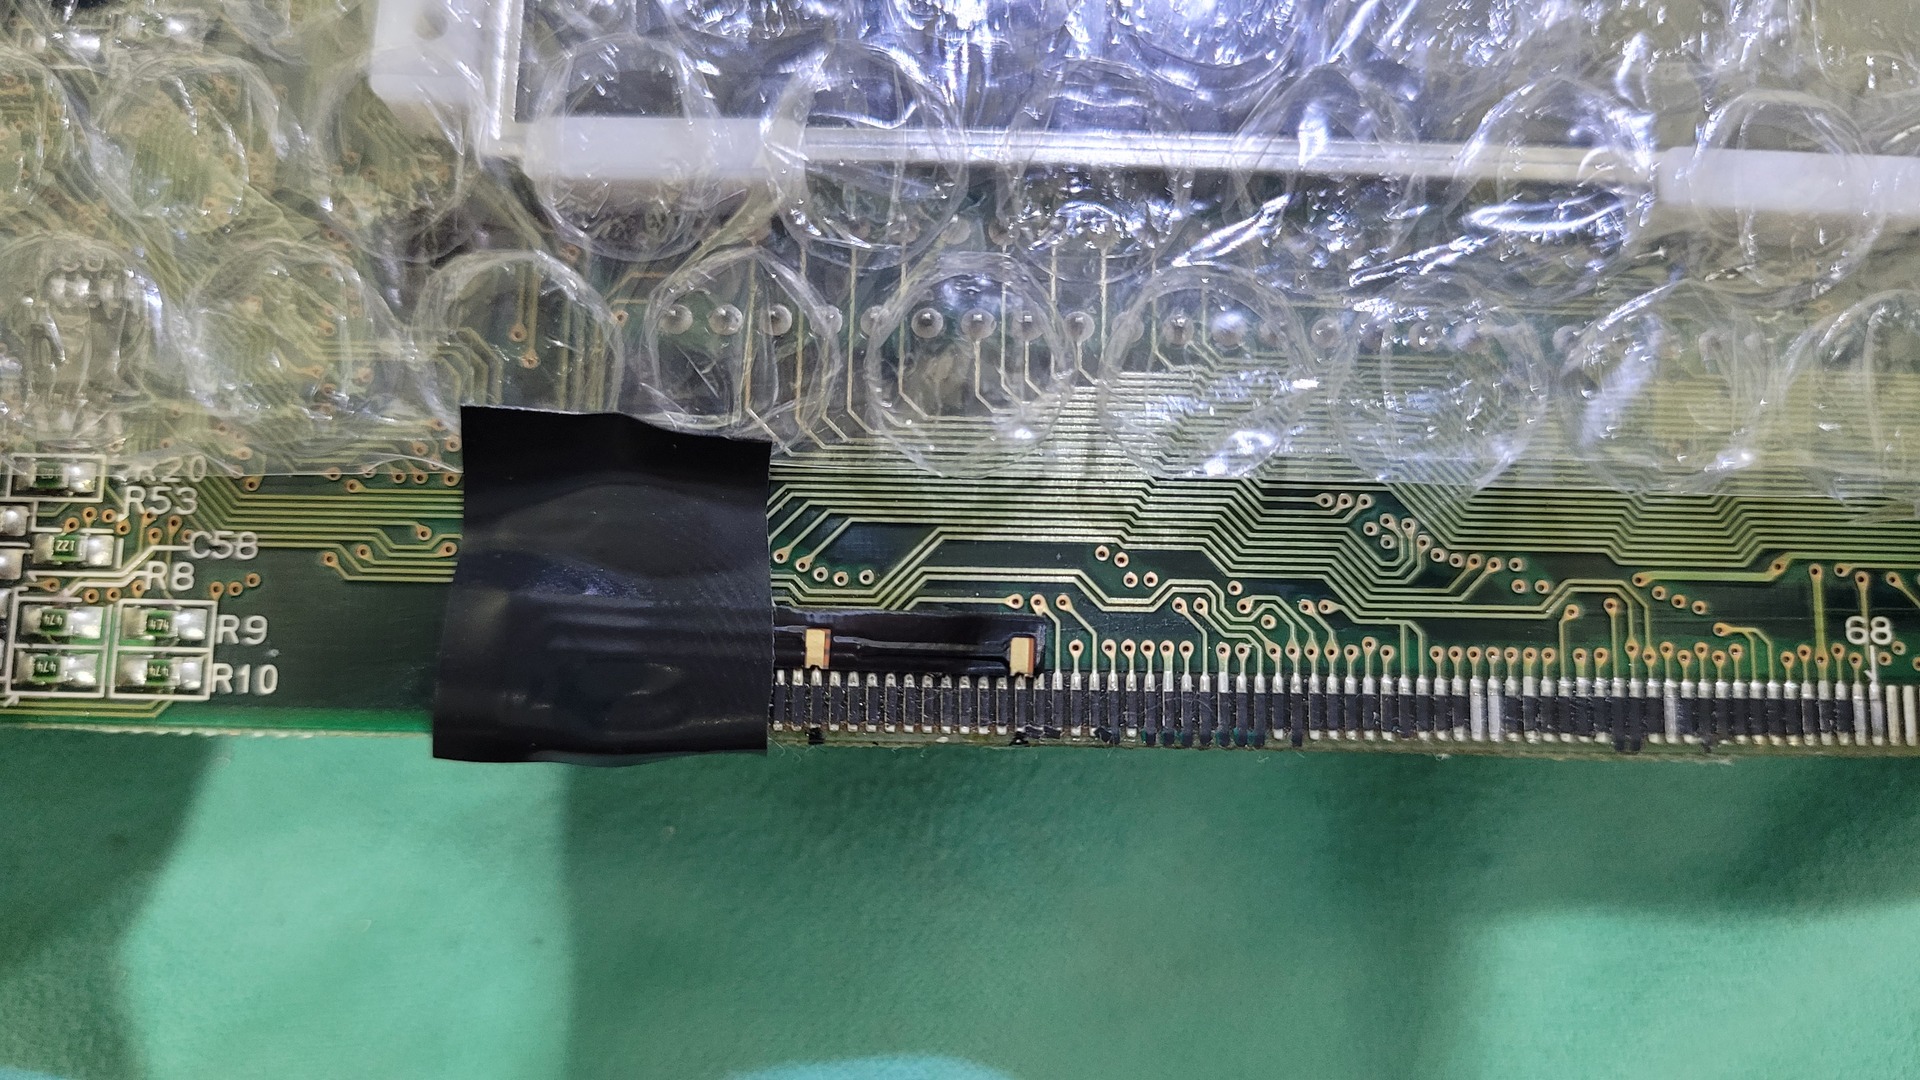
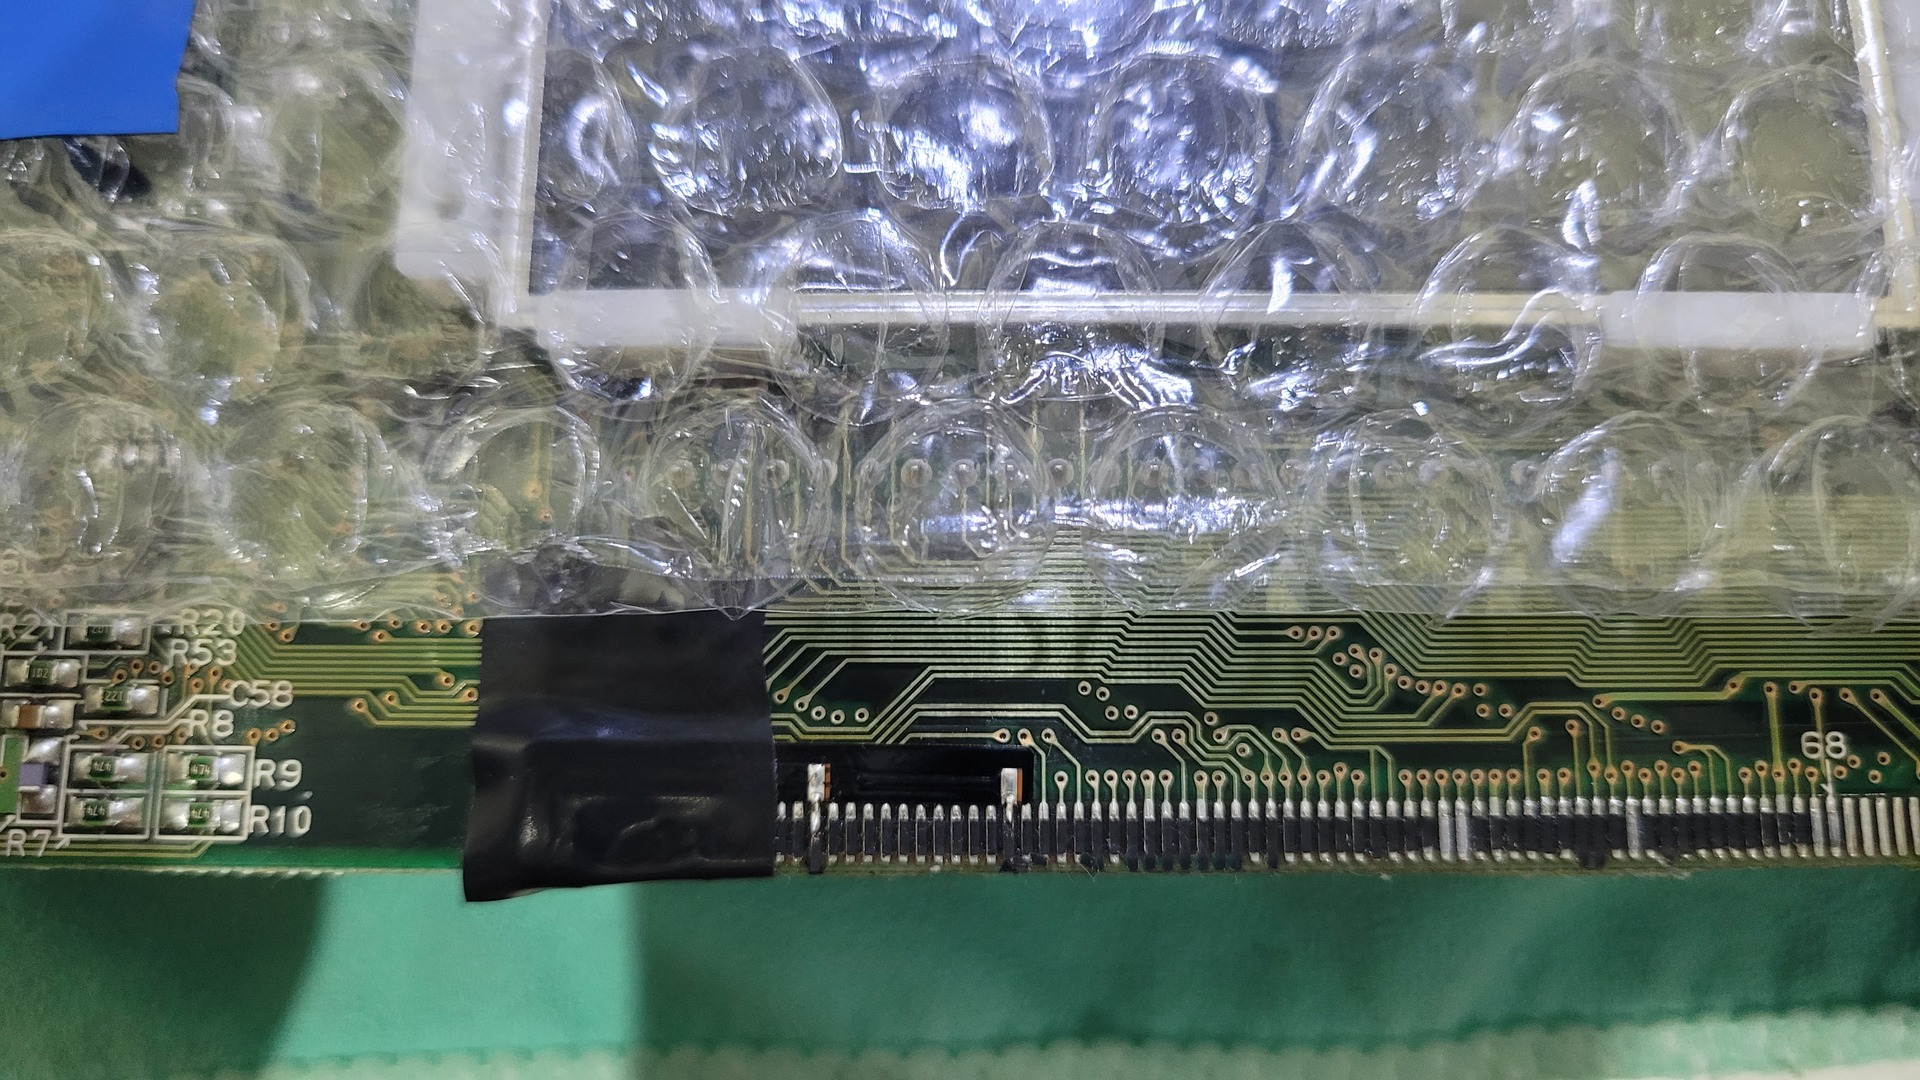
The last two solders are on the other side of the motherboard (front side), on two of the original display pins. I used some adhesive tape to maintain the flat cable in place before soldering.
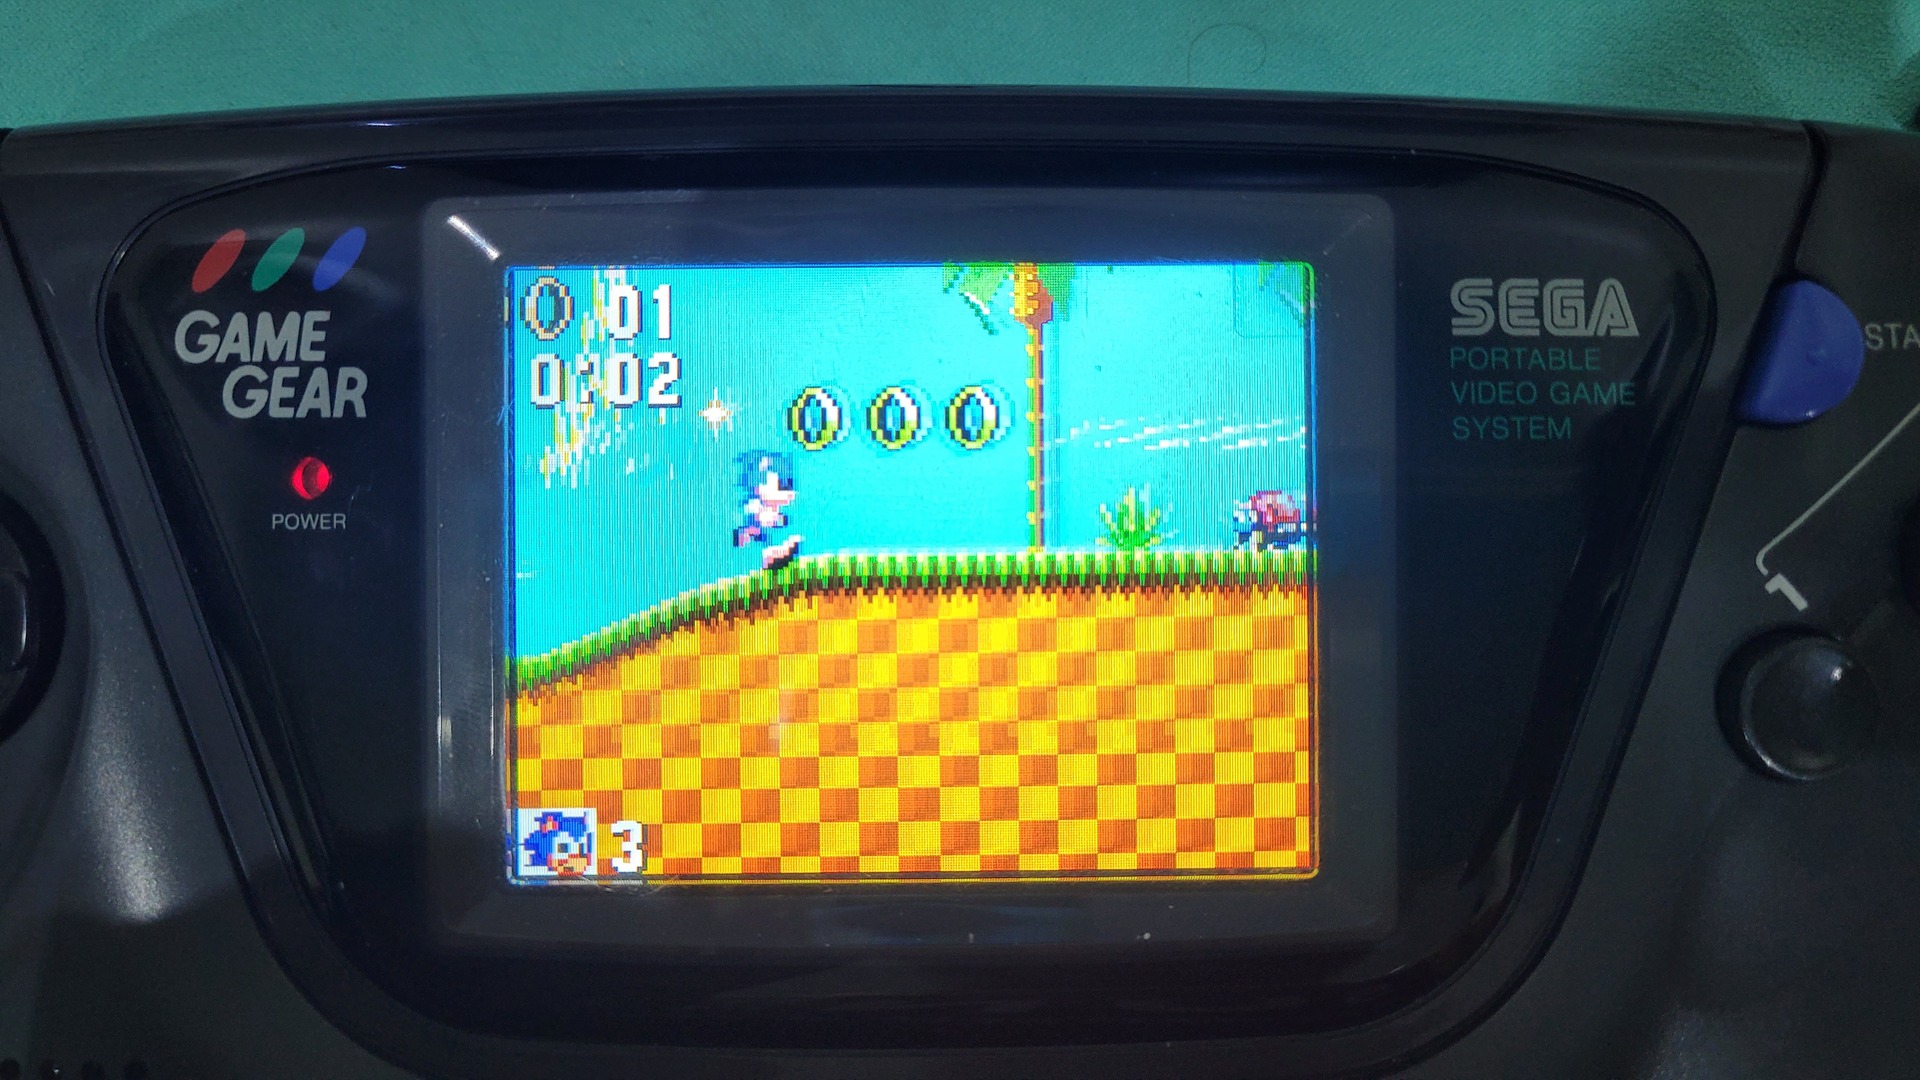
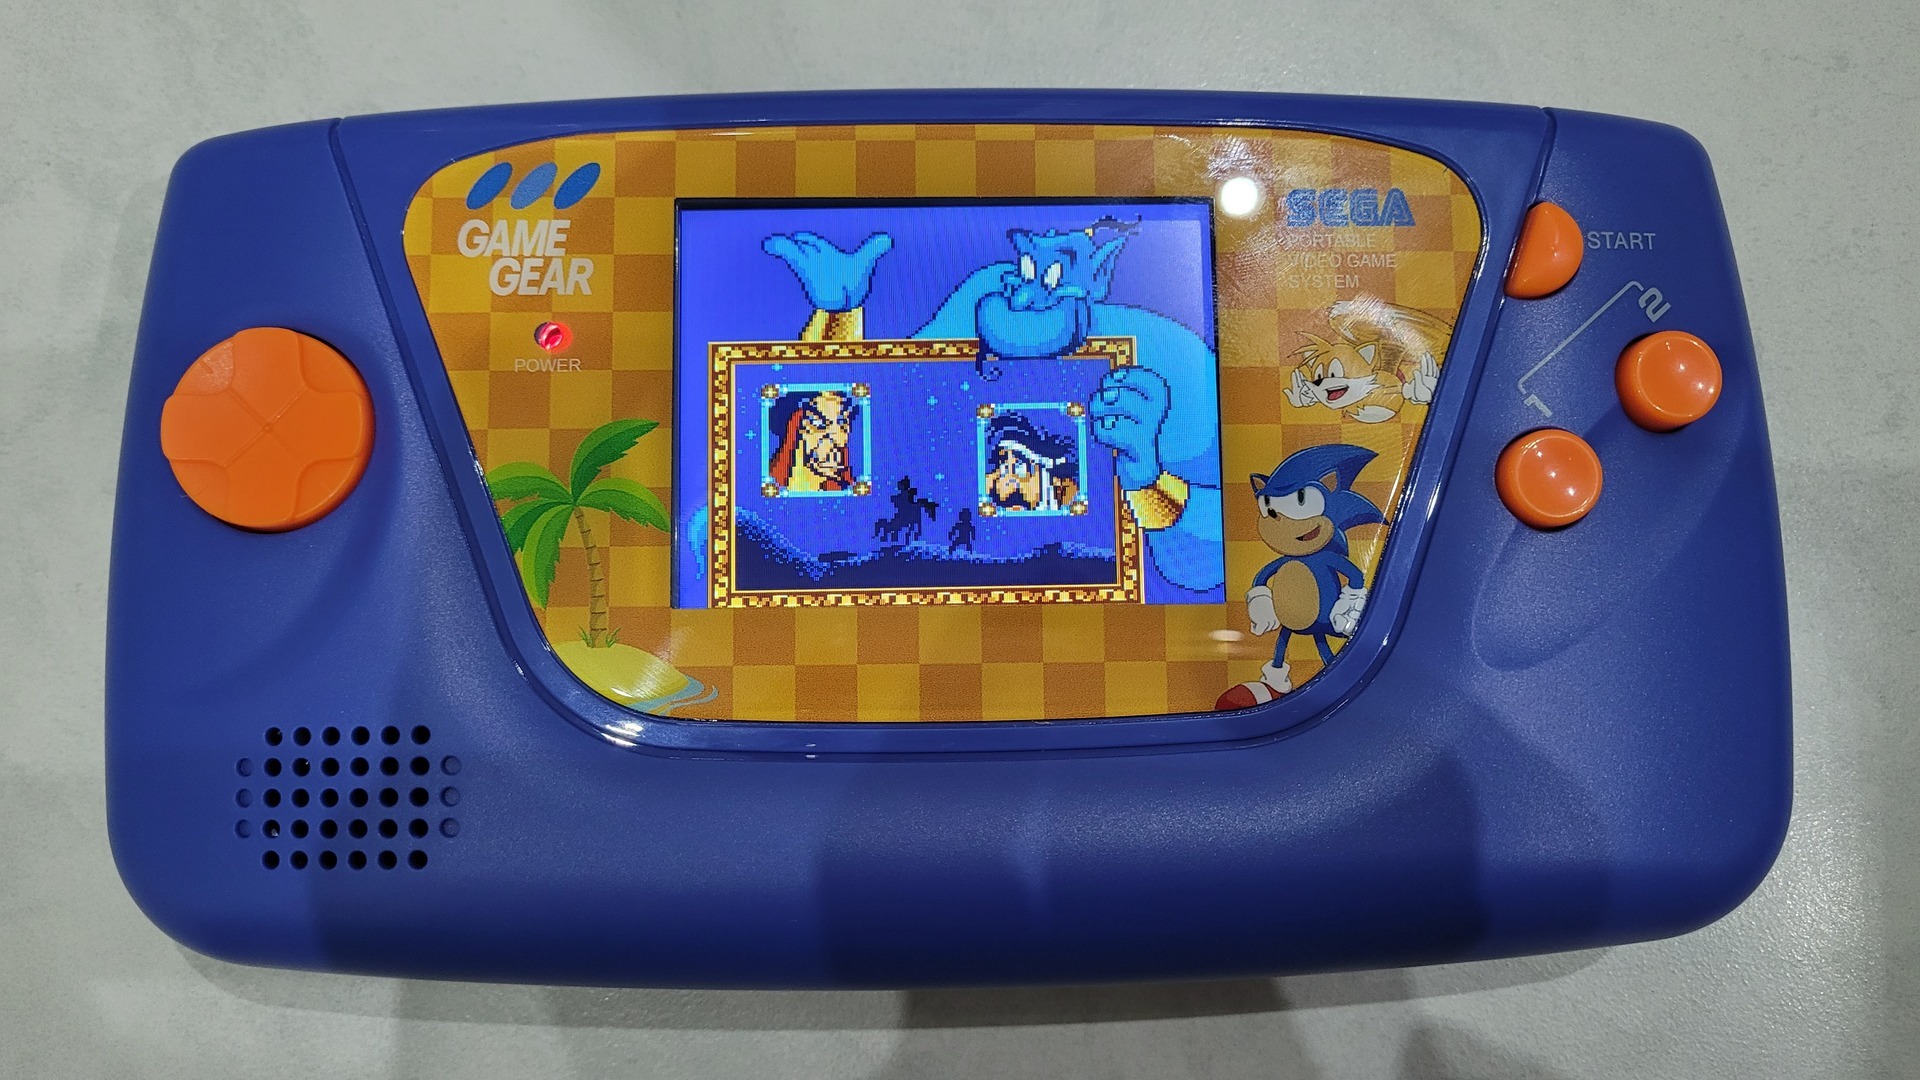
The final step for the new display was to plug the screen cable to the controler’s connector and test it before inserting everything in the new shell.

Remounting in the new shell
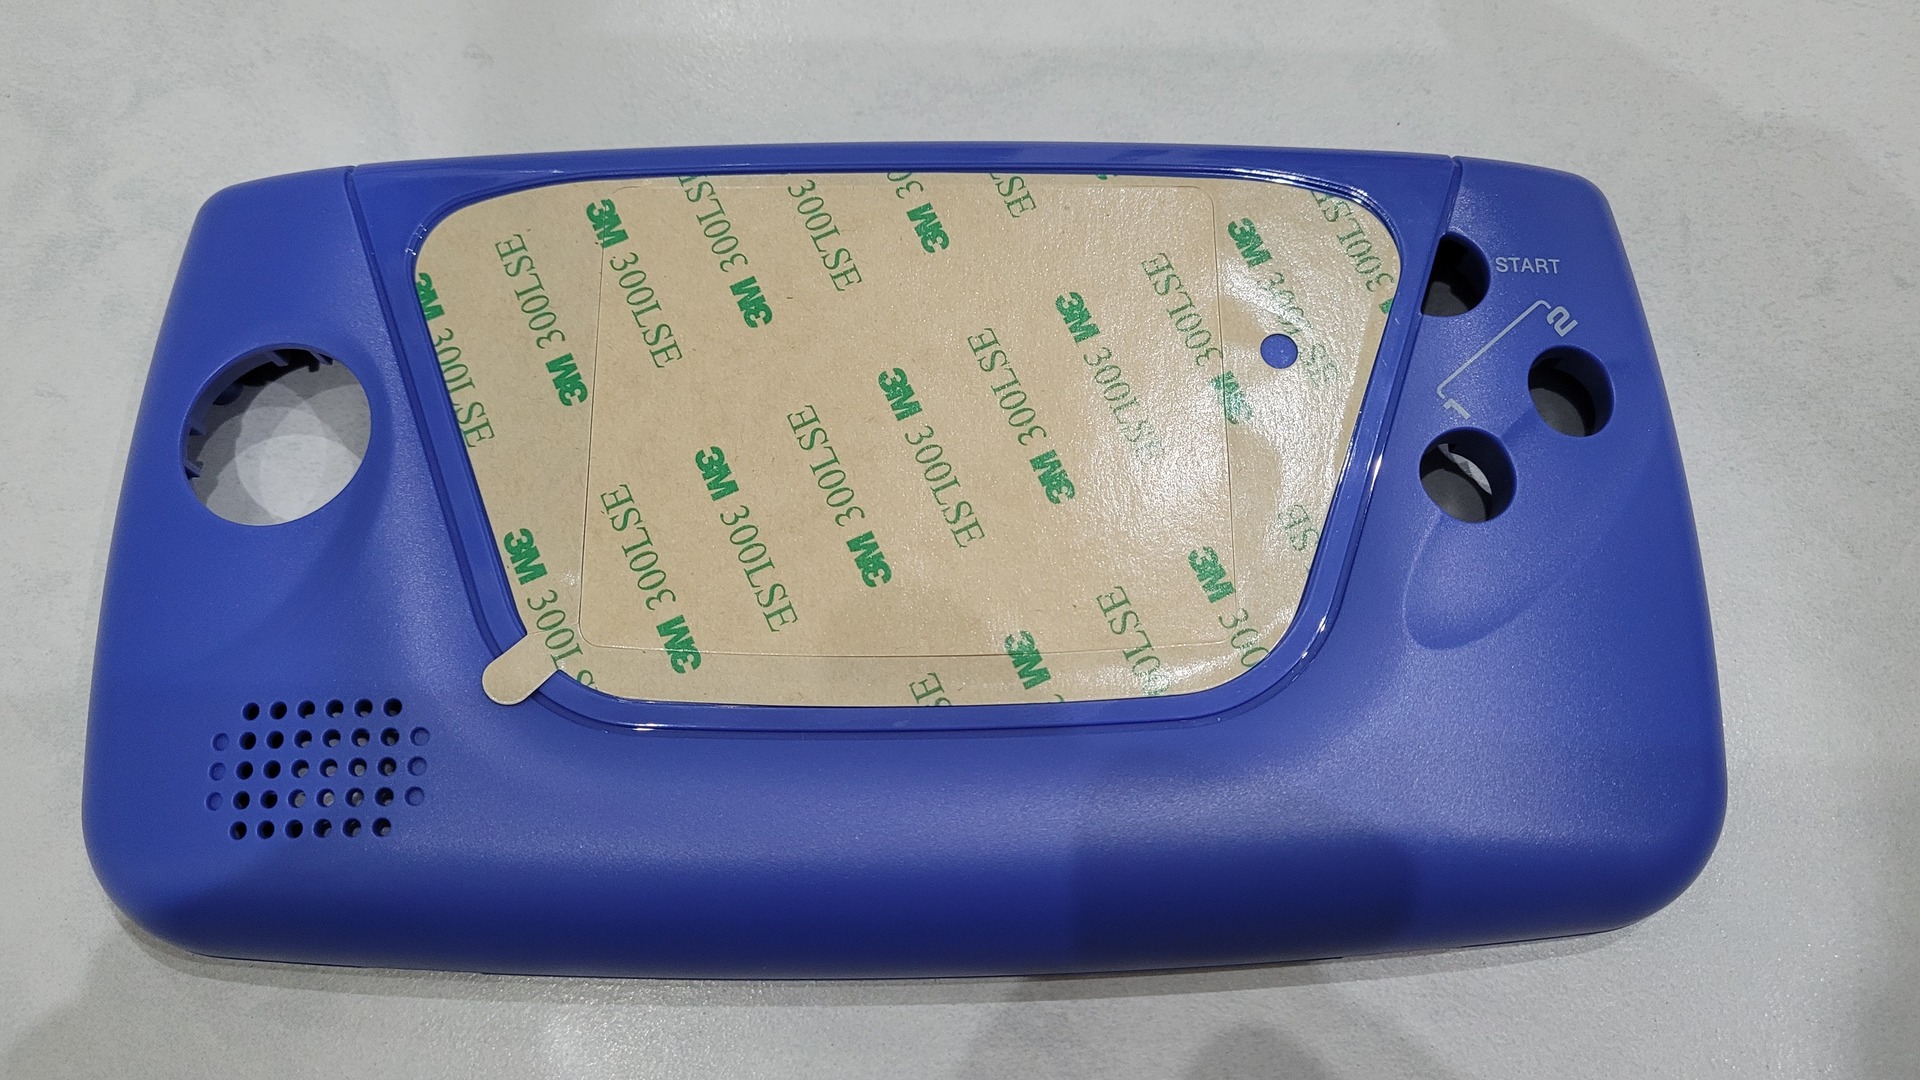
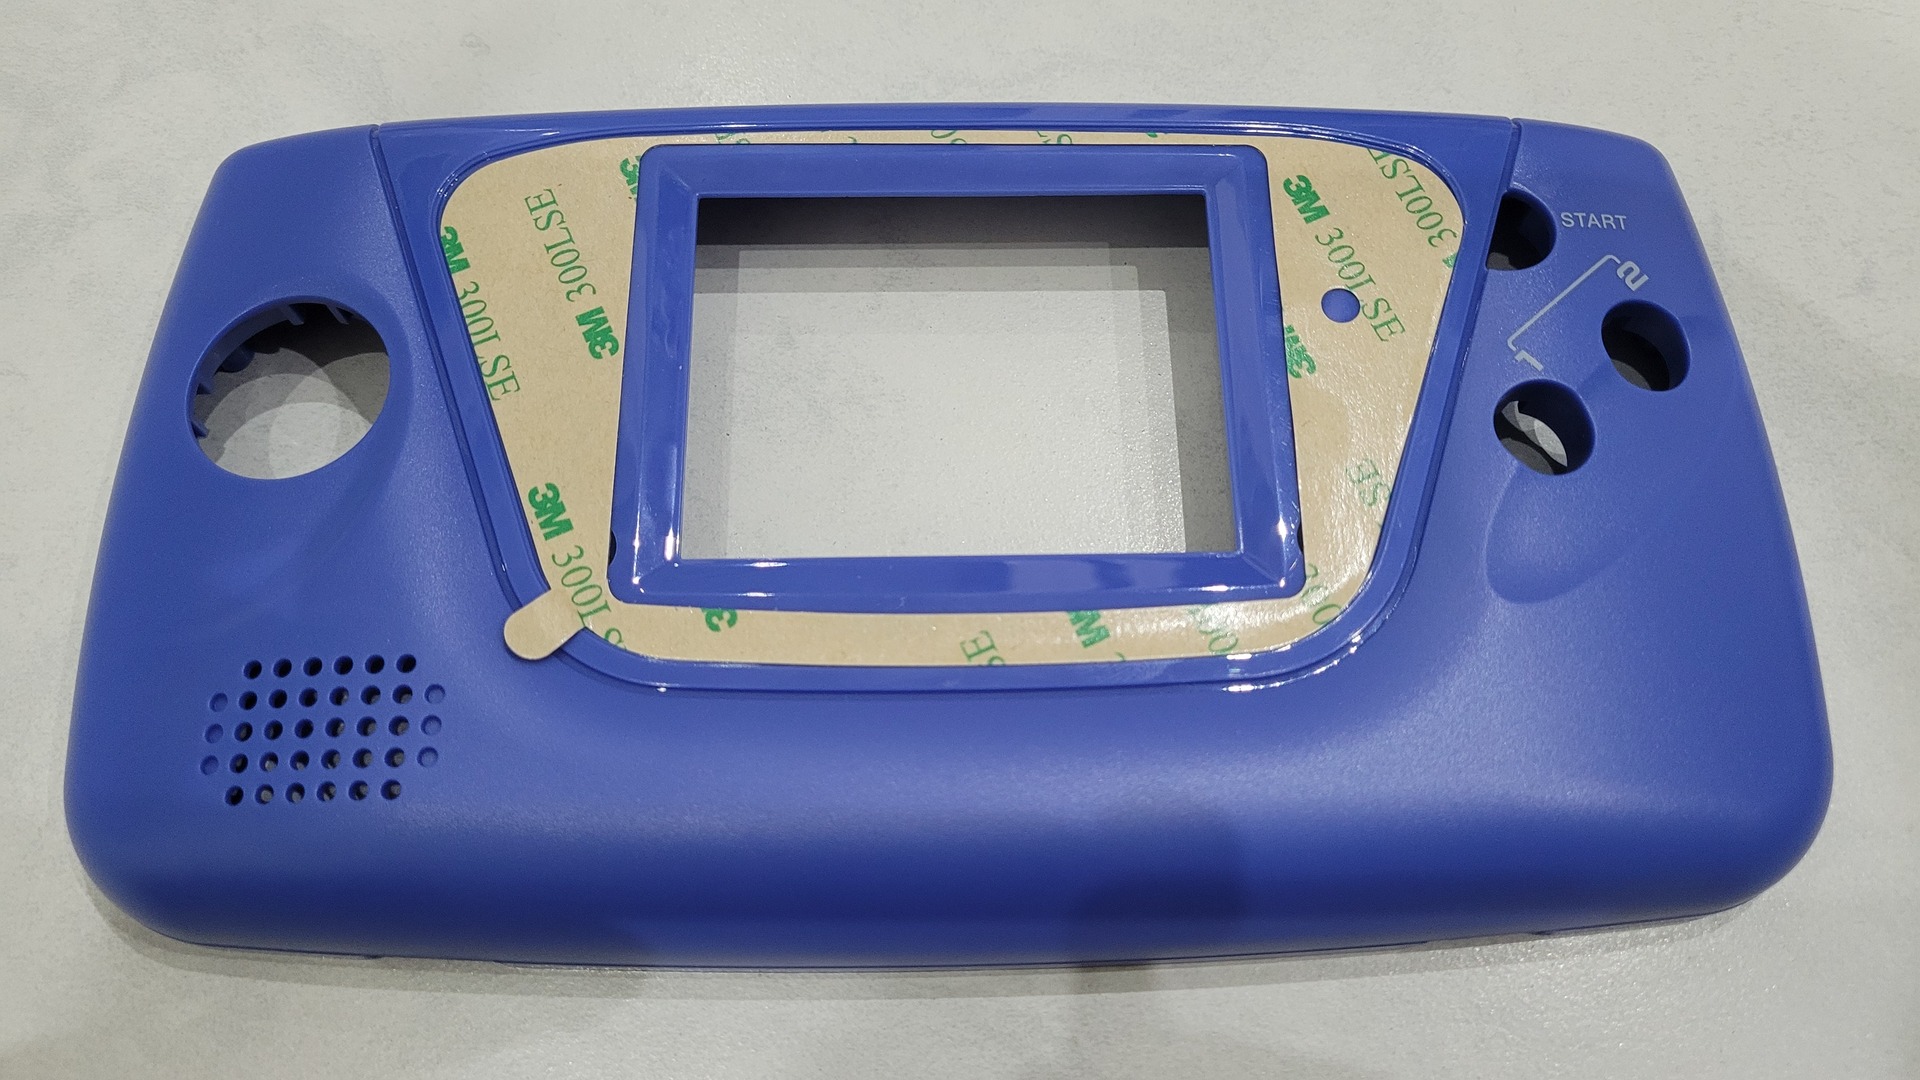
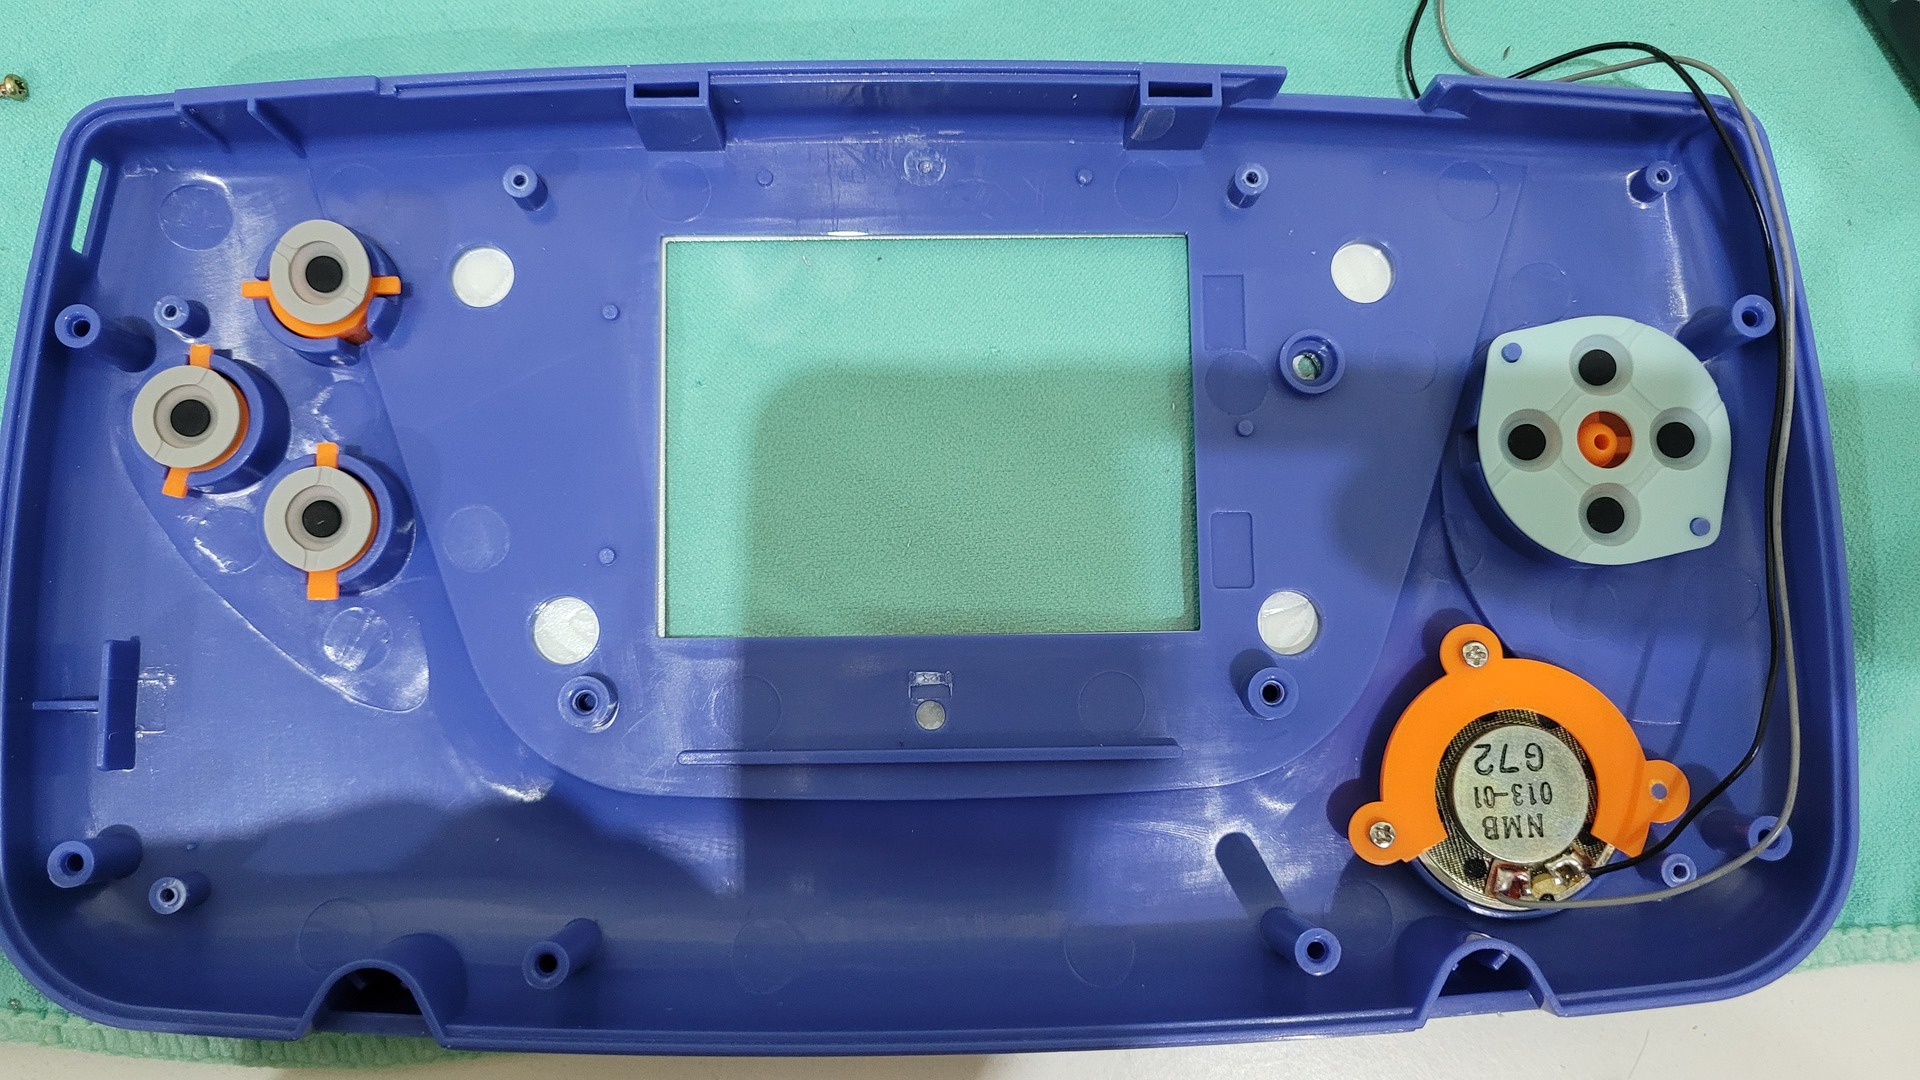
Preparing the front face
The protective glass has just to be glued with the provided double sided adhesive tape.
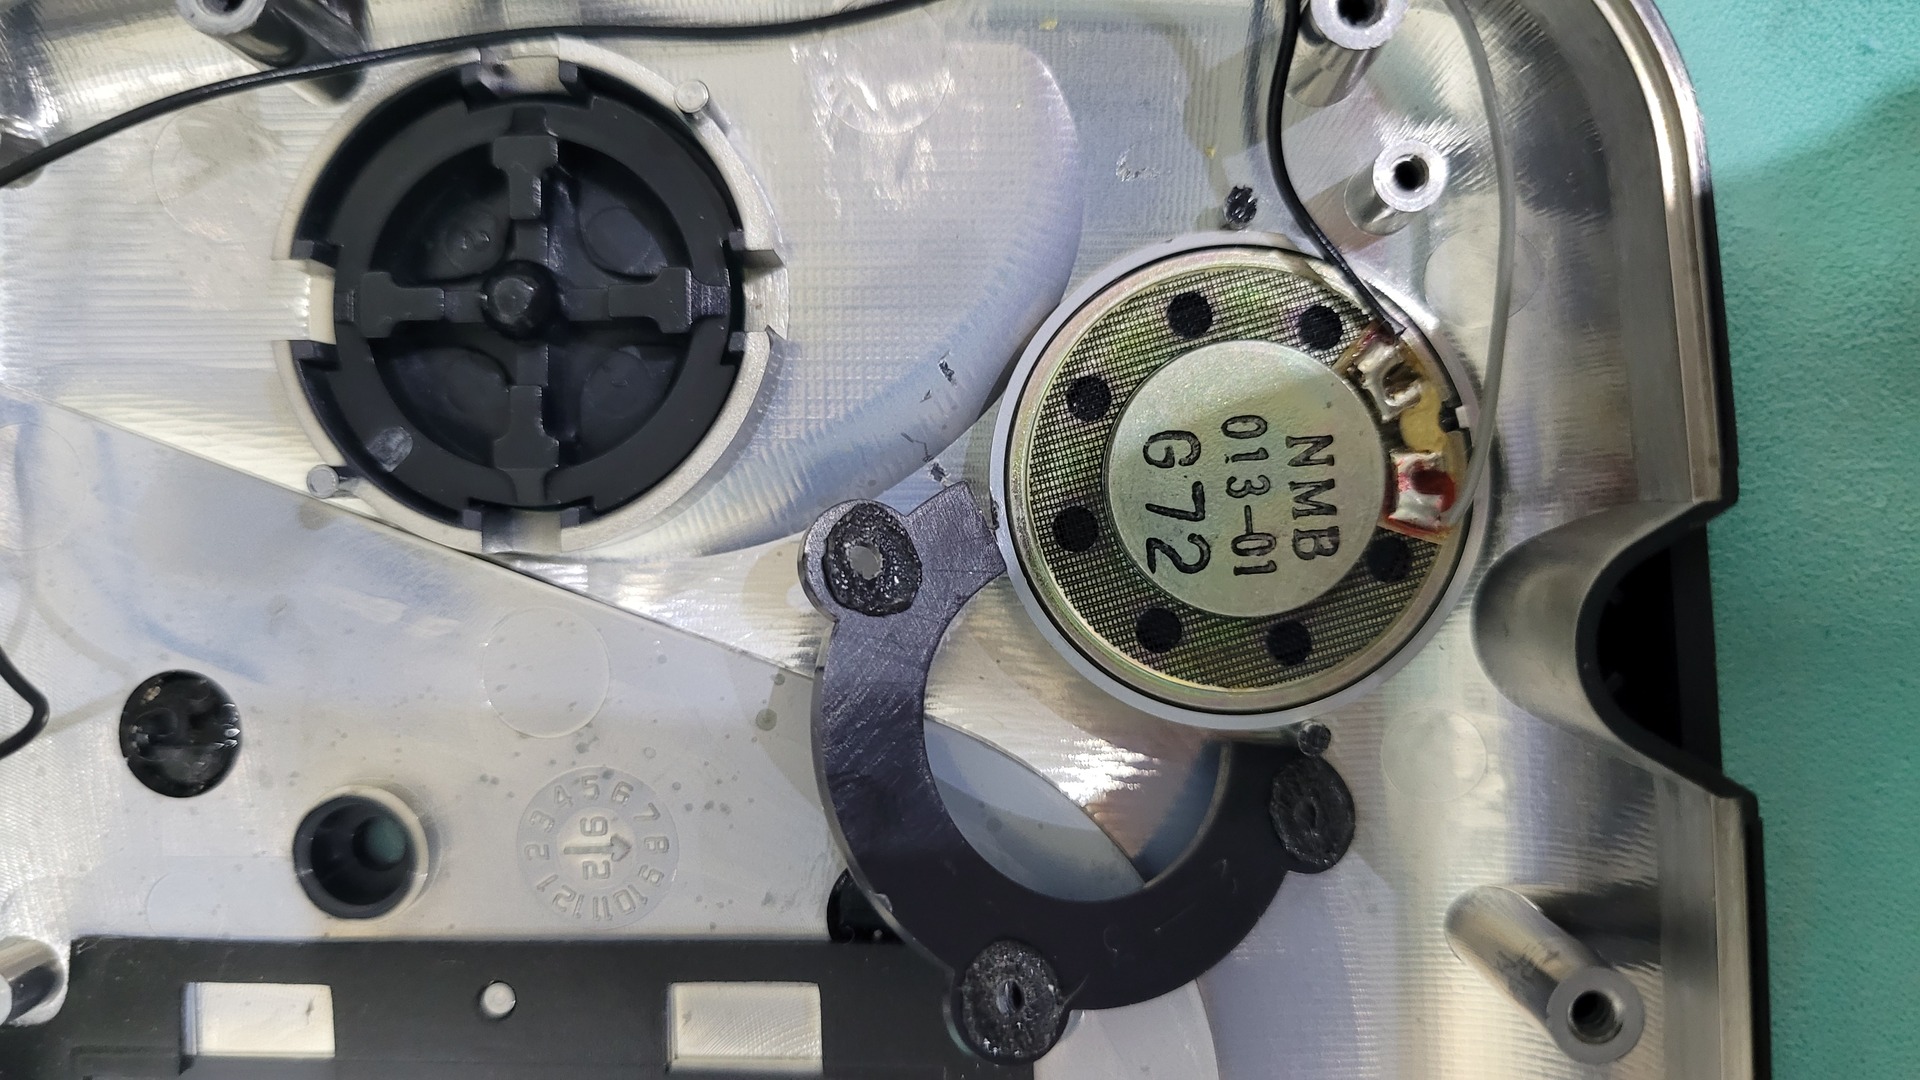
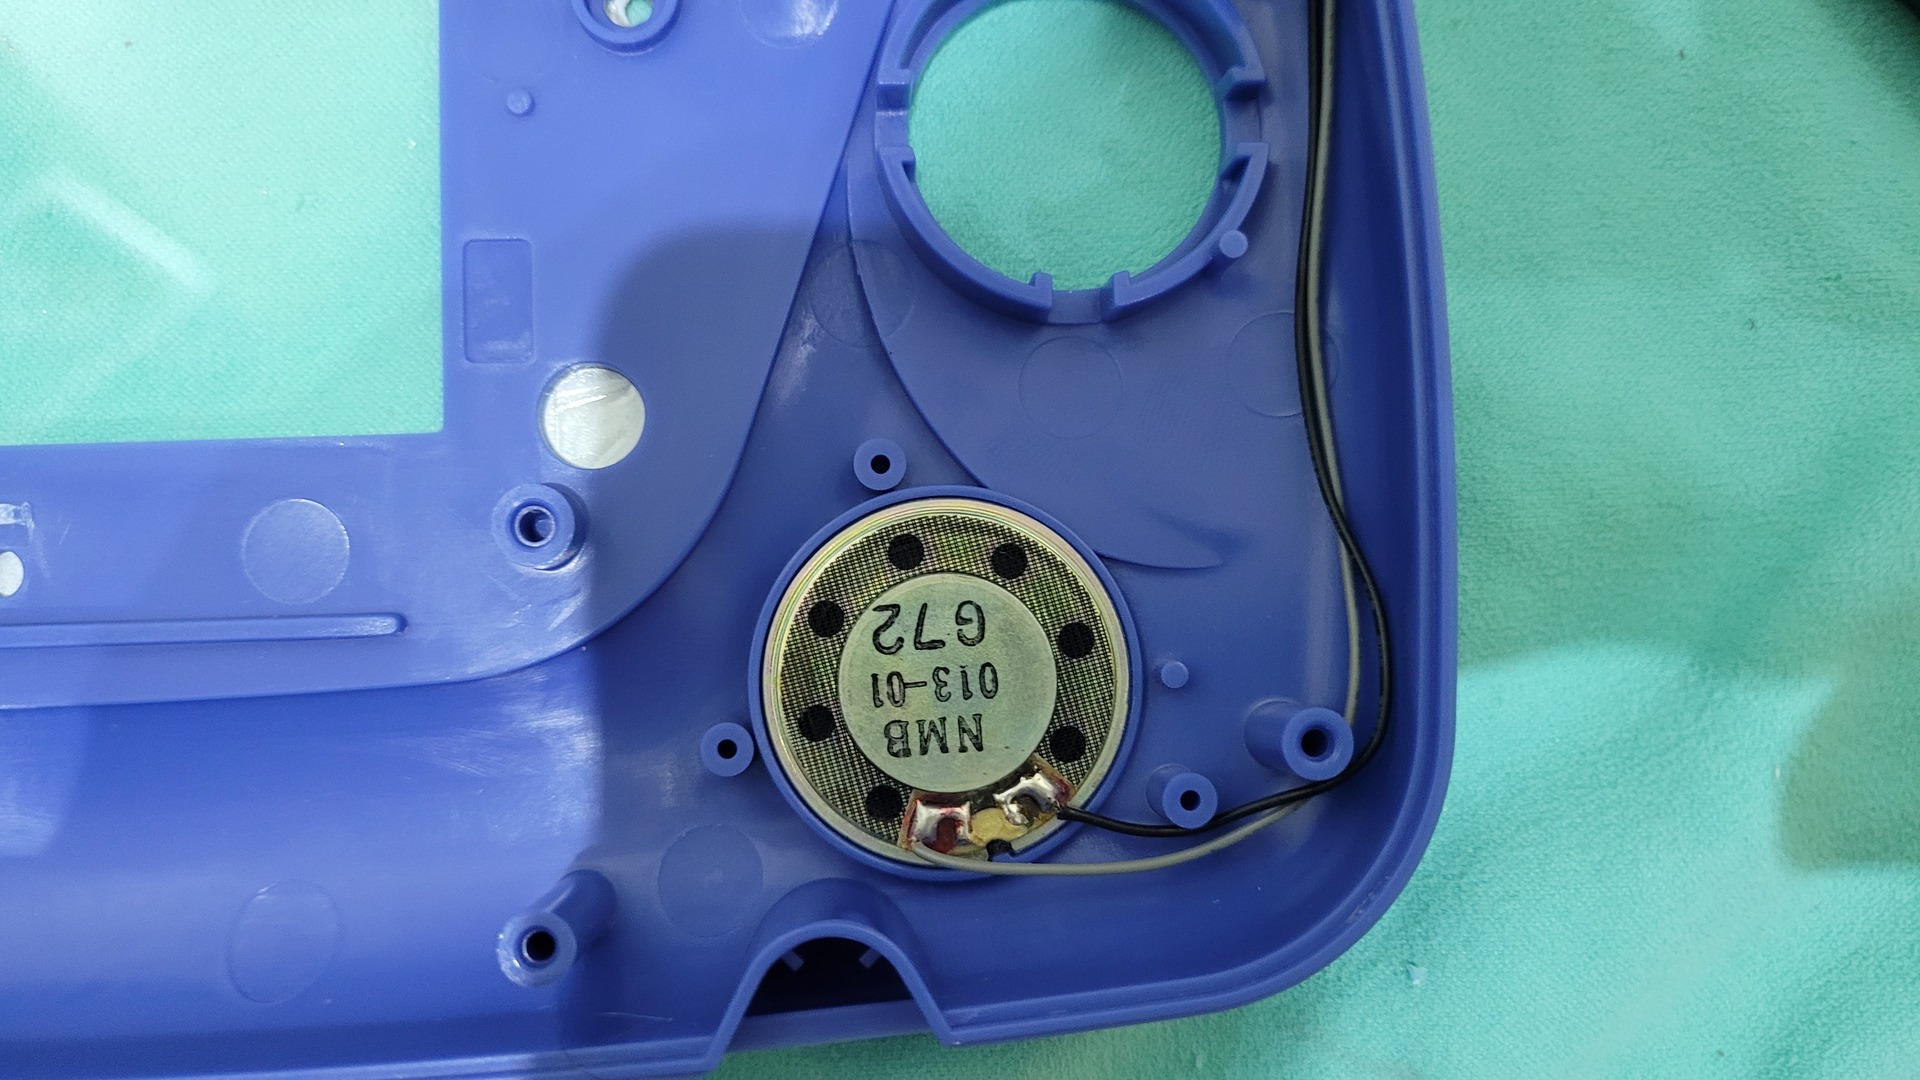
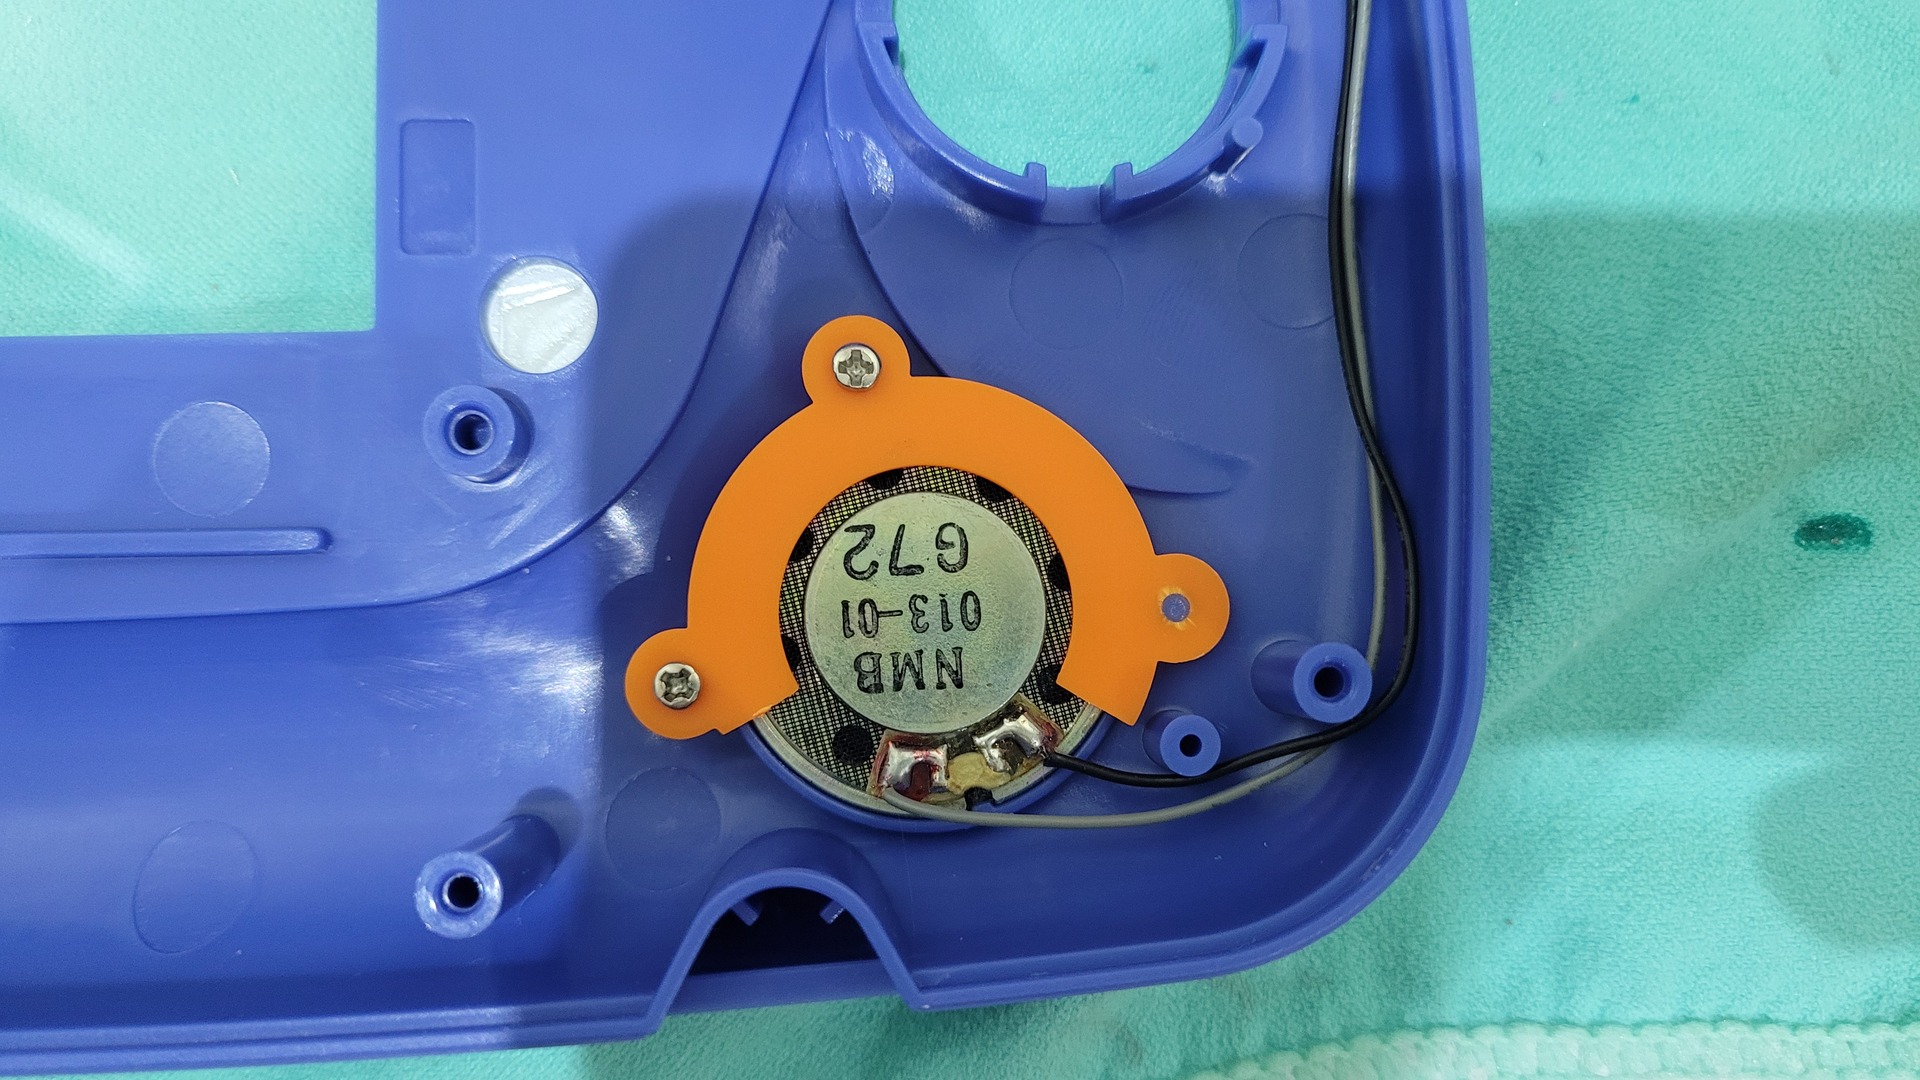
Audio speaker
The speaker has to be removed from the original front shell (with its wires). The speaker is simply fixed with a small plastic which is replaced by a new one that is provided with the kit.
Putting all together
The front part : adding the buttons and fixing the motherboard:
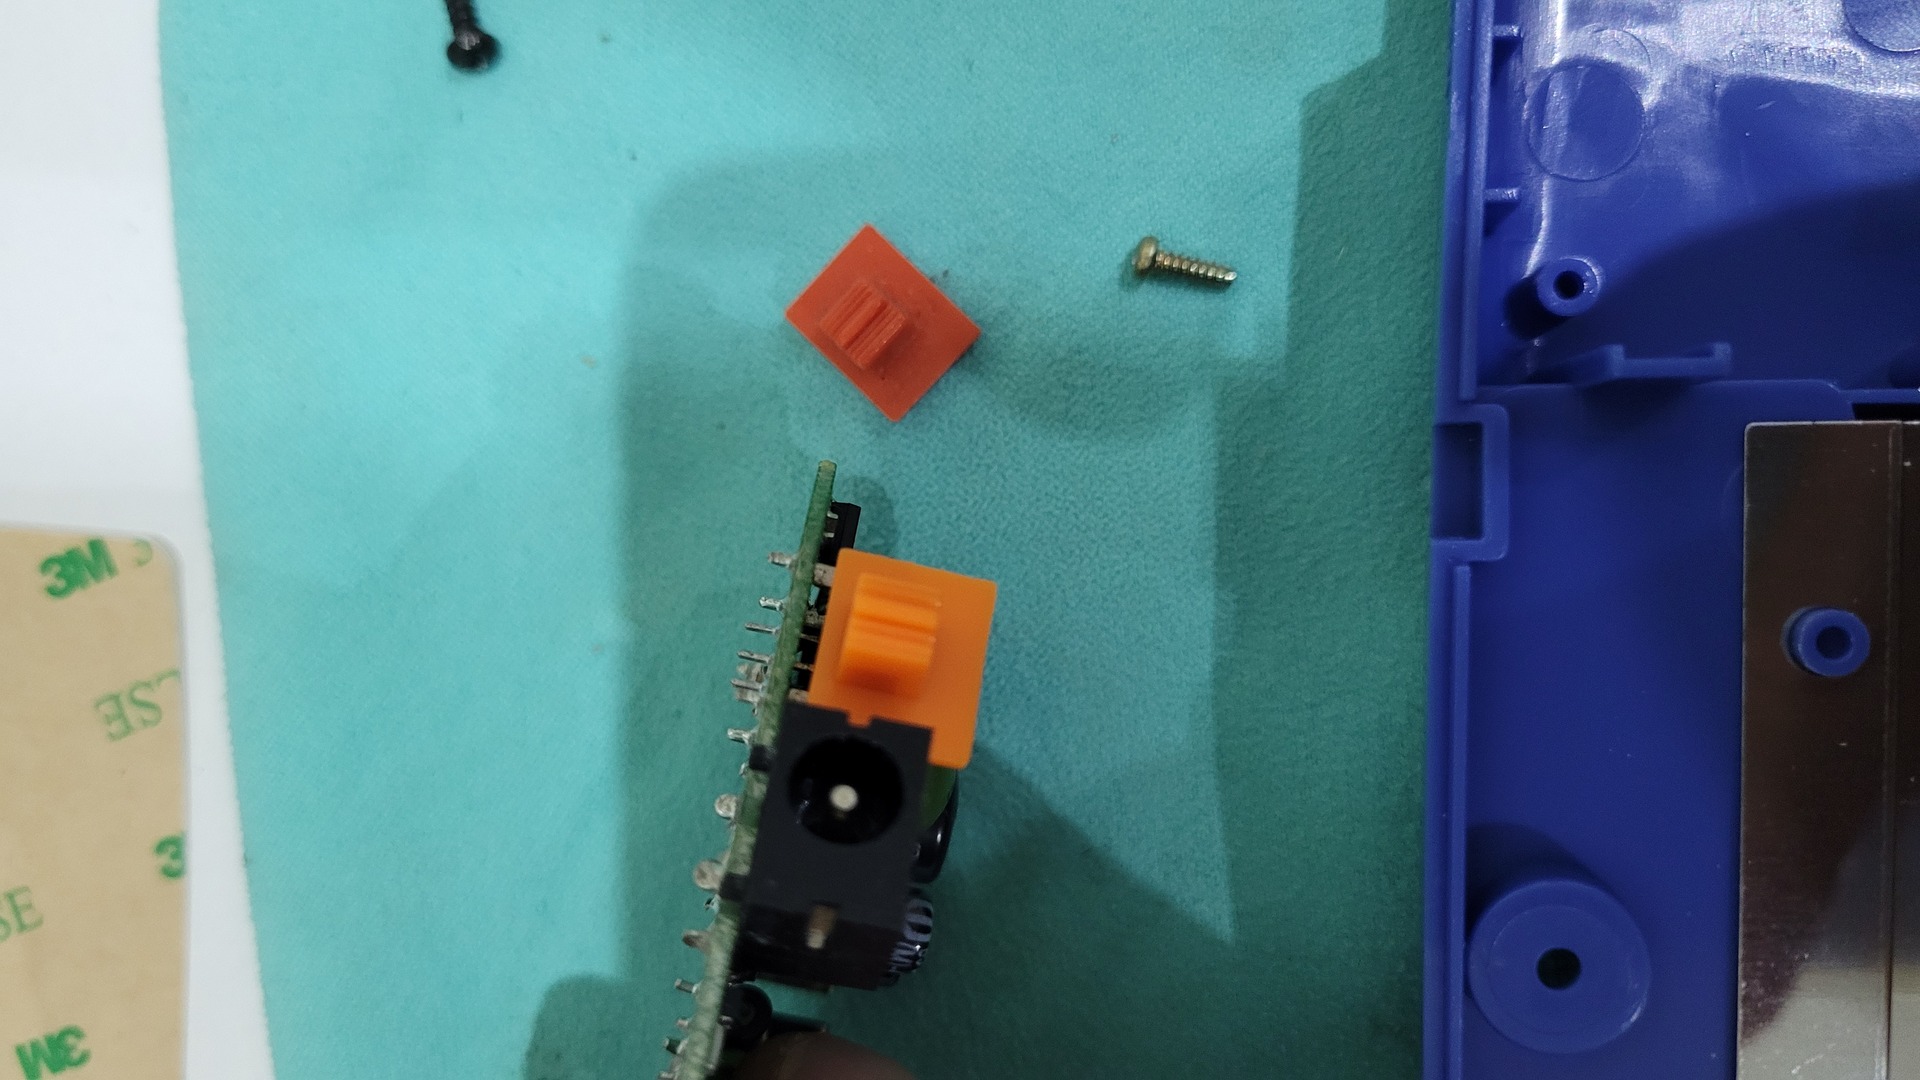
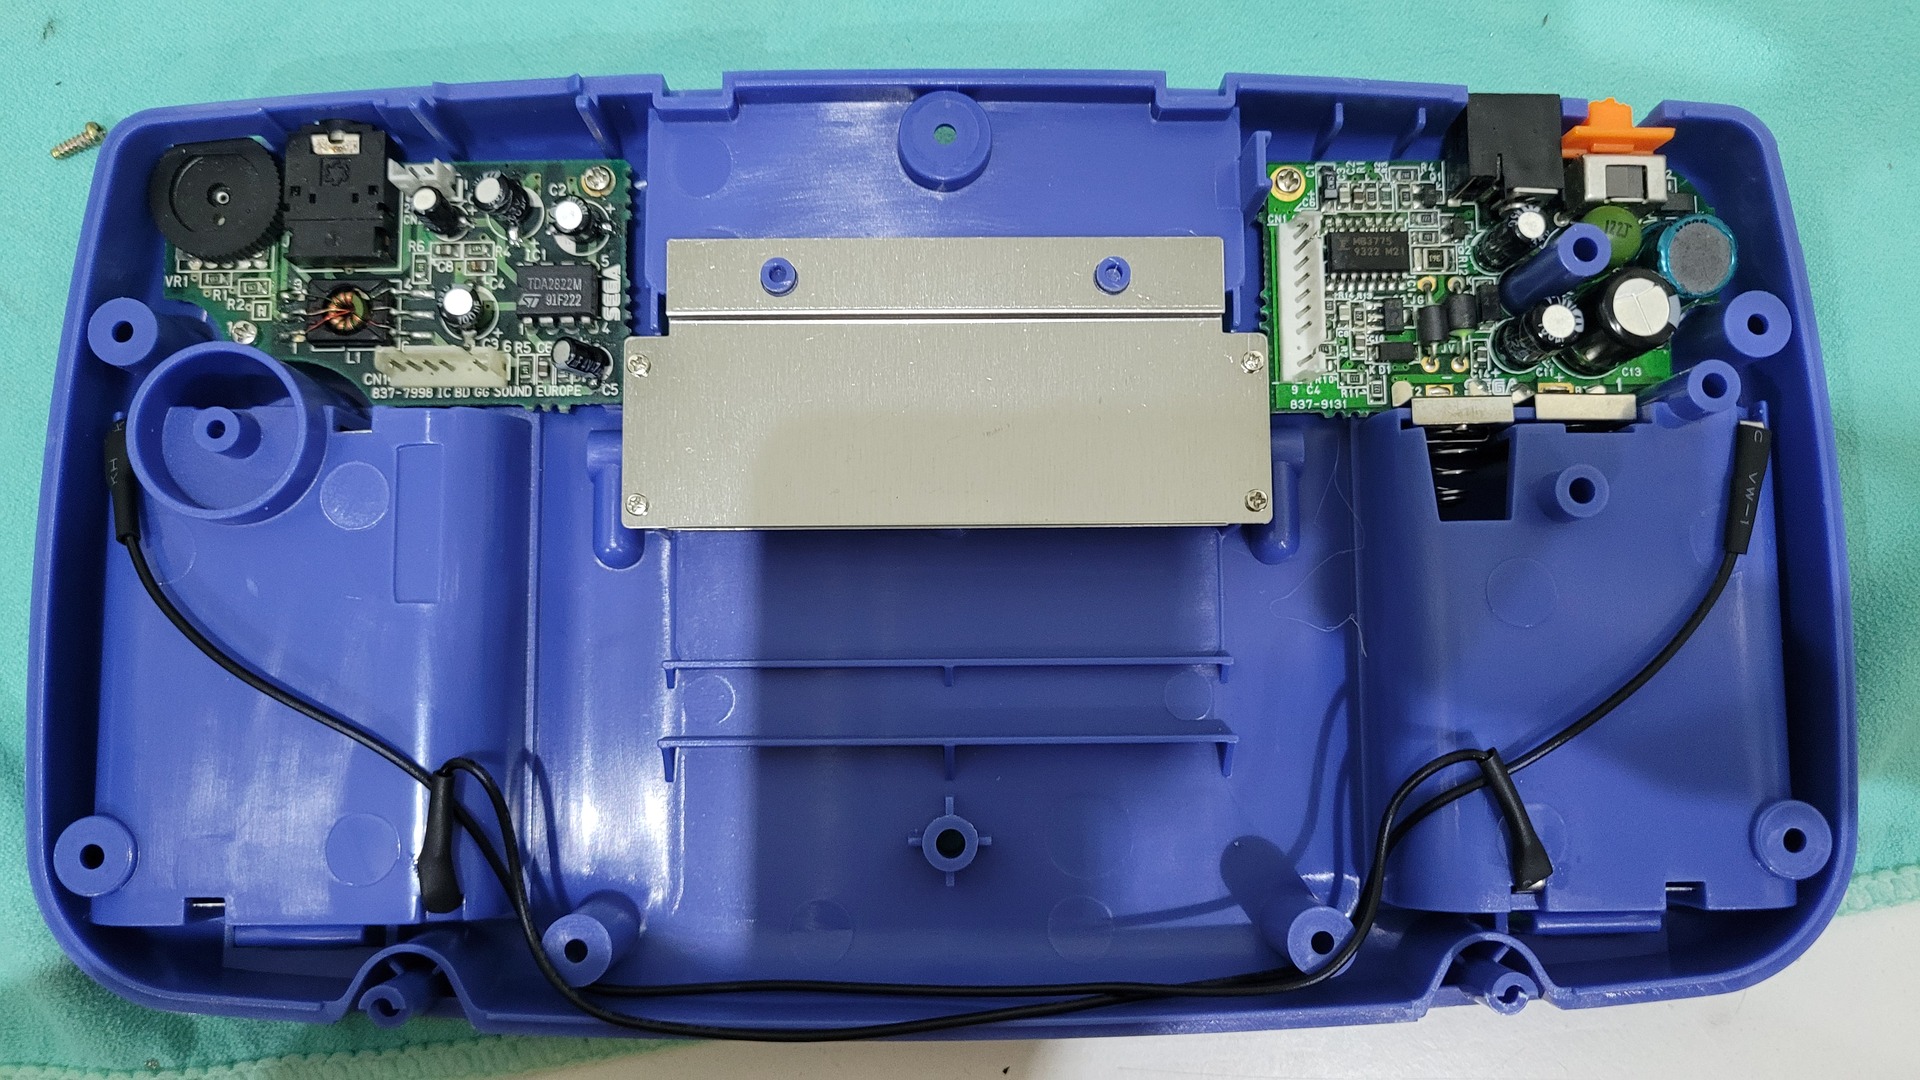
For the back part, the power and audio blocks must be removed from the original shell. I also replaced the red on / off button cover.
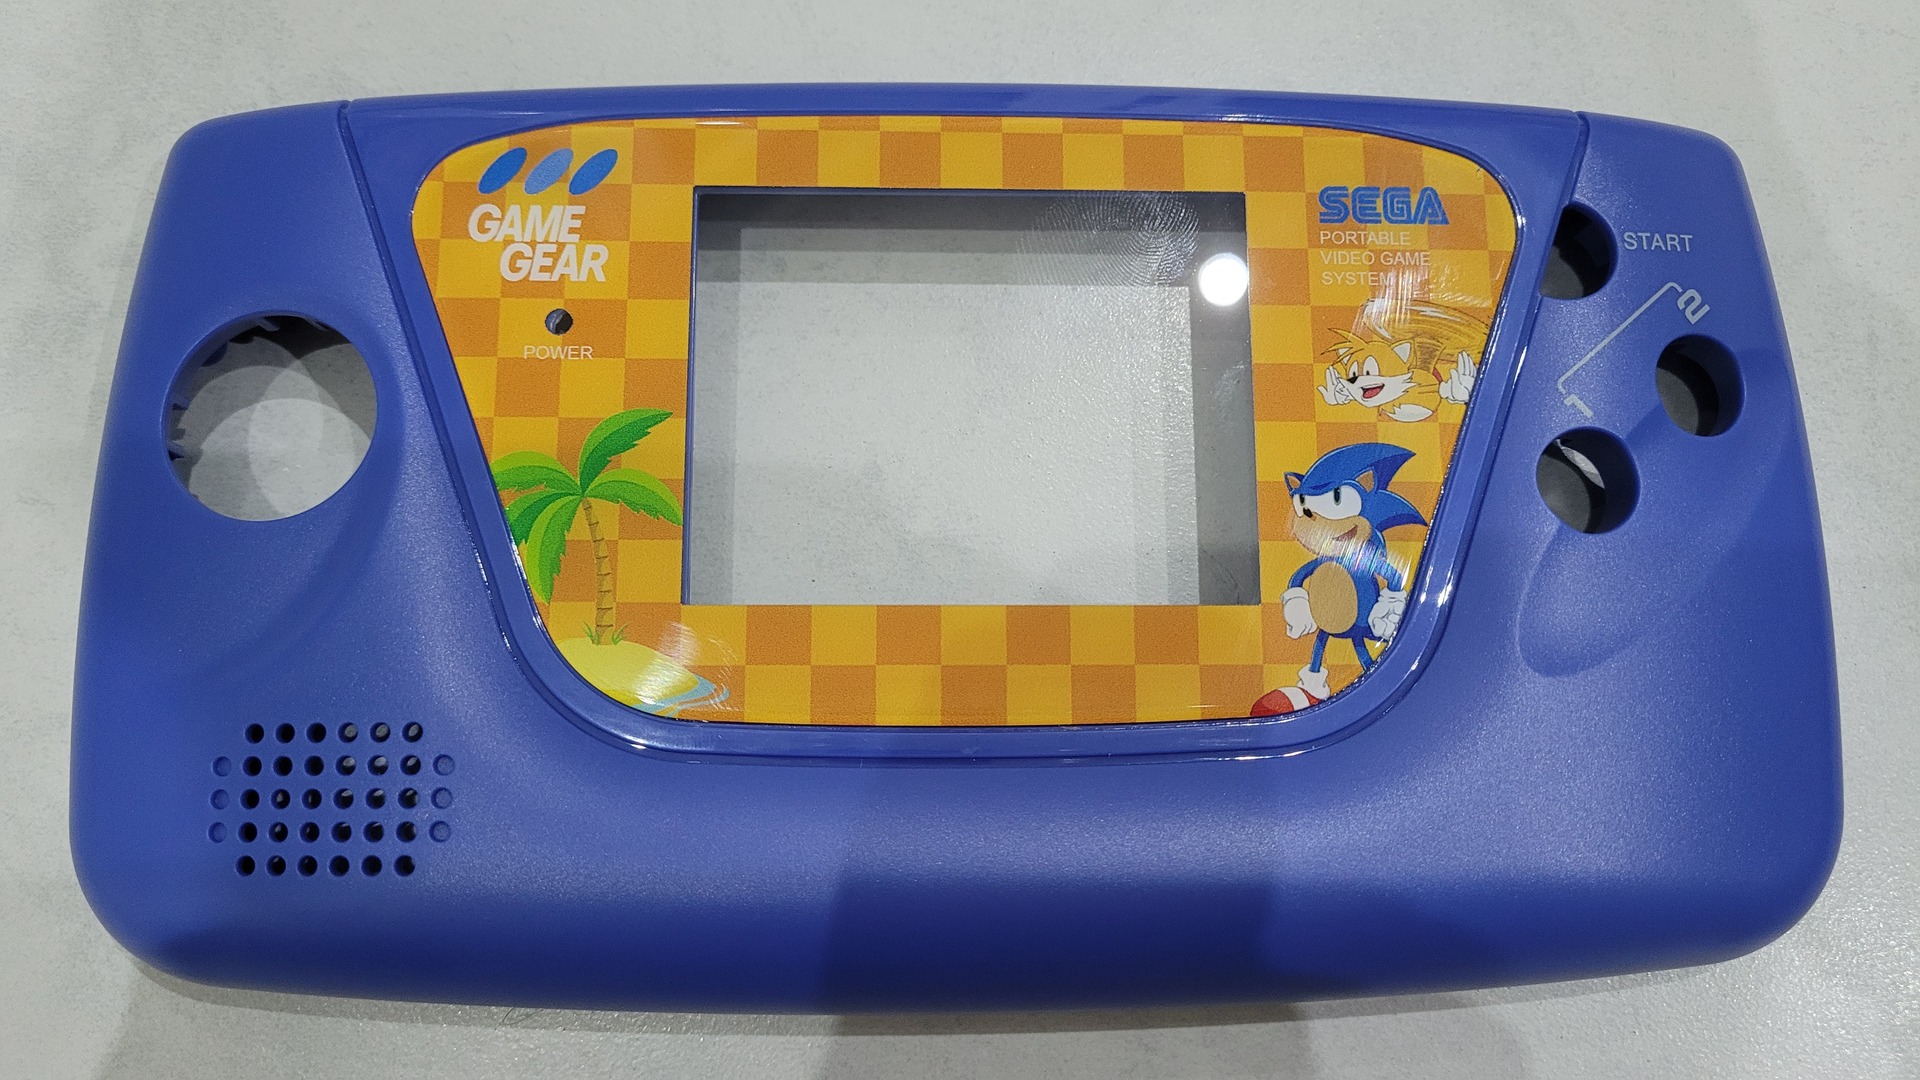
Final Result
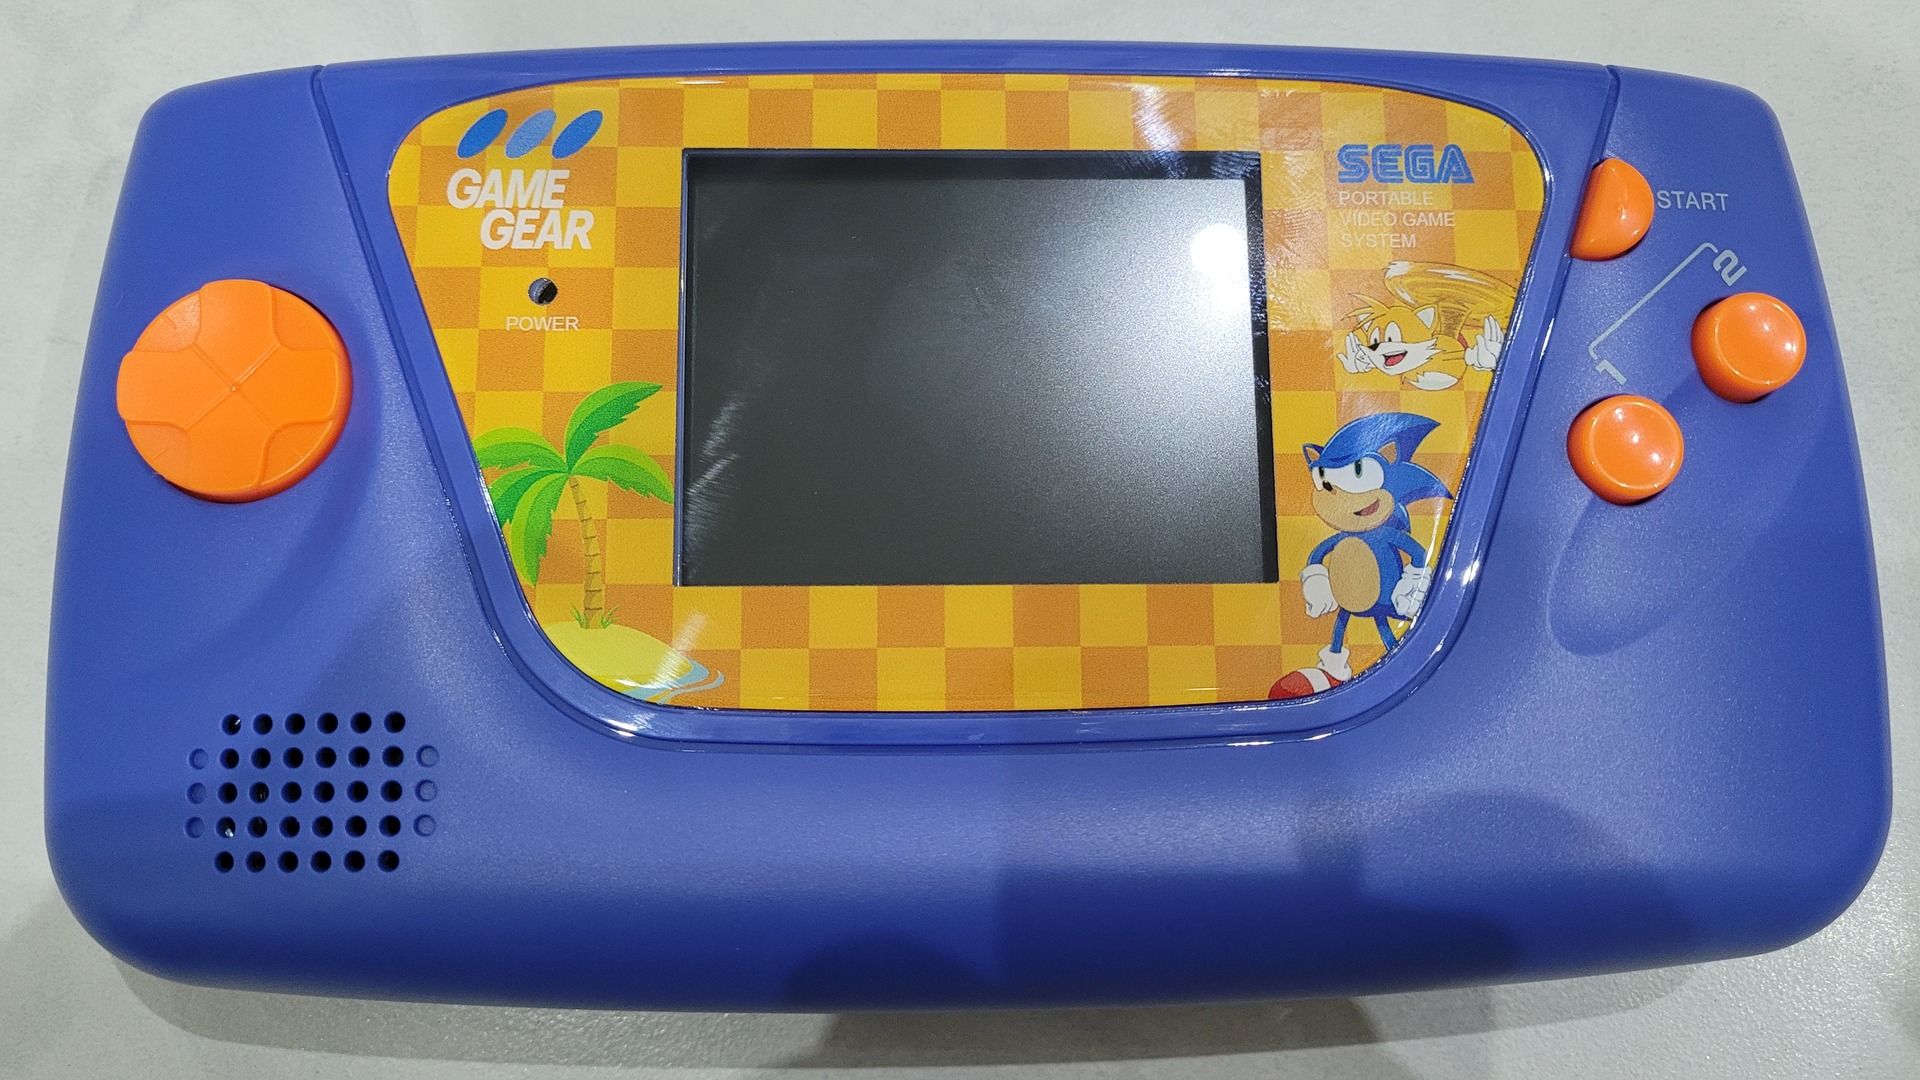

[…] time ago, I wrote about my pimped Game Gear with a brand new shell and an new LCD display from Retrosix. We all know that the orginal Game Gear […]