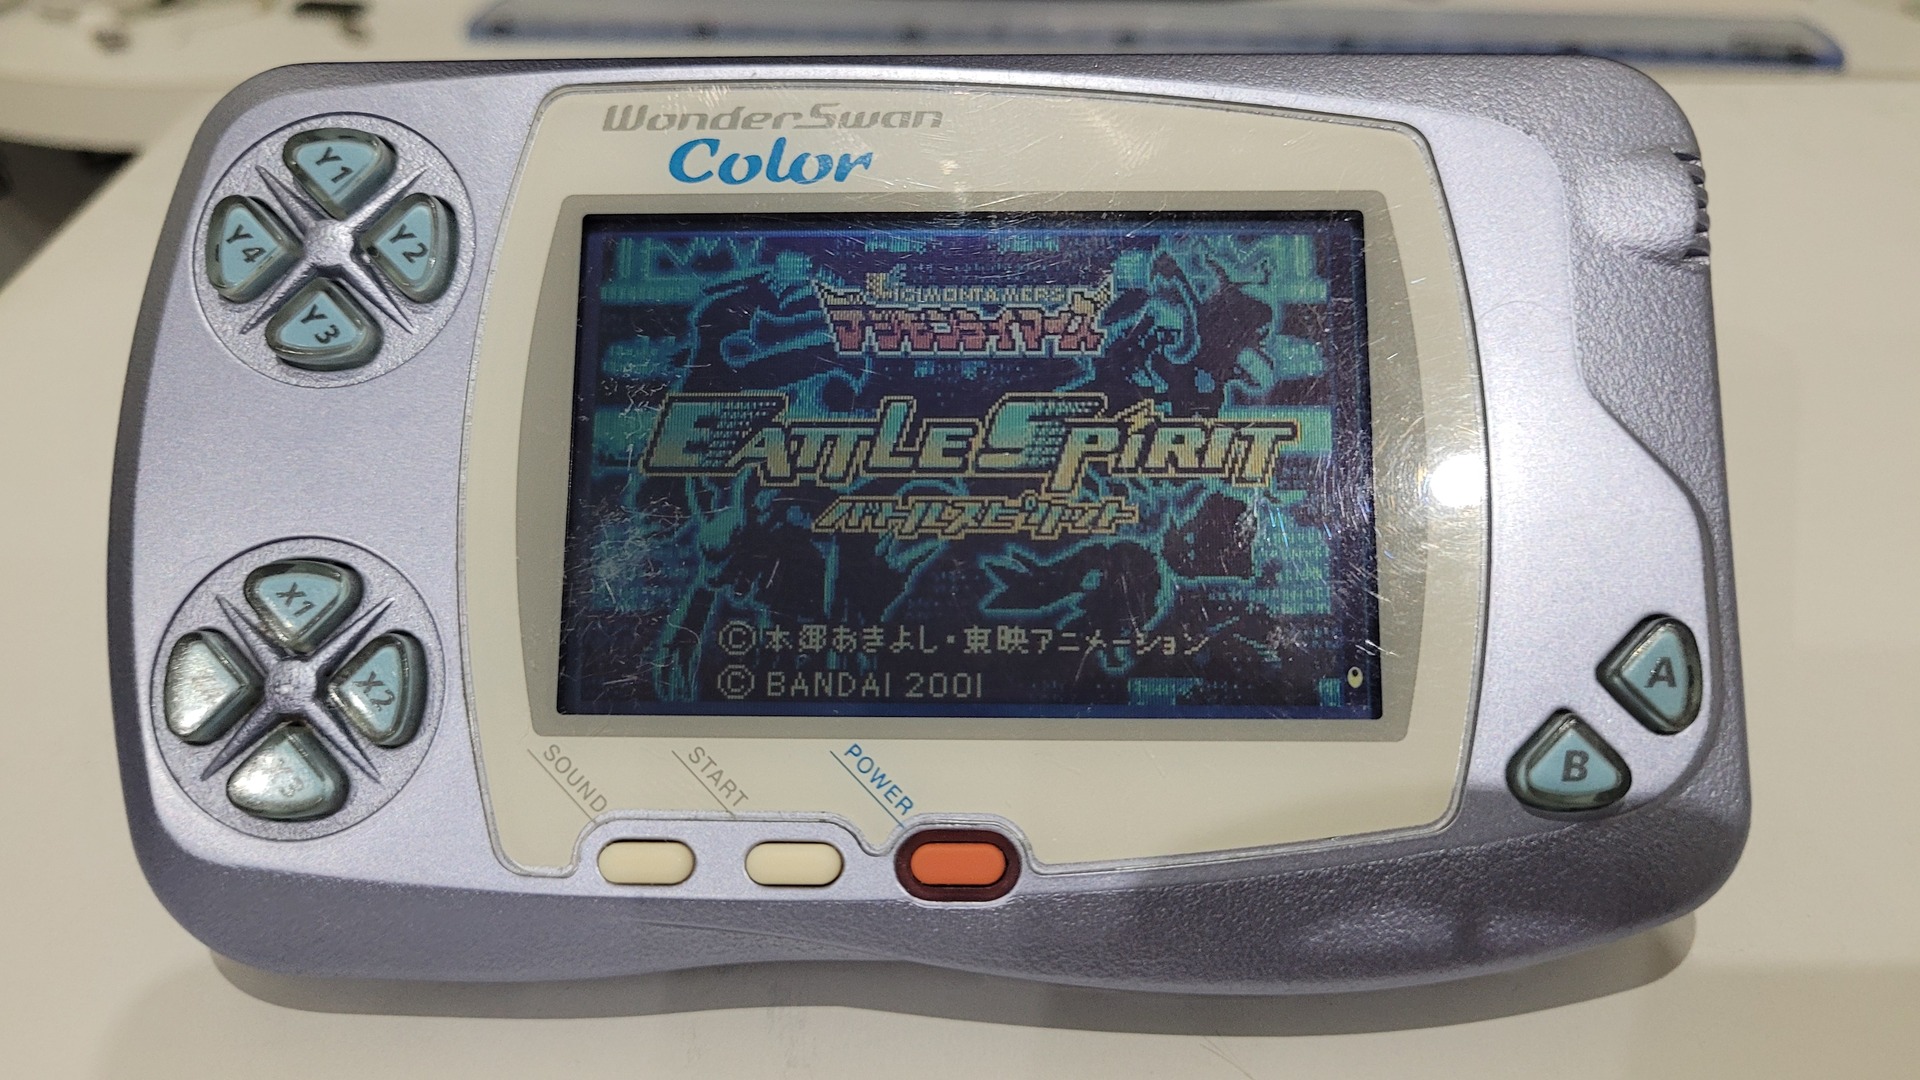
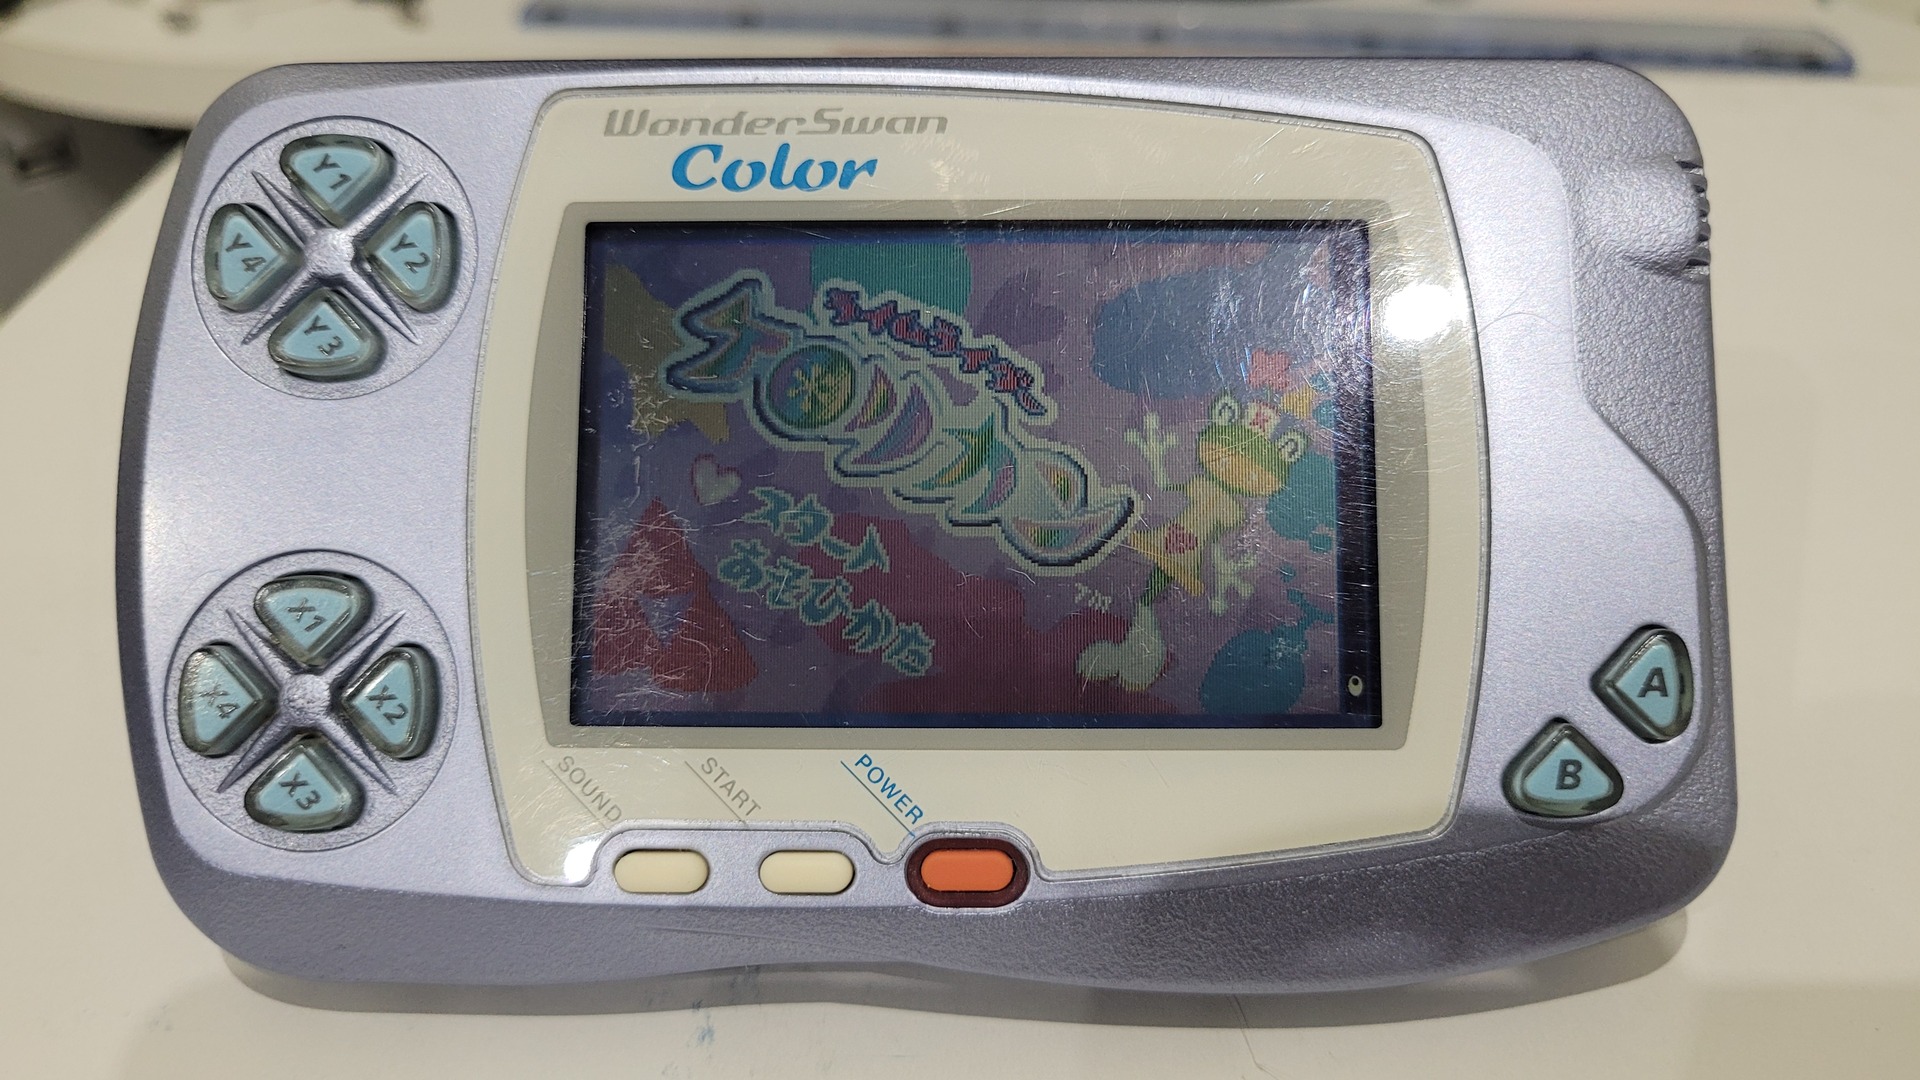
The Wonderswan color is an upgrade of the Wonderswan which had a black & white display… Well an upgrade regarding the colors of the display, but not its quality. The original screen is even worth than the one of the GameBoy Advance : very dark but also very blurry (ghosting) because of its cheap technology, a passive matrix LCD (FSTN). Fortunately, an IPS display upgrade exists !
The Wonderswan crystal, which is an upgrade over the Wonderswan color, has a better screen. But it is also more expansive and still has no backlight. An IPS display upgrade also exists, but it requires to modify the shell.
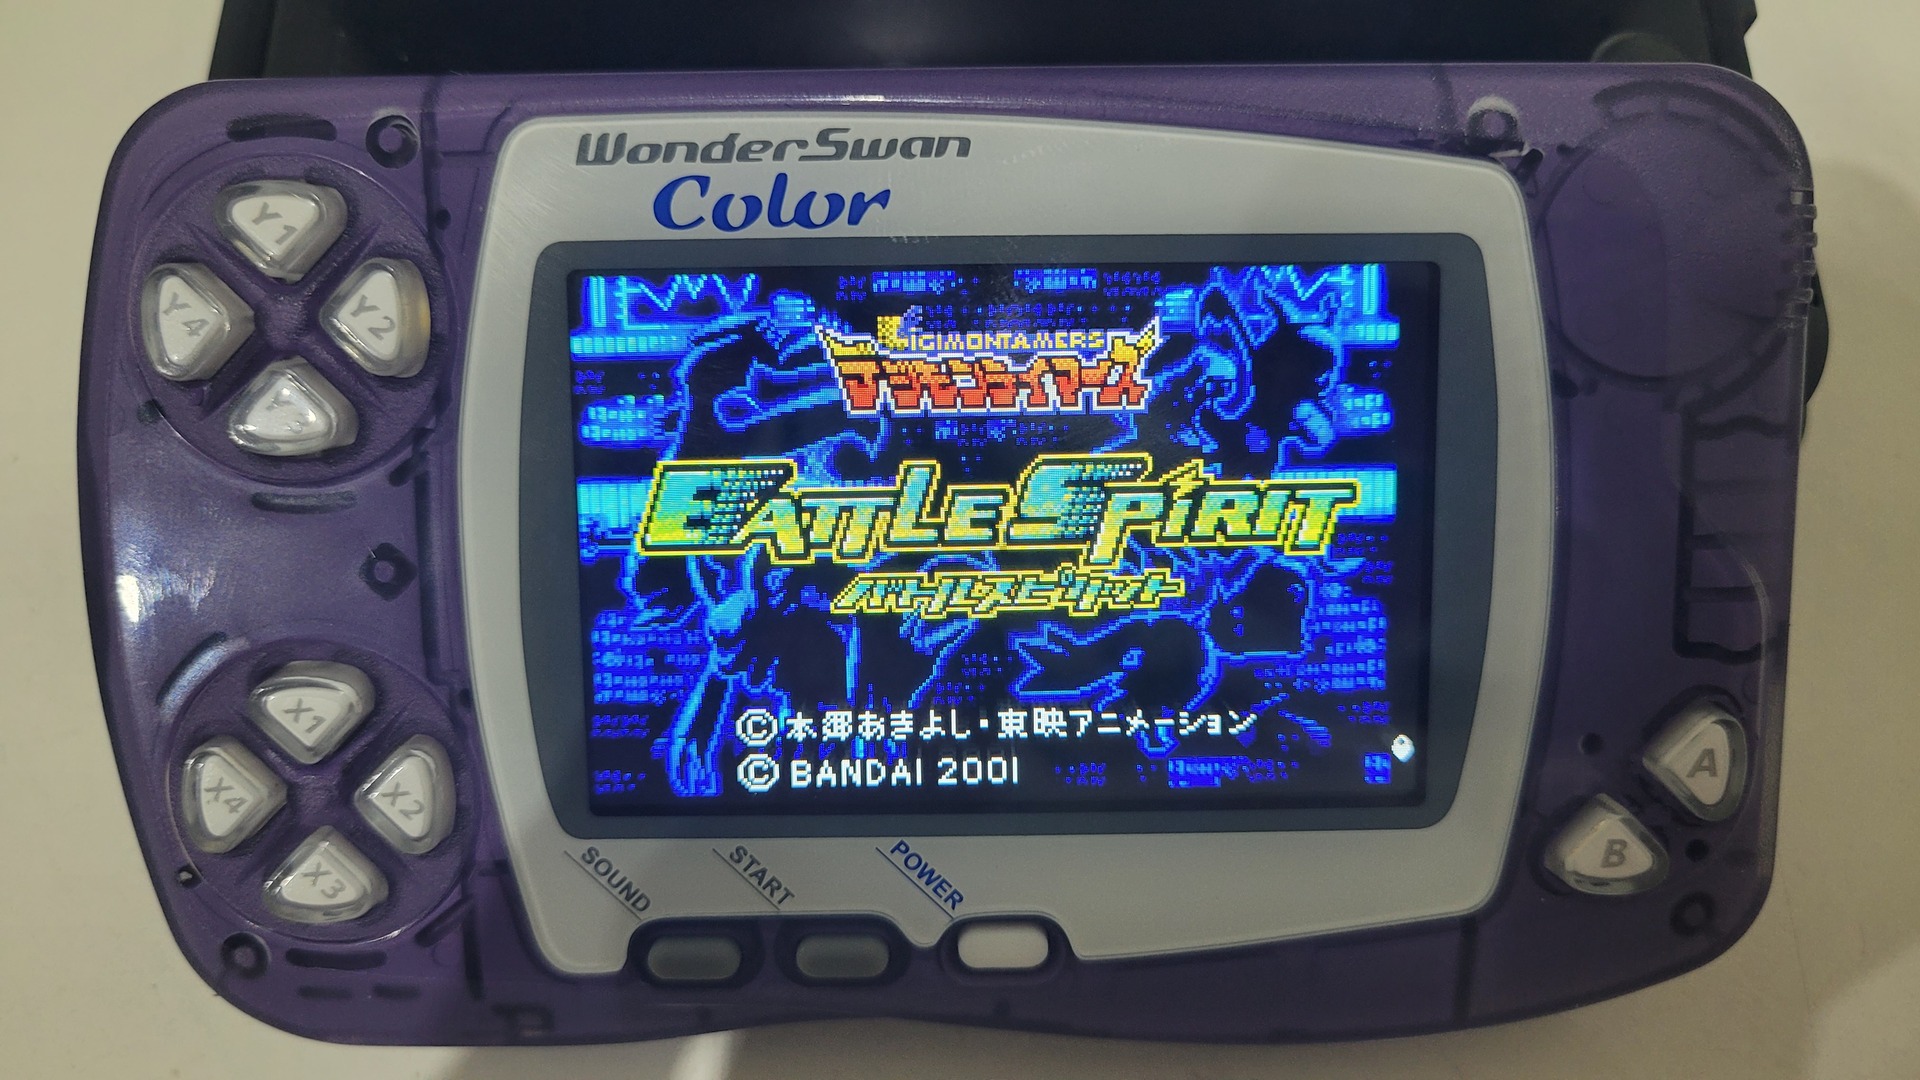
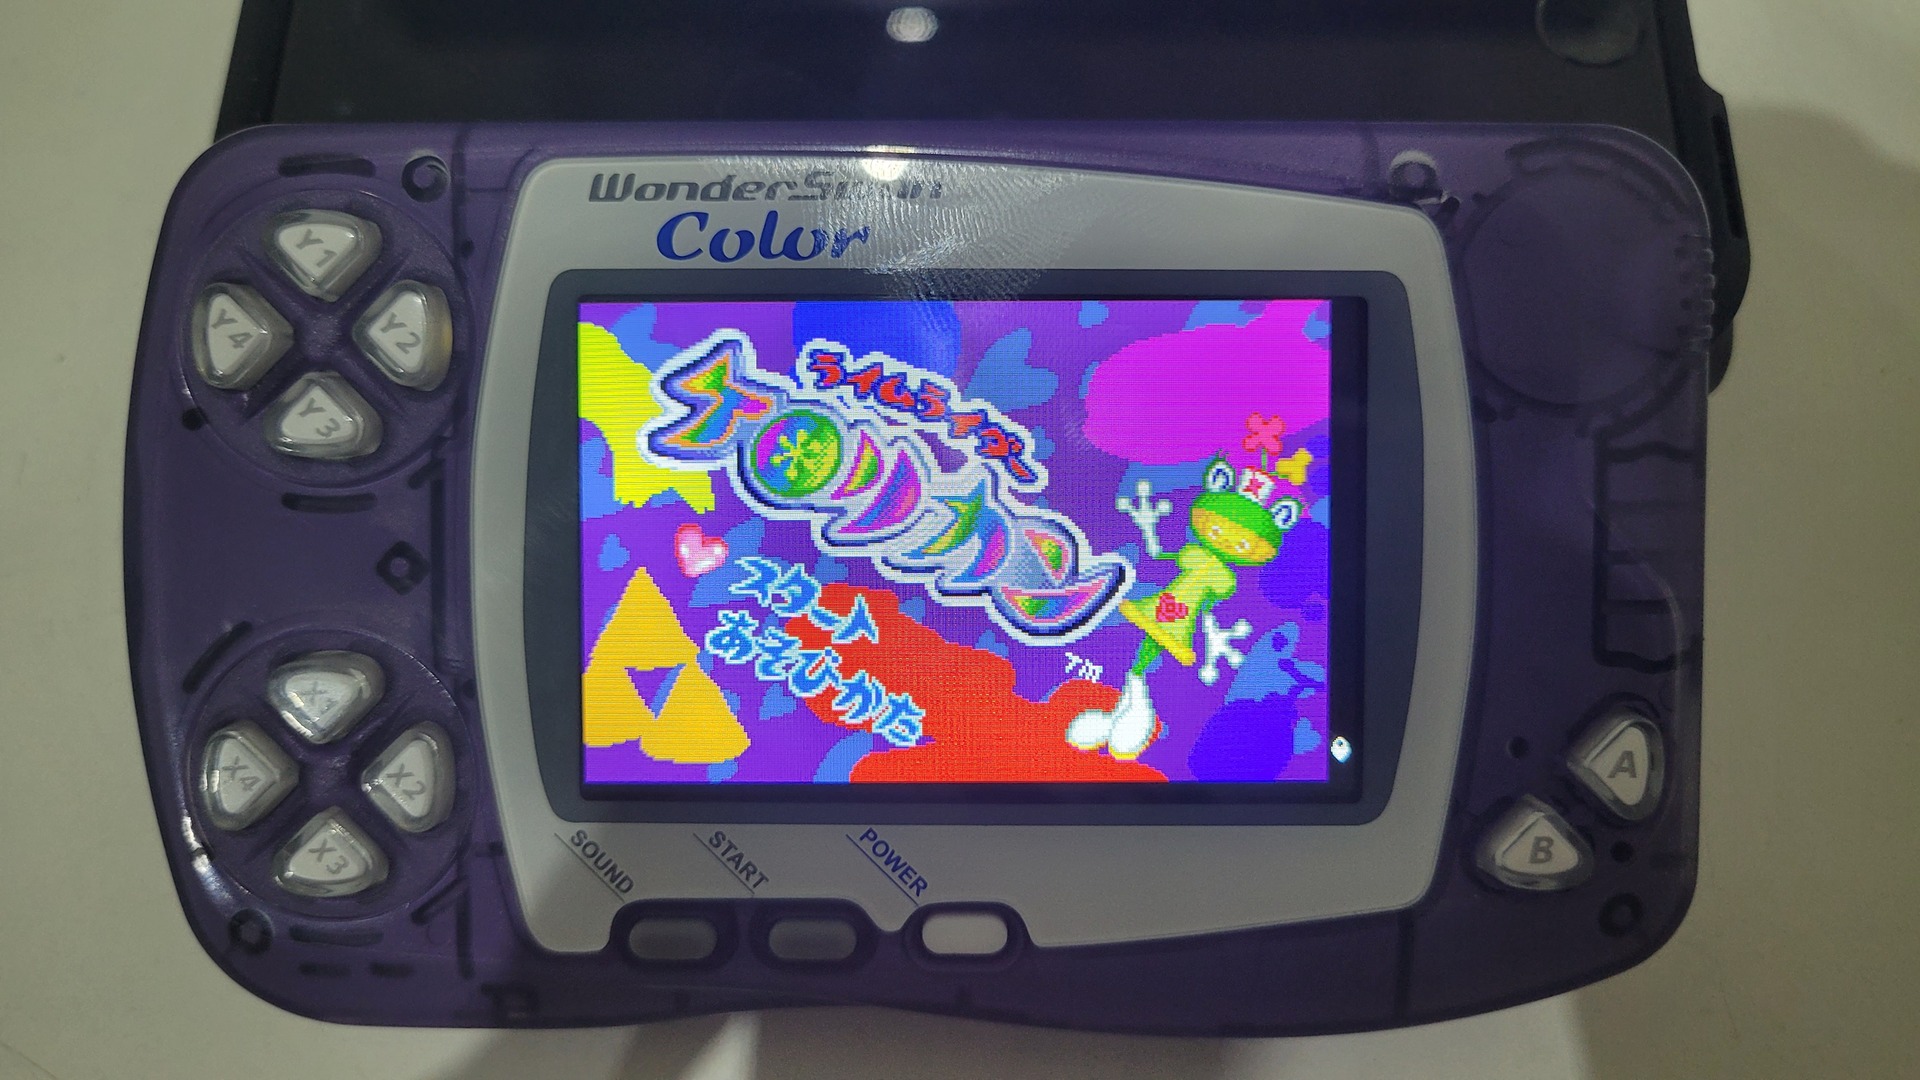
All in all, the Wonderswan color seems to definitly be the best choice for modding, as you get the same result, cheaper and without any shell cut. Not to mention that replacement shell for the crystal seems more difficult to find (if any exists).
I got a Wonderswan color sometime ago, and the shell was in pretty bad conditions. So, here is the story of my modded Wonderswan : IPS display + shell replacement…
Used materials
- A Wonderswan color, obviously
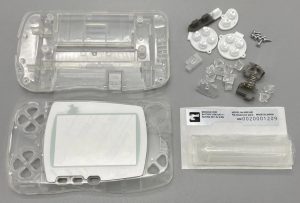
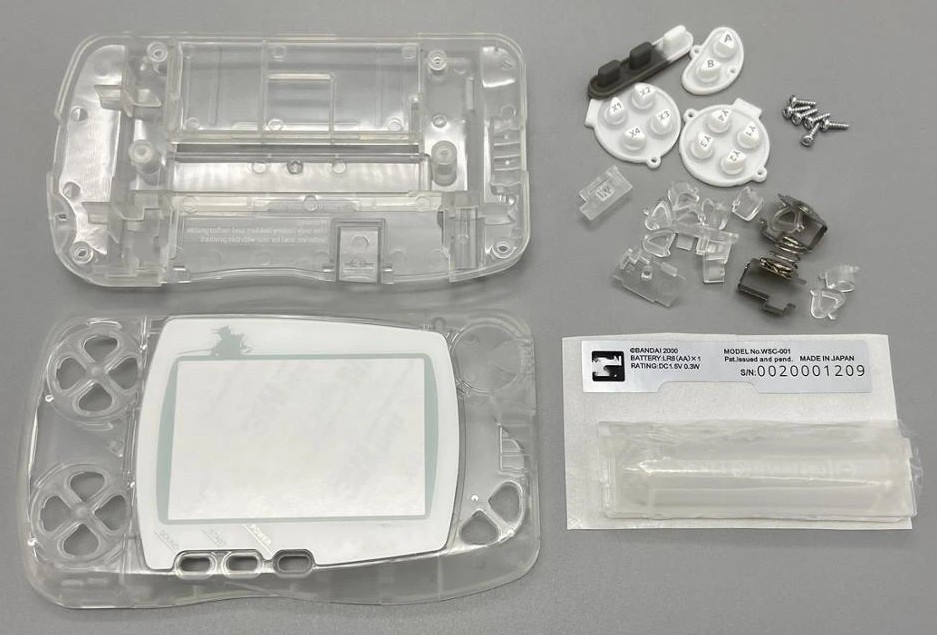
- A transparent shell replacement, found on Aliexpress
- Some paint protective adhesive
- Acrylic spray paint : I used Edding 5200 spray permanent – lilas mat, from Amazon
- An IPS replacement display kit, found on Aliexpress
- A soldering Iron
- Q-tip and isopropyl alcool
Shell paint job
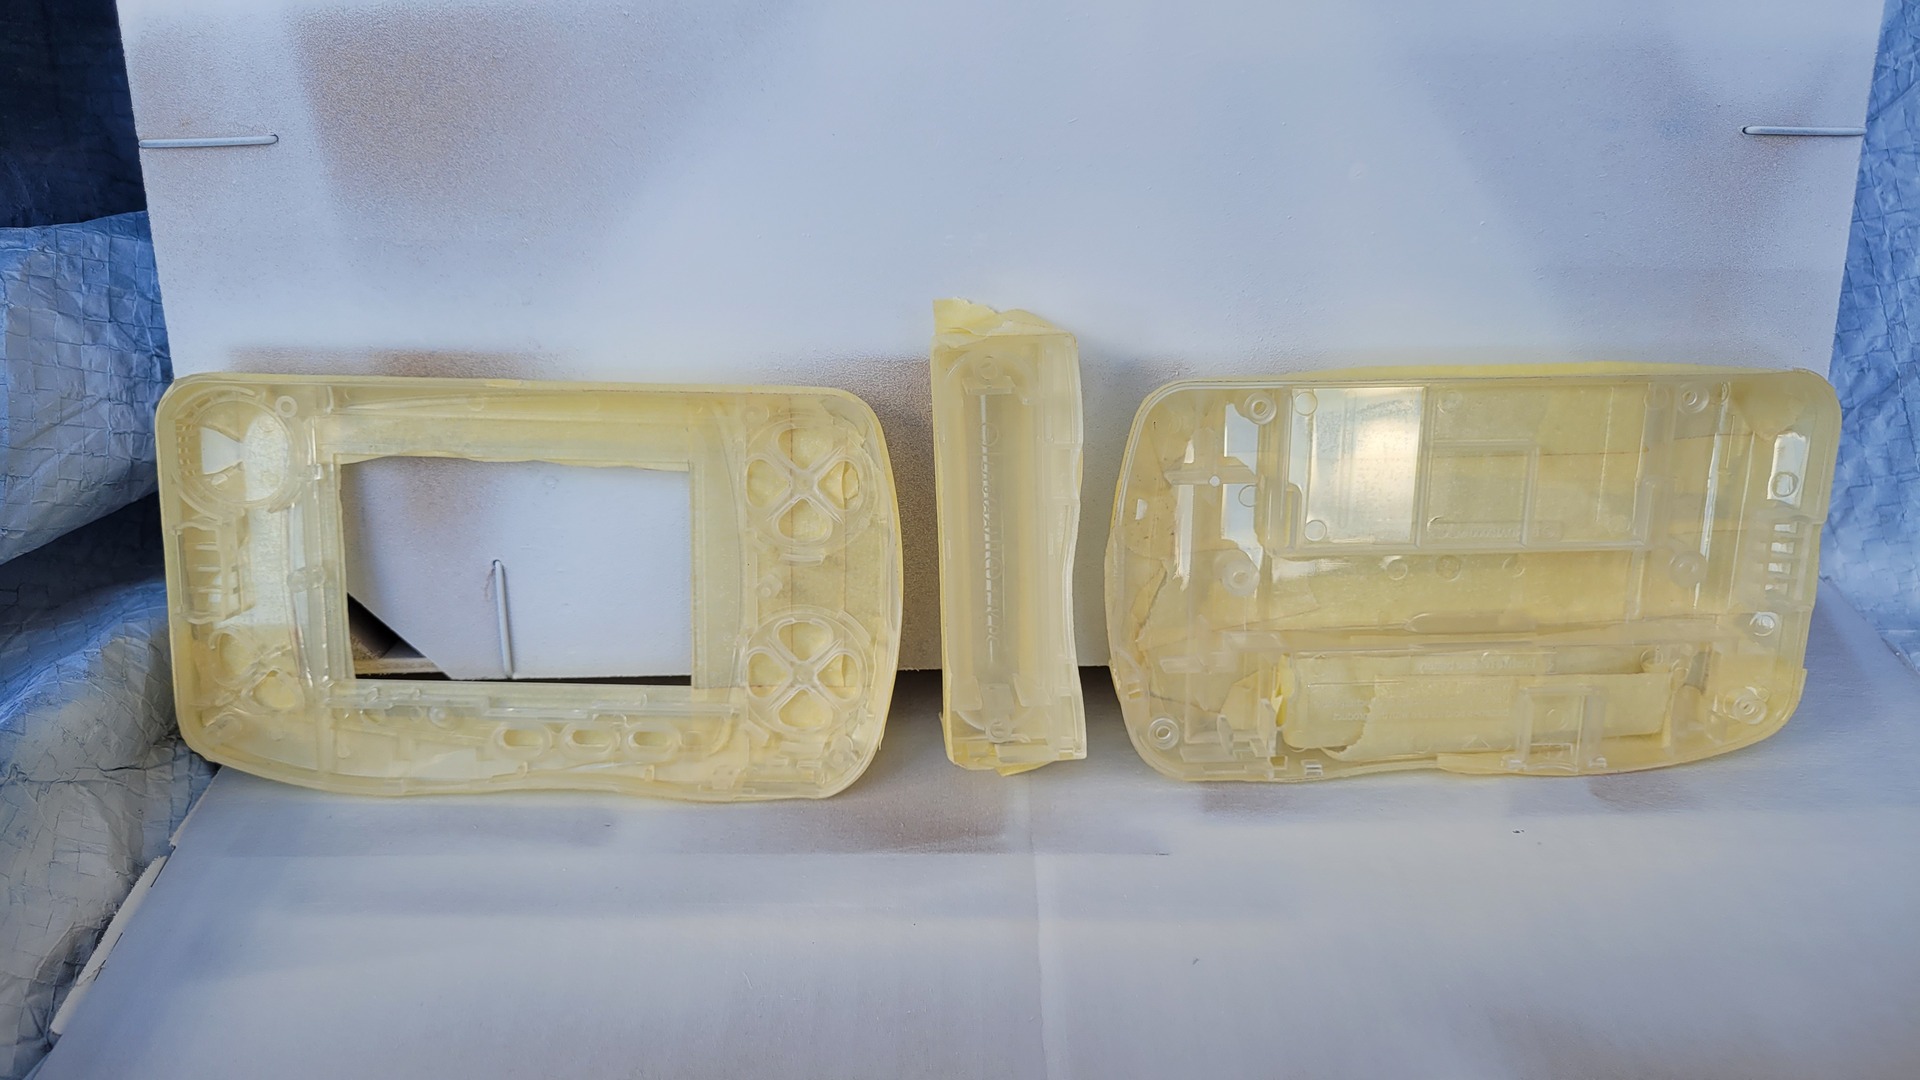
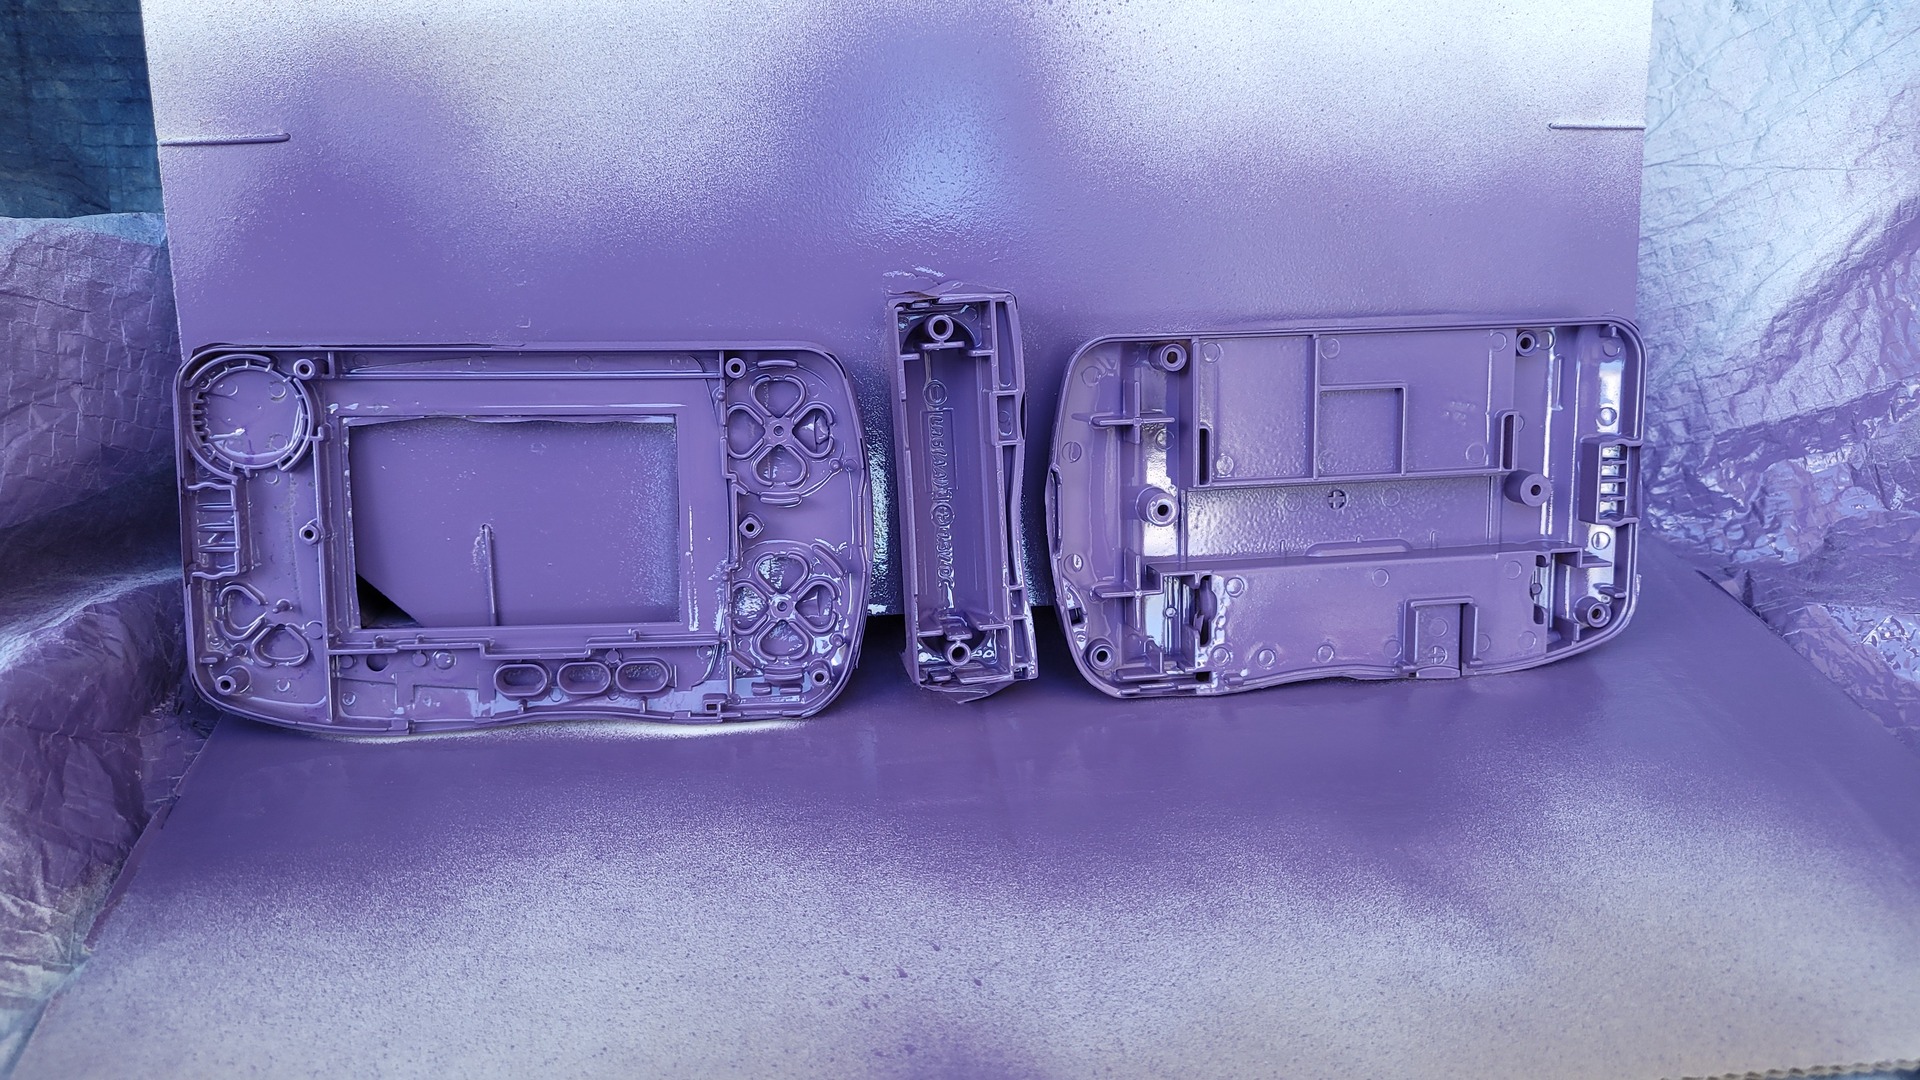
Unlike the GBA or the GBC, the replacement shells for Wonderswan are available in very few colors (I found only 3 : white, black and transparent). As I wanted something a bit more custom, I chose the transparent version and painted it from the inside. So the paint is protected and I like the effect.
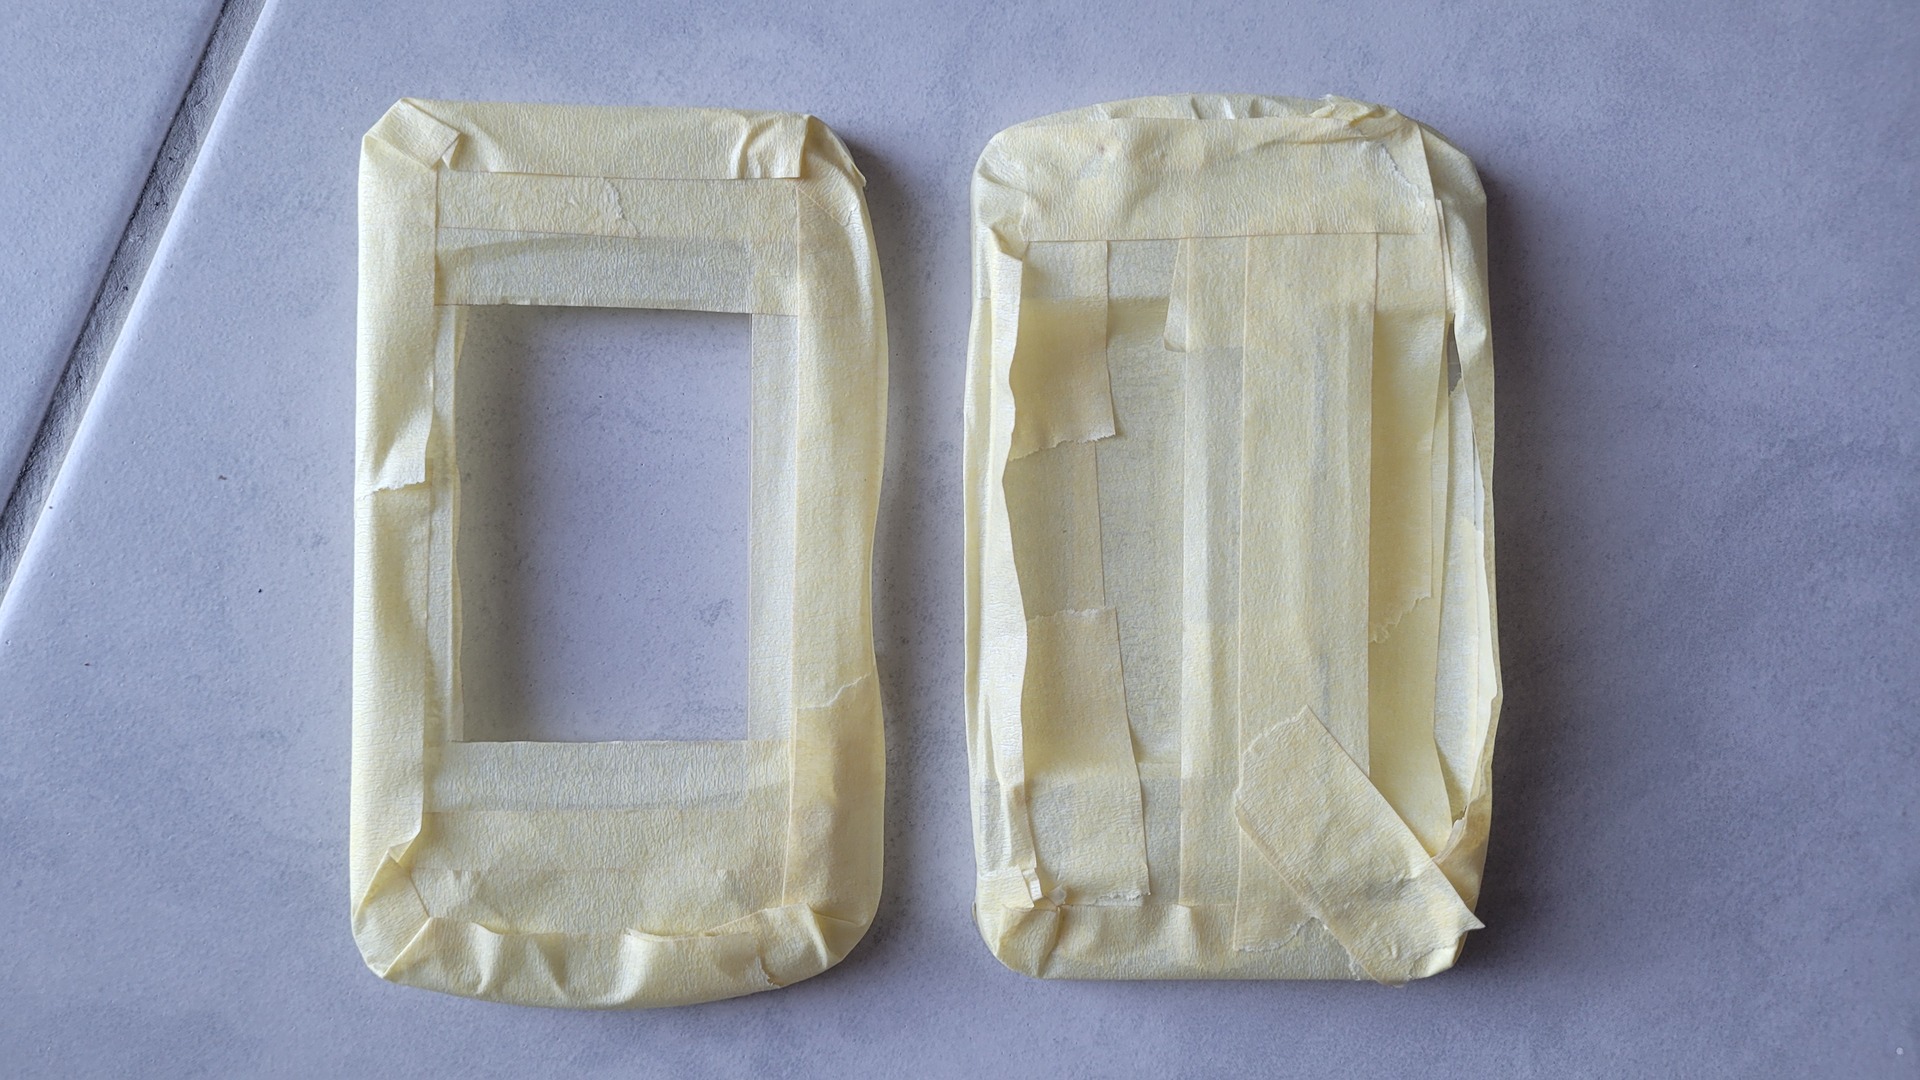
Before starting the paint job, I protected all the outside parts of the shell with some adhesive tape, then I used two paint layers to ensure a good coverage
New shell assembly
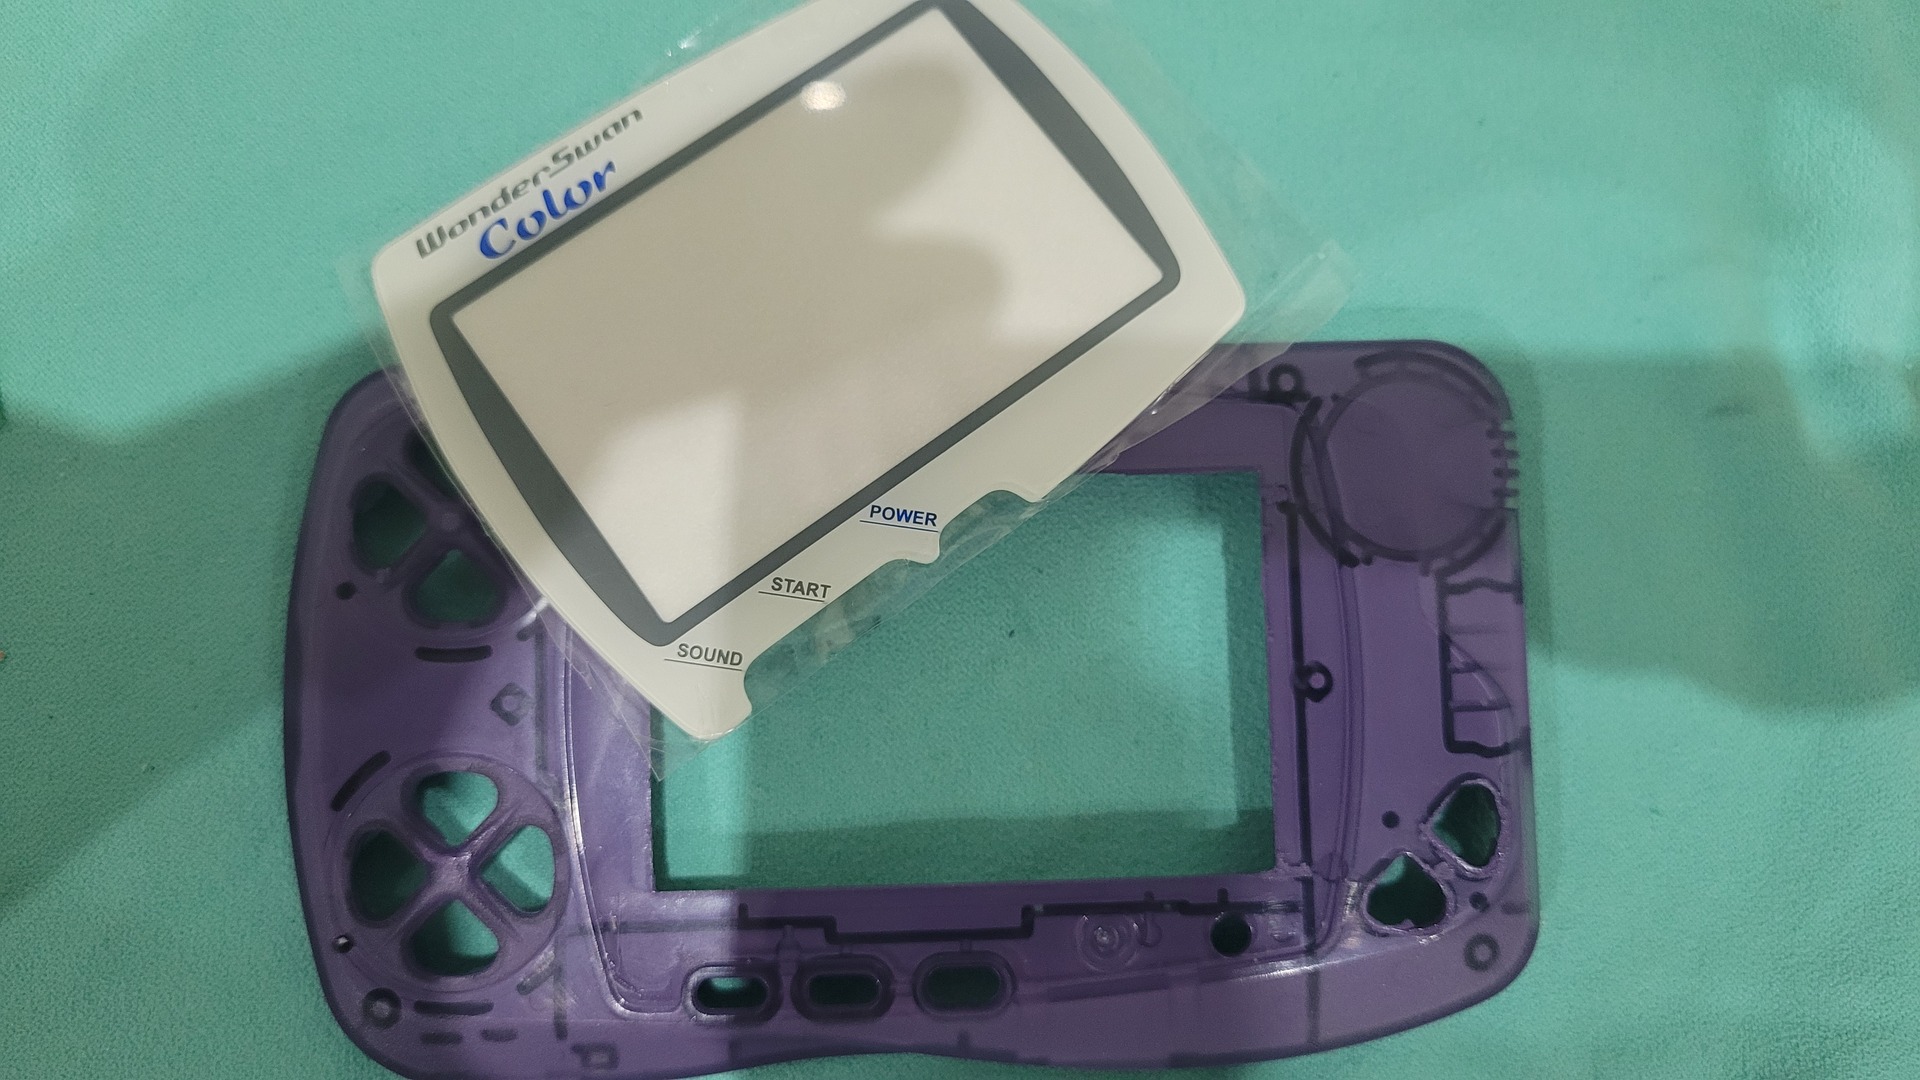
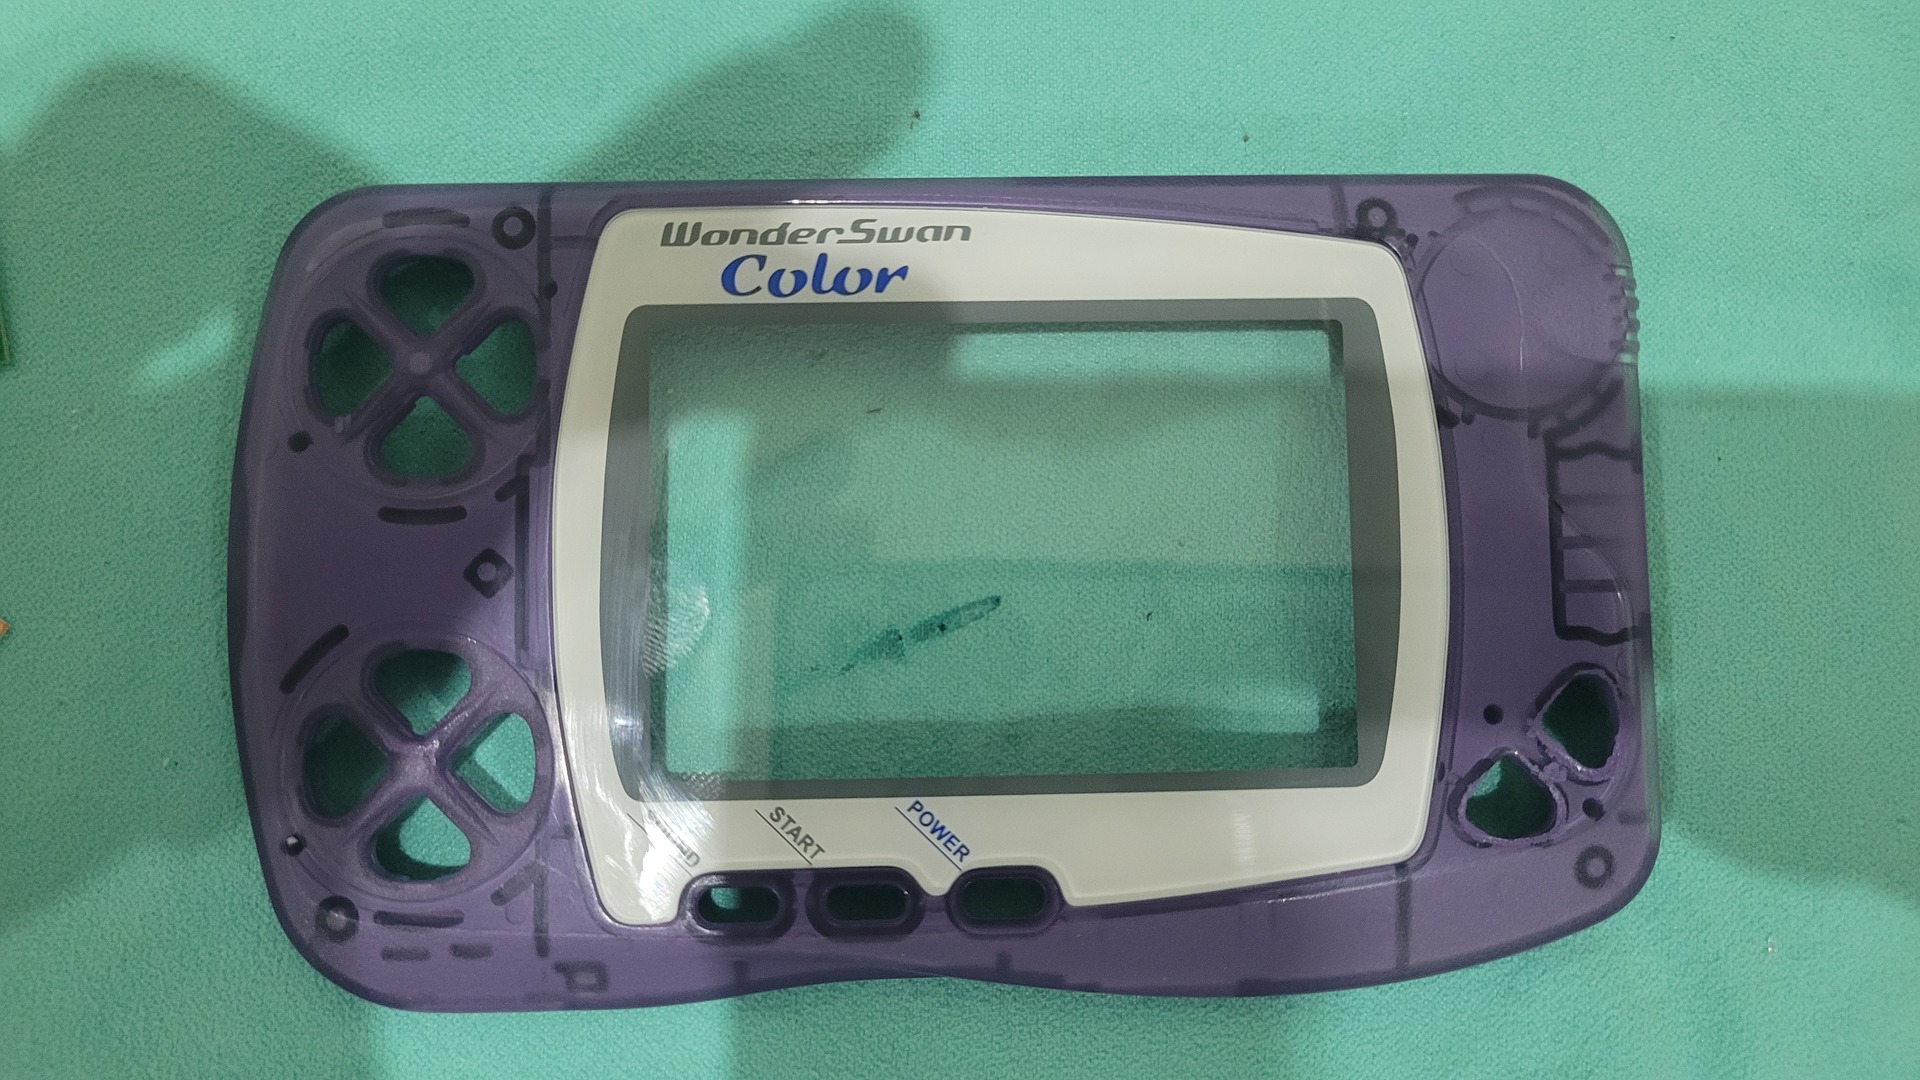
Probably the easiest part : I just removed the protective adhesive tape, added the screen protection and all the buttons
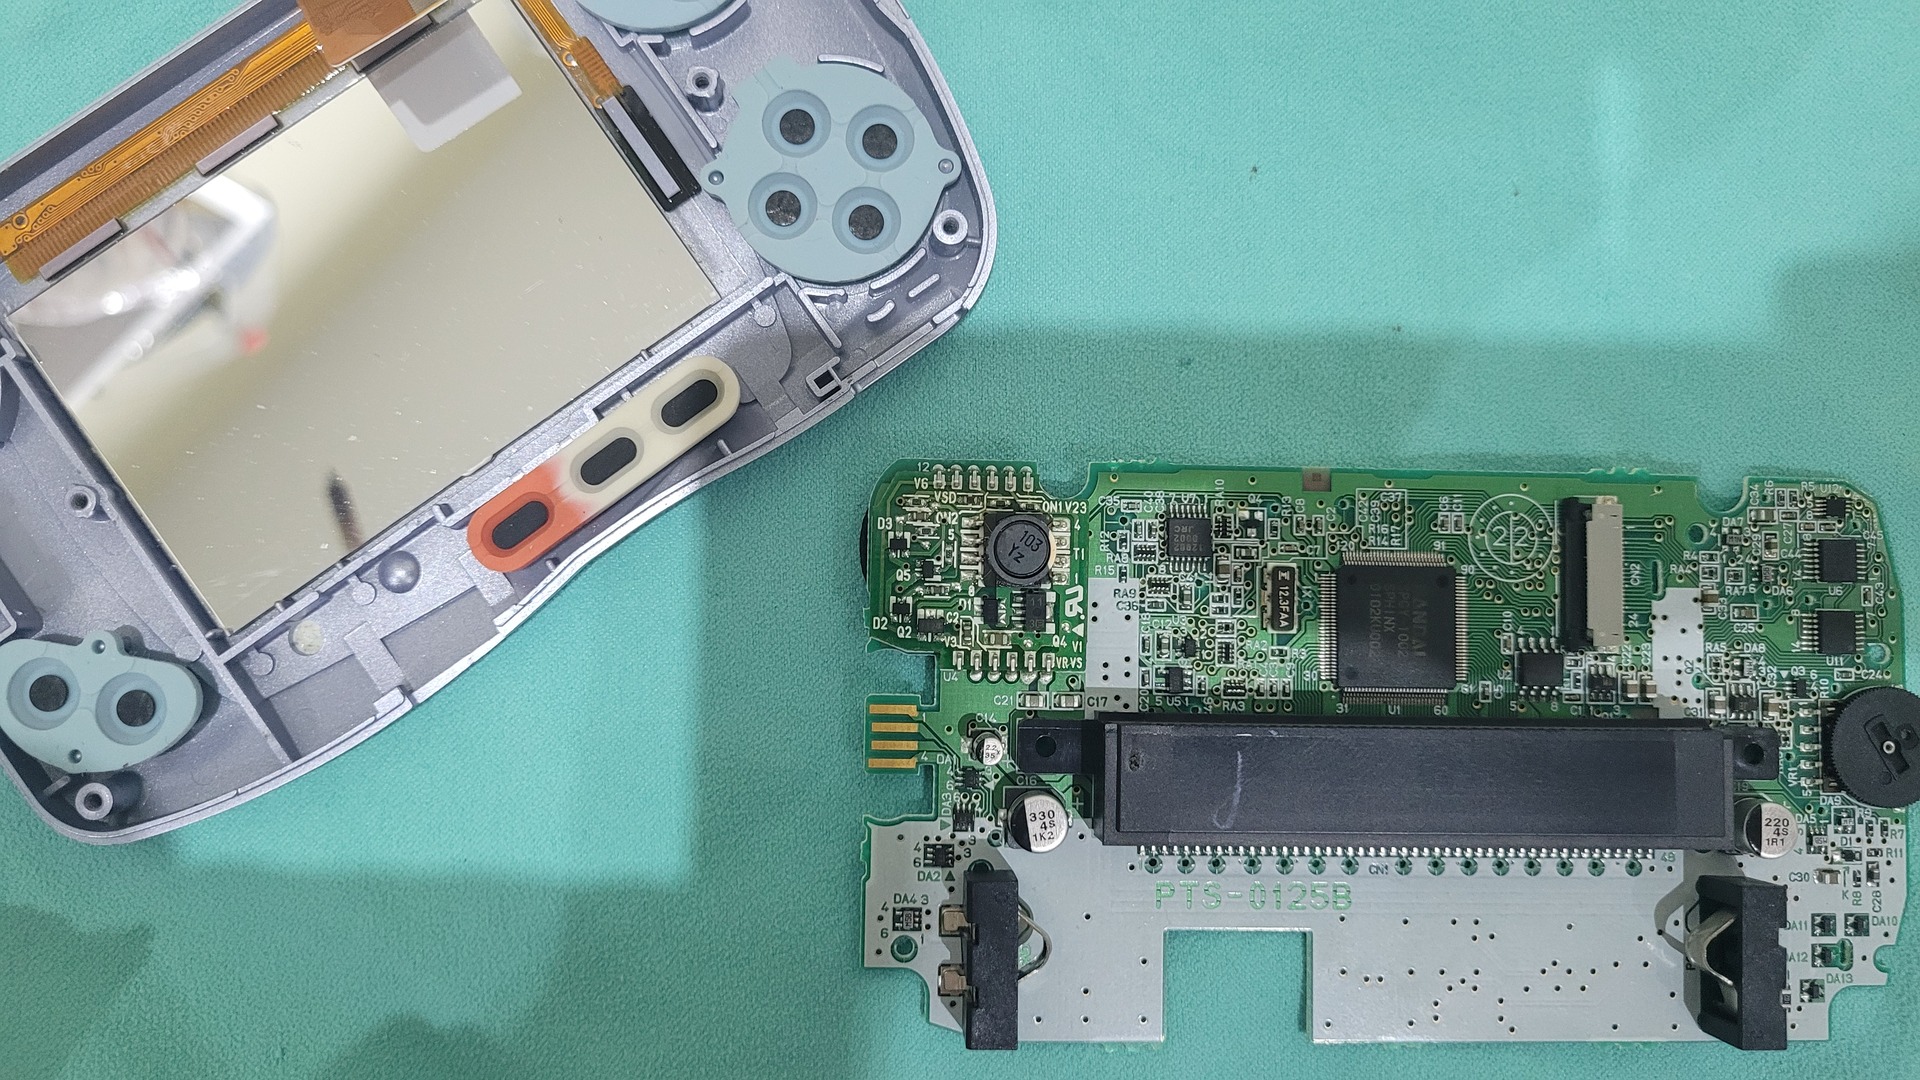
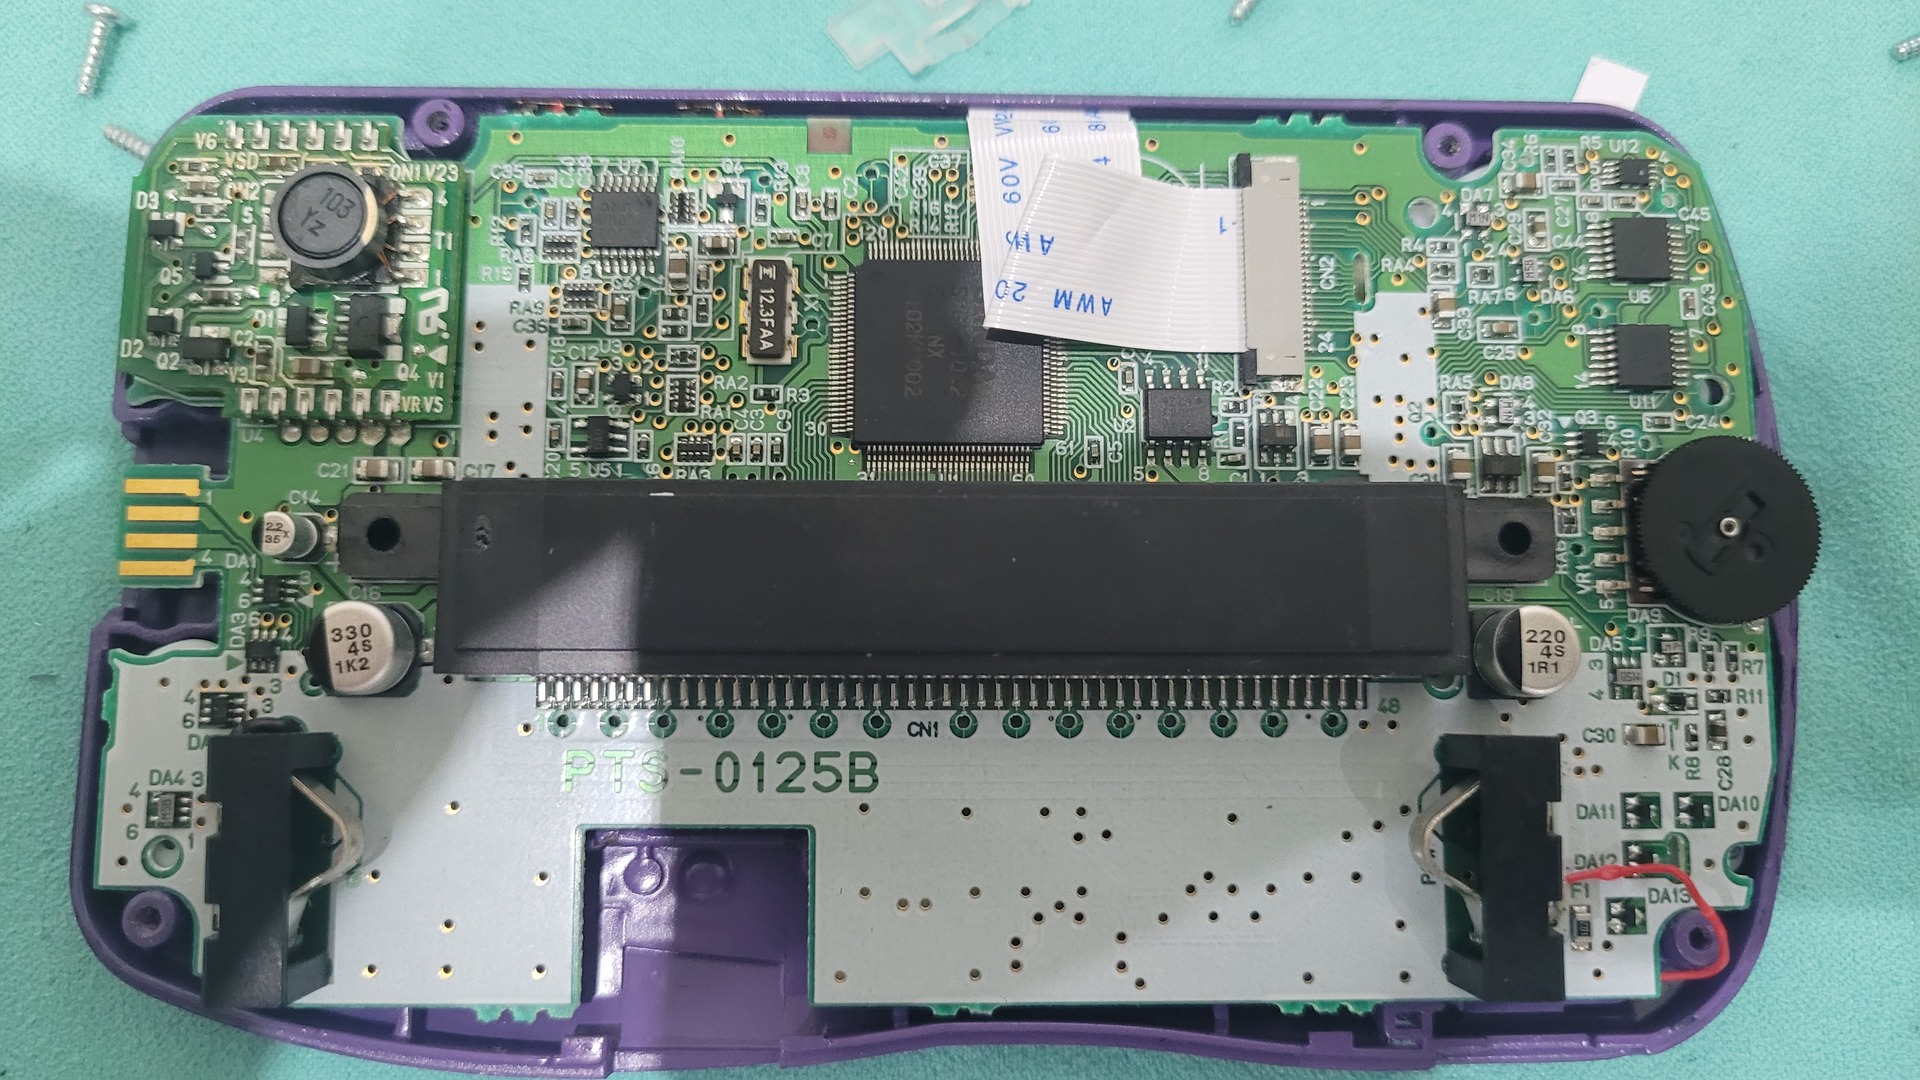
Extracting the motherboard
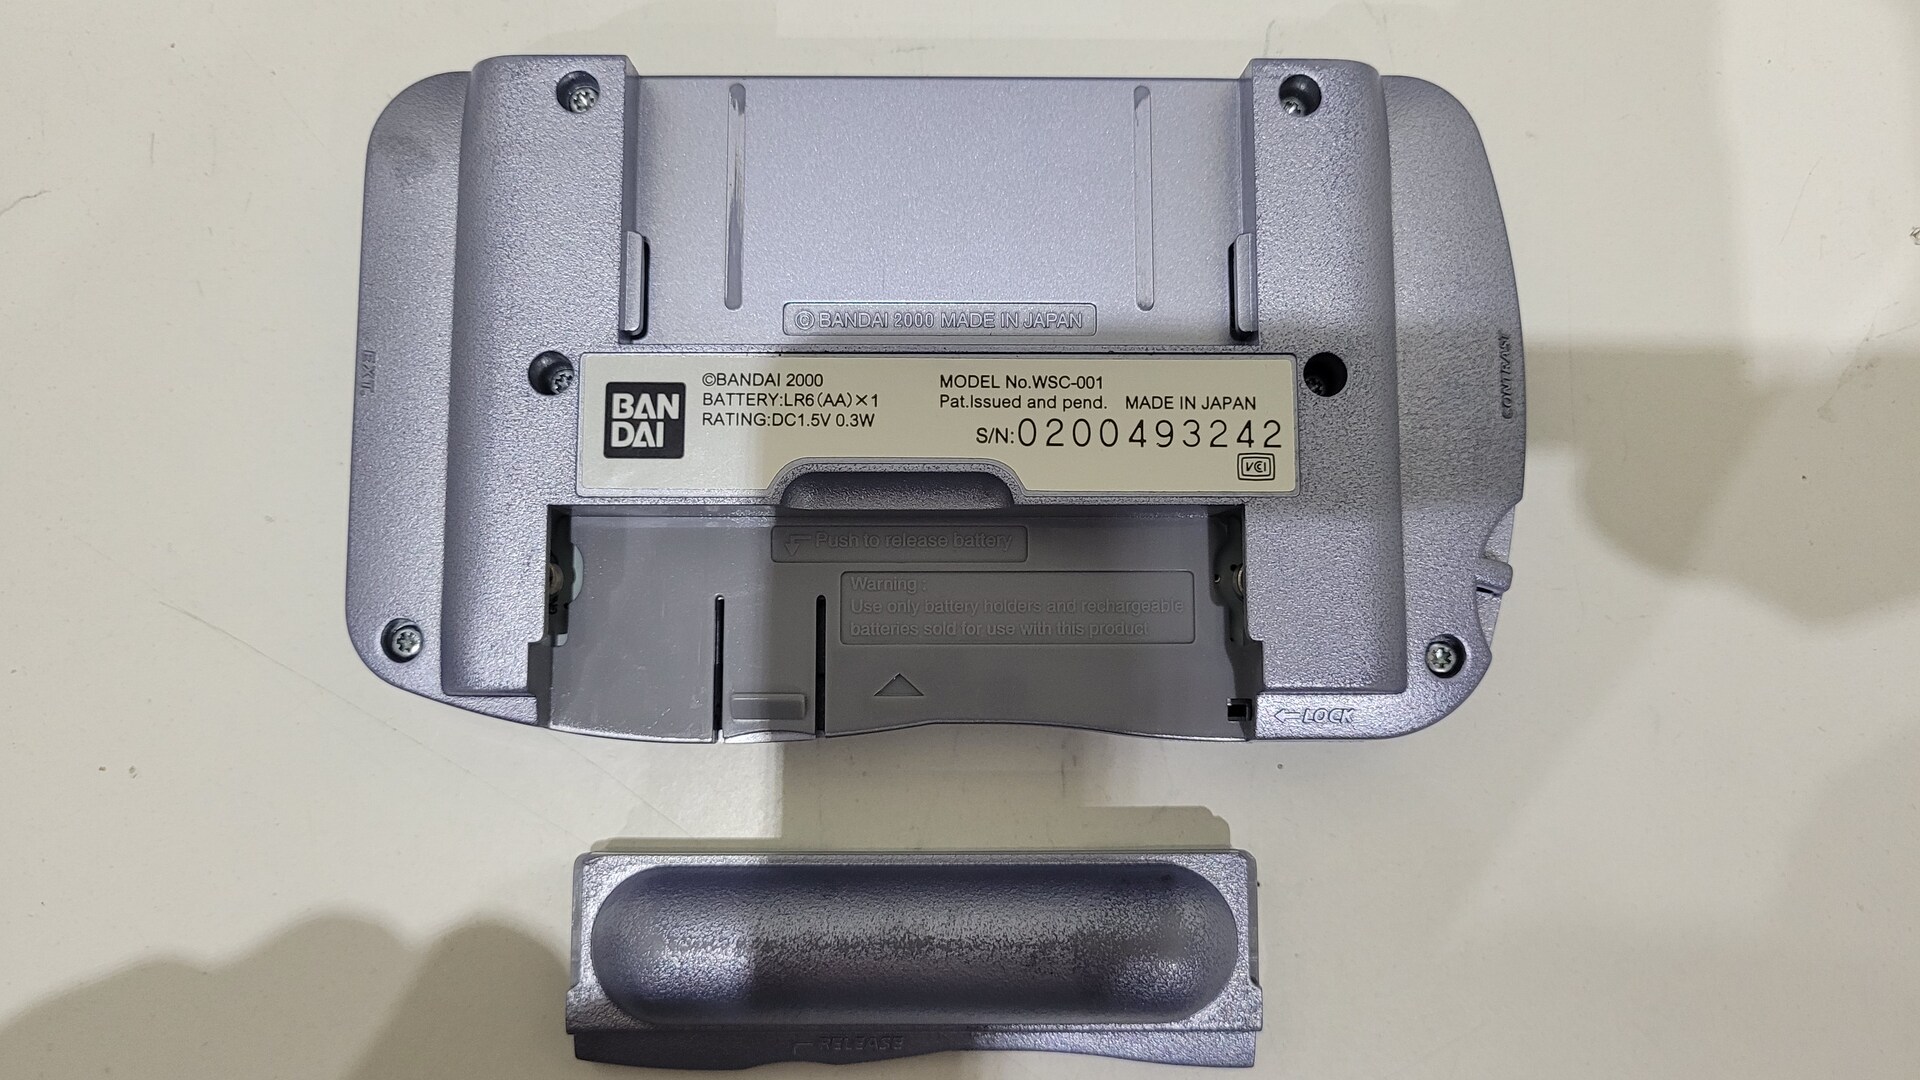
The Wonderswan is really easy to open : just remove the battery holder and five skrews to remove the back of the shell:
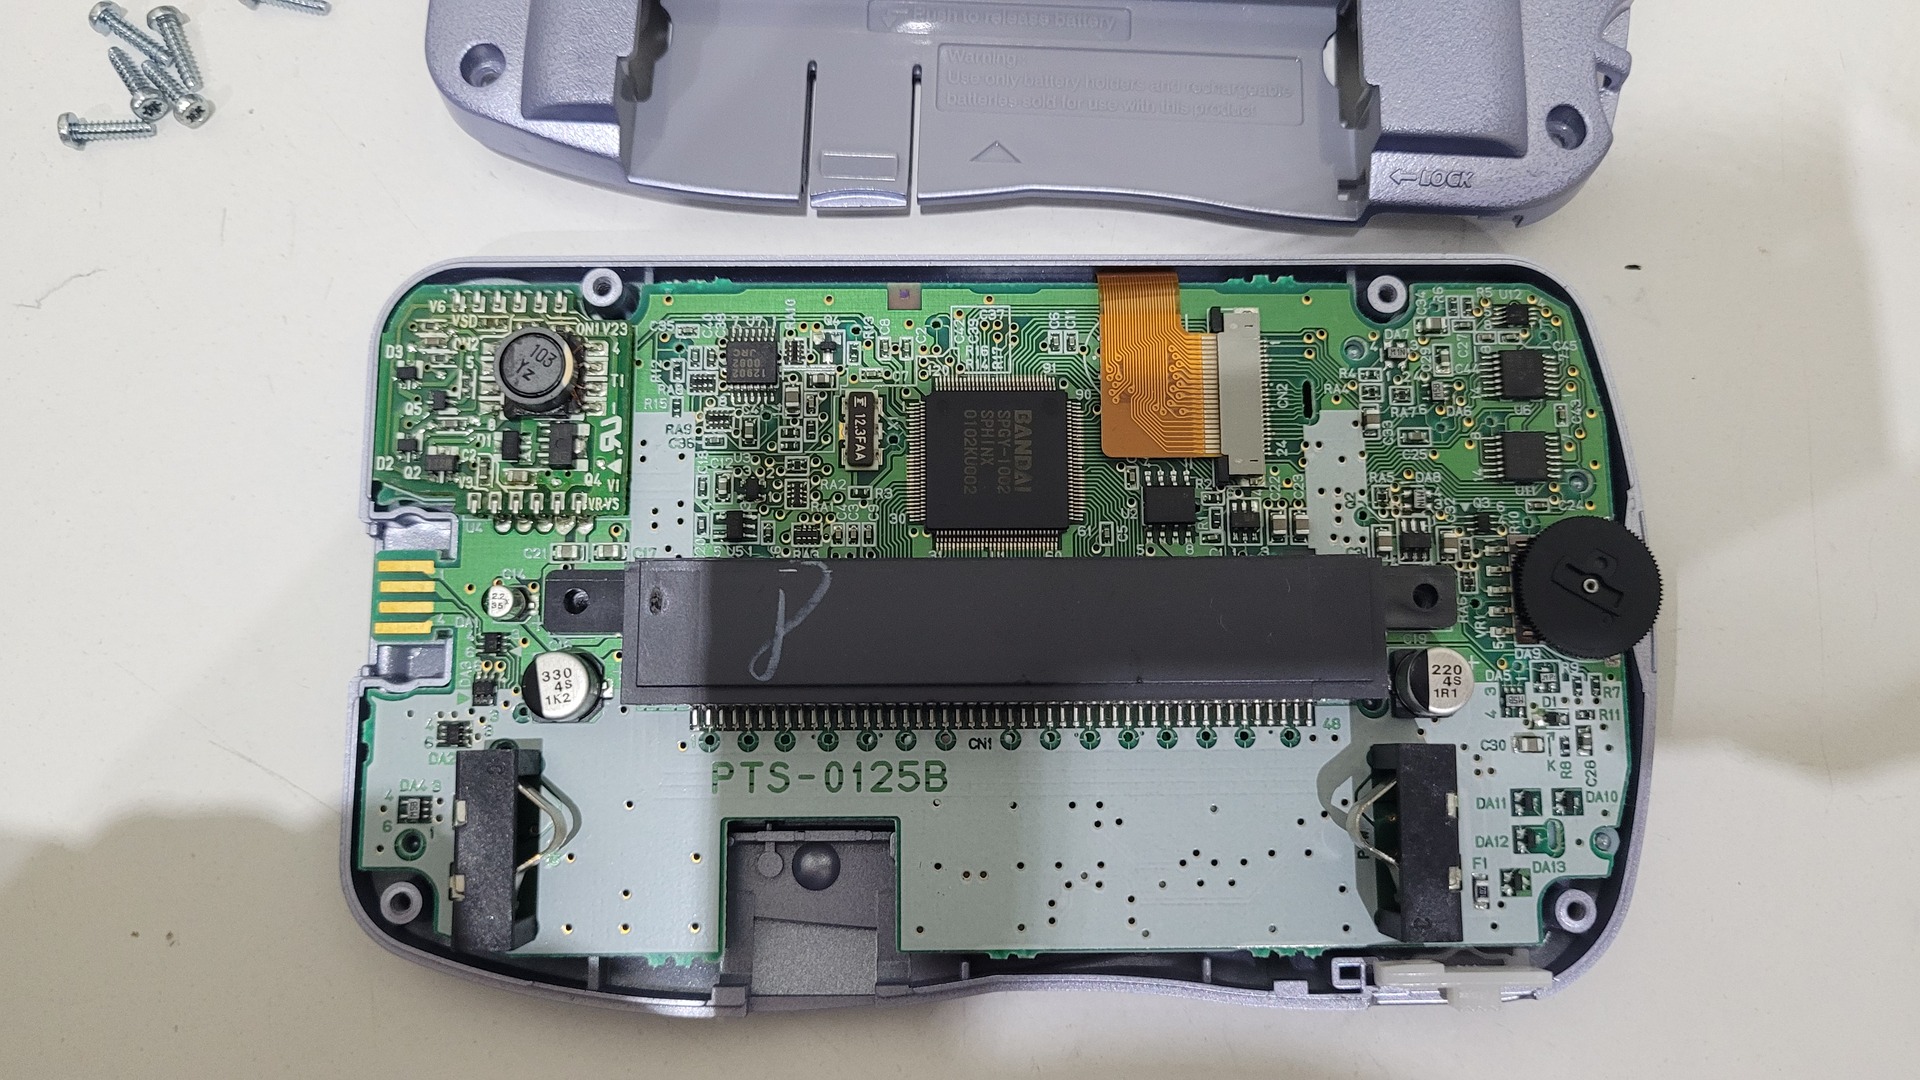
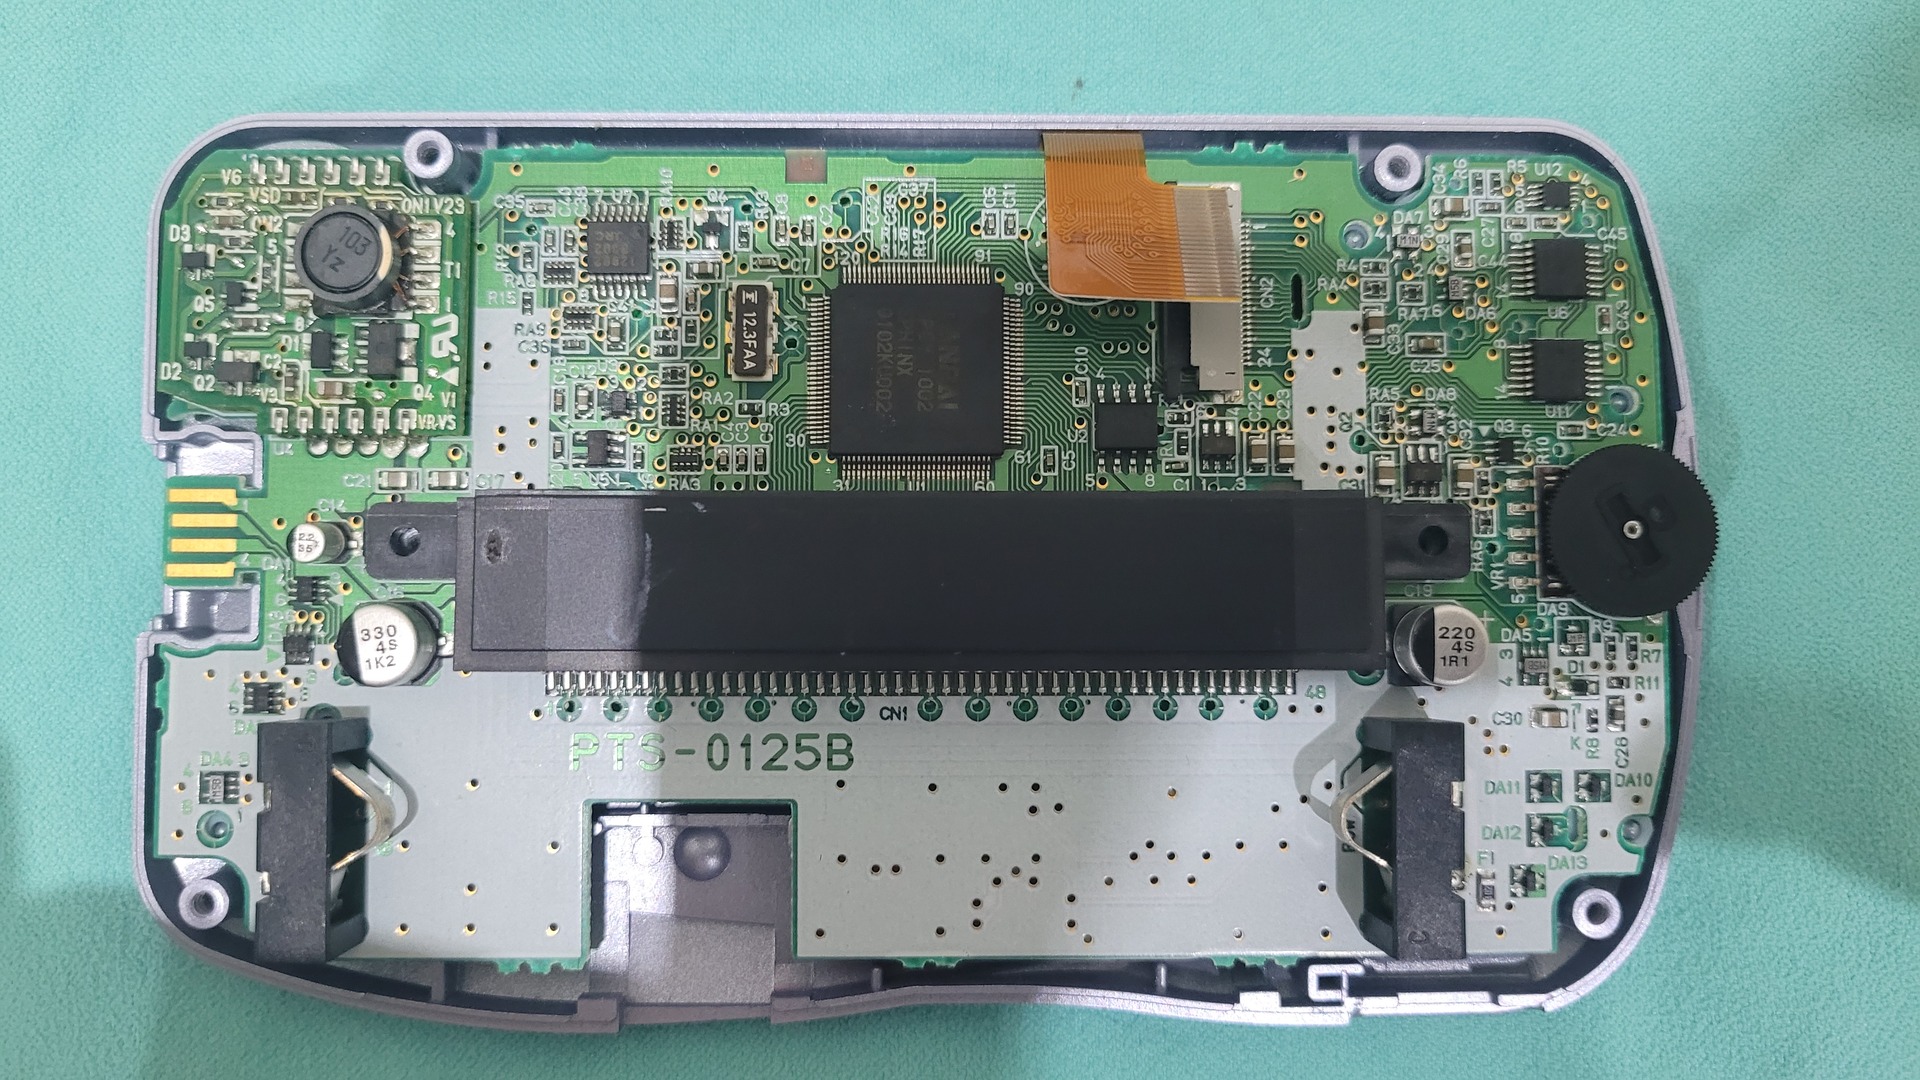
The motherboard is not skrewed to the front part of the shell, the only thing to do to extract the motherboard is to unplug the display’s ribbon cable
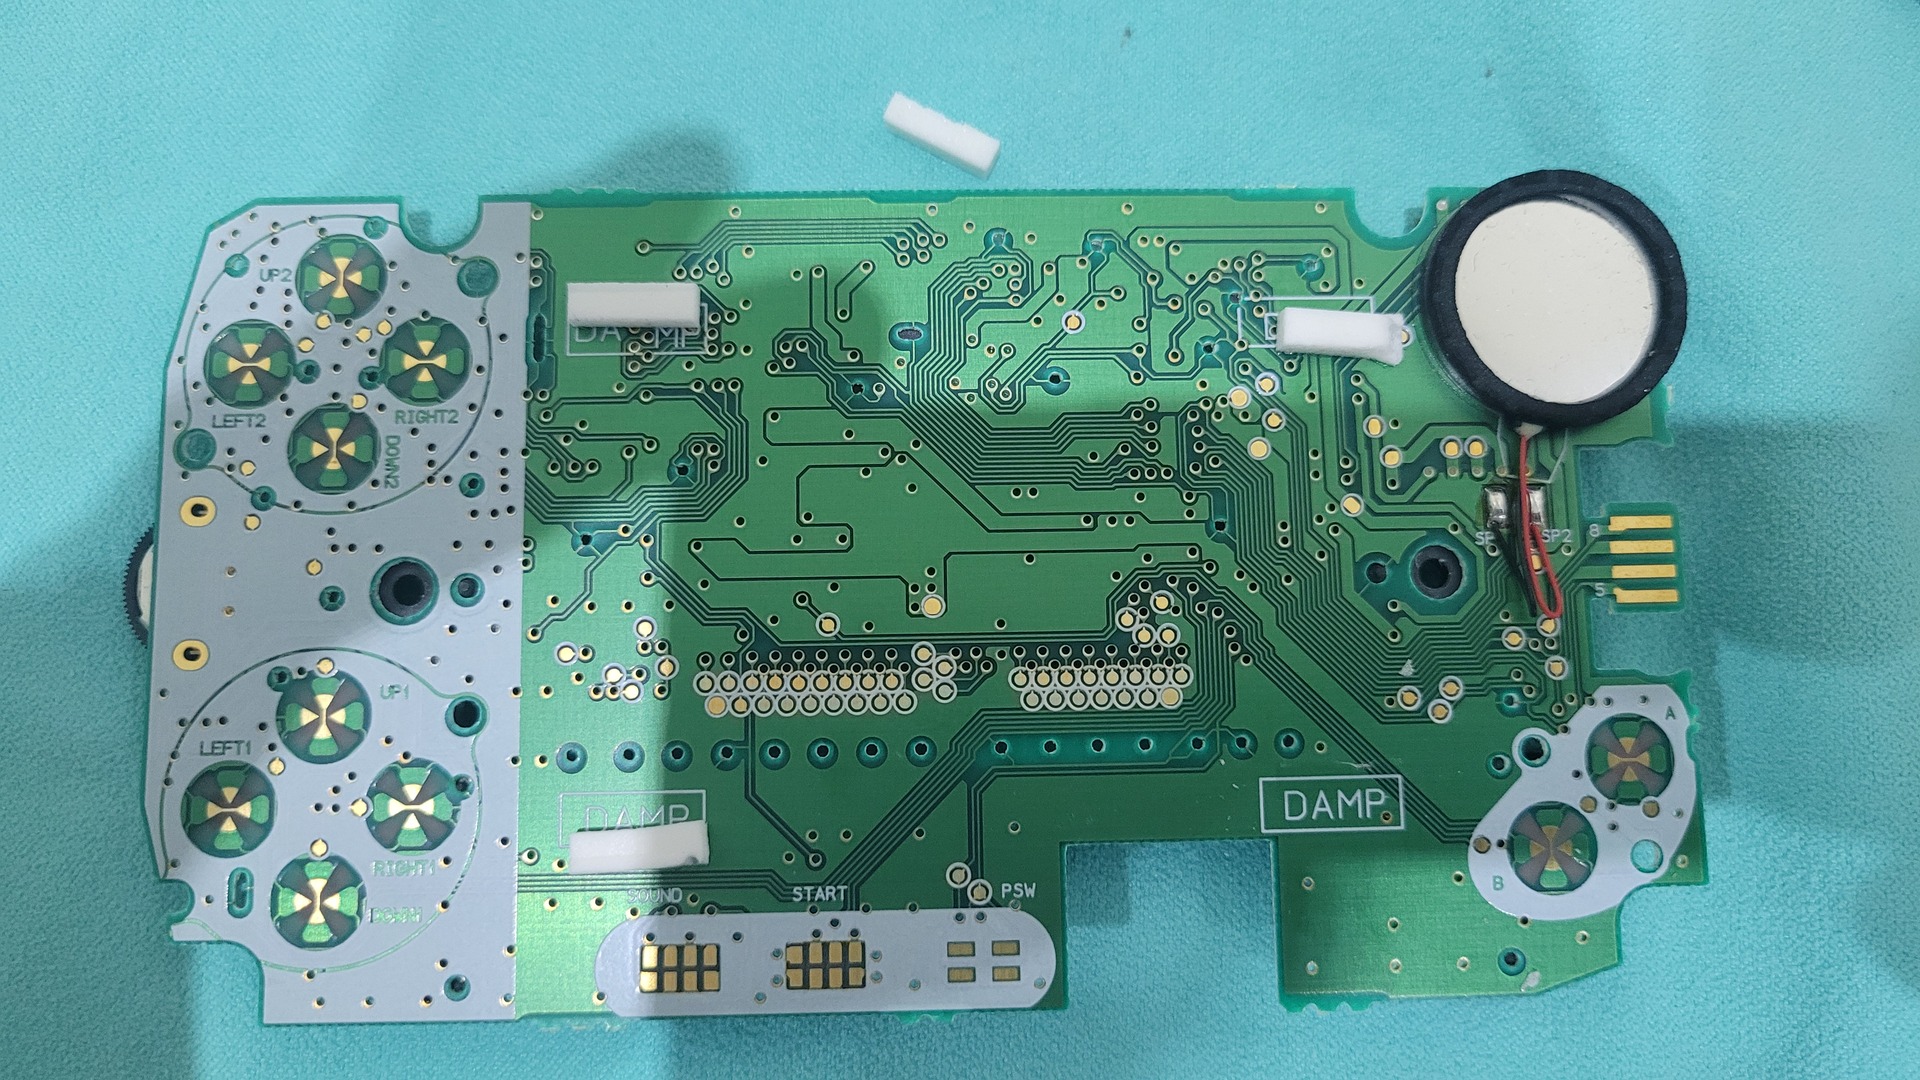
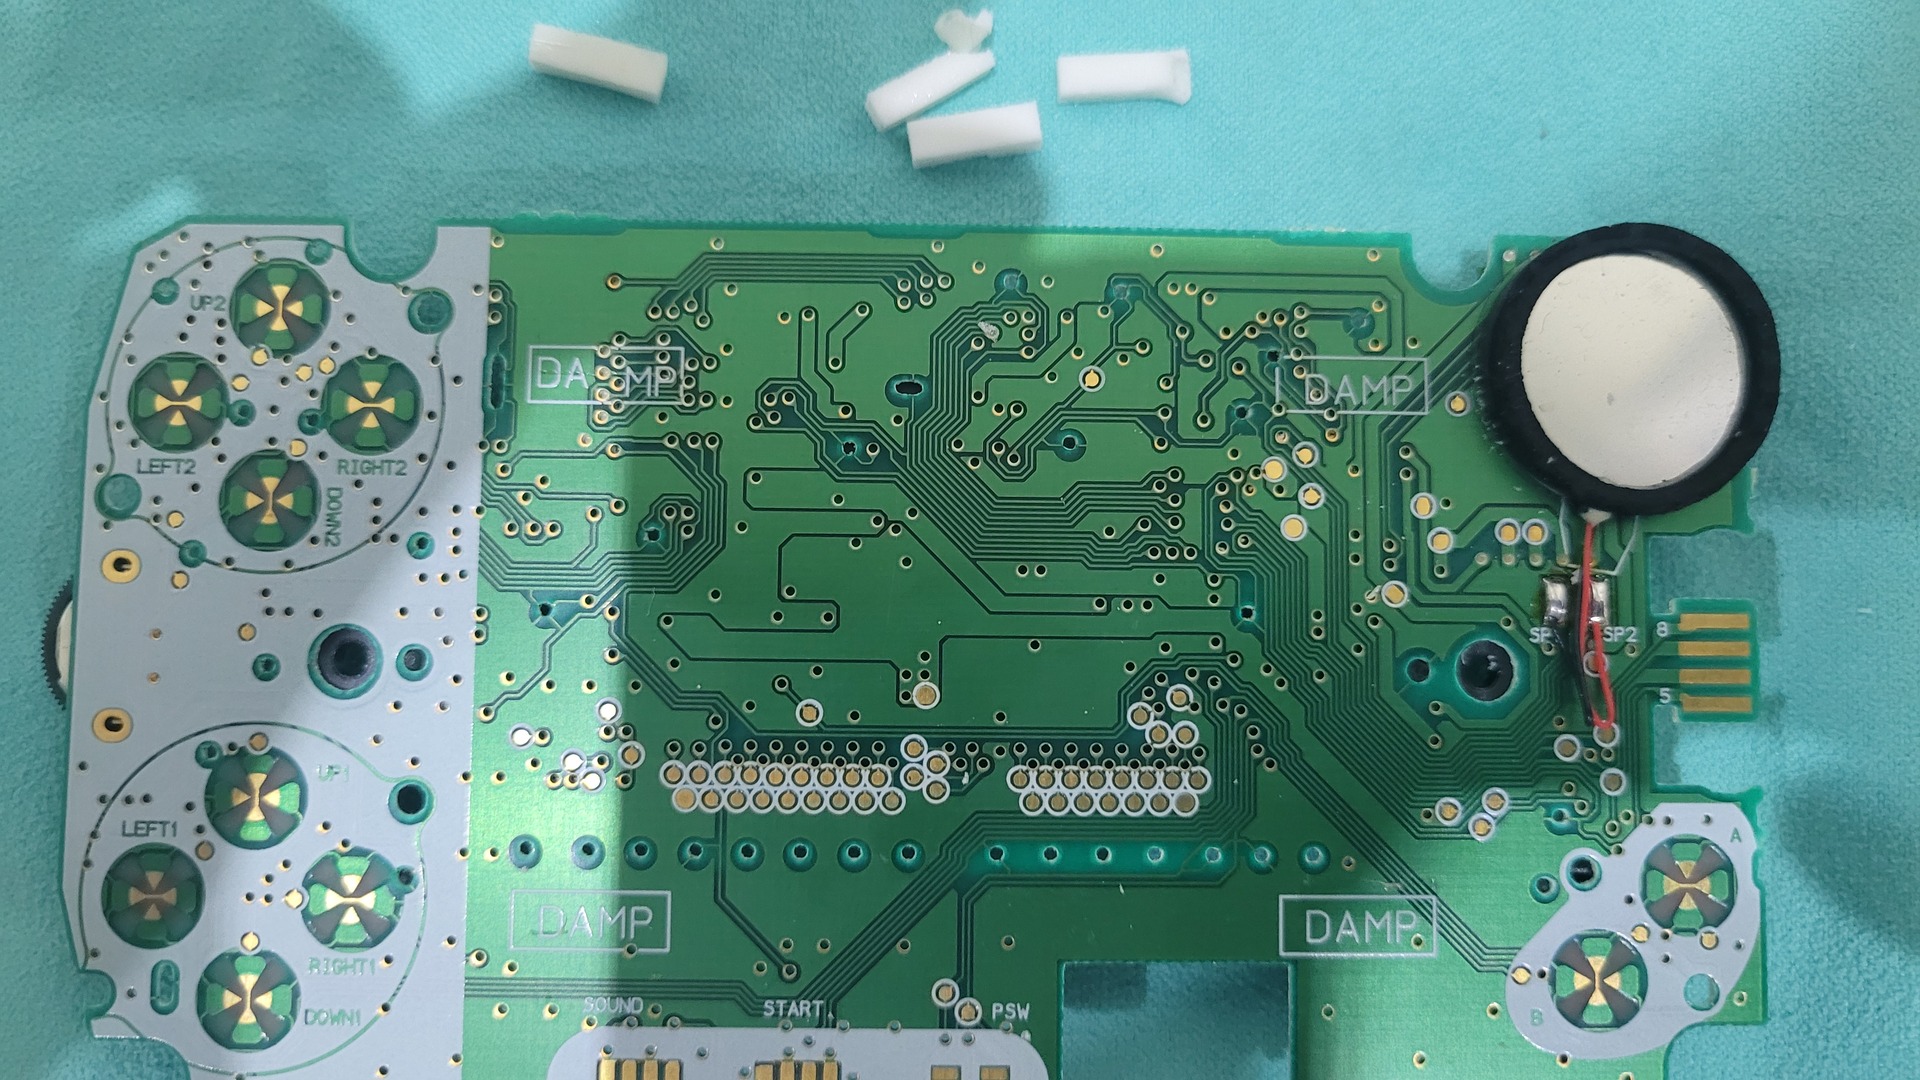
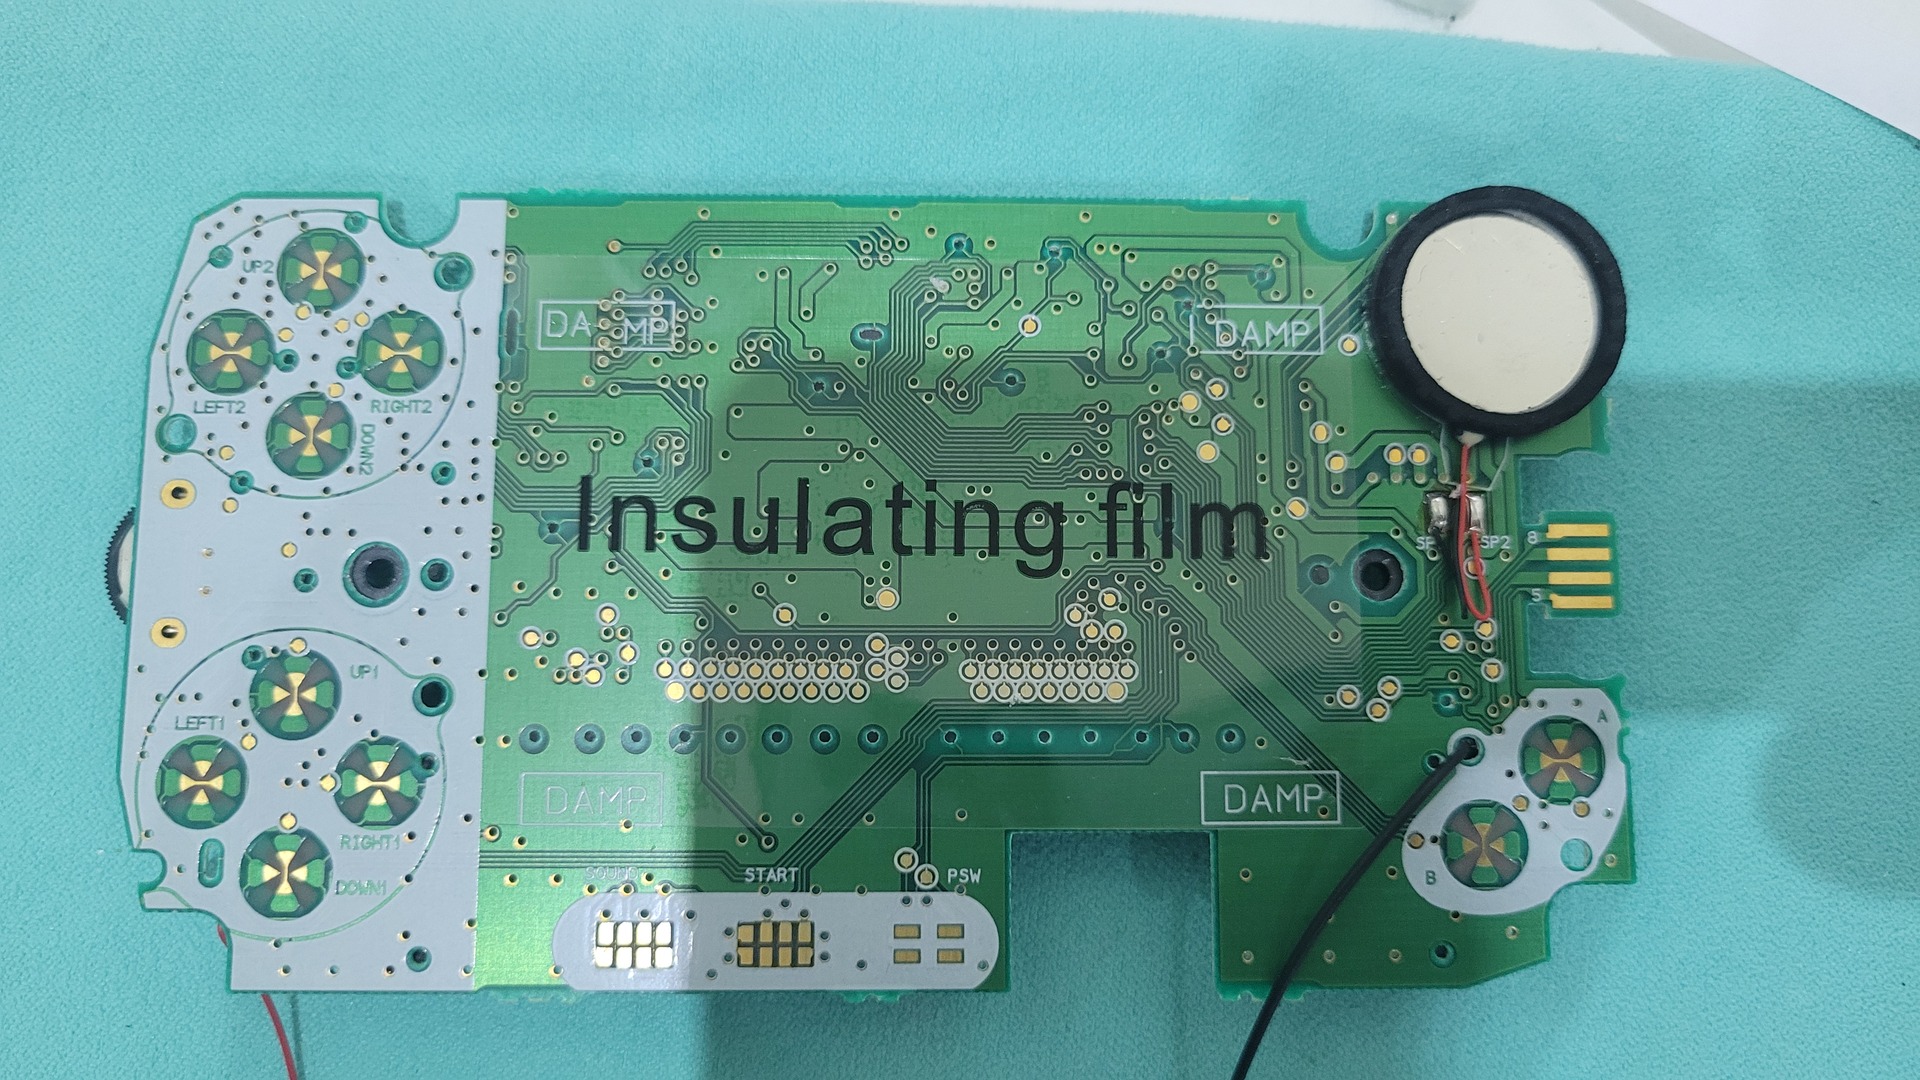
Preparing the motherboard
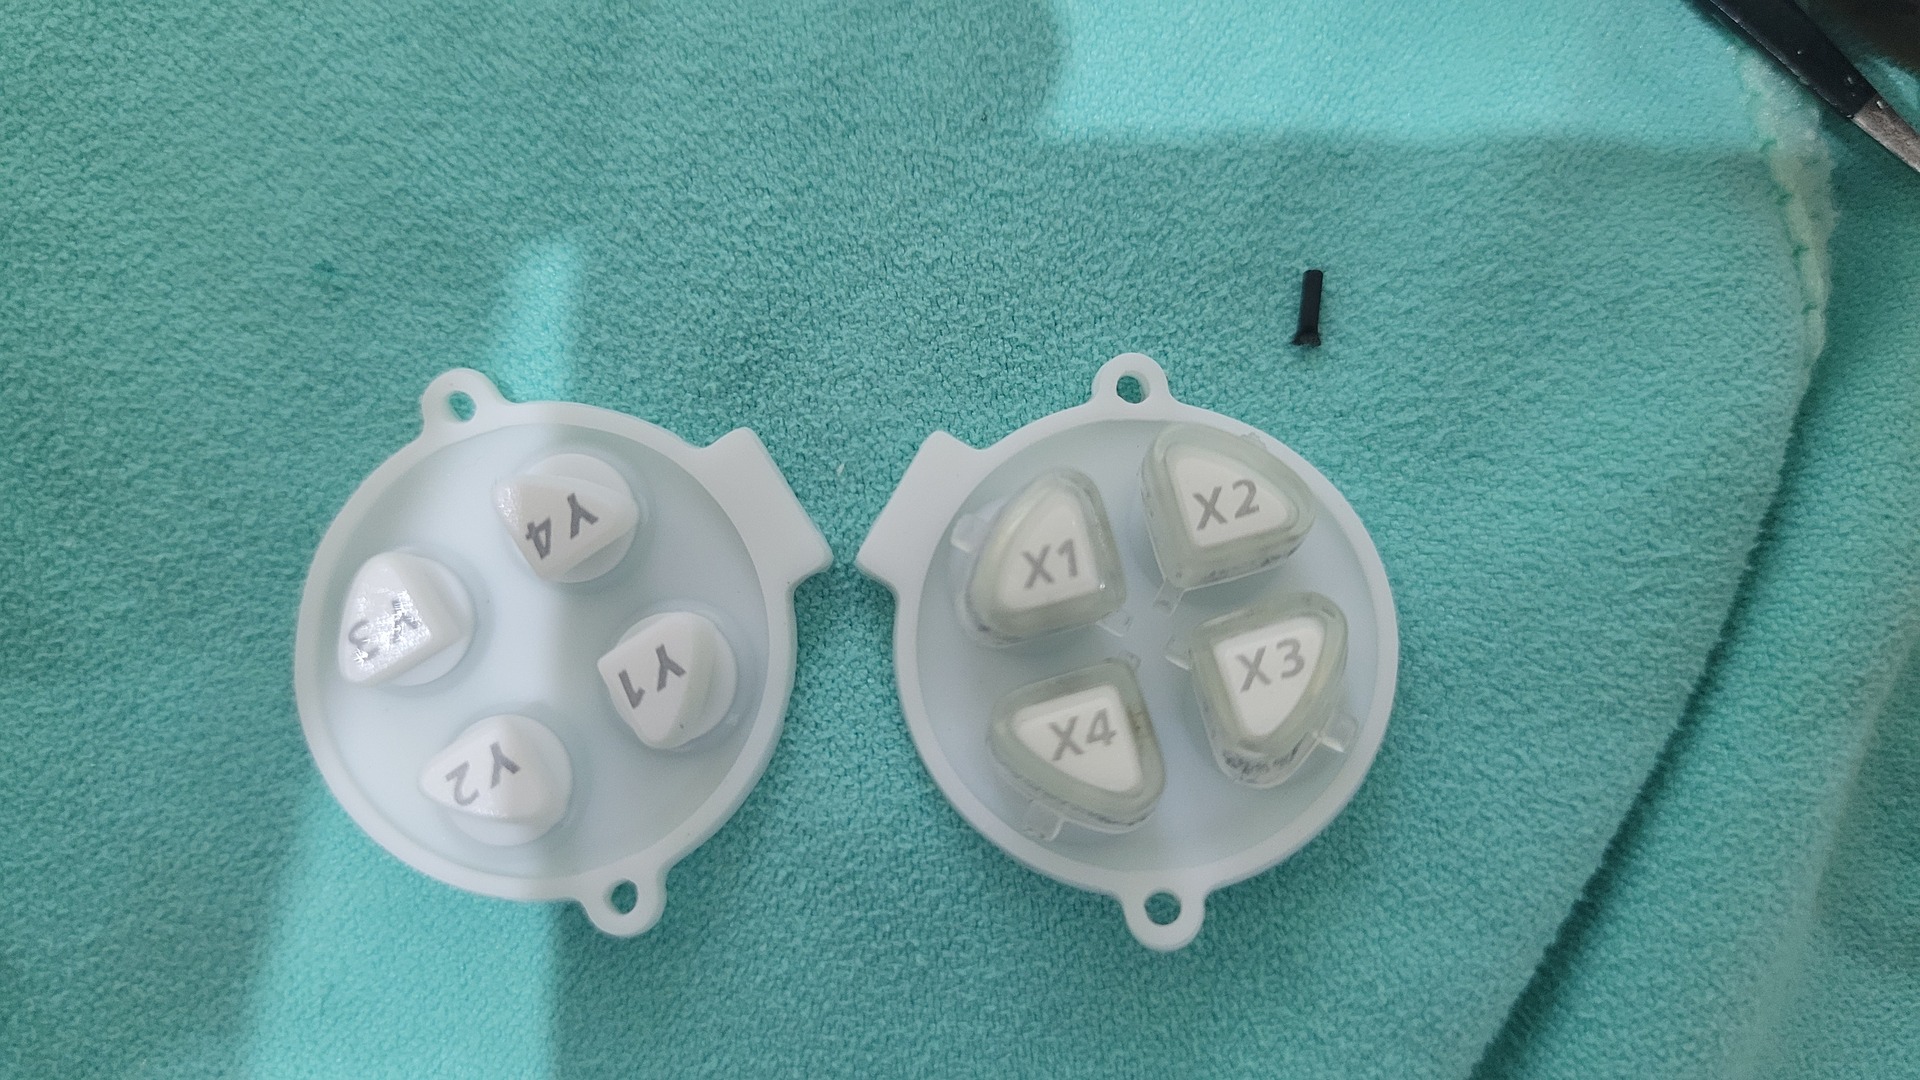
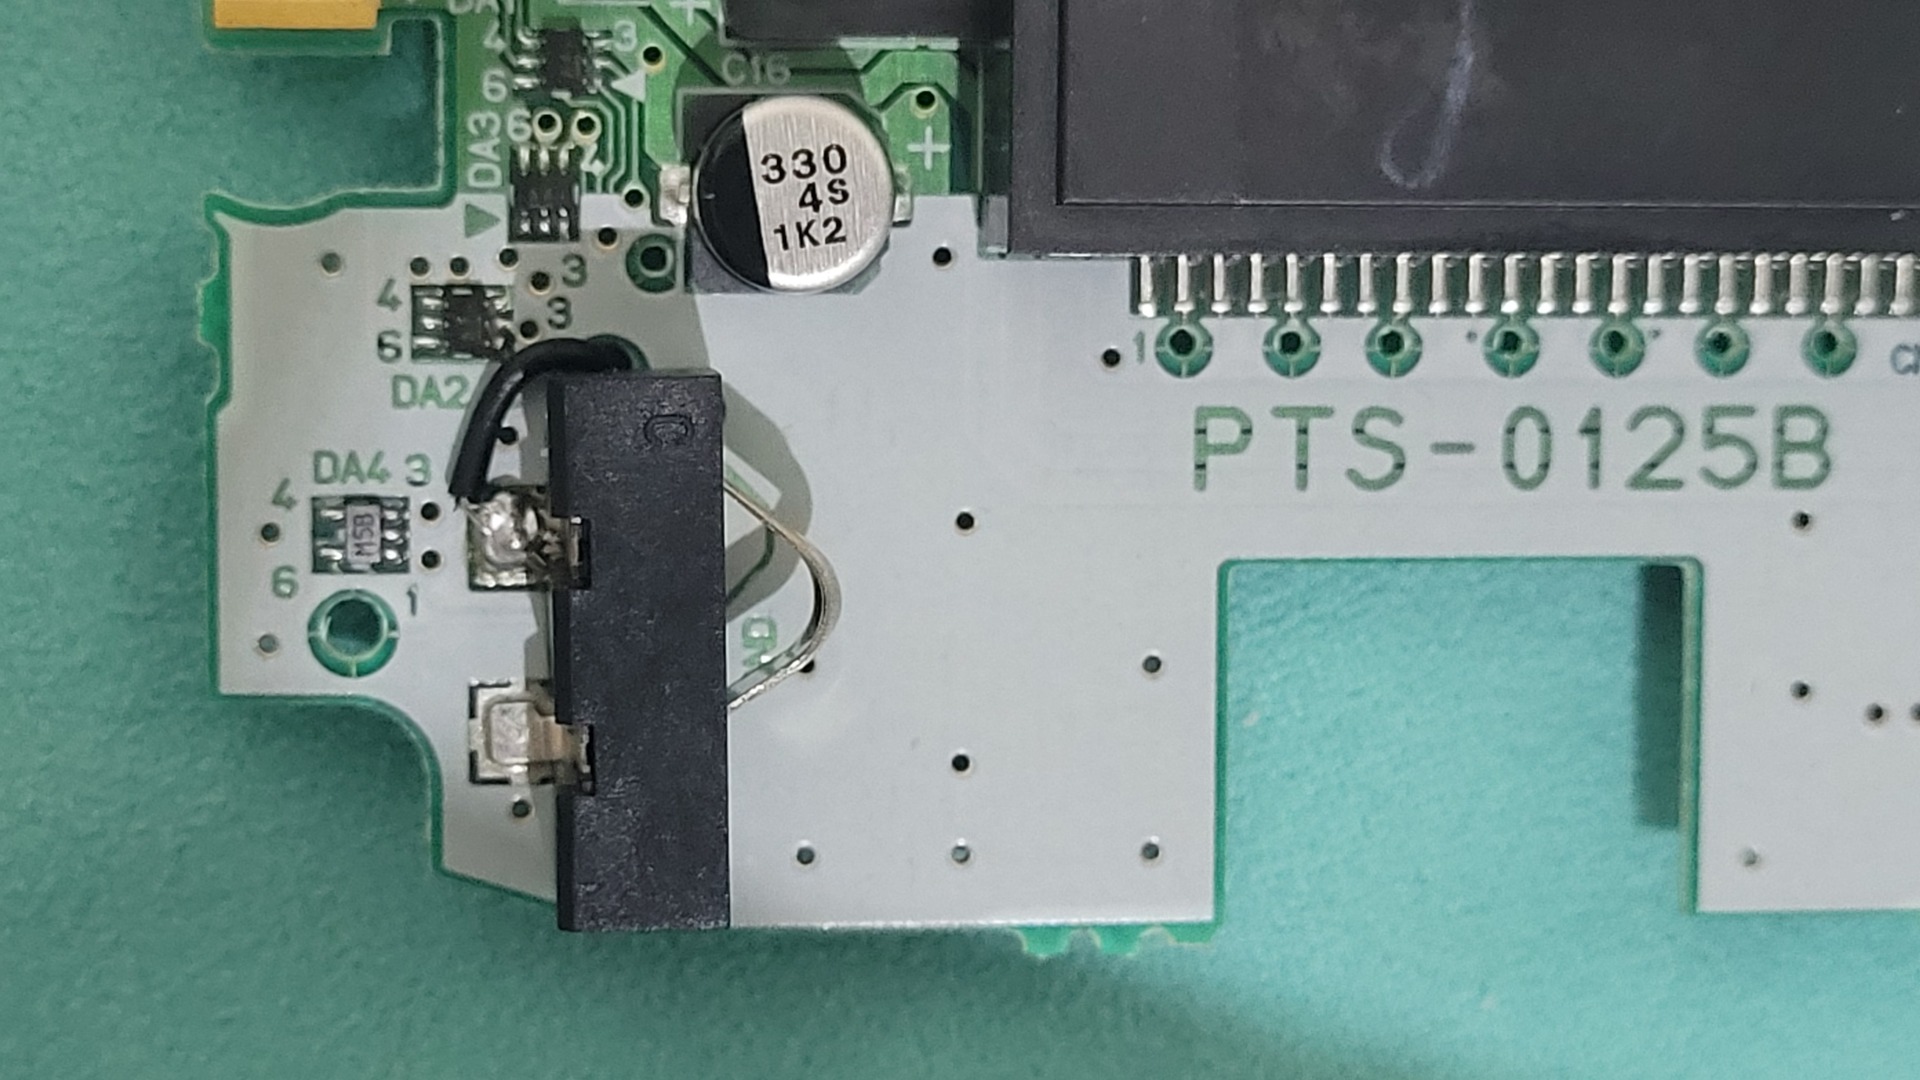
The new display comes with a controler, thus the whole thing is thicker than the original display. for that reason, the small foam pads on the front of the motherboard must be removed. I also used a Q-Tip with isopropyl alcool to clean up any glue residu. It was also a good time to clean up all button’s contacts.

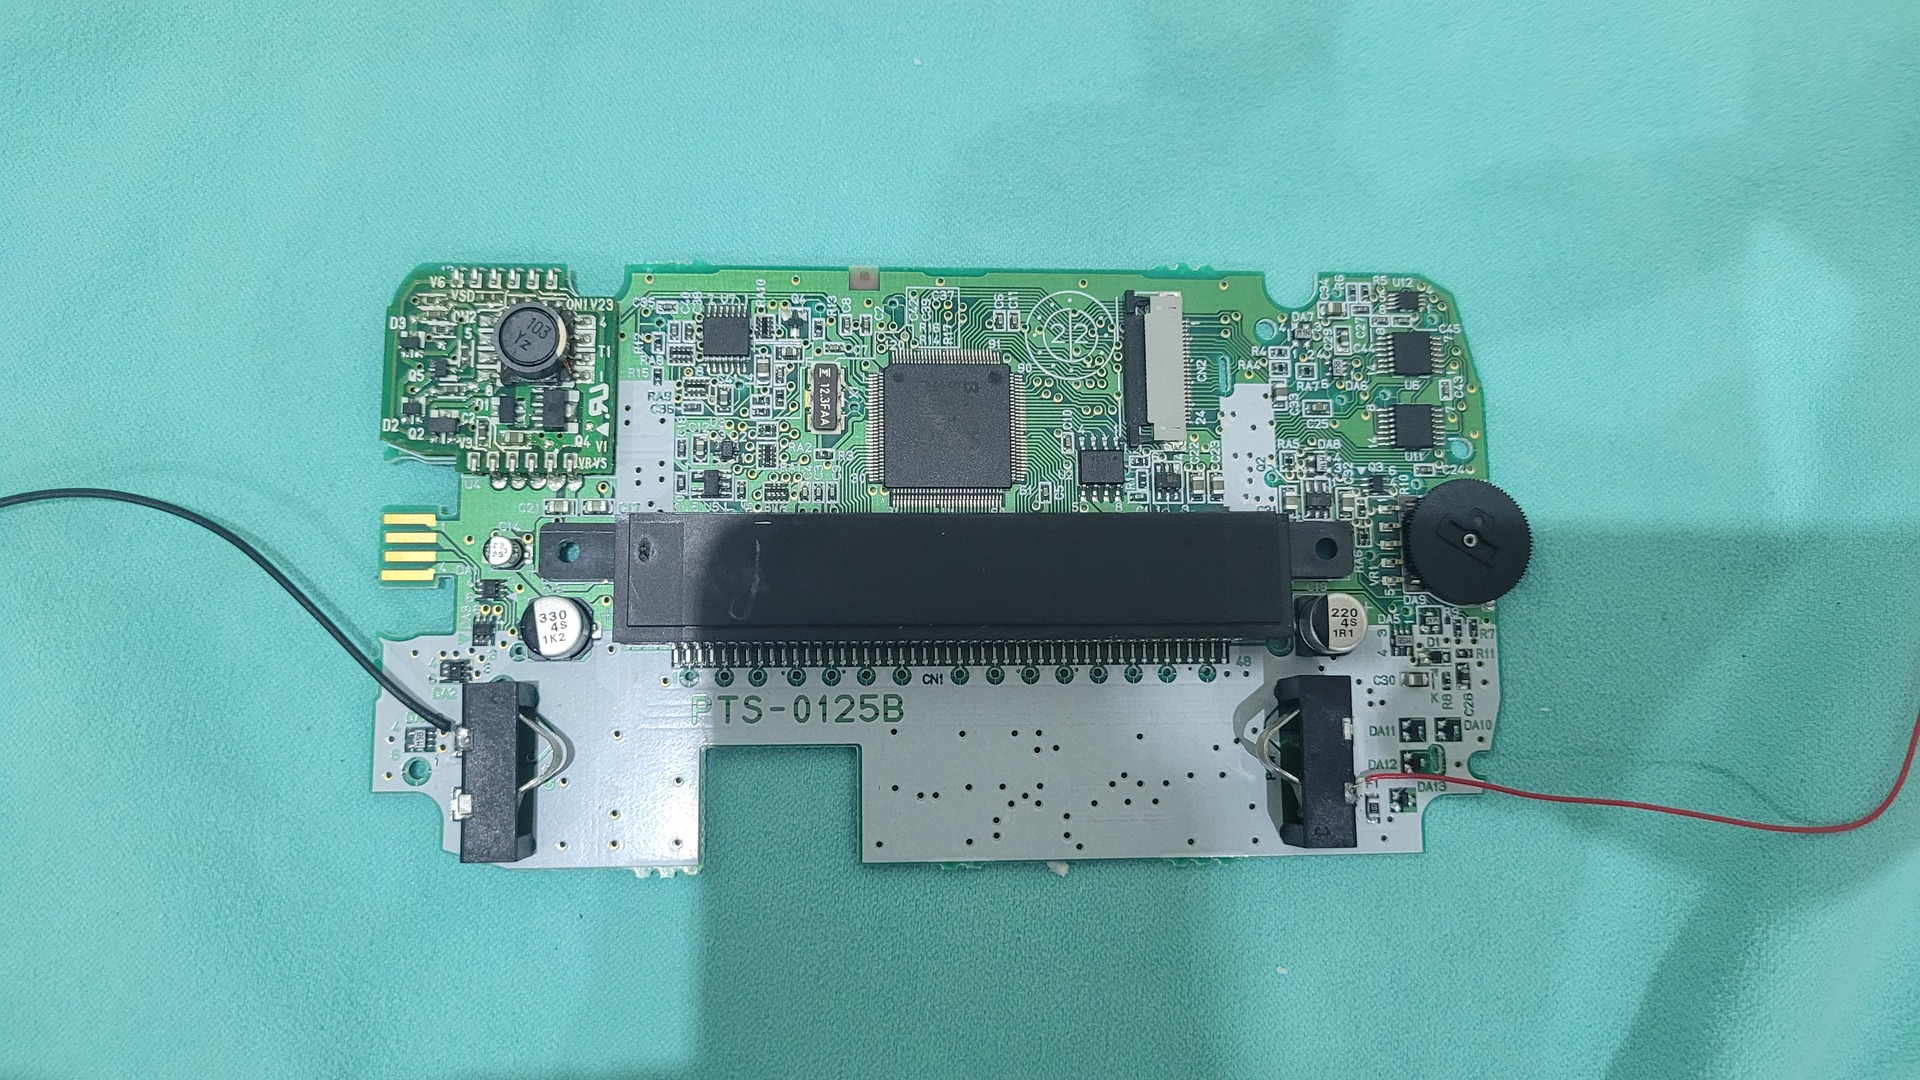
Then, two wires have to be soldered on both battery connectors : they will allow to power the new display system. On my kit, there was only red wires, but I only used one and took another black one from my inventory for the negative signal.
This negative wire can be passed through a small hole near the battery connector, while the positive wire (in red) just go over the bottom of the motherboard.
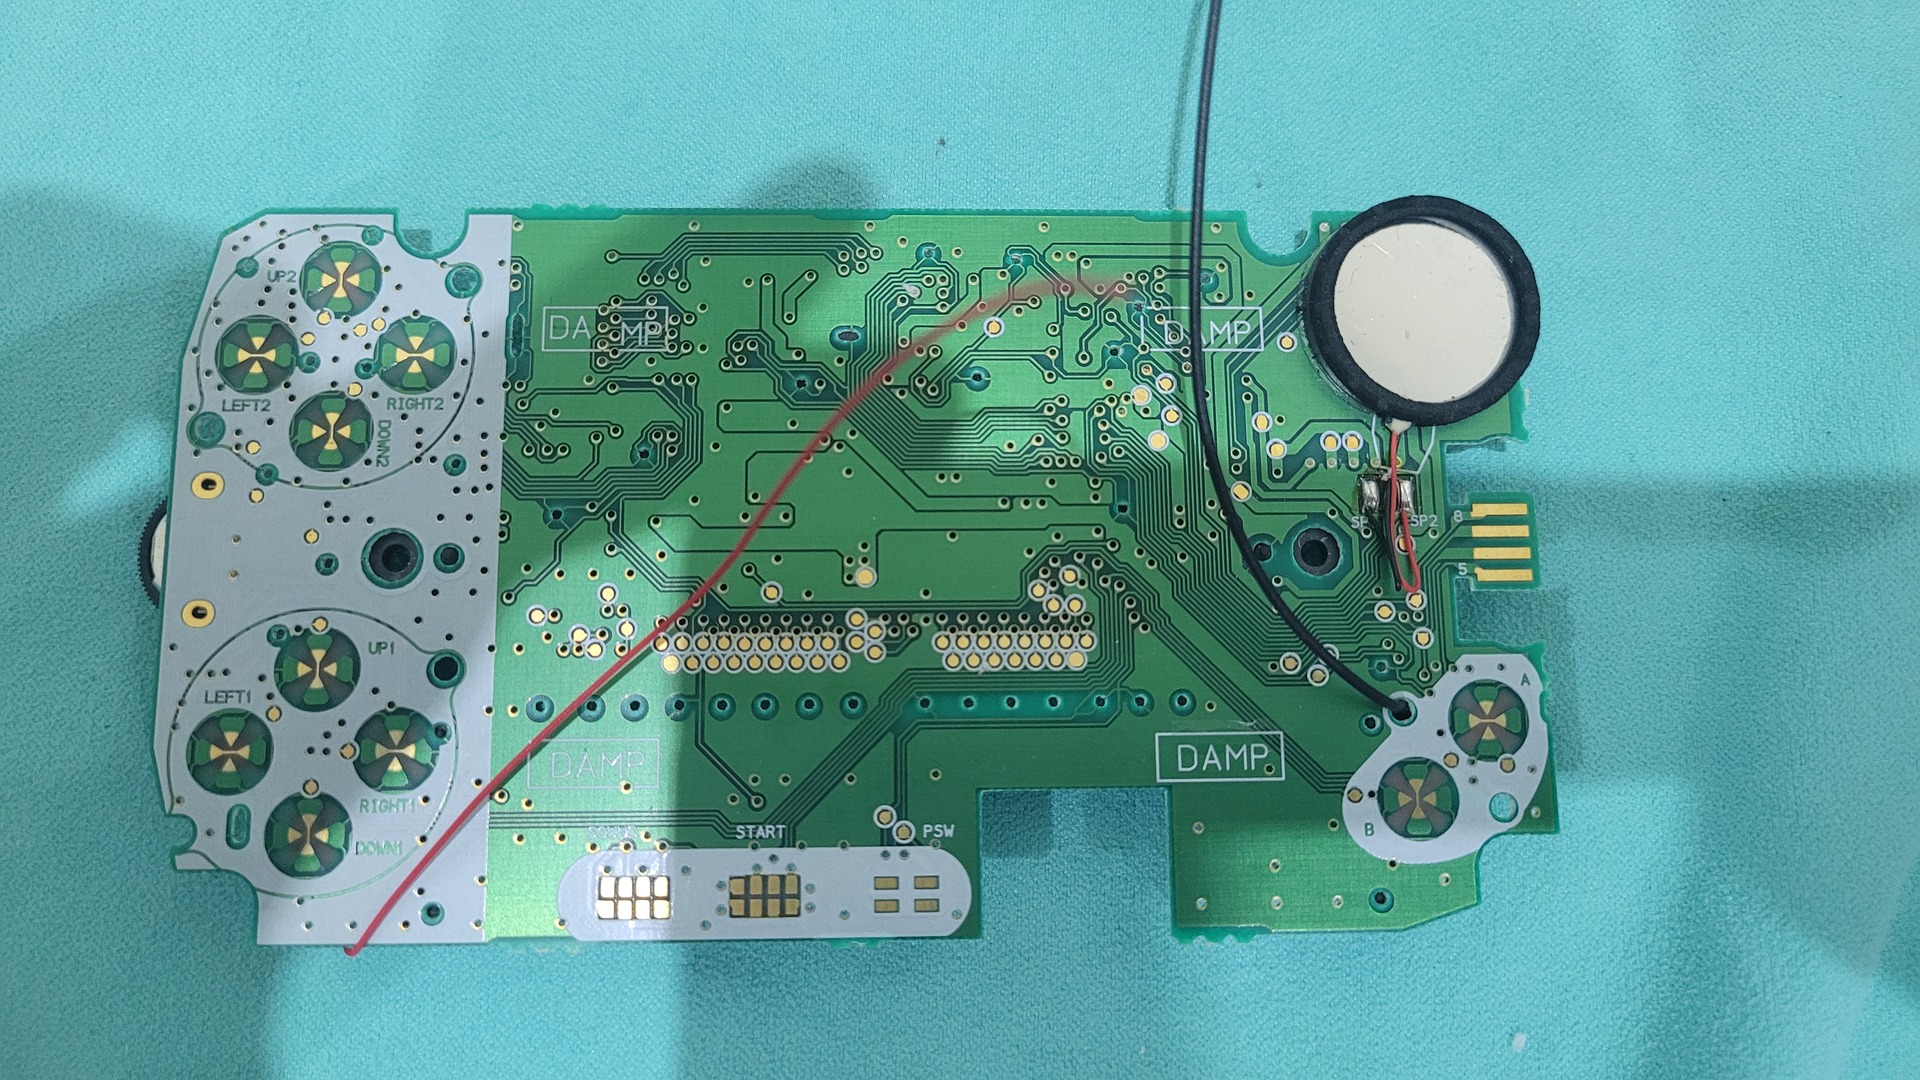
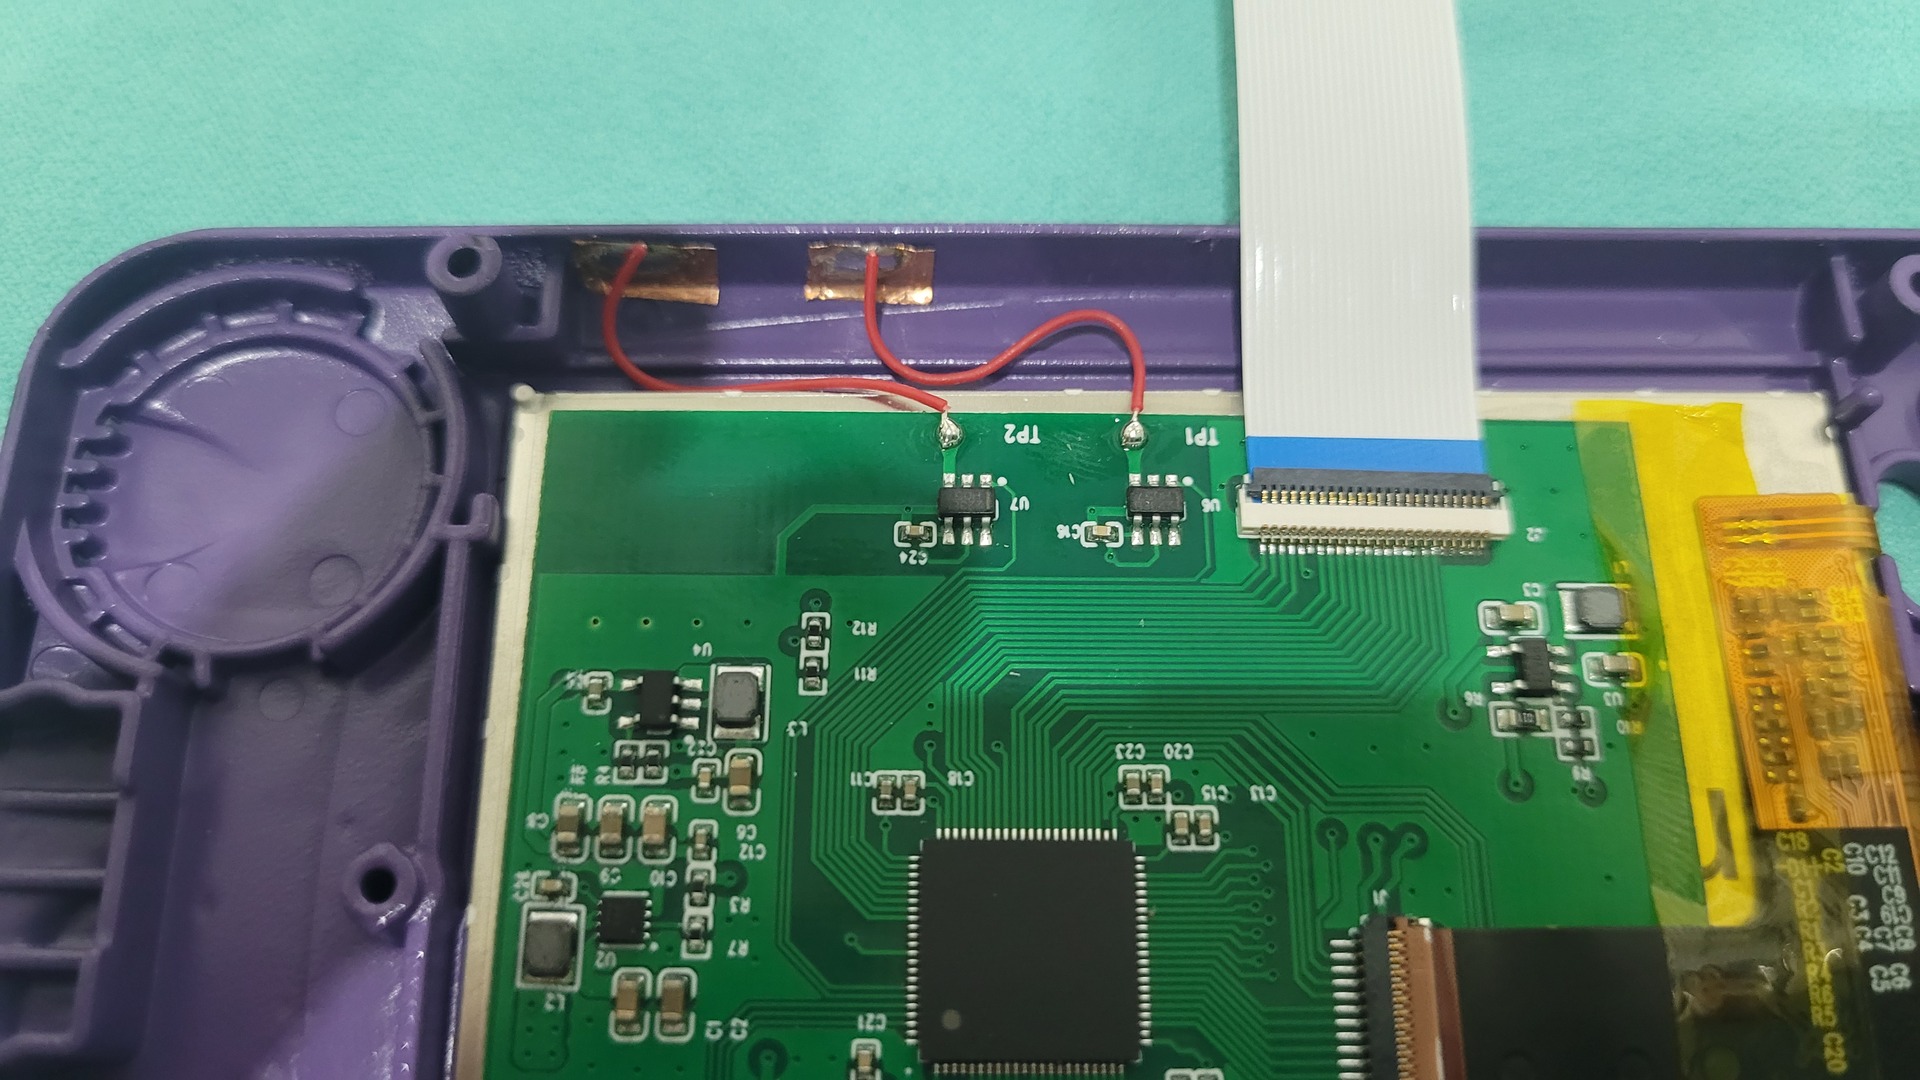
Soldering display controler
The display controler comes with two touch pads already soldered to control color mode and brightness. There are only two wires to solder, which are the ones that have been soldered to the battery connectors in order to power the whole kit (note that I shortened the wires a bit). You may want not to use the color mode selection pad, as this functionality is pretty useless from my point of view.
A ribbon cable must also be connected for the display panel
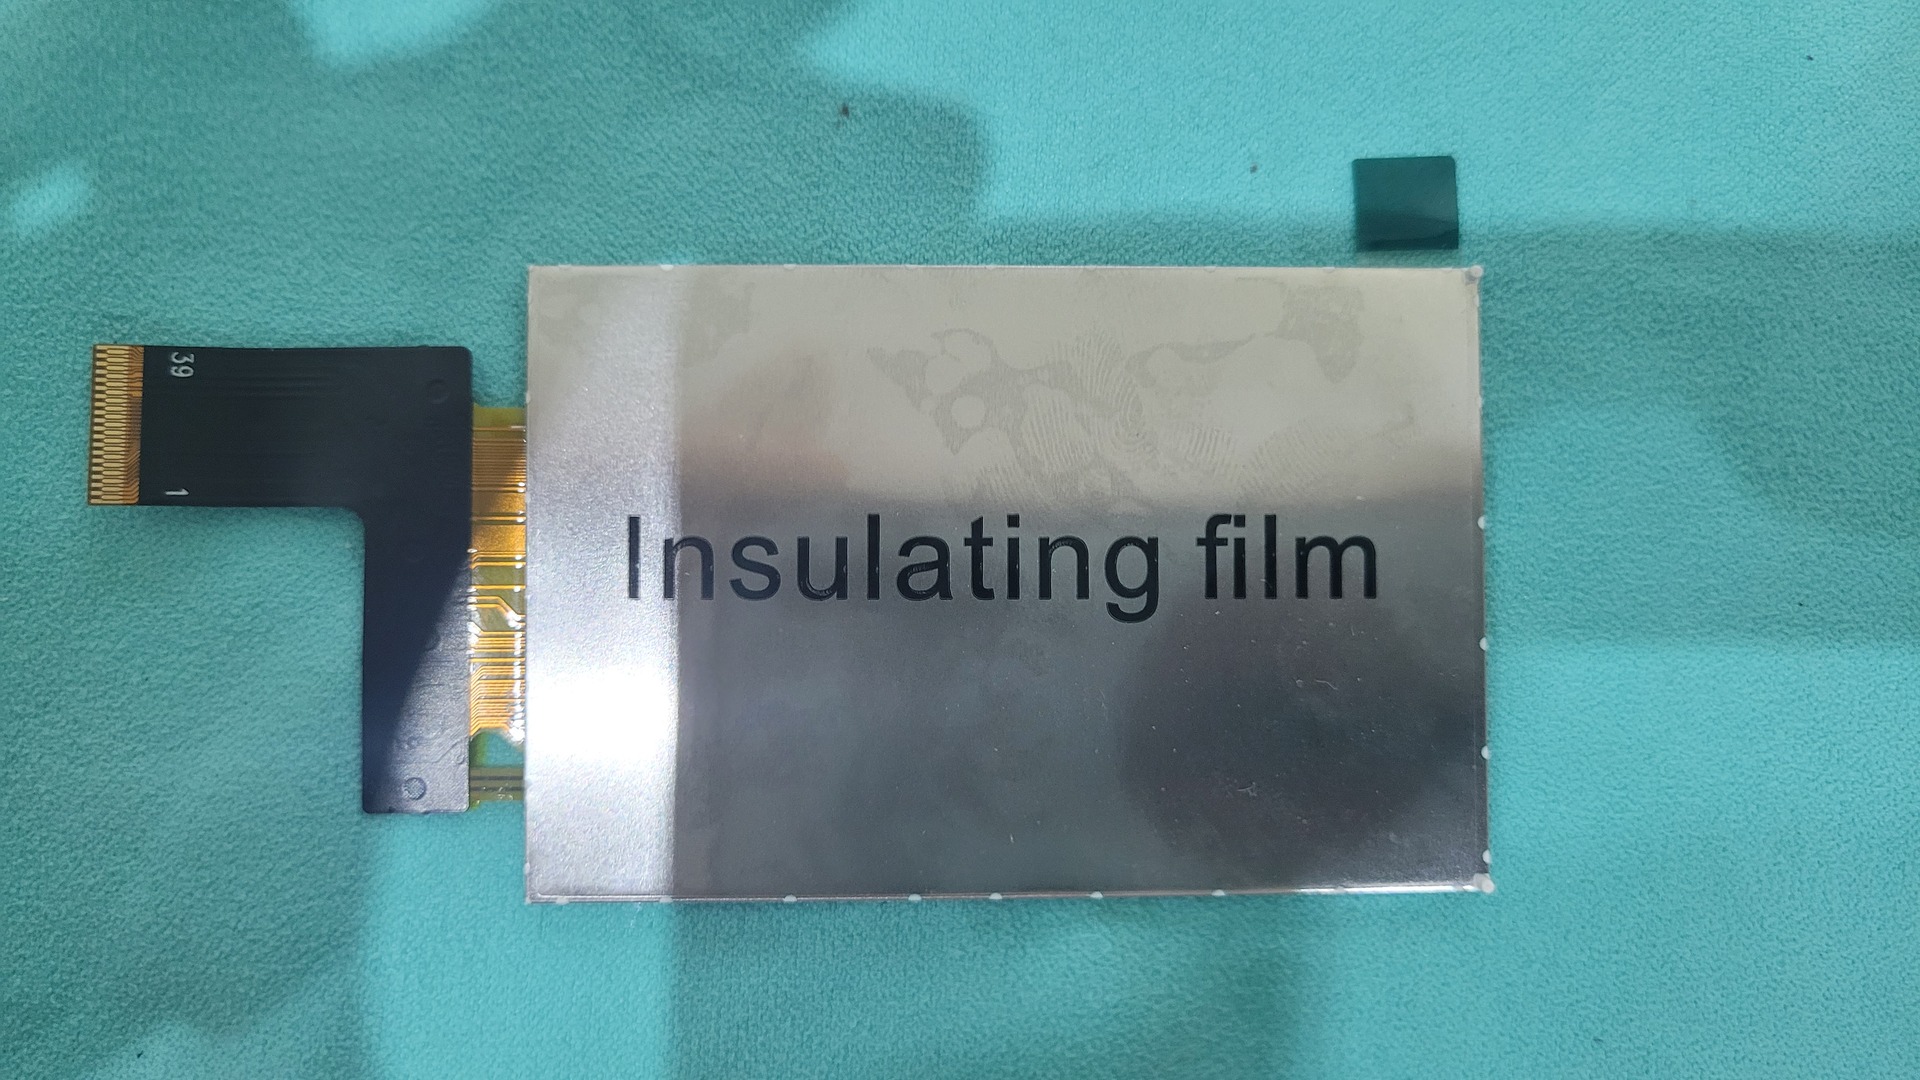
As the foam pad has been removed, the kit provide two insulating films to protect the motherboard from short circuits with the display panel.
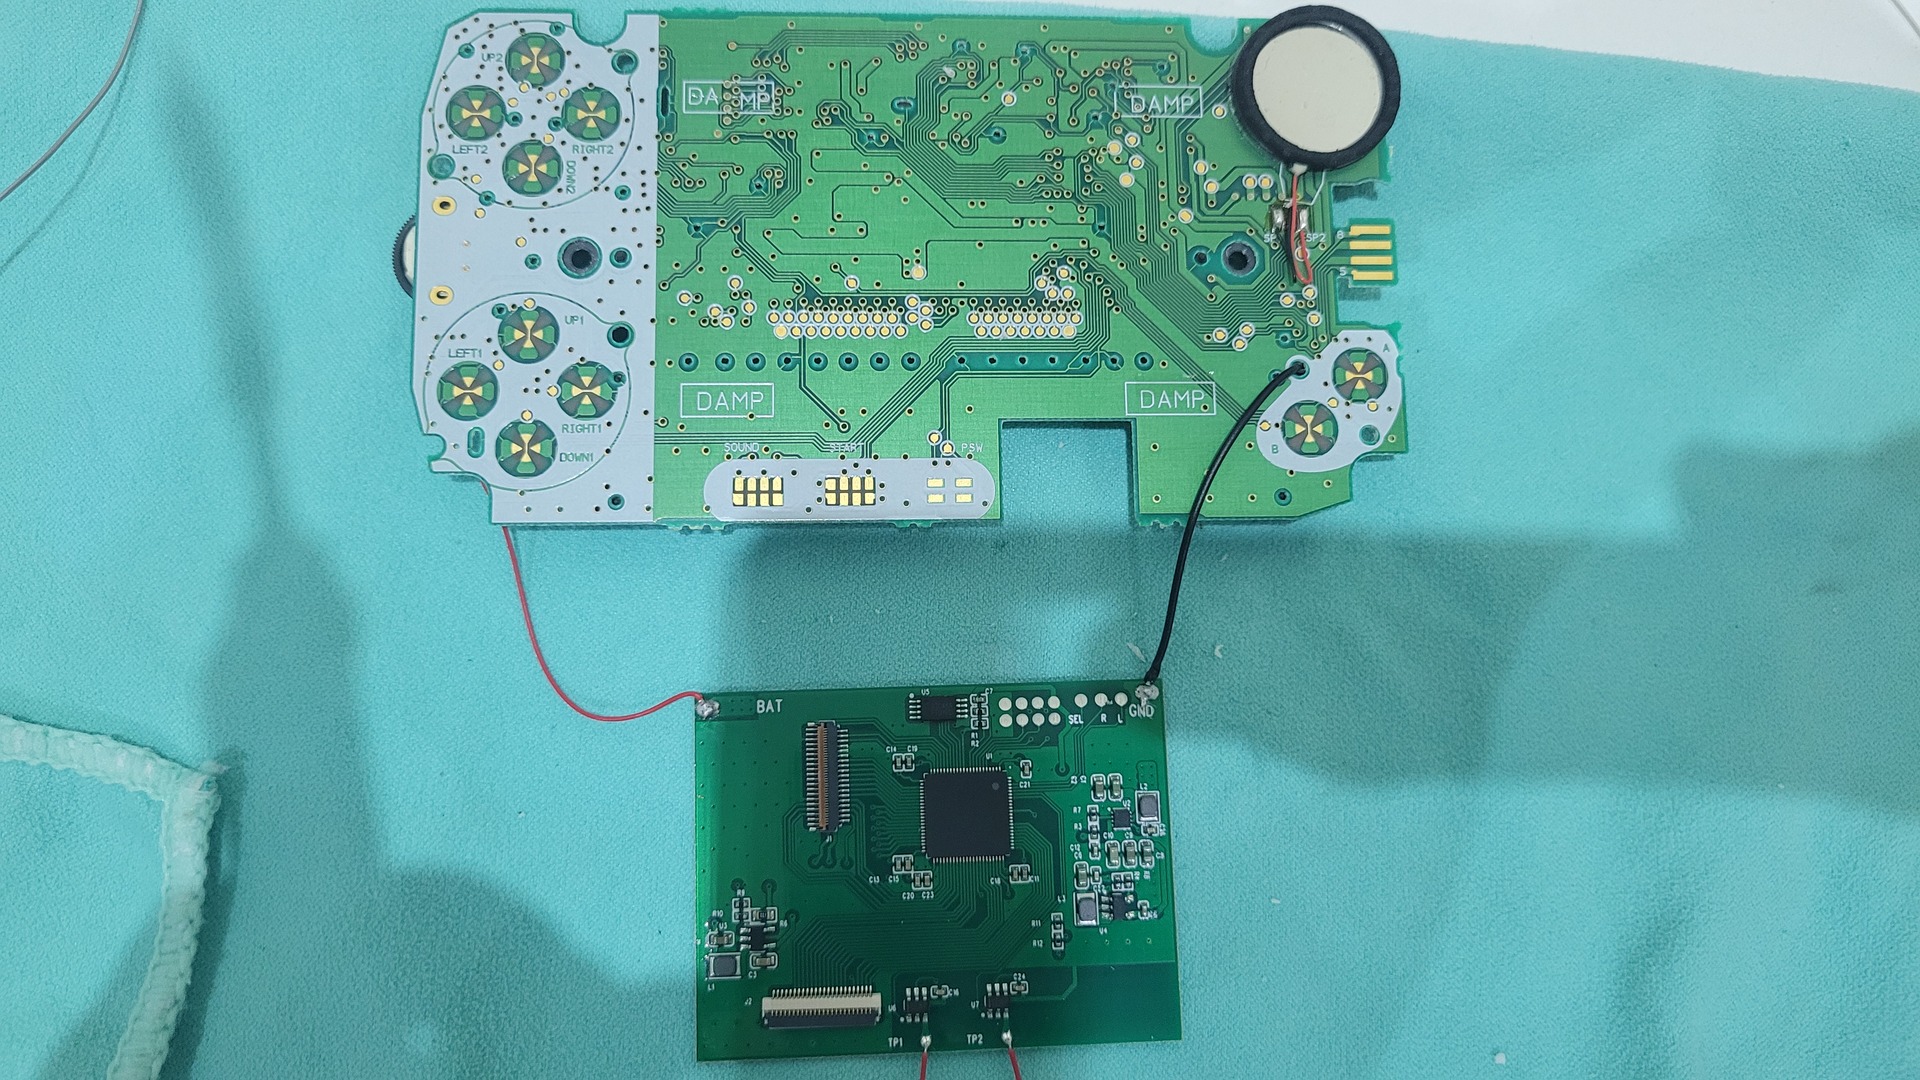
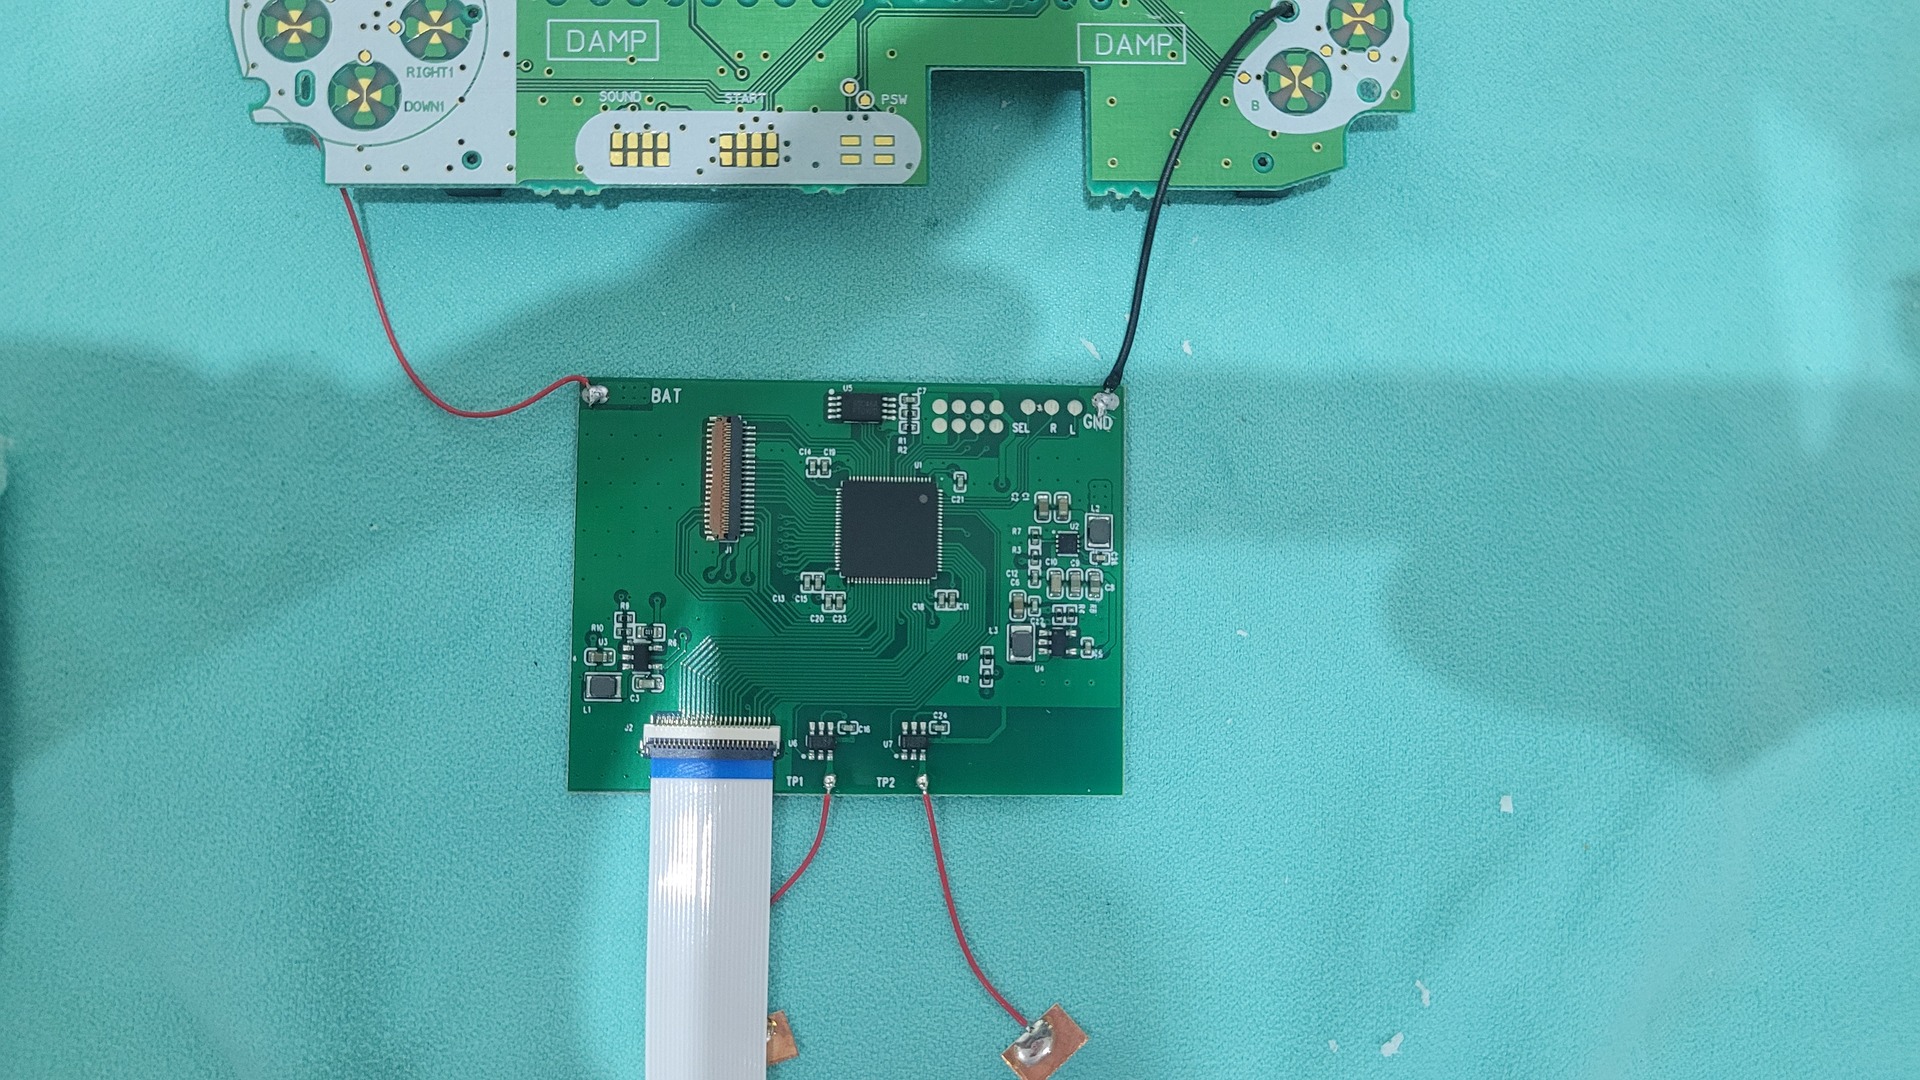
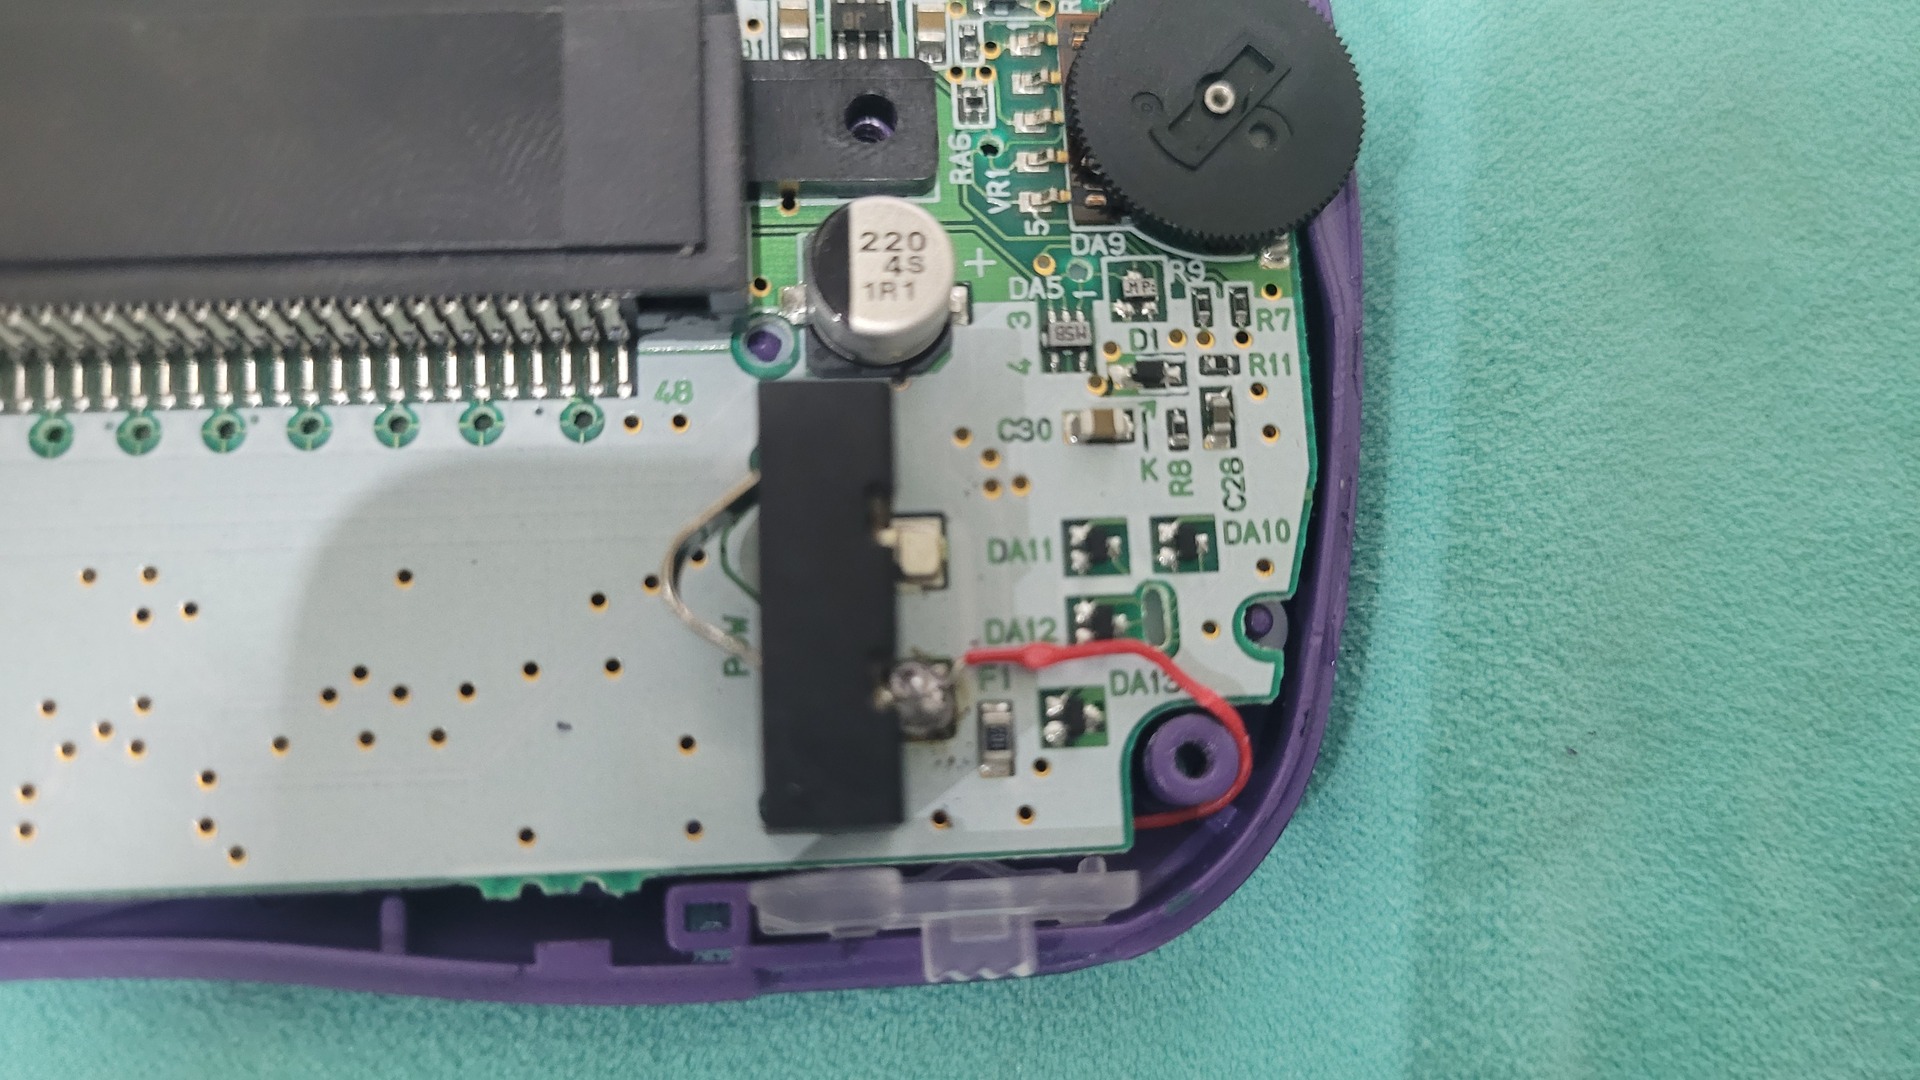
Final assembly
With all wiring finished, putting all together is a matter of few minutes. There is no need to use adhesive tape to fixe the display panel as it can’t move when the console is closed. Again here, you may choose to remove the color mode selection pad (I will probably do that too).

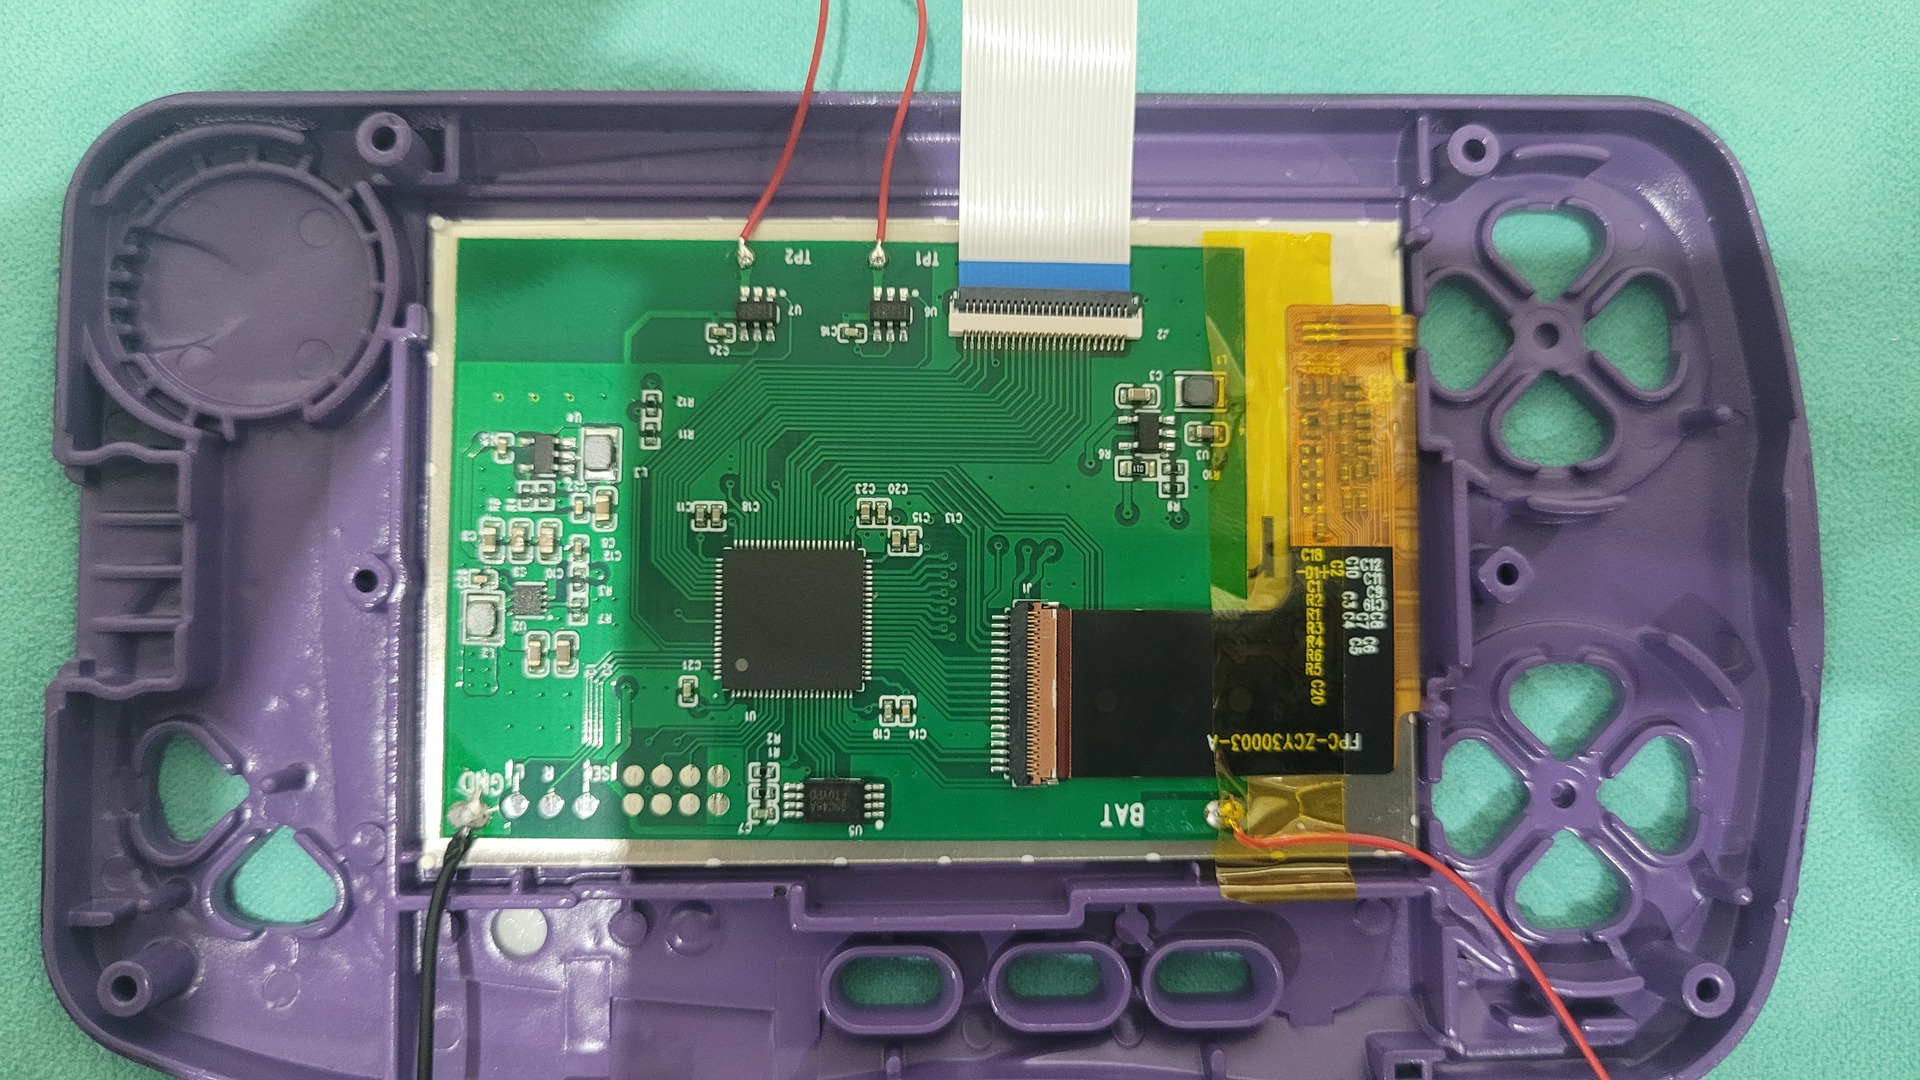
the last step is to connect the ribbon cable from the new display controler to the motherboard. The ribbon cable of my kit was a bit taller than necessary, but it can slide easily between the motherboard and the display controler.
Also, the wire from the positive battery connector have to be correctly positioned in order to avoid any damage the skrew could do while closing the shell.

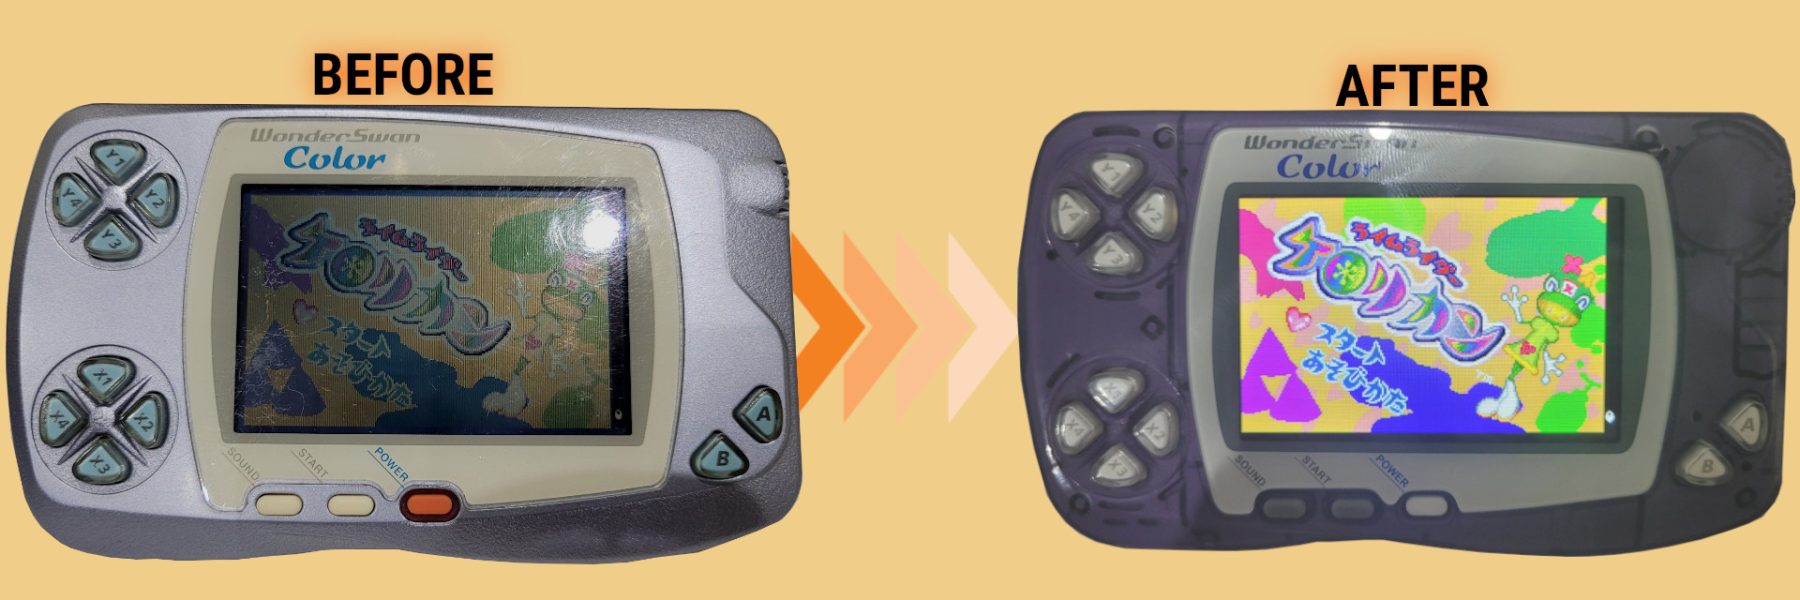
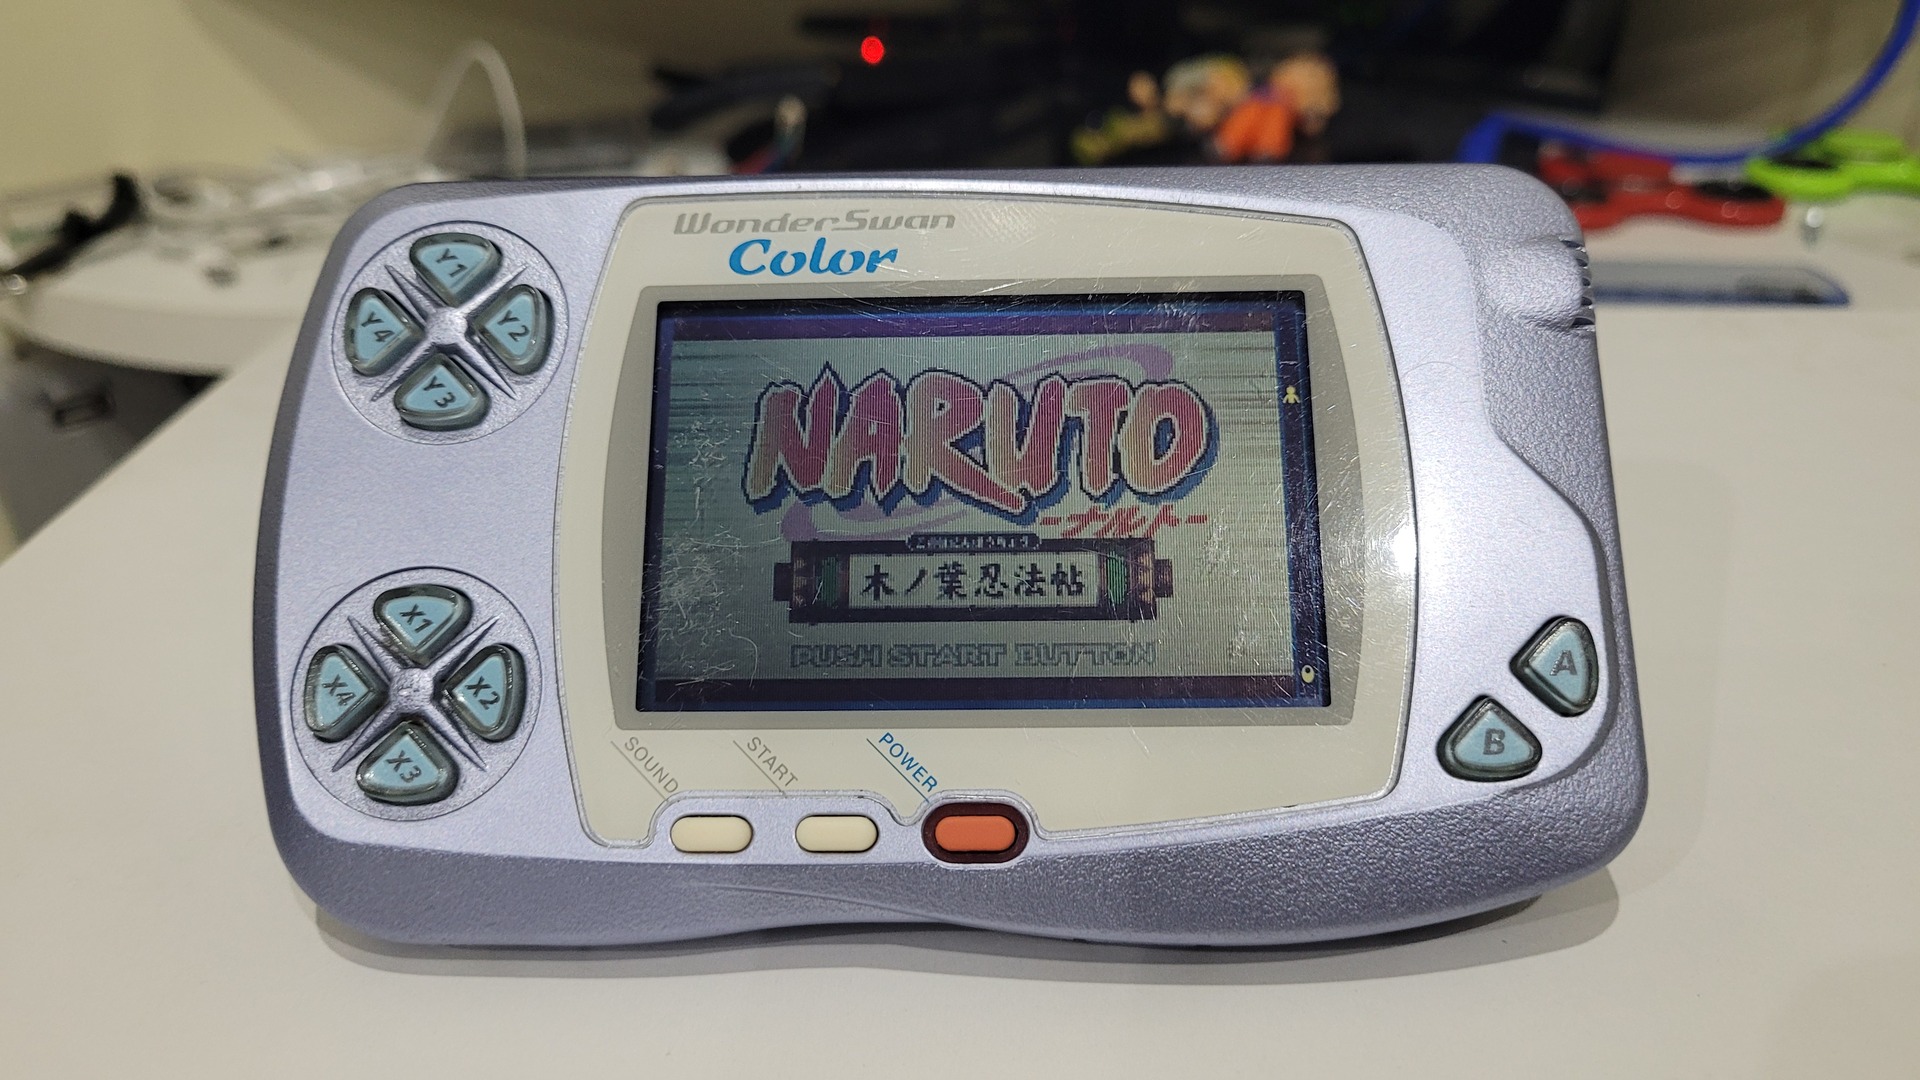
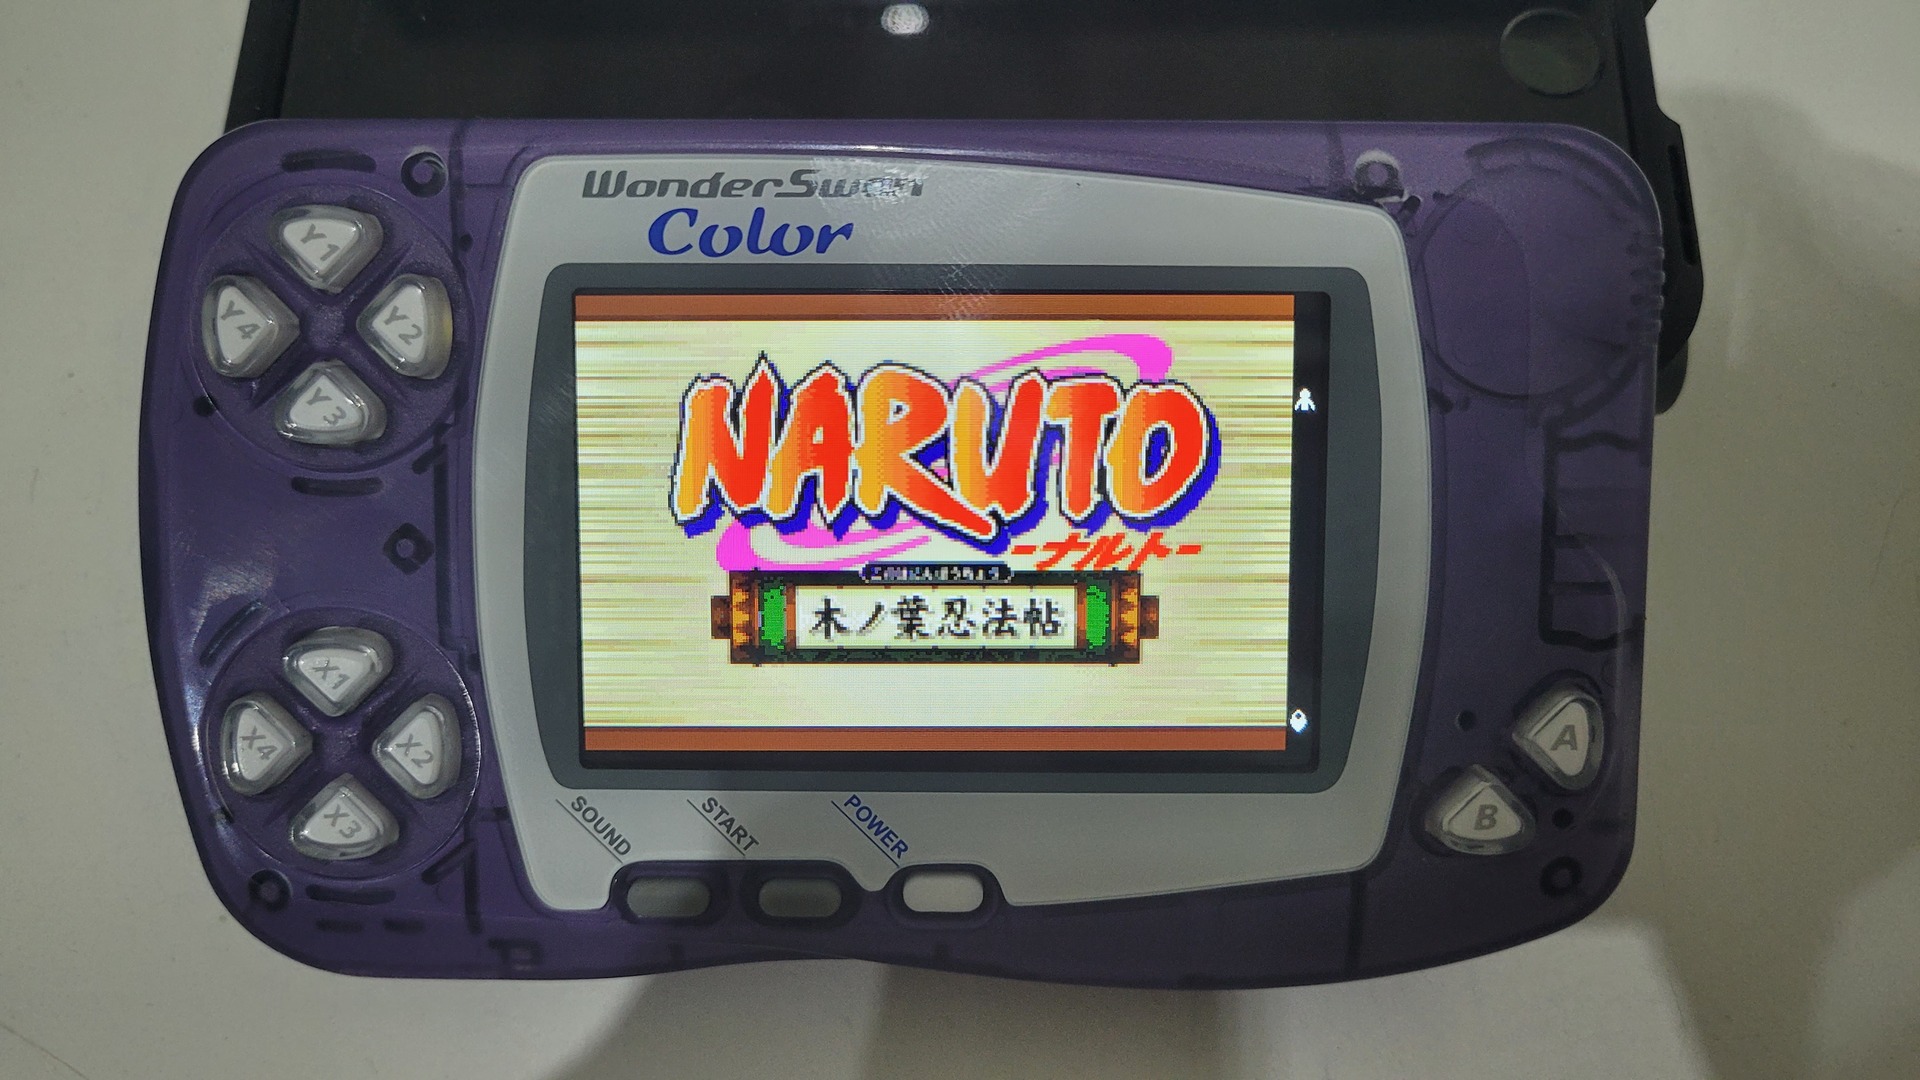
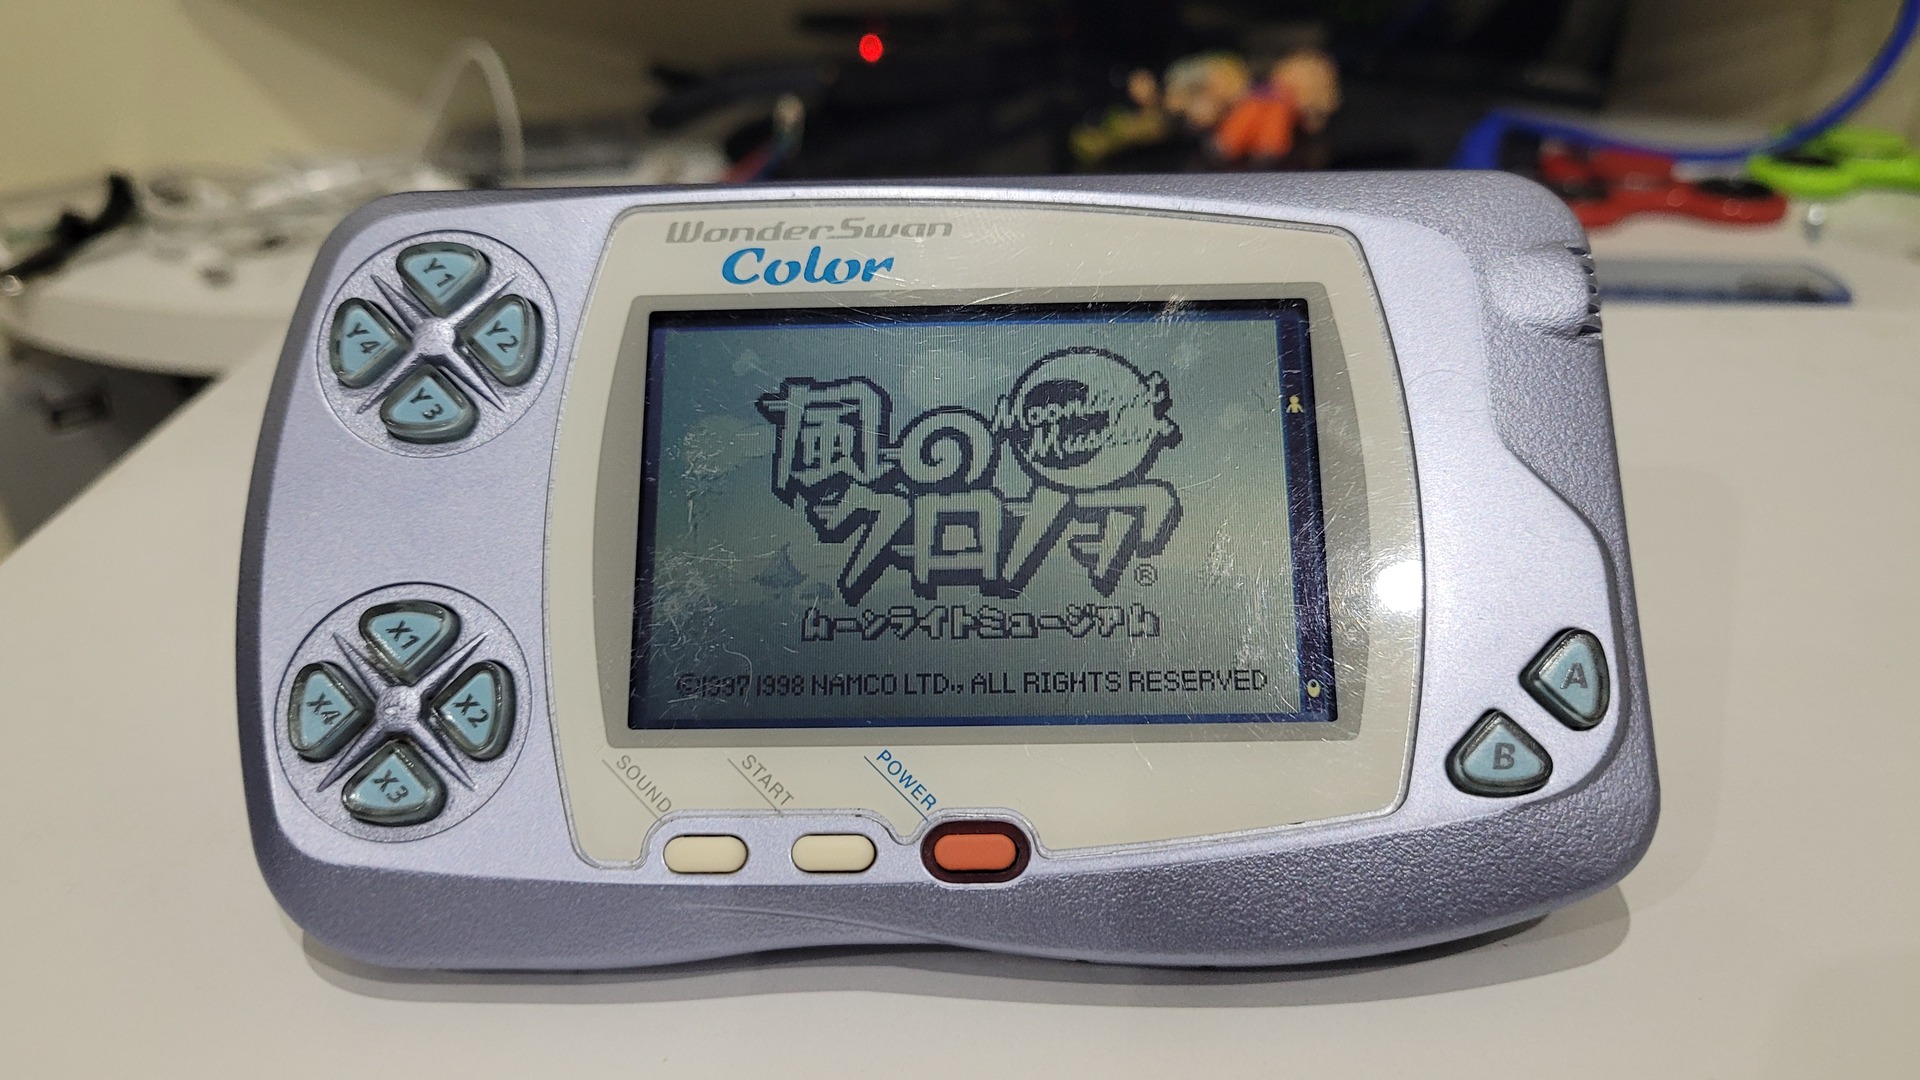
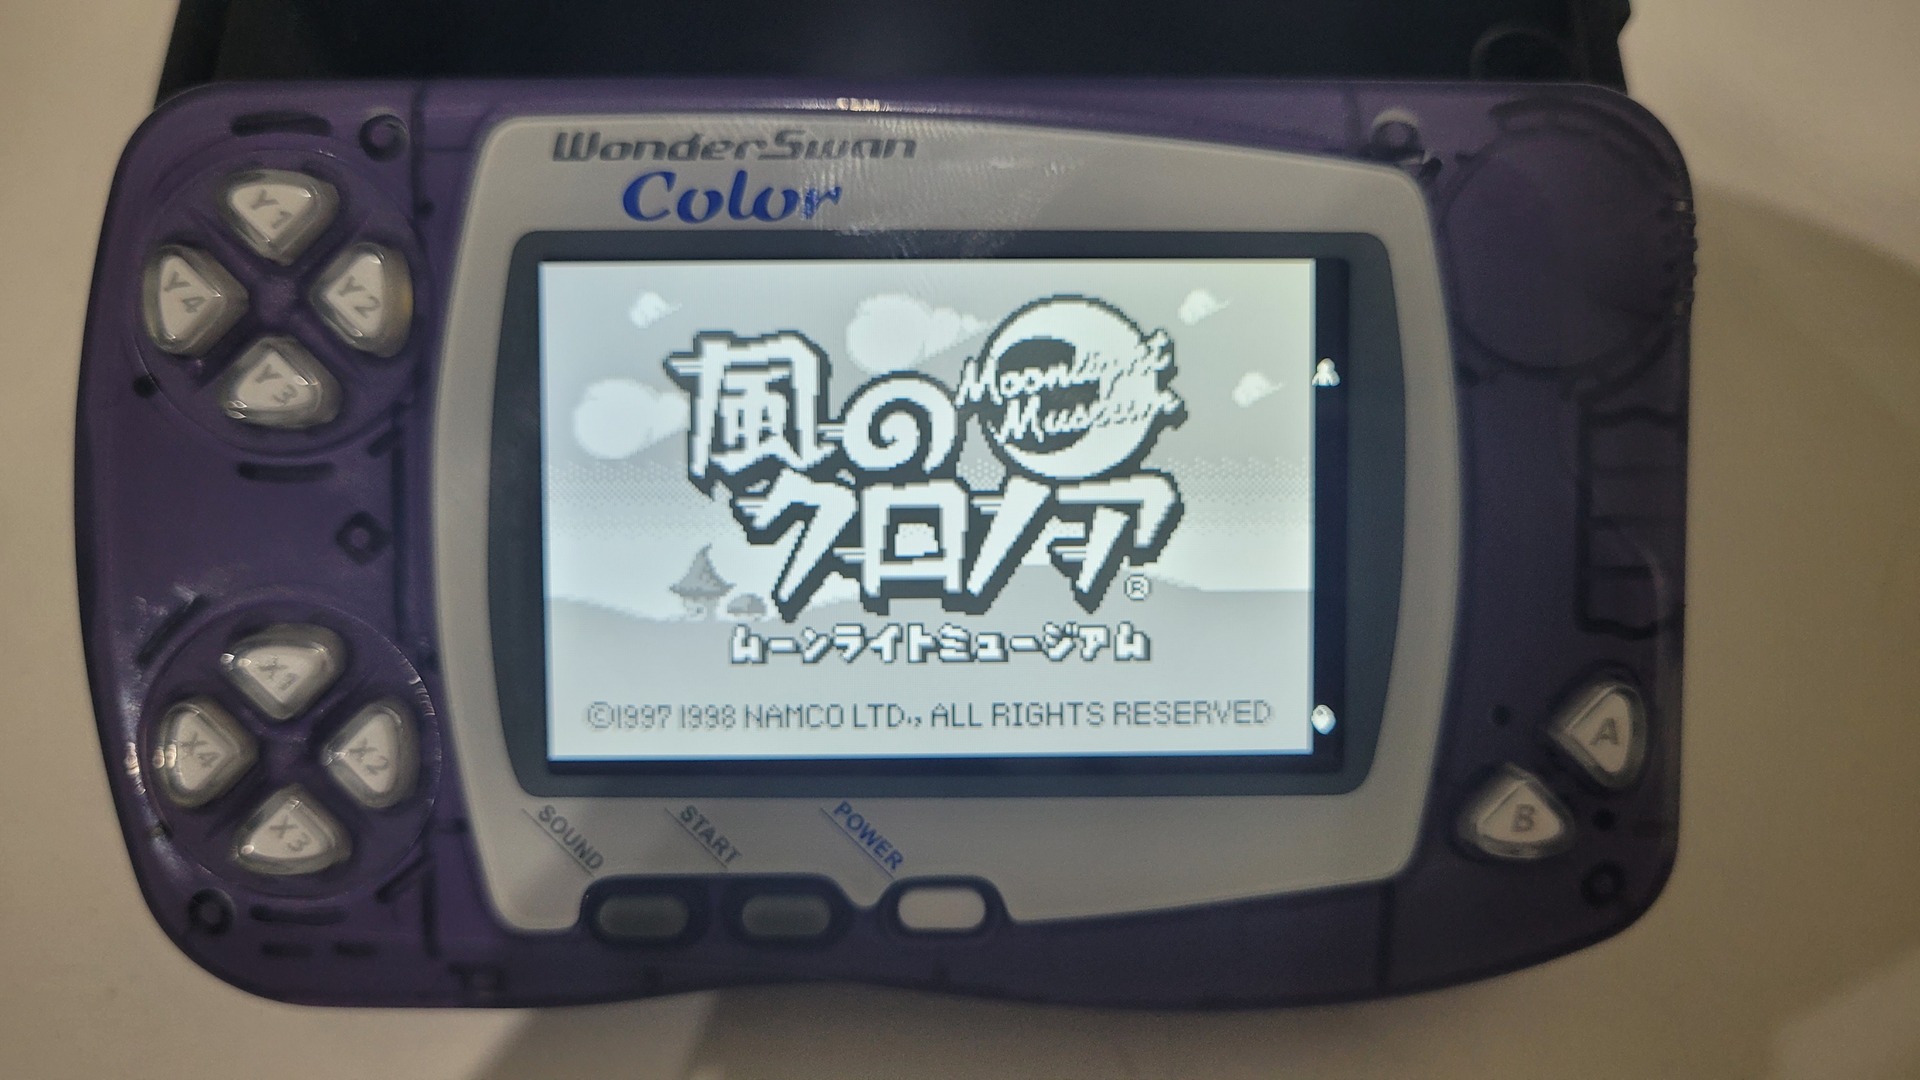
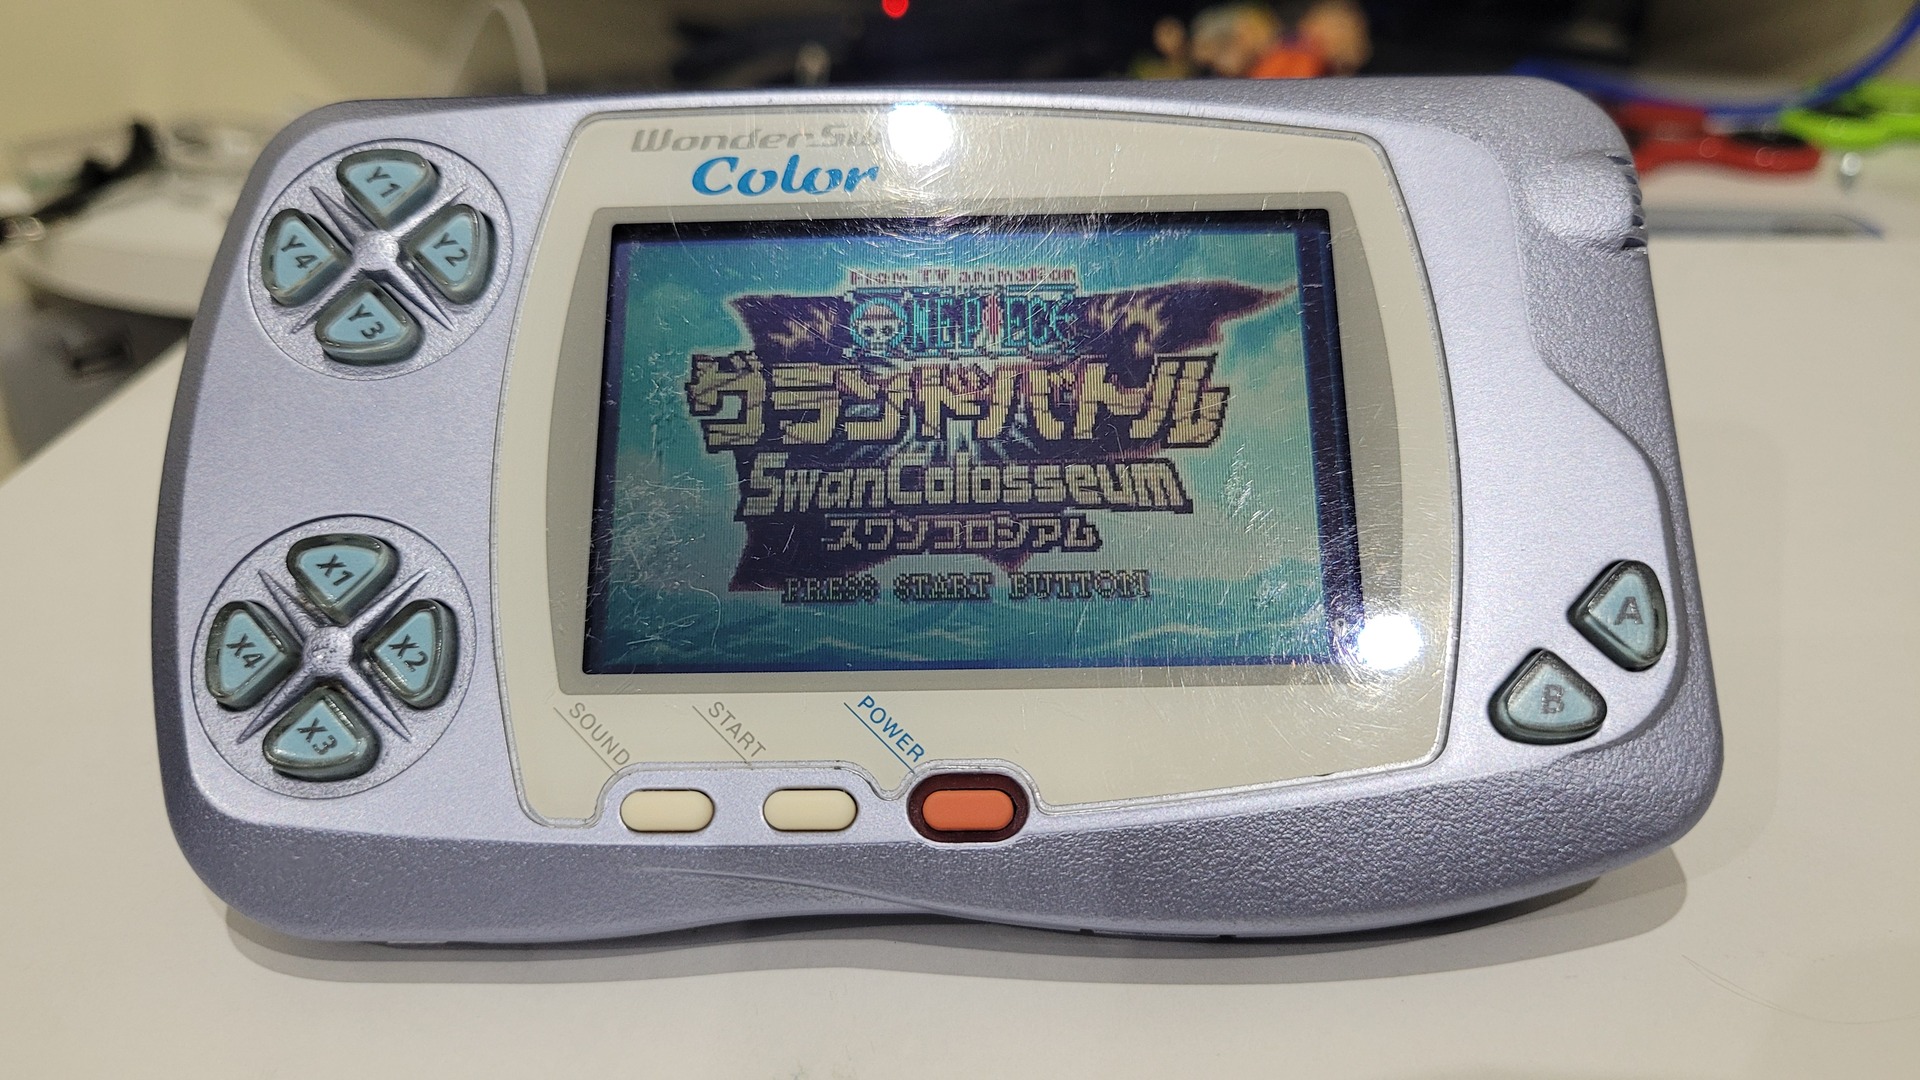
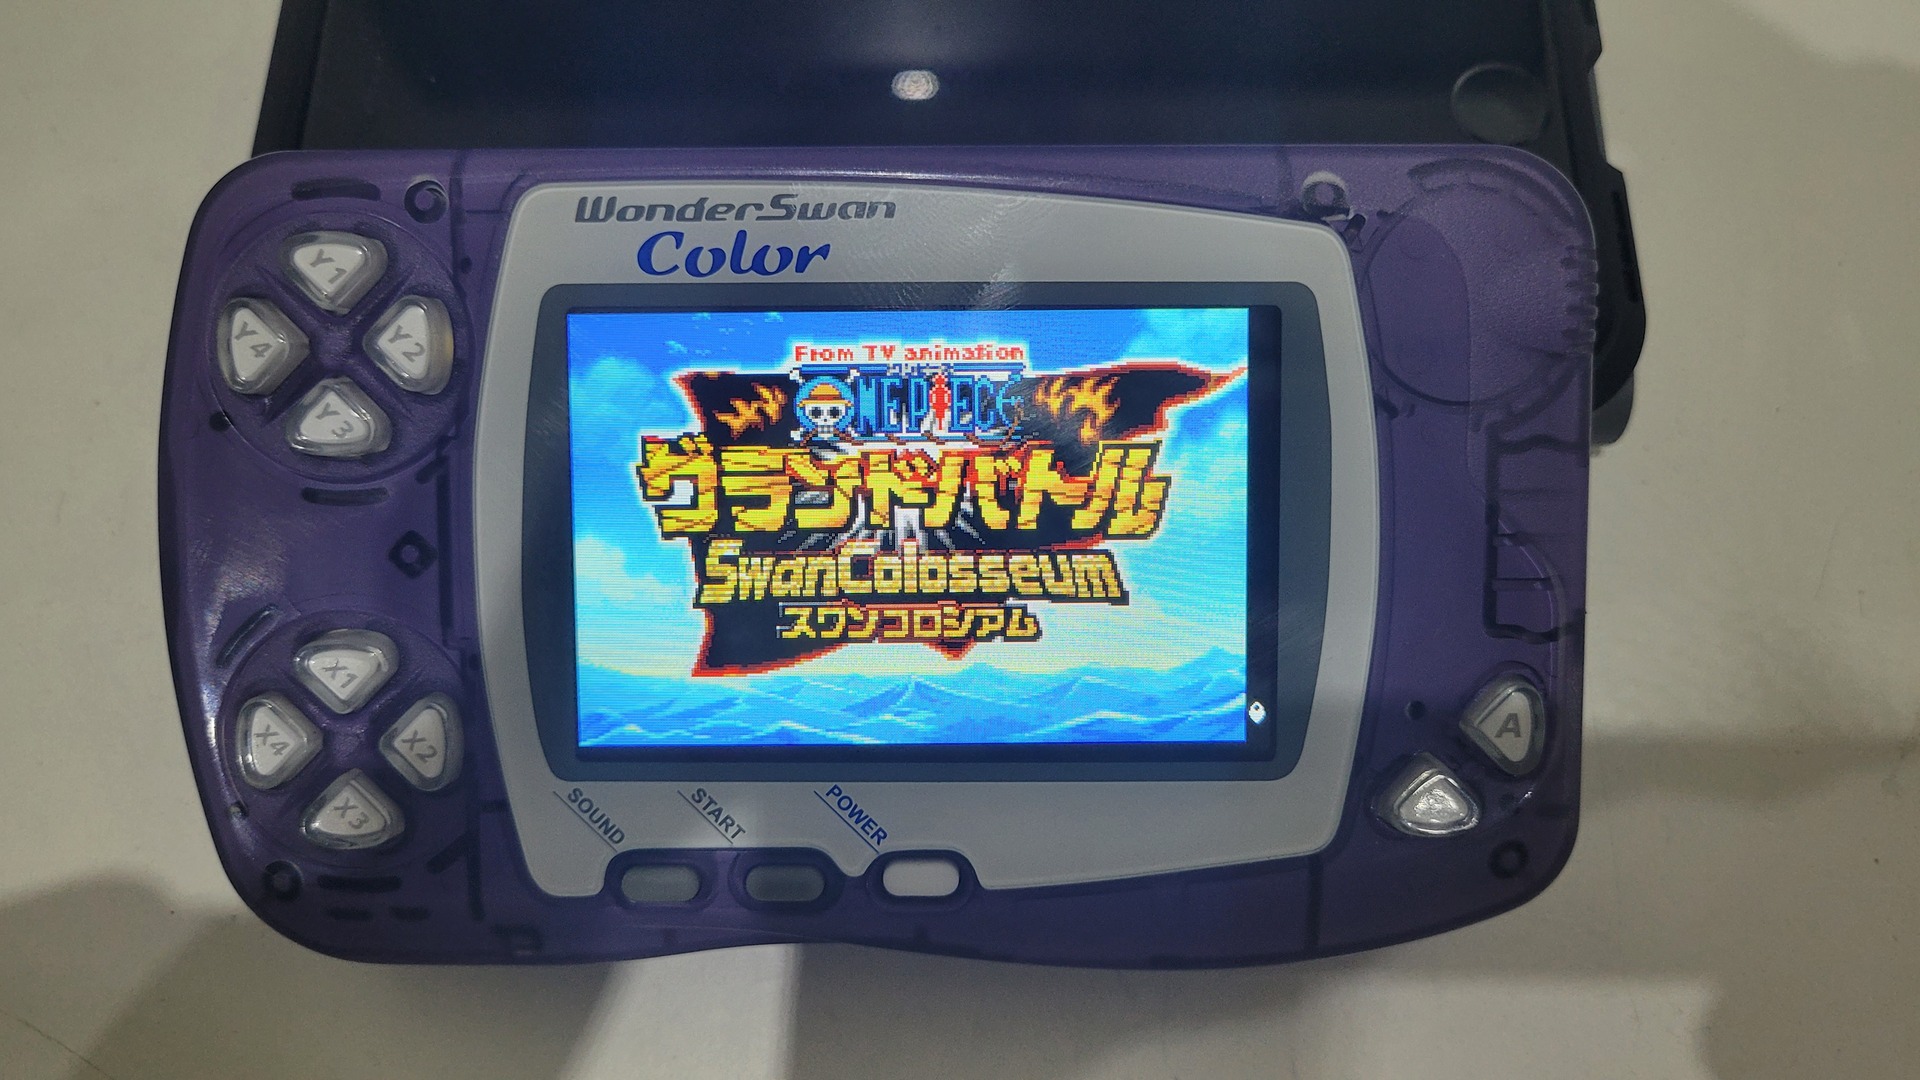
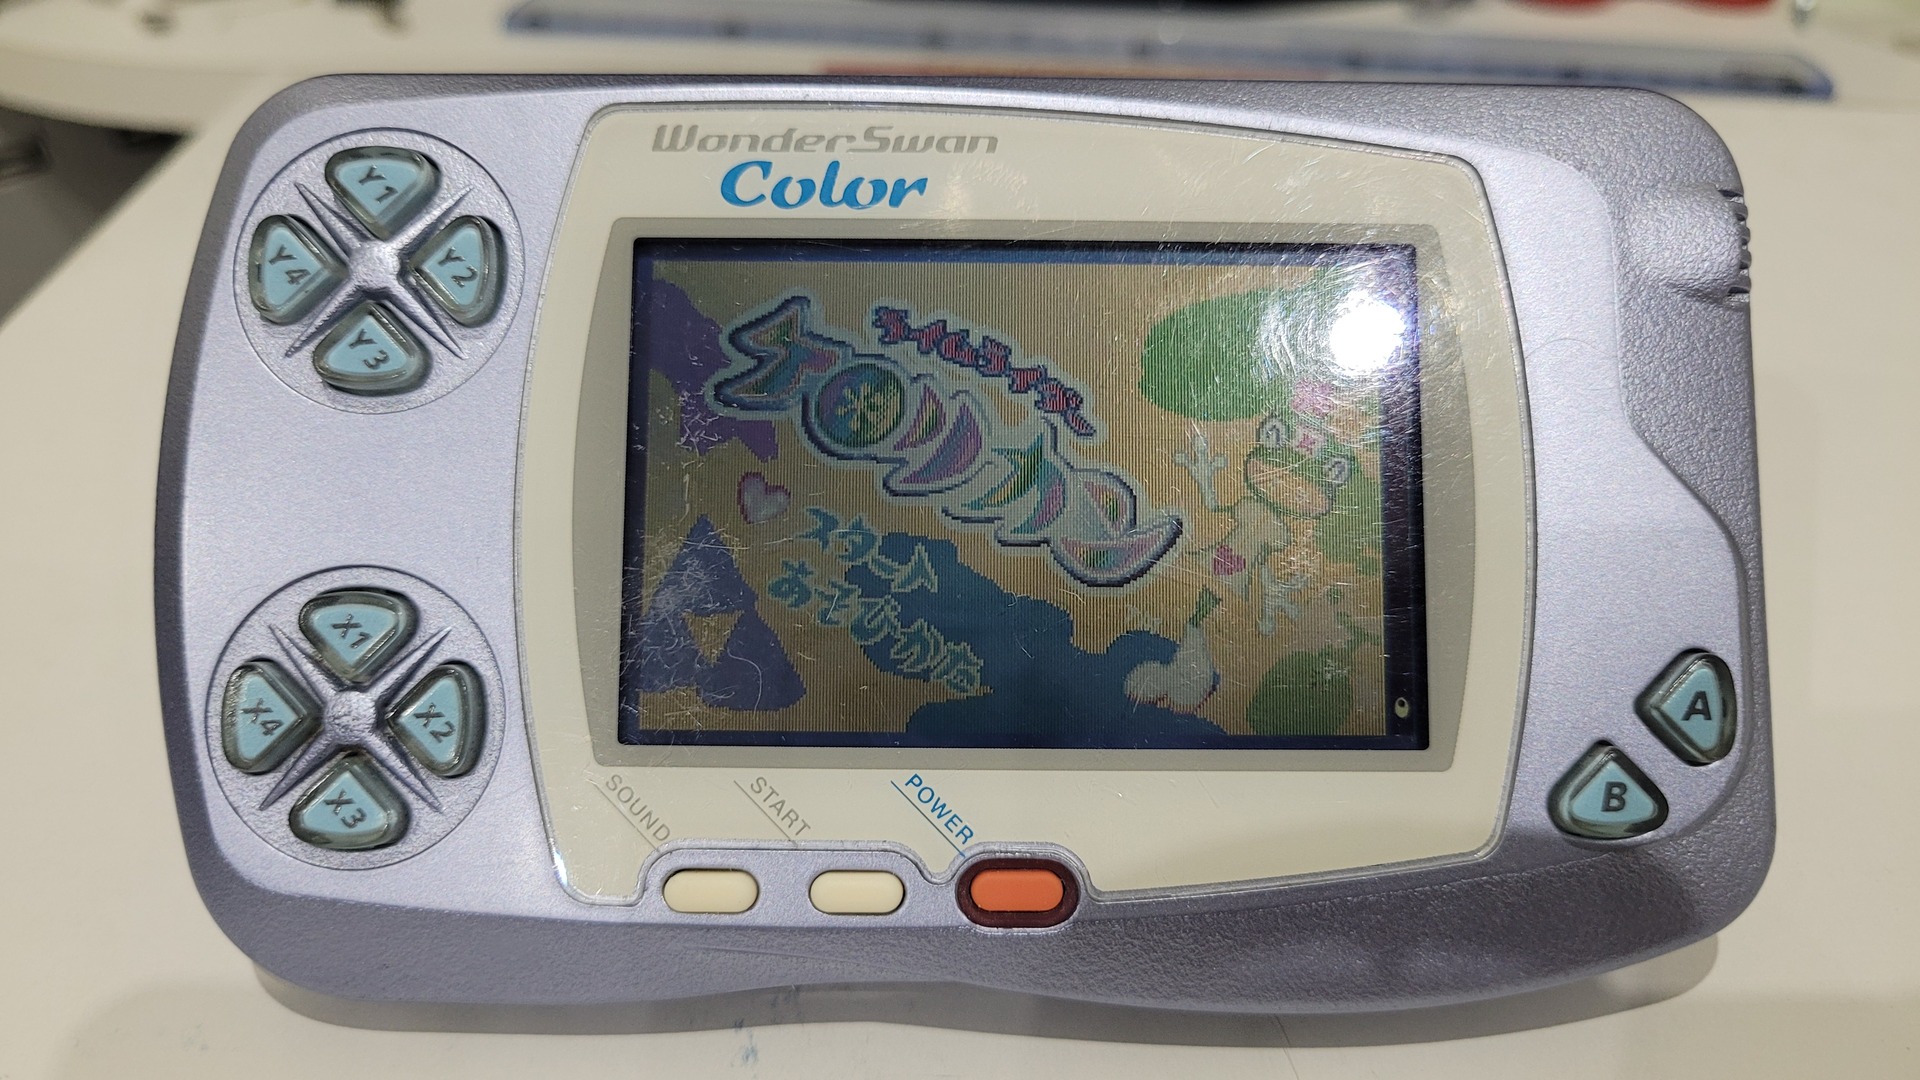
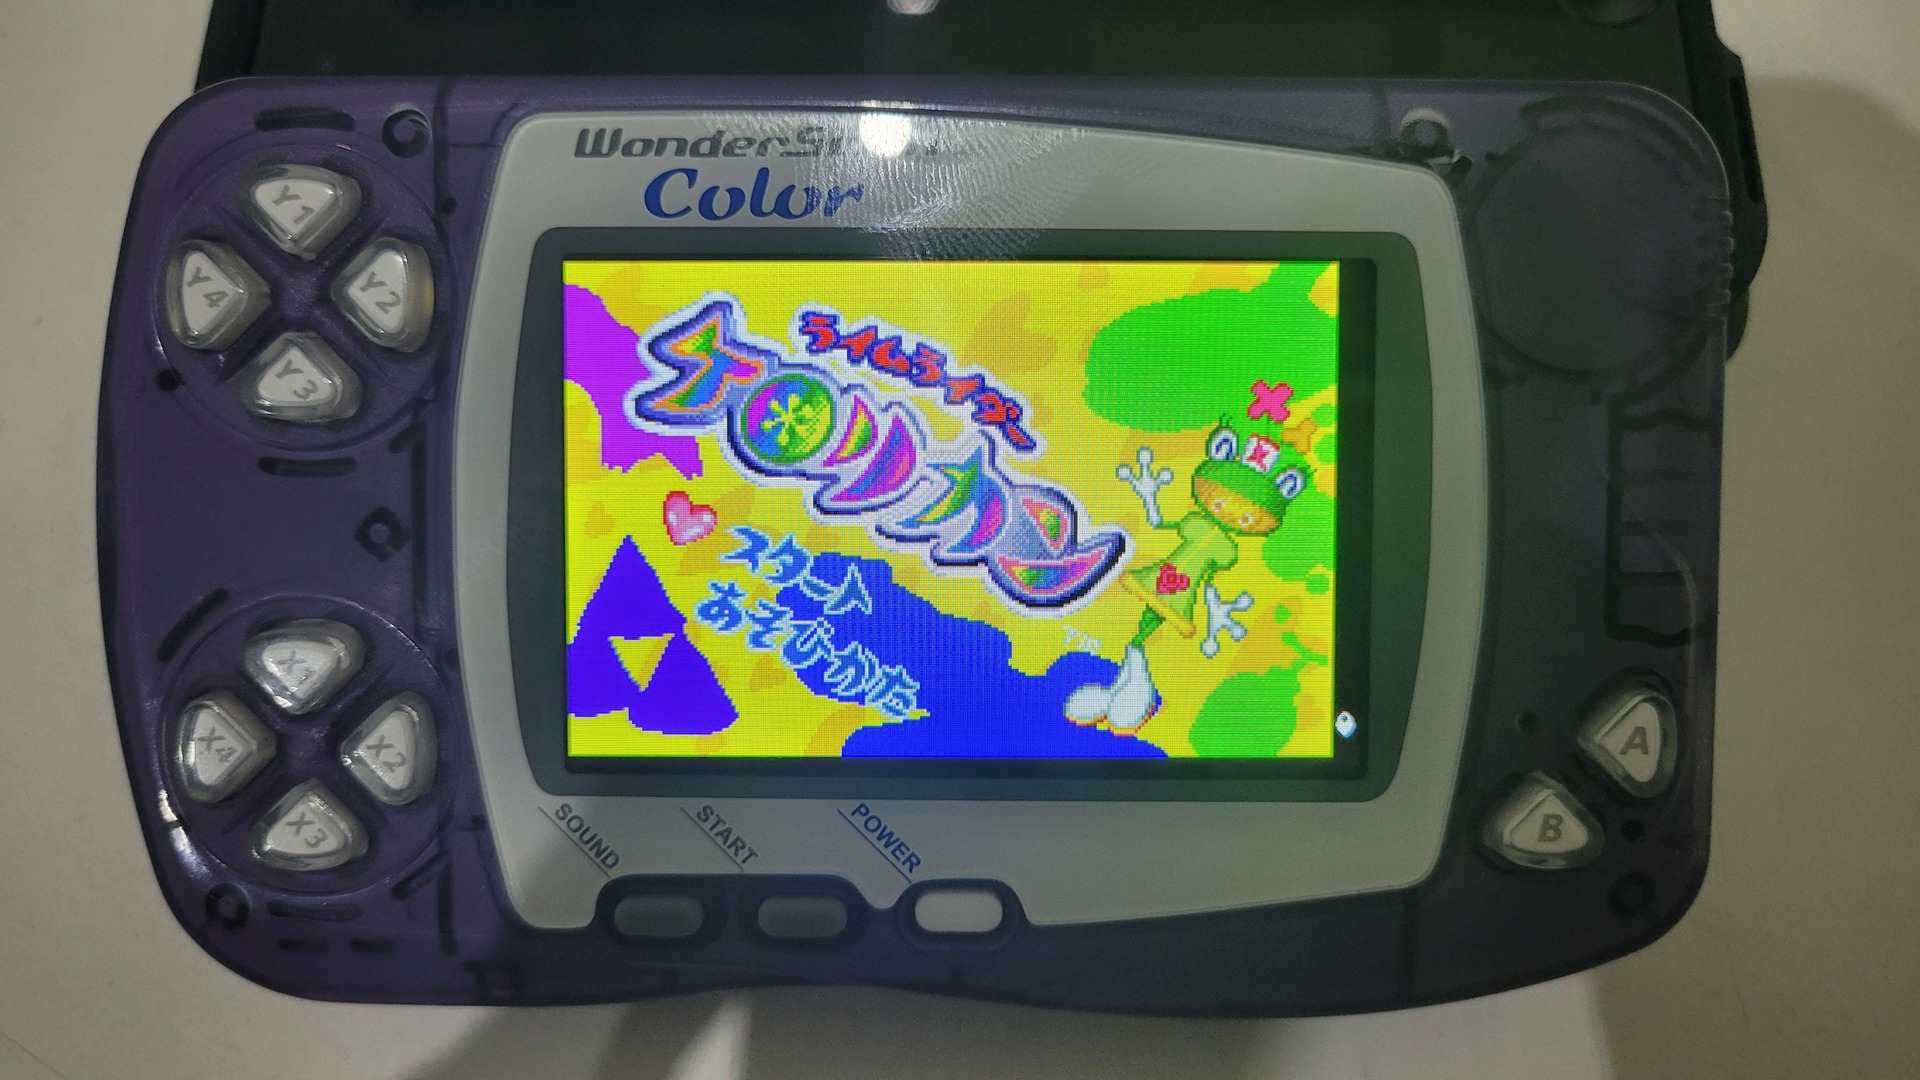
Result / compare
Below are several photos to compare the orignal console VS the modded one. Even if the battery life is by far not the same, this mod absolutely worth it in my opinion. the Original display is not really usable by today’s standards… At least, my eyes were not accepting that 🙂
Compare it live !
